Does your Windows PC shut down or restart without warning? There are several potential causes behind that. For example, it could be a software/hardware conflict, overheating, or hard drive error. This troubleshooting guide will outline multiple solutions to fix auto-shutdowns and restarts in Windows 10/11.
If your computer shuts down constantly, you must boot your computer in Safe Mode or use the system recovery options in WinRE to work on the fixes below.

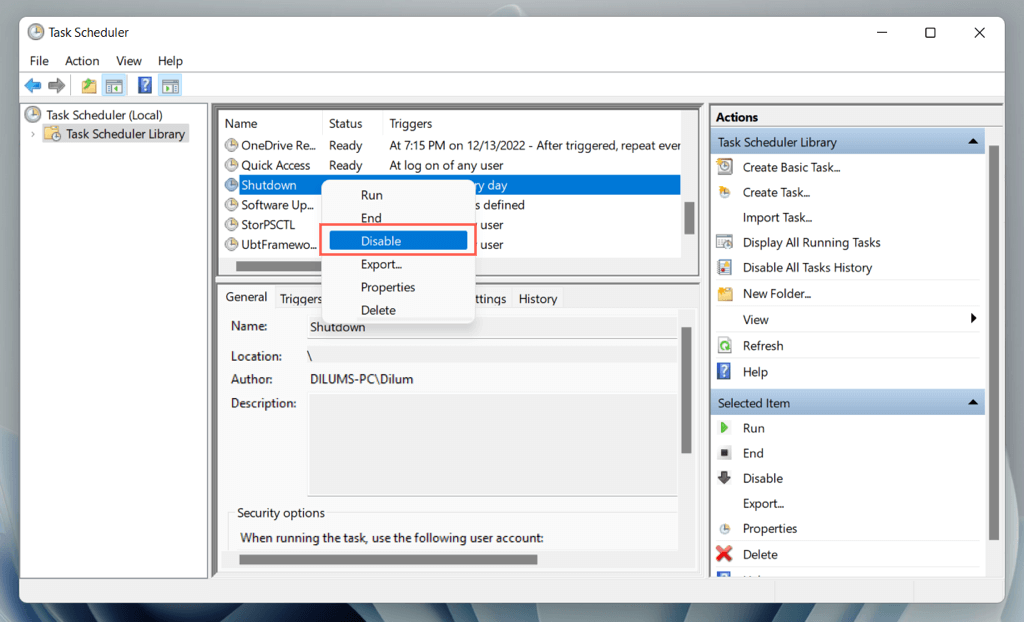
1. Check the Task Scheduler
If your computer shuts down automatically but only at a specific time of the day, that’s probably due to a scheduled task that you or a third-party program created. To check:
- გახსნა Start მენიუშიტიპი სამუშაო Schedulerდა პრესა შეიყვანეთ.
- Review your computer’s list of scheduled tasks under სამუშაო Scheduler (Thư viện).
- Right-click any tasks that force your PC to shut down or restart and select გამორთე.
2. გამორთეთ სწრაფი გაშვება
სწრაფი გაშვება is a Windows power management feature that hibernates the kernel (the operating system’s core) to speed up your PC during a cold start. However, it can destabilize the system.
სწრაფი გაშვების გამორთვა:
- გახსნა Windows პანელი და აირჩიეთ აპარატურა და ხმა > დენის პარამეტრები > Choose what the დენის ღილაკები do.
- აირჩიეთ პარამეტრების შეცვლა that are currently unavailable.
- მონიშვნის მონიშვნა მონიშნეთ გვერდით სწრაფი გაშვების ჩართვა (რეკომენდირებულია).
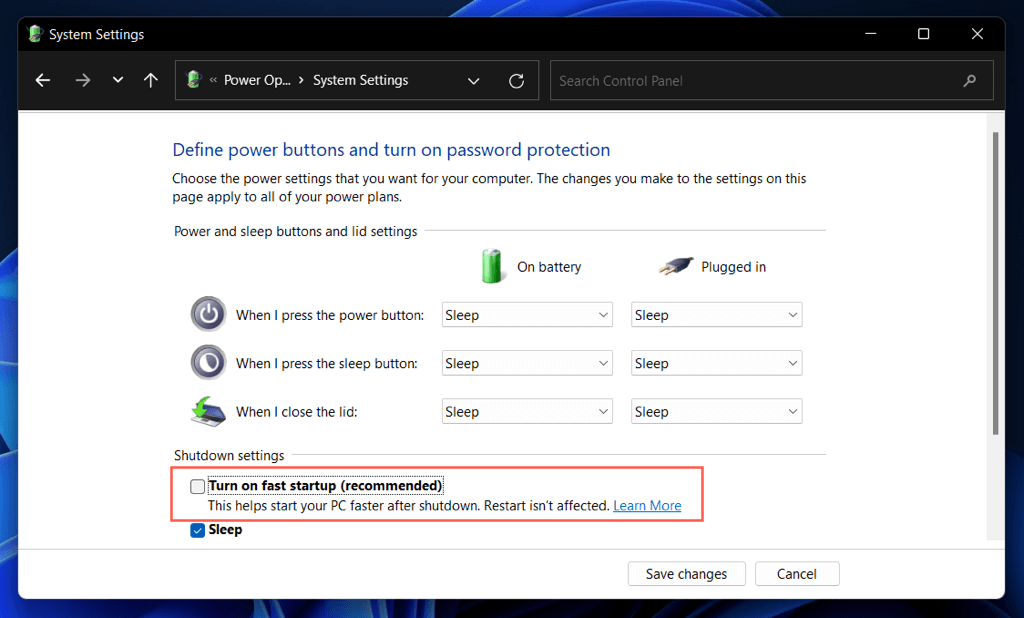
- აირჩიეთ ცვლილებების შენახვა.
- გახსნა Start მენიუში და აირჩიეთ Power > Გათიშვა.
- გადატვირთეთ კომპიუტერი.
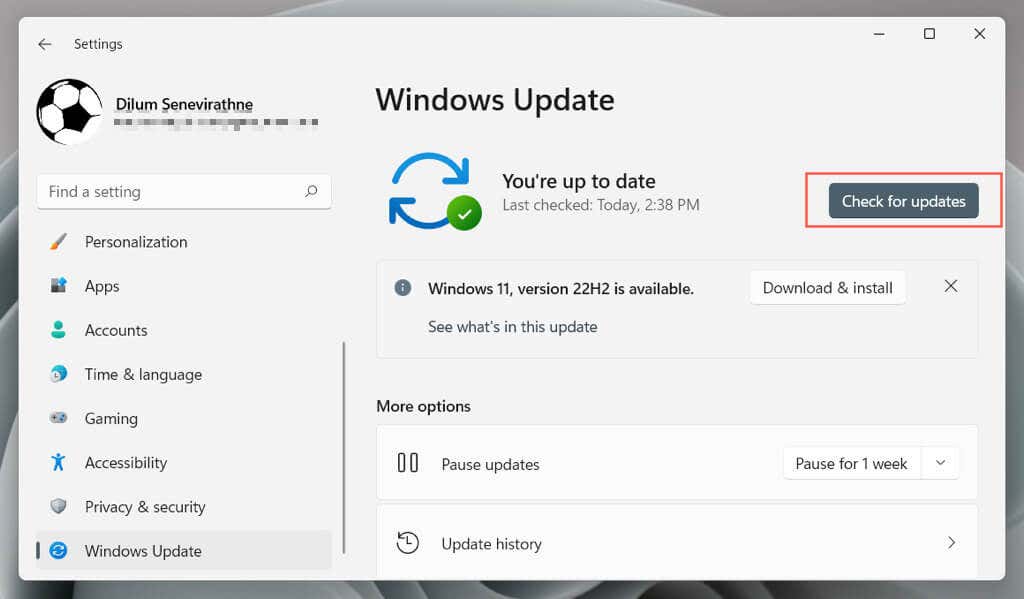
3. Update Windows to Its Latest Version
Specific versions of Windows contain severe bugs and issues that cause significant problems with particular hardware and software configurations. Install the latest operating system updates to fix them.
- გახსნა Start მენიუში და აირჩიეთ პარამეტრები.
- აირჩიეთ Windows Update.
- აირჩიეთ შეამოწმოთ განახლებები. If there’s a new update, select ჩამოტვირთეთ და დააინსტალირეთ.
4. Update Your Computer’s Drivers
მოძალადე hardware device drivers are a common problem behind a computer that shuts down or restarts randomly. Use a driver updater utility ისევე როგორც მძღოლი Booster to update your computer’s drivers.
Additionally, use Windows Update to install Microsoft-verified hardware drivers and updates. To do that:
- გახსნა Start მენიუში და აირჩიეთ პარამეტრები.
- აირჩიეთ Windows Update.
- მე დამატებითი პარამეტრები > არჩევითი განახლებები and install all pending driver updates.
5. Roll Back Drivers
Rarely, new driver updates can introduce issues and break down the system. Microsoft knows that, which is why you have the option to roll them back.
For example, if the problem occurred after updating your graphics card driver:
- მარჯვენა ღილაკით Start მენიუში და აირჩიეთ Device Manager.
- Expand the driver category—ეკრანის გადამყვანები.
- Right-click the graphics card driver and select განცხადებები.
- გადახვიდეთ მძღოლი Tab.
- აირჩიეთ Roll უკანა მძღოლი.

6. Run the SFC and DISM Tools
Windows comes with two command-line tools—System File Checker and DISM—that can scan and fix system file corruption.
Open an elevated Command Prompt console—type cmd into the Start menu and select გახსენით როგორც ადმინისტრატორი—and run the following commands one after the other:
sfc / scannow
DISM.exe /Online /Cleanup-Image /Restorehealth
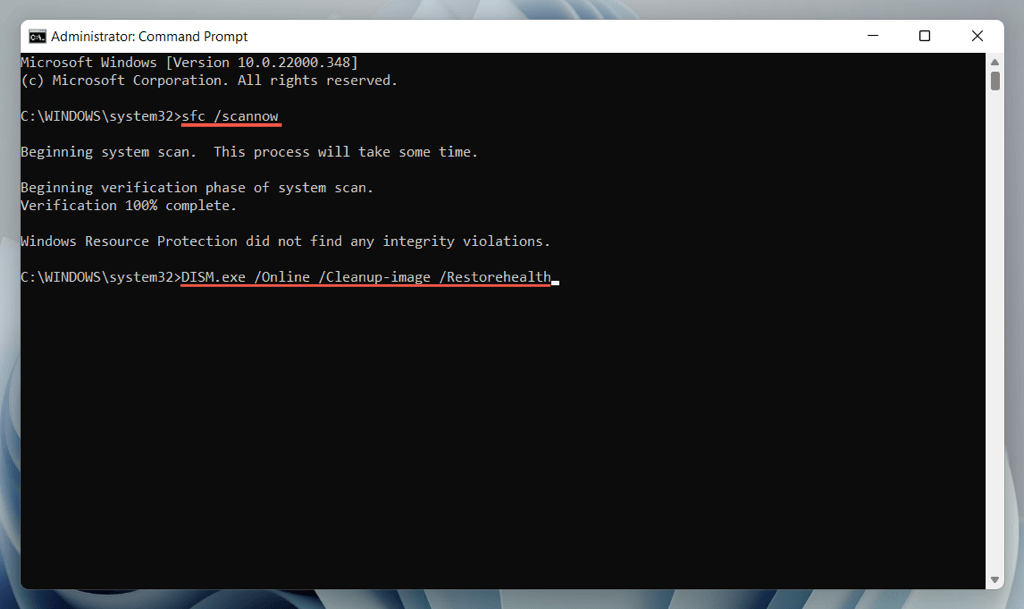
SFC and DISM scans take a long time to complete. If the progress percentage indicator gets stuck, do not do anything; it should resume eventually.
7. გაუშვით CHKDSK
შემდეგი, აწარმოებს CHKDSK (Check Disk) utility to fix HDD/SSD errors in the system partition. Again, open an elevated Command Prompt console and run the following command:
chkdsk c: / r
CHKDSK only runs at computer startup, so press Y to schedule the scan the next time you reboot your computer.
8. Troubleshoot BSOD Errors
If your computer crashes and restarts into a Blue Screen of Death (BSOD) screen, it will continue to repeat that until you diagnose and troubleshoot it with the appropriate fixes.

Start by noting down the stop code related to the BSOD error—e.g., Memory_Management, Kernel_Security_Check_Failure, Driver_Overran_Stack_Buffer, etc. Then, refer to our complete BSOD troubleshooting guide to learn what you must do next.
9. შეამოწმეთ მავნე პროგრამული უზრუნველყოფა
Malicious software and potentially unwanted programs (or PUPs) can wreak havoc on the operating system and trigger unexpected shutdowns and restarts.
If the problem persists, you must scan your computer for potential malware. Windows Defender isn’t likely to do any good მას შემდეგ, რაც a severe infection, so your best option is to rely on a third-party virus removal utility.
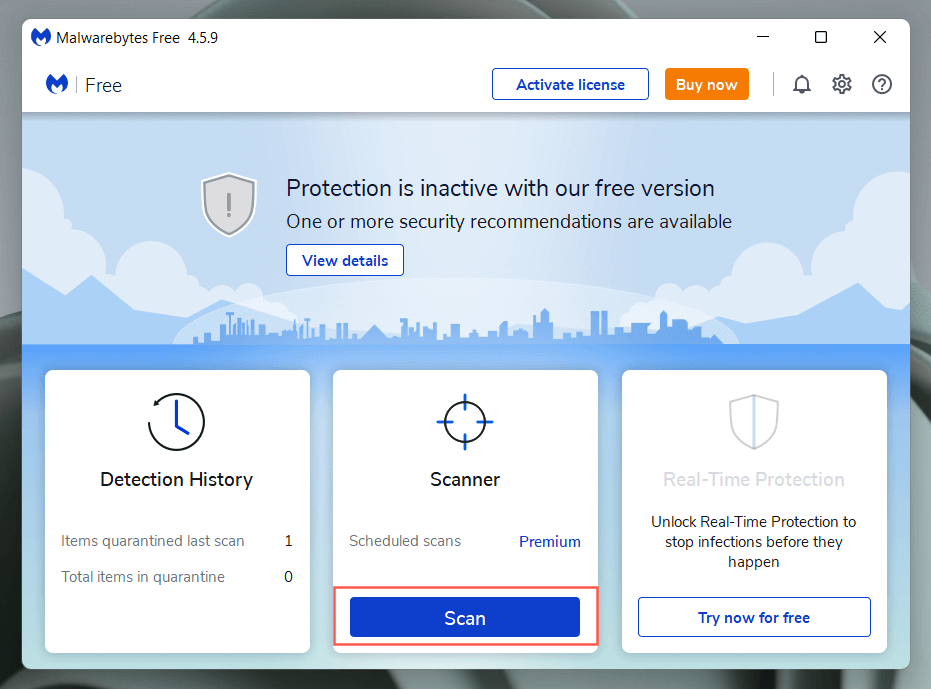
For example, the free versions of Bitdefender ანტივირუსული მდე Malwarebytes are extremely effective at detecting malware. Download either one, run a quick scan, and then follow up with a full scan.
10. უზრუნველყოს ადექვატური ვენტილაცია
Inadequate ventilation leads to overheating, forcing your computer to shut down to cool itself. For example, if you use a laptop, avoid using it on soft surfaces—cushions, bed covers, etc.—that could plug up its ventilation holes. Also, check and clean the CPU or laptop casing to ensure nothing is blocking the airflow.
11. შეასრულეთ სისტემის აღდგენა
If the shutdowns and restarts persist, roll back Windows to a time when it did not shut down or restart automatically. Assuming that სისტემის აღდგენა is active on your computer, you must:
- პრეს Windows + R Run-ის გასახსნელად. შემდეგ, აკრიფეთ Rstrui შევიდა ღიაა ველი და აირჩიეთ OK.
- Pick a restore point and select სკანირება დაზარალებული პროგრამებისთვის to identify the changes to expect if you decide to go ahead.
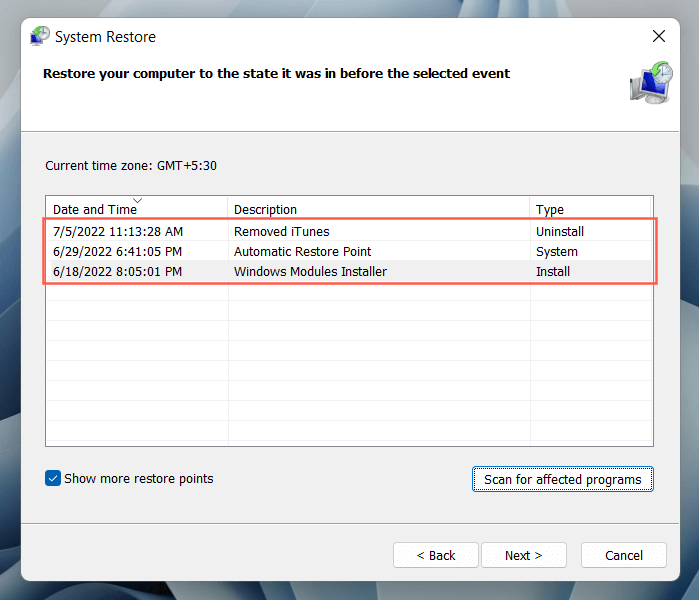
- აირჩიეთ შემდეგი and follow the onscreen instructions to revert your computer to the restore point.
12. ჩაატარეთ მეხსიერების ტესტი
Faulty RAM (random access memory) modules are another reason for random shutdowns and restarts. Windows comes with a built-in Windows Memory Diagnostic tool you can run to scan for bad memory.
- ტიპი Windows მეხსიერების დიაგნოსტიკური into the Start menu and select ღიაა.
- აირჩიეთ გადატვირთეთ ახლავე და შეამოწმეთ პრობლემები (რეკომენდებულია).
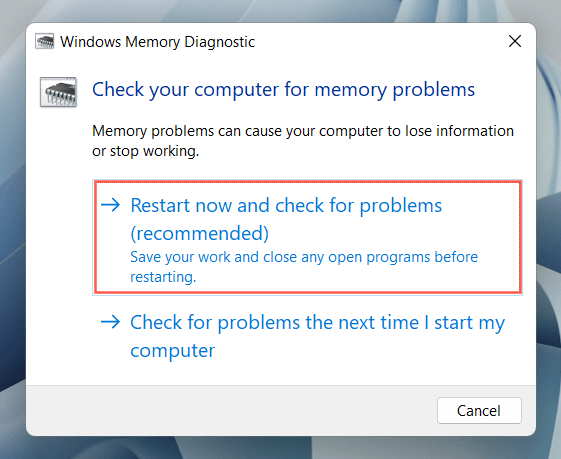
- Wait until Windows Memory Diagnostic reboots your computer and tests it for memory problems.
For comprehensive step-by-step instructions and alternative methods, check our guide to testing a Windows PC for bad memory.
13. Reset/Update the BIOS or UEFI
Outdated or incorrectly configured motherboard firmware—the BIOS or UEFI—creates stability issues. Check if the BIOS needs an update or revert it to its default settings.
14. Factory-Reset or Reinstall Windows
If none of the fixes above help, you must reset Windows to its default settings. შექმენით თქვენი კომპიუტერის სარეზერვო ასლი, და მერე:
- გახსენით პარამეტრების აპი და აირჩიეთ სისტემის > აღდგენა.
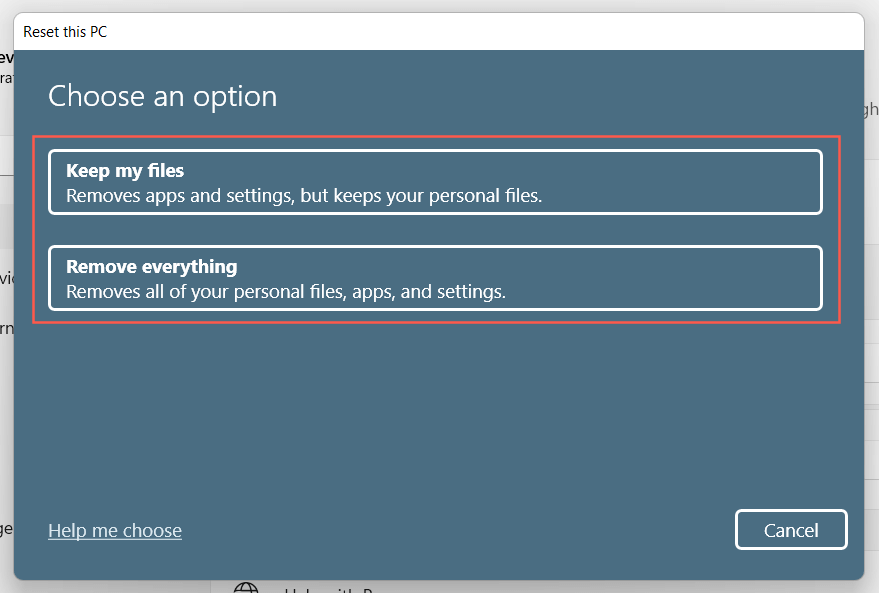
- აირჩიეთ კომპიუტერის გადატვირთვა.
- აირჩიეთ შეინახეთ ჩემი ფაილი (if you want to keep personal files intact) or ამოიღეთ ყველაფერი.
If that fails, you must remove and reinstall Windows from scratch.
15. მიიღეთ პროფესიონალური დახმარება
If the problem persists and your computer continues to shut down and restart automatically, you might be dealing with a faulty hardware component or a defective power supply unit. Visit your local PC repair shop and let a technician take a look at it.

