Chrome is one of the most-used browsers in the world. Millions of users love it because of its incredible customization and easy-to-use interface. But like a coin of two sides, Chrome also faces some errors sometimes. One such common error is Aw Snap! Chrome ran out of memory. As the name indicates, when Google Chrome consumes more RAM in your PC, you will face this error. We bring to you a perfect guide that will help you fix Chrome out of memory issues. So, continue reading!
How to Fix Chrome Ran Out of Memory in Windows 10
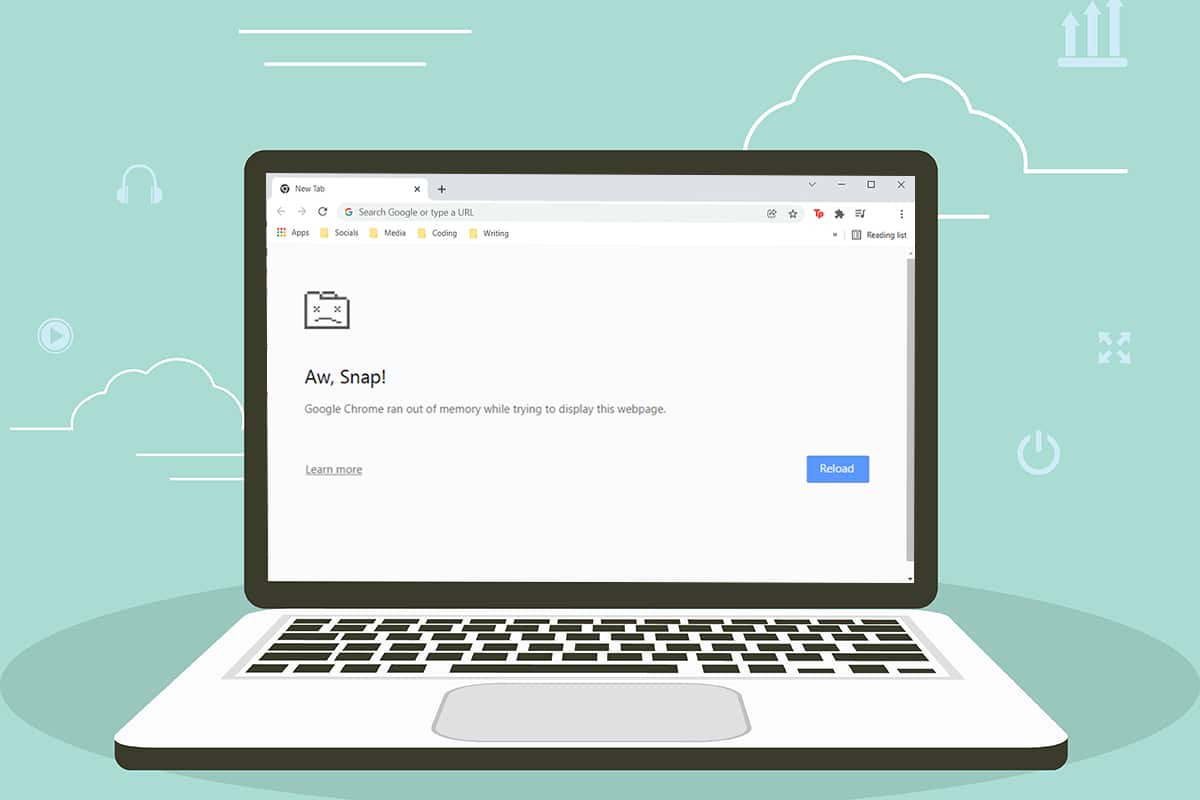
Following is the error that you may face if Chrome runs out of memory on Windows 10.
Aw, Snap!
Google Chrome ran out of memory while trying to display this webpage.
The reason for this error is not very obvious. Yet, there are some root causes for this Chrome browser out of memory issue listed below. Either random or specific, if you face this error in your browser, we will help you resolve the same by this guide.
- Интернетке қосылу мәселелері
- Damaged or bulky browser cache
- Үйлесімсіз кеңейтімдер
- Bulged temporary files in PC
- A glitch in the User profile
- Unwanted or incompatible programs in PC
- Ескірген браузер
- Site blocked by firewall
Негізгі ақаулықтарды жою
Here are some basic troubleshooting steps are given below to fix this error. You should follow these points before going through the methods given in this article.
- Компьютеріңізді қайта іске қосыңыз: Көп жағдайда, a simple restart may fix the issue without any challenging layouts. Alternatively, you can entirely shut down the system using the Power options and turn it on again.
- Ensure Proper Internet Connectivity: This is the most apparent reason that causes the discussed error. When your internet connectivity is not optimum, the connection interrupts more frequently. You can run a speed test to know the optimum level of network speed required for the proper connection. You can also prefer a new faster internet package and buy it from your network provider.
- Close Unwanted Tabs: This might help in fixing the error. If none of these basic troubleshooting tips helped you, then close all the tabs and restart the Chrome browser.
Still, if you face the same error, go ahead with the troubleshooting methods given below. Follow them in the same order to attain quicker results.
Method 1: Update to 64-bit Version of Chrome
First, check if you use the 64-bit version of Chrome. If the browser consumes a lot of RAM from your processors, you must be sure of using a 64-bit version instead of a 32-bit version. This manages more computer resources, thereby resolving the said problem. Here are a few instructions to check and update the version of Google Chrome.
1.. Іске қосыңыз Google Chrome Браузер.
2. Басыңыз үш нүкте белгішесі and hover to көмек таңдаңыз Google Chrome туралы опция.
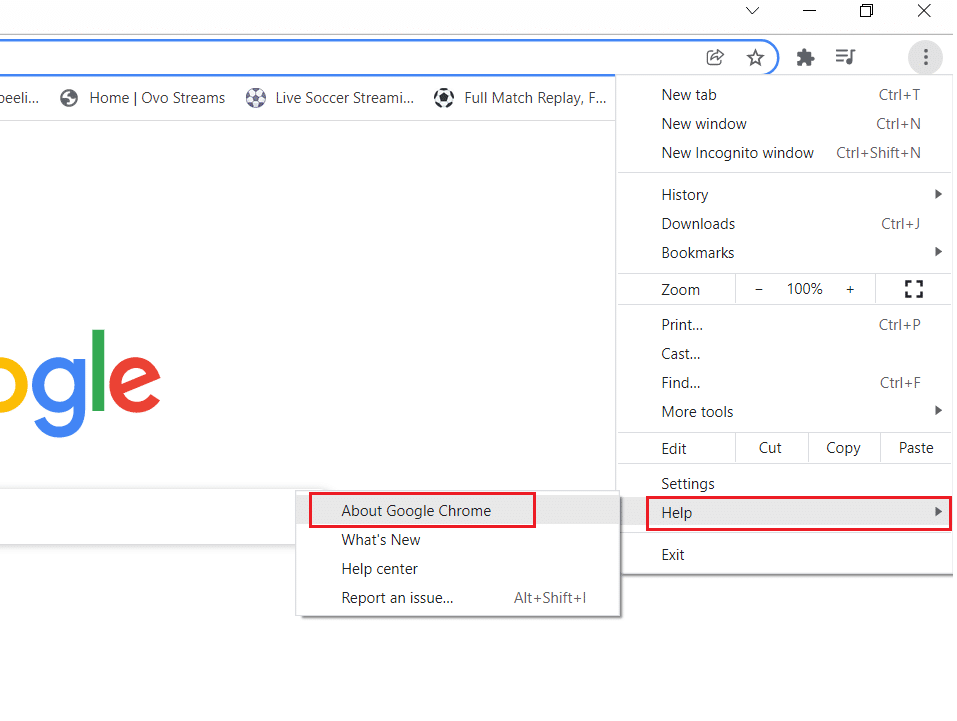
3. Here, check if Google Chrome is of 64-bit version or not.
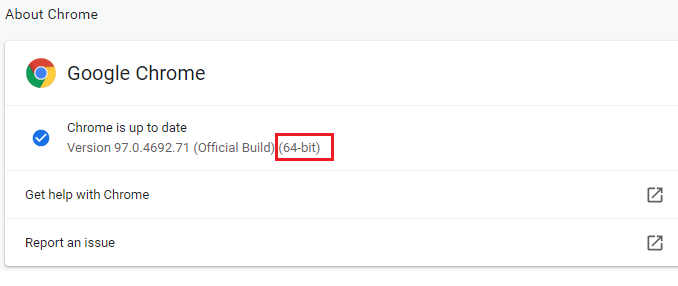
4. Бар болса 32-биттік given next to the version of Chrome, you have to download the 64-биттік нұсқасы of Google Chrome.
5. Жүктелген орнату файлын іске қосыңыз to install Google Chrome 64-bit version.
Method 2: End Google Chrome Processes
Like Windows, Chrome also has Task Manager that allows you to manage its tabs and extensions. The interface of this setting is very straightforward, and you can abort or end any high resource-consuming Chrome tasks. For example, you can distinguish which process consumes allocated memory contributing to this error. Thus, you can eliminate that particular tab instead of closing all the tabs. Here are a few instructions to manage tabs in Chrome.
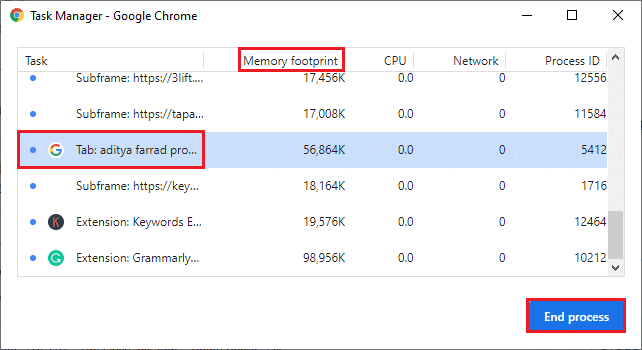
1. ашық Google Chrome және баспасөз Shift + Esc keys ашу үшін бірге Task Manager – Google Chrome.
2. Now, scroll down and check if you have an unusual Жад ізі мәні.
3. If so, click on the Аяқтау процесі button for the respective тапсырма.
4. Енді, қайта жүктеу the site and check if you face the error again.
Сондай-ақ оқыңыз: How to Fix Chrome Keeps Crashing
Method 3: Restart Google Chrome Process
If you did not attain a fix by terminating specific Chrome tabs and extensions from the above method, try to force shutdown all the Chrome tasks you do regularly in Task Manager. There may be plenty of applications that run in the background. This will increase the CPU and memory space, thereby affecting the performance of the system. Follow the below-mentioned steps to close the Chrome background tasks.
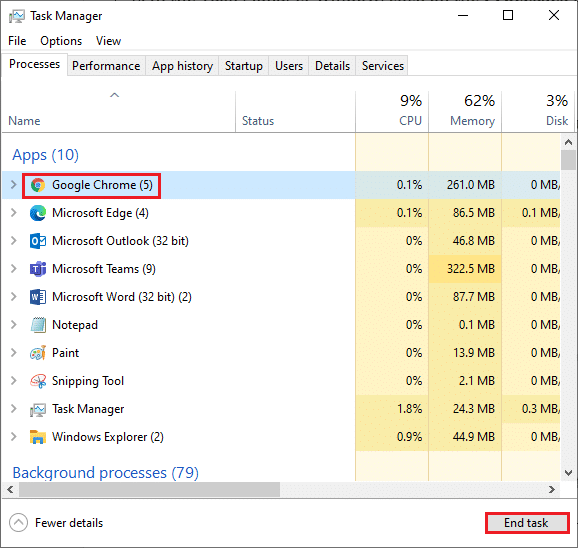
1. Іске қосу Тапсырмалар менеджері ұру арқылы Ctrl + Shift + Esc пернелері мезгілде.
2. Ішінде Процестер tab, search and select the Chrome процесс.
3. Содан кейін түймесін басыңыз Аяқталу тапсырмасы button as depicted in the below picture.
4. Енді, Google Chrome-ды қайта іске қосыңыз and check if you have fixed the issue.
Method 4: Clean up Temporary Files
When your system has any corrupt temporary files or folders, you may encounter this Chrome out of memory error. You can sort out this error by clearing the temporary files in your system. Then, follow the instructions to implement the same.
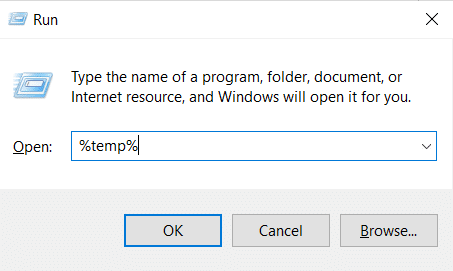
1. Түймесін басыңыз Windows + R пернелері бір уақытта ашу жүгіру тілқатысу терезесі.
2. Түрі % temp% және хит Кілт сөзді енгізіңіз ашу AppDataLocalTemp қалта.
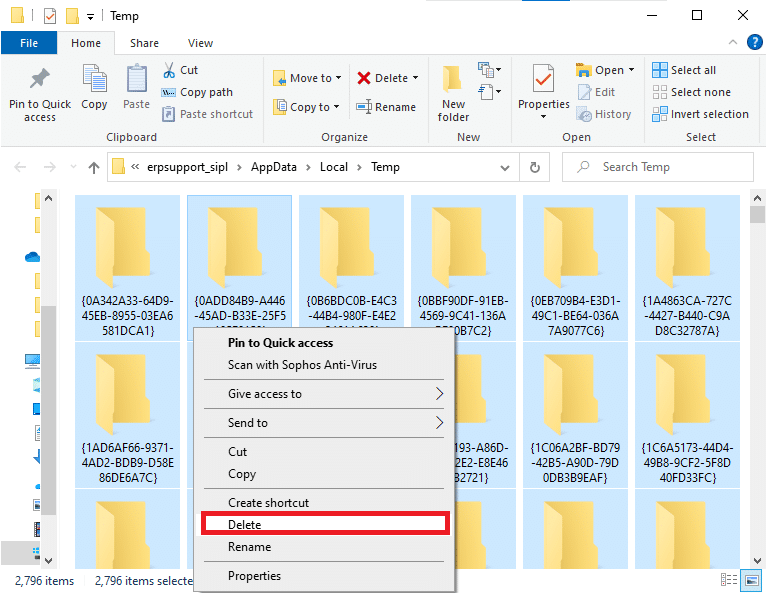
3. Басыңыз Ctrl + A пернелері together to select all the unrequired files and right-click on the file and select the Жою опция.
Ескерту: Some files cannot be deleted coz they are being used, so you can skip these.
4. Finally, redirect to the Қоржын and permanently delete the files and folders you have deleted now.
Method 5: Use Private Browsing
In some cases, using private surfing mode could resolve this error since some details of the web pages are hidden in it. Below are some advantages of using Incognito mode in Chrome. The Incognito Mode in Chrome & Edge browsers is primarily designed for secure and private browsing.
- Бұл made for users who do not want their search history or recent pages saved on their device.
- Due to its privacy policy, this mode does not allow users to record their screens or take screenshots.
- It blocks cookies, hides search history, but provides the freedom to browse the desired website.
Follow the below-mentioned steps to open desired web page in private mode:
1A. Go to Google Chrome және басыңыз үш нүктелі белгіше. Here, select the Жаңа инкогнито терезесі көрсетілгендей опция.
![]()
1B. Alternatively, you can also press Ctrl + Shift + N keys іске қосу үшін бірге Жаңа инкогнито терезесі.
Сондай-ақ оқыңыз: Chrome браузерінде ашылмаған PDF файлдарын қалай түзетуге болады
Method 6: Clear Cache and Cookies in Chrome
Try clearing cache and cookies to fix Chrome ran out of memory error by implementing the following steps.
1. Іске қосу Google Chrome.
2. Содан кейін түймесін басыңыз үш нүктелі белгіше > Қосымша құралдар > Қарап шығу деректерін тазалау ... төменде көрсетілгендей.
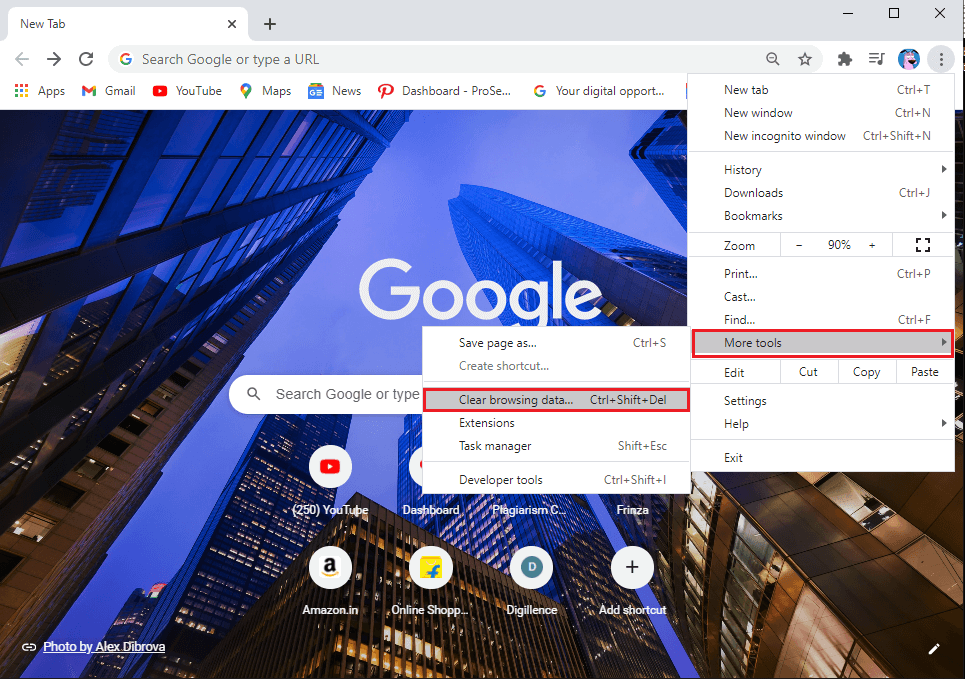
3. Check the following options.
- Cookie файлдары және басқа сайт деректері
- Кэштелген суреттер мен файлдар
4. Енді таңдаңыз Барлық уақытта үшін опция Уақыт диапазоны.
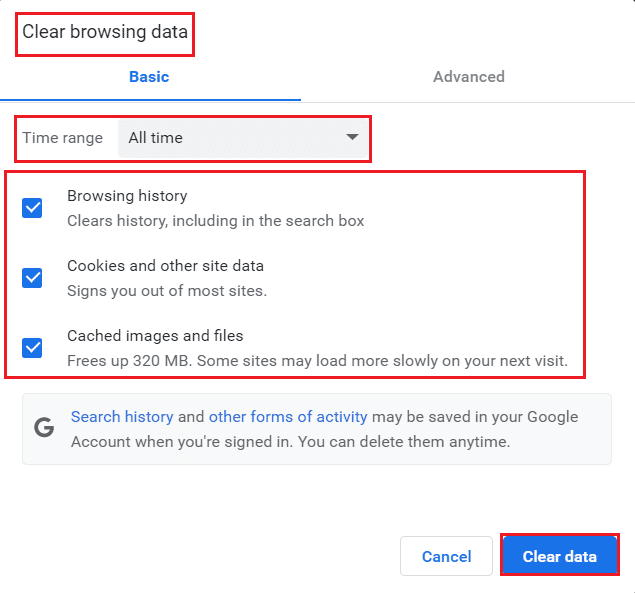
5. Соңында түймесін басыңыз Clear деректер.
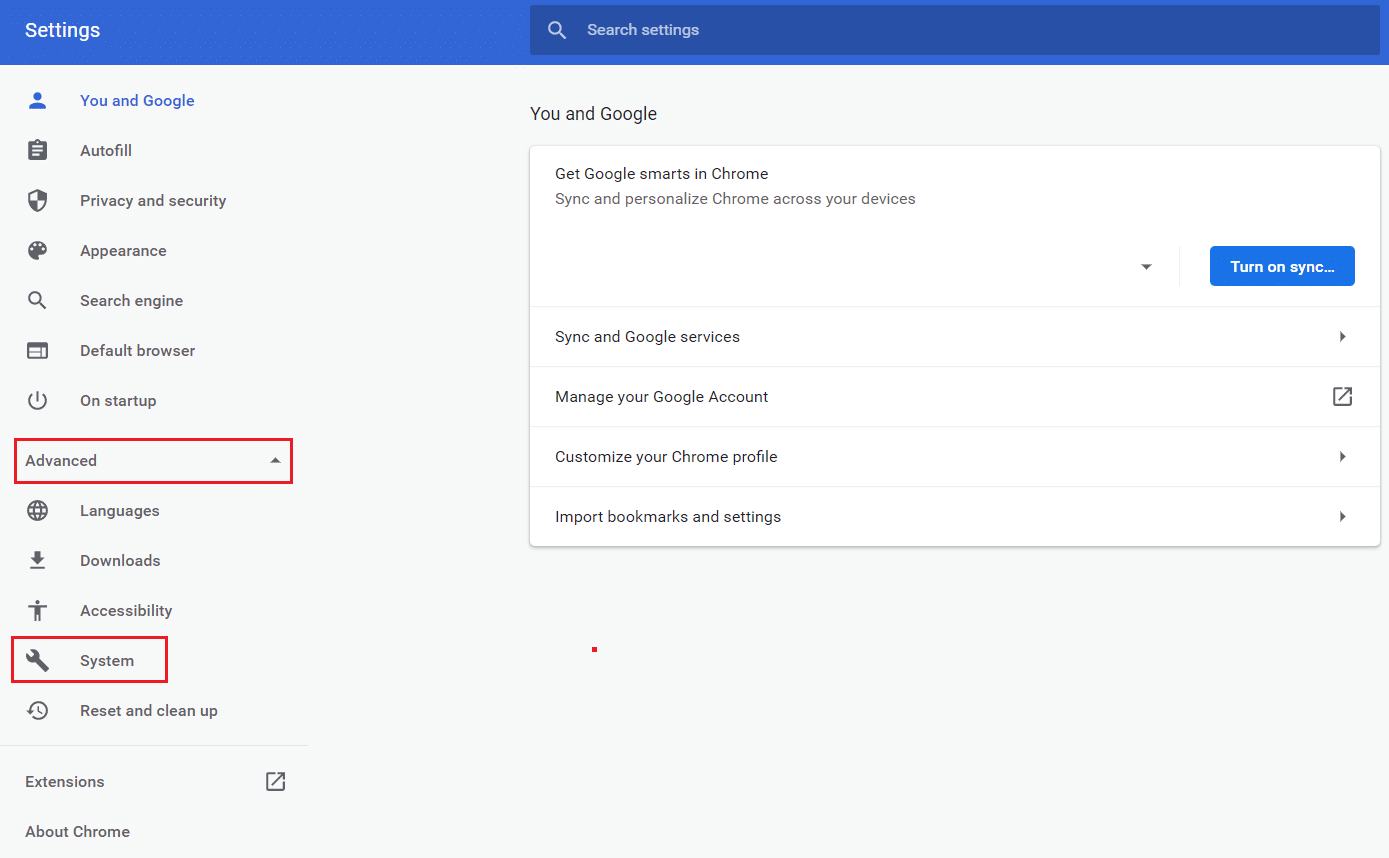
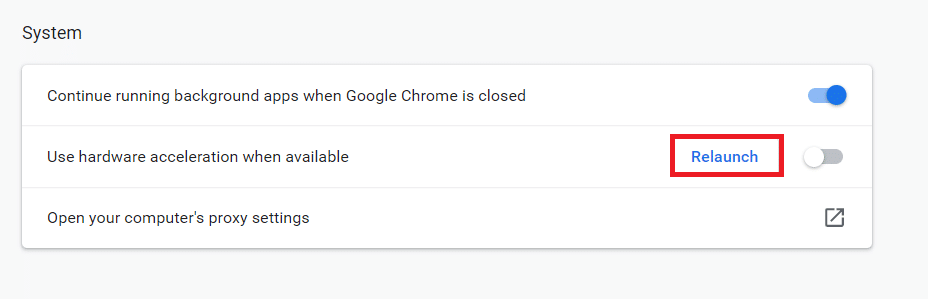
7-әдіс: Аппараттық жеделдетуді өшіріңіз
Sometimes, web browsers may run in the background, and this will consume the CPU resources. Hence, it is better to disable the hardware acceleration in the browser to fix Chrome out of memory error.
1. Іске қосу Google Chrome және басыңыз үш нүктелі белгіше жоғарғы оң жақ бұрышта көрсетіледі.
2. Енді, басыңыз Параметрлер as depicted in the below picture.
![]()
3. Енді кеңейтіңіз озат section in the left pane and click on жүйе, көрсетілгендей.
4. Here, switch ажыратылған үшін ауыстырып-қосқыш Қол жетімді болғанда аппараттық жеделдетуді пайдаланыңыз опция.
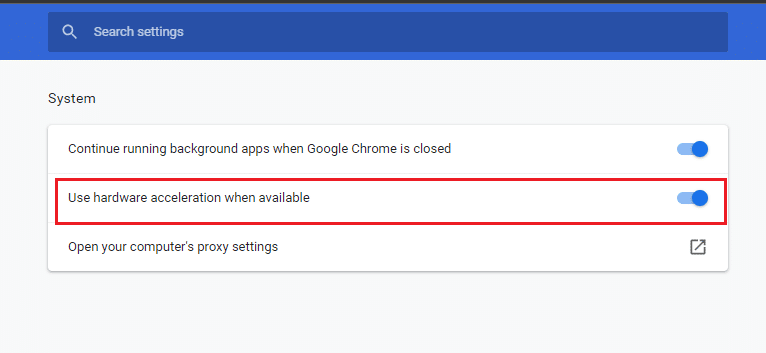
5. Содан кейін түймесін басыңыз Қайта іске қосу опция.
Сондай-ақ оқыңыз: Chrome тақырыптарын қалай жоюға болады
Method 8: Disable Extensions (If Applicable)
Follow these steps to disable the extensions which has high memory usage to fix Chrome out of memory error.
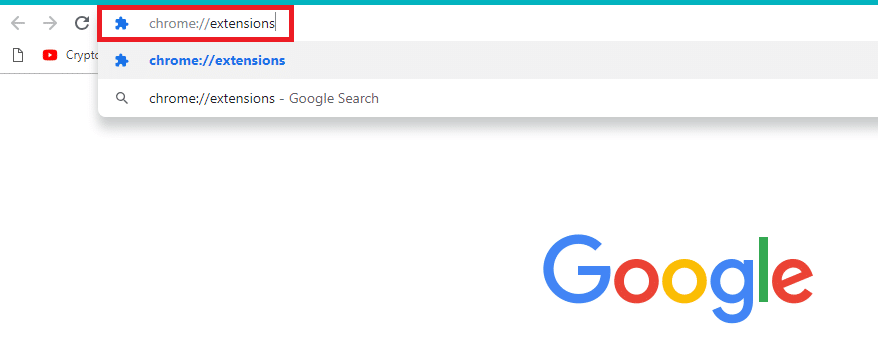
1. Іске қосу Chrome және түрі chrome: // кеңейтімдер in URL Bar. Хит кіру барлық орнатылған кеңейтімдердің тізімін алу үшін.
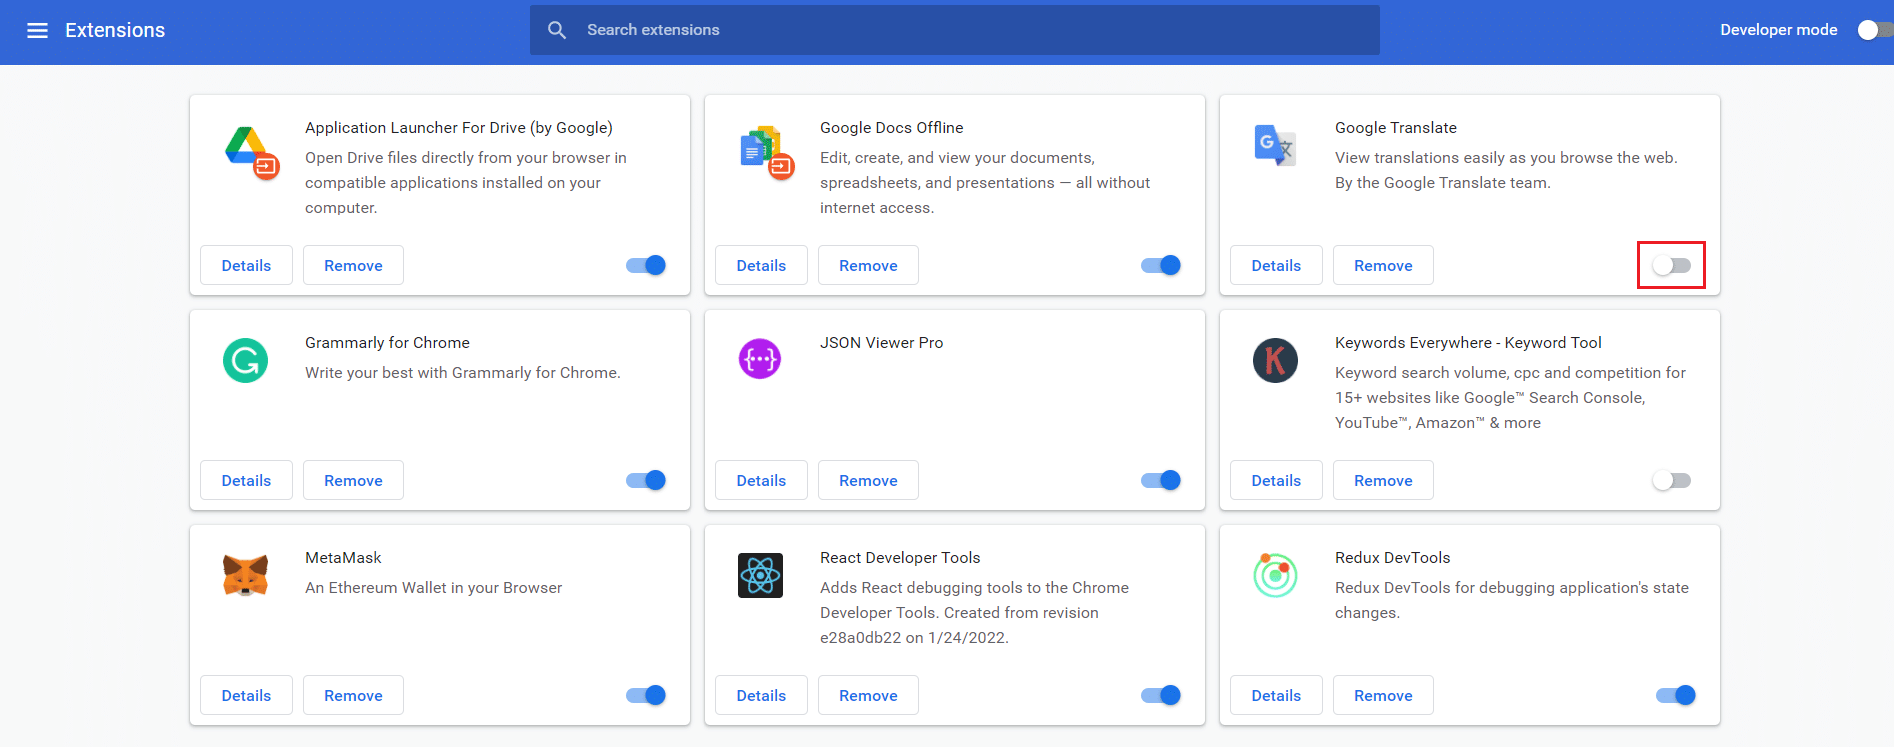
2. Switch Off the toggle for the extension you want to disable.
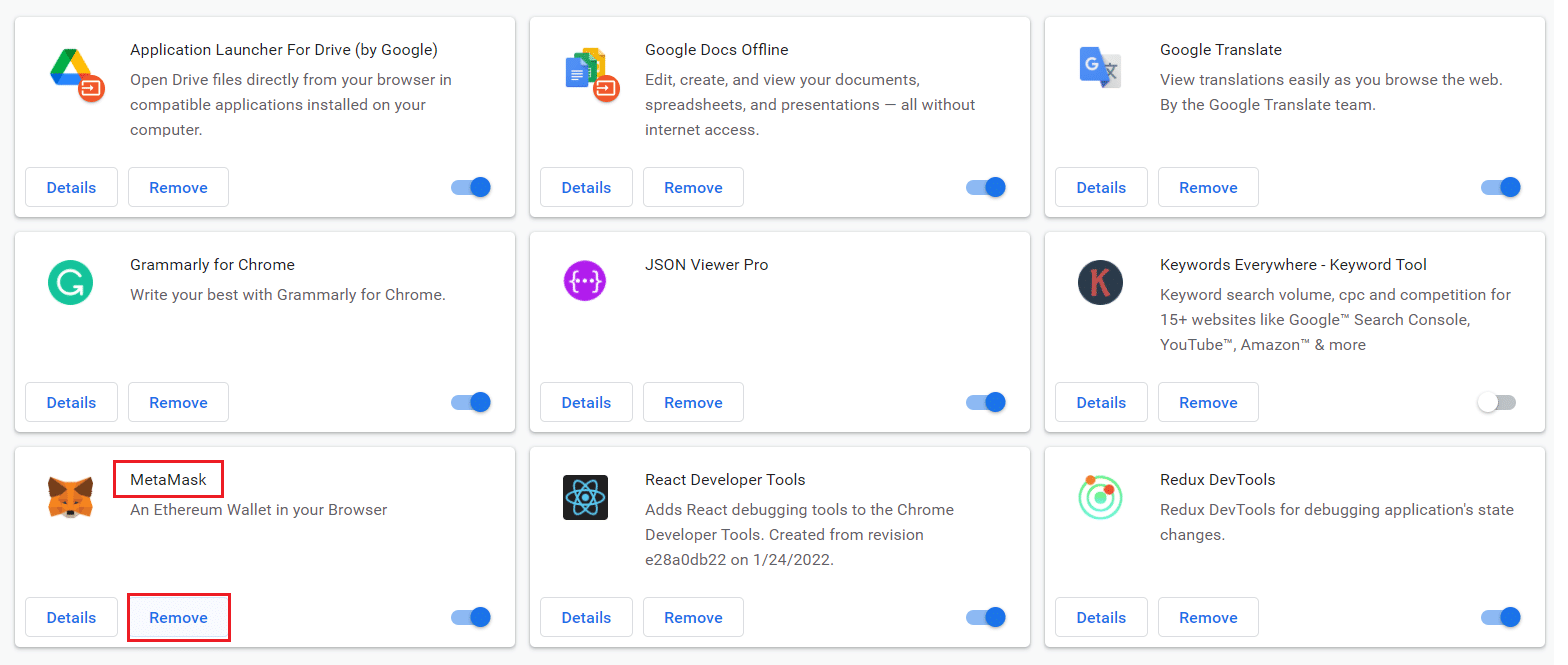
Method 9: Remove Extensions (If Applicable)
A web app extension in the Chrome browser might also cause this error. You should remove those unwanted apps extension individually to check whether the issue still persists or not. Follow the below-mentioned instructions to delete the extensions from Google Chrome.
1. Іске қосу Chrome және түрі chrome: // кеңейтімдер in URL Bar. Хит кіру барлық орнатылған кеңейтімдердің тізімін алу үшін.
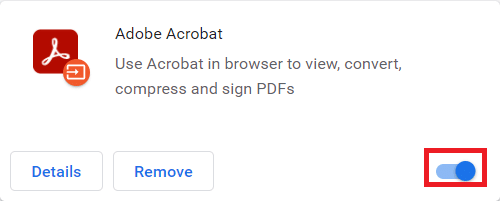
2. Ауыстыру ажыратылған үшін ауыстырып-қосқыш recently installed extension оны өшіру.
3. қайталау the same one by one for each extension, until you find the corrupt extension.
4. Once found, click on the кетіру button to uninstall the corrupt extension.
Ескерту: We have shown the MetaMask extension as an example.
Refresh your browser and check if the issue is fixed now.
Method 10: Remove Harmful Software from Chrome
The Chrome Cleanup Tool is an antivirus program for your browser.
- It scans your PC for malicious programs that affect the browser.
- Since Google has assured privacy over data scanned by the tool thus, it cannot access them in any way.
Only the harmful programs are detected by the tool, and the tool warns you with an alert. Usually, the tool alerts you for malicious programs after sending the metadata files to Google. If you do not want your files to be sent to Google, you can uncheck the box Google-дың мәліметтерін хабарлау қорапта.
Here’s how to run Chrome Cleanup Tool to fix Chrome ran out of memory issue:
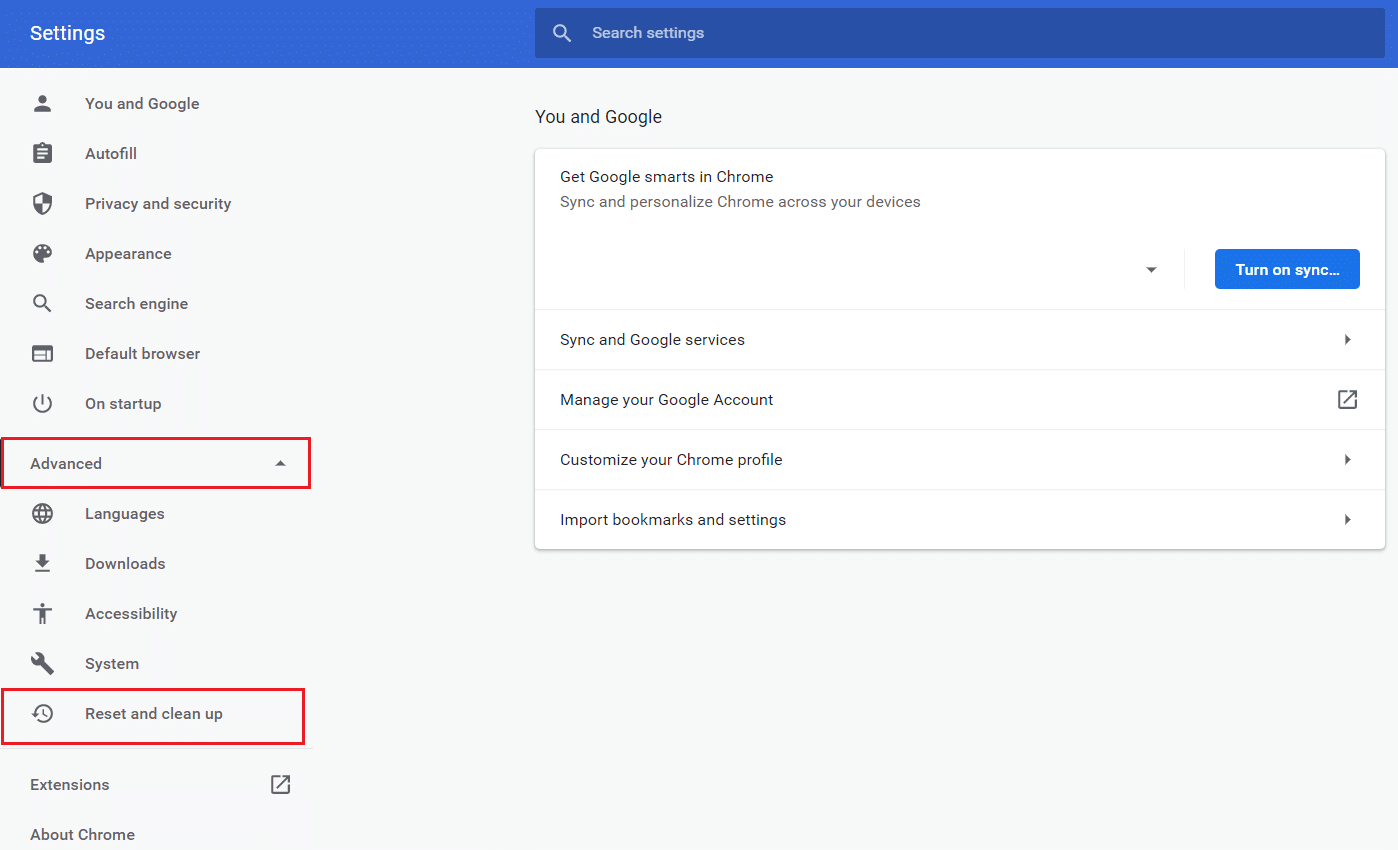
1. Іске қосу Google Chrome батырмасын басыңыз және үш нүктелі белгіше > Параметрлер көрсетілгендей бөлектелген.
![]()
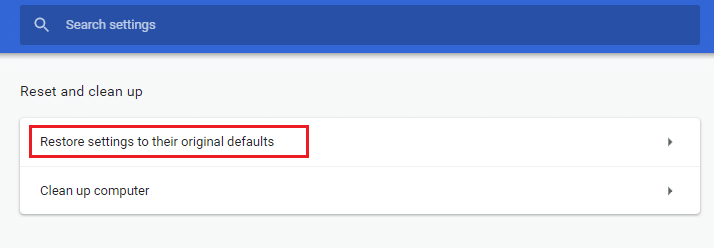
2. Осы жерде түймесін басыңыз озат setting in the left pane and select Reset және clean up опция.
3. Енді опциясын таңдаңыз Компьютерді тазалау опция төменде көрсетілгендей.
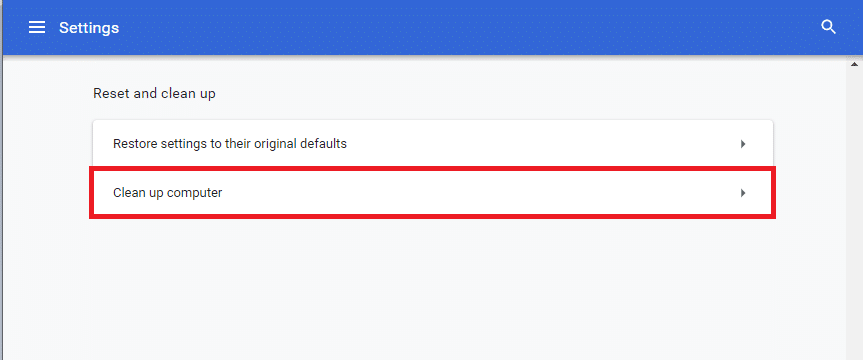
4. Осы жерде түймесін басыңыз табу button to enable Chrome to find harmful software компьютеріңізде.

5. күту for the process to be completed and кетіру the harmful programs detected by Google Chrome.
6. Компьютеріңізді қайта қосыңыз және мәселенің шешілгенін тексеріңіз.
Сондай-ақ оқыңыз: Fix Crunchyroll Not Working on Chrome
11-әдіс: Жаңа пайдаланушы профилін жасау
If there are any damaged files or glitches in data stored by Google Chrome on your PC, then renaming the default folder might help you resolve Chrome out of memory error. This may also occur when you have a damaged user profile. Here are a few instructions to rename your user profile folder.
Ескерту: Renaming the folder will not affect the functionality. The folder will be recreated once you restart the browser.
1. түймесін басып тұрыңыз Windows + E пернелері ашу үшін бірге File Explorer бағдарламасы.
2. Енді келесіні қойыңыз жолы мекенжай жолағында және басыңыз Кілт сөзді енгізіңіз.
% LOCALAPPDATA% GoogleChromeUser деректері
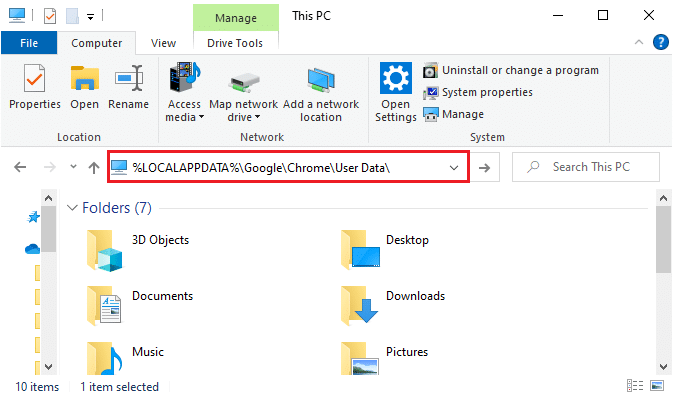
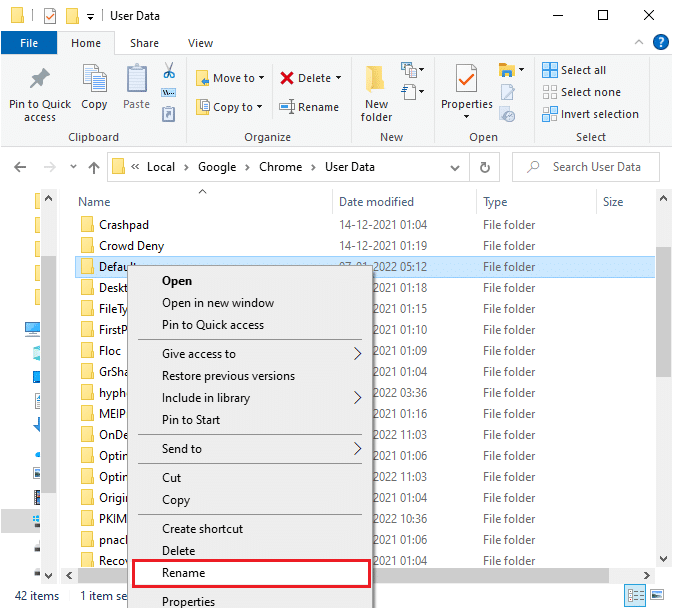
3. табыңыз әдепкі қалтаны таңдап, оны тінтуірдің оң жақ түймешігімен басыңыз.
4. Содан кейін, таңдаңыз Атын өзгерту көрсетілгендей опция.
5. Next, rename the folder to Ескі әдепкі және соққы беріңіз Кілт сөзді енгізіңіз.
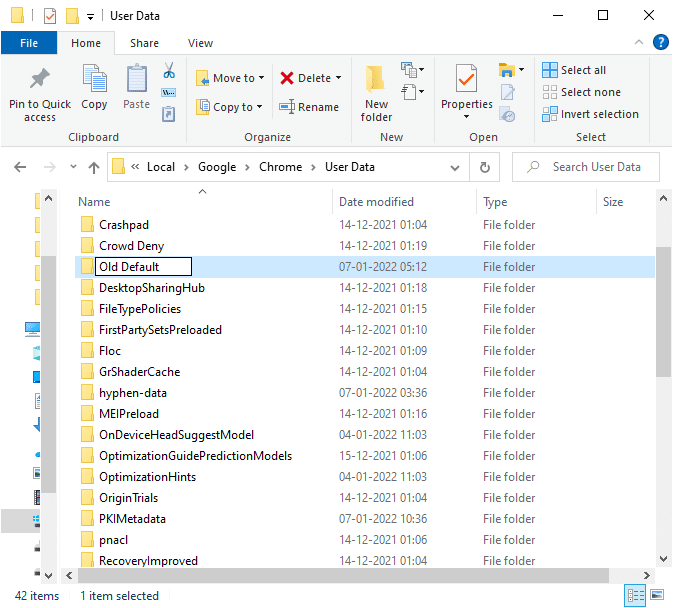
6. Соңында, қайтадан қосу Chrome and check if you have fixed the issue.
Method 12: Increase Memory Limit of Chrome
If you are handling web pages that require high memory, you can increase the memory limit of the browser by modifying the target link as instructed below to fix Chrome ran out of memory problem.
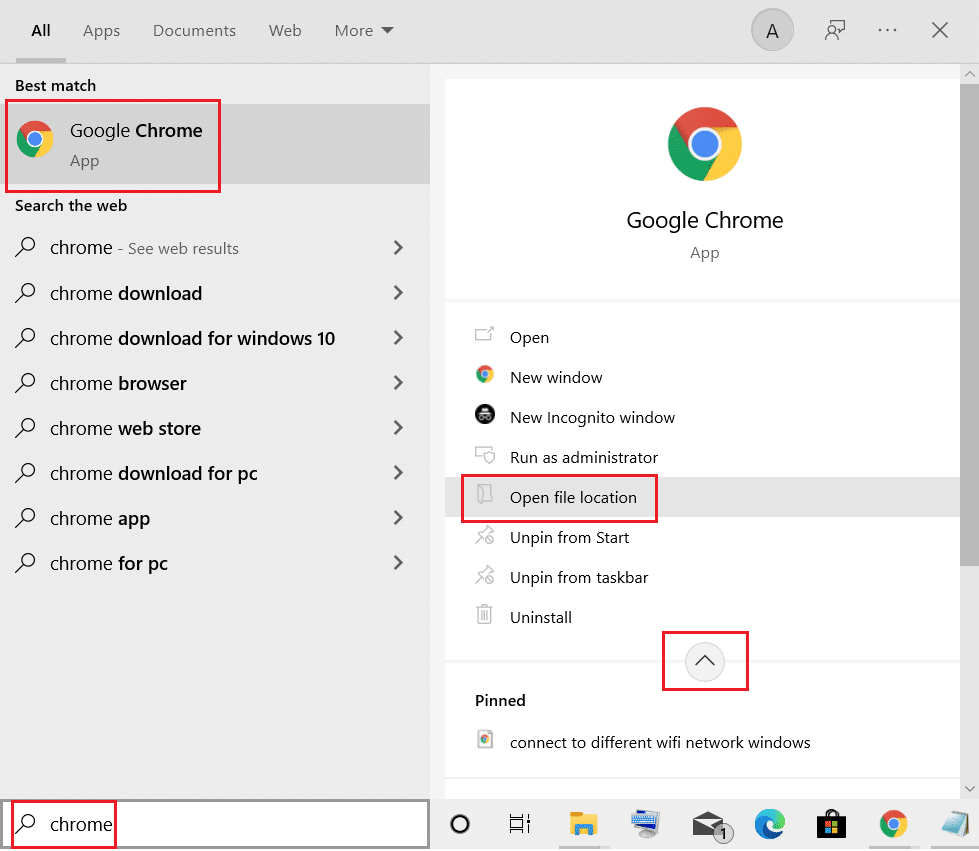
1. түймесін басыңыз Windows кілті, теріңіз хром, басыңыз Файлдың орнын ашыңыз опция.
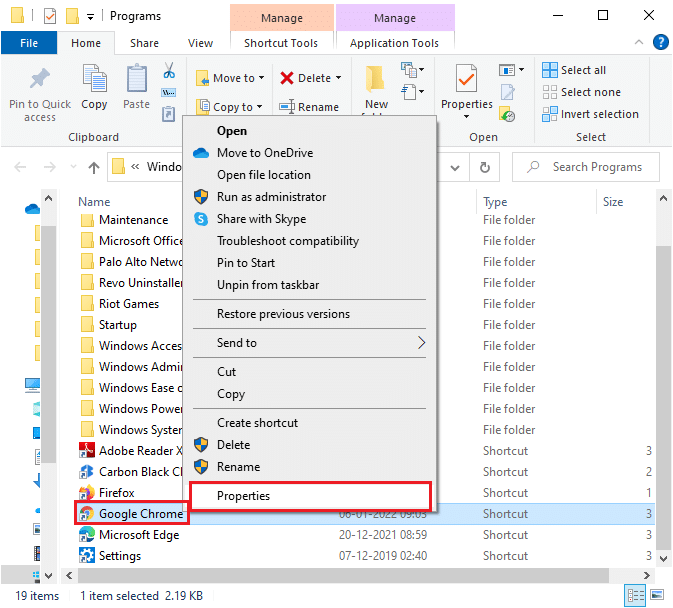
2. Then, right-click on Google Chrome батырмасын басыңыз және Сипаттар көрсетілгендей.
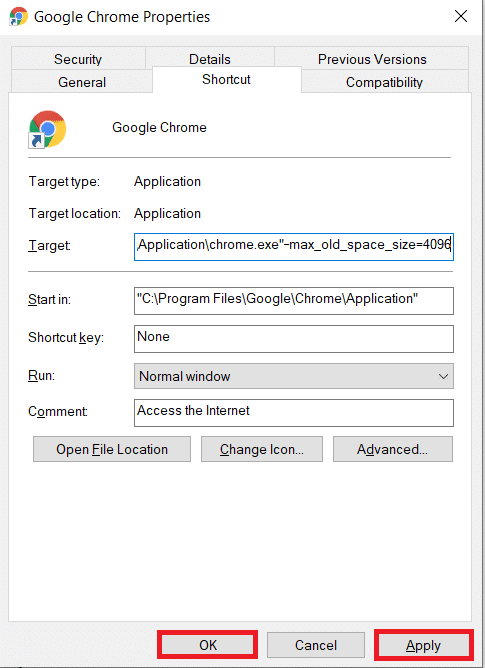
3. Ішінде Google Chrome Properties window, add -max_old_space_size=4096 ішінде нысана field as illustrated below.
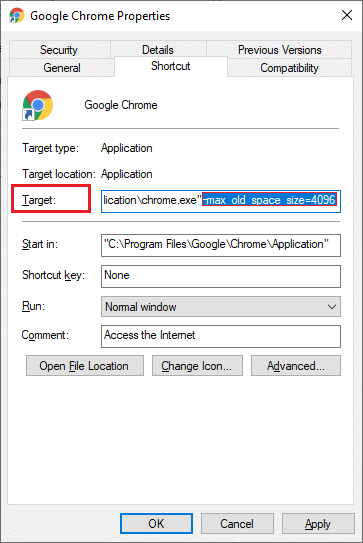
4. Соңында түймесін басыңыз Қолдану содан соң OK өзгерістерді сақтау.
Сондай-ақ оқыңыз: Chrome жүйесінде HTTPS арқылы DNS қалай қосуға болады
Method 13: Update Chrome
If you have an outdated browser, the improved features of the OS will not be supported. This may also result in Chrome ran out of memory issues. To fix this error, you should update Chrome by following the steps below.
1. Іске қосу Google Chrome.
2. Басыңыз үш нүктелі белгіше кеңейту Параметрлер мәзірі.
3. Содан кейін таңдаңыз Help > Google Chrome туралы төменде көрсетілгендей.
4. Рұқсат ету Google Chrome to search for updates. The screen will display Жаңартулар тексерілуде message, as shown.
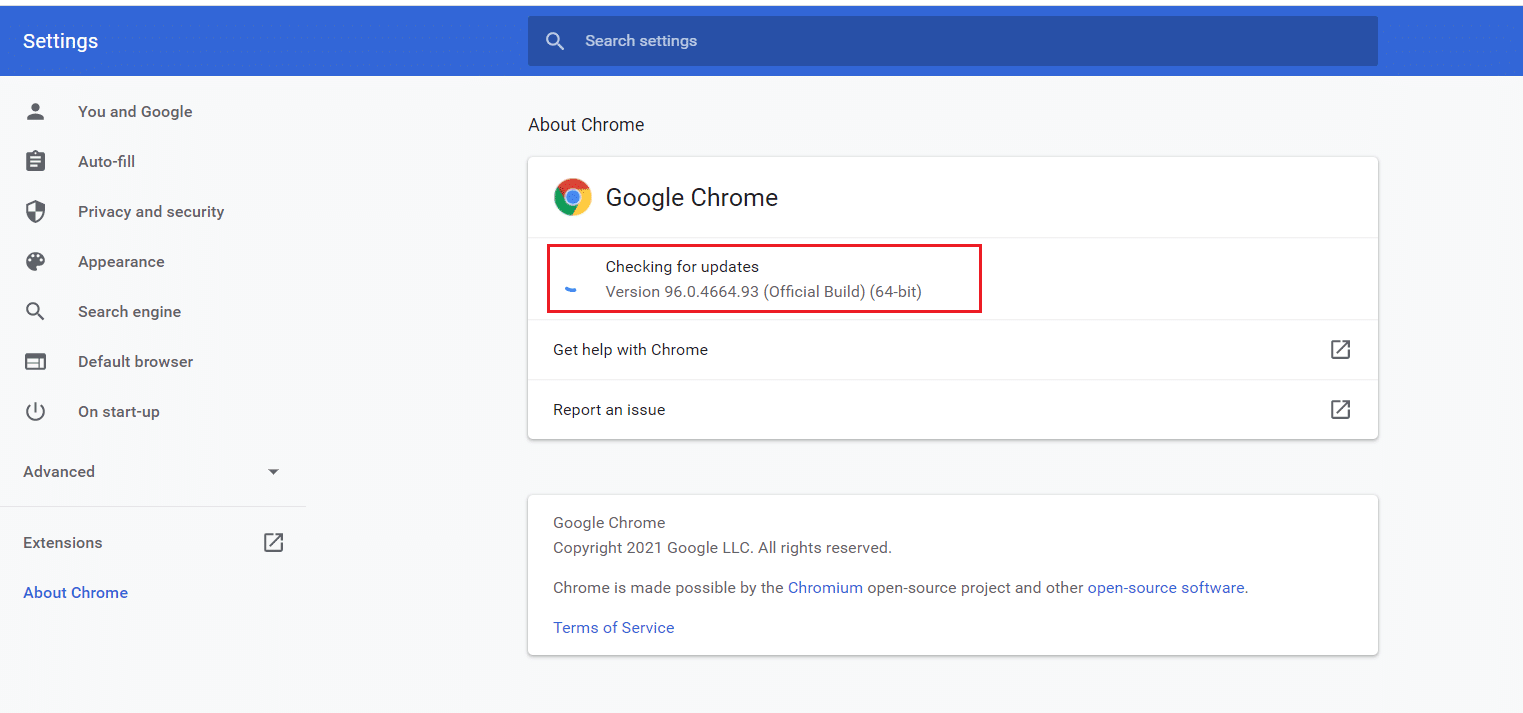
5A. If updates are available, click on the Жаңарту түймесін басыңыз.
5B. If Chrome is already updated then, Google Chrome жаңартылған хабары көрсетіледі.
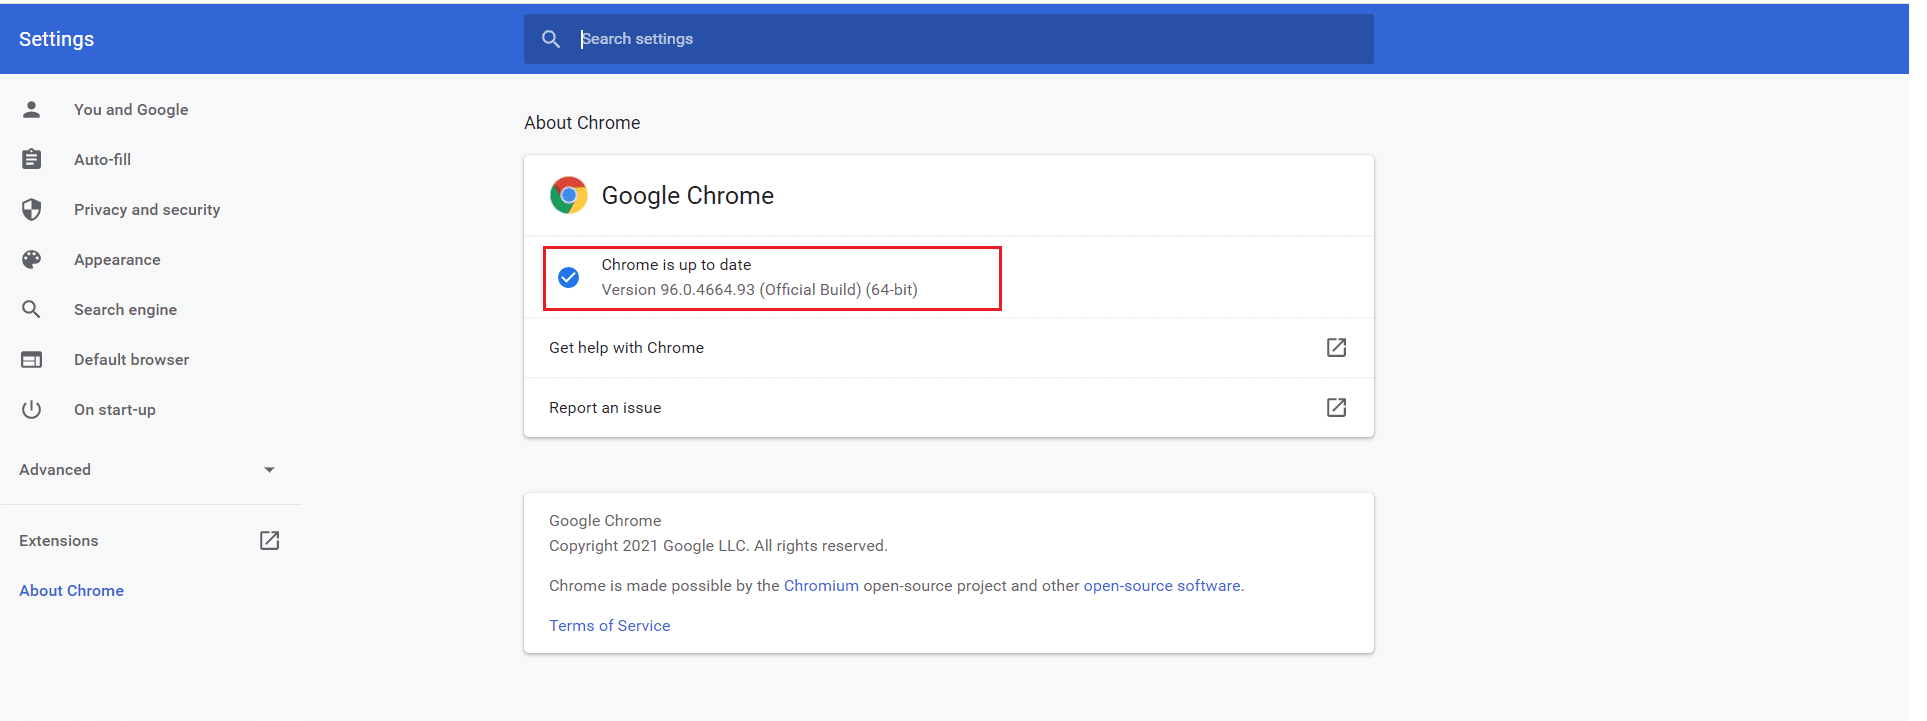
6. Finally, launch the updated browser and check again.
Method 14: Reset Chrome
Resetting Chrome will restore the browser to its default settings, and there are more possibilities that you can fix the discussed error. Follow the below-mentioned steps to reset Google Chrome and check if the issue is resolved.
1. ашық Google Chrome және барыңыз chrome: // параметрлер / қалпына келтіру
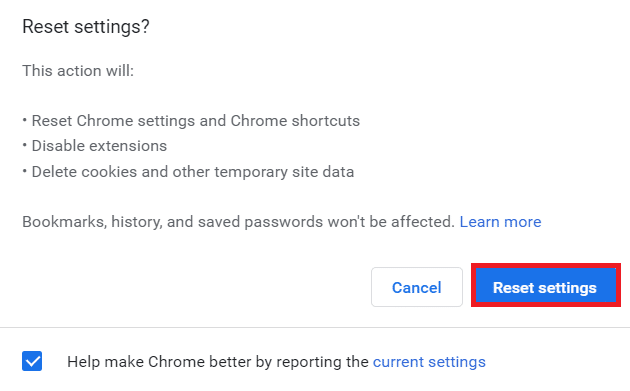
2. Басыңыз Параметрлерді бастапқы параметрлерін қалпына келтіріңіз option, shown highlighted.
3. Now, confirm your action by clicking on the Параметрлерді қалпына келтіру түймесін басыңыз.
Now, launch the website again and check the issue is resolved.
Сондай-ақ оқыңыз: Google Chrome браузерінен сақталған құпия сөздерді қалай экспорттауға болады
15-әдіс: Chrome браузерін қайта орнатыңыз
If none of those mentioned above methods have helped you, you can try reinstalling Google Chrome to fix Chrome ran out of memory issue. Doing this will fix all the relevant issues with the search engine, updates, or other related problems triggering this issue.
Ескерту: Back up all favorites, saved passwords, bookmarks and sync your google account with your Gmail. Uninstalling Google Chrome will delete all the saved files.
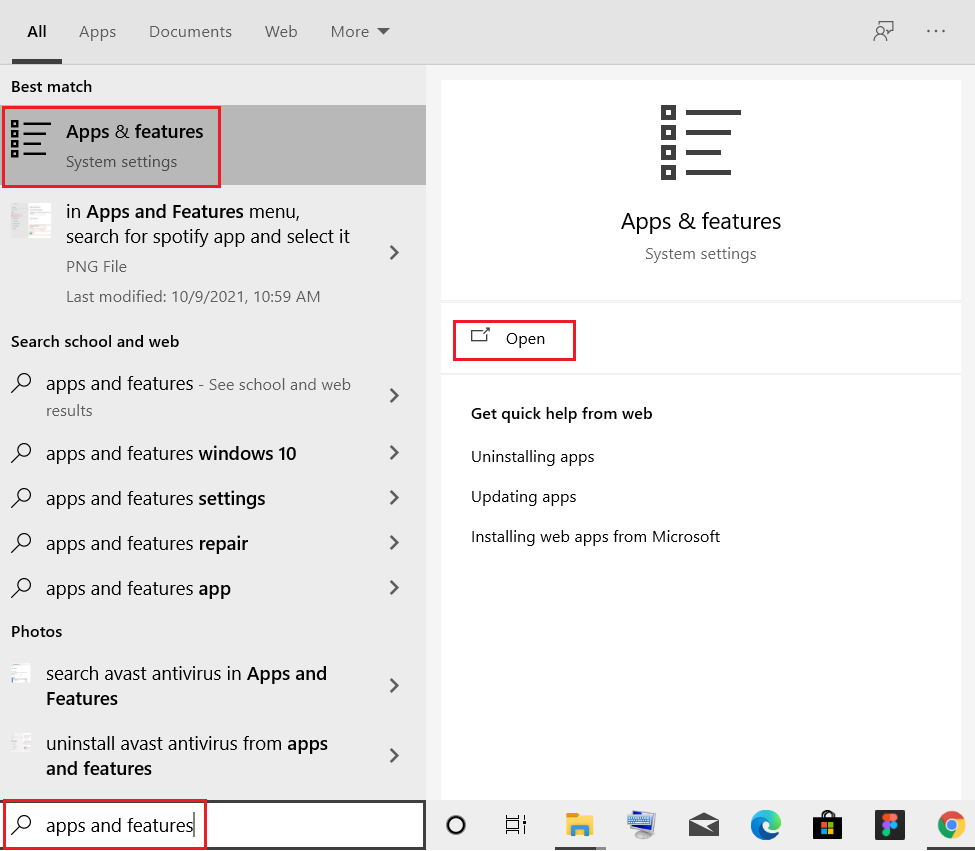
1. түймесін басыңыз Windows кілті, теріңіз қолданбалар мен мүмкіндіктер, және нұқыңыз ашық.
2. Іздеу Chrome in Осы тізімнен іздеңіз өріс.
3. Содан кейін таңдаңыз Chrome және басыңыз Uninstall түймесі бөлектелген.
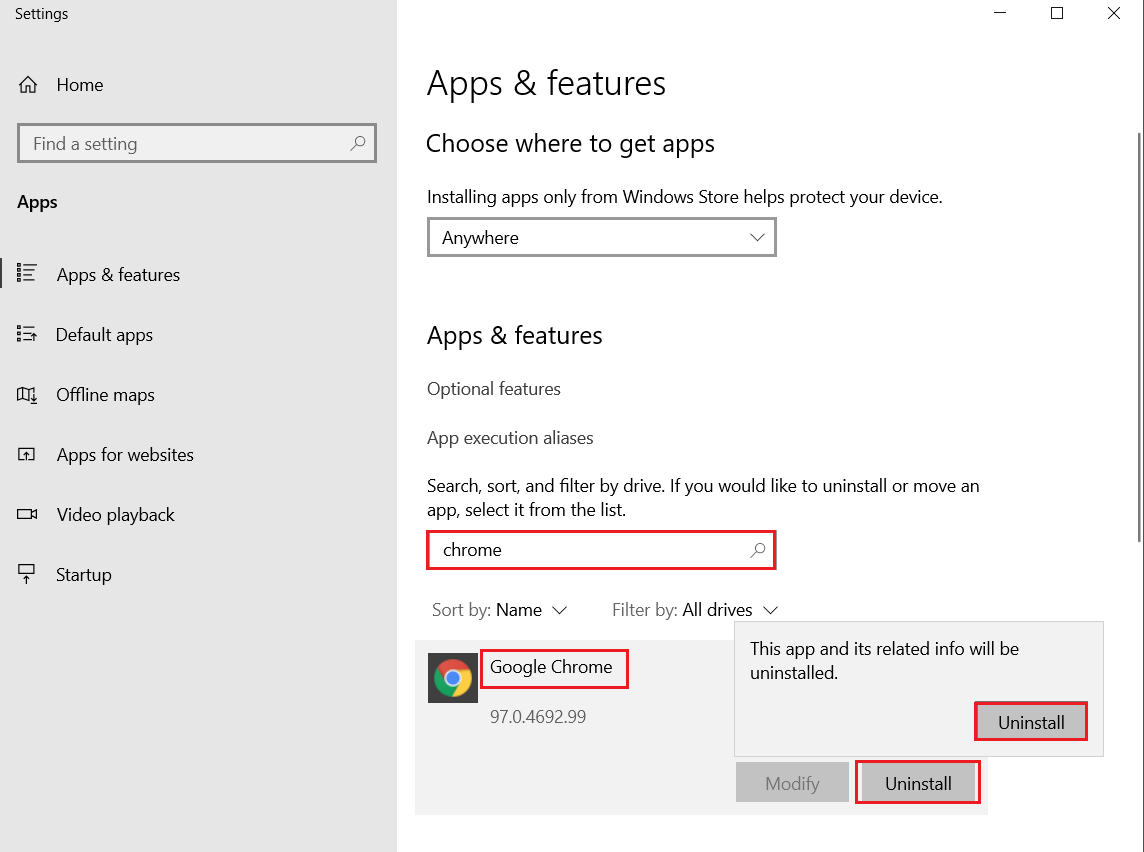
4. Тағы да түймесін басыңыз Uninstall қабылдау.
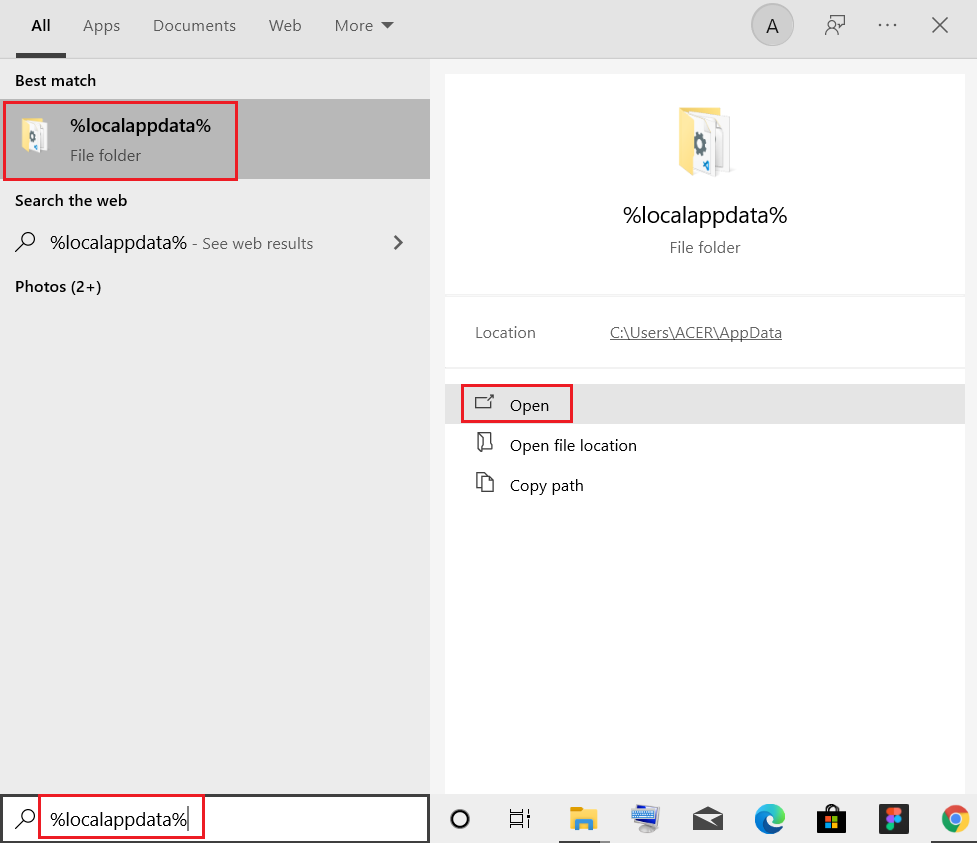
5. Енді түймесін басыңыз Windows кілті, теріңіз % localappdata%, және нұқыңыз ашық өту Жергілікті AppData қалта.
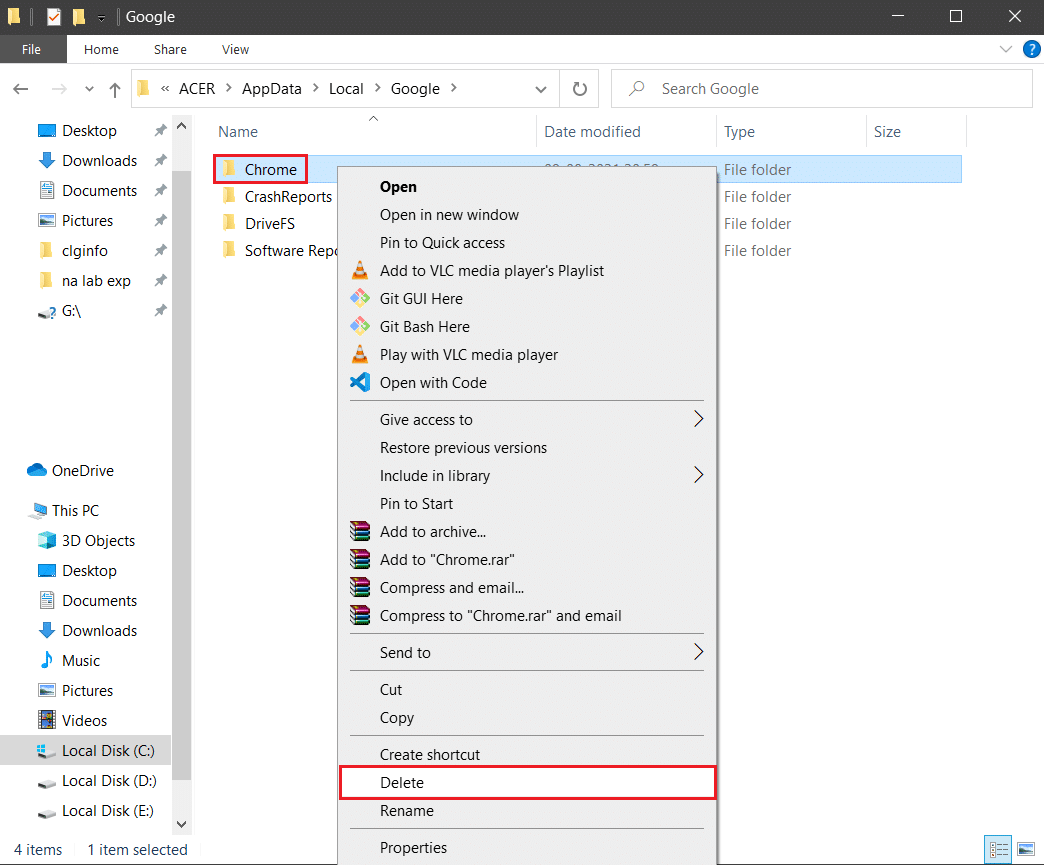
6. ашыңыз Google қалтаны екі рет басу арқылы.

7. тінтуірдің оң жағын басыңыз Chrome қалтасын таңдаңыз Жою опция төменде көрсетілгендей.
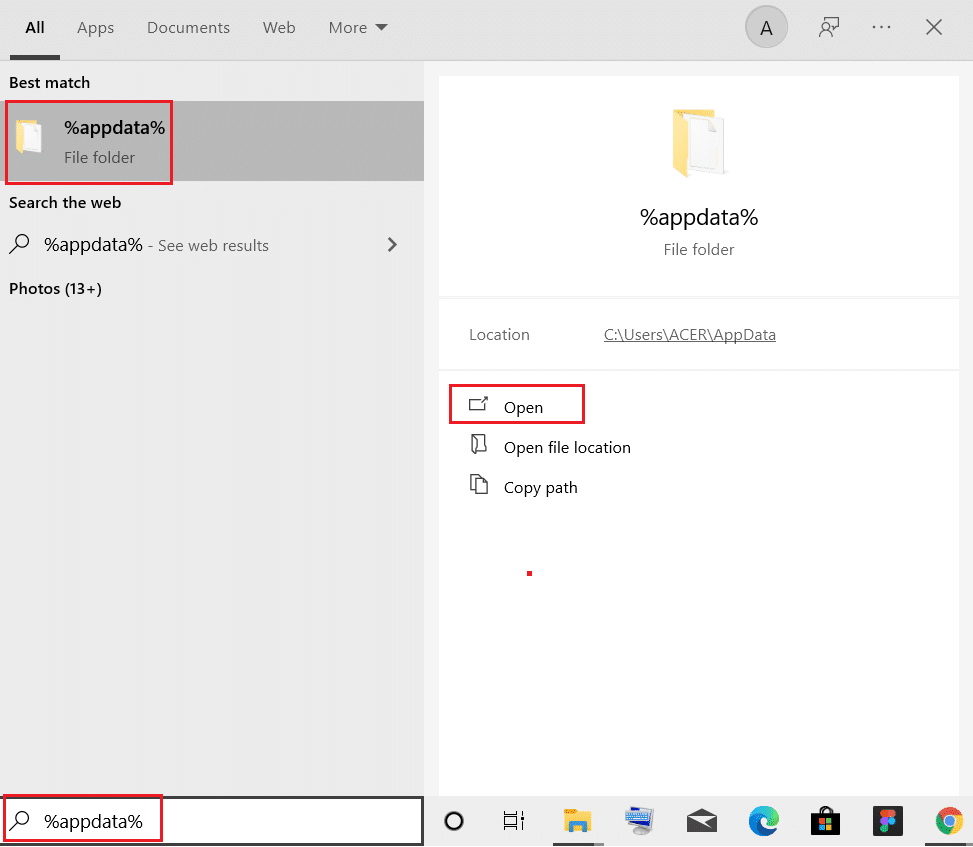
8. Тағы да басыңыз Windows кілті, теріңіз % appdata%, және нұқыңыз ашық өту AppData роуминг қалта.
9. Тағы да, келесіге өтіңіз Google қалта және жою The Chrome қалтада көрсетілгендей 6-7 қадамдар.
10. Соңында, қайтадан қосу компьютерге
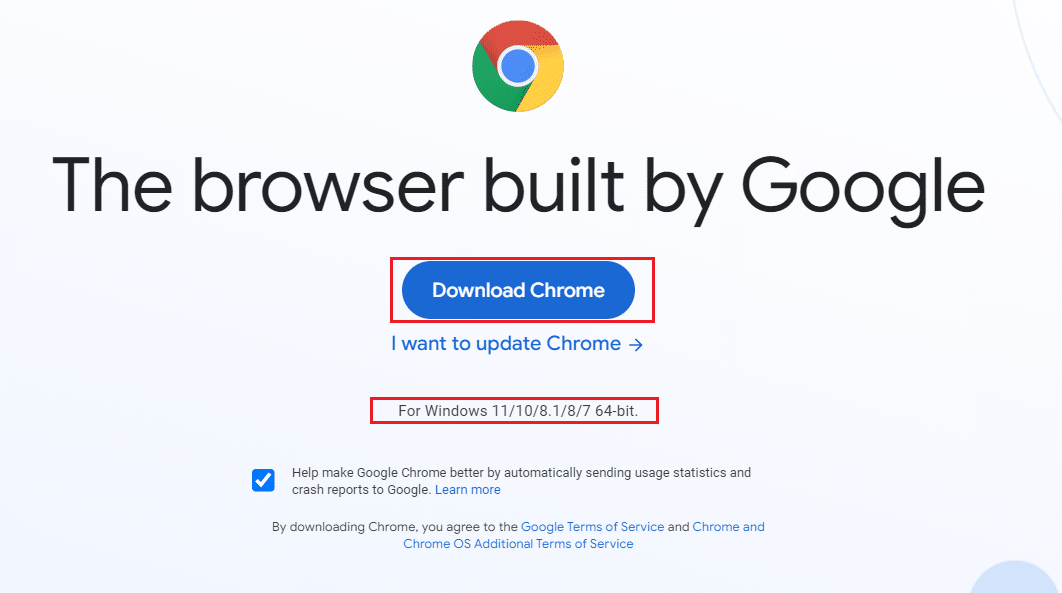
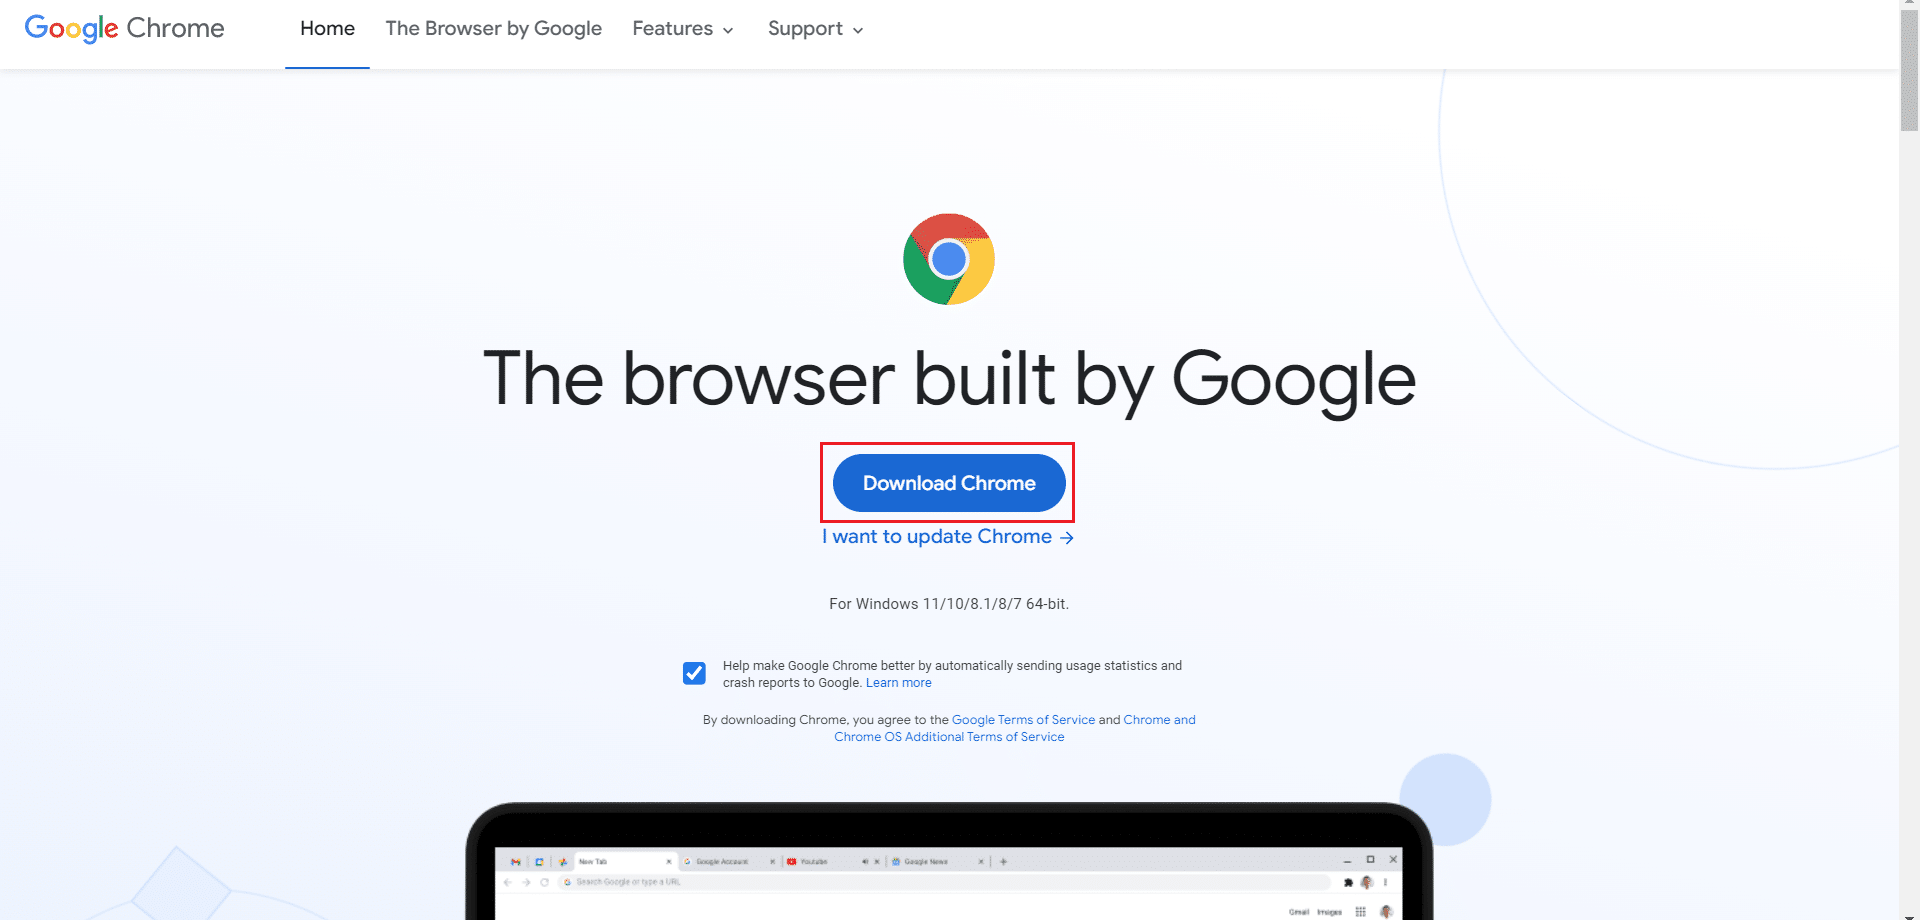
11. Содан кейін жүктеп алыңыз соңғы нұсқасы of Google Chrome көрсетілгендей.
12. іске қосыңыз орнату файлы және экрандағы нұсқауларды орындаңыз Chrome орнатыңыз.
Ұсынылған:
Бұл нұсқаулық пайдалы болды және сіз түзете аласыз деп үміттенеміз Chrome ran out of memory issue in your system. Let us know which method worked for you the best. Also, if you have any queries/suggestions regarding this article, then feel free to drop them in the comments section.

