Your PC is connected to the internet but have no access to the Internet is a pretty common problem that everyone sometimes faces in their lives. The question is, why this error haunts you? I mean, when everything was working perfectly, then why suddenly you have to face this error?
Well, let’s just say many perimeters can cause such a problem, the first being software updates or new installation, which might change the registry value. Sometimes your PC can’t obtain IP or DNS address automatically while it can also be a driver issue but don’t worry because in all of these cases, it’s a pretty fixable issue, so without wasting any time, let’s see how to Fix WiFi Connected but no Internet Access.
Fix WiFi Connected but no Internet Access
혹시라도 문제가 생길 경우를 대비해 복원 지점을 만들어 두시기 바랍니다.
Method 1: Reboot your Computer and Router
Most of us know about this very basic trick. Rebooting your computer can sometimes fix any software conflict by giving it a fresh start. So if you are someone who would rather put their computer on sleep, restarting your computer is a good idea.
1. 클릭 시작 메뉴 다음을 클릭합니다 전원 버튼 available at the bottom left corner.
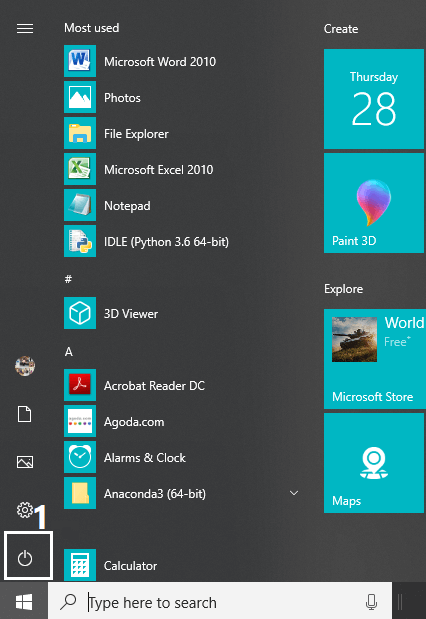
2. 다음으로 다시 시작 option and your computer will restart itself.
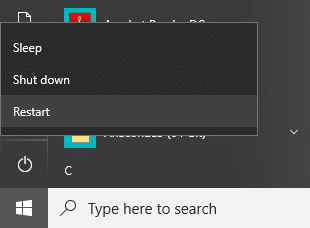
After the computer restarts, check if your problem is resolved or not.
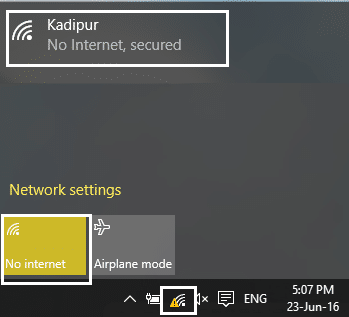
If your router is not configured properly, you may not be able to access internet even though you’re connected to WiFi. You just need to press the Refresh/Reset button on your router or you can open the settings of your router locate the reset option in setting.
1. Turn off your WiFi router or modem, then unplug the power source from it.
2. Wait for 10-20 seconds and then again connect the power cable to the router.
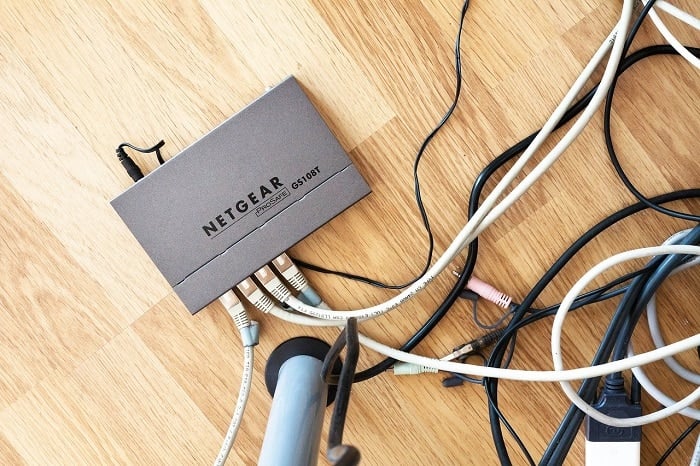
3. Switch on the router and again try to connect your device.
Method 2: Update Network Adapter Drivers
1. Press Windows key + R and type “devmgmt.msc를” in Run dialogue box to open 기기 관리자.

2. 확장 네트워크 어댑터을 클릭한 다음 와이파이 컨트롤러 (for example Broadcom or Intel) and select 드라이버 소프트웨어를 업데이트하십시오.

3. Now select “Search for automatically for updated driver software".
4. Now Windows will automatically search for the Network driver update and if new update is found, it will automatically download and install it.
5. Once finished, close everything and reboot your PC.
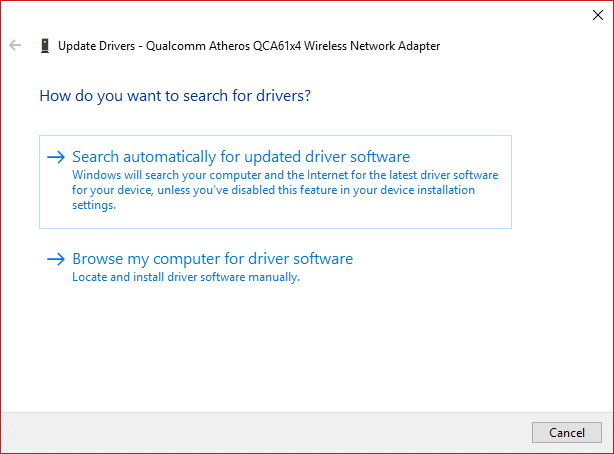
6. If you’re still facing the WiFi Connected but no Internet Access issue, then right-click on your WiFi and select 드라이버 업데이트 장치 관리자에서.
7. Now, in the Update Driver Software Windows, select “내 컴퓨터에서 드라이버 소프트웨어 찾아보기."

8. Now select “내 컴퓨터에서 사용 가능한 드라이버 목록에서 선택하겠습니다."

9. 시도 update drivers from the listed versions (make sure to checkmark compatible hardware).
10. If the above didn’t work then go to 제조사의 웹사이트 드라이버를 업데이트합니다.

11. Download and install the latest driver from the manufacturer’s website then restart your PC.
Method 3: Uninstall Wireless drivers
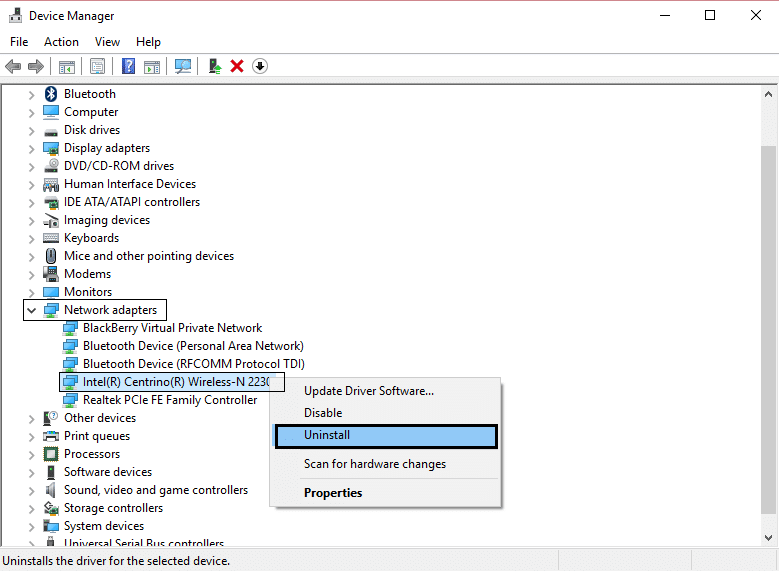
1. Press Windows key + R, then type “devmgmt.msc를” and hit Enter to open device manager.
2. Expand Network adapters and right-click on the 무선 네트워크 카드.
3. 선택 제거, if asked for confirmation, select yes.
4. After uninstallation is complete, click 동작 그런 다음 '하드웨어 변경 사항을 스캔하십시오.'

5. The device manager will automatically install the wireless drivers.
6. Now, look for a wireless network and 연결을 설정합니다.
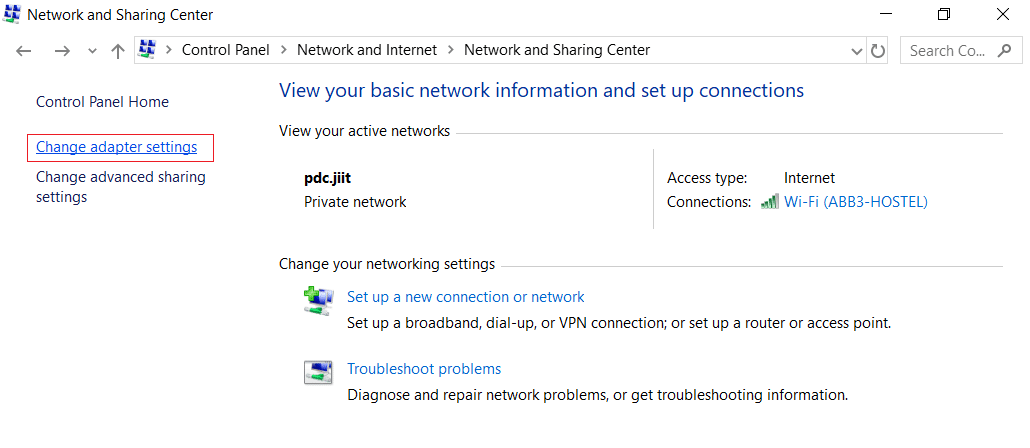
7. 열려있는 네트워크 및 공유 센터 그런 다음 '를 클릭하십시오.어댑터 설정 변경.'
8. Finally, right-click on Wi-Fi and select 사용 안함.
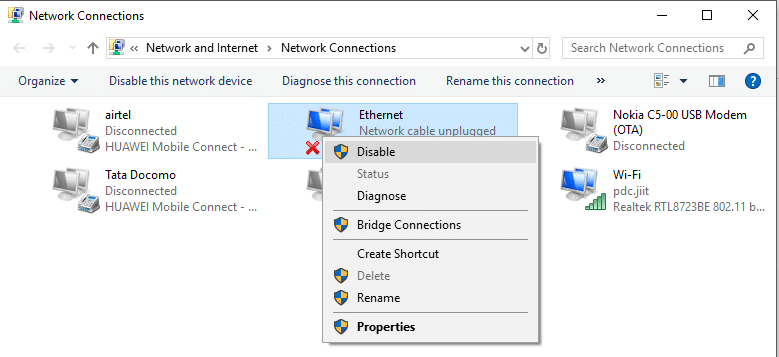
9. Right-click again on the same network card and select ‘사용’ from the list.
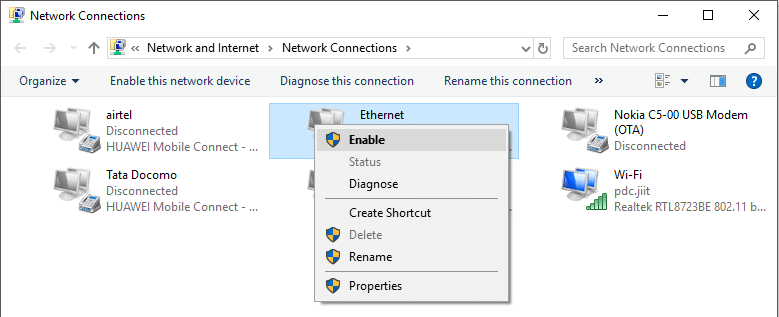
10. Now right click on the network icon and select ‘Troubleshoot Problems.'
![]()
11. Let the troubleshooter automatically fix the issue.
12. Reboot to apply changes.
Method 4: Obtain IP address and DNS server address automatically
1. Right-click on the Network icon and select ‘네트워크 및 공유 센터 열기.'
![]()
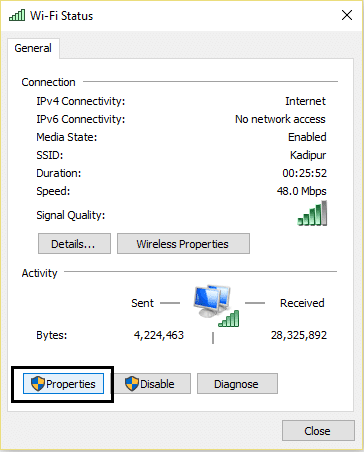
2. Now click on your connection, i.e. the wireless network to which you are connected to.
3. In the Wi-Fi Status window, click on ‘속성.'
4. 선택 4 인터넷 프로토콜 버전 (TCP / IPv4) 클릭 속성.
5. In the General tab, checkmark 자동으로 IP 주소 받기 와 자동으로 DNS 서버 주소를 얻습니다.
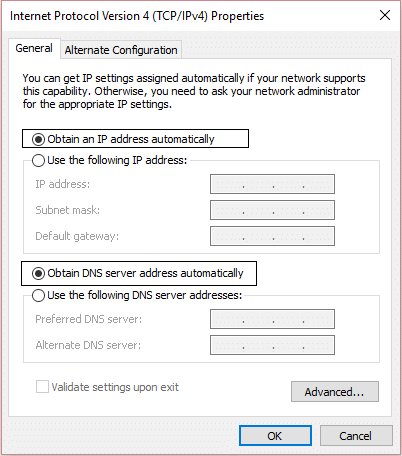
6. Reboot your PC and see if you’re able to Fix WiFi Connected but no Internet Access. If not then you can switch to Google DNS or Open DNS, as it seems to fix the issue for users.
Method 5: Try resetting TCP/IP or Winsock
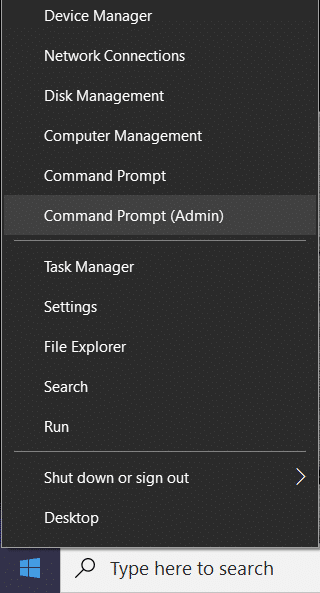
1. Right-click on the Windows button and select “명령 프롬프트(관리자)."
2. Now type the following command and press Enter after each one:
ipconfig를 / 해제
ipconfig를 / flushdns를
갱신 ipconfig / all을

3. Again open Command Prompt and type the following command one by one and hit enter after each one:
netsh winsock reset
netsh int ip reset
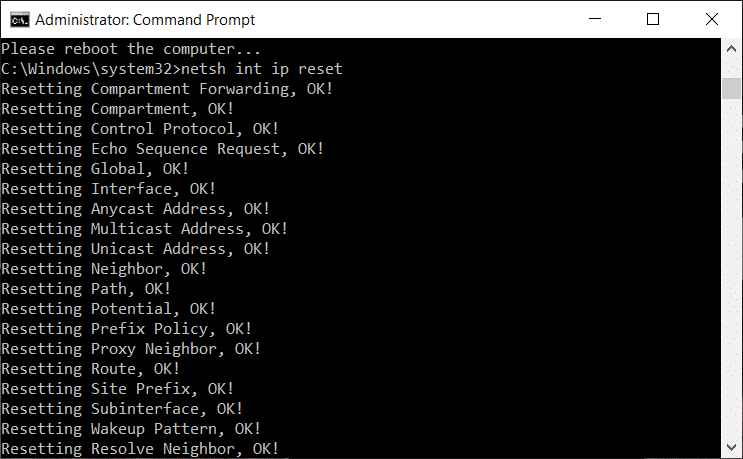
4. Reboot to apply changes.
또한 읽기 : How to fix Ethernet doesn’t have a valid IP Configuration Error
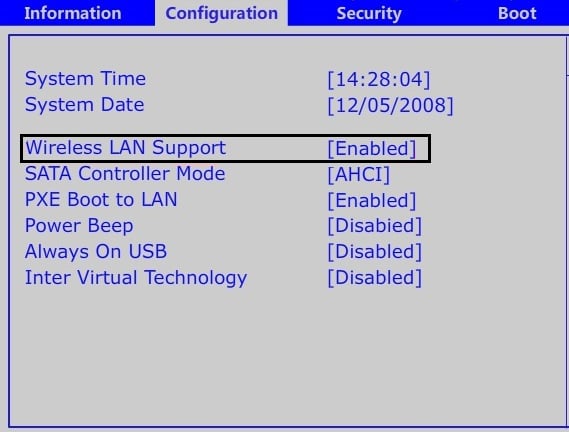
Method 6: Enable WiFi from BIOS
Sometimes none of the above will be useful because the wireless adapter has been disabled from BIOS, in this case, you need to enter BIOS and set it as default, then log in again and go to “Windows 모바일 센터” through Control Panel and you can turn the wireless adapter ON/OFF. 당신이 할 수 있는지 확인 resolve WiFi connected but no Internet access problem but if nothing works try updating the wireless drivers from 여기에서 지금 확인해 보세요. or from here.
Method 7: Edit Registry key
1. Press Windows key + R then type “regedit” and hit enter.

2. In Registry editor, navigate to the following key:
HKEY_LOCAL_MACHINESYSTEMCurrentControlSetservicesNlaSvcParametersInternet
3. Search for the key “EnableActiveProbing” and set its 1 값.
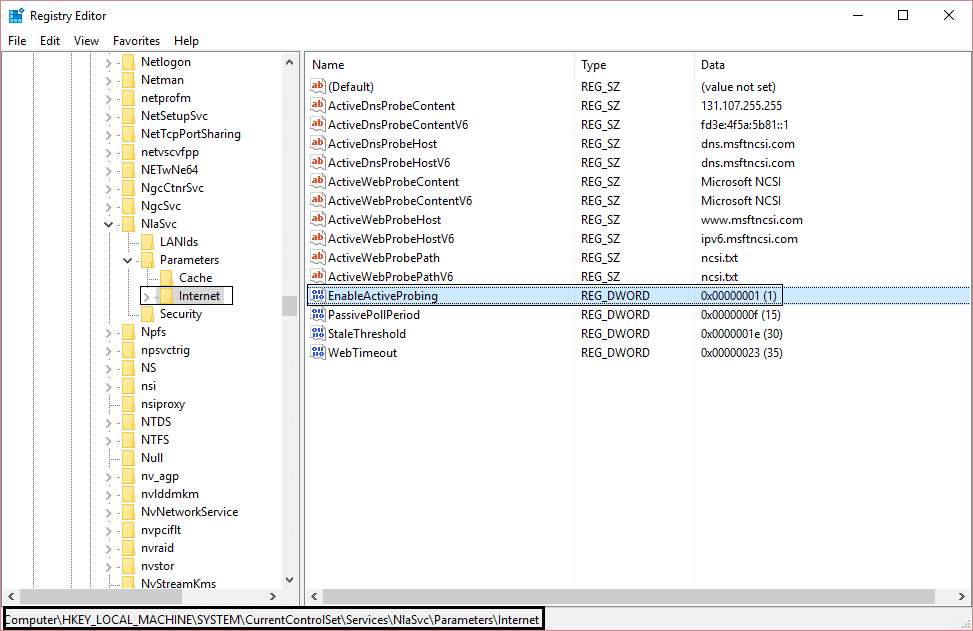
4. Finally, reboot your PC, and see if you’re able to fix WiFi Connected but no Internet Access.
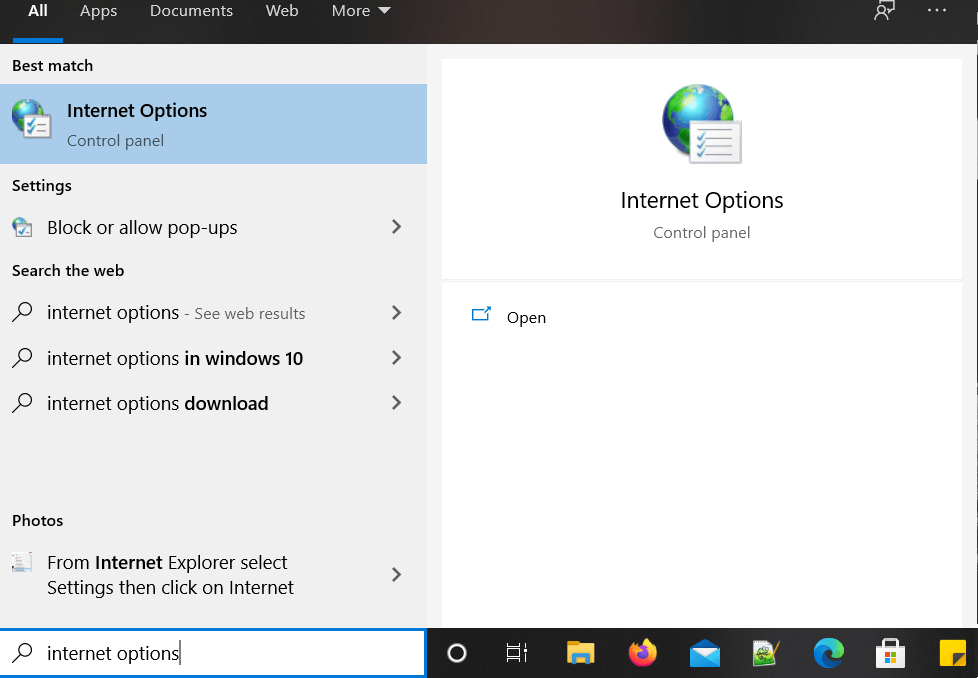
Method 8: Disable Proxy
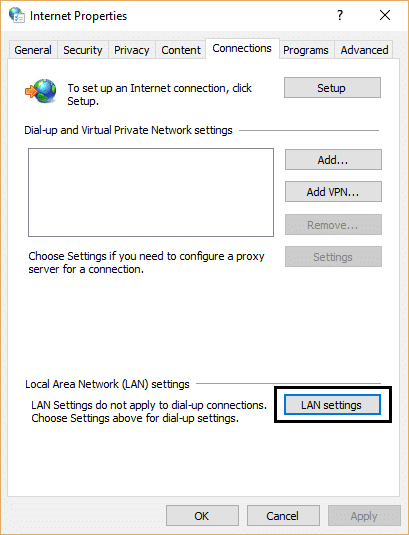
1. 유형 "internet properties"또는"인터넷 옵션” in Windows Search and click on Internet Options.
2. Now go to the Connections tab and then click on LAN settings.
3. Make sure that “자동으로 설정 검색"는 체크 와 "Use a proxy server for LAN"는 선택 취소.
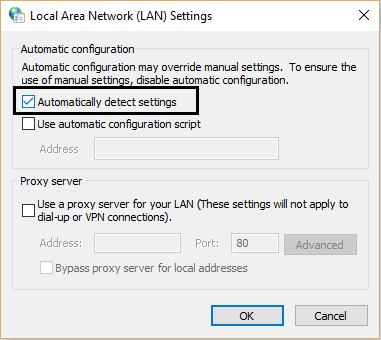
4. Click OK and then click apply.
5. Finally, Reboot your PC to save changes and check if you’re able to Fix WiFi Connected but no Internet Access.
방법 9 : 네트워크 문제 해결사 실행
1. Windows 키 + I를 눌러 설정을 연 다음 업데이트 및 보안.
![]()
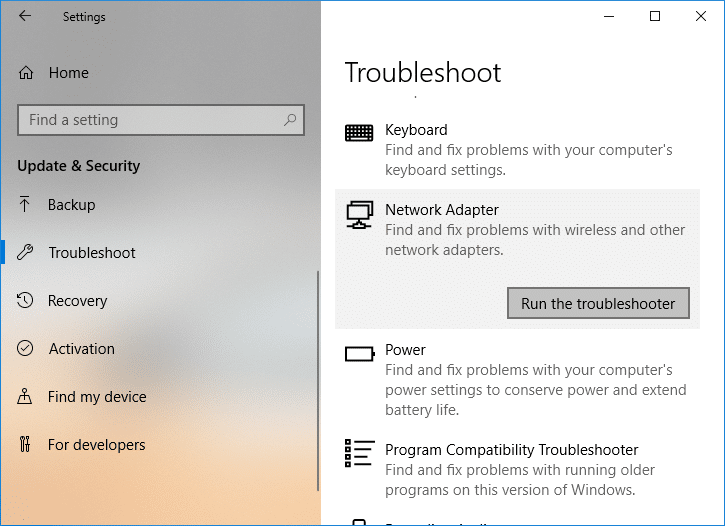
2. From the left-hand menu select 문제를 해결하십시오.
3. Under Troubleshoot click on 인터넷 연결 다음을 클릭합니다 문제 해결사를 실행하십시오.

4. Follow further on-screen instructions to run the troubleshooter.
5. If the above didn’t fix the issue then from the Troubleshoot window, click on 네트워크 어댑터 다음을 클릭하십시오 문제 해결사를 실행하십시오.
5. Reboot your PC to save changes and see if you’re able to fix WiFi Connected but no Internet Access issue.
Method 10: Reset Your Network
1. Windows 키 + I를 눌러 설정을 연 다음 네트워크 및 인터넷.

2. From the left-hand menu select 지위.
3. Now scroll down and click on 네트워크 재설정 하단에.

4. 다시“지금 재설정” under Network reset section.

5. This will successfully reset your network and once it is complete the system will be restarted.
Pro Tip: Scan your system for Malware
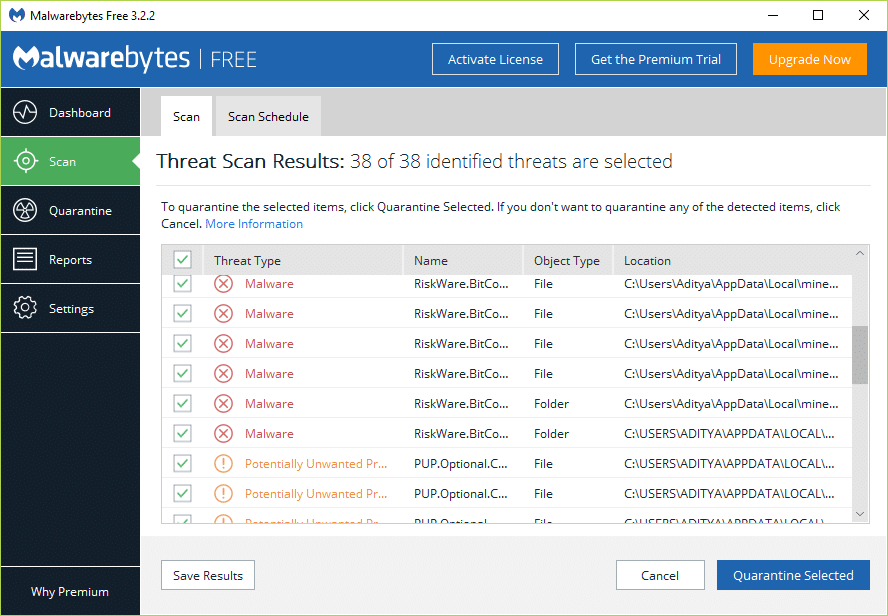
An Internet worm is a malicious software program that spreads at a very fast speed from one device to another. Once an Internet worm or other malware enters your device, it creates heavy network traffic on Google spontaneously and can cause internet connection problems. Thus, read How to Troubleshoot Network Connectivity Problems on Windows 10. Thus, read How to Troubleshoot Network Connectivity Problems on Windows 10. So, it is advised to keep an updated anti-virus which can frequently scan and remove Malware from your system.
If you don’t have any Antivirus then you can use Malwarebytes Anti-Malware to remove malware from your PC. If you are using Windows 10, then you have a great advantage as Windows 10 comes with a built-in antivirus software called Windows Defender를 which can automatically scan and remove any harmful virus or malware from your device.
권장 사항 : How to fix limited access or no connectivity WiFi issues
그것이 당신이 성공적으로 배운 것입니다. How to Fix WiFi Connected but no Internet Access, so go on enjoy your internet again.

