Change Critical Battery Levels on Windows 10: Users are unable to change the critical & low battery levels below a specific point and if you got a big battery then you are not able to utilize your battery to the optimum levels. You won’t be able to change the critical battery levels below 5% on Windows 10 and 5% means close to 15 minutes of battery time. So in order to utilize that 5 %, users want to change the critical battery levels to 1%, because once the critical battery levels are met the system is automatically put into hibernation which just takes close to 30 seconds to complete.
By default the following battery levels are set by Windows:
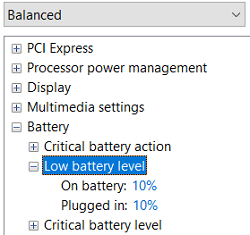
Low Battery Level: 10%
Reserve Power: 7%
Critical Level: 5%
Once the battery is below 10% you will get a notification saying low battery levels accompanied by a beep sound. After that, once the battery is below 7% the Windows will flash a warning message to save your work and turn off your PC or plug in the charger. Now once the battery levels are at 5% then Windows will automatically get into hibernation. So without wasting any time let’s see How to Change Critical Battery Levels on Windows 10 with the help of the below-listed guide.
Change Critical Battery Levels on Windows 10
혹시라도 문제가 생길 경우를 대비해 복원 지점을 만들어 두시기 바랍니다.
Method 1: Change Critical & Low Level Battery Levels
참고 : This method doesn’t seem to work on all computers, but it’s worth a try.
1.Turn off your PC then remove battery from your laptop.
2.Plug in the power source and start your PC.
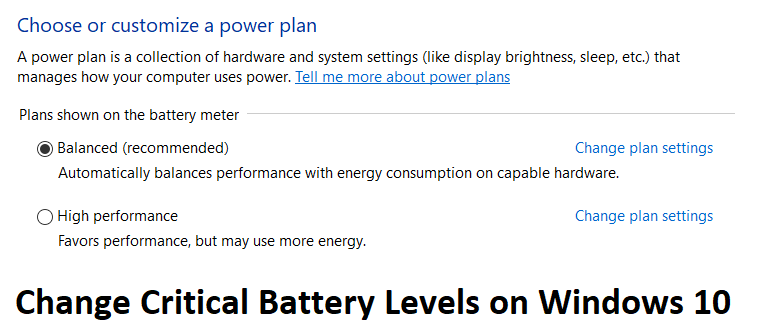
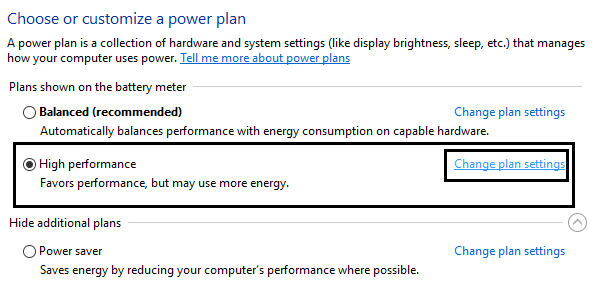
3.Log into Windows then right-click on Power icon 선택 전원 옵션.
4. 그런 다음 계획 설정 변경 next to your currently active plan.
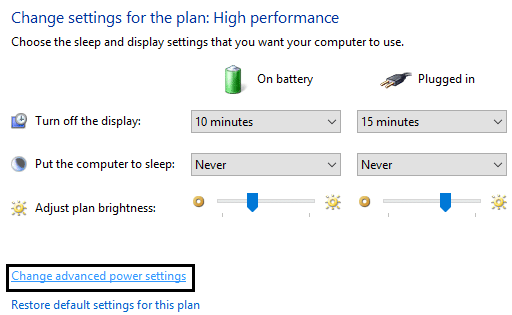
5.다음을 클릭하세요. 고급 전원 설정을 변경하십시오.
6.Scroll down till you find 배터리, click the plus icon to expand it.
7.Now if you want to then you can change the actions which computer takes on reaching a specific battery level by expanding Critical battery actions.
8.다음으로 확장하세요. 배터리 위험 수준 그리고 settings to 1% for both Plugged in and On battery.
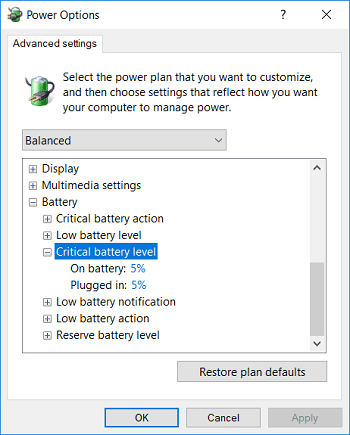
10.If you want then do the same for 배터리 부족 just make sure to set it to 5%, not below it.
11. 적용을 클릭한 다음 확인을 클릭합니다.
12. PC를 재부팅하여 변경 사항을 저장합니다.
Method 2: Use Powercfg.exe to change battery levels
1. Windows 키 + X를 누른 다음 선택 명령 프롬프트 (Admin).

2. cmd에 다음 명령을 입력하고 Enter 키를 누릅니다.
powercfg -setdcvalueindex SCHEME_CURRENT SUB_BATTERY BATLEVELCRIT <percentage>
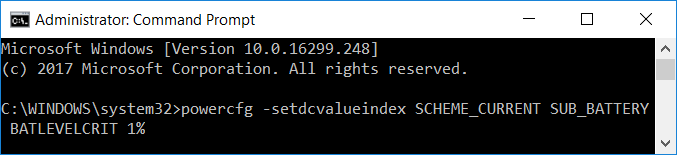
참고 : If you want to set the critical battery level to 1% then the above command will be:
powercfg -setdcvalueindex SCHEME_CURRENT SUB_BATTERY BATLEVELCRIT 1%
3.Now if you want to set the critical battery level for plugged into 1% then the command will be:
powercfg -setacvalueindex SCHEME_CURRENT SUB_BATTERY BATLEVELCRIT 1%

4. PC를 재부팅하여 변경 사항을 저장합니다.
In addition to above, you could learn more about troubleshooting power plans from 여기를 클릭해 문의해주세요.
권장 사항 :
그게 당신이 성공적으로 Change Critical Battery Levels on Windows 10 하지만 이 가이드에 관해 여전히 질문이 있는 경우 댓글 섹션에서 자유롭게 질문하세요.

