If you have 2 in 1 Windows device such as Tablets, you would be familiar with the importance of the screen rotation feature. Users report that the screen rotation feature has stopped working & the Screen Rotation Lock option is greyed out. If you’re facing this issue, then don’t worry as this is just a setting issue which means it can be easily fixed. This guide will walk you through the steps to fix rotation lock greyed out in Windows 10.
Here are issues which can be resolved using this guide:
- Rotation lock missing
- Auto Rotate not working
- Rotation lock greyed out.
- Screen rotation not working
Fix Rotation Lock greyed out in Windows 10
혹시라도 문제가 생길 경우를 대비해 복원 지점을 만들어 두시기 바랍니다.
Method – 1: Enable Portrait Mode
One of the methods to fix this problem is to rotate your screen in portrait mode. Once you rotate it to portrait mode, most probably your rotation lock would start working, i.e. clickable again. In case your device is not rotating into portrait mode automatically, try to do it manually.
1. 프레스 Windows 키 + 나 to open Settings then click on the 아이콘.

2. Make sure to select 디스플레이 왼쪽 메뉴에서.
3. Orientation section where you need to choose 초상화 드롭 다운 메뉴에서
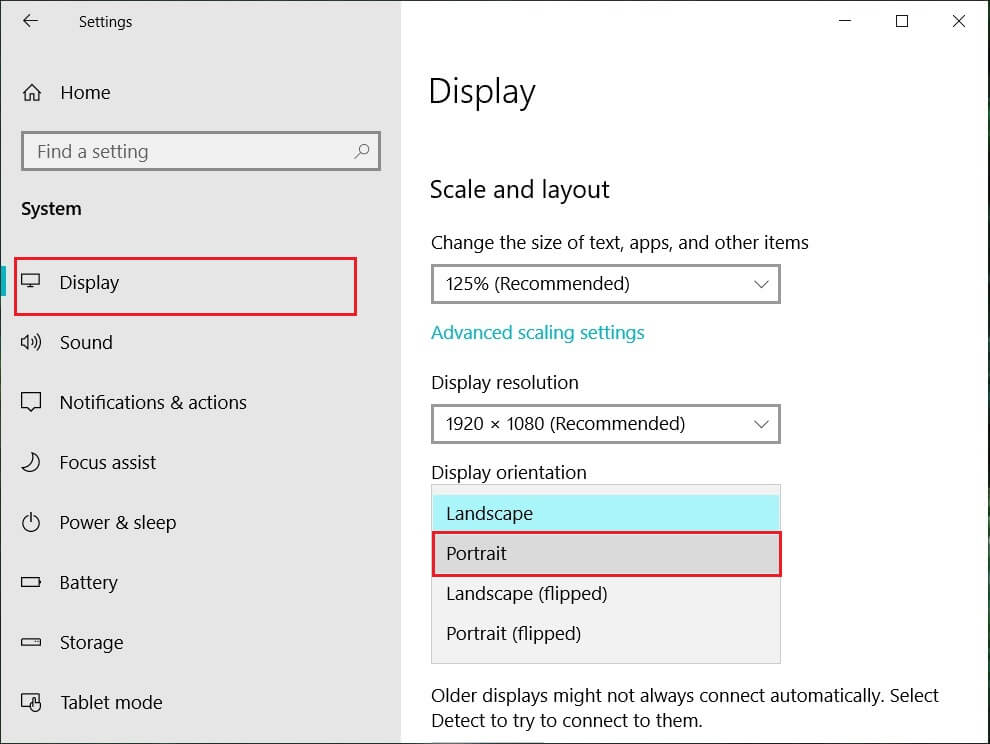
4. Your device will automatically turn into portrait mode.
Method – 2: Use your device in tent mode
Some users, particularly Dell Inspiron, experienced that when their rotation lock is greyed out, the only way to solve this problem is to put your device in Tent Mode.
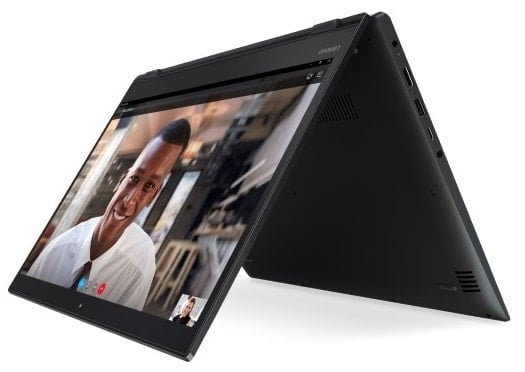
이미지 신용 : Microsoft
1. You need to put your device in Tent Mode. If your display is upside down, you need not worry.
2. 이제를 클릭하십시오 Windows 관리 센터, 회전 잠금 will be working. Here you need to turn it off if you want so that your device rotate properly.
Method – 3: Disconnect your keyboard
If rotation lock is greyed in your Dell XPS and Surface Pro 3 (2-in-1 device), you need to disconnect your keyboard, and many users reported that disconnecting the keyboard solves the rotation lock problem. If you own different devices, you can still use this method to fix rotation lock greyed out in Windows 10 issue.
Method – 4: Switch to Tablet Mode
Many users experienced that this rotation greyed out the problem by switching their device into Tablet Mode. If it is switched automatically, it is good; otherwise, you can do it manually.
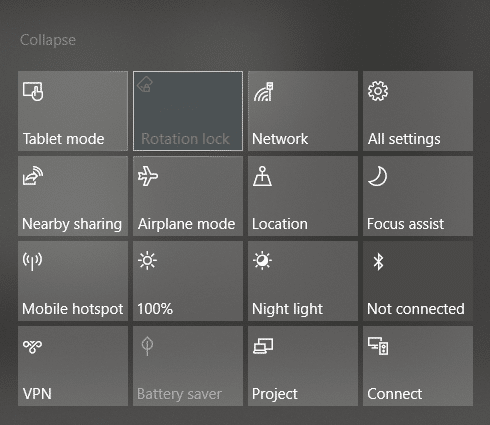
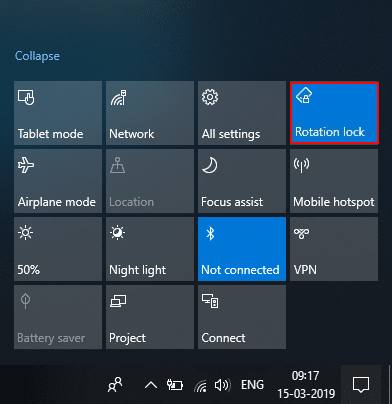
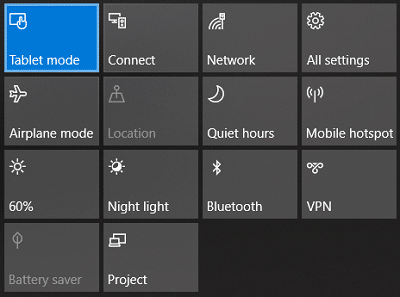
1. 클릭 윈도우 액션 센터.
2. 여기에서 찾을 수 있습니다. 태블릿 모드 option, Click on It.
OR
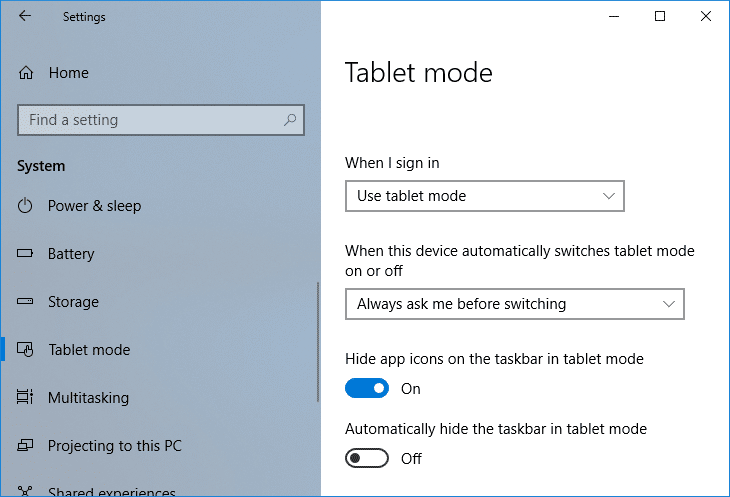
1. Windows 키 + I를 눌러 엽니다. 설정 그런 다음 아이콘.
2. Here it would help if you located 태블릿 모드 option under the left window pane.
3. Now from the “When I sign in” drop-down, select “태블릿 모드 사용".
Method – 5: Change LastOrientation Registry Value
If you still experience a problem, you can solve it by changing some registry values.
1. Press Windows +R and enter regedit를 그런 다음 Enter를 누르십시오.

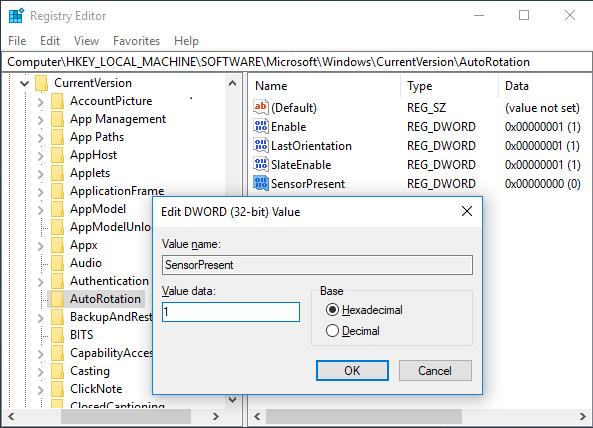
2. Once registry editor opens, you need to navigate to the below path:
HKEY_LOCAL_MACHINESOFTWAREMicrosoftWindowsCurrentVersionAutoRotation
참고 : Follow the above folders one by one to locate Auto Rotation.
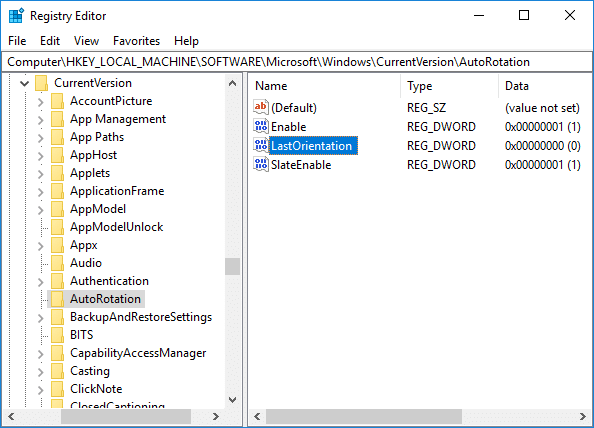
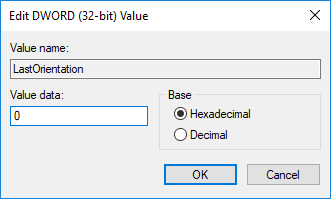
3. 반드시 select AutoRotation 그런 다음 오른쪽 창에서 다음을 두 번 클릭합니다. Last Orientation DWORD.
4. 이제 입력 0 under Value data field 확인을 클릭하십시오.
5. 있는 경우 SensorPresent DWORD, double-click on it and set its 1 값.
Method – 6: Check Sensor Monitoring Service
Sometimes services of your device can cause a rotation lock problem. Therefore, we can get it sorted with Windows Monitoring services feature.
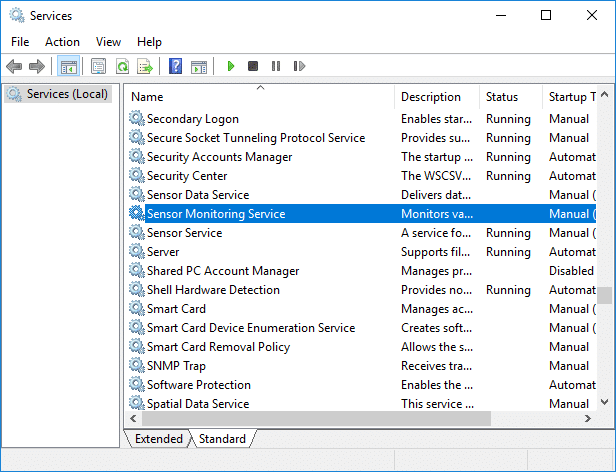
1. Windows + R을 누르고 다음을 입력합니다. services.msc를 Enter를 누르십시오.

2. Once the services window opens, find the Sensor Monitoring services option 그리고 그것을 두 번 클릭하십시오.
3. Now, from the Startup type drop-down select Automatic 다음을 클릭합니다 시작 버튼 to start the service.
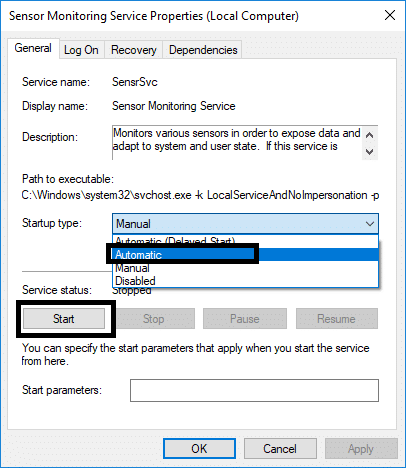
4. Finally, click Apply followed by OK to save the settings, and you can reboot the system to apply the changes.
Method – 7: Disable YMC service
If you are using a Lenovo Yoga device and experiencing this problem, you can fix rotation lock grayed out in the Windows 10 issue by disabling YMC service.
1. Windows + R type services.msc를 Enter를 누르십시오.
2. 찾아 YMC services 두 번 클릭하십시오.
3. 시작 유형을 다음으로 설정합니다. 장애인 and click Apply, followed by OK.
Method – 8: Update Display Drivers
One reason for this problem could be the driver update. If your respective driver for the monitor is not updated, it can cause the Rotation Lock greyed out in Windows 10 Issue.
Manually Update Graphics Drivers using Device Manager
1. Windows 키 + R을 누른 다음 입력 devmgmt.msc를 Enter 키를 눌러 엽니다. 기기 관리자.

2. 다음으로 확장하세요. 디스플레이 어댑터 그래픽 카드를 마우스 오른쪽 버튼으로 클릭하고 사용하도록 설정합니다.

3. 이 작업을 다시 수행한 후 그래픽 카드를 마우스 오른쪽 버튼으로 클릭하고 "드라이버 업데이트".

4. 고르다 "업데이트 된 드라이버 소프트웨어 자동 검색” 그리고 프로세스를 마치도록 하세요.

5. If the above steps helped fix the issue then very good, if not then continue.
6. 다시 그래픽 카드를 마우스 오른쪽 버튼으로 클릭하고 "드라이버 업데이트” 하지만 이번에는 다음 화면에서 “내 컴퓨터에서 드라이버 소프트웨어 찾아보기."

7. 이제 '를 선택하세요.컴퓨터에서 사용 가능한 드라이버 목록에서 선택하겠습니다.. "

8. 마지막으로, 최신 드라이버를 선택하세요 목록에서 다음.
9. 위의 프로세스가 완료되면 PC를 다시 시작하여 변경 사항을 저장합니다.
통합 그래픽 카드(이 경우 Intel)에 대해 동일한 단계를 수행하여 드라이버를 업데이트합니다. 당신이 할 수 있는지 확인 Fix Rotation Lock greyed out Issue, 그렇지 않은 경우 다음 단계를 계속 진행하세요.
제조업체 웹사이트에서 그래픽 드라이버 자동 업데이트
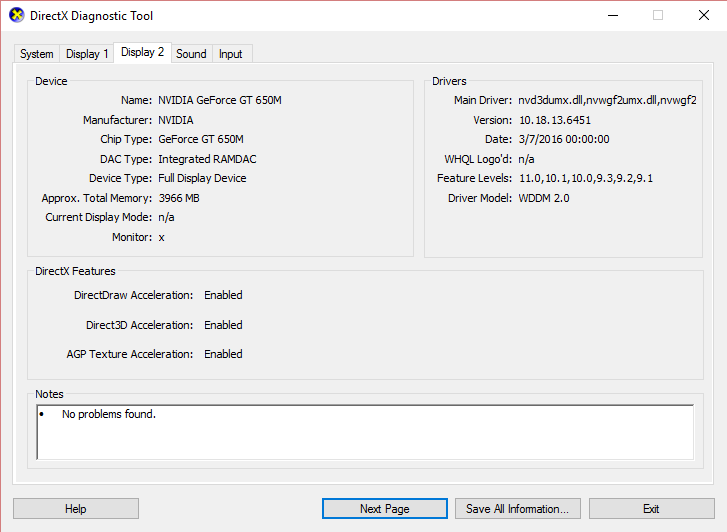
1. Windows 키 + R을 누르고 대화 상자에 “dxdiag를”를 입력하고 엔터를 누릅니다.

2. 디스플레이 탭을 검색한 후(두 개의 디스플레이 탭이 있는데 하나는 통합 그래픽 카드용이고 다른 하나는 Nvidia용입니다) 디스플레이 탭을 클릭하고 그래픽 카드를 찾으세요.
3. 이제 Nvidia 드라이버로 이동합니다. 웹 사이트 다운로드 그리고 우리가 알아낸 제품 세부정보를 입력하세요.
4. 정보를 입력한 후 드라이버를 검색하고 동의를 클릭하여 드라이버를 다운로드합니다.

5. 성공적으로 다운로드한 후 드라이버를 설치하면 Nvidia 드라이버를 수동으로 성공적으로 업데이트했습니다.
Method – 9: Remove Intel Virtual Buttons Driver
Some users reported that Intel Virtual button drivers cause rotation lock problem on your device. To solve this problem, you can uninstall the driver.
1. Open Device manager on your device by pressing Windows + R and type devmgmt.msc를 and hit Enter or press Windows X and choose 장치 관리자 from the options list.
2. Once Device manager box is opened locate Intel virtual buttons driver.
3. 그것을 마우스 오른쪽 버튼으로 클릭하고 선택하십시오 제거.
권장 사항 :
이 글이 도움이 되었기를 바랍니다. 이제 쉽게 Fix Rotation Lock greyed out in Windows 10, 하지만 이 튜토리얼에 관해 여전히 질문이 있는 경우 댓글 섹션에서 자유롭게 질문하세요.
")
