How to Fix Automatic Repair couldn’t repair your PC: Windows 10 is the latest operating system offered by Microsoft and with each Windows upgrade Microsoft is trying their best to overcome the limitation and shortcomings of various issues found in earlier versions of Windows. But there are some errors that are common to all versions of Windows including boot failure being the major one. Boot failure can happen with any version of Windows including Windows 10.
Automatic repair is generally able to fix the boot failure error, this is a built-in option that comes along with Windows itself. When Windows 10 running system fails to boot, the Automatic Repair option tries to repair Windows automatically. In most cases, automatic repair fixes various issues related to boot failures but like any other program, it also has its limitations, and sometimes Automatic Repair fails to work.
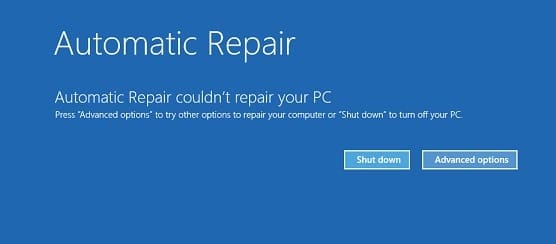
Automatic Repair fails because there are some errors or corrupted or missing files in your operating system installation that prevent Windows from starting correctly and if Automatic Repair fails then you won’t be able to get into Safe Mode. Often a failed automatic repair option will show you some kind of error message like this one:
Automatic Repair couldn't repair your PC.
Press "Advanced options" to try other options to repair your PC or "Shut down" to turn off your PC.
Log file: C:WINDOWSSystem32LogfilesSrtSrtTrail.txt
In a situation when Automatic Repair couldn’t repair your PC, Bootable installation media or Recovery Drive/System Repair Disc are helpful in such cases. Let’s get started and see step by step how you can fix Automatic Repair couldn’t repair your PC error.
참고 : For each and every step below you need to have Bootable installation media or Recovery Drive/System Repair Disc and if you don’t have one then create one. If you don’t want to download the entire OS from the website then you use your friend’s PC to create the disc using this 링크 or you need to download official Windows 10 ISO but for that, you need to have a working internet connection and PC.
IMPORTANT: Never convert a Basic disk that contains your operating system to a Dynamic disk, as it could make your system unbootable.
How to open Command Prompt at Boot in Windows 10
알림: You need to open Command Prompt at Boot a lot in order to fix various issues.
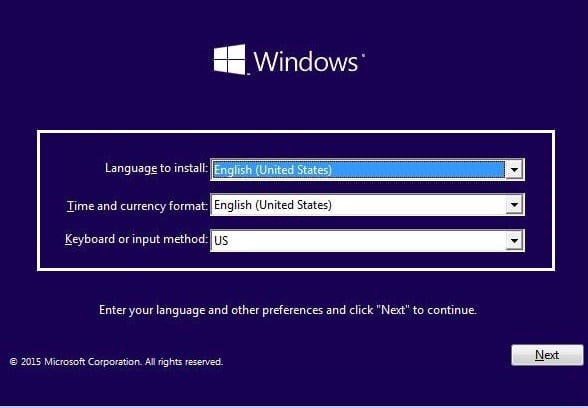
a) Put in the Windows installation media or Recovery Drive/System Repair Disc and select your 언어 환경 설정, 다음을 클릭하십시오.
b) 클릭 수리 컴퓨터는 맨 아래에 있습니다.

c) Now choose 문제 해결 그리고 고급 옵션.
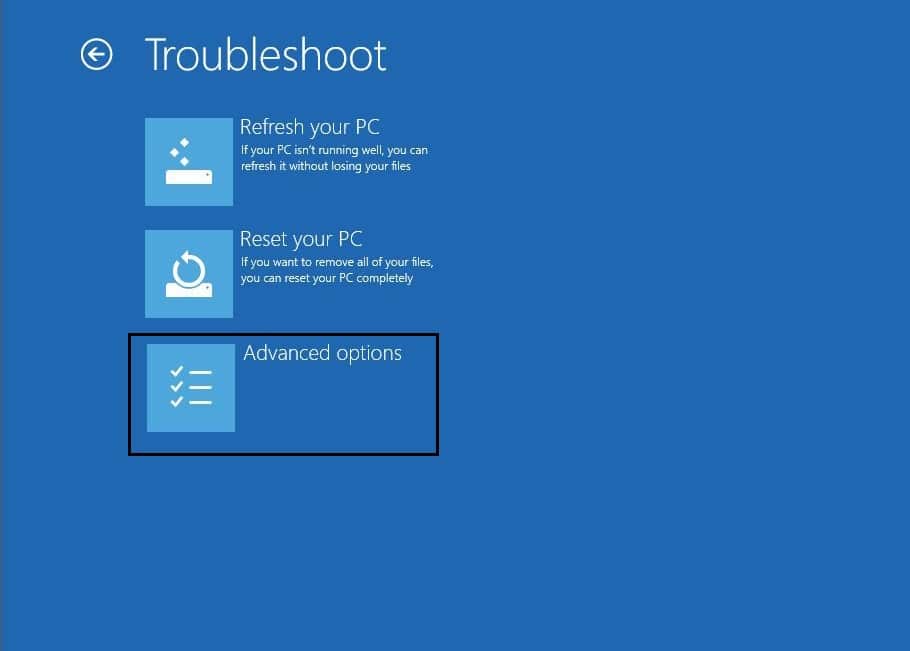
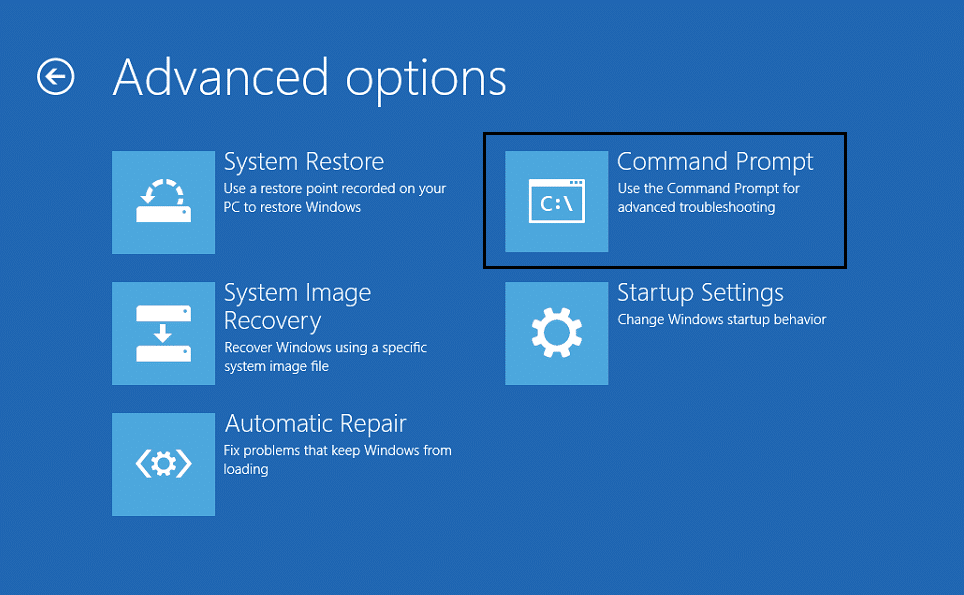
d) 선택 명령 프롬프트 (네트워킹 포함) 옵션 목록에서.
Fix Automatic Repair couldn’t repair your PC
중요 면책 조항:
These are very advanced tutorial, if you don’t know what you’re doing then you may accidentally harm your PC or perform some steps incorrectly that will ultimately make your PC unable to boot to Windows. So if you don’t know what you’re doing, please take help from any technician or expert supervision is recommended.
Method 1: Fix boot and rebuild BCD
1. Open the Command prompt and type the following commands one by one & hit enter:
bootrec.exe / rebuildbcd
bootrec.exe / fixmbr
bootrec.exe / fixboot
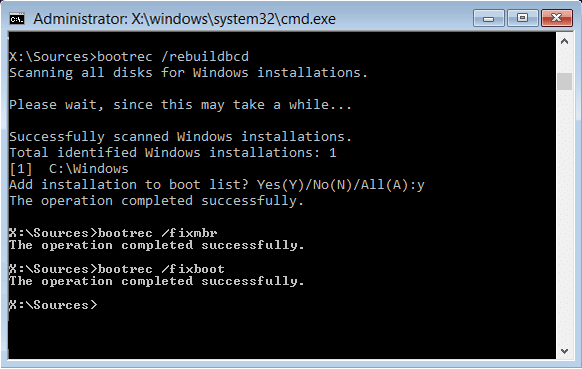
2. After completing each command successfully type 출구.
3. Restart your PC to see if you boot to windows.
4. If you get an error in the above method then try this:
bootsect /ntfs60 C: (드라이브 문자를 부팅 드라이브 문자로 교체)
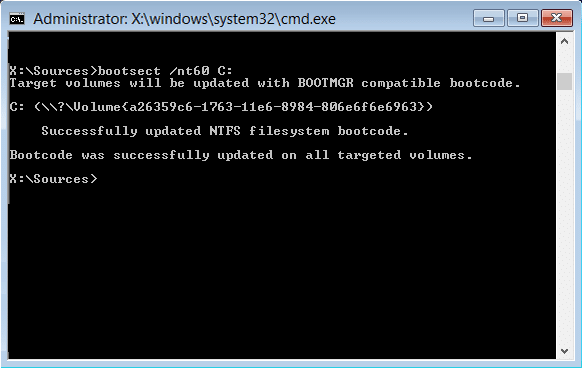
5. And again try the above commands which failed earlier.
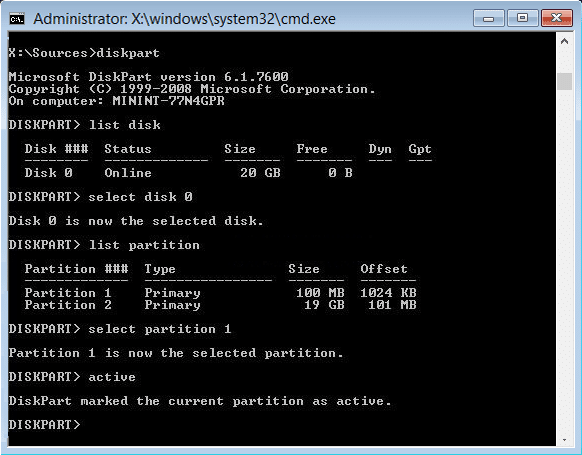
Method 2: Use Diskpart to fix corrupted file system
1. Again go to 명령 프롬프트 다음을 입력하십시오. diskpart를
2. Now type these commands in Diskpart: (don’t type DISKPART)
DISKPART> 디스크 1 선택
DISKPART> 파티션 1 선택
DISKPART> 활성
DISKPART> 파일 시스템 확장
DISKPART> 종료
3. 이제 다음 명령을 입력하십시오.
 bootrec.exe / rebuildbcd
 bootrec.exe / fixmbr
 bootrec.exe / fixboot
4. Restart to apply changes and see if you’re able to fix Automatic Repair couldn’t repair your PC error.
Method 3: Use Check Disk Utility
1. Go to command prompt and type the following: chkdsk /f /r C:
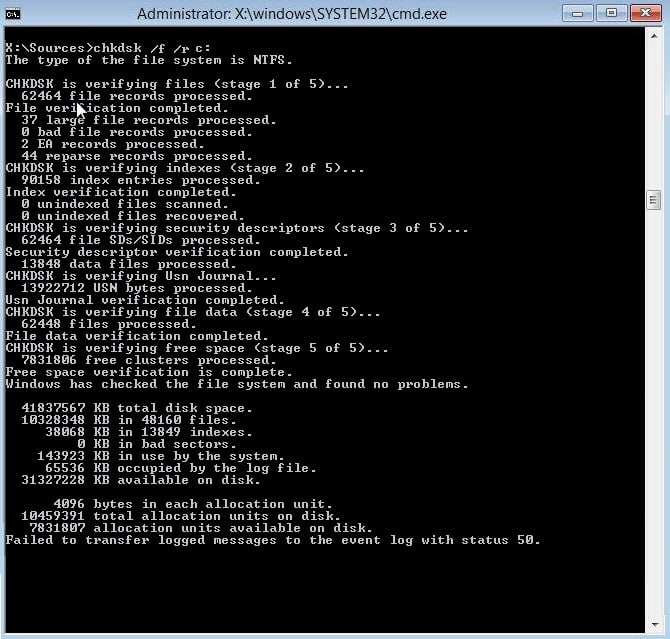
2. 지금 PC를 다시 시작하십시오. to see if the problem is fixed or not.
Method 4: Recover Windows registry
1. 를 입력 설치 또는 복구 미디어 그리고 그것에서 부팅하십시오.
2. 선택 언어 기본 설정 다음을 클릭하십시오.
3. After selecting language press Shift + F10 명령 프롬프트로.
4. Type the following command in the Command Prompt:
cd C:windowssystem32logfilesrt (드라이브 문자를 적절하게 변경하세요)

5. Now type this to open the file in notepad: SrtTrail.txt
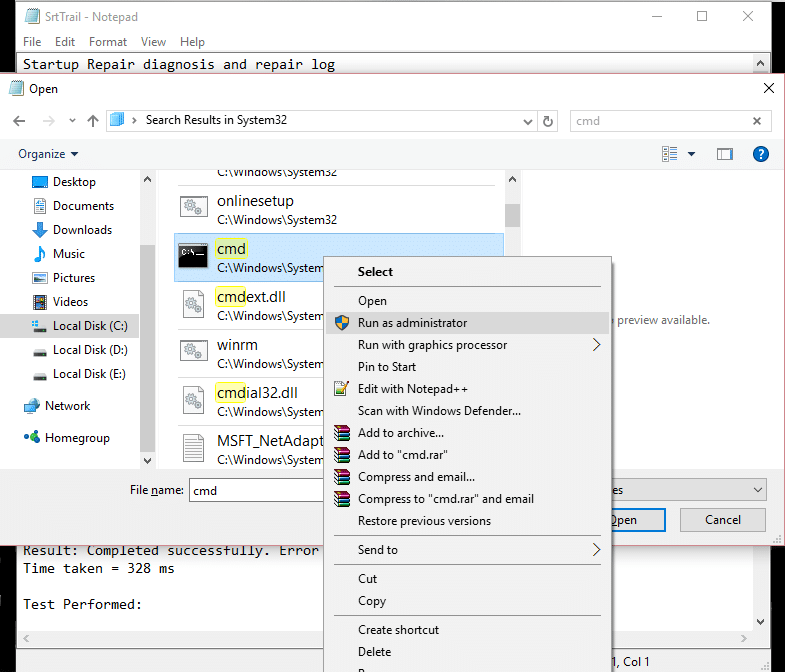
6. 프레스 CTRL + O 그런 다음 파일 유형에서 "를 선택하십시오.모든 파일” 그리고 다음으로 이동합니다. C:windowssystem32 then right-click CMD 다음으로 실행을 선택하세요. 관리자.
7. Type the following command in cmd: CD C:windowssystem32config
8. Rename Default, Software, SAM, System, and Security files to .bak to back up those files.
9. To do so type the following command:
rename DEFAULT DEFAULT.bak
rename SAM SAM.bak
rename SECURITY SECURITY.bak
rename SOFTWARE SOFTWARE.bak
rename SYSTEM SYSTEM.bak
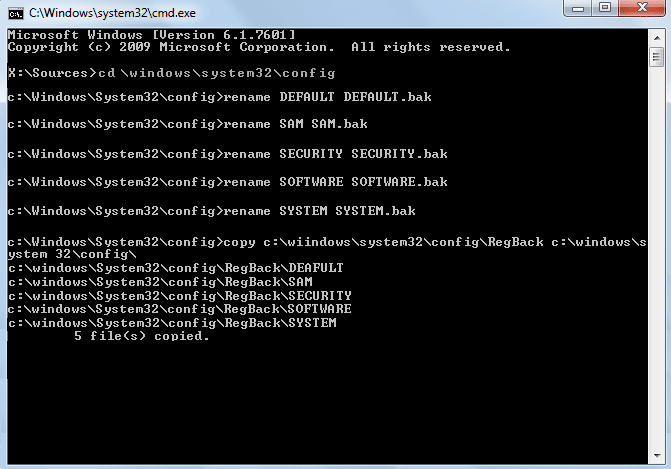
10. Now type the following command in cmd:
c:windowssystem32configRegBack c:windowssystem32config 복사
11. Restart your PC to see if you can boot to Windows.
Method 5: Repair Windows Image
1. Open Command Prompt and enter the following command:
DISM / 온라인 / 정리 - 이미지 / 복원 건강

2. Press enter to run the above command and wait for the process to complete, usually, it takes 15-20 minutes.
알림: If the above command doesn’t work then try this: Dism /이미지:C:오프라인 /Cleanup-Image /RestoreHealth /소스:c:testmountwindows or Dism /Online /Cleanup-Image /RestoreHealth /Source:c:testmountwindows /LimitAccess
3. After the process is completed restart your PC.
4. Reinstall all the windows drivers and fix Automatic Repair couldn’t repair your PC error.
방법 6: 문제가 있는 파일 삭제
1. Access Command Prompt again and enter the following command:
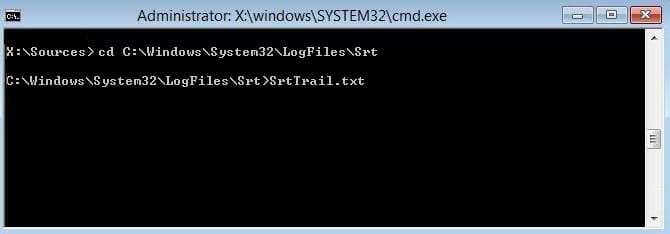
CD C:WindowsSystem32LogFilesSrt
SrtTrail.txt
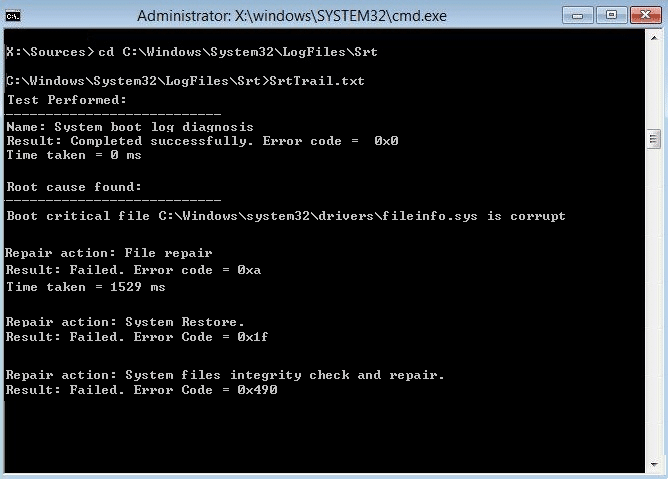
2. When the file opens you should see something like this:
부팅에 중요한 파일 c:windowssystem32driverstmel.sys가 손상되었습니다.
3. Delete the problematic file by entering the following command in cmd:
cd c : windowssystem32drivers
델 tmel.sys
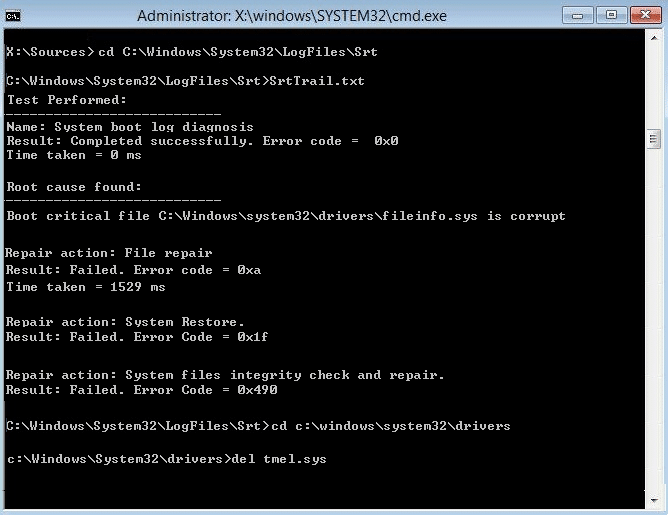
알림: Windows가 운영 체제를 로드하는 데 필수적인 드라이버를 삭제하지 마십시오.
4. Restart to see if the issue is fixed if not continue to the next method.
Method 7: Disable Automatic Startup Repair Loop
1. Open Command Prompt and enter the following command:
알림: Only disable if you are in Automatic Startup Repair Loop
bcdedit / set {default} recoveryenabled 아니요
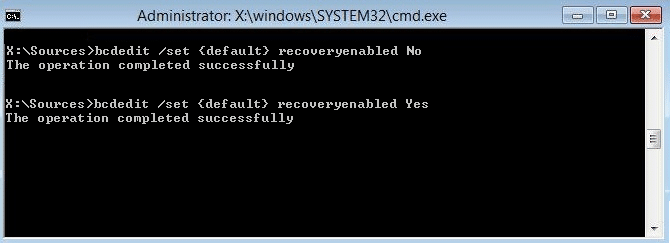
2. Restart and Automatic Startup Repair should be disabled.
3. If you need to again enable it, enter the following command in cmd:
bcdedit /set {default} 복구 활성화 예
4. 재부팅하여 변경 사항을 적용합니다.
방법 8: 장치 파티션 및 osdevice 파티션의 올바른 값 설정
1. In Command Prompt type the following and press enter: BCDEDIT
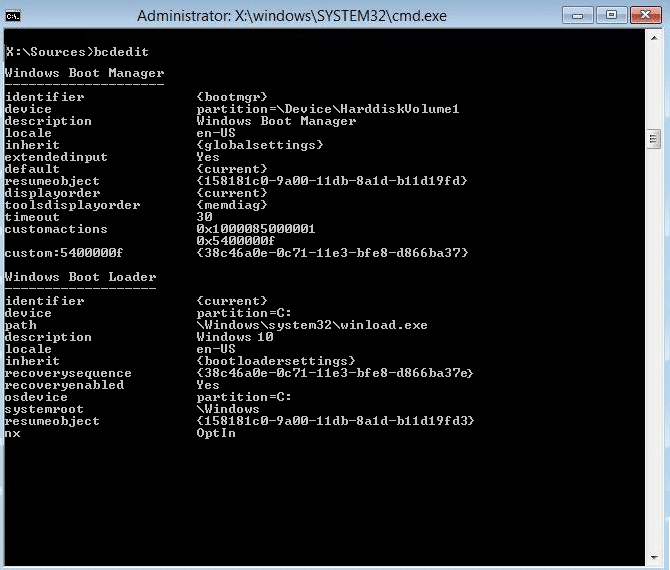
2. Now find the values of 장치 파티션 및 osdevice 파티션 해당 값이 올바른지 또는 올바른 파티션으로 설정되어 있는지 확인하십시오.
3. By default value is C: because Windows comes pre-installed on this partition only.
4. If by any reason it is changed to any other drive then enter the following commands and press Enter after each one:
bcdedit / {default} 장치 파티션 설정 = c :
bcdedit / {default} osdevice 파티션 설정 = c :
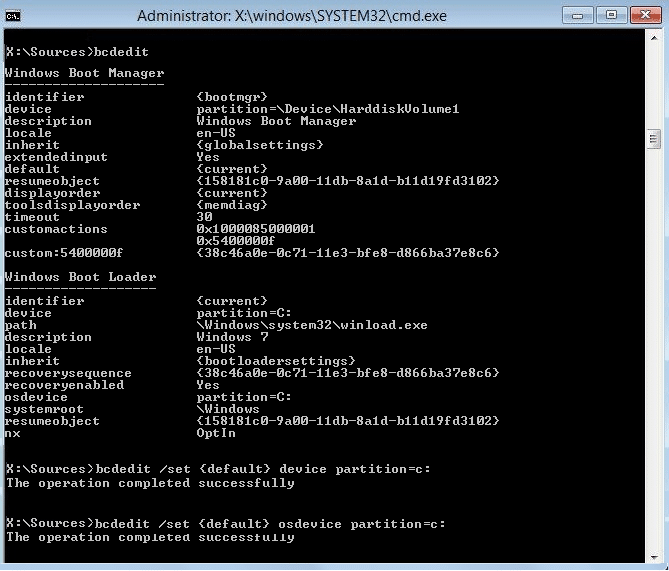
참고 : 다른 드라이브에 Windows를 설치한 경우 C 대신 해당 드라이브를 사용하십시오.
5. Reboot your PC to save changes and fix Automatic Repair couldn’t repair your PC error.
Method 9: Disable driver signature enforcement
1. Put in the Windows installation media or Recovery Drive/System Repair Disc and select your 언어 환경 설정, 다음을 클릭하십시오.
2. 클릭 수리 컴퓨터는 맨 아래에 있습니다.
3. Now choose 문제 해결 그리고 고급 옵션.
4. 고르다 시작 설정.
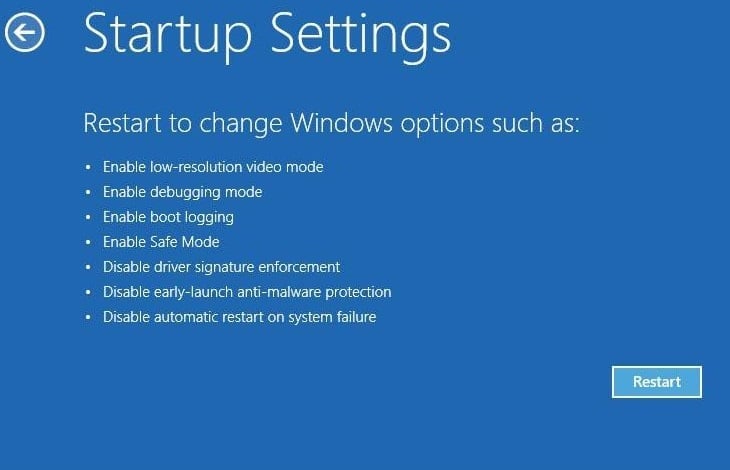
5. PC를 다시 시작하고 숫자 7를 누르십시오 (If 7 isn’t working then relaunch the process and try different numbers).

Method 10: Last option is to perform Refresh or Reset
Again insert Windows 10 ISO then select your language preferences and click 컴퓨터 복구를 하단에.
1. 고르다 문제해결 시 부팅 메뉴 나타납니다.

2. Now choose between the option Refresh or Reset.
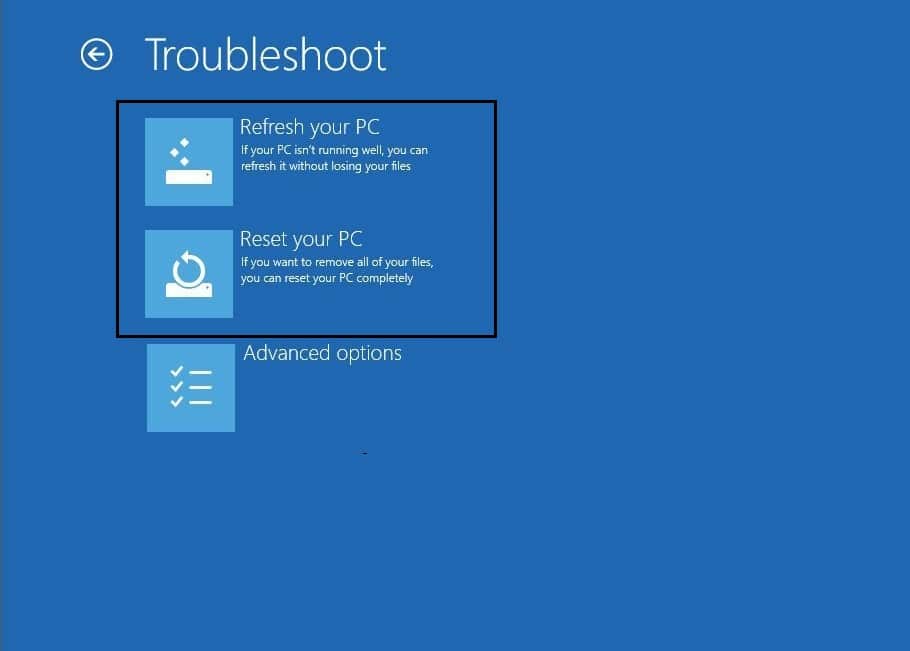
3. Follow the on-screen instructions to complete the Reset or Refresh.
4. Make sure you have the latest OS disc (바람직 윈도우 10) in order to complete this process.
당신을 위해 추천 된:
By now you must have successfully 고정 된 자동 복구로 PC를 복구 할 수 없음 but if you still have any questions regarding this guide please feel free to ask them in the comment section.

