With an earlier version of Windows, users could only track their Wireless (Wi-Fi) or Ethernet Adapter data usage. Still, with the Windows 10 April 2018 Update version 1803, you can now set a data limit for Ethernet, Wi-Fi, and mobile networks. Although you could set Ethernet or Wi-Fi connections as metered, you couldn’t restrict the data usage by any of these networks.
This feature works best for those who use a limited data broadband plan; in such cases keeping track of your data usage becomes difficult, and this is where the new feature of Windows 10 comes into action. Once you reach your data limit, Windows will notify you regarding the same. You can also restrict the network’s background data usage, and once you reach within the 10% of the data limit, background data usage will be restricted. Anyway, without wasting any time, let’s see How to set Data Limit for WiFi and Ethernet in Windows 10 with the help of the below-listed tutorial.
How to set Data Limit for WiFi and Ethernet in Windows 10
혹시라도 문제가 생길 경우를 대비해 복원 지점을 만들어 두시기 바랍니다.
Method 1: Set Data Limit for WiFi and Ethernet in Windows 10 Settings
1. Windows 키 + I를 눌러 엽니다. 설정 그런 다음 Network & Internet icon.

2. 이제 왼쪽 메뉴에서 데이터 사용량.
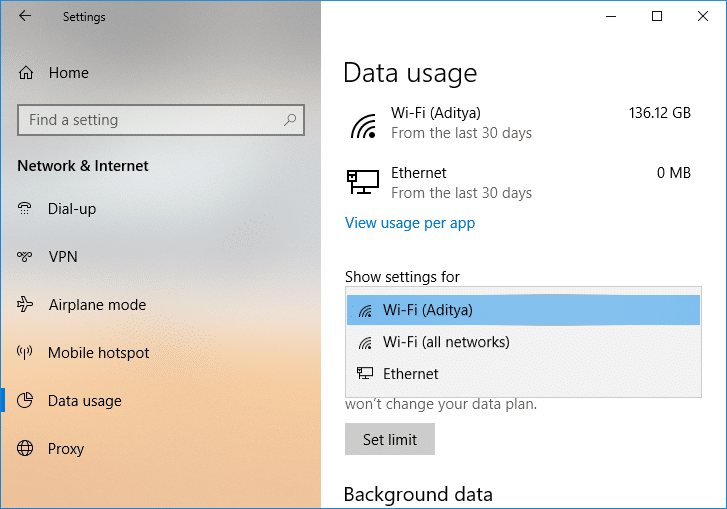
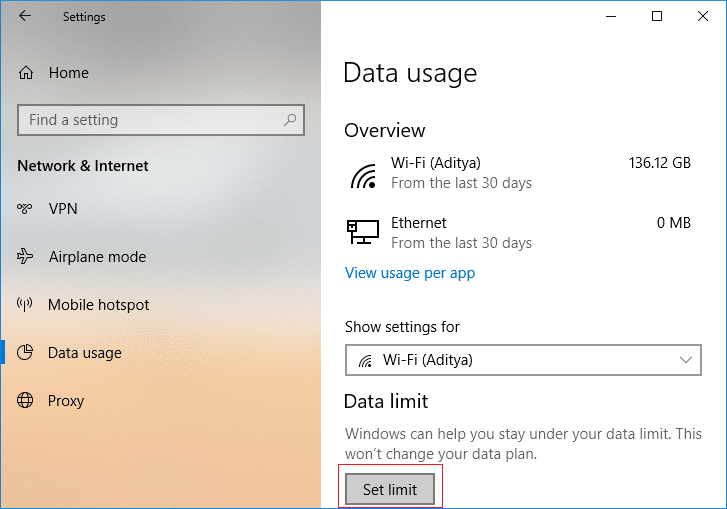
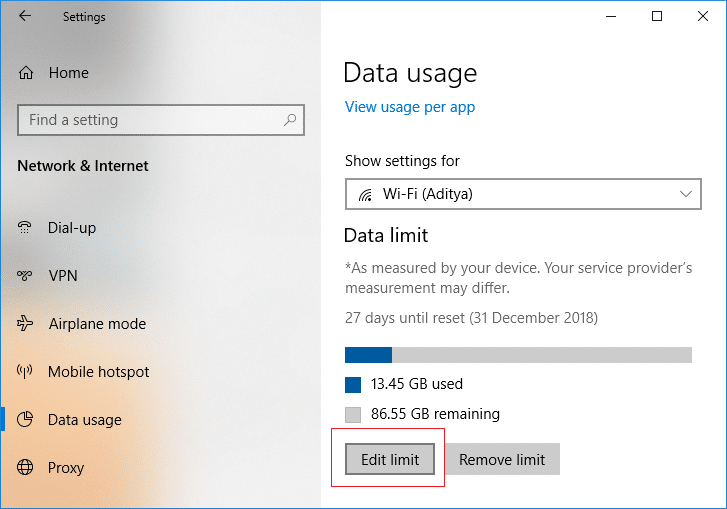
3. In the right-hand side window, from the “Show settings for” dropdown select the network connection you want to set a data limit for and then click on “한도 설정"버튼을 누릅니다.
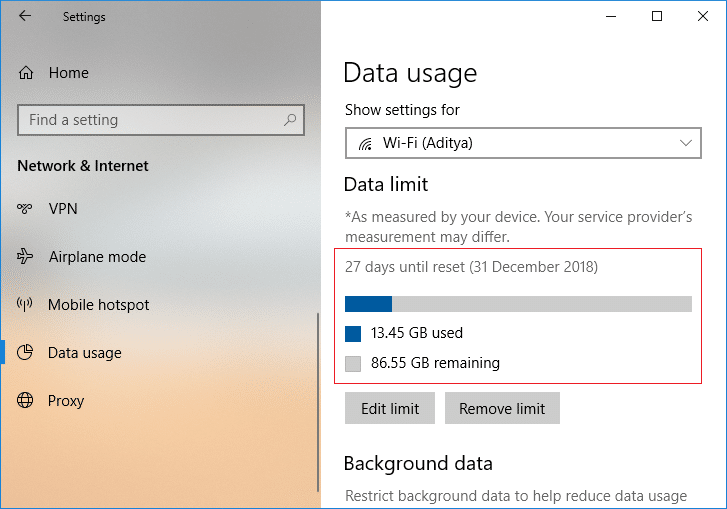
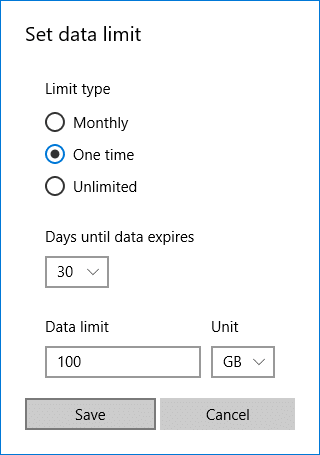
4. 다음 것, specify the limit type, monthly reset date, data limit, etc. 다음을 클릭하십시오. 저장합니다.

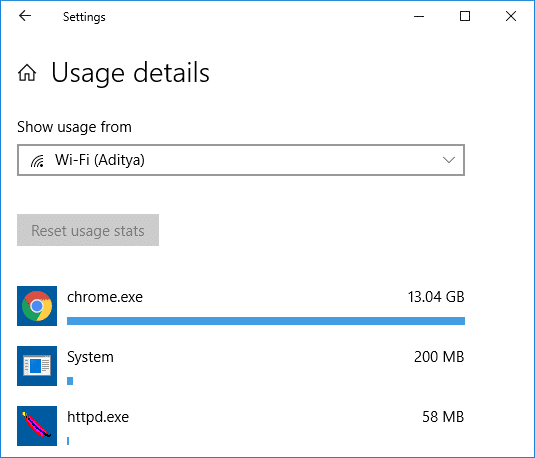
참고 : Once you click Save, it will detail how much your data has been consumed till now as the data has already been tracked.
Method 2: Set Background Data Limit for WiFi and Ethernet in Windows 10 Settings
1. Windows 키 + I를 눌러 엽니다. 설정 그런 다음 Network & Internet icon.
2. 이제 왼쪽 메뉴에서 데이터 사용량.
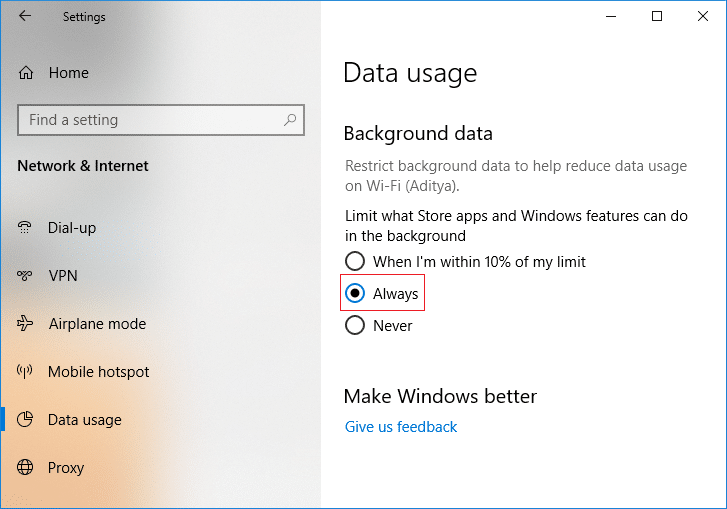
3. 다음 것, select the network connection for which you want to set the data limit from the “Show settings for” drop-down then under 배경 데이터 either select “항상"또는"어머 놀랐다".
Method 3: Edit Data Limit for WiFi and Ethernet in Windows 10 Settings
1. Windows 키 + I를 눌러 엽니다. 환경s then click on the Network & Internet icon.
2. 이제 왼쪽 메뉴에서 데이터 사용량.
3. In the right-hand side window, from the “Show settings for” dropdown select the network connection you want to edit the data limit for and then to click on “한도 수정"버튼을 누릅니다.
4. 다시 specify the data limit you want to set for this network connection and then 저장을 클릭합니다.
Method 4: Remove Data Limit for WiFi and Ethernet in Windows 10 Settings
1. Windows 키 + I를 눌러 엽니다. 설정 그런 다음 Network & Internet icon.
2. 이제 왼쪽 메뉴에서 데이터 사용량.
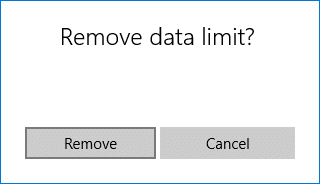
3. 다음 것, select the network connection for which you want to remove the data limit from the “Show settings for” drop-down then click on “한도 제거"버튼을 누릅니다.
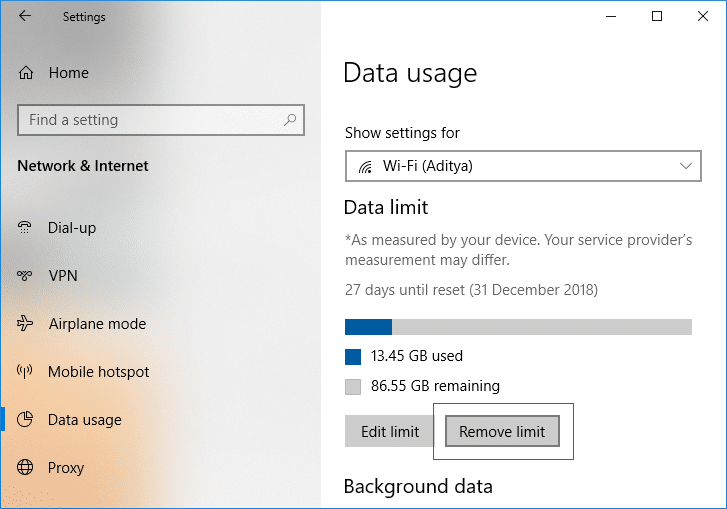
4. Again click on 제거 당신의 행동을 확인합니다.
5. Once finished, you can close the Settings window.
권장 사항 :
그것이 당신이 성공적으로 배운 것입니다. How to set Data Limit for WiFi and Ethernet in Windows 10 그러나 이 게시물과 관련하여 여전히 질문이 있는 경우 댓글 섹션에서 자유롭게 질문하세요.
")
