WmiPrvSE is the acronym for Windows Management Instrumentation Provider Service. Windows Management Instrumentation (WMI) is a component of the Microsoft Windows operating system that provides management information and control in an enterprise environment. Many people believe it’s a virus as sometimes WmiPrvSE.exe causes high CPU usage, but it’s not a virus or malware instead WmiPrvSE.exe is manufactured by Microsoft itself.
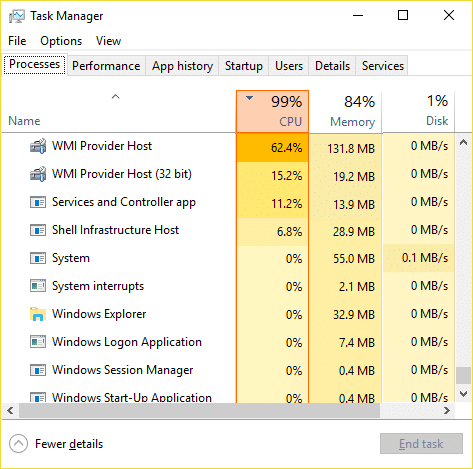
The main problem is that the Windows freezes or stuck when WmiPrvSE.exe is taking many system resources, and all the other apps or programs are left with a little or no resources at all. This will cause your PC to become sluggish, and you won’t be able to use it all, at last, you will have to reboot your PC. Even after a reboot, sometimes this issue will not be resolved, and you will again face the same problem. So without wasting any time let’s see how to actually Fix High CPU Usage by WmiPrvSE.exe with the below-listed troubleshooting guide.
Fix High CPU Usage by WmiPrvSE.exe
Бир нерсе туура эмес болуп калса, калыбына келтирүү чекитин түзүүнү унутпаңыз.
Method 1: Restart Windows Management Instrumentation Service
1. Windows баскычын + R басып, анан териңиз services.msc -ди.

2. Табуу Windows Management Instrumentation Service in the list then right-click on it and select Кайра жүргүзүү.
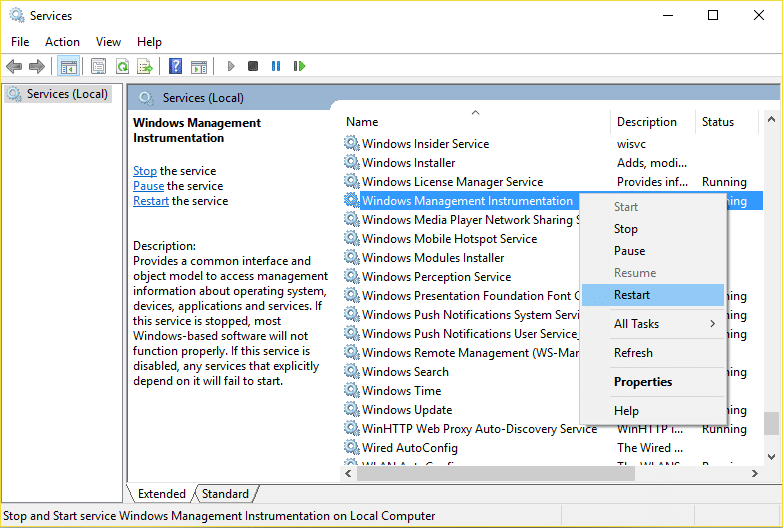
3. This will restart all the service associated with WMI services and Fix High CPU Usage by WmiPrvSE.exe.
Method 2: Restart Other Services associated with WMI
1. Press Windows Key + X then select Команда киргизүүгө чакыруу (Admin).

2. Type the following into cmd and hit Enter after each one:
net stop iphlpsvc
net stop wscsvc
net stop winmgmt
net start winmgmt
таза баштоо wscsvc
таза баштоо iphlpsvc
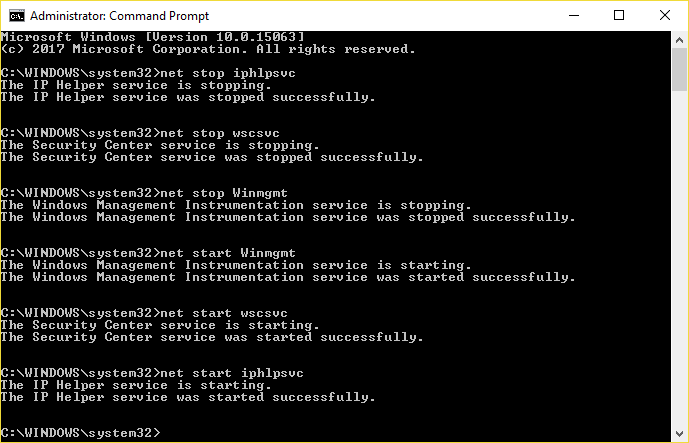
3. Өзгөртүүлөрдү сактоо үчүн компьютериңизди өчүрүп күйгүзүңүз.
Метод 3: CCleaner жана Malwarebytes иштетиңиз
1. Жүктөп алып, орнотуу CCleaner & Malwarebytes.
2. Malwarebytes иштетиңиз жана системаңызды зыяндуу файлдарды текшерүүгө уруксат бериңиз. Эгер зыяндуу программа табылса, ал аларды автоматтык түрдө жок кылат.

3. Эми CCleanerди иштетиңиз жана тандаңыз Тазалоо Тазалоо.
4. Ыңгайлаштырылган тазалоо астынан тандаңыз Windows өтмөгү then make sure to checkmark defaults and click талдоо жүргүзүү.

5. Анализ аяктагандан кийин, жок кылына турган файлдарды сөзсүз алып салыңыз.

6. Акырында, чыкылдатыңыз Тазалагычты иштетүү баскычын басып, CCleanerге өз курсун иштетиңиз.
7. Системаңызды андан ары тазалоо үчүн, Реестр өтмөгүн тандаңыз, жана төмөнкүлөр текшерилгенин камсыз кылуу:

8. чыкылдатып Маселелерди издөө баскычын басып, CCleanerге сканерлөө мүмкүнчүлүгүн бериңиз, андан кийин басыңыз Тандалган маселелерди оңдоо баскычы.

9. CCleaner сураганда "Реестрге камдык өзгөрүүлөрдү каалайсызбы?« Ооба тандаңыз.
10. Камдык көчүрмөңүз аяктагандан кийин, чыкылдатыңыз Бардык тандалган маселелерди оңдоо баскычы.
11. Өзгөртүүлөрдү сактоо үчүн компьютериңизди өчүрүп күйгүзүңүз.
Method 4: Run System Maintenance Troubleshooter
1. Press Windows Key + X and click on Control Panel.

2. Search Troubleshoot and click on Кыйынчылыктарды оңдоо.

3. Next, click on view all in the left pane.
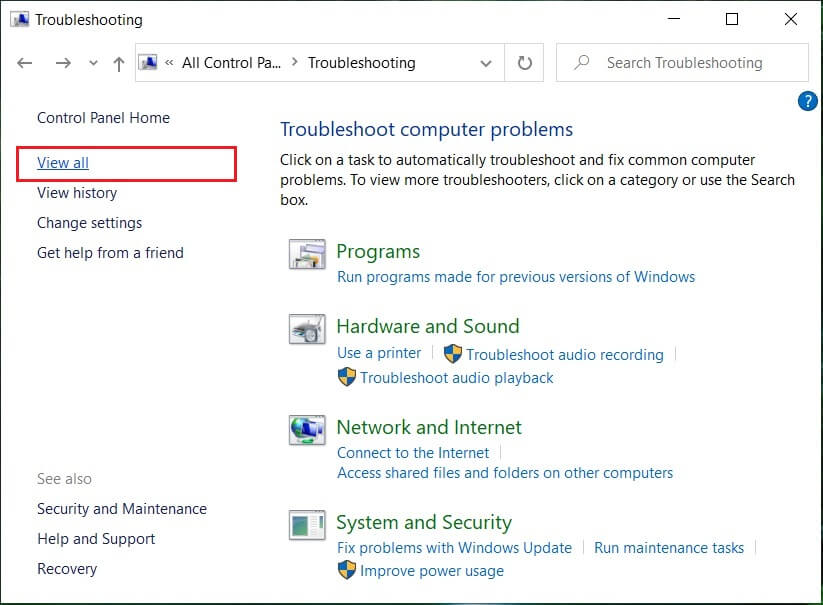
4. Click and run the Troubleshooter for System Maintenance.

5. The Troubleshooter may be able to Fix High CPU Usage by WmiPrvSE.exe.
Method 5: Locate the process manually using Event Viewer
1. Windows баскычын + R басып, анан териңиз eventvwr.msc жана ачуу үчүн Enter басыңыз Окуяларды көрүү.

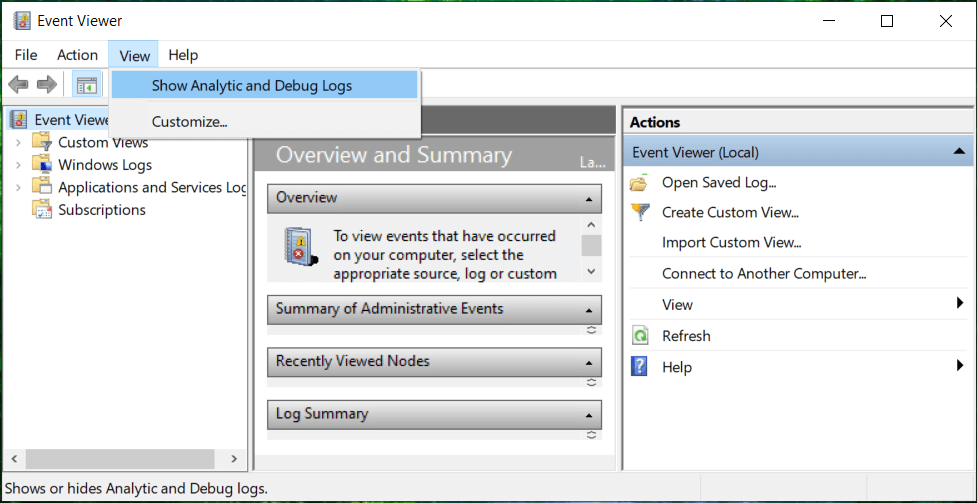
2. From the top menu, click on көрүнүш жана тандоо Show Analytic and Debug Logs option.
3. Now, from the left pane navigate to the following by double-clicking on each of them:
Applications and Services Logs > Microsoft > Windows > WMI-Activity
4. Once you are under WMI-Activity folder (make sure you have expanded it by double-clicking on it) select Operationally.
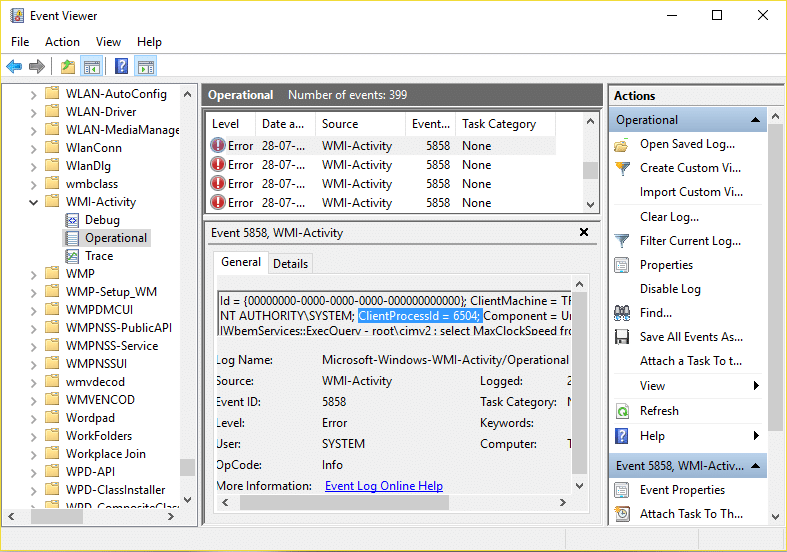
5. In the right window pane select ката under Operational and General tab look for the ClientProcessId for that particular service.
6. Now we have the Process Id of the particular service causing High CPU usage, we need to disable this particular service бул маселени чечүү үчүн.
7. басма сөз Ctrl + Shift + Esc together to open Task Manager.

8. Которуу Service tab жана кара Process Id which you noted above.
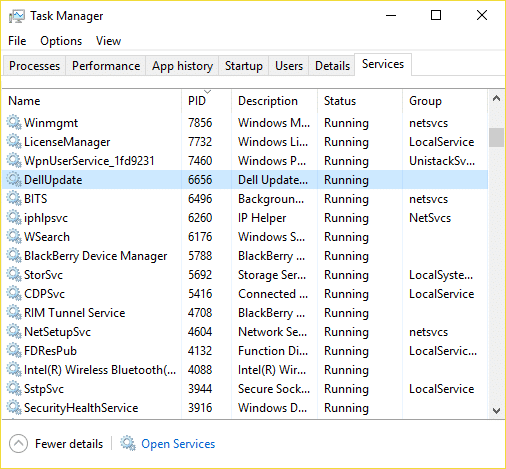
9. The service with the corresponding Process ID is the culprit, so once you find it go to Control Panel > Uninstall a Program.
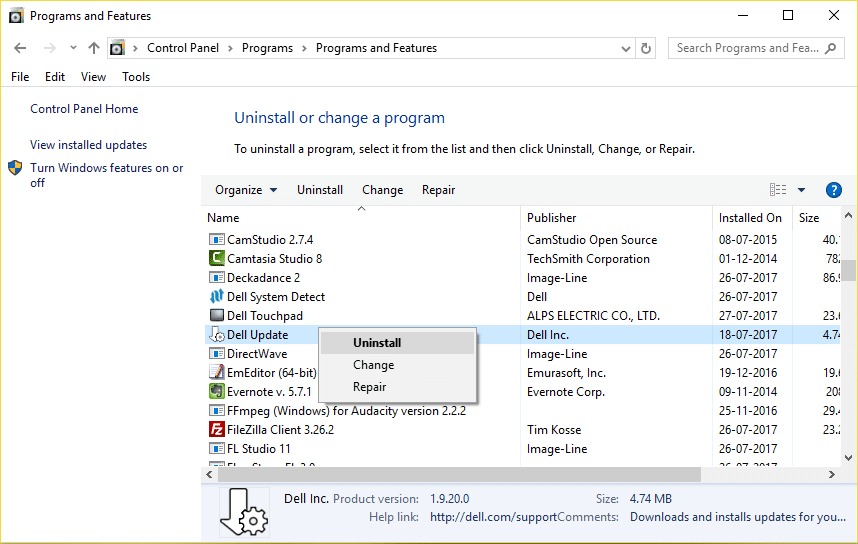
10. Uninstall the particular program or service associated with above Process ID then reboot your PC.
сунушталат:
Бул сиз ийгиликтүү болдуңуз Fix High CPU Usage by WmiPrvSE.exe but if you still have any questions regarding this post then feel free to ask them in the comment’s section.

