If you have 2 in 1 Windows device such as Tablets, you would be familiar with the importance of the screen rotation feature. Users report that the screen rotation feature has stopped working & the Screen Rotation Lock option is greyed out. If you’re facing this issue, then don’t worry as this is just a setting issue which means it can be easily fixed. This guide will walk you through the steps to fix rotation lock greyed out in Windows 10.
Here are issues which can be resolved using this guide:
- Rotation lock missing
- Auto Rotate not working
- Rotation lock greyed out.
- Screen rotation not working
Fix Rotation Lock greyed out in Windows 10
Бир нерсе туура эмес болуп калса, калыбына келтирүү чекитин түзүүнү унутпаңыз.
Method – 1: Enable Portrait Mode
One of the methods to fix this problem is to rotate your screen in portrait mode. Once you rotate it to portrait mode, most probably your rotation lock would start working, i.e. clickable again. In case your device is not rotating into portrait mode automatically, try to do it manually.
1. басма сөз Windows ачыш үчүн + мен to open Settings then click on the система сөлөкөтү.

2. Make sure to select дисплей сол жактагы менюдан.
3. табыңыз Orientation section where you need to choose портрет ачылуучу менюдан.
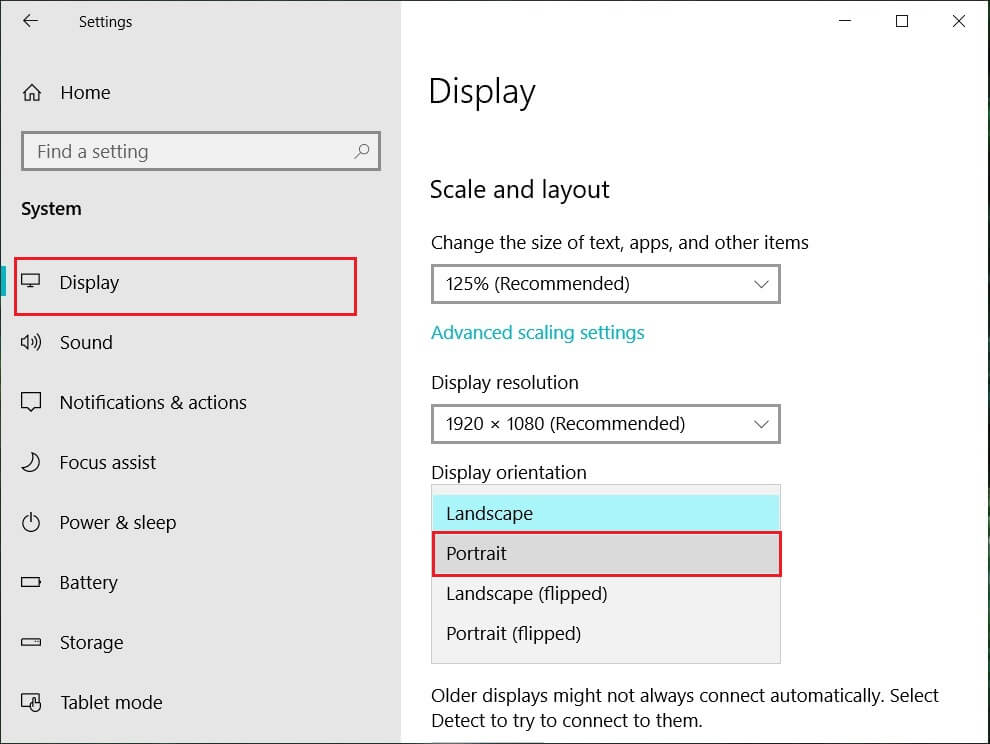
4. Your device will automatically turn into portrait mode.
Method – 2: Use your device in tent mode
Some users, particularly Dell Inspiron, experienced that when their rotation lock is greyed out, the only way to solve this problem is to put your device in Tent Mode.
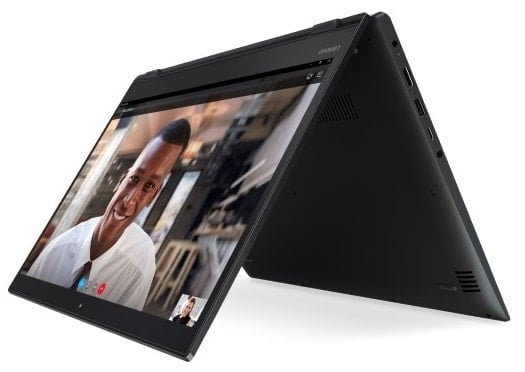
Image Кредити: Microsoft
1. You need to put your device in Tent Mode. If your display is upside down, you need not worry.
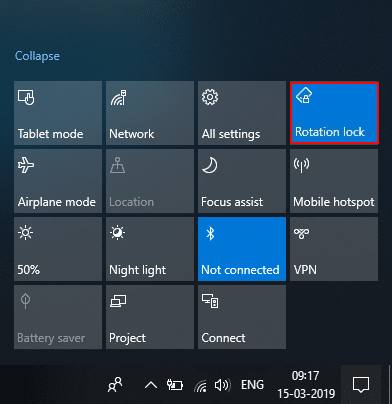
2. Эми чыкылдатыңыз Windows Action Center, Айлануу кулпу will be working. Here you need to turn it off if you want so that your device rotate properly.
Method – 3: Disconnect your keyboard
If rotation lock is greyed in your Dell XPS and Surface Pro 3 (2-in-1 device), you need to disconnect your keyboard, and many users reported that disconnecting the keyboard solves the rotation lock problem. If you own different devices, you can still use this method to fix rotation lock greyed out in Windows 10 issue.
Method – 4: Switch to Tablet Mode
Many users experienced that this rotation greyed out the problem by switching their device into Tablet Mode. If it is switched automatically, it is good; otherwise, you can do it manually.
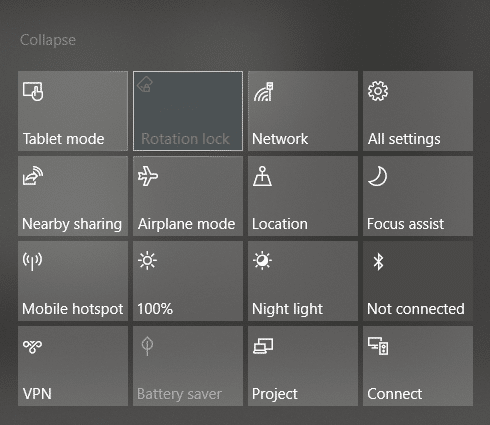
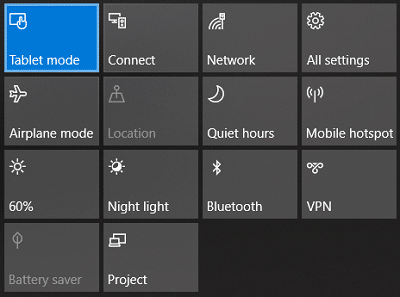
1. чыкылдатып Windows аракет борбору.
2. Here, you will find Планшет Mode option, Click on It.
OR
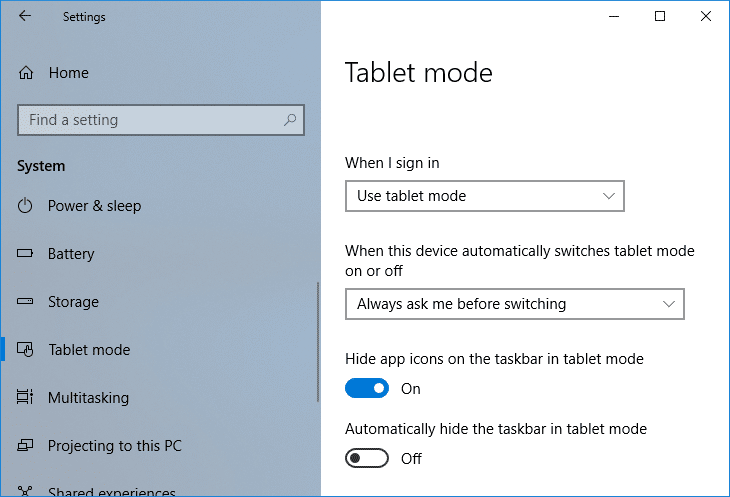
1. Ачуу үчүн Windows баскычын + I басыңыз Орнотуулар андан кийин система сөлөкөтү.
2. Here it would help if you located Планшет Mode option under the left window pane.
3. Now from the “When I sign in” drop-down, select “Use tablet mode".
Method – 5: Change LastOrientation Registry Value
If you still experience a problem, you can solve it by changing some registry values.
1. Press Windows +R and enter regedit анда кириш чапты.

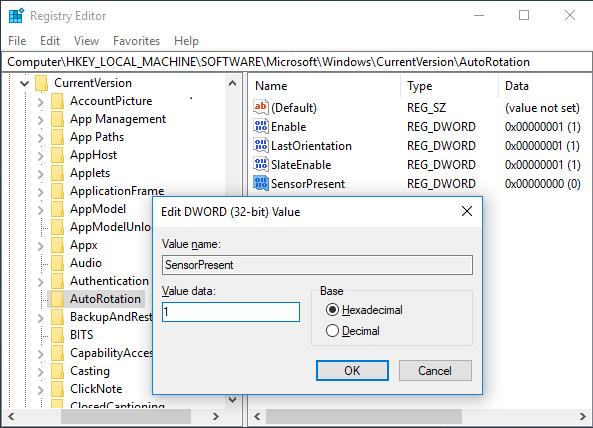
2. Once registry editor opens, you need to navigate to the below path:
HKEY_LOCAL_MACHINESOFTWAREMicrosoftWindowsCurrentVersionAutoRotation
Эскертүү: Follow the above folders one by one to locate Auto Rotation.
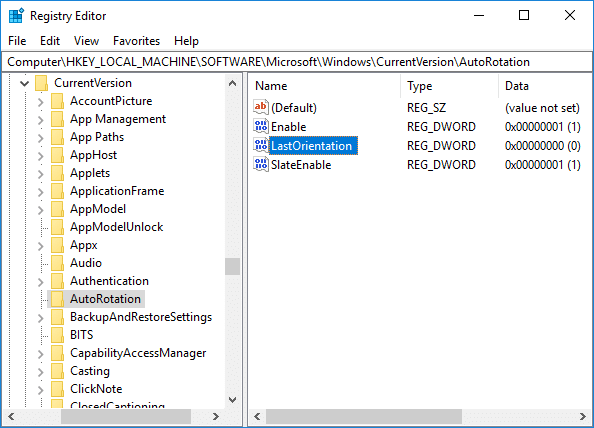
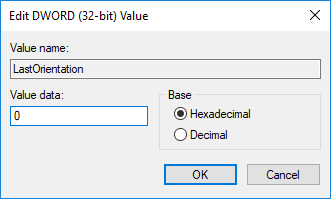
3. Үчүн select AutoRotation андан кийин оң терезе панелинде эки жолу чыкылдатыңыз Last Orientation DWORD.
4. Now enter 0 under Value data field жана ОК баскычын чыкылдатыңыз.
5. Эгерде бар болсо SensorPresent DWORD, double-click on it and set its мааниси 1 чейин.
Method – 6: Check Sensor Monitoring Service
Sometimes services of your device can cause a rotation lock problem. Therefore, we can get it sorted with Windows Monitoring services feature.
1. Windows + R басыңыз жана териңиз services.msc -ди.

2. Once the services window opens, find the Sensor Monitoring services option жана аны эки жолу басыңыз.
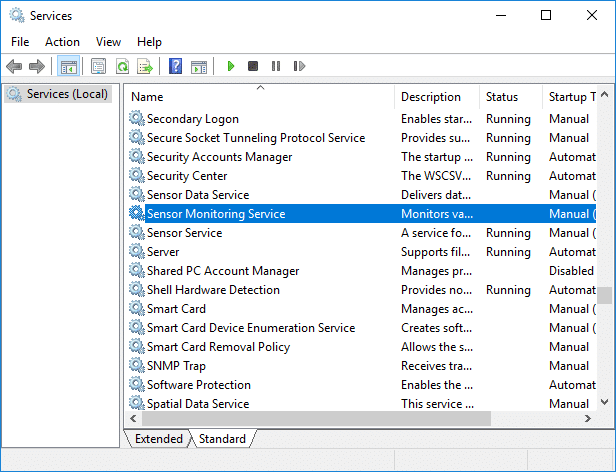
3. Now, from the Startup type drop-down select автоматтык анан басып баскычын баштоо to start the service.
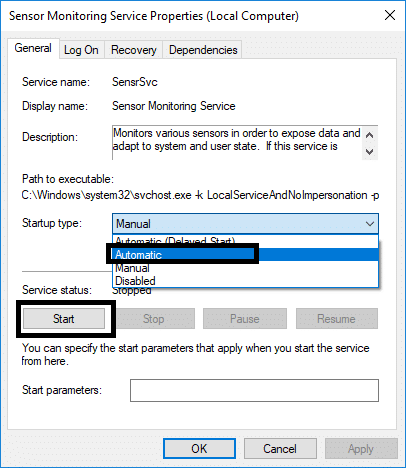
4. Finally, click Apply followed by OK to save the settings, and you can reboot the system to apply the changes.
Method – 7: Disable YMC service
If you are using a Lenovo Yoga device and experiencing this problem, you can fix rotation lock grayed out in the Windows 10 issue by disabling YMC service.
1. Windows + R type services.msc -ди.
2. жайгашкан жер YMC services жана аны эки жолу басыңыз.
3. Set the Startup type to өчүрүлгөн and click Apply, followed by OK.
Method – 8: Update Display Drivers
One reason for this problem could be the driver update. If your respective driver for the monitor is not updated, it can cause the Rotation Lock greyed out in Windows 10 Issue.
Manually Update Graphics Drivers using Device Manager
1. Windows баскычын + R басып, анан териңиз devmgmt.msc жана ачуу үчүн enter баскычын басыңыз Аппарат менеджери.

2. Андан кийин, кеңейтүү Видео адаптерлер жана Графикалык картаңызды оң баскыч менен чыкылдатып, тандаңыз Иштетүү.

3. Муну жасагандан кийин, графикалык картаңызды оң баскыч менен чыкылдатып, "Драйверди жаңылоо".

4. тандоо "такташты айдоочусу ЭЭМ үчүн программага жазуусу издөө” жана ал процессти бүтүрсүн.

5. If the above steps helped fix the issue then very good, if not then continue.
6. Графикалык картаңызды кайрадан оң баскыч менен чыкылдатып, "Драйверди жаңылоо” бирок бул жолу кийинки экранда “айдоочу ЭЭМ үчүн программага Попса карап чыгуу.«

7. Эми “Компьютеримдеги айдоочулардын тизмесин тандап алайын. «

8. Акыры, акыркы драйверди тандоо Тизмеге жана чык тартып Кийинки.
9. Жогорудагы процессти бүтүрүп, өзгөртүүлөрдү сактоо үчүн компьютериңизди өчүрүп күйгүзүңүз.
Интегралдык графикалык карта үчүн (бул учурда Intel) драйверлерин жаңыртуу үчүн ошол эле кадамдарды жасаңыз. Мүмкүнчүлүгүң барбы, кара Fix Rotation Lock greyed out Issue, жок болсо, кийинки кадам менен улантыңыз.
Өндүрүүчүнүн веб-сайтынан графикалык драйверлерди автоматтык түрдө жаңыртыңыз
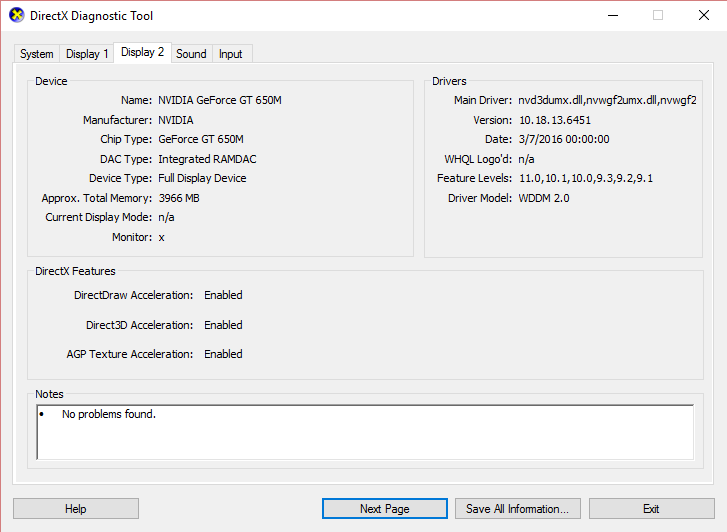
1. Windows Key + R баскычтарын басып, диалог терезесине "dxdiag” жана enter баскычын басыңыз.

2. Андан кийин дисплей өтмөгүн издеңиз (бири интеграцияланган графикалык карта үчүн эки дисплей өтмөктөрү болот, экинчиси Nvidiaга таандык болот) Дисплей өтмөгүнө чыкылдатыңыз жана графикалык картаңызды табыңыз.
3. Эми Nvidia драйверине барыңыз жүктөө сайты жана биз тапкан продукттун чоо-жайын киргизиңиз.
4. Маалыматты киргизгенден кийин драйверлериңизди издеңиз, Макулмун басыңыз жана драйверлерди жүктөп алыңыз.

5. Ийгиликтүү жүктөөдөн кийин, драйверди орнотуңуз жана сиз Nvidia драйверлерин кол менен ийгиликтүү жаңырттыңыз.
Method – 9: Remove Intel Virtual Buttons Driver
Some users reported that Intel Virtual button drivers cause rotation lock problem on your device. To solve this problem, you can uninstall the driver.
1. Open Device manager on your device by pressing Windows + R and type devmgmt.msc and hit Enter or press Windows X and choose Аппарат менеджери from the options list.
2. Once Device manager box is opened locate Intel virtual buttons driver.
3. Right-click on it and choose Өчүр.
сунушталат:
Бул макала пайдалуу болду деп үмүттөнөм жана эми сиз оңой эле кыла аласыз Fix Rotation Lock greyed out in Windows 10, but if you still have any questions regarding this tutorial then feel free to ask them in the comment’s section.
")
