When you buy a new computer or connect a new hard drive to your computer, it usually comes with a single partition. However, it is always a good idea to have at least three partitions on your hard drive for a variety of reasons. The more partitions you have, the larger the capacity of your hard drive. ноты of a hard drive are referred to as Drives in Windows and typically have a letter associated with it as an indicator. Hard Drive Partitions can be created, shrunk, or resized, among other things. We bring to you a perfect guide that will teach you how to partition hard disk drive in Windows 11. So, continue reading!

How to Partition Hard Disk Drive in Windows 11
Why Create Partitions on the Hard Drive?
түзүлүүдө бөлүктөр on a hard drive can be beneficial in a variety of ways.
- It is always best to keep the operating system and system files on a separate drive or partition. If you need to reset your computer, if you have your operating system on a separate drive, you can save all other data by simply formatting the drive where the operating system is installed.
- Aside from the above, installing apps and games on the same drive as your operating system will eventually slow down your computer. Hence, keeping the two separate would be ideal.
- Creating partitions with labels also aids in file organization.
Thus, we recommend you divide hard disk drive into several partitions.
How Many Disk Partitions Should be Made?
The number of partitions you should create on your hard drive is solely determined by the size of the hard drive you have installed on your computer. In general, it is recommended that you create үч бөлүктөр катуу дискиңизде.
- One for the Windows иштетүү системасы
- The second one for your эмес програмдардын тили such as software and games etc.
- The last partition for your жеке файлдар such as documents, media, and so on.
Эскертүү: If you have a small hard drive, such as 128GB же 256GB, you should not create any additional partitions. This is because it is recommended that your operating system be installed on a drive with a minimum capacity of 120-150GB.
On the other hand, if you’re working with a 500GB to 2TB hard drive, you can create as many hard drive partitions as you need.
To utilize space on your Windows PC, you can choose to use an external drive to store most of your data instead. Read our list of Best External Hard Drive for PC Gaming here.
How to Create & Modify Hard Disk Drive Partitions
The process of creating partitions on a hard drive is both, systematic and straightforward. It makes use of the built-in Disk Management tool. If your computer has two partitions, the File Explorer window will show two drives indicated by a letter and so on.
Step 1: Shrink Partition Drive to Create Unallocated Space
To successfully create a new drive or partition, you must first shrink an existing one to free up unallocated space. Your Hard Drive’s unallocated space cannot be used. To create partitions, they must be assigned as a new drive.
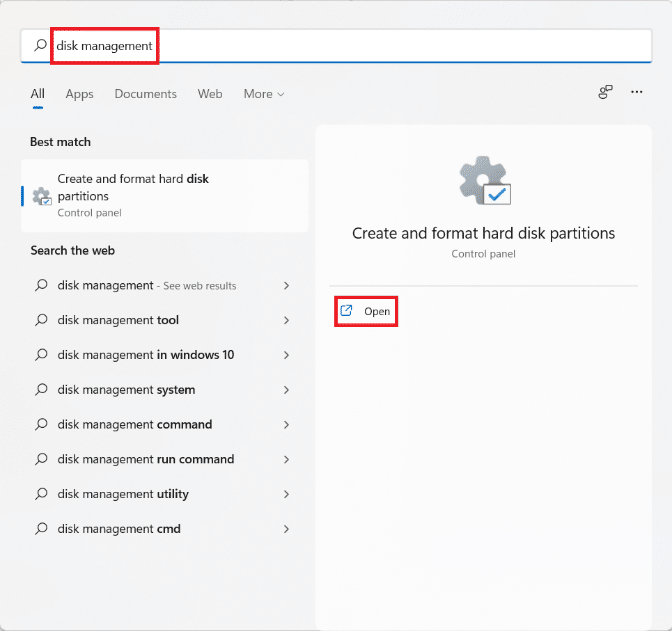
1. чыкылдатып Издөө сөлөкөтү жана түрү диск башкаруу.
2. Then, click on ачык үчүн Катуу диск бөлүктөрүн түзүү жана форматтоо, көрсөтүлгөндөй.
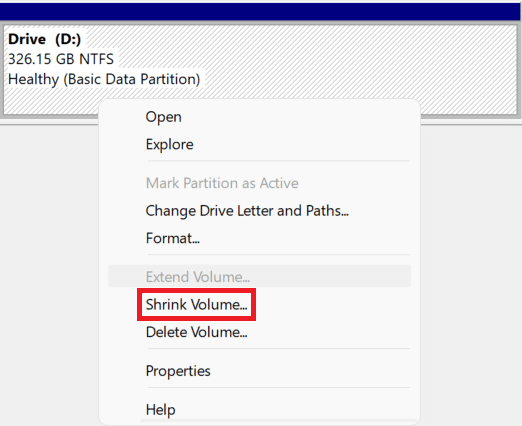
3. Ичинде диск башкаруу window, you will find information regarding existing disk partitions and drives installed on your PC named Disk 1, Disk 2, and so on. Click on the box representing the кубалоо you want to shrink.
Эскертүү: The selected drive will have диагоналдык сызыктар highlighting the selection.
4. чыкылдатуу менен Selected drive (мисалы, Drive (D:)) and select Shrink Volume… from the context menu, as illustrated below.
5. Ичинде Shrink D: dialog box, input the көлөм you want to separate from the existing drive in Megabytes (MB) жана чыкылдатуу азаюу.
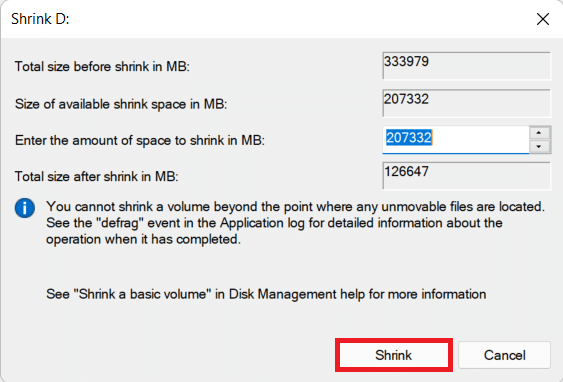
6. After shrinking, you will see a newly created space on the disk labeled as Бөлүнбөйт -ныкы көлөм you chose in Step 5.
Ошондой эле окуу: Fix: New Hard Drive not showing up in Disk Management
Step 2: Create New Drive Partition From Unallocated Space
Here’s how to partition hard disk drive in Windows 11 by creating a new drive partition using unallocated space:
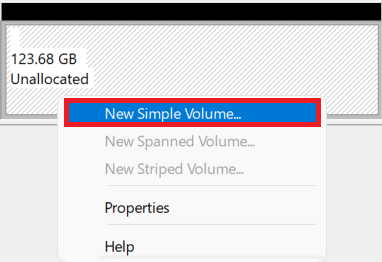
1. Right-click on the box labeled Бөлүнбөйт.
Эскертүү: The selected drive will have диагоналдык сызыктар highlighting the selection.
2. Click жөнүндө Жаңы жөнөкөй көлөм… from the context menu, as shown.
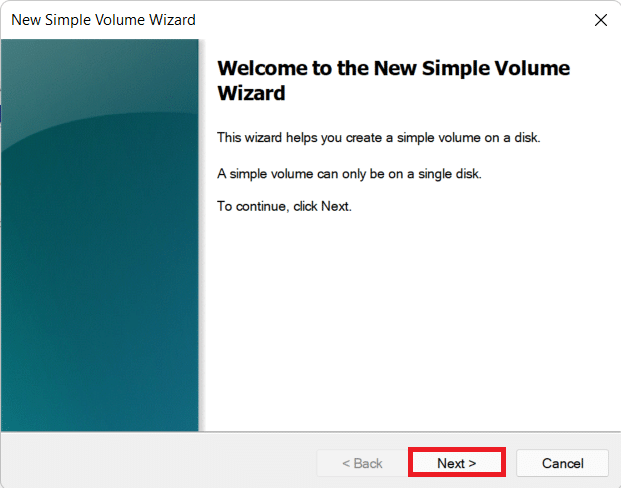
3. Ичинде Жаңы жөнөкөй көлөм устасы, Бас кийинки.
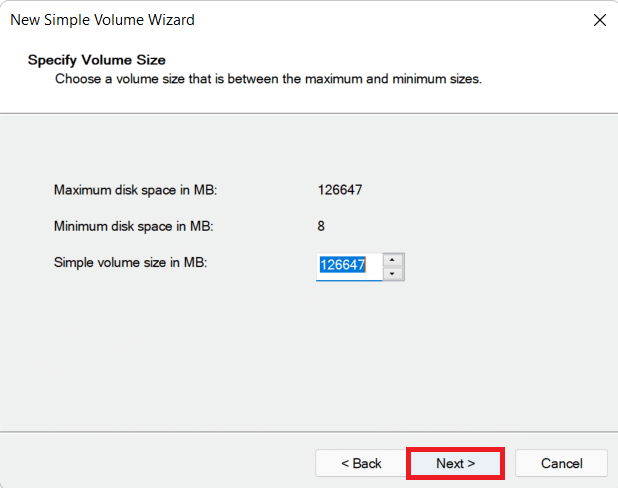
4. Ичинде Simple Volume Size window, enter the desired volume көлөм in MB, Жана баскан кийинки.
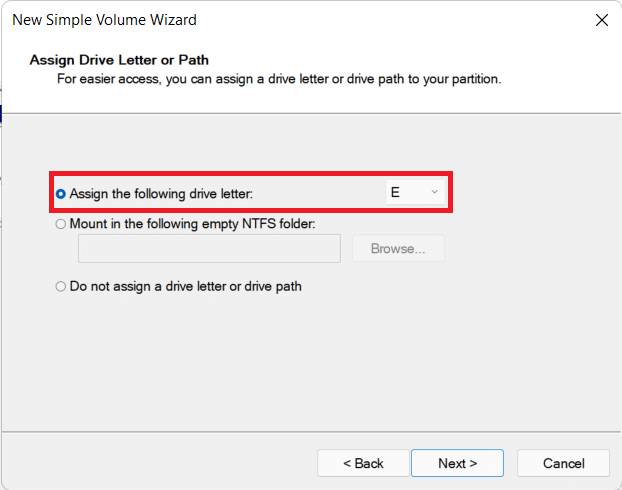
5. Үстүндө Drive кат же жолду дайындоо screen, choose a кат чейин Assign the following drive кат drop-down menu. Then, click кийинки, көрсөтүлгөндөй.
6A. Now, you can format the partition by selecting Бул томду төмөнкү орнотуулар менен форматтаңыз параметрлери.
- Файлдык система
- Бөлүштүрүү бирдигинин көлөмү
- Көлөмүнүн белгиси
6B. If you do not want to format partition, then select Do not format this volume тандоо.
7. Акырында, басыңыз бүтүрүү, сүрөттөлгөндөй.
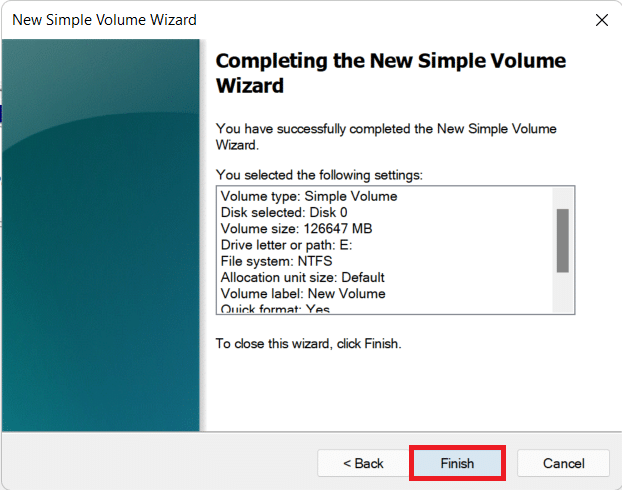
You can see the newly added partition indicated by the assigned letter and space as chosen.
Ошондой эле окуу: 3 Ways to Check if a Disk Uses MBR or GPT Partition in Windows 10
How to Delete Drive to Increase the Size of Another Drive
In case, you feel system performance has slowed down or that you do not require any additional partition, you can choose to delete the partition as well. Here’s how to modify disk partition in Windows 11:
1. чыкылдатып Издөө сөлөкөтү жана түрү диск башкаруу.
2. Андан кийин, тандаңыз ачык үчүн параметр Катуу диск бөлүктөрүн түзүү жана форматтоо, көрсөтүлгөндөй.

3. Танда кубалоо Сен жок кылгым келет.
Эскертүү: Make sure you have prepared a маалыматтардын камдык көчүрмөсү for the drive you want to delete on a different drive.
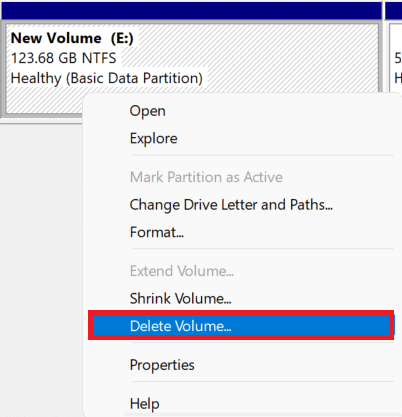
4. Right-click on the selected drive and select Delete Volume… контексттик менюдан.
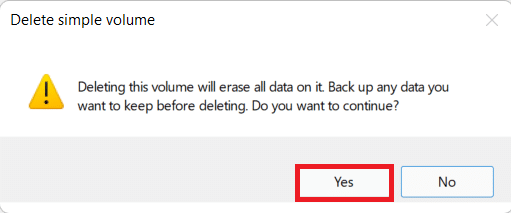
5. Click жөнүндө Ооба ичинде Delete simple volume confirmation prompt, as depicted.
6. Сиз көрөсүз Unallocated space with the size of the drive you deleted.
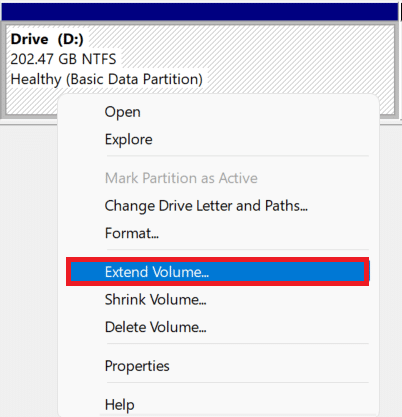
7. чыкылдатуу менен кубалоо you want to expand in size and select Extend Volume… төмөндө көрсөтүлгөндөй.
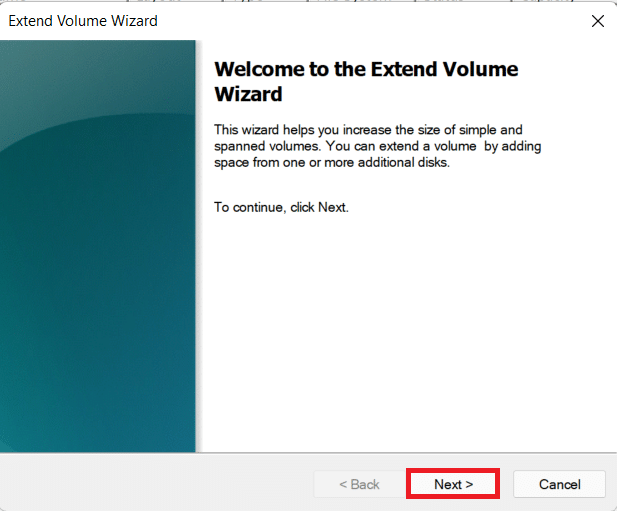
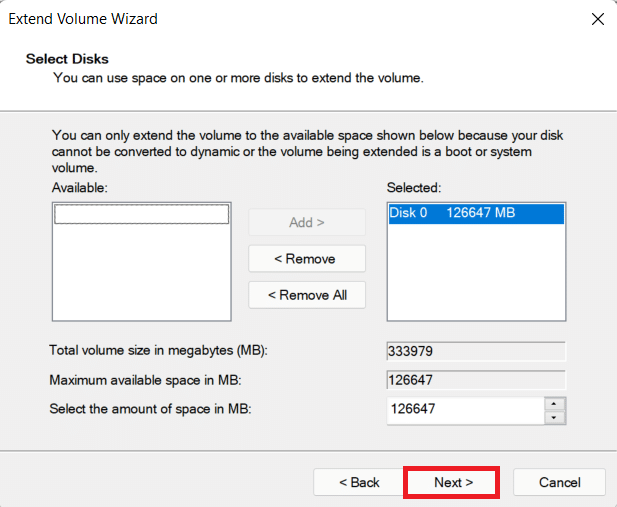
8. Click жөнүндө кийинки ичинде Extend Volume Wizard.
9. Эми, чыкылдатыңыз кийинки кийинки экранда.
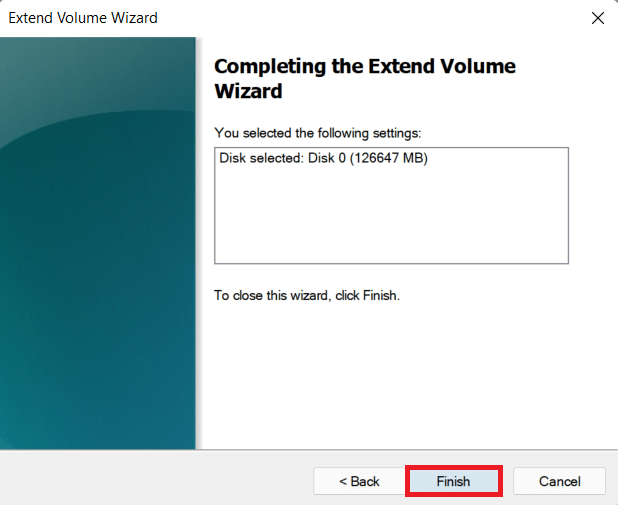
10. Акырында, басыңыз бүтүрүү.
сунушталат:
We hope you found this article interesting and helpful about how to partition hard disk in Windows 11. You can send your suggestions and queries in the comment section below. We would love to gear from you!

![[SOLVED] 0xc000000e: The selected entry could not be loaded](https://lbsite.org/wp-content/uploads/2023/01/Fix-Boot-Error-0xc000000e-The-selected-entry-could-not-be-loaded.jpg "[SOLVED] 0xc000000e: The selected entry could not be loaded")