There is a saying that a picture is worth a thousand words. Photos are always special, and each photo holds different memories and meanings. But what happens when an interference hinders your photo app, especially concerning windows errors? It drowns you, right? In fact, it terrifies you when you think if something will happen to the photos. The error message popup labeled with file system errors are happening often recently for many windows users. This article specifically focuses on the file system error (-2147219196) popup in the windows photos app. It is necessary to fix this error code without any delay as it might restrain you from accessing other file types or apps on your windows. It could also lead to a loss of your favorite memories in a rare, inevitable circumstance.
How to Fix File System Error 2147219196 in Windows 10
When you double-click on a JGP, JPEG, PNG, or other image file formats, the windows photo app popup with file system error (-2147219196) sometimes. Check out the causes of the error listed below.
- Presence of corrupt files in the disk or cache.
- Recently updated windows update bug
- Interference of third-party applications
- Misconfiguration of photo viewer ownership
- Bug release or fix via latest windows update
- Not installing the Microsoft stores app updates
- Existence of multiple apps
Follow the method in the same order one by one until you get a fix for the file system error Windows 10 2147219196 issue.
ວິທີ 1: Restart PC
The fundamental fix for any issue is to restart all the relevant applications associated with it and the file system error (-2147219196) is no exception. Therefore, close all the apps or programs running and follow the steps given below to restart the PC.
ກົດປຸ່ມ Windows ທີ່ສໍາຄັນ.
2 ໃຫ້ຄລິກໃສ່ ພະລັງງານ ແລະເລືອກເອົາ ເລີ່ມຕົ້ນໃຫມ່ ທາງເລືອກ.
![]()
3. Wait until your system gets rebooted. Now, launch a photo with the Windows photo application and see if you can open it.
Method 2: Perform Clean Boot
Clean booting your PC catches if any third-party applications running behind are involved in the file system error Windows 10 issue. Read our article to Perform Clean boot in Windows 10.
Method 3: Run Windows Store Apps Troubleshooter
A troubleshooter in Windows 10 exists to resolve any kind of problem on your PC automatically instead of fix-it tools. To identify and fix the file system error persisting with the Windows Photo Viewer application, it is worth a shot to run Windows Store apps troubleshooter. Read our article on How to Run Windows Update Troubleshooter.
ຍັງອ່ານ: Fix 0x80004002: No Such Interface Supported on Windows 10
ວິທີ 4: ອັບເດດ Windows
It is good to keep an eye on your system Windows Update as this error could be a bug release in the latest update which could rectify the issue. Therefore, ensure to keep your system windows up to date. To check for updates, follow the steps given.
1 ກົດປຸ່ມ ປຸ່ມ Windows + I simultaneously to launch ການຕັ້ງຄ່າ.
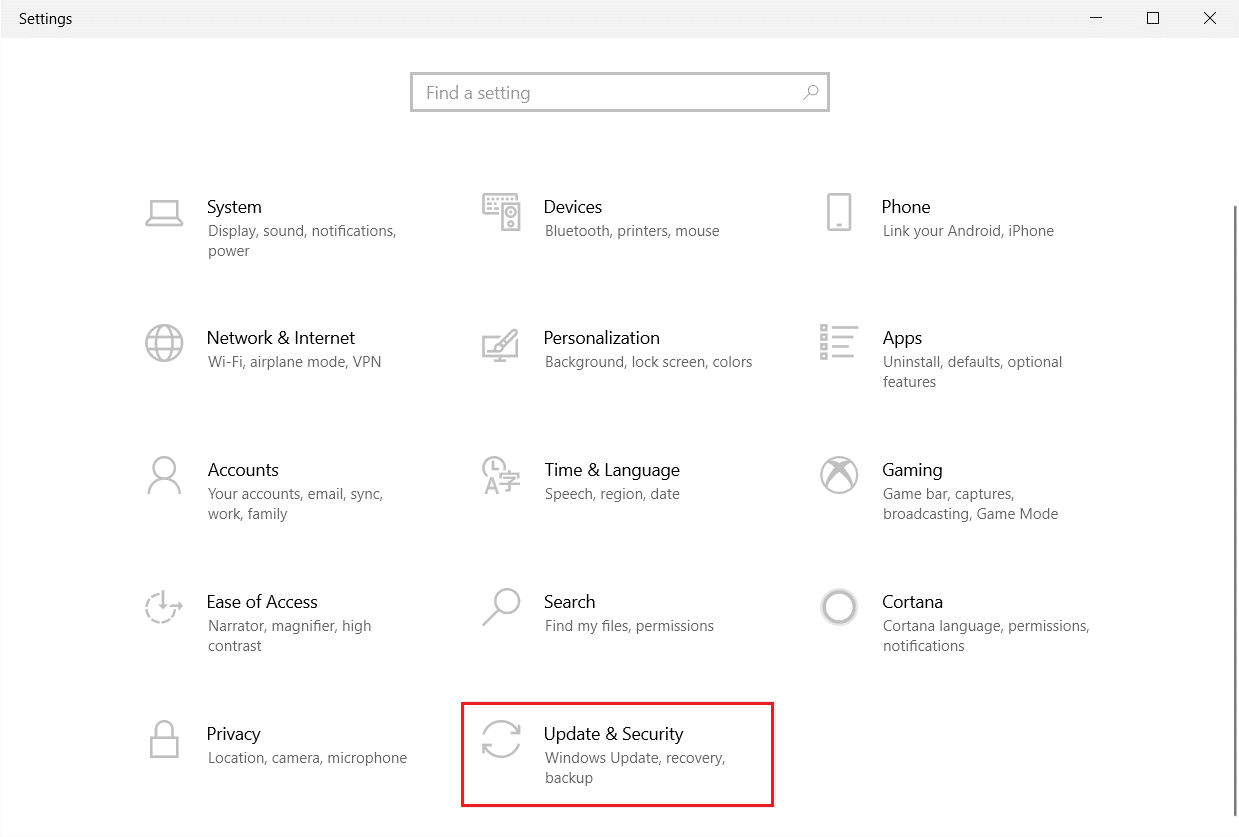
2 ໃຫ້ຄລິກໃສ່ ປັບປຸງແລະຄວາມປອດໄພ tile, as shown.
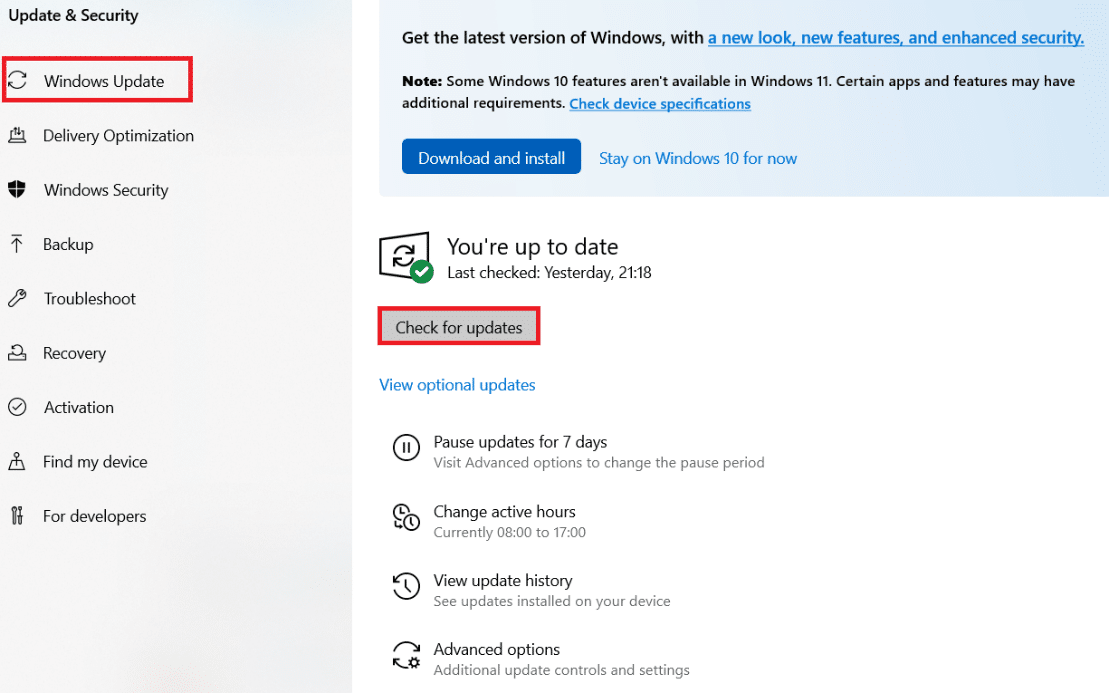
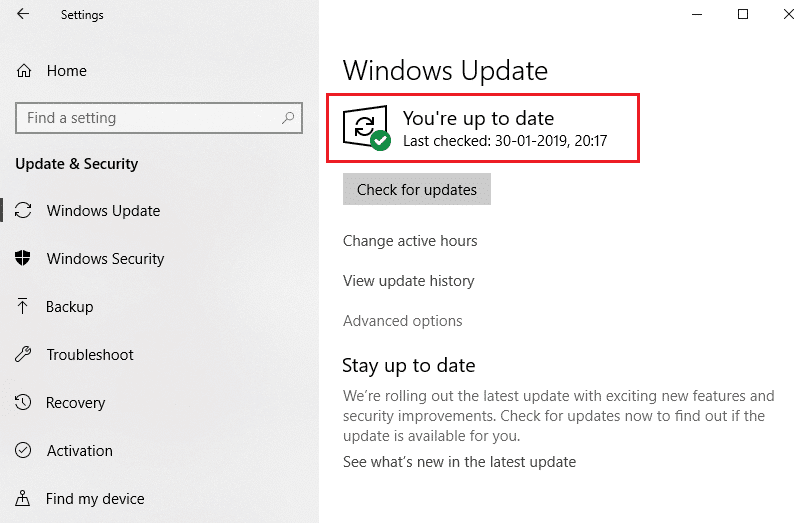
3 ໃນ Windows Update ແຖບ, ໃຫ້ຄລິກໃສ່ ກວດສອບການປັບປຸງ ປຸ່ມ.
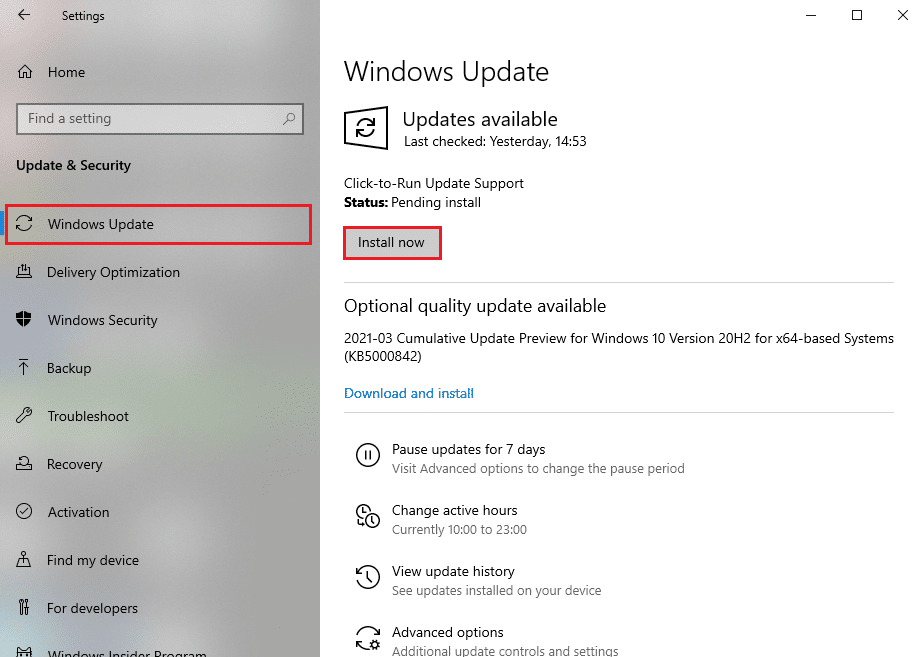
4A. If a new update is available, then click ຕິດຕັ້ງຕອນນີ້ and follow the instructions to update.
4B. Otherwise, if the Windows is up-to-date, then it will show You’re up to date ຂໍ້ຄວາມ.
Method 5: Repair Photos App
The photos app has a repair option to fix file system error 0x80070002 or (2147219196) on your system. Follow the steps given below to repair it.
1. ຕີໄດ້ Windows ຄີແລະເລືອກ ການຕັ້ງຄ່າ.
![]()
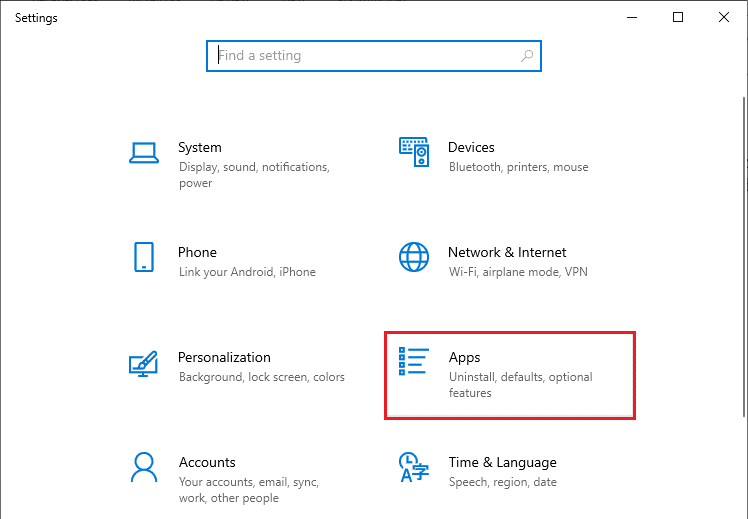
2 ເລືອກເອົາ ກິດ.
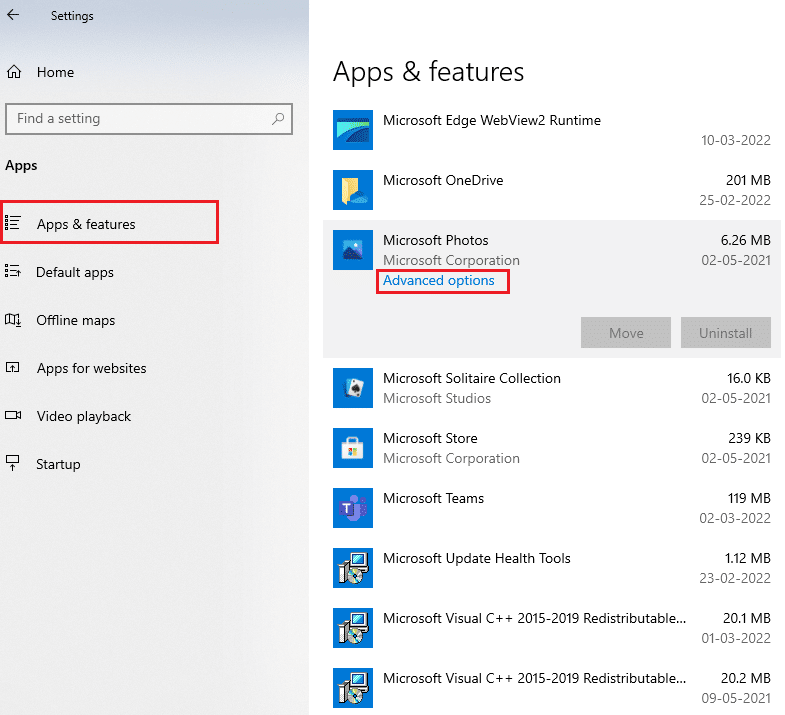
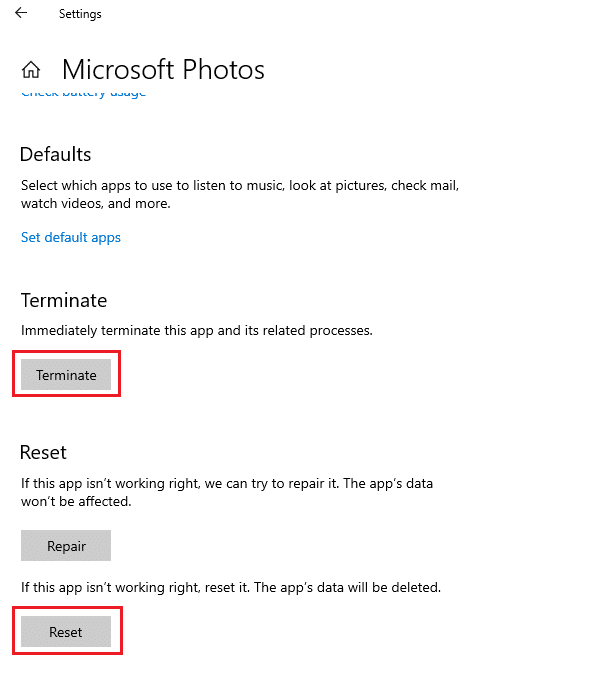
3 ເລືອກເອົາ Apps ແລະຄຸນສົມບັດ option on the left pane. Scroll down and select the Microsoft Photos app. Click the ທາງເລືອກຂັ້ນສູງ.
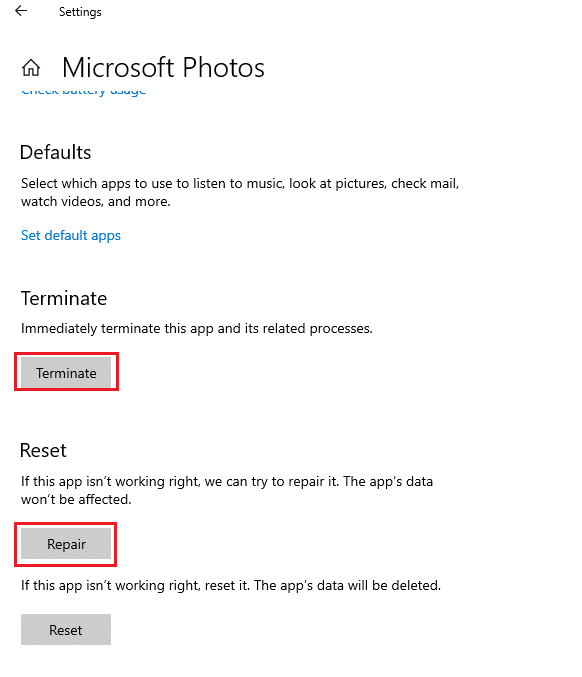
4. Scroll down and select the ຢຸດຕິ button. Then, click the ການສ້ອມແປງ button shown highlighted.
ຍັງອ່ານ: 7 ວິທີແກ້ໄຂຂໍ້ຜິດພາດ iaStorA.sys BSOD ເທິງ Windows 10
Method 6: Reset Photos App
If the repair option did not help you to fix error 0xc004f050 or 2147219196, then try to reset the app to default. To reset the Photo App. Follow the instruction given below.
1. ເປີດ ການຕັ້ງຄ່າ ທາງເລືອກ.
![]()
2 ເລືອກເອົາ ກິດ.
3 ໃຫ້ຄລິກໃສ່ Apps ແລະຄຸນສົມບັດ option on the left pane. Scroll down and select Microsoft Photos. ກົດ ຕົວເລືອກຂັ້ນສູງ.
4 ເລືອກເອົາ ຢຸດຕິ button to stop the live processes of Photos App. Click on the ຕັ້ງຄ່າ ປຸ່ມ.
ຫມາຍເຫດ: The app’s data will be deleted if you reset the Photos App.
5. Launch a picture format file and see if you can view it without any error message.
Method 7: Repair Corrupt Files
The disk drive error impacts the integrity of the processor. Therefore, it is necessary to run check disk utility, system file checker, and deployment image servicing and management scan to repair the errors.
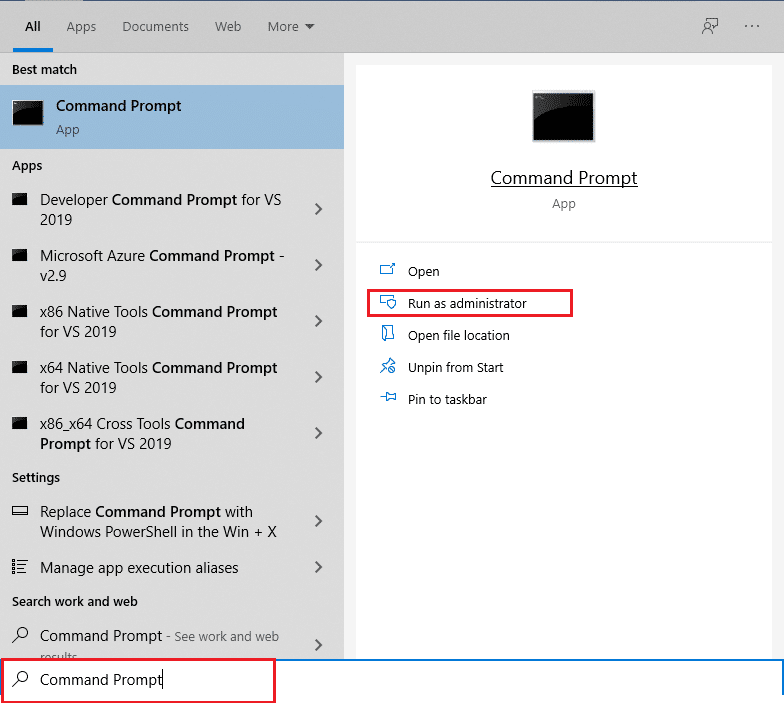
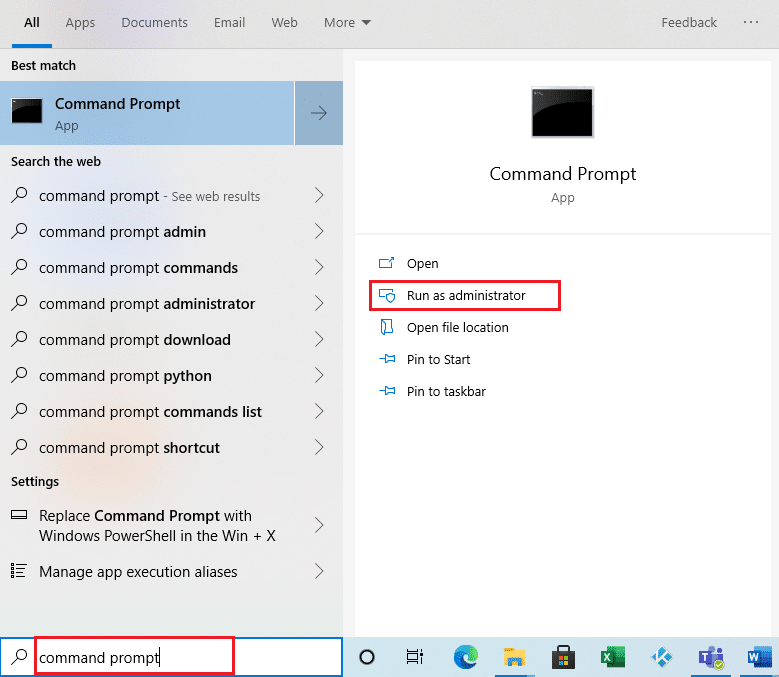
1. ຕີໄດ້ ປຸ່ມ Windows, ປະເພດ Command Prompt ແລະຄລິກໃສ່ ດໍາເນີນການບໍລິຫານ.
2 ໃຫ້ຄລິກໃສ່ ແມ່ນແລ້ວ ໃນ User Account Control prompt
3 ປະເພດ chkdsk C: / f / r / x ຄໍາສັ່ງແລະຕີ ໃສ່ລະຫັດ.

4. If you are prompted with a message, Chkdsk cannot run…the volume is… in use process, then, type Y ແລະມົນຕີໄດ້ ໃສ່ລະຫັດ.
5. Again, type the command: sfc / scannow ແລະກົດ ໃສ່ລະຫັດ ດໍາເນີນການ System File Checker ສະແກນ.
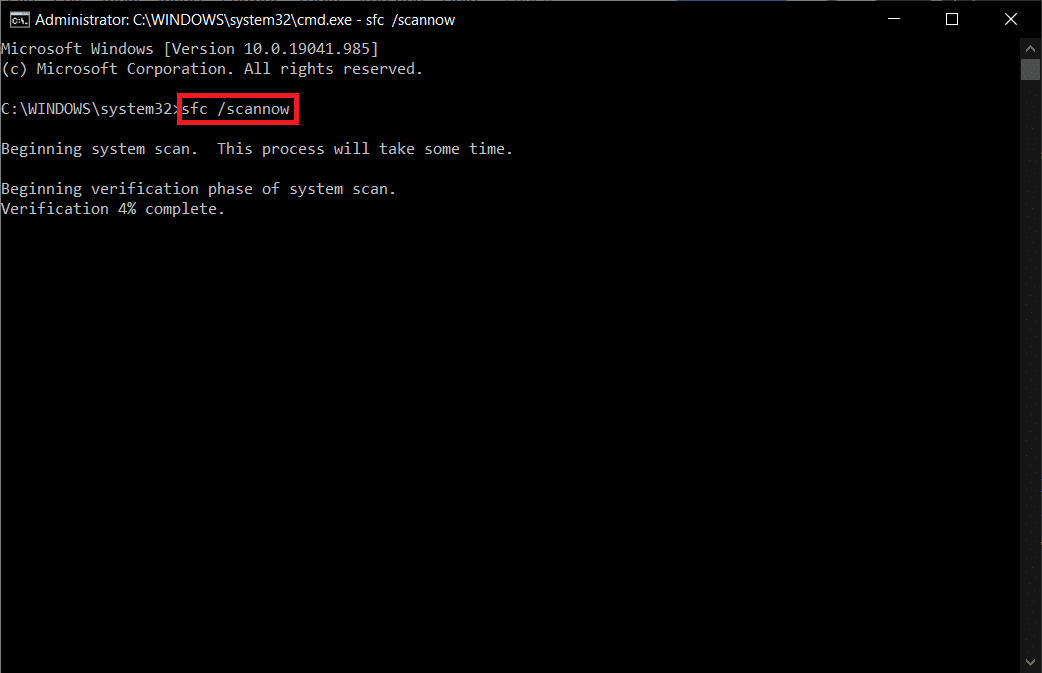
ຫມາຍເຫດ: A system scan will be initiated and it will take a couple of minutes to finish. Meanwhile, you can continue performing other activities but be mindful of not accidentally closing the window.
After completing the scan, it will show either of these messages:
- Windows Resource Protection ບໍ່ພົບການລະເມີດດ້ານຄວາມຊື່ສັດໃດ.
- Windows Resource Protection could not perform the requested operation.
- Windows Resource Protection found corrupt files and successfully repaired them.
- ການປົກປ້ອງຊັບພະຍາກອນ Windows ພົບໄຟລ໌ທີ່ເສຍຫາຍແຕ່ບໍ່ສາມາດແກ້ໄຂບາງໄຟລ໌ໄດ້.
6. Once the scan is finished, ເລີ່ມຕົ້ນໃຫມ່ PC ຂອງທ່ານ.
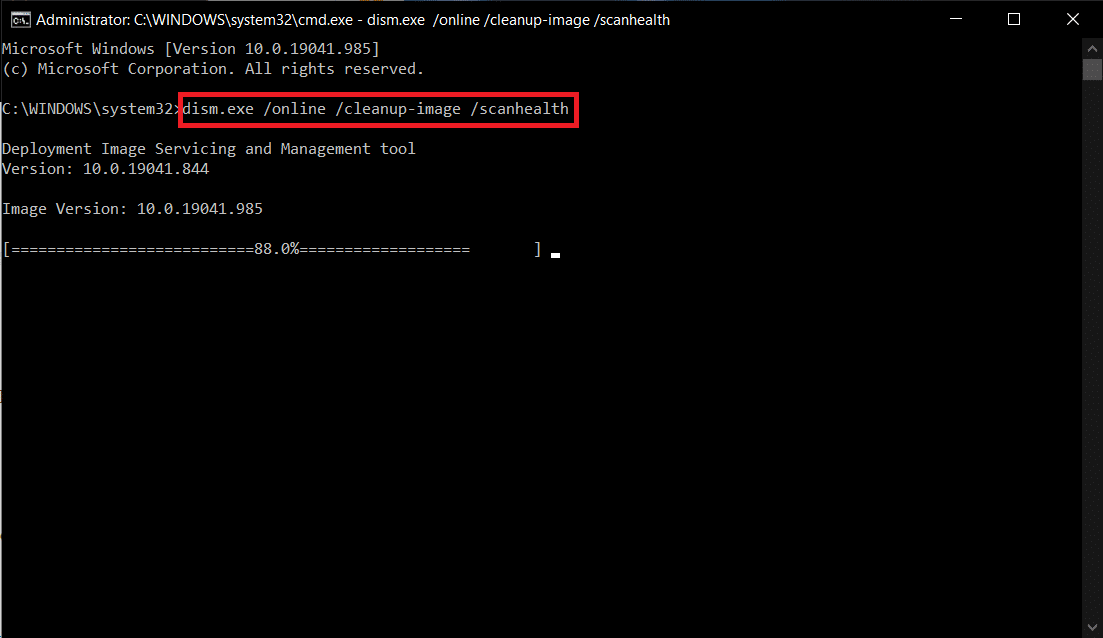
7. Again, launch Command Prompt ເປັນຜູ້ເບິ່ງແຍງລະບົບ and execute the given commands one after the other:
dism.exe /Online /cleanup-image /scanhealth
dism.exe /Online /cleanup-image /restorehealth
dism.exe /Online /cleanup-image /startcomponentcleanup
ຫມາຍເຫດ: You must have a working internet connection to execute DISM commands properly.
ຍັງອ່ານ: How to Delete Win Setup Files in Windows 10
ວິທີການ 8: ຖອນການຕິດຕັ້ງການປັບປຸງທີ່ຜ່ານມາ
Updates are released regularly by Microsoft to fix the prevailing bugs and enhance functionality in the windows 10 software. However, these updates can cause unusual interference and create problems. If your Windows Photo App is not working right for an update process, then follow the steps below and uninstall it.
ກົດປຸ່ມ Windows ທີ່ສໍາຄັນແລະເລືອກເອົາ ໄອຄອນການຕັ້ງຄ່າ.
![]()
2 ເລືອກເອົາ ການປັບປຸງແລະຄວາມປອດໄພ.
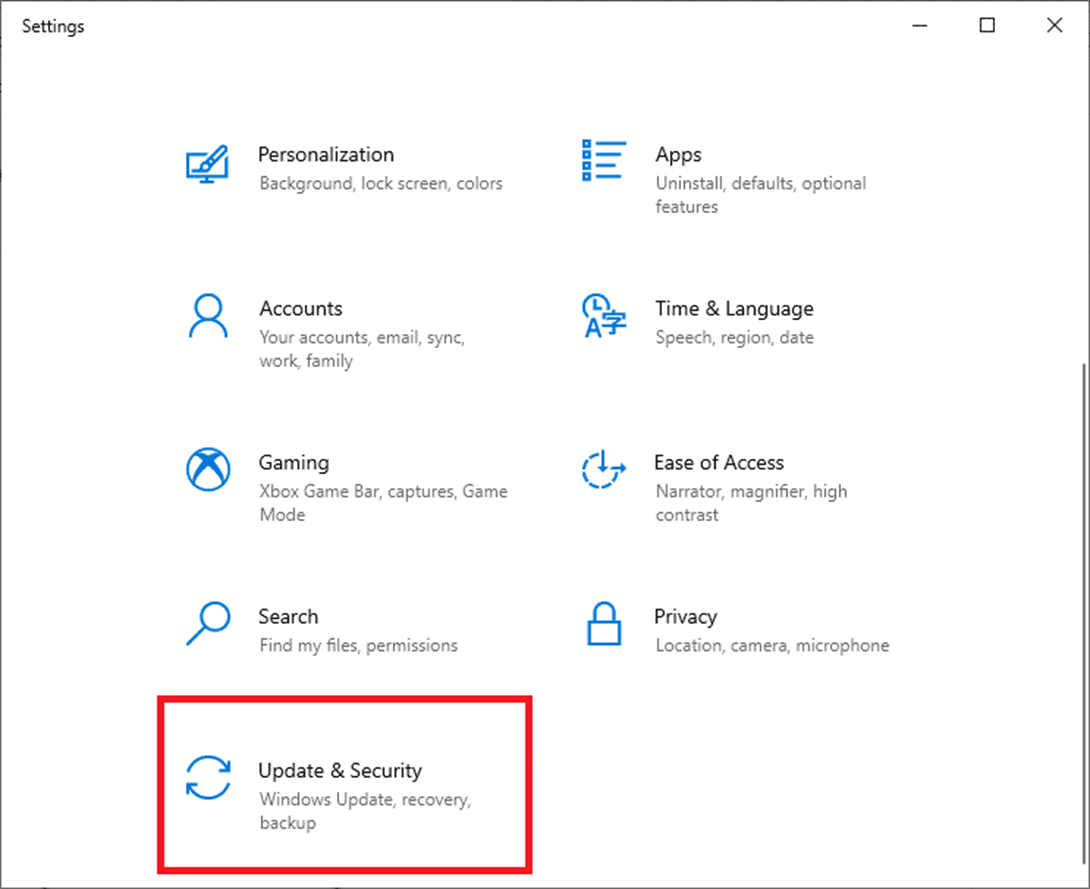
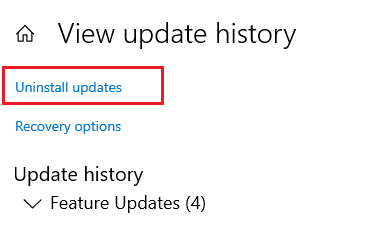
3 ໃຫ້ຄລິກໃສ່ ເບິ່ງປະຫວັດການປັບປຸງ ແລະເລືອກເອົາ ຖອນການຕິດຕັ້ງອັບເດດ.
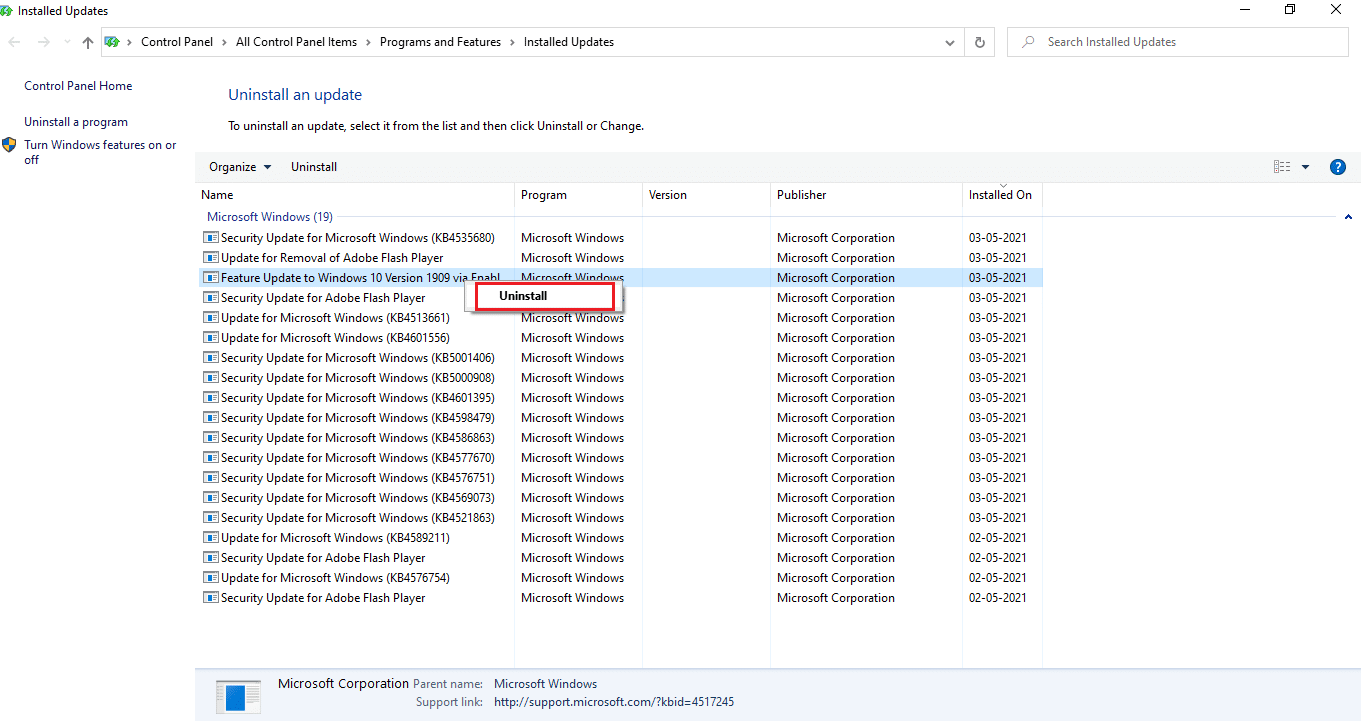
4. Navigate to the latest update you installed on the desktop, ກົດຂວາ ໃສ່ມັນແລ້ວເລືອກ ຖອນການຕິດຕັ້ງ.
ຫມາຍເຫດ: Skip the security update if you have done any.
ຍັງອ່ານ: Fix The Process Cannot Access the File error on Windows 10
Method 9: Change the Photos app Ownership
Sometimes the photo viewing application changes its ownership. Users are allowed to change the configuration which enables app permissions as per their wish, which could possibly fix the error. Please follow the method closely as they can be a little complex.
1. ຕີໄດ້ ປຸ່ມ Windows, ປະເພດ ວ່ອງໄວ ຄຳ ສັ່ງ, ແລະກົດເຂົ້າ ດໍາເນີນການບໍລິຫານ.

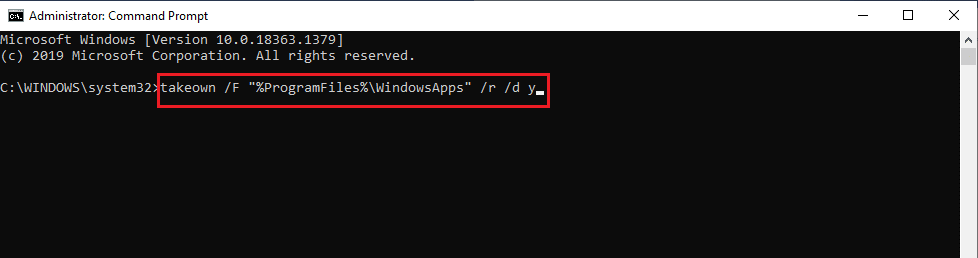
2. Copy and paste the following command on the Command Prompt Admin Console ດັ່ງທີ່ສະແດງ.
takeown /F “%ProgramFiles%WindowsApps” /r /d y
3 ກົດປຸ່ມ Windows + E ໃຊ້ together and open File Explorer.
4 ເລືອກເອົາ ເບິ່ງ on the menu bar and enable ລາຍການທີ່ເຊື່ອງໄວ້ check box
![]()
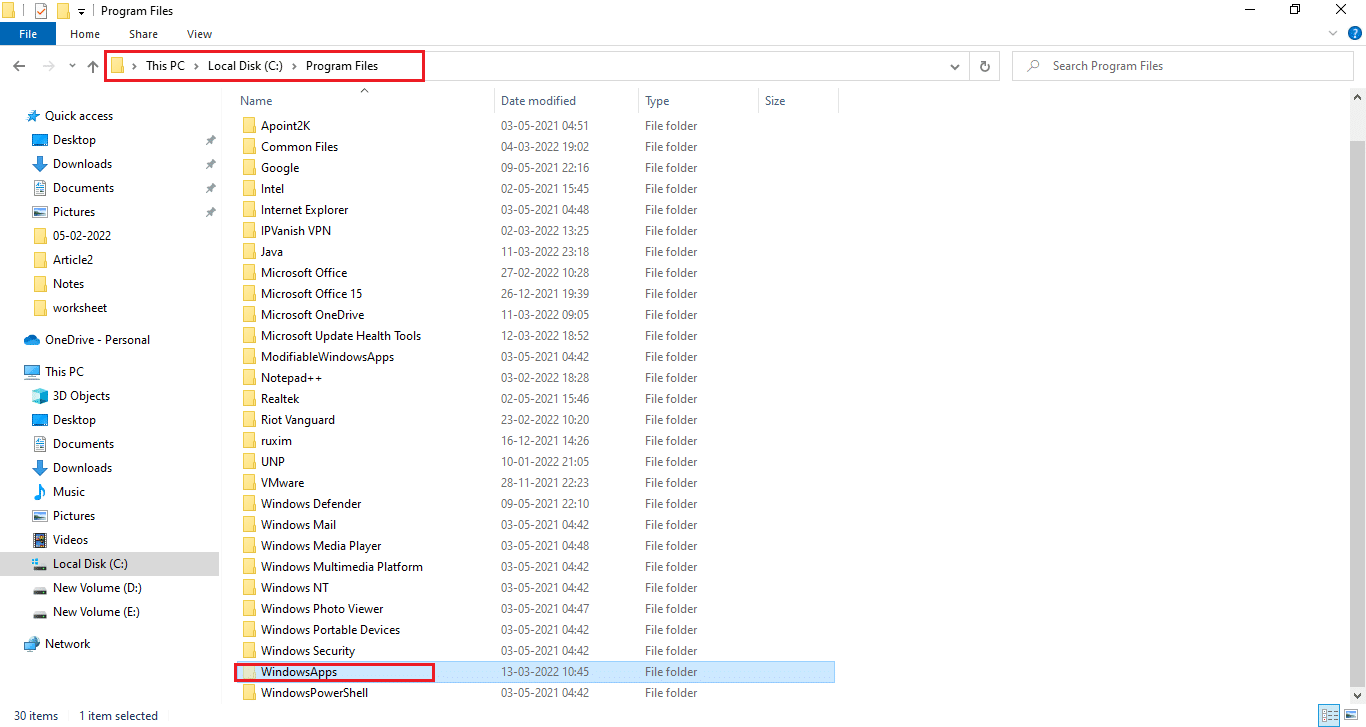
5. Navigate to the location: ທ້ອງຖິ່ນ C > ໂປລແກລມໄຟລ໌ > WindowsApps and double click the WindowsApps folder.
6. ຄລິກ ສືບຕໍ່ການ ໃນການເຂົ້າເຖິງ ແອັບ Windows ໂຟນເດີ.
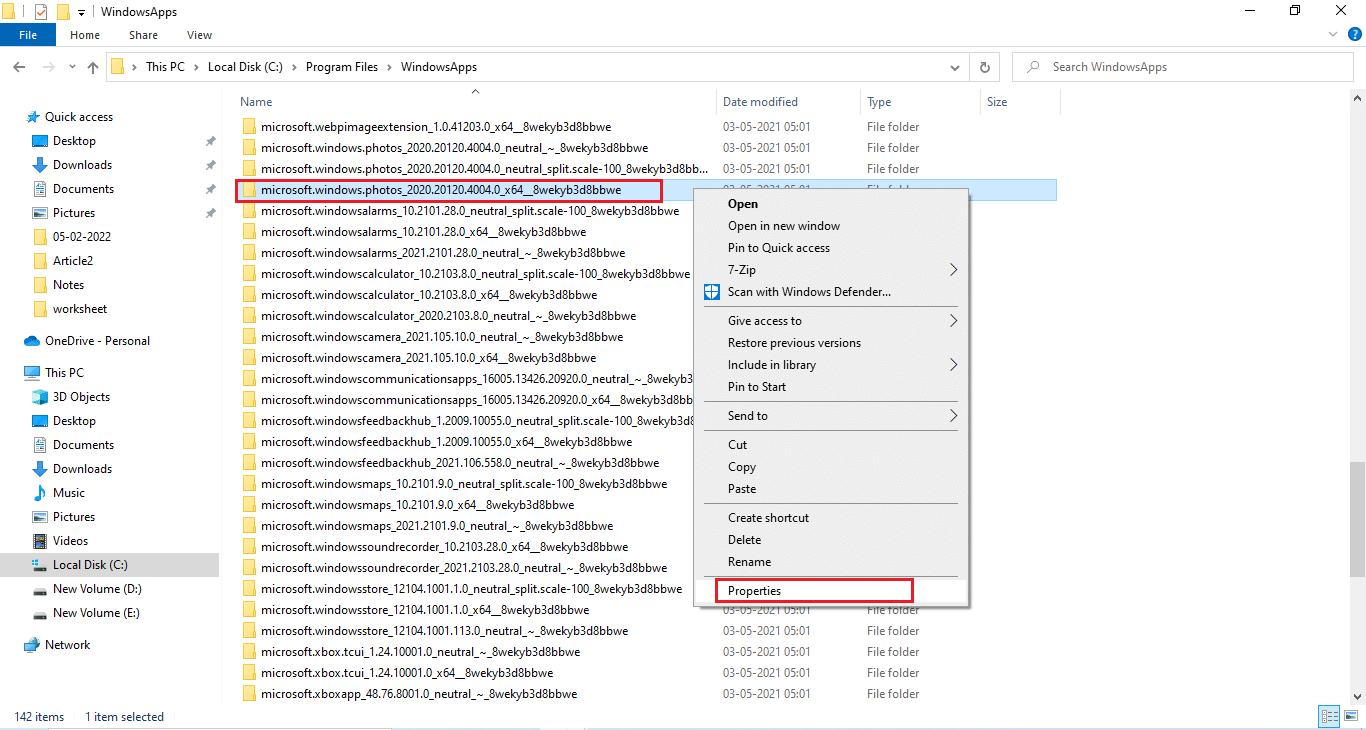
7 ເລືອກເອົາ Microsoft.Windows.Photos_[version number] directory that contains x64 in the file name. Right-click on the folder and select ອະສັງຫາ.
8 ເລືອກເອົາ ຄວາມປອດໄພ ແຖບແລະຄລິກ ແບບພິເສດ.
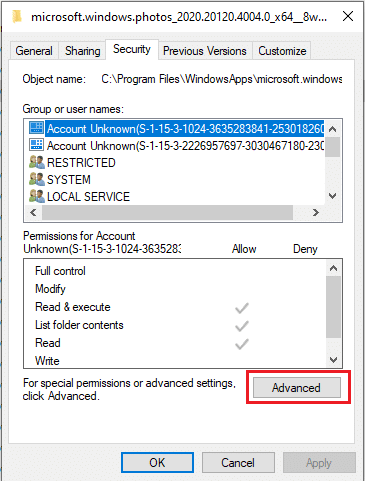
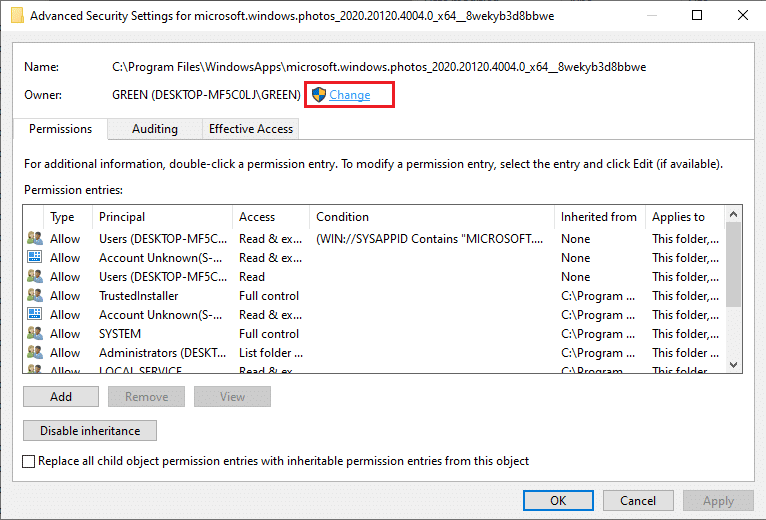
9. ຄລິກ ການປ່ຽນແປງ ເພື່ອປ່ຽນຊື່ ເຈົ້າຂອງ ກ່ຽວກັບ ການຕັ້ງຄ່າຄວາມປອດໄພຂັ້ນສູງ window.
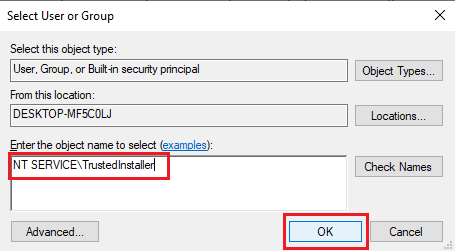
10 ປະເພດ NT SERIVCETrustedInstaller as object name and click OK.
11. ເປີດໃຊ້ງານ ປ່ຽນແທນເຈົ້າຂອງສິນຄ້າຍ່ອຍແລະວັດຖຸຕ່າງໆທີ່ຢູ່ ເລືອກເອົາ ສະຫມັກຂໍເອົາ ແລະຫຼັງຈາກນັ້ນ OK.
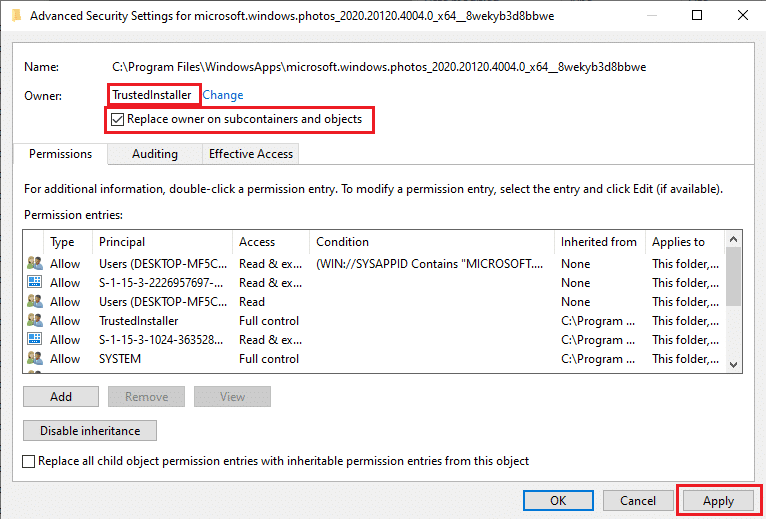
12. Again click OK on the existing properties window.
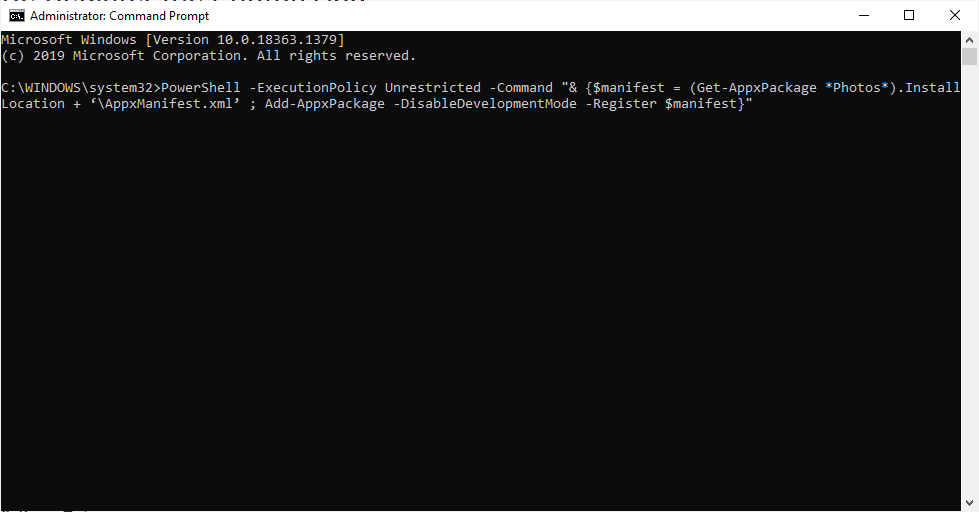
ກົດປຸ່ມ ປຸ່ມ Windows, ປະເພດ ວ່ອງໄວ ຄຳ ສັ່ງ, ແລະກົດເຂົ້າ ດໍາເນີນການບໍລິຫານ.

2. Copy the command given and paste it on the Command Prompt. ຕີ ກະລຸນາໃສ່.
PowerShell -ExecutionPolicy Unrestricted -Command “& {$manifest = (Get-AppxPackage *Photos*).InstallLocation + ‘AppxManifest.xml’ ; Add-AppxPackage -DisableDevelopmentMode -Register $manifest}”
3. Reboot your system and check if file system error 2147219196 is resolved.
ຍັງອ່ານ: How to Fix Error 0x80070002 Windows 10
Method 10: Use Registry Editor with Admin rights
Registry Editor in Windows is the hierarchical database that holds all the configurations of the applications or programs the windows use. They allow you to edit, view and change the value set of the database.
ຫມາຍເຫດ: Ensure you have a backup of your system as the Registry Editor are prone to corruption if performed in a wrong manner.
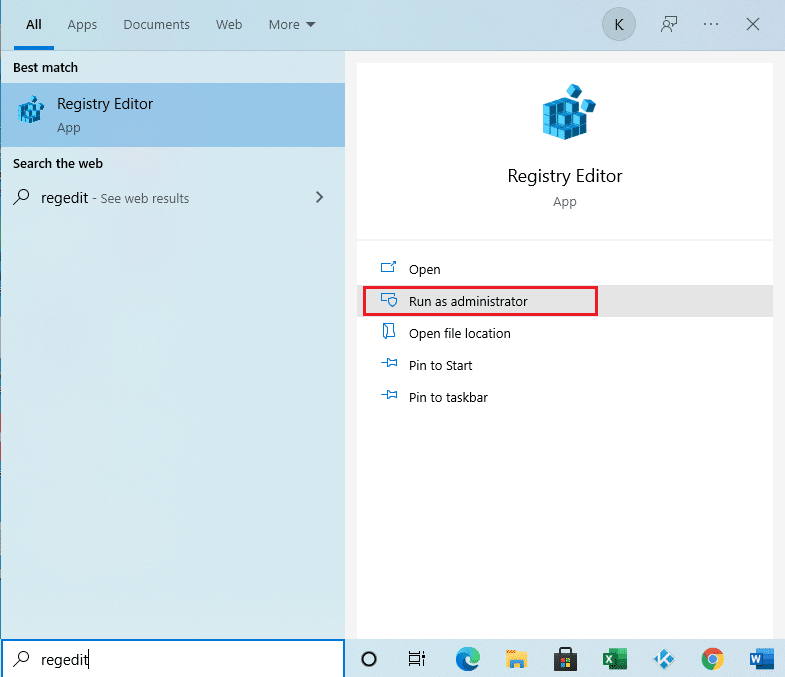
1. ຕີໄດ້ ປຸ່ມ Windows, ປະເພດ regedit, ແລະໃຫ້ຄລິກໃສ່ ດໍາເນີນການບໍລິຫານ.
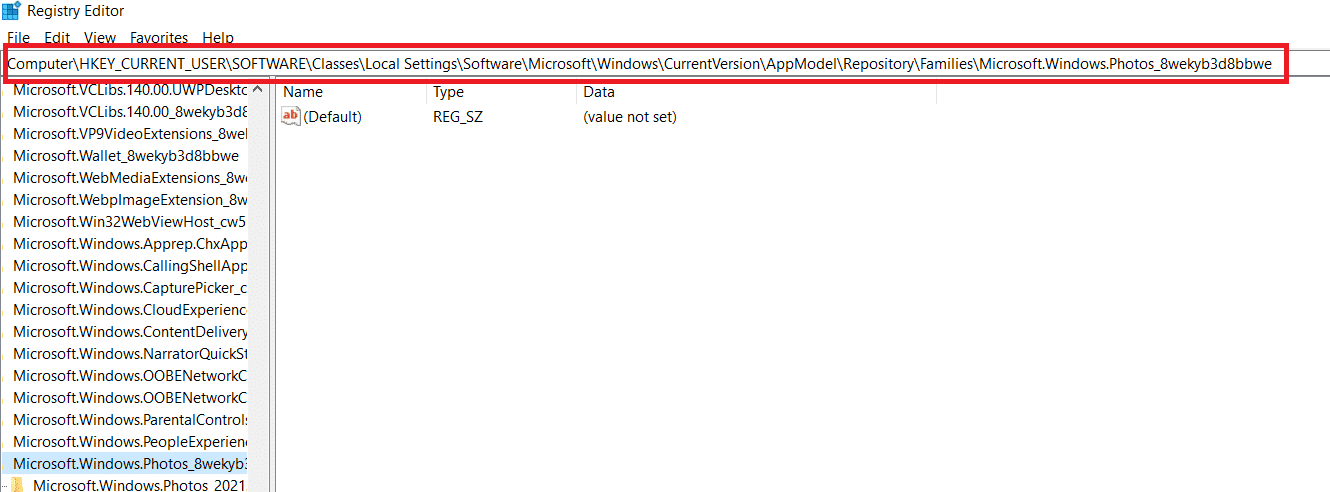
2. Navigate to the given location ເສັ້ນທາງ ໃນ Registry Editor.
Keys_CURRENT_USERSOFTWAREClasses Local SettingsSoftwareMicrosoftWindows Current versionApp model RepositoryFamilyMicrosoft.Windows.Photos
3. The number of folders that exist depends on the uninstall that you have done. In this case there are only 3 folders.
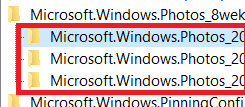
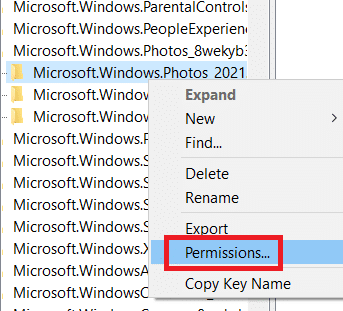
4. Right-click on the entry and click on Permissions.
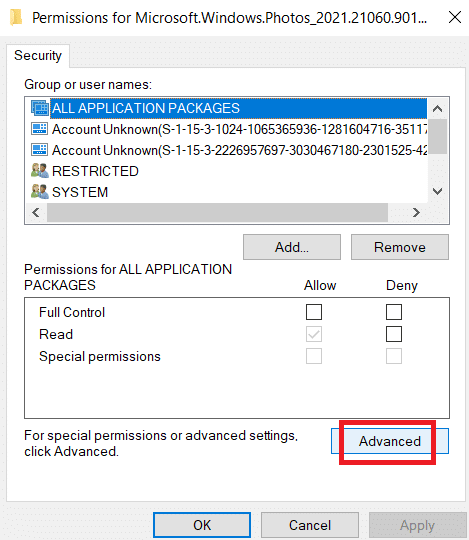
5 ໃຫ້ຄລິກໃສ່ ແບບພິເສດ.
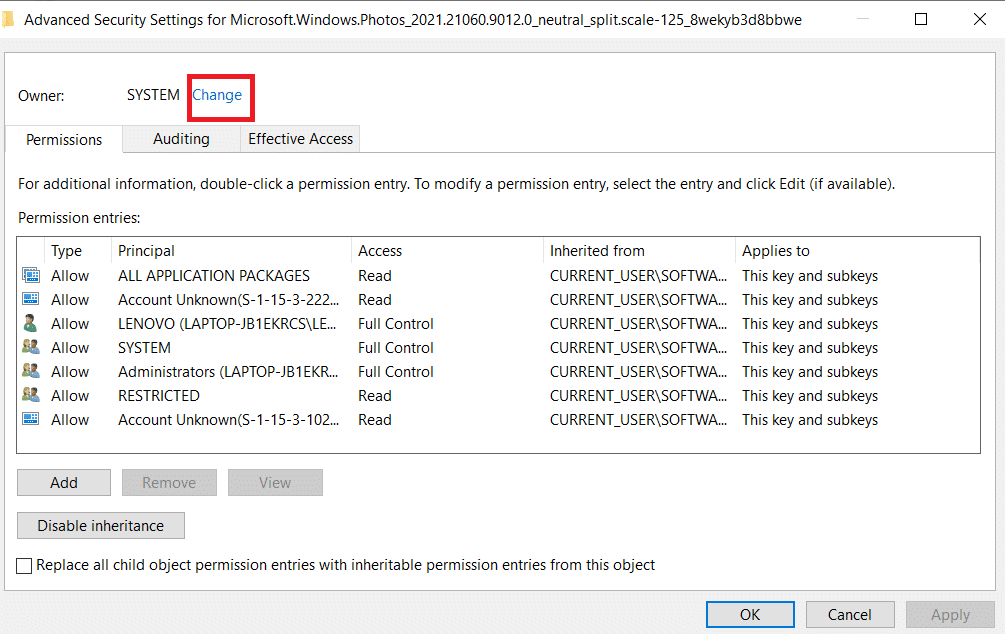
6 ເລືອກເອົາ ການປ່ຽນແປງ ກ່ຽວກັບ ເຈົ້າຂອງ ທາງເລືອກ.
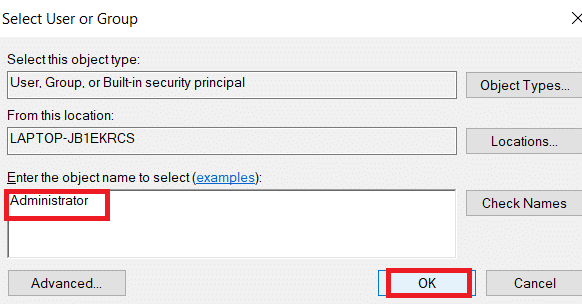
7. ປ່ຽນຊື່ ເຈົ້າຂອງ as ຜູ້ບໍລິຫານ ແລະຄິກ Ok.
8. Repeat the process from step 4 to step 8 again for each entry folder you have.
9. ສຸດທ້າຍ, ເລີ່ມຕົ້ນໃຫມ່ PC ຂອງທ່ານ and try launching the Photo Viewer application.
Method 11: Remove Microsoft Store Cache
The Microsoft Store accumulates various data of log files, thumbnails, download files, and so forth during its usage are cache. This cache gets corrupted sometimes and clashes with the Microsoft Store app and prevents them from any kind of process which in turn could impact the Photos App. Thus, resetting the Microsoft Store cache removes the files system error prevailing in Photos App. To do so, follow the steps.
1 ກົດປຸ່ມ Windows + R ໃຊ້ together and open the ການດໍາເນີນງານ ກ່ອງໂຕ້ຕອບ
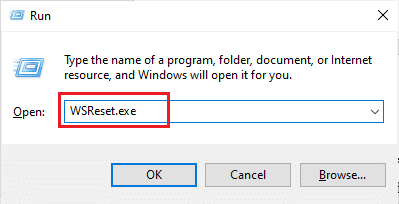
2 ປະເພດ WSReset.exe ກ່ຽວກັບ Run prompt ແລະມົນຕີ ກະລຸນາໃສ່.
3. A black blank screen window appears.
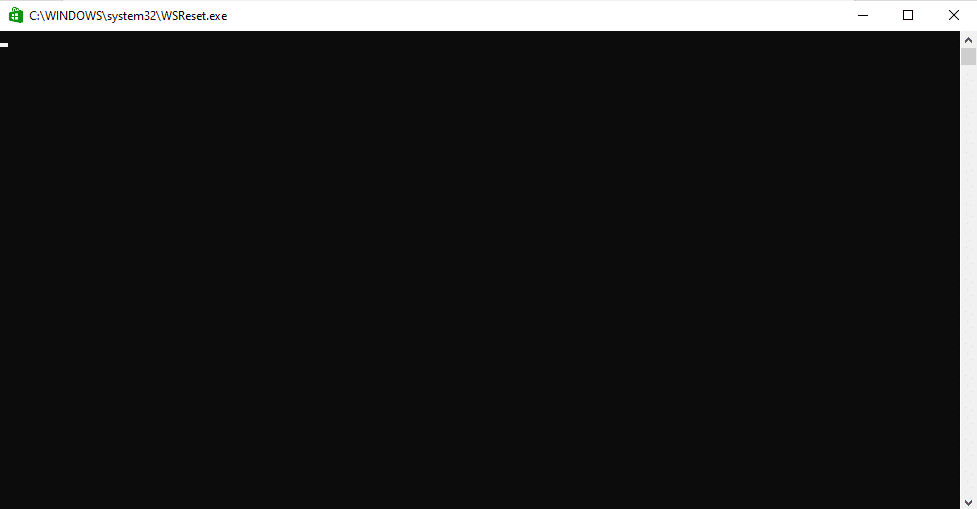
4. Wait till you can see Windows Store on your display screen. Open an image file format and see if the error is resolved.
ຍັງອ່ານ: How to Fix Corrupted Registry in Windows 10
Method 12: Re-Register the Photos App
The re-registering method is suggested first as this will not cause you any loss of data in the Photo App. This could be considered as a less conventional method but if you can fix the error with this then the method kind doesn’t really matter. Follow the procedure and ensure to give the command as given below.
1. ຕີໄດ້ ປຸ່ມ Windows, ປະເພດ ວ່ອງໄວ ຄຳ ສັ່ງ, ແລະກົດເຂົ້າ ດໍາເນີນການບໍລິຫານ.
2. Copy the command given and paste it on the Command Prompt. ຕີ ກະລຸນາໃສ່.
PowerShell -ExecutionPolicy Unrestricted -Command “& {$manifest = (Get-AppxPackage *Photos*).InstallLocation + ‘AppxManifest.xml’ ; Add-AppxPackage -DisableDevelopmentMode -Register $manifest}”

Method 13: Re-Register All Microsoft Store App
Though similar to the less conventional re-registering method of Photos App which did not help you, this process with a slight difference involves you to re-register the entire Microsoft Store App which could fix the error. To do so, implement the steps given.
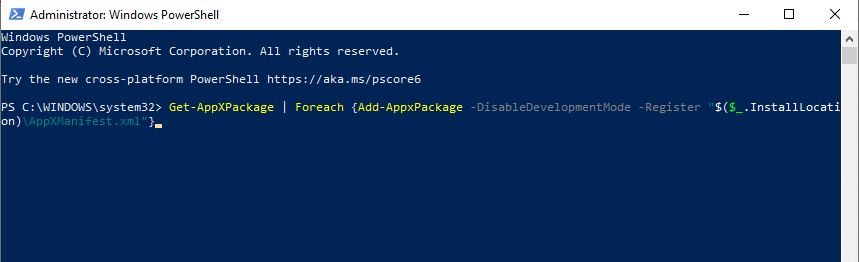
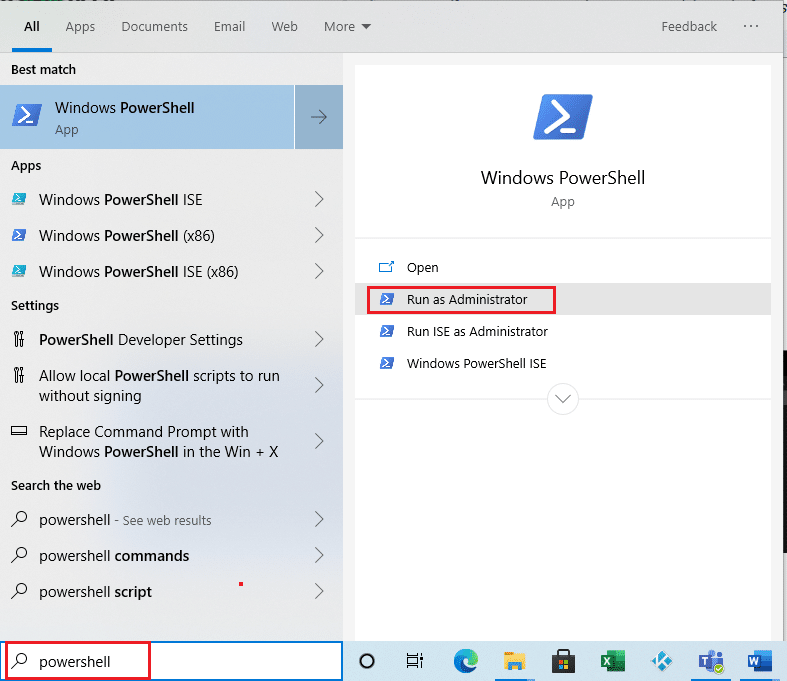
1. ຕີໄດ້ ປຸ່ມ Windows, ປະເພດ powershell, ແລະກົດເຂົ້າ ດໍາເນີນການບໍລິຫານ.

2. Type the given command and hit the ໃສ່ລະຫັດ.
Get-AppXPackage | Foreach {Add-AppxPackage -DisableDevelopmentMode -Register “$($_.InstallLocation)AppXManifest.xml”}
ຍັງອ່ານ: Fix Steam Corrupt Disk Error on Windows 10
Method 14: Uninstall and Reinstall the Photos App
The entire file corruption could be the reason behind the file system error (-2147219196) on the app. The final conventional method to fix it is to uninstall and reinstall the Windows Photo application which worked out very well for many users so far. Follow the steps given below.
1. ຕີໄດ້ ປຸ່ມ Windows, ປະເພດ powershell, ແລະກົດເຂົ້າ ດໍາເນີນການບໍລິຫານ.
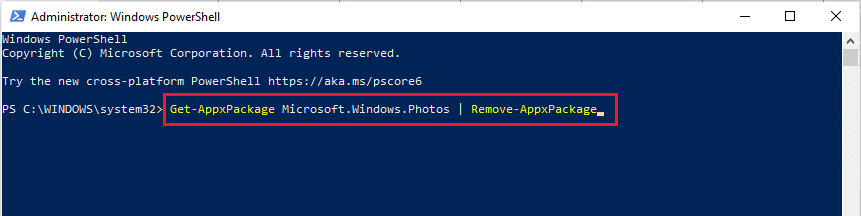
2. Copy and paste the command on Windows PowerShell. Hit ກະລຸນາໃສ່ ທີ່ສໍາຄັນ.
Get-AppxPackage Microsoft.Windows.Photos | Remove-AppxPackage
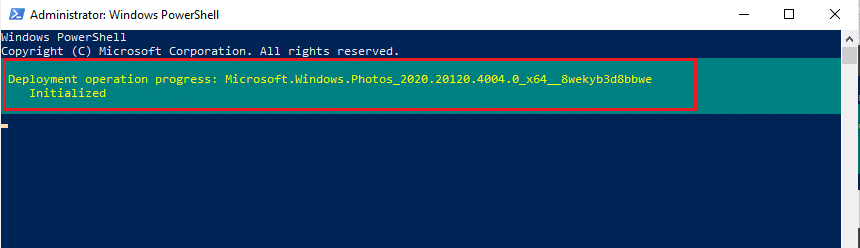
3. Wait till the process deployment or uninstallation of the Windows Photo App to complete.
4. ດາວນ໌ໂຫລດໄດ້ PsTools package ຈາກເວັບໄຊທ໌ທາງການ.
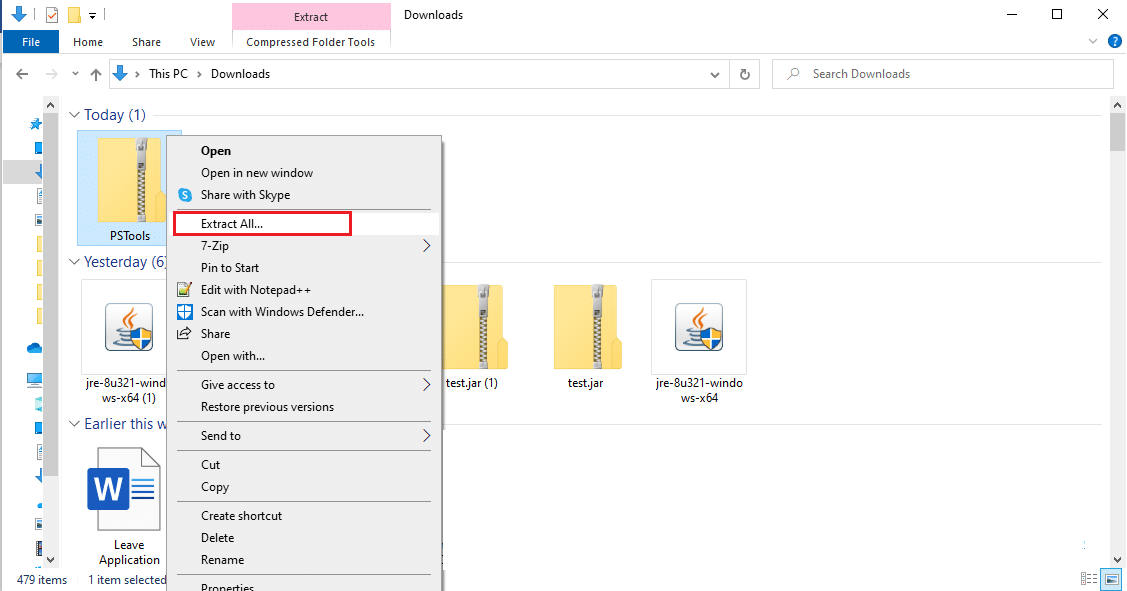
5. ໄປຫາ ດາວໂຫລດ. Right-click on the downloaded PSTools compressed file ແລະເລືອກເອົາ ສະກັດທັງ ໝົດ.
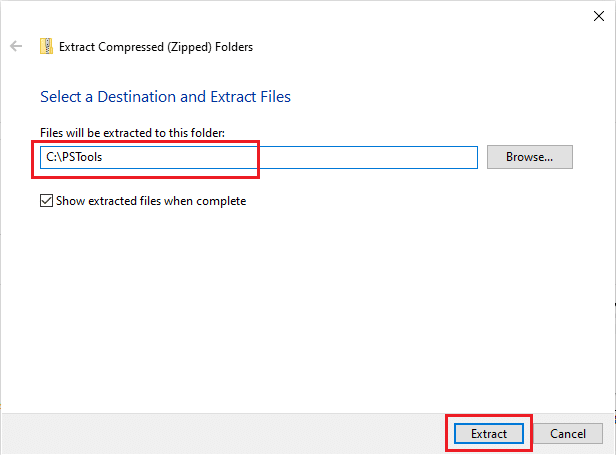
6. ເລືອກກ destination folder location to save the extracting files. Then, click on ສານສະກັດຈາກ.
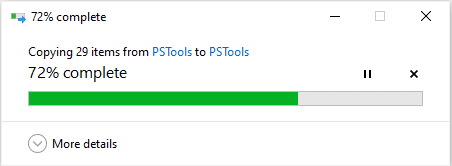
7. Wait till the folder gets extracted files.
ກົດປຸ່ມ ປຸ່ມ Windows, ປະເພດ ວ່ອງໄວ ຄຳ ສັ່ງ, ແລະກົດເຂົ້າ ດໍາເນີນການບໍລິຫານ.

9. Execute the given command and hit the ໃສ່ລະຫັດ.
<PsExec location address>PsExec.exe -sid c:windowssystem32cmd.exe
ຫມາຍເຫດ: <PsExec location address> should be the location path where you saved the extracted file. Here is an example using the following command: C:PSToolsPsExec.exe -sid C:WindowsSystem32cmd.exe

10. ຄລິກ ຕົກລົງເຫັນດີ ການຍອມຮັບ Sysinternals software license terms on the new prompt opened.
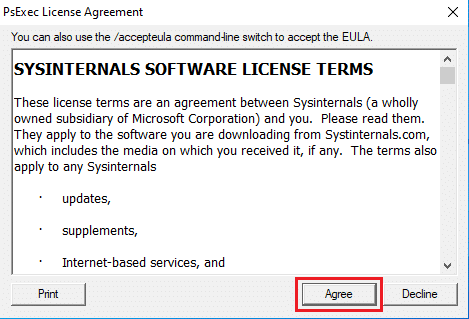
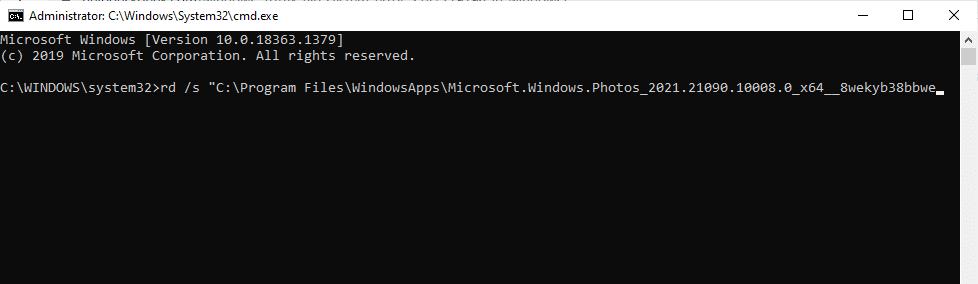
11 A new Command Prompt app opens. Here, copy and paste the following command and press ໃສ່ລະຫັດ.
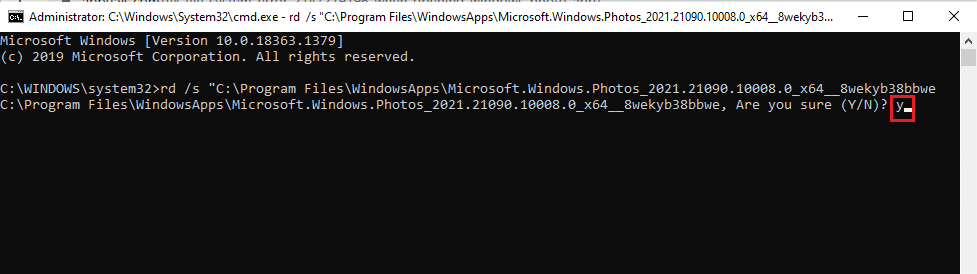
rd /s “C:ProgramFilesWindowsAppsMicrosoft.Windows.Photos_2017.37071.16410.0_x64__8wekyb3d8bbwe
12. Type the Y ທີ່ສໍາຄັນ ແລະມົນຕີ ໃສ່ລະຫັດ ສໍາລັບການຢັ້ງຢືນ.
13. Once done, launch Microsoft Store and download the app. Check if file system error 2147219196 error is resolved by trying to open an image of any file format.
Method 15: Download a Different Application
Don’t lose hope if none of the above methods worked for you, it’s alright. There will always be an alternative solution. Here, one such alternative method is to download a third-party application to open the picture file formats. You can use any different application of your choice.
ແນະນໍາໃຫ້:
We hope that this guide was helpful, and you were able to learn to fix file system error 2147219196. If you have any queries or, suggestions then feel free to drop them in the comments section. Let us know what you want to learn about next.

