Fix Desktop Icons keep getting rearranged after Windows 10 Creators Update: After installing the latest Windows 10 Creators Update users are complaining about a new strange issue where the desktop icons keep getting rearranged automatically. Every time the user hits refresh the desktop icons arrangement is changed or messed up. In short whatever you do from saving a new file on the desktop, to rearranging icons on the desktop, to renaming files or shortcuts on the desktop affects the icon arrangement in some way or other.
![]()
In some cases, in addition to above issues, users are also complaining about the icon spacing issue as before the update the space between icons was different and after the Creators Update, the icon spacing is also messed up. Below is the official Windows announcement of a new feature being introduced in Creators Update called Desktop Icon Placement Improvements:
Windows now more intelligently rearranges and scales desktop icons when you switch between different monitors and scaling settings, seeking to preserve your custom icon layout rather than scrambling them.
Now the main issue about this feature is you can’t disable it and this time Microsoft has really messed up by introducing this feature which is causing more harm than good. Anyway without wasting any more time let’s see how to actually Fix Desktop Icons keep getting rearranged after Windows 10 Creators Update with the below-listed troubleshooting guide.
Pataisyti darbalaukio piktogramos vis pertvarkomos po „Windows 10“ kūrėjų atnaujinimo
Įsitikinkite, kad sukurti atkūrimo tašką tik tuo atveju, jei kažkas negerai.
Method 1: Change the Icon View
1.Right-click on the desktop then select Vaizdas and change the view from your currently selected view to any other. For example if “Medium” is currently selected then click on “Small.”

2.Now again select the same view which was earlier selected for example we would select Medium again.
3. Tada pasirinkite „mažas” in the View option and you would immediately see the changes in the icon on the desktop.
![]()
4.After this, the icon won’t rearrange themselves automatically.
Method 2: Enable Align icons to grid
1.Right-click on an empty space on the desktop then select View ir nuimkite Align icons to grid.
![]()
2.Now again from the view option enable Align icons to grid and see if you are able to fix the issue.
3.If not then from the View option uncheck Auto arrange icons and everything will work out.
Method 3: Uncheck Allow themes to change desktop icons
1. Paspauskite Windows Key + I, kad atidarytumėte Nustatymai, tada spustelėkite Suasmeninimas.
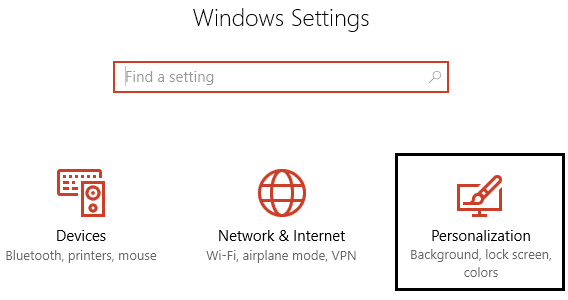
2. Kairiajame meniu pasirinkite tematika tada spustelėkite Darbalaukio piktogramų nustatymai.
![]()
3.Now in the Desktop Icon Settings window uncheck the option “Allow themes to change desktop icons” in the bottom.
![]()
4.Spustelėkite Taikyti ir Gerai.
5. Iš naujo paleiskite kompiuterį, kad išsaugotumėte pakeitimus ir patikrintumėte, ar galite tai padaryti Fix Desktop Icons keep getting rearranged automatically issue.
Method 4: Delete Icon Cache
1.Make sure to save all the work which you are currently doing on your PC and close all the present applications or folder windows.
2.Press Ctrl + Shift + Esc together to open Užduočių vadovas.
3. Dešiniuoju pelės mygtuku spustelėkite "Windows Explorer" ir pasirinkite Baigti užduotį.

4.Click filė tada spustelėkite Run new task.

5. Tipas cmd.exe in the value field and click OK.

6.Now type the following command in cmd and hit Enter after each one:
CD /d %userprofile%AppDataLocal
DEL IconCache.db / a
EXIT
![]()
7.Once all the commands are successfully executed close command prompt.
8.Now again open the Task Manager if you have closed then click File > Run new task.
9.Type explorer.exe and click OK. This would restart your Windows Explorer and Fix Desktop Icons keep getting rearranged issue.

Method 5: Roll back to the previous Windows 10 build
1.First, go to the Login screen then click on Maitinimo mygtukas tada palaikykite Shift tada spustelėkite Iš naujo.
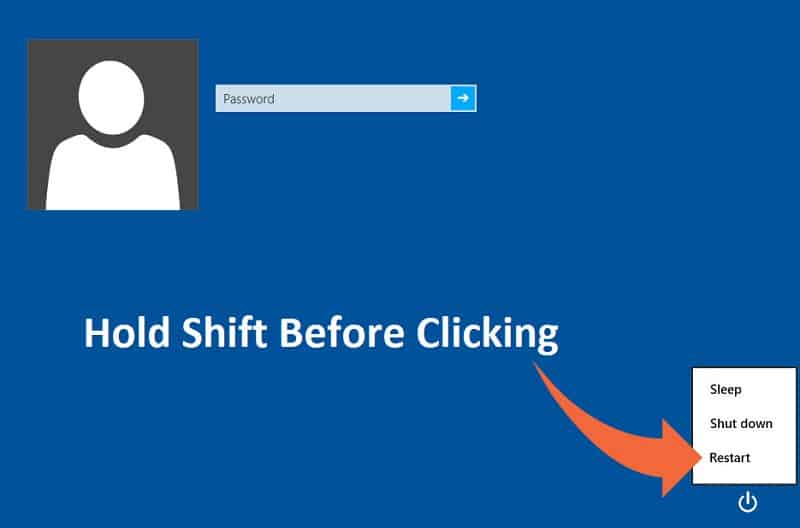
2. Įsitikinkite, kad nepaleidote mygtuko „Shift“, kol pamatysite Išplėstinių atkūrimo parinkčių meniu.

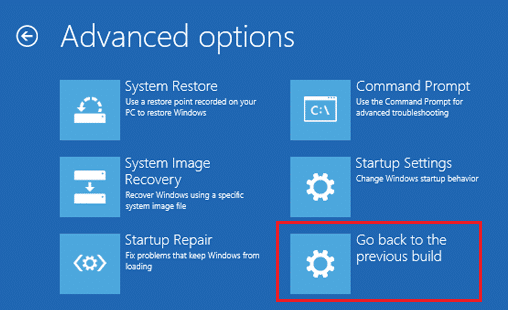
3. Dabar eikite į toliau pateiktą meniu Išplėstinės atkūrimo parinktys:
Trikčių šalinimas > Išplėstinės parinktys > Grįžti į ankstesnę versiją.
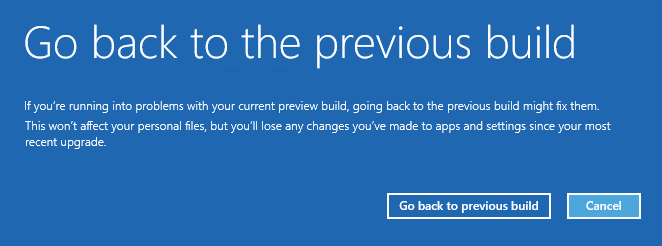
3.After a few seconds, you will be asked to choose your User Account. Click on the User Account, type in your password and click Continue. Once done, choose the option Go Back to the Previous Build again.
Rekomenduota jums:
Tai tau pavyko Pataisyti darbalaukio piktogramos vis pertvarkomos po „Windows 10“ kūrėjų atnaujinimo bet jei vis dar turite klausimų dėl šio vadovo, nedvejodami paklauskite jų komentarų skiltyje.
![Fix WMI Provider Host High CPU Usage [Windows 10]](https://lbsite.org/wp-content/uploads/2023/02/Fix-WMI-Provider-Host-High-CPU-Usage-on-Windows-10.png "Fix WMI Provider Host High CPU Usage [Windows 10]")
