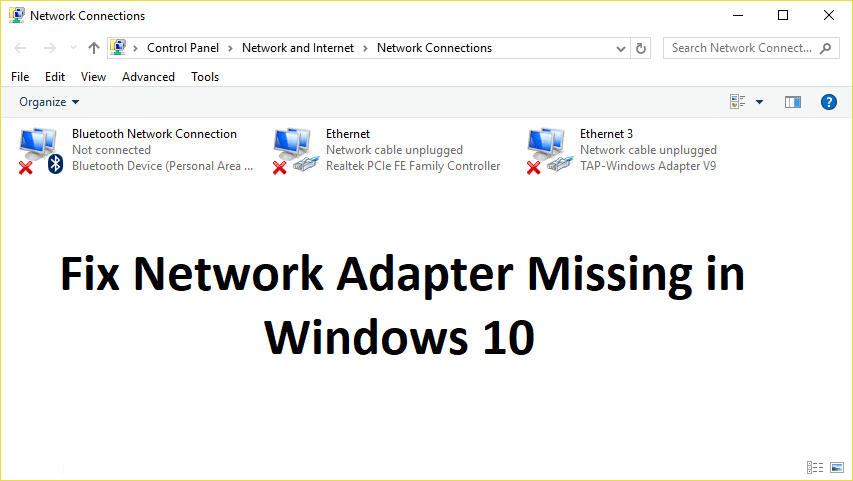
If you don’t see Wireless Adapter under Network Connections neither there is a Network adapter tab under device manager then it seems like your Network Adapter is missing or not detected on your Windows 10 which is a serious issue because you won’t be able to access the Internet until the issue is resolved. In short, when you click on the Wireless icon on the system tray there won’t be any device listed in order to connect to the Internet and if you open Device Manager then you won’t see the Network Adapter tab.
These are the reasons behind the Network Adapter missing issue:
- Network adapter missing in Device manager
- No Network Adapters showing in Device Manager
- Network Adapter Not Detected
- Network Adapter Not Found Windows 10
- No Network Adapter In Device Manager
The main cause of this issue seems to be outdated, incompatible or corrupted Network Adapter drivers. If you have recently upgraded from previous versions of Windows then it’s possible that the old drivers will not work with the new Windows and hence the issue. So without wasting any time let’s see how to actually Fix Network Adapter Missing in Windows 10 issue with the below-listed troubleshooting steps.
Note: Just make sure to uninstall any VPN software on your PC before continuing.
Fix Network Adapter Missing in Windows 10
Būtinai sukurkite atkūrimo tašką, jei kas nors nutiktų.
Method 1: Reboot your Computer
Daugelis iš mūsų žino apie šį labai paprastą triuką. Kompiuterio paleidimas iš naujo kartais gali išspręsti bet kokį programinės įrangos konfliktą, jį paleidus iš naujo. Taigi, jei esate tas, kuris mieliau įjungs kompiuterį miego režimu, verta iš naujo paleisti kompiuterį.
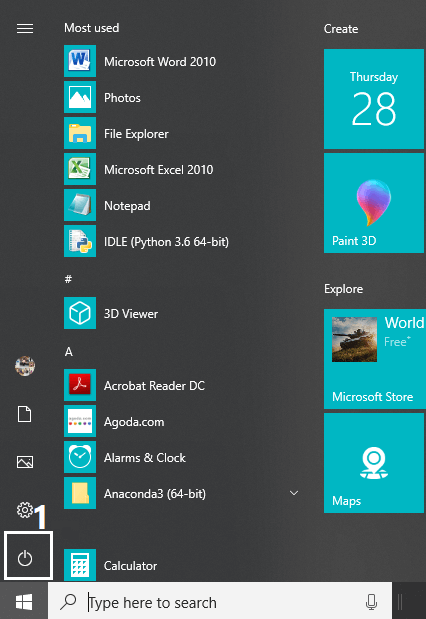
1. Spustelėkite ant Pradėti meniu ir tada spauskite Maitinimo mygtukas galima apatiniame kairiajame kampe.
2. Tada spustelėkite Iš naujo ir jūsų kompiuteris bus paleistas iš naujo.
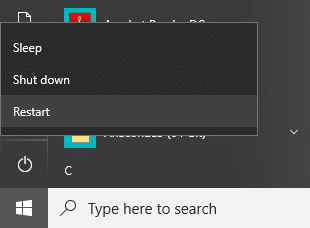
Kai kompiuteris paleidžiamas iš naujo, patikrinkite, ar problema išspręsta, ar ne.
Method 2: Flush DNS and Reset Winsock Components
1. Open elevated Command Prompt.
2. Dabar įveskite šią komandą ir po kiekvienos paspauskite Enter:
ipconfig / spaudai
ipconfig / flushdns
ipconfig / renew

3. Dar kartą atidarykite komandų eilutę ir po vieną įveskite šią komandą ir po kiekvienos paspauskite Enter:
ipconfig /flushdns nbtstat –r netsh int ip reset netsh winsock reset
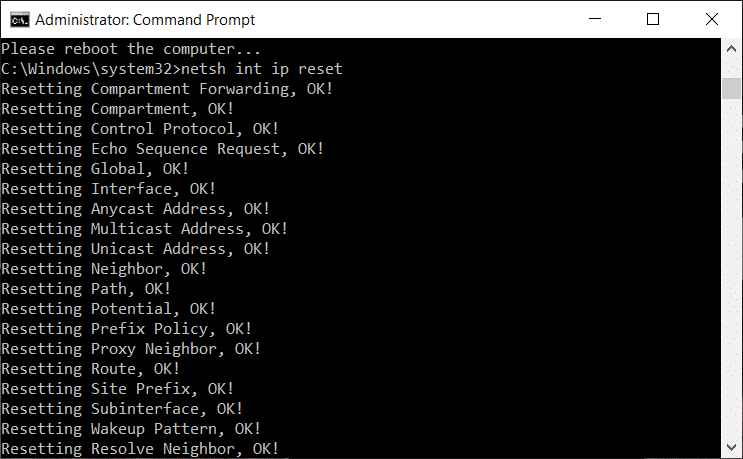
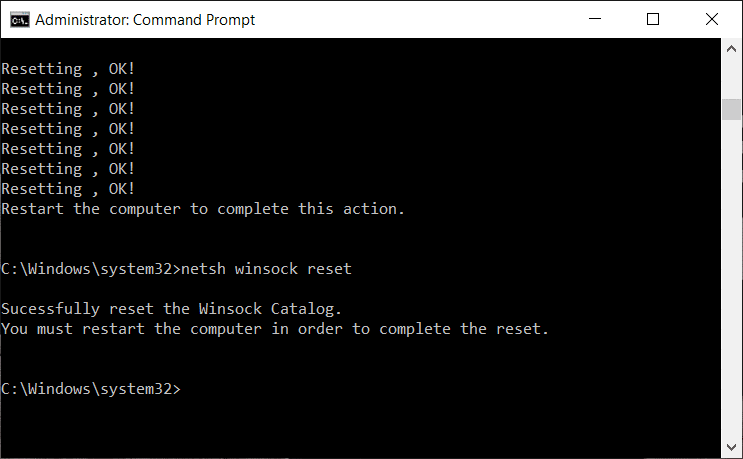
4. Paleiskite iš naujo, kad pritaikytumėte pakeitimus. Atrodo, kad nuplaunamas DNS Fix Network Adapter Driver Issues on Windows 10.
Method 3: Run WWAN AutoConfig Service
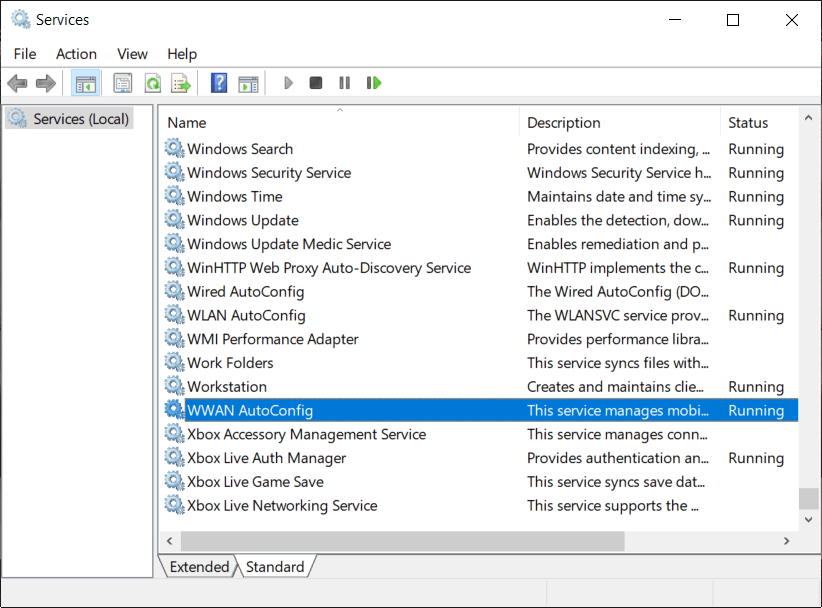
1. Paspauskite „Windows“ klavišą + R, tada įveskite services.msc ir paspauskite "Enter".

2. Raskite WWAN AutoConfig Service in the list (press W to reach to the end of the list quickly).
3. Dukart spustelėkite WWAN AutoConfig Service.
4. If the service is already running then click on Stop, then from the Startup type drop-down select Automatinis.
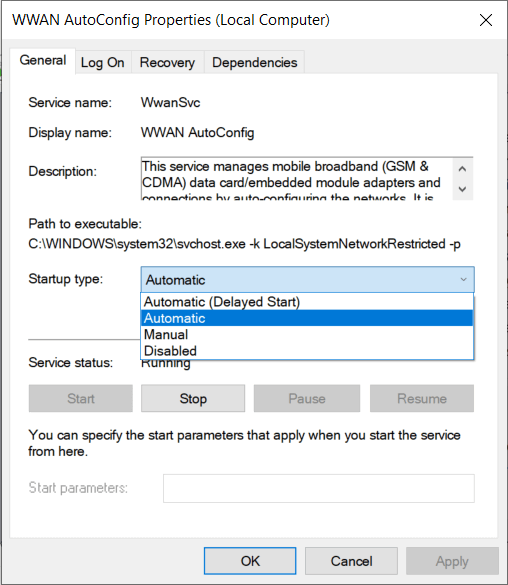
5. Click Apply followed by OK.
6. Dešiniuoju pelės mygtuku spustelėkite WWAN AutoConfig Service ir pasirinkite Pradėti.
4 būdas: atnaujinkite tinklo adapterio tvarkykles
1. Paspauskite „Windows“ klavišą + R ir įveskite „devmgmt.msc“ dialogo lange Vykdyti, kad atidarytumėte įrenginių tvarkytuvė.

2. Išskleisti Tinklo adapteriai, tada dešiniuoju pelės mygtuku spustelėkite savo Wi-Fi valdiklis (pvz., Broadcom arba Intel) ir pasirinkite Atnaujinti tvarkyklės programinę įrangą.

3. Dabar pasirinkite „Automatiškai ieškokite atnaujintos tvarkyklės programinės įrangos".
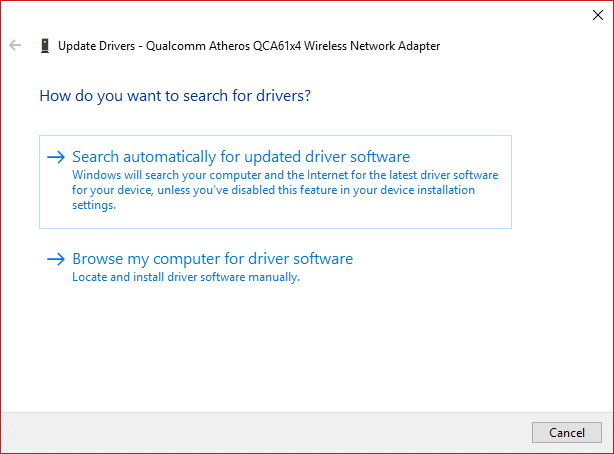
4. Dabar Windows will automatically search for the Network driver update and if new update is found, it will automatically download and install it.
5. Baigę uždarykite viską ir paleiskite kompiuterį iš naujo.
6. Jei vis dar susiduriate su Network Adapter Missing in Windows 10 issue, then again right-click on your WiFi controller and select Atnaujinti tvarkyklę Įrenginių tvarkytuvėje.
7. Dabar Windows atnaujinimo tvarkyklės programinėje įrangoje pasirinkiteNaršykite kompiuterį tvarkyklės programinei įrangai."

8. Dabar pasirinkite „Leiskite pasirinkti iš mano kompiuteryje esančių tvarkyklių sąrašo."

9. Pabandykite atnaujinkite tvarkykles iš išvardytų versijų (būtinai pažymėkite suderinamą aparatinę įrangą).
10. Jei pirmiau minėti veiksmai nepadėjo, eikite į gamintojo svetainėje atnaujinti tvarkykles.

11. Atsisiųskite ir įdiekite naujausią tvarkyklę iš gamintojo svetainės, tada iš naujo paleiskite kompiuterį.
Method 5: Uninstall Network Adapter Drivers
1. Paspauskite „Windows“ klavišą + R, tada įveskite „devmgmt.msc“ ir paspauskite Enter, kad atidarytumėte įrenginių tvarkytuvę.
2. Išskleiskite Network Adapters ir suraskite savo tinklo adapterio pavadinimą.
3. Įsitikinkite, kad jūs užsirašykite adapterio pavadinimą tik tuo atveju, jei kažkas negerai.
4. Right-click on your network adapter and uninstall it.

5. It will ask for confirmation pasirinkite Taip.
6. Restart your PC and Windows will automatically install the network adapter drivers again.
7. If the drivers are not installed automatically then again open the Device Manager.
8. From the Device Manager menu, click on Veikla tada spustelėkite "Nuskaitykite aparatūros pakeitimus".

6 būdas: įsitikinkite, kad „Windows“ yra atnaujinta
1. Paspauskite „Windows Key +“ I to open Settings then click on Atnaujinimas ir sauga.
![]()
2. From the left-hand side, menu click on "Windows" naujinimas.
3. Now click on the “Patikrinti atnaujinimus“ mygtuką, kad patikrintumėte, ar nėra galimų naujinimų.

4. If any updates are pending then click on Atsisiųskite ir įdiekite naujinimus.

5. Once the updates are downloaded, install them and your Windows will become up-to-date.
6. After the updates are installed reboot your PC to save changes.
Method 7: Run Network Adapter Troubleshooter
1. Paspauskite Windows Key + I, kad atidarytumėte nustatymus, tada spustelėkite Atnaujinimas ir sauga.
![]()
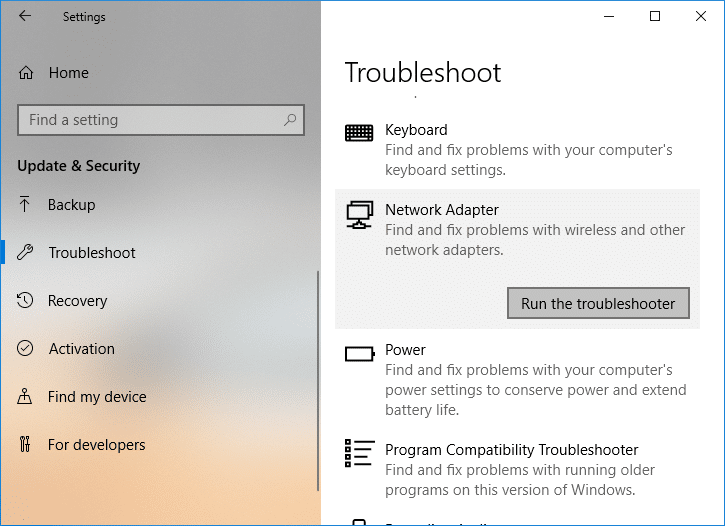
2. Kairiajame meniu pasirinkite Trikčių šalinimas.
3. Dalyje Trikčių šalinimas spustelėkite Interneto ryšys tada spustelėkite Paleiskite trikčių šalinimo įrankį.

4. Vykdykite kitas ekrane pateikiamas instrukcijas, kad paleistumėte trikčių šalinimo įrankį.
5. Jei tai, kas išdėstyta pirmiau, nepadėjo išspręsti problemos, tada lange Trikčių šalinimas spustelėkite Tinklo adapteris tada spustelėkite Paleiskite trikčių šalinimo įrankį.
5. Iš naujo paleiskite kompiuterį, kad išsaugotumėte pakeitimus ir patikrintumėte, ar galite tai padaryti fix the Network Adapter Missing issue.
Method 8: Install Intel PROSet/Wireless Software
Sometimes the problem is caused due to outdated Intel PROSet Software, hence updating it seems to fix Network Adapter Missing in Windows 10 issue. Todėl, eikite čia and download the latest version of PROSet/Wireless Software and install it. This is a third party software which manages your WiFi connection instead of Windows and if PROset/Wireless Software is outdated is can cause drivers issue in Belaidis tinklo adapteris. Hence, read How to Update Network Adapter Drivers on Windows 10.
9 būdas: iš naujo nustatykite tinklo ryšį
1. Paspauskite Windows Key + I, kad atidarytumėte nustatymus, tada spustelėkite Tinklas ir internetas.

2. Kairiajame meniu pasirinkite Statusas.
3. Dabar slinkite žemyn ir spustelėkite Tinklo atstatymas apačioje.

4. Dar kartą spustelėkite „Atstatyti dabar“ skyriuje Tinklo atstatymas.

5. This will successfully reset your network adapter and once it is complete the system will be restarted.
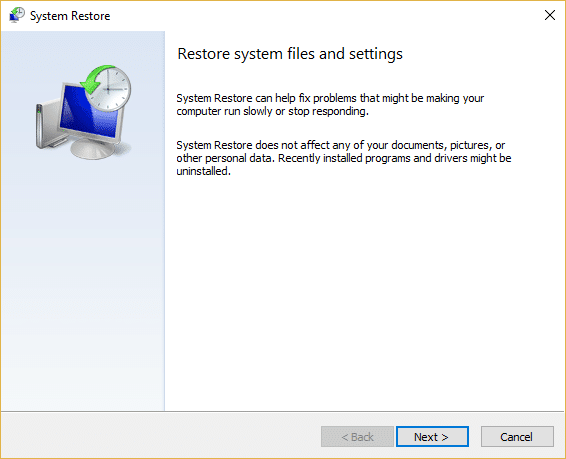
10 būdas: atlikite sistemos atkūrimą
Sistemos atkūrimas visada padeda išspręsti klaidą, todėl sistemos atkūrimas tikrai gali padėti ištaisyti šią klaidą. Taigi, negaišdami laiko paleiskite sistemos atkūrimą resolve Network Adapter Missing issue.
Method 11: Using elevated Command Prompt
1. Paspauskite „Windows“ klavišą + X, tada pasirinkite Komandų eilutė (administratorius).

2. Įveskite šią komandą į cmd ir paspauskite Enter:
netcfg –sn
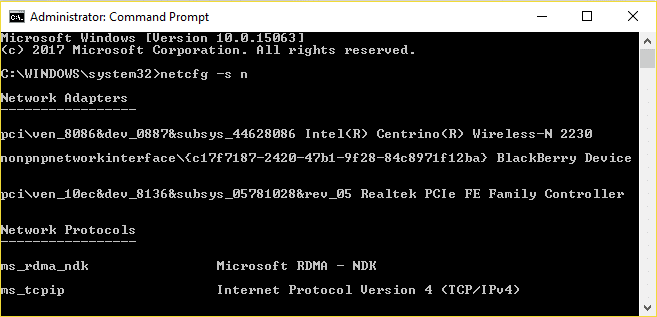
3. This will display a list of networking protocols and in that list find DNI_DNE.
4. If DNI_DNE is listed then type the following command into cmd:
reg ištrinti HKCRCLSID {988248f3-a1ad-49bf-9170-676cbbc36ba3} / va / f
netcfg -v -u days_day
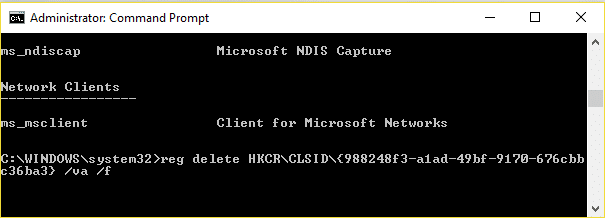
5. If you don’t see DNI_DNE listed then only run the command netcfg -v -u dni_dne.
6. Now if you receive the error 0x80004002 after trying to run the above command then you need to delete the above key manually.
7. Paspauskite „Windows“ klavišą + R, tada įveskite regedit ir paspauskite "Enter".

8. Navigate to the following Registry Key:
HKEY_CLASSES_ROOTCLSID{988248f3-a1ad-49bf-9170-676cbbc36ba3}
9. Delete this key and then again type netcfg -v -u days_day command in cmd.
10. Iš naujo paleiskite kompiuterį, kad išsaugotumėte pakeitimus.
Rekomenduota jums:
Tai tau pavyko Fix Network Adapter Missing in Windows 10 bet jei vis dar turite klausimų dėl šio įrašo, nedvejodami užduokite juos komentarų skiltyje.

