Windows PowerShell is a task-based command-line shell and scripting language designed especially for system administration. You may have seen many of my tutorials where I have mentioned the use of PowerShell. Still, many people are not aware of how to open Elevated Windows PowerShell in Windows 10. While most of us are aware with Command Prompt and how to open elevated Command Prompt but not many of the users are aware of the use of the Windows PowerShell.
The Windows PowerShell is an advanced version of Command Prompt which has ready to use cmdlets (pronounced “command-let”) which can be used to troubleshoot various issues with the operating system. PowerShell includes more than one hundred basic core cmdlets, and you can also write your own cmdlets. Anyway, without wasting any time, let’s see How to Open Elevated Windows PowerShell in Windows 10 with the help of the below-listed tutorial.
7 Ways to Open Elevated Windows PowerShell in Windows 10
Noteikti izveidojiet atjaunošanas punktu, ja kaut kas noiet greizi.
Method 1: Open Elevated Windows PowerShell in Windows 10 Search
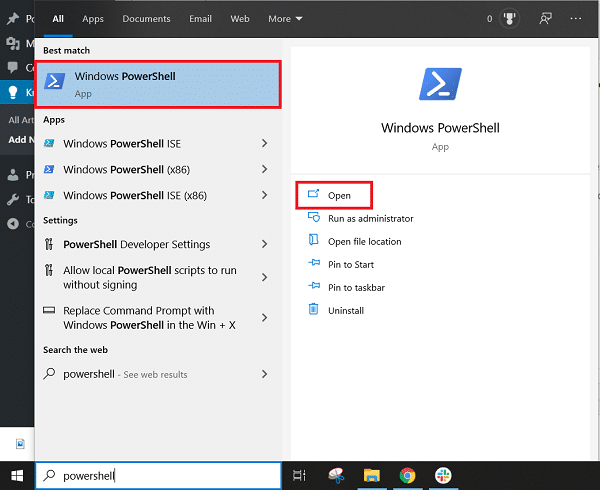
1. Search for Windows PowerShell meklēšanas joslā un noklikšķiniet uz Palaist kā administratoram.
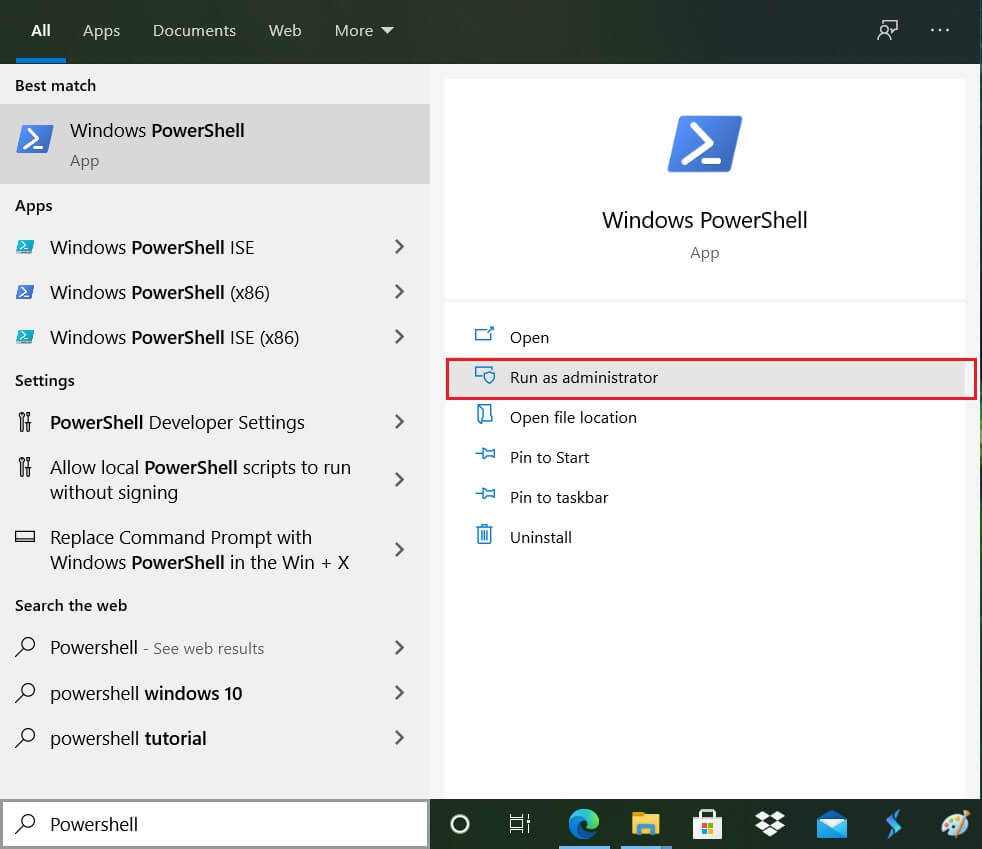
2. If you wish to open unelevated PowerShell, then click on it from the search result.
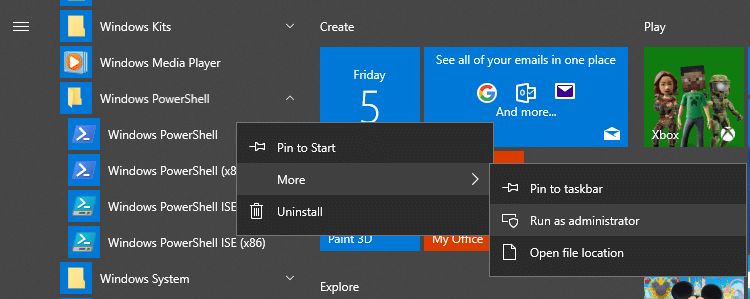
1. Press Windows Key to open Sākt izvēlni.
2. Now Scroll down to the bottom of the list where you will find Windows PowerShell folder.
3. Click on the above folder to expand its content, now right-click on Windows PowerShell and select Palaist kā administratoram.
Method 3: Open Elevated Windows PowerShell from Run Window
1. Nospiediet Windows taustiņu + R, pēc tam ierakstiet PowerShell un nospiediet taustiņu Enter.

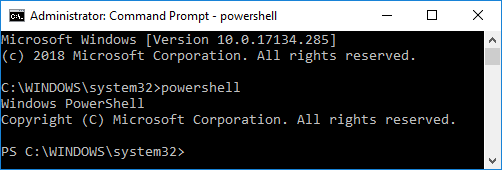
2. Windows PowerShell will launch, but if you want to open elevated PowerShell then type the following command into PowerShell window and hit Enter:
Start-Process PowerShell -Verb runAs
Method 4: Open Elevated Windows PowerShell from Task Manager
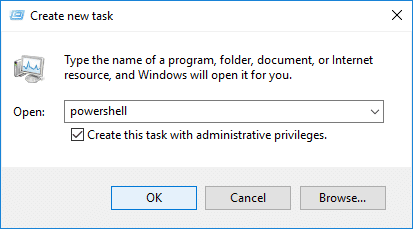
1. Nospiediet Ctrl + Shift + Esc lai atvērtu uzdevumu pārvaldnieku.
2. From the Task Manager menu, click on Failu, then select “Izpildīt jaunu uzdevumu".
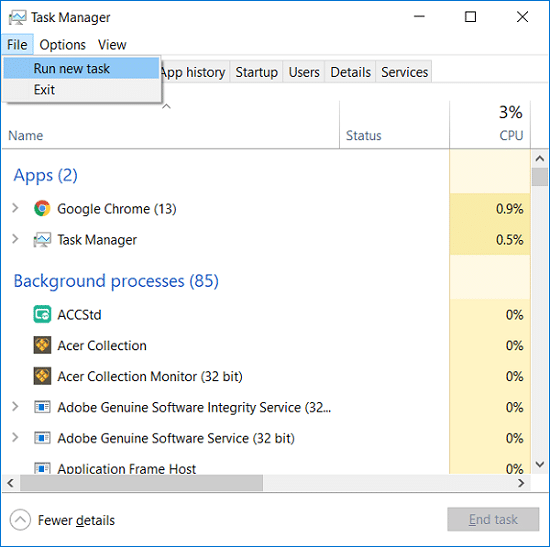
3. Tagad ierakstiet PowerShell un atzīmējiet "Izveidojiet šo uzdevumu ar administratora tiesībām"Un noklikšķiniet Labi.
Method 5: Open Elevated Windows PowerShell in File Explorer
1. Press Windows Key + E to open File Explorer then navigate to the folder or drive where you want to open the PowerShell.
2. Now from the File Explorer ribbon click on File then hover your mouse on “Open Windows PowerShell” un pēc tam noklikšķiniet uz Open Windows PowerShell as administrator.

OR
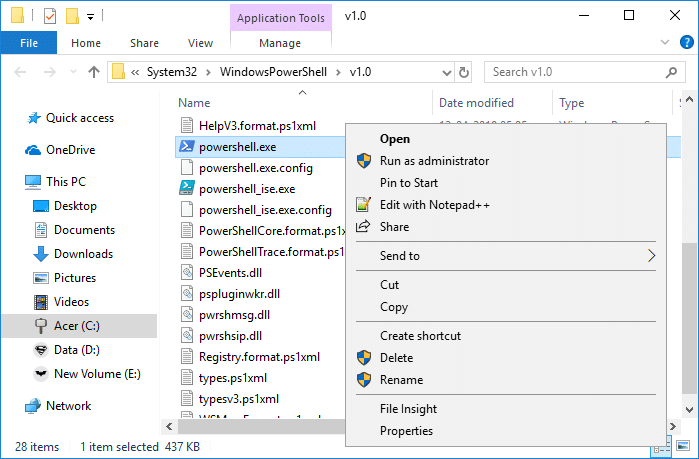
1. Navigate to the following location in the File Explorer:
C:WindowsSystem32WindowsPowerShellv1.0
2. Right-click on powershell.exe then select Palaist kā administratoram.
Method 6: Open Elevated Windows PowerShell in Command Prompt
1. Press Windows Key + Q to bring up search then type Command Prompt pēc tam ar peles labo pogu noklikšķiniet uz tā un atlasiet Palaist kā administratoram.
Piezīme: You can open Elevated Command Prompt using any method you like.
2. Now type the following command into cmd and hit Enter:
PowerShell
1. Go to Start menu search and type PowerShell and click on the search result.
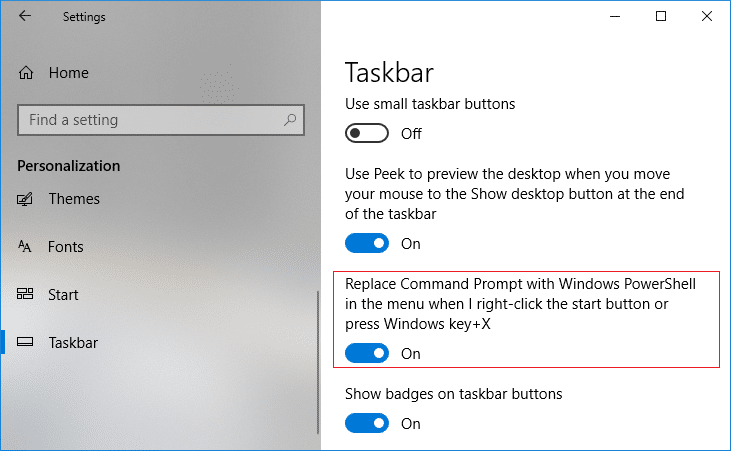
2. If you don’t see PowerShell in the Win + X menu then press Windows Key + I to open Settings.
3. Now click on Personalization then from the left-hand menu select Uzdevumjosla.
4. Pārliecinieties, ka Iespējojiet pārslēgšanu zem "Replace Command Prompt with Windows PowerShell in the menu when I right-click the start button or press Windows key + X".
5. Now again follow step 1 to open Elevated Windows PowerShell.
Ieteicams:
To jūs esat veiksmīgi iemācījušies How to Open Elevated Windows PowerShell in Windows 10 you have but if you still have any queries regarding this tutorial then feel free to ask them in the comment’s section.

