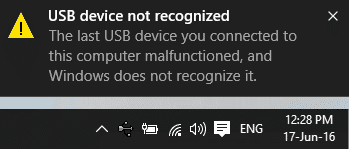
If you attach an external USB device to Windows 10 and get an error message saying “USB not recognized. Device Descriptor Request Failed” then you are at the right place as today we will see How to fix this error. The main issue is that you won’t be able to access your USB device because of this error message. If you will click on the error notification or you will go into device manager then right-click on the malfunctioned device and select Properties you will see the error message “The last USB device you connected to this computer malfunctioned, and Windows does not recognize it.”
One more thing to note here that the device which malfunctioned will be labelled as “Unknown USB Device (Device Descriptor Request Failed)” with a yellow triangle which will confirm that your device is not working properly or USB is not recognized as it is labelled as Unknown USB Device. So without wasting any time let’s see How to Fix Unkown USB Device (Device Descriptor Request Failed) with the help of the below-listed tutorial.
What is Device descriptor request failed Error?
The USB device descriptor is responsible for storing information related to various USB devices and recognizing these USB devices in future when connected to the system. If the USB is not recognized, then the USB device descriptor is not working properly on Windows 10 hence you will face the Device Descriptor Request Failed error. Depending on your system configuration, you may face one of the following error messages:
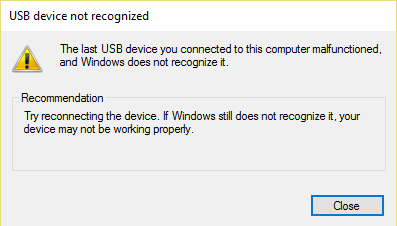
USB device not recognized. The last USB device you connected to this computer malfunctioned, and Windows does not recognized.
One of the USB devices attached to this computer has malfunctioned, and Windows does not recognize it.
Try reconnecting the device. If Windows still does not recognize it, your device may not be working properly.
Unknown USB device (device descriptor request failed) code 43
USBDEVICE_DESCRIPTOR_FAILURE
Causes of Device Descriptor Request Failed Error
- Outdated, corrupted or incompatible USB device drivers
- Virus or malware has corrupted your system.
- USB port is malfunctioned or not working properly
- BIOS is not updated which might cause this issue
- USB device might be damaged
- Windows cannot find the description of the USB device you might be using
Whakatikahia te Tono Whakaahua Pūrere i Rahua (Pūrere USB Kaore i te mohiotia)
Me whakarite ki te hanga i tetahi waahi whakaora mena ka raru tetahi mea.
Method 1: Change USB Selective Suspend Settings
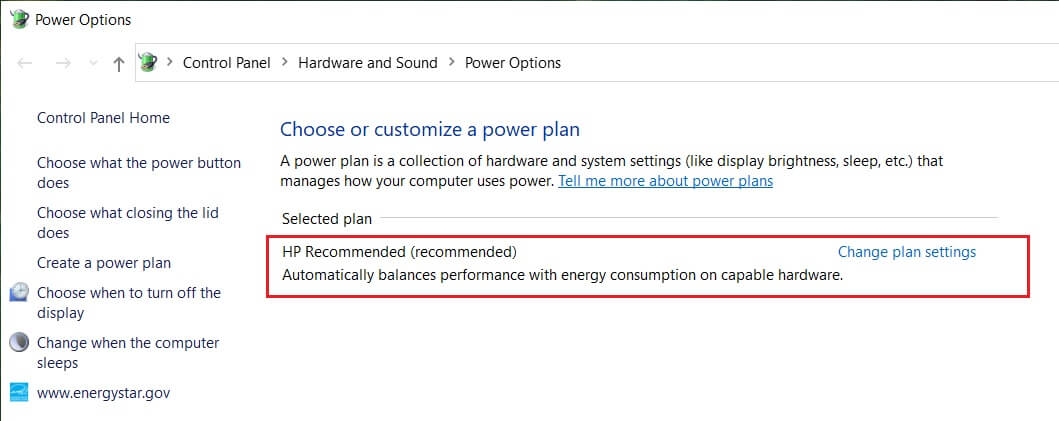
1. Paato matau-i runga i te battery icon on Taskbar ka tīpako Kōwhiringa Mana.

2. Next to your currently active Power Plan, click on Hurihia nga tautuhinga mahere.
3. Na pāwhiritia Hurihia nga tautuhinga mana whakamua.
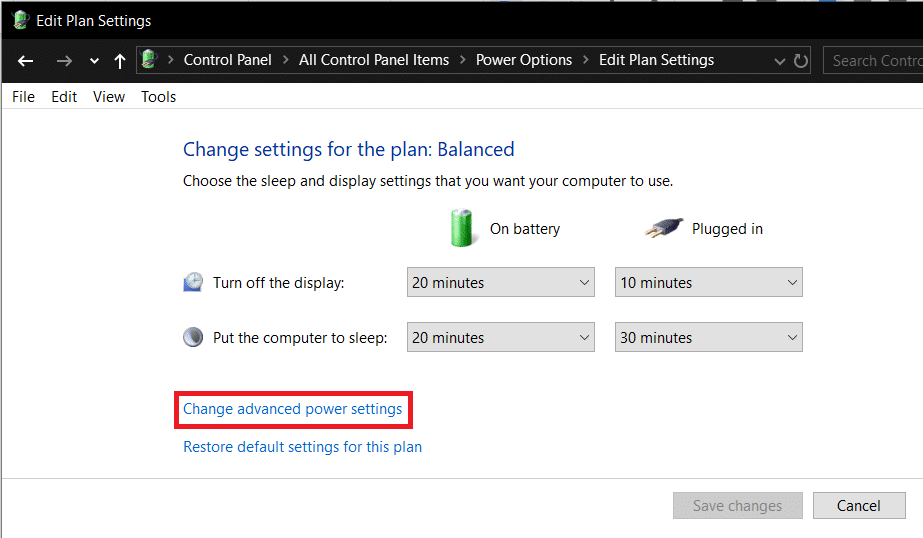
4. Rapua Tautuhinga USB kātahi ka pāwhiritia i runga i te Plus (+) ata ki te whaanui.
5. Again expand Ko te tautuhi i te tautuhinga a USB and make sure to select monokia for both “On Battery” and “Plugged in”.
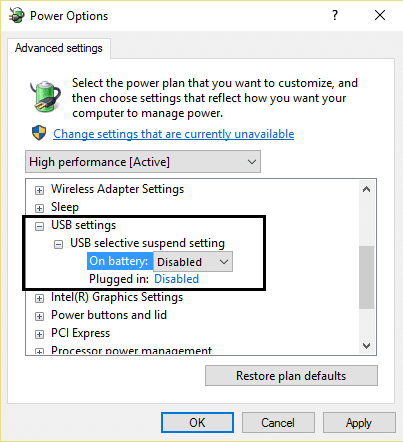
6. ClickApply followed by OK a Tautoko mai your PC to save changes.
Method 2: Use Hardware and Devices troubleshooter
1. Press Kī Windows + R ka pato mana and hit enter to open the Control Panel.

2. Now inside Control Panel Search box type te raruraru ka tīpako Raparongoā.

4. After that, click on Configure a device link i raro i Pūmāriki me te Rongo and follow the on-screen instruction.
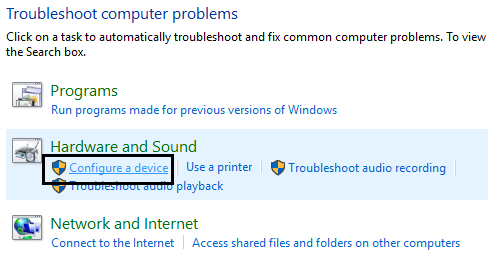
5. If the problem is found, click Hoatu tenei whakatika.
See if you’re able to Whakatikahia te Tono Whakaahua Pūrere i Rahua (Pūrere USB Kaore i te mohiotia), ki te kore ka haere tonu.
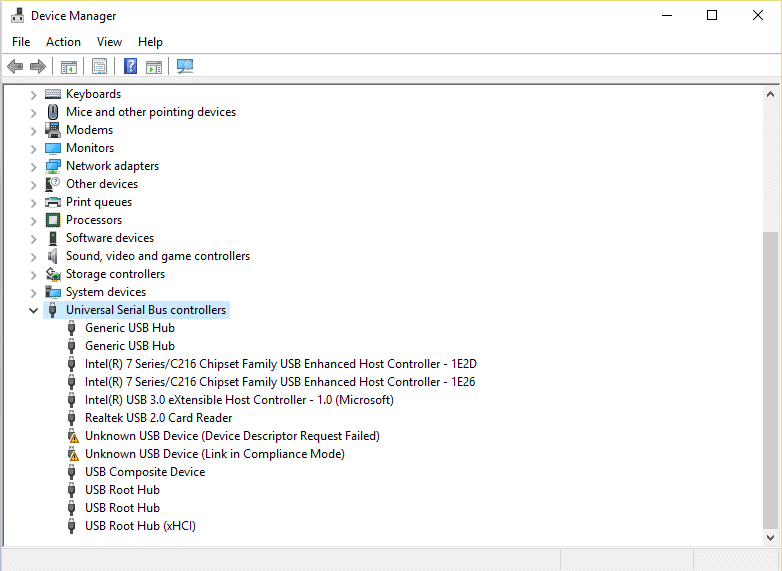
Method 3: Uninstall Unknown USB Drivers
1. Press Kī Windows + R ka pato devmgmt.msc and hit enter to open Kaiwhakahaere Pūrere.

2. In device Manager expands Ko nga kaiwhakahaere Bus Serial Universal.
4. Connect your device, which is not being recognized by Windows.
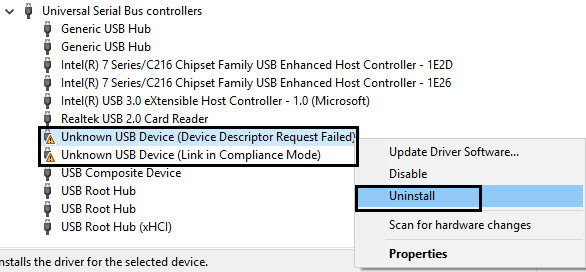
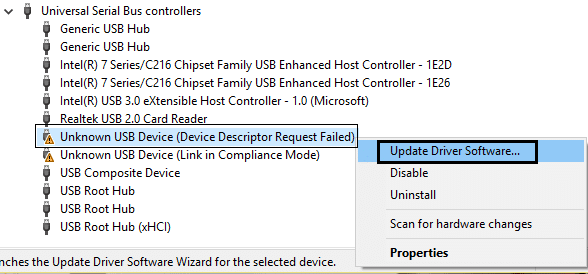
5. Ka kite koe i te Unknown USB device (Device Descriptor Request Failed) with a yellow exclamation mark under Ko nga kaiwhakahaere Bus Serial Universal.
6. Now right-click on it and select Wetetāuta.
Tuhipoka: Do this for all the devices under Ngā Kaihautū Ahurangi Tere which have a yellow exclamation mark.
7. Restart your PC, and the drivers will be automatically installed.
Method 4: Disable Fast Startup
1. Press Windows Key + R ka patopato mana ka pa ki te Enter kia tuwhera Paewhiri Mana.
2. Pāwhiritia te Pūmāriki me te Rongo ka turaki i runga Kōwhiringa Mana.
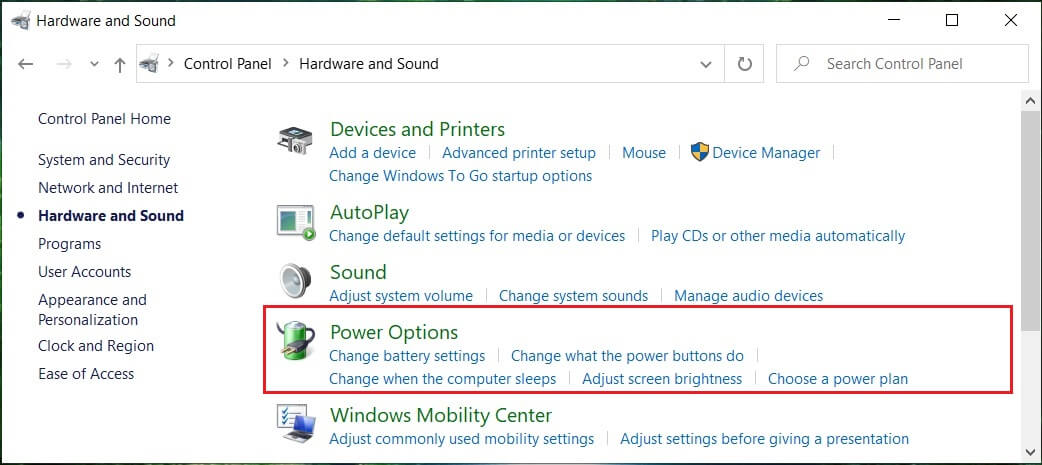
3. Then, from the left window pane select “Choose what the power buttons do.”

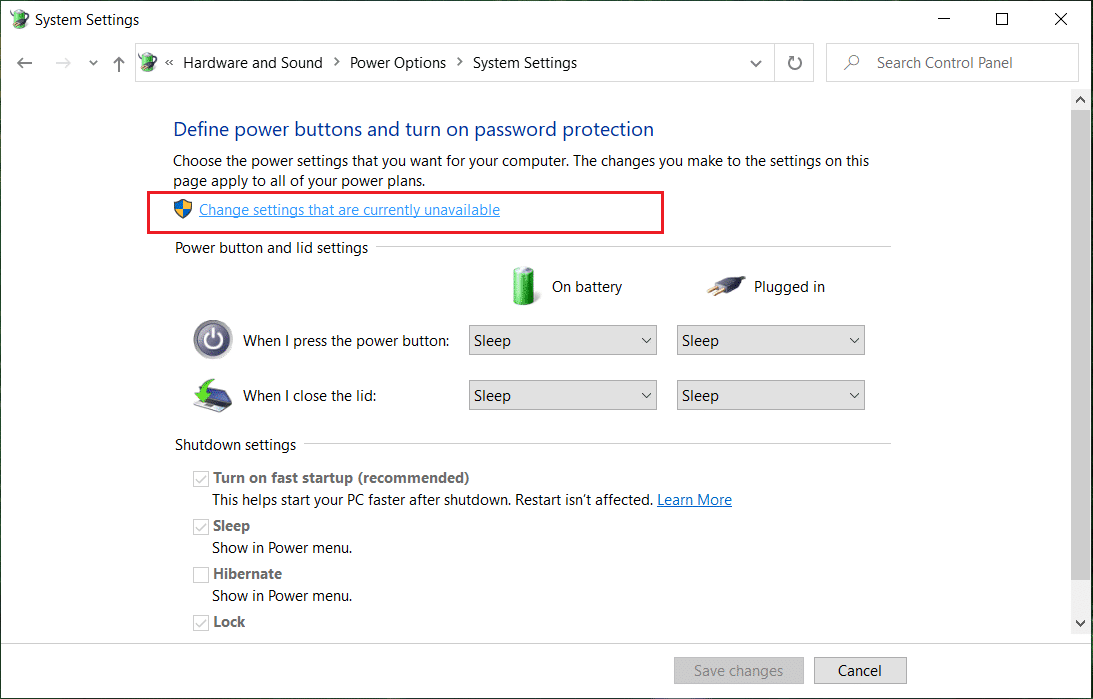
4. Na ka pa ki runga “Change settings that are currently unavailable.”
5. Uncheck “Whakatikahia te whakaoho tere” and click on Save changes.
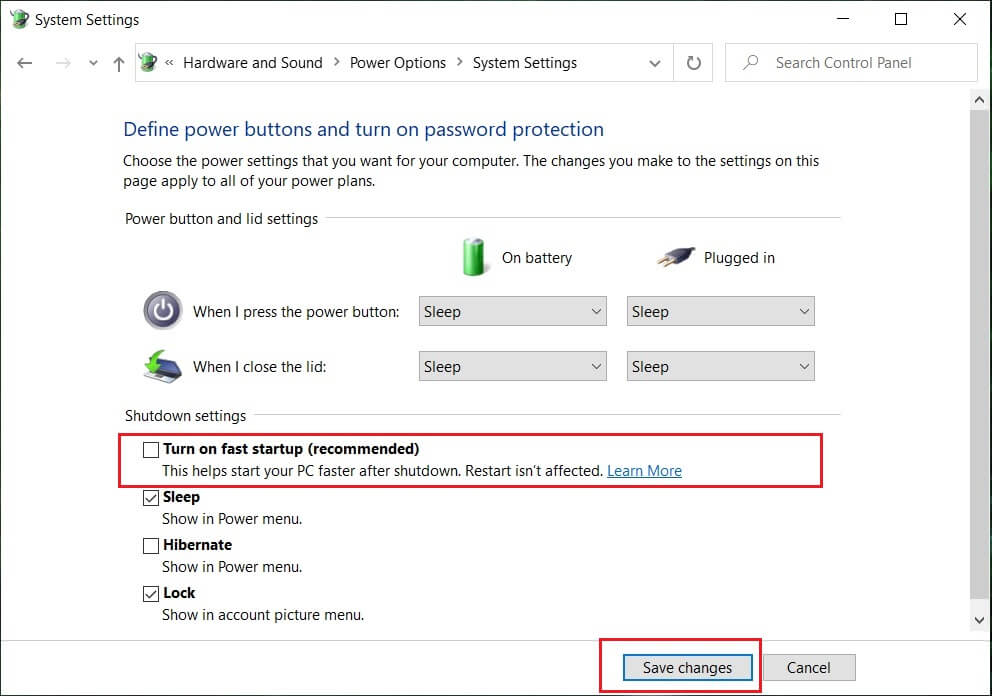
6. Reboot your PC to save changes and see if you’re able to Fix Device Descriptor Request Failed (Unkown USB Device).
Method 5: Update Generic USB Hub
1. Press Kī Windows + R ka pato devmgmt.msc ka tomo ki te whakatuwhera i te Kaiwhakahaere Pūrere.
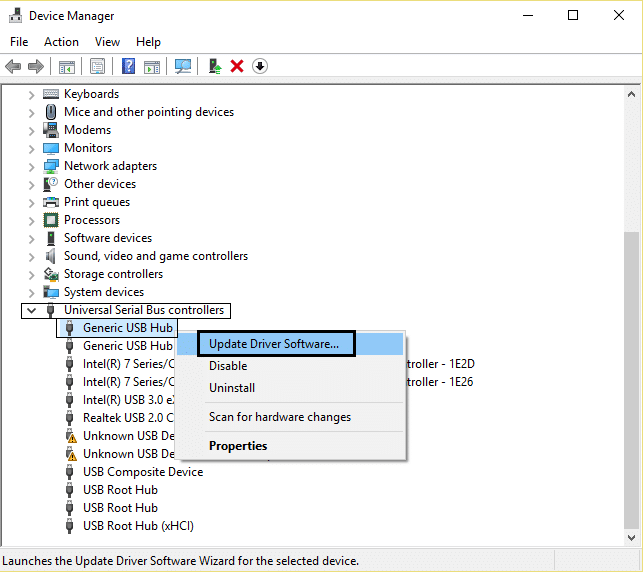
2. Whakanuia Ko nga kaiwhakahaere Bus Serial Universal.
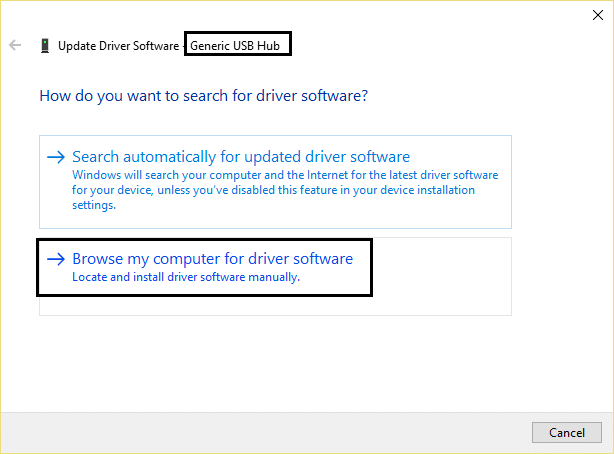
3. Paatohia-matau i runga Hub Hub USB ka tīpako "Whakahou Atekōkiri."
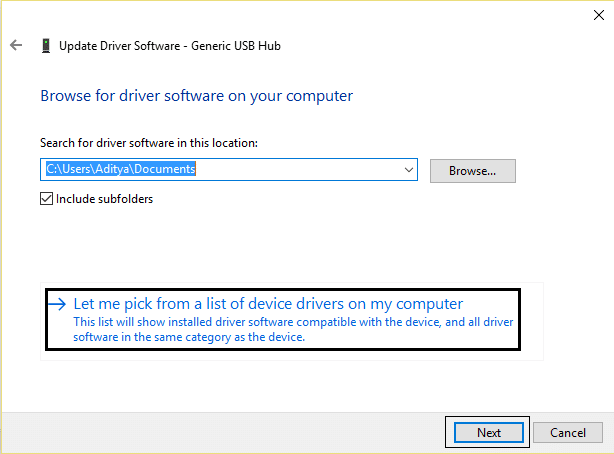
4. Na, tohua Tirohia taku rorohiko mo te taraiwa.
5. Click on. Tukuna ahau ki te tiki mai i te rarangi o nga taraiwa kei runga i taku rorohiko.
6. Tīpako Hub Hub USB mai i te rarangi o nga taraiwa ka paato Tuhinga o mua.
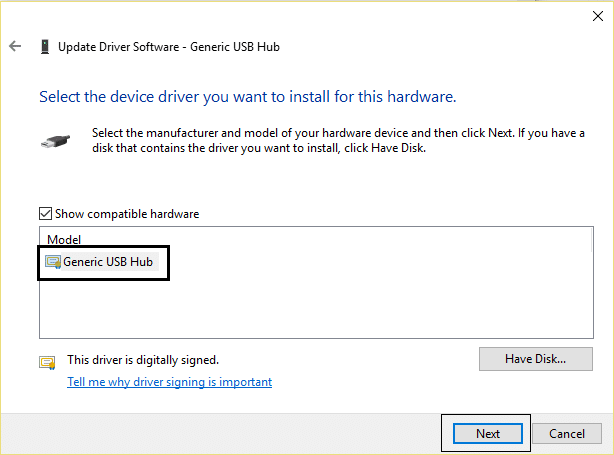
7. Wait for Windows to finish the installation, then click Katia.
8. Make sure to follow the steps 4 to 8 for all the “Puka USB Generis” kei raro i nga kaiwhakahaere Bus Serial Universal.
9. If the problem is still resolved, follow the above steps for all the devices listed under Ko nga kaiwhakahaere Bus Serial Universal.
This method may be able to Fix Device Descriptor Request Failed (Unkown USB Device), if not then continue.
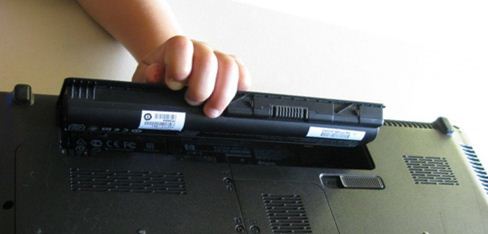
Method 6: Remove Power Supply to Fix USB Device Not Recognized
If for some reason your laptop fails to deliver power to USB Ports, then it’s possible that the USB Ports might not work at all. To fix the issue with the laptop power supply, you need to shut down your system completely. Then remove the power supply cable and then remove the battery from your laptop. Now hold the power button for 15-20 seconds and then again insert the battery but don’t connect the power supply. Power ON your system and check if you’re able to Fix Device Descriptor Request Failed (Unkown USB Device).
Method 7: Update BIOS to the latest version
Performing BIOS update is a critical task, and if something goes wrong it can seriously damage your system; therefore, expert supervision is recommended.
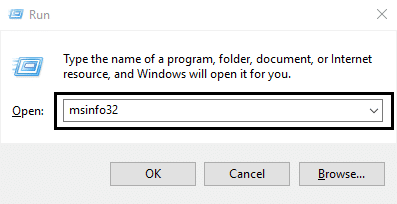
1. The first step is to identify your BIOS version, press Windows Key + R then type “msinfo32” (without quotes) and hit enter to open System Information.
2. Kotahi te Mōhiohio pūnaha window opens locate BIOS Version/Date then note down the manufacturer and BIOS version.
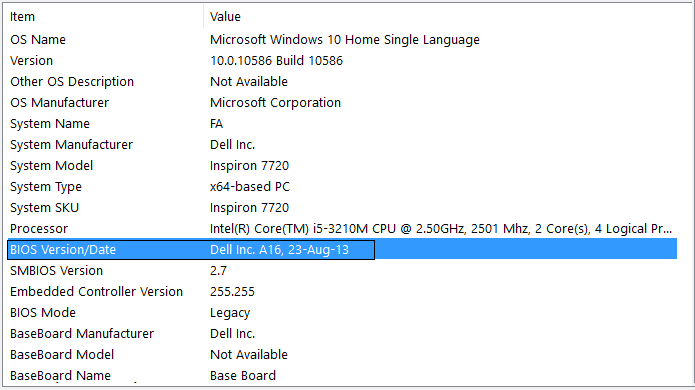
3. Next, go to your manufacturer’s website, e.g. in my case it’s Dell, so I will go to Paetukutuku a Dell and then enter my computer serial number or click on the auto-detect option.
4. Now, from the list of drivers shown, I will click on BIOS and will download the recommended update.
Tuhipoka: Do not turn off your computer or disconnect from your power source while updating the BIOS or you may harm your computer. During the update, your computer will restart, and you will briefly see a black screen.
5. Once the file is downloaded, just double-click on the .exe file to run it.
6. If you have followed all the above steps correctly, you may be able to successfully update your BIOS to the latest version.
Manakohia:
Koira kua angitu koe Whakatikahia te Tono Whakaahua Pūrere i Rahua (Pūrere USB Kaore i te mohiotia) but if you still have any queries regarding this tutorial feel free to ask them in the comment’s section.
![How to Delete Win Setup Files in Windows 10 [GUIDE]](https://lbsite.org/wp-content/uploads/2023/02/1675348889_How-to-Delete-Win-Setup-Files-in-Windows-101.jpg "How to Delete Win Setup Files in Windows 10 [GUIDE]")

)