It’s been a long time since Apple was a distant runner-up to Microsoft in the personal computer world. Still, Windows is the most popular desktop operating system (OS). If you’re primarily a Windows user, you may need to dip your toes in the Mac world infrequently. Instead of buying a MacBook, You could install macOS in a virtual machine on your Windows PC.
Can I Run macOS on Windows?
If you’re a Windows power user, you know you can run Linux or other versions of Windows within Hyper-V. If you’re a Mac power user, you know you can run Windows on a Mac with Boot Camp, or a virtual machine like VMWare Fusion, Parallels, or VirtualBox. But, can you run a macOS on Windows? You could run macOS on VMWare in Windows, but using VirtualBox is free.
You can install macOS in VirtualBox on Windows if you have:
- A legally obtained copy of a macOS
- At least 2 GB of spare RAM
- A 64-bit based CPU with at least 4 logical CPUs
- Administrator access on the PC
Fortunately, many computers today exceed the minimum hardware requirements.
Get a Copy of macOS
Open the Apple App Store and download a copy of BigSur. It’s an entire operating system, so it’s a large download. Make sure you’ve got the space and time to download it. If you don’t have access to download macOS BigSur from the App Store, we don’t recommend using other versions found on the internet, for security reasons.
Install VirtualBox on Windows
The newest version of VirtualBox that this process appears to work with is VirtualBox v6.1.26. Go to the VirtualBox 6.1.26 download pae ka kowhiri VirtualBox-6.1.26-145957-Win.exe. Also select the VirtualBox Extension pack Oracle_VM_VirtualBox_Extension_Pack-6.1.26-145957.vbox-extpack.

- Install VirtualBox by running the downloaded installer.

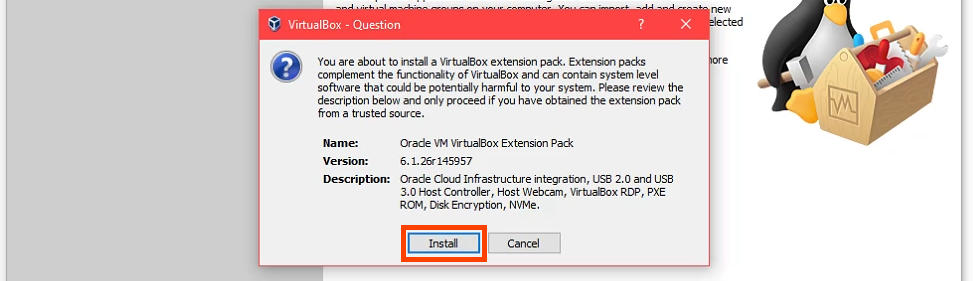
- When the VirtualBox installation is complete, Install the VirtualBox extension pack.
Create a Virtual Machine In VirtualBox
Think of creating a virtual machine as building a computer inside your computer. This gives macOS its own place to install to and allocates the resources it needs to work.
- Tīpakohia te New pātene.

- Enter a name for the virtual machine in the ingoa field. A simple name is easier to work with, like MacOS. Select where the macOS virtual machine will be installed in the Machine Folder field. For a multi-disk PC, pick a disk with at least 100GB of free space. If possible, pick an SSD disk. That will help performance. Or leave it as the default. VirtualBox will automatically set the momo Tuhinga o mua Mac OS X a putanga Tuhinga o mua Mac OS X (64-bit) based on the name entered for the VM.

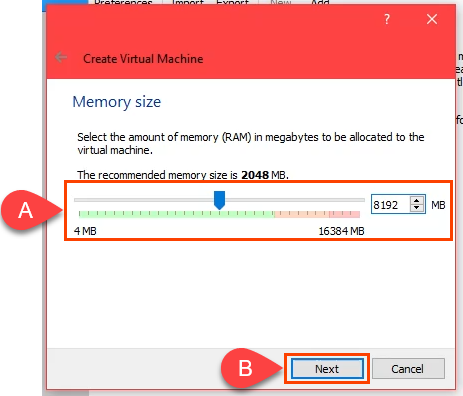
- Allocate as much memory as possible for the macOS VM without exceeding 50% of total memory. Your PC still needs resources too.
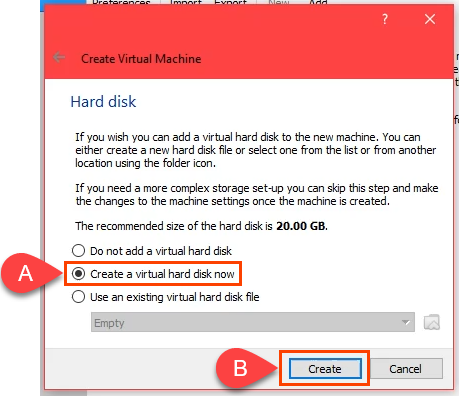
- Me whakarite tena Create a virtual hard disk now is selected and select Waihanga kia haere tonu.
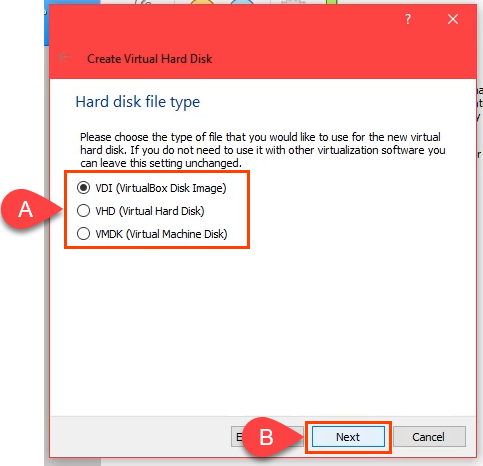
- Choose a hard disk file type. The default VHD is good. Or choose another one based on what you need.
- VDI (VirtualBox Atahanga Kōpae): Only works in VirtualBox. If you might migrate the VM to another VM host like Hyper-V or VMWare, don’t choose this one.
- VHD (Virtual Hard Disk): Good for migrating the VM to Hyper-V.
- VMDK (Virtual Machine Disk): Good for migrating the VM to VMWare.
- If you’re creating the macOS on an SSD or nvMe drive, you can select Dynamically allocated. SSDs are fast enough to resize without affecting performance much. If you’re not certain, choose Rahi piri. Tīpako Panuku kia haere tonu.

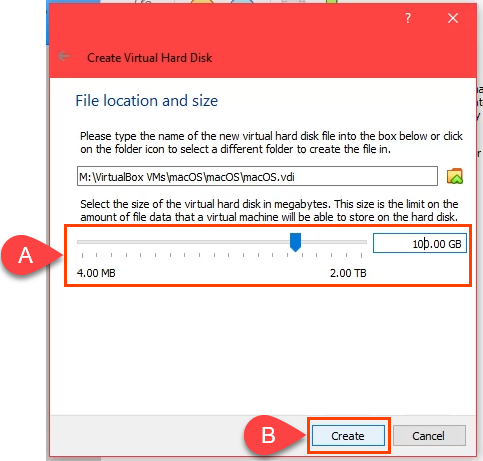
- I runga i te File location and size screen, leave the default folder path. Allocate a minimum of 60 GB for the virtual hard disk. If you plan on installing several programs or upgrading the macOS to Monterey, use at least 100 GB. Select Waihanga kia haere tonu.
- When the VM creation process ends, select the macOS VM and select the tautuhinga pātene.

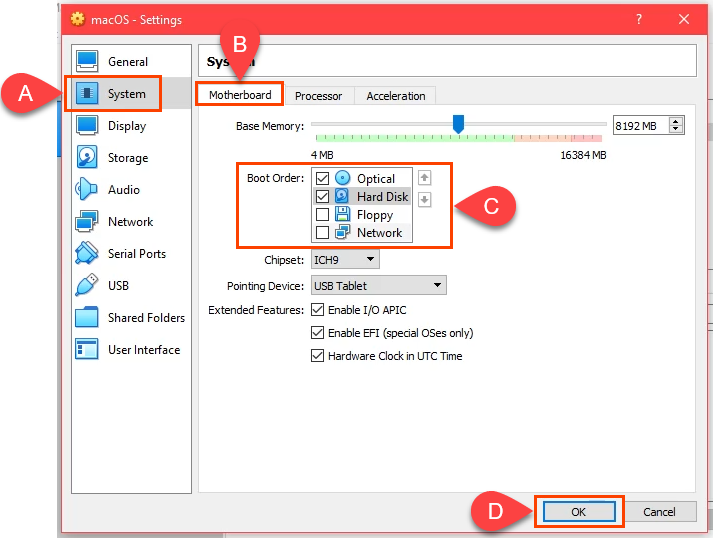
- Haere ki te pūnaha page then the kaupapa tab.In the Whakatau Whakaara field uncheck kōpae pīngore. Use the up and down arrows to adjust the boot order so Optical is first, and Kōpae Hard is second. The defaults for the remaining options are good to leave as is.
- Neke ki te pūtukatuka tab. Adjust Processor(s) to at least 2 CPUs. If your CPU has 4 cores and 8 logical processors, VirtualBox will show that you have up to 8 CPUs to use. Don’t use more than half. Leave Kapene Whakamate at 100 orau a Whakahohe PAE/NX should be selected by default as well. Select OK kia haere tonu.

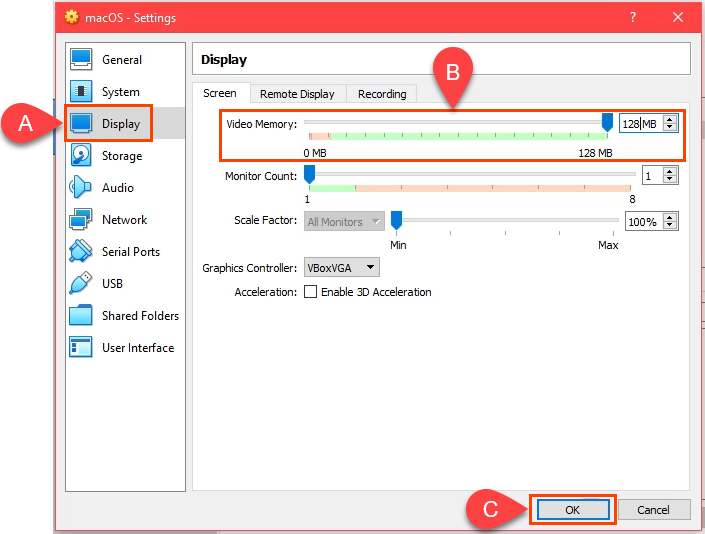
- Haere ki te whakaatu page, then the Mata tab. Max out Pūmahara ataata Tuhinga o mua 128MB. Leave the defaults for the other options on this tab selected.
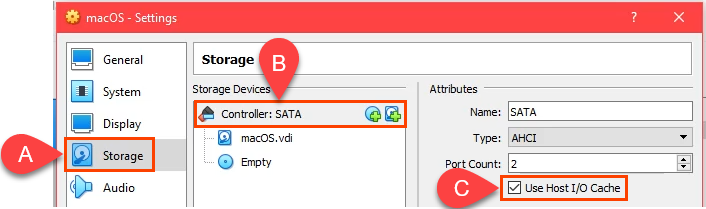
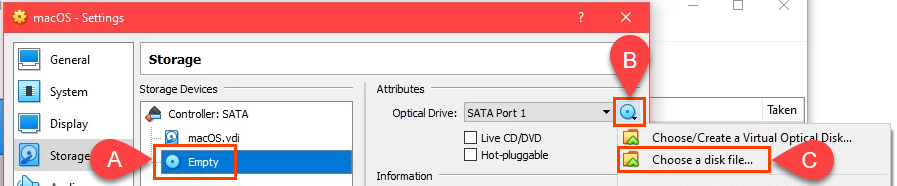
- Haere ki te Storage whaarangi Tohua Controller: SATA and then check the Whakamahia te Kaihaututu I / O Keteroki box. Then select the Whakawatea taputapu rokiroki.
Select the DVD icon next to the Ko te Opana Drive field. Then select Choose a disk file. Navigate to where you stored the macOS .iso download and select it. Select OK kia haere tonu.
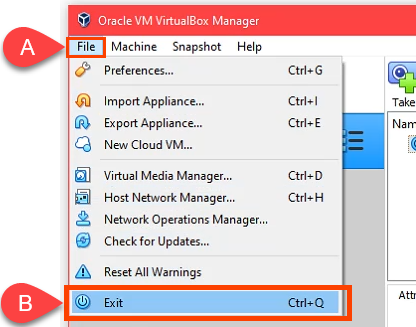
- To complete the next step, exit VirtualBox. The next step won’t work if you don’t exit it or it keeps running as a zombie process. You will not be able to create the macOS VM. After closing VirtualBox, open Kaiwhakahaere Tūmahi and ensure the process is not listed.
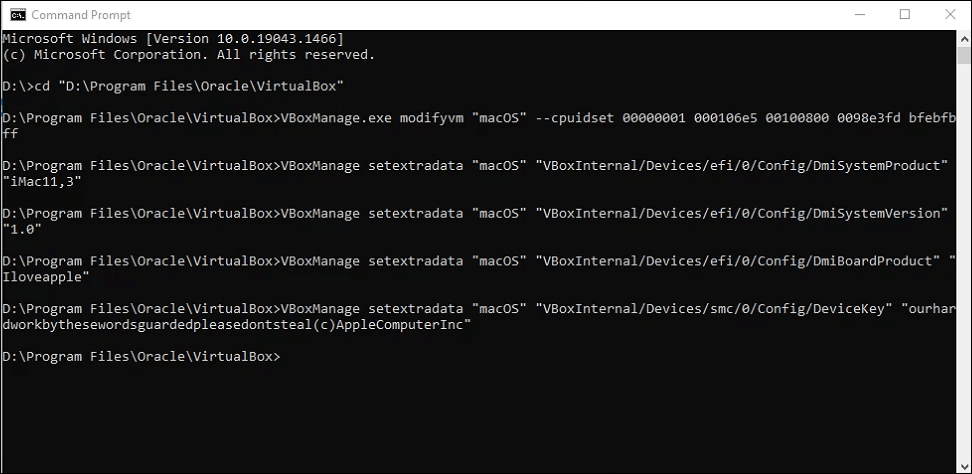
- Go to GitHub and get the VirtualBox macOS codes. Copy them from there and paste them into Notepad. The codes will need to be edited to match your macOS VM situation.
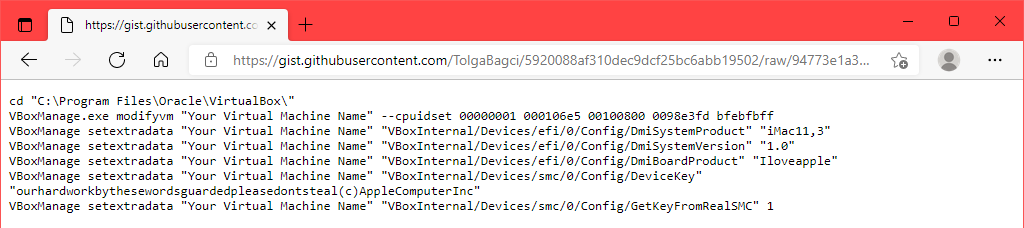
If you installed VirtualBox to a location different from what’s shown in the first line, edit the first line to match.

In the remaining lines, change Your Virtual Machine Name to macOS, the name you gave this VM.

- Whakatūwheratia te Whakaaetia te Whakatairanga as Kaiwhakahaere. Copy the first line of code and enter it. This will change the base directory in the Command prompt to where you installed VirtualBox. Then copy, paste, and run each line by itself in the Command prompt.
Install macOS Big Sur
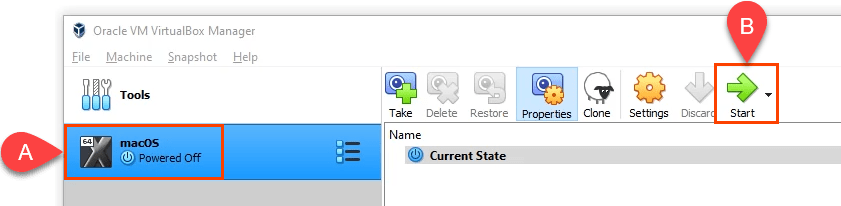
- When the last command finishes, close the Command Prompt and open VirtualBox again. Choose your MacOS VM and select Tīmata.
- You’ll see a lot of white text on a black background. This can take a few minutes. If the white text and black background step continues for more than 15-20 minutes, it’s probably not going to work. You’ll see the Apple icon and a progress bar. If you get this far, it’s probably going to work.

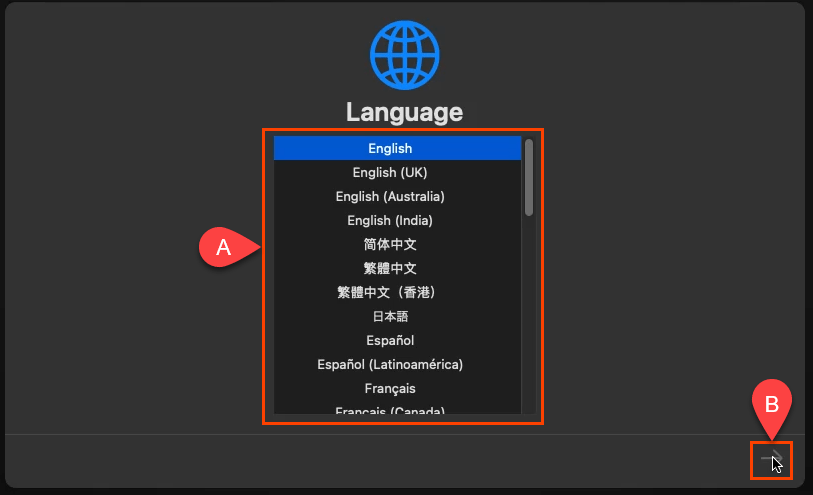
- Next you’ll see the Reo screen. Choose the language you prefer and select the next arrow to go to the macOS Recovery screen.
- Tīpakohia Rapu Kōpae.

- I runga i te Rapu Kōpae mata, tohua te VBOX KAUPAPA KAUPAPA KAUPAPA in the left column and select Mukua.

- It will ask you to confirm that you want to erase it. You need to give the volume a new name, too. Any name will do. Select Mukua kia haere tonu.
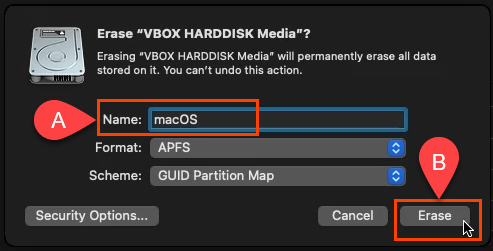
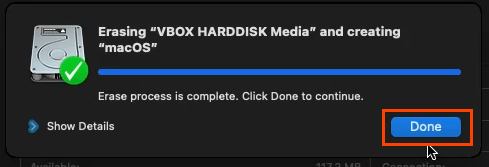
- Once the volume is erased and renamed, select mahia kia haere tonu.
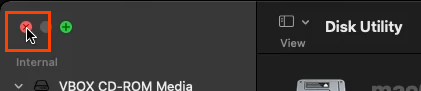
- Katia te Rapu Kōpae matapihi.
- I runga i te Whakaora mata, tīpako Install macOS Big Sur a ka tonu.
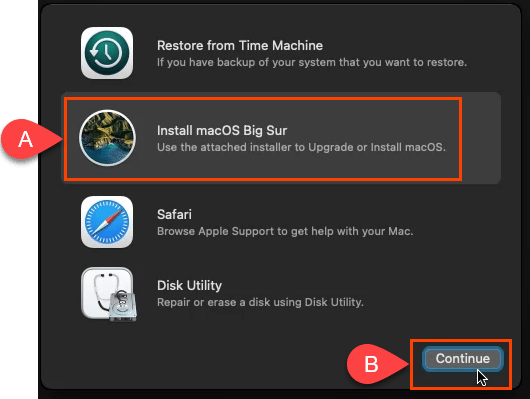
- It asks you to tonu again. Then it will ask you to agree to the software license agreement (SLA) twice. Agree if you want to continue.
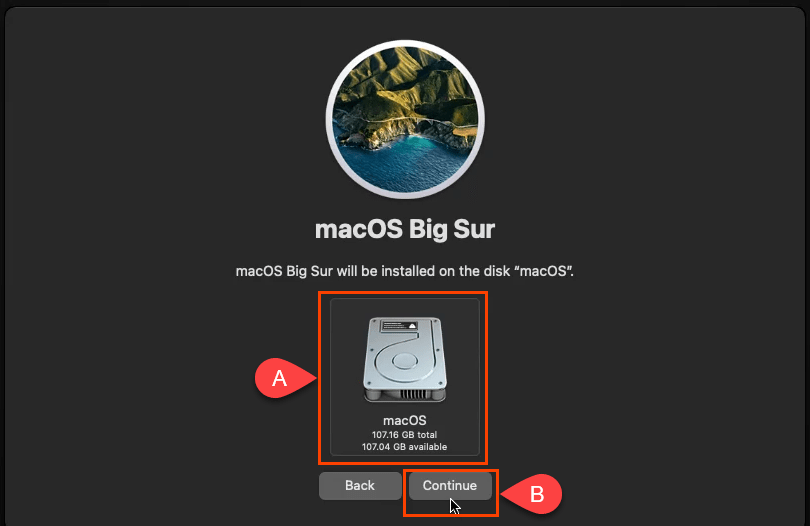
- Select the disk to install macOS Big Sur on. Only your macOS disk should be showing so click on that. Then select tonu.
- It starts installing. The screen might say that there’s about 12 to 18 minutes remaining. It’s not correct as this part can take an hour.

- It will go to a black screen with white text, then to a gray screen with the Apple logo that says, “Less than a minute remaining…” There is a lot more than a minute remaining.

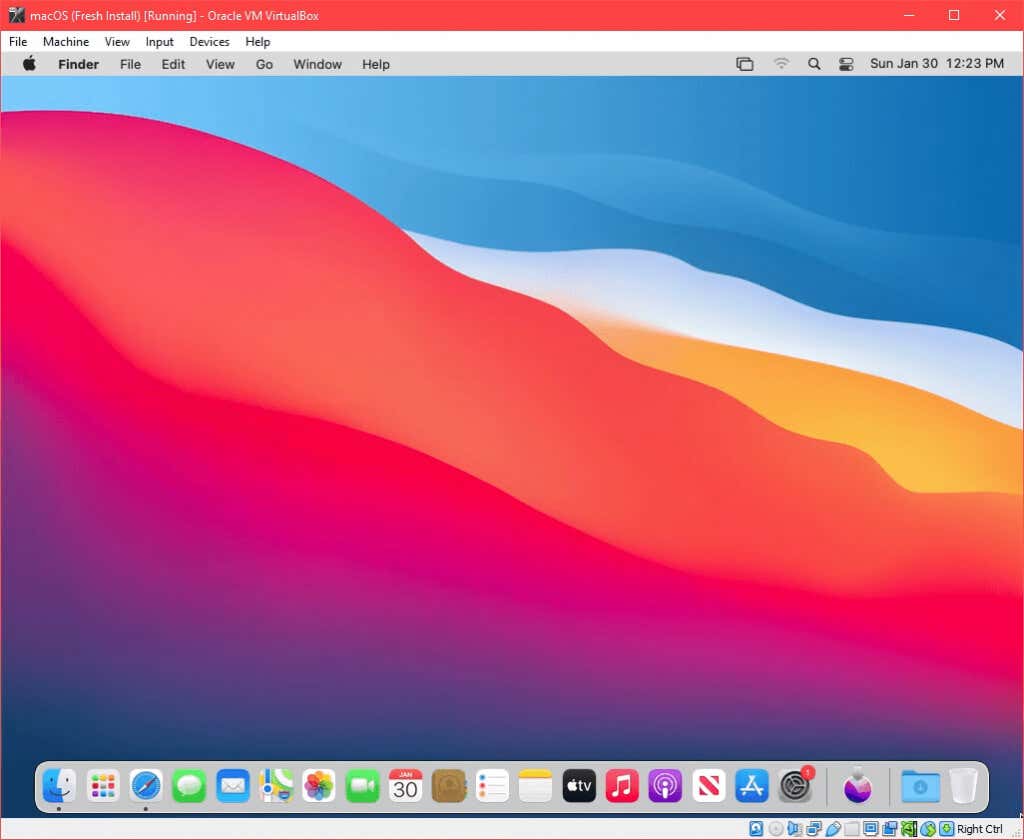
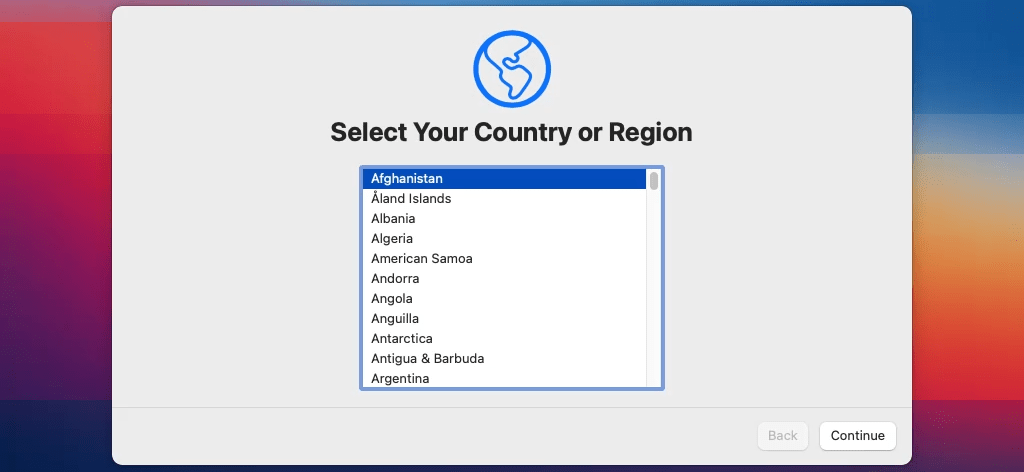
- Eventually, you’ll see the Select Your Country or Region screen. You’re now in the setup of your freshly installed macOS. Go through the set up.
- Once you’ve completed the setup, take a snapshot of the freshly installed state. This allows you to revert back to it easily should something go wrong with the macOS VM in the future.

Change the Resolution of the macOS Virtual Machine
If you prefer greater resolution than the VirtualBox default, you can do that too.
- Shut down the macOS virtual machine and completely exit VirtualBox.
- Whakatuwheratia te Tohu Whakahau hei Kaiwhakahaere.
- Navigate to where VirtualBox is installed.
- E tomo i te whakahau e whai ake nei:
VBoxManage setextradata “macOS” VBoxInternal2/EfiGraphicsResolution 1920×1080
The last part of the command, 1920×1080 is the resolution. It can be changed to any of 1280×720, 1920×1080, 2560×1440, 2048×1080, 3840×2160, 5120×2880, or 7680×4320 supported resolutions. Some may not work for you though. After the command completes, restart VirtualBox and your macOS VM to make sure the change works.
Tips on Using macOS in VirtualBox
During the install, if you see a circle-slash like a no parking sign, the installation isn’t going to work. Shut the machine down as there’s no sense waiting.

Again, check to ensure that you applied the VirtualBox codes correctly. Completely close VirtualBox and reapply them if needed.
If that doesn’t work, change the VM settings to use less RAM or CPUs. Sometimes the PC can’t keep up with a higher setting.
Once the install is complete, you can change the VM settings to use more RAM or CPUs to increase the performance, as long as you’re not doing anything else on the host PC.
Enjoy your new macOS virtual machine!

