When you try to install apps on Windows Store, you may face Error Code 0x80073cf9, which can be very frustrating as Windows Store is a reliable source to install apps. If you try to install 3rd party apps from any other source, you risk your machine to malware or infections but what other option you have if you cannot install apps from Windows Store. Well, that’s where you’re wrong this error can be fixed, and that’s what exactly we are going to teach you in this article.
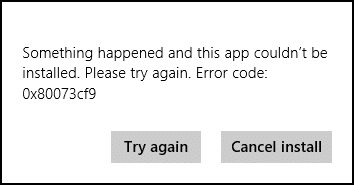
Something happened, and this app couldn’t be installed. Please try again. Error code: 0x80073cf9
There is no single cause as to why this error occurs so that various methods can fix this error. Most of the times it completely depends on the user machine configuration as to which method might work for them, so without wasting any time, let’s see how to fix this error.

Fix Windows 10 Store Error 0x80073cf9
എന്തെങ്കിലും തെറ്റ് സംഭവിച്ചാൽ ഒരു പുനഃസ്ഥാപിക്കൽ പോയിൻ്റ് സൃഷ്ടിക്കുന്നത് ഉറപ്പാക്കുക.
Method 1: Create A Folder AppReadiness
1. വിൻഡോസ് കീ + ആർ അമർത്തി ടൈപ്പ് ചെയ്യുക സി: വിൻഡോസ് Enter അമർത്തുക.
2. Find the folder AppReadniess in the Windows folder, if you can’t follow the next step.
3. Right-click in an empty area and select പുതിയത് > ഫോൾഡർ.
4. Name the newly created folder as AppReadness Enter അമർത്തുക.
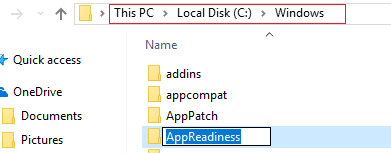
5. Reboot your PC to save changes. Again try to access the Store, and this time it might work perfectly.
Method 2: Reinstall Windows Store
1. Open Command Prompt as an അഡ്മിനിസ്ട്രേറ്റർ.

2. Run below PowerShell command
Get-AppxPackage -AllUsers | Foreach {Add-AppxPackage -DisableDevelopmentMode -Register “$ ($ _. InstallLocation) AppXManifest.xml”}

3. Once done, close command prompt and Restart your PC.
This step re-register Windows Store apps which should automatically Fix Windows 10 Store Error 0x80073cf9.
Method 3: Create a folder AUInstallAgent
1. വിൻഡോസ് കീ + ആർ അമർത്തി ടൈപ്പ് ചെയ്യുക സി: വിൻഡോസ് Enter അമർത്തുക.
2. Find the folder AUInstallAgent in the Windows folder, if you can’t then follow the next step.
3. Right-click in an empty area and select പുതിയത് > ഫോൾഡർ.
4. Name the newly created folder as AAUInstallAgent Enter അമർത്തുക.
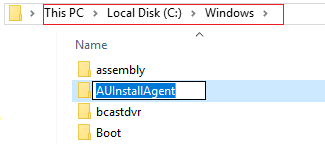
5. Reboot your PC to save changes. This step may fix Windows 10 Store Error 0x80D05001 or 0x80073cf9 but if it didn’t then continue.
Method 4: Allow Full System Access to Packages in AppRepository
1. വിൻഡോസ് കീ + ആർ അമർത്തി ടൈപ്പ് ചെയ്യുക C:ProgramDataMicrosoftWindows Enter അമർത്തുക.
2. Now double click on AppRepository folder to open it, but you will receive an error:
You have been denied permission to access this folder.
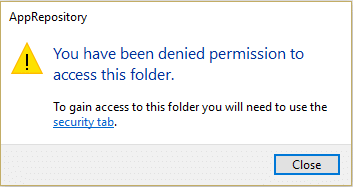
3. This means you need to take ownership of this folder before you can access it.
4. You can take ownership of the folder via the following method: How To Fix Destination Folder Access Denied Error.
5. Now you need to give the SYSTEM account, and the APPLICATION PACKAGES account full control on the folder C:ProgramDataMicrosoftWindowsAppRepositoryPackages. To this follow the next step.
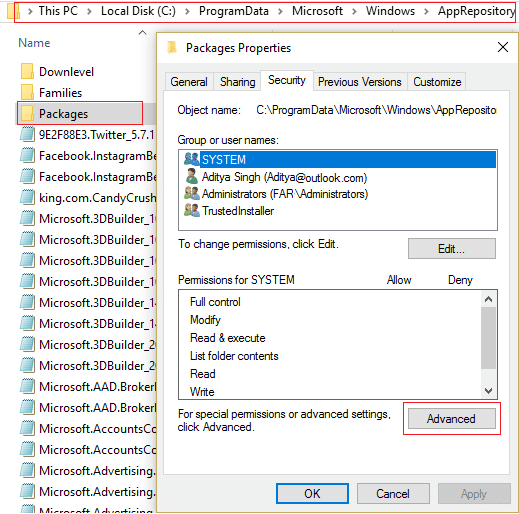
6. വലത്-ക്ലിക്കുചെയ്യുക Packages folder തെരഞ്ഞെടുക്കുക പ്രോപ്പർട്ടികൾ.
7. അതു തിരഞ്ഞെടുക്കുക സുരക്ഷാ ടാബ് തുടർന്ന് ക്ലിക്കുചെയ്യുക വിപുലമായത്.
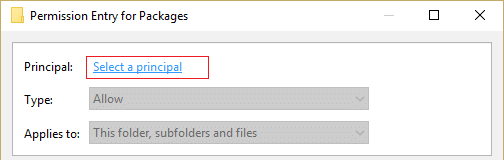
8. In Advanced Security Settings, click ചേർക്കുക and click on Select a പ്രിൻസിപ്പൽ.
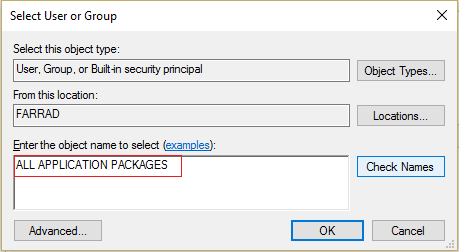
9. അടുത്തതായി, " എന്ന് ടൈപ്പ് ചെയ്യുകഎല്ലാ ആപ്ലിക്കേഷൻ പാക്കേജുകളും” (without quote) in the field Enter the object name to select and click OK.
10. Now, on the next window check mark Full control and then click OK.
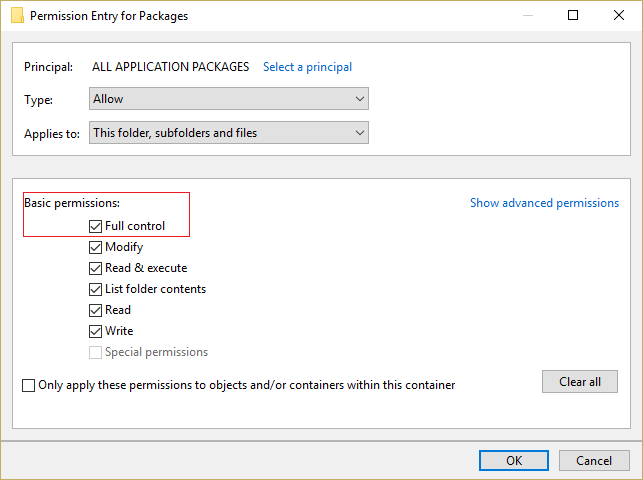
11. Do the same with the SYSTEM account. Reboot your PC to save changes.
Method 5: Rename Software Distribution Folder
1. Press Windows Key + Q to open Charms Bar and type cmd.
2. Right-click on cmd and select നിയന്ത്രണാധികാരിയായി.
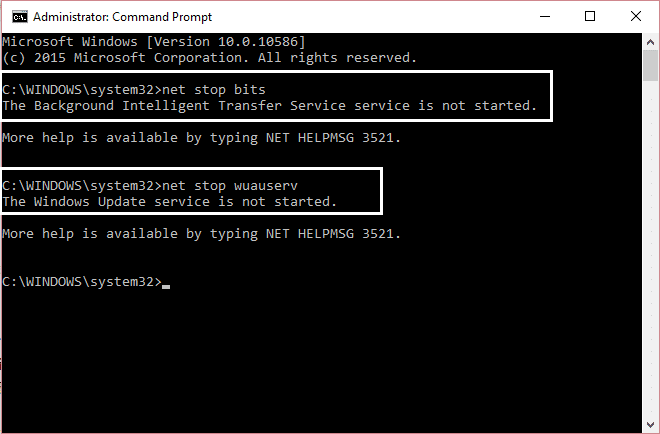
3. Type these commands and hit enter:
net stop wuauserv
ren c:windowsSoftwareDistribution softwaredistribution.old
net start wuauserv
exit
4. Reboot your PC to saves changes and again try to download updates.
രീതി 6: DISM പ്രവർത്തിപ്പിക്കുക (ഡിപ്ലോയ്മെന്റ് ഇമേജ് സർവീസിംഗും മാനേജ്മെന്റും)
1. വിൻഡോസ് കീ + X അമർത്തുക, തുടർന്ന് തിരഞ്ഞെടുക്കുക കമാൻഡ് പ്രോംപ്റ്റ് (അഡ്മിൻ).

2. Enter the following command in cmd and hit enter:
പ്രധാനം: നിങ്ങൾ ഡിഐഎസ്എം ചെയ്യുമ്പോൾ വിൻഡോസ് ഇൻസ്റ്റലേഷൻ മീഡിയ തയ്യാറാക്കേണ്ടതുണ്ട്.
DISM.exe /ഓൺലൈൻ /ക്ലീനപ്പ്-ഇമേജ് /റെസ്റ്റോർഹെൽത്ത് /ഉറവിടം:C:RepairSourceWindows /LimitAccess
കുറിപ്പ്: C:RepairSourceWindows-ന് പകരം നിങ്ങളുടെ റിപ്പയർ ഉറവിടത്തിൻ്റെ സ്ഥാനം നൽകുക

3. Press enter to run the above command and wait for the process to complete; usually, it takes 15-20 minutes.
ശ്രദ്ധിക്കുക: മുകളിലുള്ള കമാൻഡ് പ്രവർത്തിക്കുന്നില്ലെങ്കിൽ, താഴെയുള്ളവയിൽ ശ്രമിക്കുക: Dism /Image:C:offline /Cleanup-Image /RestoreHealth /Source:c:testmountwindows Dism /Online /Cleanup-Image /RestoreHealth /Source:c:testmountwindows /LimitAccess
4. After the DISM process is complete, type the following in the cmd and hit Enter: sfc / scannow
5. Let System File Checker run and once it’s complete, restart your PC.
രീതി 7: CCleaner, Malwarebytes എന്നിവ പ്രവർത്തിപ്പിക്കുക
1. ഡ Download ൺലോഡ് ചെയ്ത് ഇൻസ്റ്റാൾ ചെയ്യുക ച്ച്ലെഅനെര് & മാൽവെയർബൈറ്റുകൾ.
2. Malwarebytes പ്രവർത്തിപ്പിക്കുക ദോഷകരമായ ഫയലുകൾക്കായി നിങ്ങളുടെ സിസ്റ്റം സ്കാൻ ചെയ്യാൻ ഇത് അനുവദിക്കുക. ക്ഷുദ്രവെയർ കണ്ടെത്തിയാൽ, അത് അവ സ്വയമേവ നീക്കം ചെയ്യും.

3. ഇപ്പോൾ CCleaner പ്രവർത്തിപ്പിച്ച് തിരഞ്ഞെടുക്കുക കസ്റ്റം ക്ലീൻ.
4. കസ്റ്റം ക്ലീനിന് കീഴിൽ, തിരഞ്ഞെടുക്കുക വിൻഡോസ് ടാബ് സ്ഥിരസ്ഥിതികൾ ചെക്ക്മാർക്ക് ചെയ്ത് ക്ലിക്ക് ചെയ്യുക അപഗഥിക്കുക.

5. വിശകലനം പൂർത്തിയായിക്കഴിഞ്ഞാൽ, ഇല്ലാതാക്കേണ്ട ഫയലുകൾ നീക്കം ചെയ്യുമെന്ന് ഉറപ്പ് വരുത്തുക.

6. അവസാനമായി, ക്ലിക്കുചെയ്യുക ക്ലീനർ പ്രവർത്തിപ്പിക്കുക ബട്ടൺ, CCleaner അതിൻ്റെ കോഴ്സ് പ്രവർത്തിപ്പിക്കാൻ അനുവദിക്കുക.
7. നിങ്ങളുടെ സിസ്റ്റം കൂടുതൽ വൃത്തിയാക്കാൻ, രജിസ്ട്രി ടാബ് തിരഞ്ഞെടുക്കുക, കൂടാതെ ഇനിപ്പറയുന്നവ പരിശോധിച്ചിട്ടുണ്ടെന്ന് ഉറപ്പാക്കുക:

8. അതിൽ ക്ലിക്ക് ചെയ്യുക പ്രശ്നങ്ങൾക്കായി സ്കാൻ ചെയ്യുക ബട്ടൺ സ്കാൻ ചെയ്യാൻ CCleaner അനുവദിക്കുക, തുടർന്ന് ക്ലിക്ക് ചെയ്യുക തിരഞ്ഞെടുത്ത പ്രശ്നങ്ങൾ പരിഹരിക്കുക ബട്ടൺ.

9. CCleaner ചോദിക്കുമ്പോൾ "രജിസ്ട്രിയിൽ നിങ്ങൾക്ക് ബാക്കപ്പ് മാറ്റങ്ങൾ വേണോ?" അതെ തിരഞ്ഞെടുക്കുക.
10. നിങ്ങളുടെ ബാക്കപ്പ് പൂർത്തിയായിക്കഴിഞ്ഞാൽ, ക്ലിക്ക് ചെയ്യുക തിരഞ്ഞെടുത്ത എല്ലാ പ്രശ്നങ്ങളും പരിഹരിക്കുക ബട്ടൺ.
11. മാറ്റങ്ങൾ സംരക്ഷിക്കാൻ നിങ്ങളുടെ പിസി പുനരാരംഭിക്കുക.
Method 8: Clear Windows Store cache
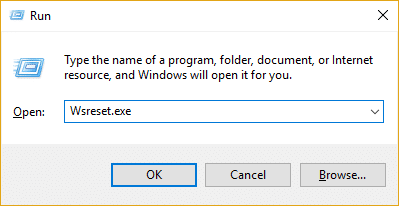
1. വിൻഡോസ് കീ + ആർ അമർത്തി ടൈപ്പ് ചെയ്യുക Wsreset.exe എന്റർ കീ അമർത്തുക.
2. ഒരു പ്രക്രിയ പൂർത്തിയായി നിങ്ങളുടെ പിസി പുനരാരംഭിക്കുക.
Method 9: Run Windows Update and Windows Store Apps troubleshooter
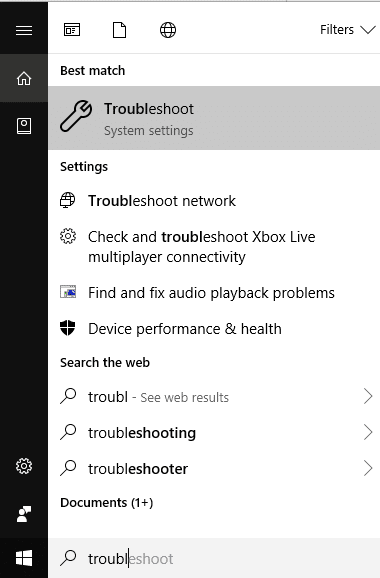
1. ടൈപ്പ് ചെയ്യുക ട്രബിൾഷൂട്ടർ in the Windows Search bar and click on Troubleshooter.
2. അടുത്തതായി, ഇടത് വിൻഡോയിൽ നിന്ന്, പാളി തിരഞ്ഞെടുക്കുക എല്ലാം കാണുക.
3. തുടർന്ന് ട്രബിൾഷൂട്ട് കമ്പ്യൂട്ടർ പ്രശ്നങ്ങൾ ലിസ്റ്റിൽ നിന്ന് തിരഞ്ഞെടുക്കുക വിൻഡോസ് പുതുക്കല്.

4. Follow on-screen instruction and let the Windows Update Troubleshoot run.

5. Now again go back to the View all window but this time select വിൻഡോസ് സ്റ്റോർ അപ്ലിക്കേഷനുകൾ. Run the troubleshooter and follow on-screen instructions.
6. Restart your PC and again try to install apps from Windows Store.
ശുപാർശ ചെയ്ത:
അതാണ് നിങ്ങൾ വിജയകരമായി പൂർത്തിയാക്കിയത് Fix Windows 10 Store Error 0x80073cf9 എന്നാൽ ഈ പോസ്റ്റിനെക്കുറിച്ച് നിങ്ങൾക്ക് ഇപ്പോഴും എന്തെങ്കിലും ചോദ്യങ്ങൾ ഉണ്ടെങ്കിൽ, അഭിപ്രായ വിഭാഗത്തിൽ അവരോട് ചോദിക്കാൻ മടിക്കേണ്ടതില്ല.

