An ISO image file is an archive file that holds the exact replica of files that remain in the physical disc (like CD, DVD or Blu-Ray discs). Even different software companies use ISO files for distributing their applications or programs. These ISO files can contain anything from Games, Windows OS, video and audio files, etc as a single compact image file. ISO is the most popular file format for disk images which has .iso as the file extension.
In order to access and use ISO files in older OS like Windows 7, Windows XP, etc, users need to install some third party application; but with the release of Windows 8, 8.1 and 10, users do not need to install any external application for running these files, and the File Explorer is enough for running. In this article, you will learn about how to mount and unmount ISO image files in different OS.
Mounting is the approach where users or vendors can create a virtual CD/DVD drive on the system so that the operating system can run an image file like it usually runs files from DVD-ROM. Unmounting is the exact opposite of mounting that is you can relate to ejecting DVD-ROM once your work is over.
3 Ways to Mount or Unmount ISO File in Windows 10
Method 1: Mount an ISO Image File in Windows 8, 8.1 or 10:
With the latest Windows OS such as Windows 8.1 or Windows 10, you can directly mount or unmount ISO file using the built-in tool. You can also mount virtual hard drives using the below steps. There are three different ways via which you can mount ISO image file:
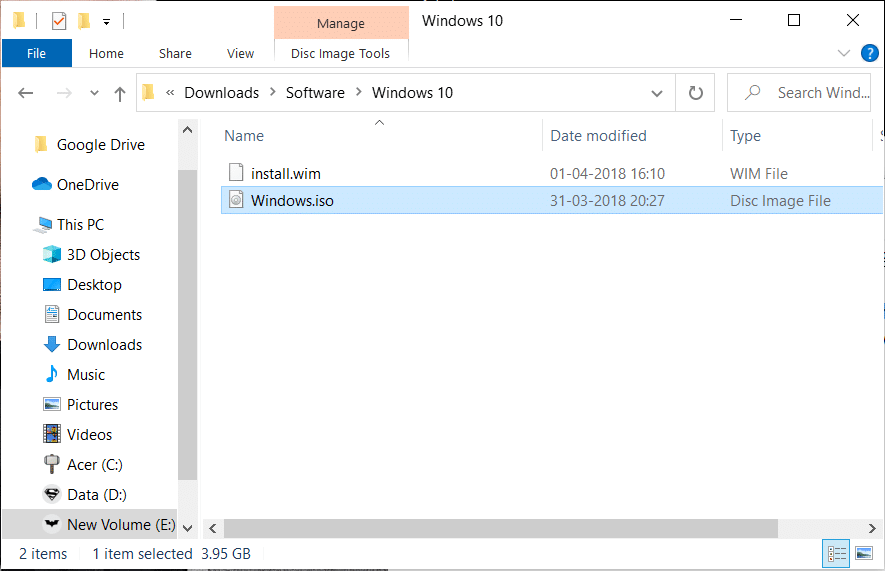
1. Navigate to the ISO file location in File Explorer then double-click on the ISO file that you want to mount.
Nota: This approach will not work if the ISO file is associated with a third-party program (to open).
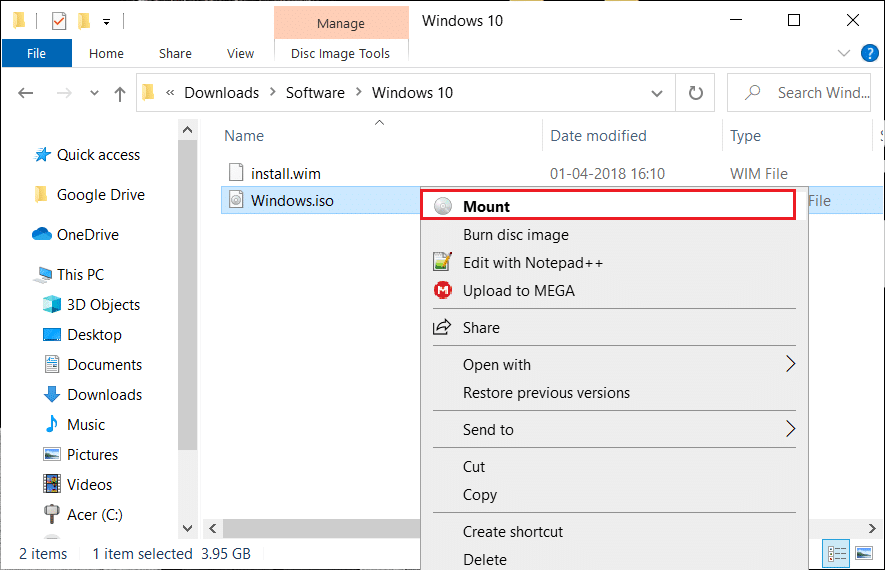
2. Another way is to ikklikkja fuq il-lemin on the ISO file that you want to mount and select “Mount” mill-menu tal-kuntest.
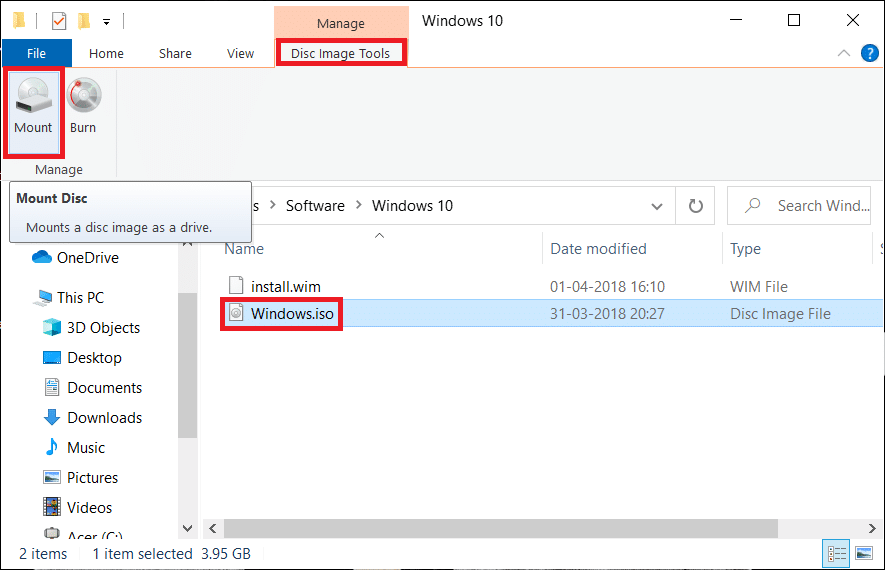
3. The final option is to mount the ISO file from File Explorer. Navigate to the location of the ISO file, then select the ISO file. From File Explorer menu, click on the Disc Image Tools tab u kklikkja fuq il-buttuna Mount għażla.
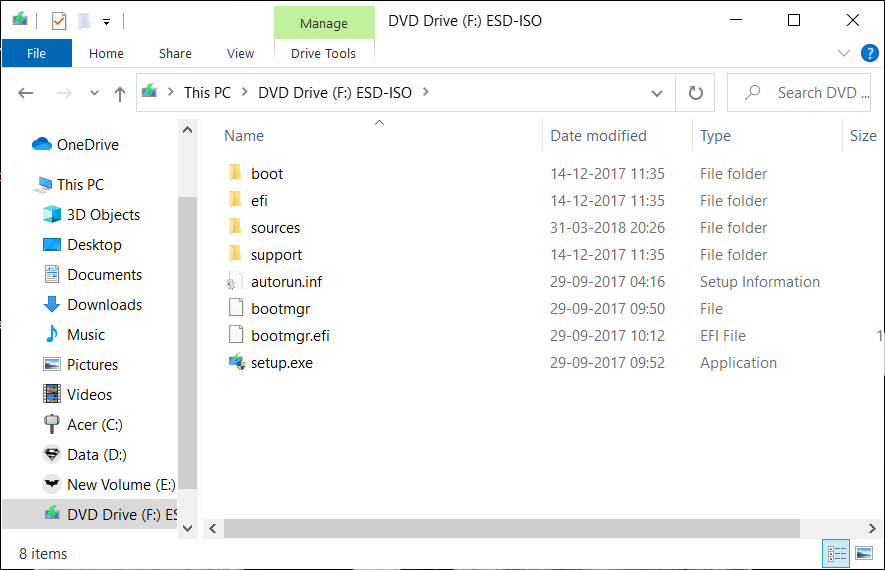
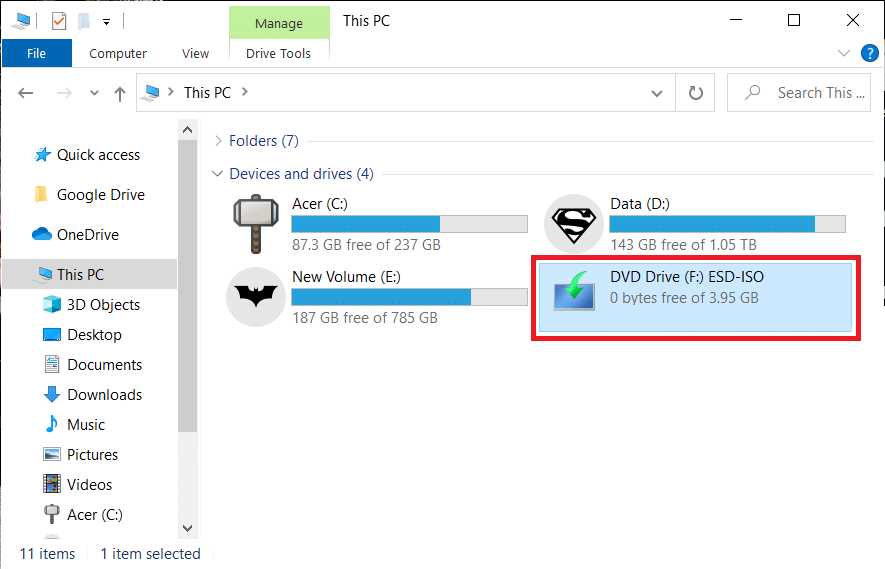
4. Sussegwentement, taħt Dan il-PC you will see a new drive (virtual) which will host the files from ISO image using which you can browse all the data of the ISO file.
5. To unmount the ISO file, ikklikkja fuq il-lemin on the new drive (mounted ISO) and select “eject” għażla mill-menu tal-kuntest.
Ukoll Aqra: Ħolqien ta 'Backup ta' Immaġni tas-Sistema Sħiħa fil-Windows 10 [Il-Gwida Ultimate]
Method 2: Mount an ISO Image File on Windows 7/Vista
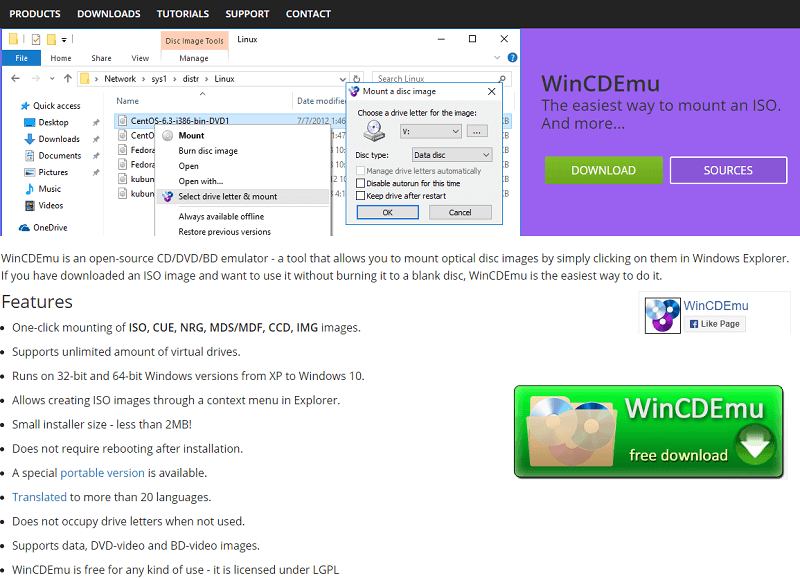
To access the content of the ISO file in older versions of Windows OS, you will need to download & install a third-party application for mounting the ISO image file. In this example, we will use the application “WinCDEmu” (which you can download from hawn) which is a simple open-source ISO mounting application. And this application also supports Windows 8 as well as Windows 10.
1. To use this application, you have to first download & install it minn din ir-rabta and give the necessary permission to complete the installation.
2. Once the installation finished, simply double-click on the ISO file to mount the image file.
3. Now start the application and you will see a window where you can choose the configuration settings for the mounted ISO drive such as drive letter and other basic options. Once done, click OK to save changes.
Method 3: How to Mount or Unmount ISO file using PowerShell:
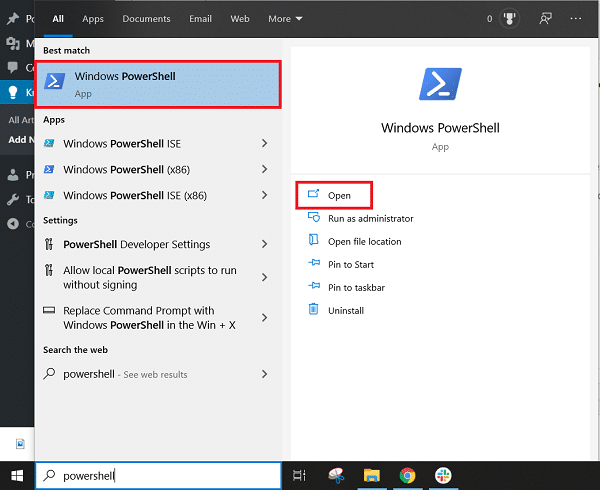
1. Mur għal Start menu search tip"PowerShell” and click on the search result to open.
2. Once the PowerShell window opens, simply ikteb il-kmand written below for mounting the ISO file:
Mount-DiskImage -ImagePath "C:PATH.ISO"
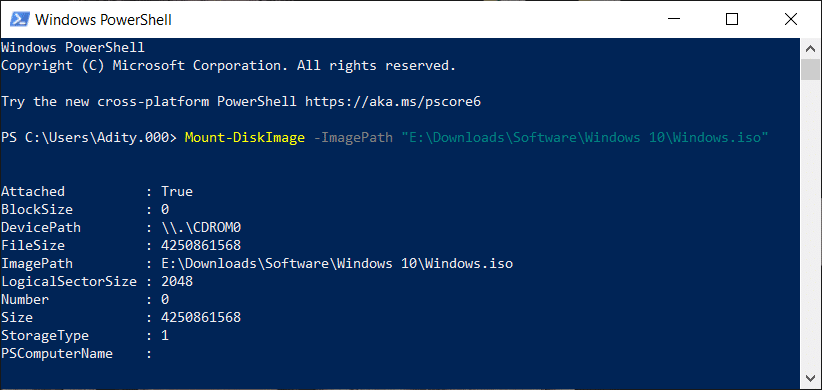
3. In the above command make sure you change C:PATH.ISO with the location of your ISO image file on your system.
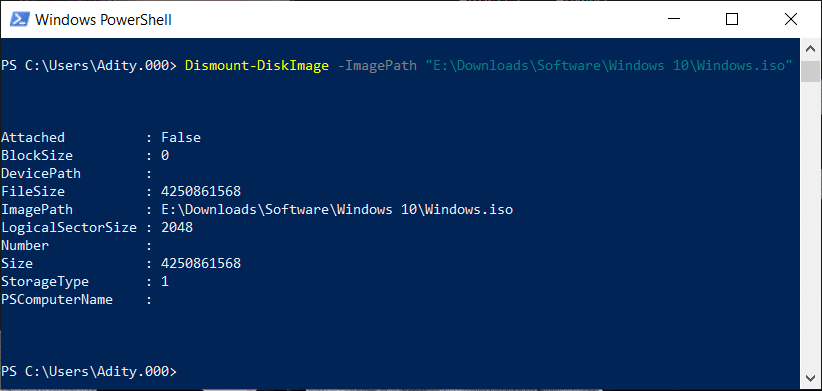
4. Also, you can easily unmount your image file by typing the command and hit Enter:
Dismount-DiskImage -ImagePath "C:FILE.ISO"
Ukoll Aqra: Download official Windows 10 ISO without Media Creation Tool
That’s the end of the article, I hope using the above steps you will be able to mount or unmount the ISO image file on Windows 10. But if you still have any questions regarding this tutorial then feel free to ask them in the comment section.
