Having full
control over a user account on your system means you can make changes to that
account owner’s files. But before you can have that control, there’s no
shortcut: you need to own it.
ဘယ်လောက်မှမသိရပါဘူး
go about this? Don’t worry. We’ll walk through the process.
In this post, you’ll learn how to change the ownership of files and folders on Windows. This way, you can make modifications as you please. Note that if a file or folder is owned by TrustedInstaller, you need to follow a different procedure, mentioned in the link.
About the Ownership of Files and Folders
သင်၌မရှိပါ အုပ်ချုပ်ရေးအခွင့်ထူး, Window 10
won’t give you permission to make changes. That is why you need to make this
ဖြစ်ပျက်ခဲ့သည်
Getting 100%
control over the files and folders means you can access them — and do whatever
you want. This is useful if you need to access old user accounts so you can
make major changes to the operating system.
How to Get Access
ဒါကပထမဦးဆုံးဖြစ်ပါတယ်
part of the process. Completing this means you can access another user account.
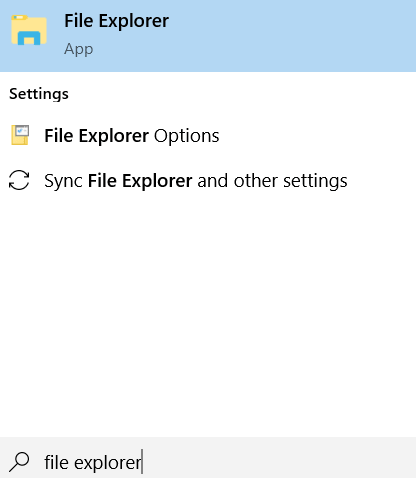
ပထမ ဦး စွာနှိပ်ပါ
Windows key and search for ဖိုင်မှတ်တမ်း Explorer ကို.
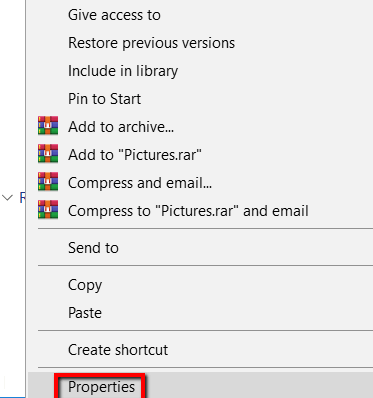
အဆိုပါဖွင့်ပါ
explorer. Then, right-click on the files or folders that you want to access and
ကို select My Properties drop-down မှ
menu ကို။
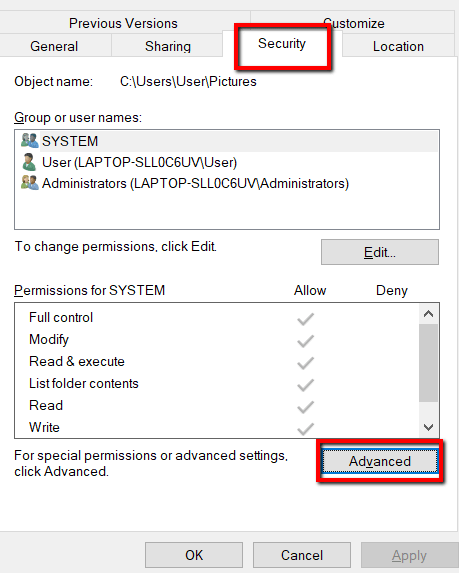
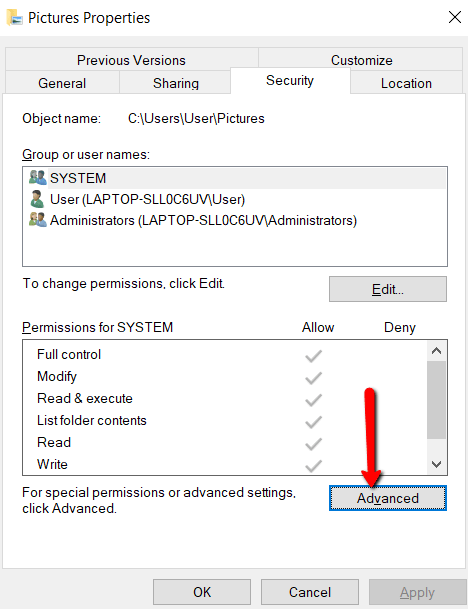
အဲဒီမှာ သွားလိုက်ပါ။ လုံခွုံရေး အဆိုပါ tab ကိုနှိပ်ပါ အဆင့်မြင့် button. Doing this allows you
to tweak the files or folders with special consideration.
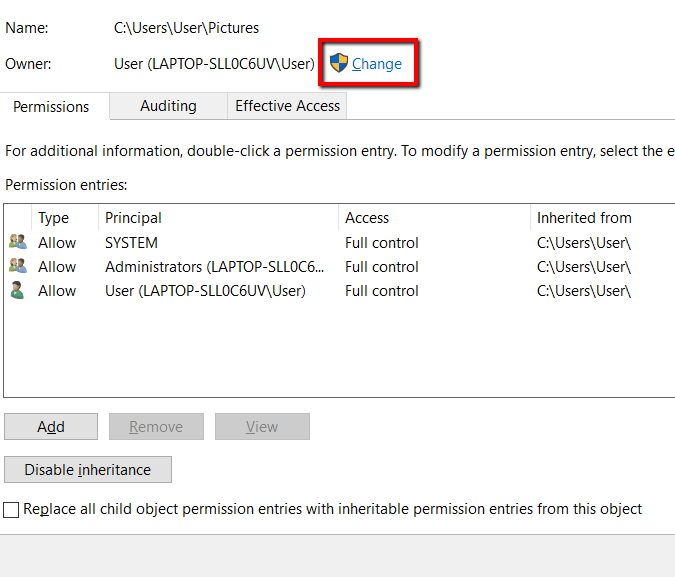
Here, focus on ပိုင်ဆိုင်သူ. It will specify the user account
that owns that file or folder. At the end of it, click ပွောငျးလဲ.
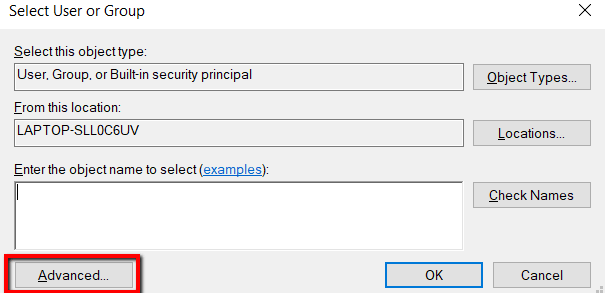
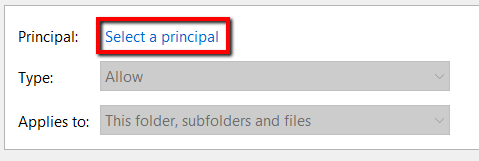
အလက်အောက်တွင် User or Group ကိုရွေးပါ window, choose the
အဆင့်မြင့် button. Doing this lets you
open more advanced settings.
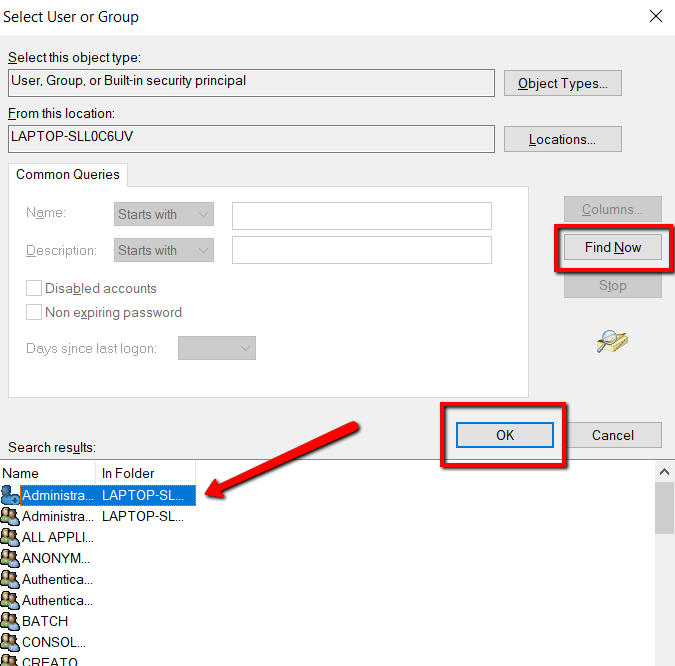
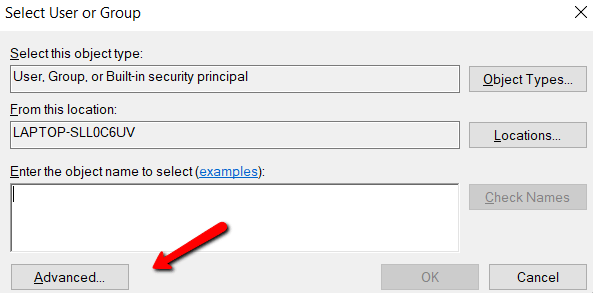
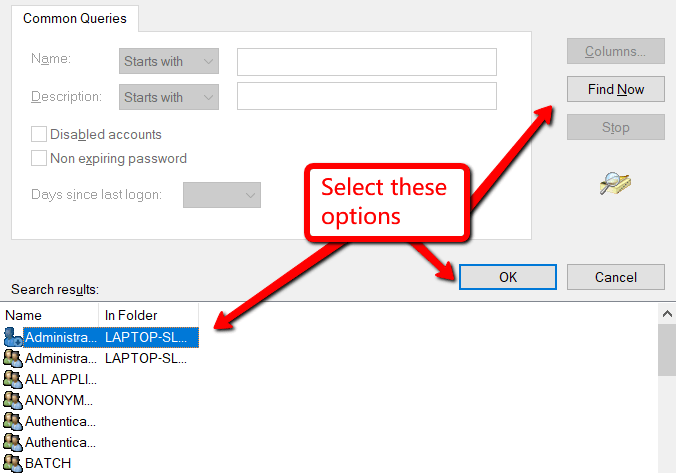
ဤတွင်ယင်းကိုကလစ်နှိပ်ပါ ယခုရှာပါ buttonto load the ရှာဖွေမှုရလဒ်များ.
And under the ရှာဖွေမှုရလဒ်များ, ကိုရှေးခယျြ
your user account. Then, hit OK.
သို့ဖြစ်လျှင်သင်သည်လိမ့်မည်
land back on the User or Group ကိုရွေးပါ ဝင်းဒိုးကို။
Once you see your user account, click OK.
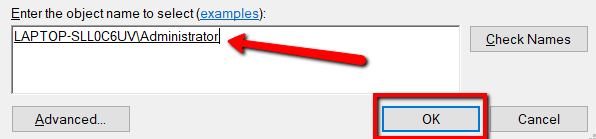
Once more, you
will land on an old window. Here, click OK
နောက်တဖန်။
Then again, do
the same for the last time.

Get လုပ်နည်း ပြည့်သော ဝင်ရောက်ခွင့်
ဒါကဖြစ်ပါသည်
second part of the process. You may have access to another account already. But
you might not use it to make major changes. After all, you’re yet to be its
ပိုင်ရှင်။
Only once you’re
the owner of a user account, you can get ပြည့်သော
access ကို။
So here’s how you
ဒီလိုလုပ်ပါ
နောက်ထပ်တစ်ခါ,
ပစ်လွှတ် ဖိုင်မှတ်တမ်း Explorer ကို နှင့်ကိုသွား My Properties။ အဆိုပါကိုသွားပါ လုံခွုံရေး tab ကိုဖွင့်ပါ။ အဆင့်မြင့် ကြယ်သီး.
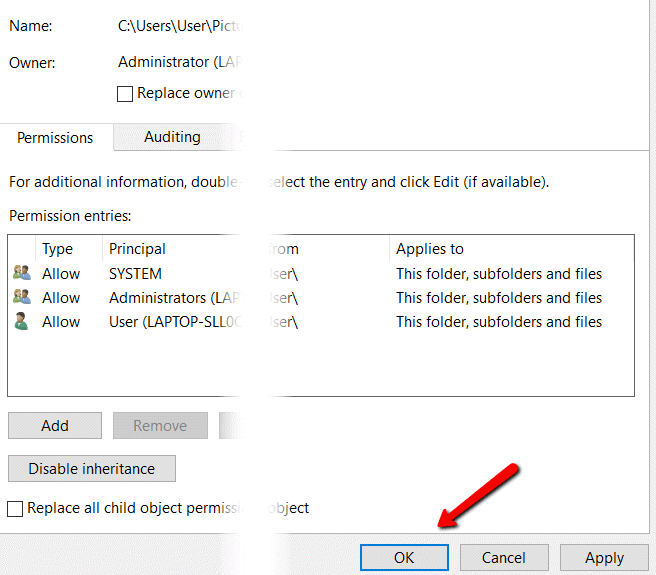
အောက် Permission entries, ကလစ် ပေါင်း.
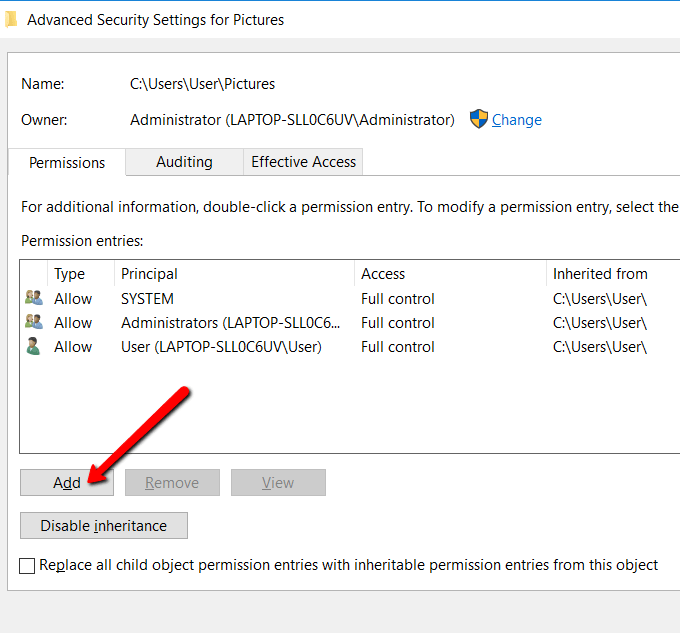
ဒီနေရာမှာကလစ်နှိပ်ပါ ကျောင်းအုပ်ရွေးပါ.
Again, you will
မြေပေါ်တွင် User or Group ကိုရွေးပါ ဝင်းဒိုးကို။
There, open အဆင့်မြင့်.
Load your user
အကောင့်ကို အသုံးပြု ယခုရှာပါ ကြယ်သီး. Like in the previous process, doing
this helps you find your user account.
သင်ရှိသည်နှင့်တစ်ပြိုင်နက်
eyes on your user account, select it and hit OK.
You will get to
familiar windows. Just click OK မှီတိုငျအောငျ
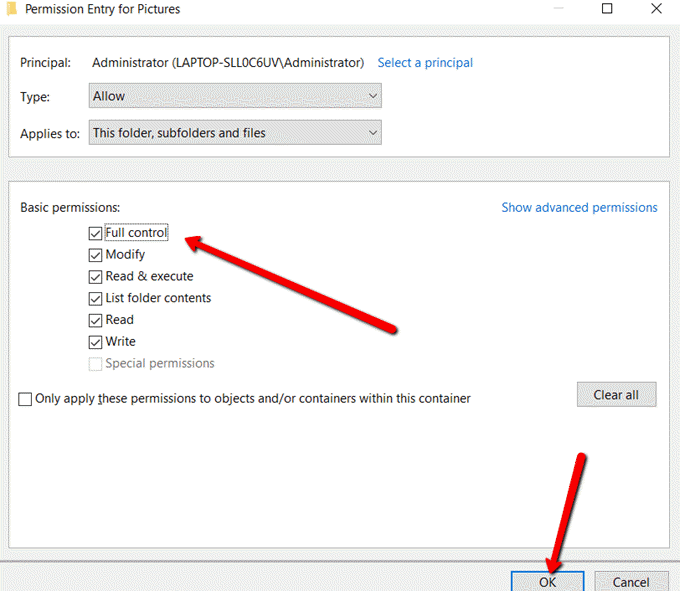
you land on a window named အခွင့်
Entry (for file or folder).
အောက် အခြေခံခွင့်ပြုချက်များ, make sure to tick
the box that lets you get အပြည့်အဝထိန်းချုပ် နှင့်
ထိုး OK.
ကို Select လုပ်ပါ Apply to let the changes take effect.
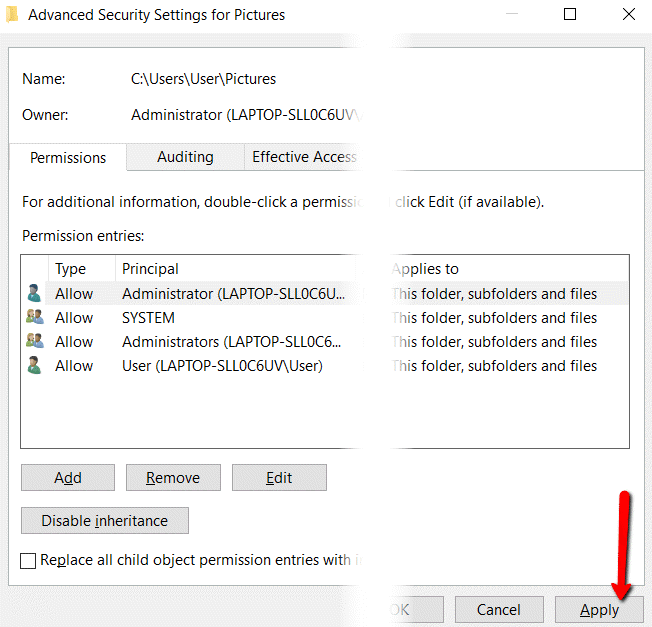
ထို့နောက်ရှေးခယျြ OK ပြတင်းပေါက်ပိတ်ရန်.


