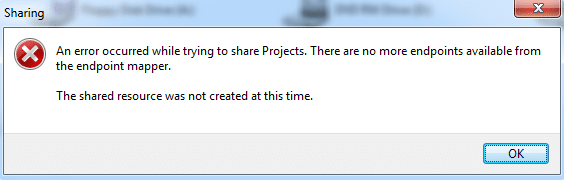
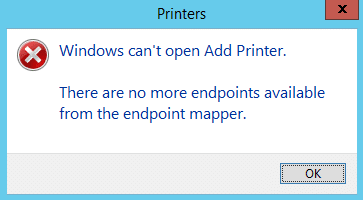
Fix There are no more endpoints available from the endpoint mapper: If you’re facing this error then this means either you are trying to install a printer or you’re sharing your drive within your network. Generally ‘No More Endpoints Available’ error occur when you try to join a domain but the Windows services are corrupted and therefore, conflicting with other services which won’t let you join that particular domain and ultimately causing the error. Anyway, this error is very annoying and that’s why troubleshooter is here to fix this error via the following troubleshooting steps.
When attempting to join a client to an Active Directory domain, you may receive the following error:
The following error occurred attempting to join the domain <domain>:
There are no more endpoints available from the endpoint mapper.
Error 1753: There are no more endpoints available from the endpoint mapper.
There are no more endpoints available from the endpoint mapper [SOLVED]
တစ်စုံတစ်ခု မှားယွင်းသွားပါက ပြန်လည်ရယူသည့်အမှတ်ကို ဖန်တီးရန် သေချာပါစေ။
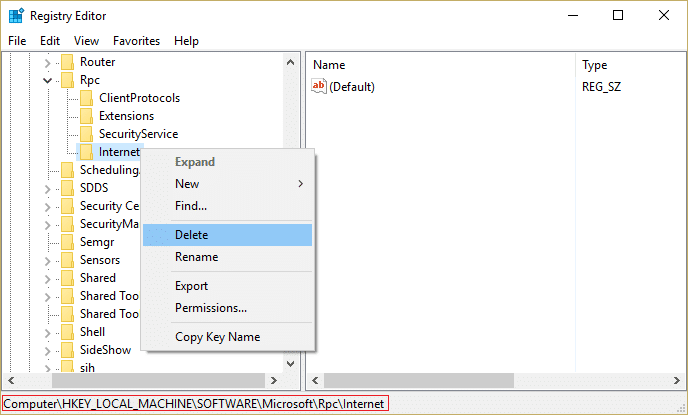
Method 1: Delete the Internet key to remove RPC restriction
1. Windows Key + R ကို နှိပ်ပြီး ရိုက်ထည့်ပါ။ regedit လို့ Registry Editor ကိုဖွင့်ရန် Enter ကိုနှိပ်ပါ။

2.အောက်ပါ registry key သို့သွားပါ-
ComputerHKEY_LOCAL_MACHINESoftwareMicrosoftRpcInternet
3. ပေါ်တွင် Right-click နှိပ်ပါ။ Internet key နှင့်ကို select ဖျက်ပစ်ပါ။
4. ပြောင်းလဲမှုများကို သိမ်းဆည်းရန် သင့် PC ကို ပြန်လည်စတင်ပါ။
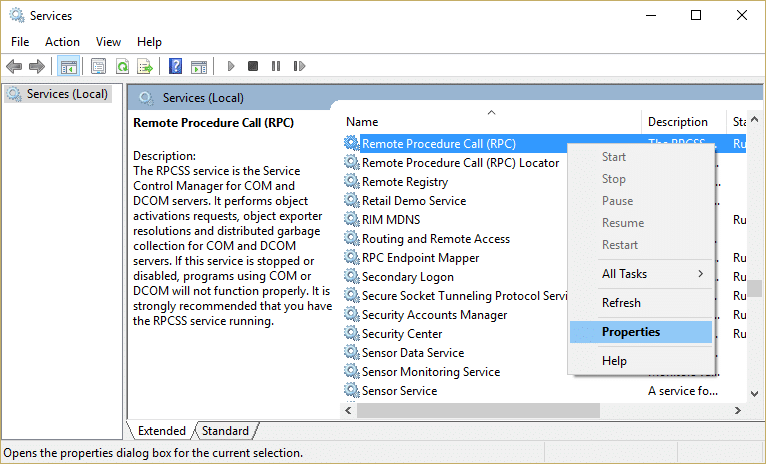
Method 2: Verify that Remote Procedure Call (RPC) Services are Started
1. Windows Key + R ကို နှိပ်ပြီး ရိုက်ထည့်ပါ။ services.msc နှင့် Enter နှိပ်ပါ။

2.Locate the following services:
အဝေးမှလုပ်ထုံးလုပ်နည်းခေါ်ဆိုမှု
Remote Procedure Call Locator
ByProcessManager
If you are trouble adding a printer then make sure following services are also running:
ပုံနှိပ်ပါ Spooler
DCOM ဆာဗာ Process ကို Launcher
RPC Endpoint Mapper
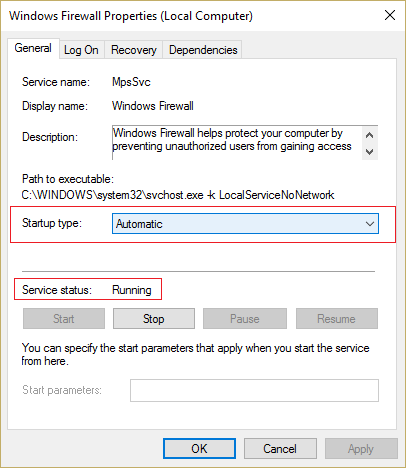
3.Right-click and select My Properties for above services.
4.Next, make sure the Startup type is Automatic နှင့် services are running.
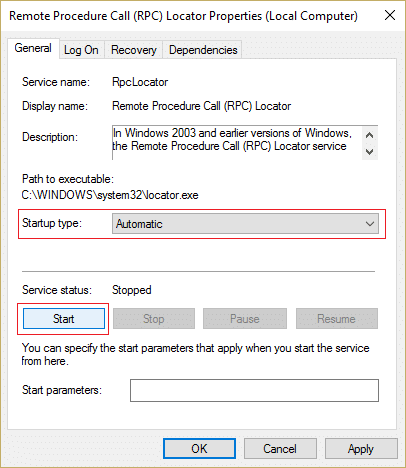
5.If the above services are stopped make sure to ပွေးသှား them from properties window.
6.Reboot your PC to save changes and the error “There are no more endpoints available from the endpoint mapper” may be resolved.
Method 3: Temporary Disable antivirus နှင့် firewall ကို
တခါတရံ Antivirus ပရိုဂရမ်ကို ဖြစ်ပေါ်စေနိုင်သည်။ “There are no more endpoints available from the endpoint mapper” ဤနေရာတွင် ဤကိစ္စမဟုတ်ကြောင်း အတည်ပြုရန်အတွက်၊ Antivirus ကိုပိတ်ထားသည့်အခါ error ပေါ်နေသေးကြောင်း စစ်ဆေးနိုင်စေရန်အတွက် သင်၏ antivirus ကို အချိန်အကန့်အသတ်ဖြင့် disable လုပ်ရန် လိုအပ်ပါသည်။
1. ပေါ်တွင် Right-click နှိပ်ပါ။ Antivirus ပရိုဂရမ် အိုင်ကွန် system tray မှရွေးချယ်ပါ။ ကိုပိတ်ထားပါ။

2. ထို့နောက်၊ ၎င်းအတွက် အချိန်ဘောင်ကို ရွေးချယ်ပါ။ Antivirus ကို ပိတ်ထားပါမည်။

မှတ်ချက်- ဖြစ်နိုင်သည့် အနည်းဆုံး အချိန်ပမာဏကို ဥပမာအားဖြင့် ၁၅ မိနစ် သို့မဟုတ် မိနစ် ၃၀ ကို ရွေးပါ။
3.ပြီးသည်နှင့်၊ WiFi ကွန်ရက်သို့ ထပ်မံချိတ်ဆက်ရန် ကြိုးစားပြီး အမှားအယွင်း ပြေလည်သွားခြင်း ရှိ၊ မရှိ စစ်ဆေးပါ။
4. Windows Key + I ကို နှိပ်ပြီး ရွေးချယ်ပါ။ ထိန်းချုပ်ရာနေရာ။

5.Next ကိုနှိပ်ပါ။ စနစ်နှင့်လုံခြုံရေး။
6.ထို့နောက် ကလစ်နှိပ်ပါ။ Windows Firewall

7.ယခုအခါ ဘယ်ဘက် ဝင်းဒိုးအကန့်မှ Turn Windows Firewall ကို အဖွင့်အပိတ်လုပ်ပါ။

8.Turn off Windows Firewall ကိုရွေးချယ်ပြီး သင့် PC ကို ပြန်လည်စတင်ပါ။ Again try to connect to the WiFi network and see if the issue is resolved or not.
အကယ်၍ အထက်ပါနည်းလမ်းသည် အလုပ်မဖြစ်ပါက သင့် Firewall ကို ထပ်မံဖွင့်ရန် တူညီသော အဆင့်များကို လိုက်နာရန် သေချာပါစေ။
Method 4: Run Print Troubleshooter
1. Windows Search bar တွင် “ပြဿနာဖြေရှင်းခြင်း” ကို ရိုက်ထည့်ပြီး နှိပ်ပါ။ ပြသာနာရှာဖွေရှင်းပေးခြင်း။

2.Next, ဘယ်ဘက် window pane မှ select လုပ်ပါ။ အားလုံးကိုကြည့်ရှုပါ။
3.ထို့နောက် Troubleshoot computer problems list မှ select လုပ်ပါ။ ပရင်တာ။

4. စခရင်ပေါ်ရှိ ညွှန်ကြားချက်ကို လိုက်နာပြီး ပရင်တာ ပြဿနာဖြေရှင်းပေးသူကို လည်ပတ်စေပါ။
5.Restart your PC and the error “There are no more endpoints available from the endpoint mapper” may be resolved.
Method 5: Change advanced sharing settings
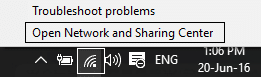
1.Right-click on Wireless icon on system tray and click on Open Network နှင့် Sharing စင်တာ။
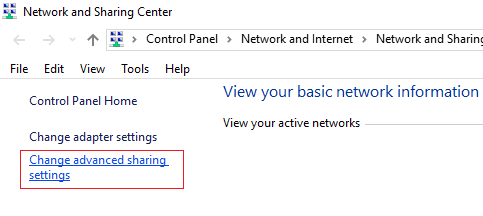
2.Click အပေါ် အဆင့်မြင့်ခွဲဝေမှု setting များကိုပြောင်းလဲပါ in the left-hand window.
3.Enable the Network discovery, File and printer sharing and Public folder.
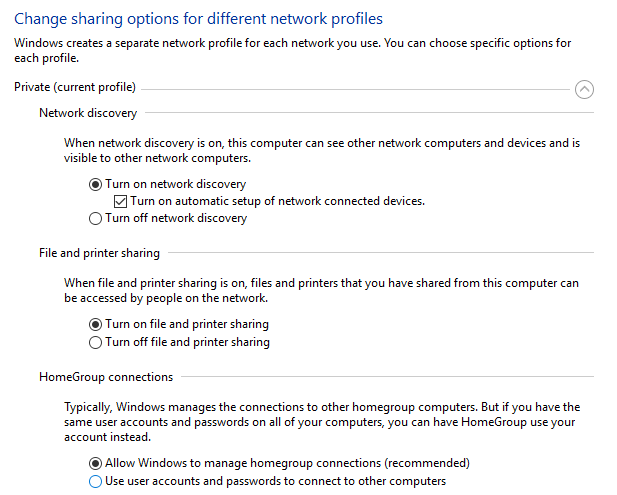
4.Click Save changes and close everything. Reboot your PC to save changes.
Method 6: Registry fix for Sharing error
၆ MpsSvc.reg နှင့် BFE.reg files. Double-click on them to run and to add these files to the registry.
2. ပြောင်းလဲမှုများကို သိမ်းဆည်းရန် သင့် PC ကို ပြန်လည်စတင်ပါ။
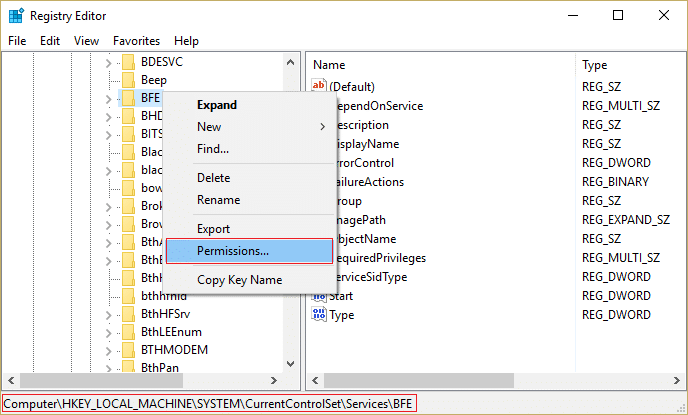
3. Windows Key + R ကို နှိပ်ပြီး ရိုက်ထည့်ပါ။ regedit လို့ Registry Editor ကိုဖွင့်ရန် Enter ကိုနှိပ်ပါ။
4.ထို့နောက်၊ အောက်ပါ မှတ်ပုံတင်ကီးသို့ သွားပါ-
ComputerHKEY_LOCAL_MACHINESYSTEMCurrentControlSetServicesBFE
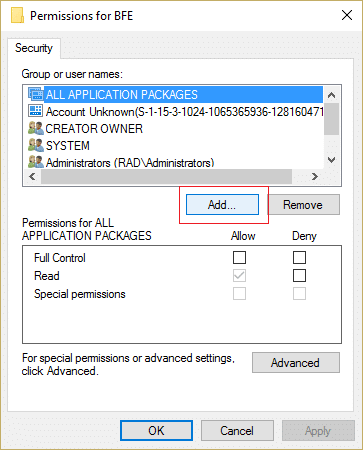
5.Right-click the BFE key and select Permissions.
6.In the next window that opens, click the Add ခလုတ်။
7. ရိုက်ပါလူတိုင်း” (without quotes) under the field Enter the object names to select and then click on အမည်များကို စစ်ဆေးပါ။
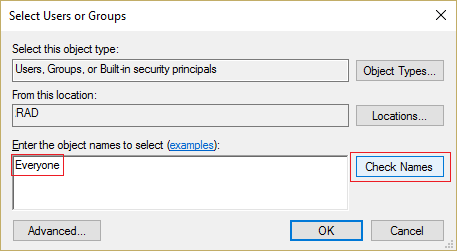
8.Now once the name is verified click အိုကေ။
9.Everyone should be now added to the Group or user names section.
10. သေချာရွေးချယ်ပါ။ လူတိုင်း from the list and check mark အပြည့်အဝထိန်းချုပ်ရေး option in Allow column.
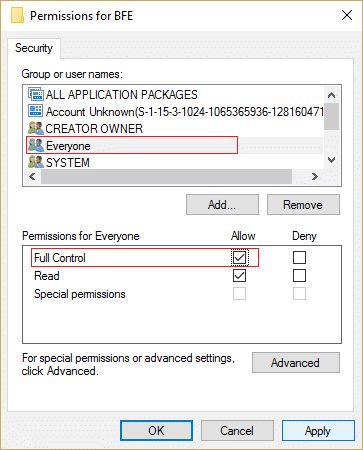
11. Apply ပြီးနောက် OK ကိုနှိပ်ပါ။
12. Windows Key + R ကို နှိပ်ပြီး ရိုက်ထည့်ပါ။ services.msc နှင့် Enter နှိပ်ပါ။
13.Find the below services and right-click on them then select properties ကို:
Filtering Engine
Windows Firewall ကို
14.Enable them both in the Properties window (click on Start) and make sure their startup type ကို သတ်မှတ် အလိုအလျောက်။
15.That’s it you may have Fix There are no more endpoints available from the endpoint mapper but if not then run SFC and CHKDSK in the next step.
နည်းလမ်း 7- System File Checker (SFC) နှင့် Check Disk (CHKDSK) ကိုဖွင့်ပါ။
1. Window Key + X ကို နှိပ်ပြီး အပေါ်ကို နှိပ်ပါ။ Command Prompt(Admin)။

2.ယခု အောက်ပါတို့ကို cmd တွင် ရိုက်ထည့်ပြီး enter နှိပ်ပါ။
Sfc /scannow sfc /scannow /offbootdir=c: /offwindir=c:windows

3. အထက်ပါ လုပ်ငန်းစဉ် ပြီးဆုံးရန် စောင့်ပြီး ပြီးသည်နှင့် သင့် PC ကို ပြန်လည်စတင်ပါ။
4. ထို့နောက် ဤနေရာမှ CHKDSK ကို run ပါ။ Check Disk Utility(CHKDSK) ဖြင့် ဖိုင်စနစ်အမှားများကို ပြင်ဆင်ပါ။
5. အထက်ပါ လုပ်ငန်းစဉ်ကို အပြီးသတ်ပြီး အပြောင်းအလဲများကို သိမ်းဆည်းရန် သင့် PC ကို ပြန်လည်စတင်ပါ။
နည်းလမ်း 8- DISM (Deployment Image Servicing and Management) ကိုဖွင့်ပါ
1. Windows Key + X ကို နှိပ်ပြီး ရွေးချယ်ပါ။ Command Prompt(Admin)။

2.Enter the following command in cmd and hit enter:
အရေးကြီး: When you DISM you need to have Windows Installation Media ready.
DISM.exe /Online /Cleanup-Image /RestoreHealth /Source:C:RepairSourceWindows /LimitAccess
မှတ်စု: Replace the C:RepairSourceWindows with the location of your repair source

2.Press enter to run the above command and wait for the process to complete, usually, it takes 15-20 minutes.
မှတ်စု: If the above command doesn't work then try on the below:
Dism /Image:C:offline /Cleanup-Image /RestoreHealth /Source:c:testmountwindows
Dism /Online /Cleanup-Image /RestoreHealth /Source:c:testmountwindows /LimitAccess
3.After the DISM process if complete, type the following in the cmd and hit Enter: sfc / scannow
4.Let System File Checker run and once it’s complete, restart your PC. Check if the Windows 10 Slow Shutdown problem is resolved or not.
သင်တို့အဘို့အကြံပြု:
ဒါပဲ မင်းအောင်မြင်သွားပြီ Fix There are no more endpoints available from the endpoint mapper ဒါပေမယ့် ဒီ post နဲ့ ပတ်သတ်ပြီး သိချင်တာတွေရှိသေးရင် comment ရဲ့ ကဏ္ဍမှာ မေးမြန်းနိုင်ပါတယ်။

