After installing the latest Windows feature update, your PC may be trapped in an automated repair cycle. This article will give you various troubleshooting techniques if you’re attempting to locate a repair approach that will allow you to resolve diagnosing your PC Windows 10 issue. So, continue reading to fix diagnosing your PC stuck issue on Windows 10.
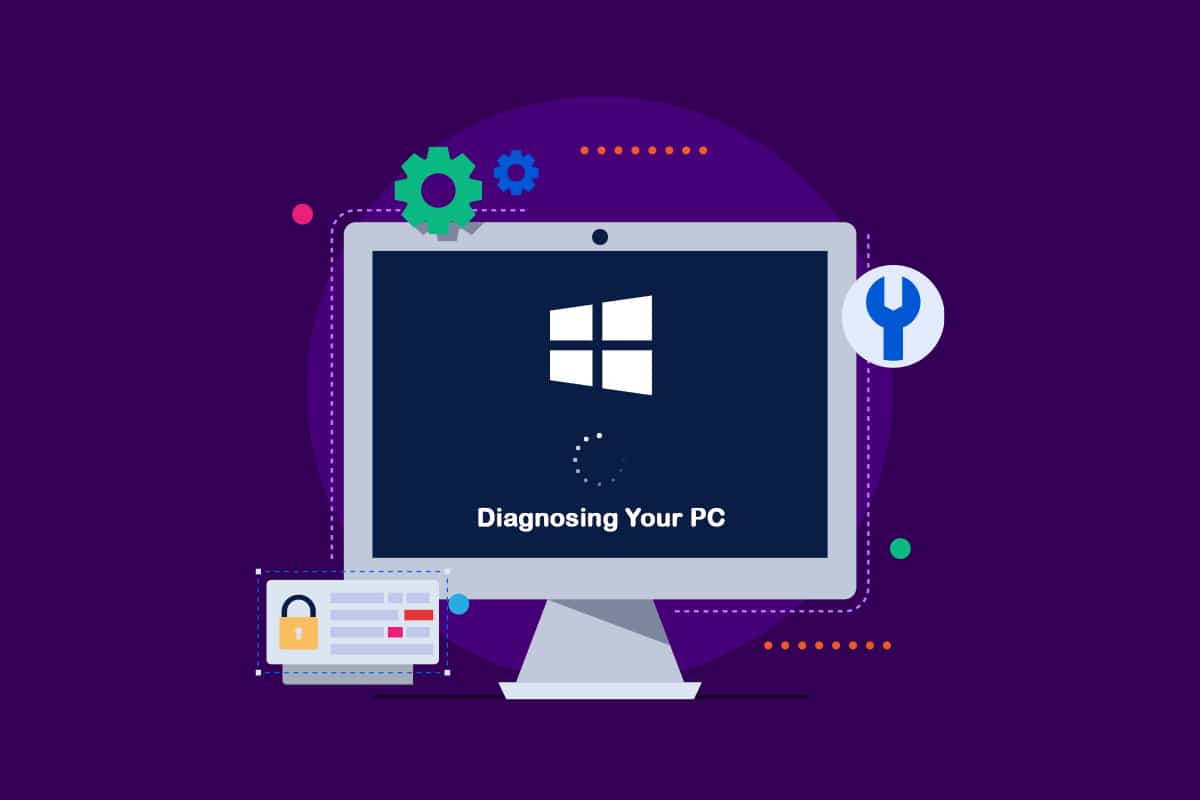
How to Fix Stuck on Diagnosing your PC in Windows 10
We looked into this diagnosing your PC stuck issue by looking at multiple user reports and tried various repair strategies suggested by some impacted users. As it turns out, various conditions make your system trapped inside the diagnosing your PC screen. Here’s a list of circumstances that might lead to this issue on Windows 10.
- Corruptie van systeembestanden: Corrupted system files might also cause the System Diagnostic tool to appear at every system start-up. If this utility is also corrupted, it will be stuck in a loop.
- Inadequate System Space: As it turns out, this problem of this issue can also arise when the system lacks sufficient storage capacity to load all the programs and services required for the starting operation.
- Glitched Automated Repair Utility: This issue has been reported by multiple customers to be caused by mysterious system drive troubles. In this instance, the Automatic Repair program will try to open at every restart in an attempt to fix the problem, but it will be unable to locate the source of the problem.
- Faulty BCD Data: Corrupted booting data might also cause this issue in severe conditions, which prevents the starting process from finishing.
Some afflicted customers have attempted rebooting their computers to get rid of this problem but have claimed that their computers go into a dark screen, show the logo, and then return to the Diagnostic PC page. The operating system indicates that your device has been diagnosed, but there might be no progress made. You can follow the below methods to resolve the issue.
Method 1: Perform Hard Reboot
You can do a hard reboot if your Windows is unable to boot due to the Preparing Automatic Repair or Diagnosing your PC issue.
1. Haal de stekker uit het stopcontact AC adapter en verwijder het Accu van het apparaat.
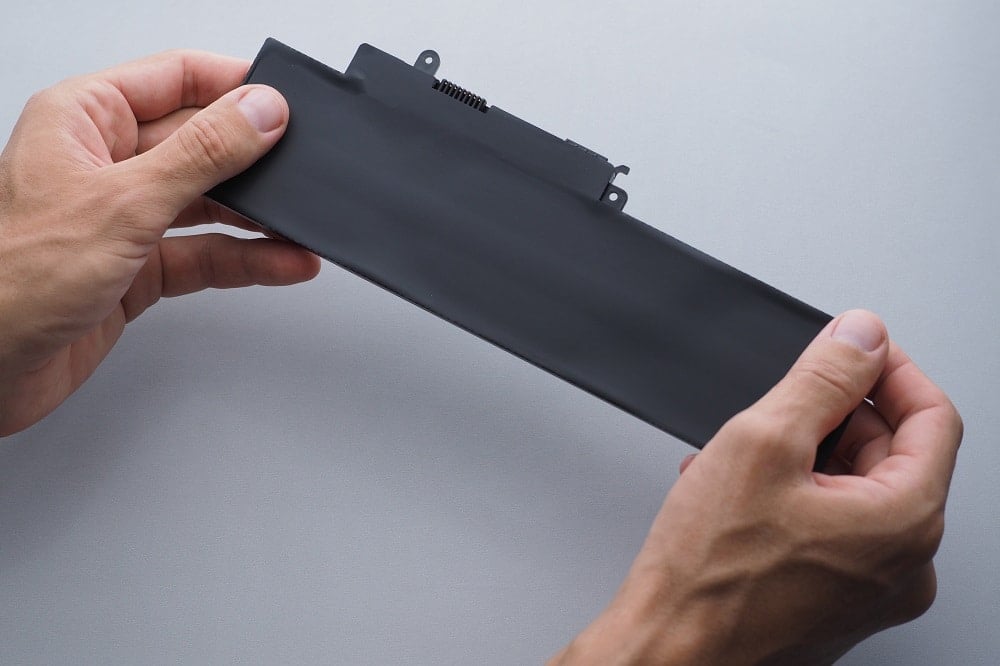
2. Check if it boots up normally by pressing and holding the uit-knop For 20 seconden.
If this technique fails, try one of the following options.
Lees ook: Hoe u de WDF_VIOLATION-fout in Windows 10 kunt oplossen
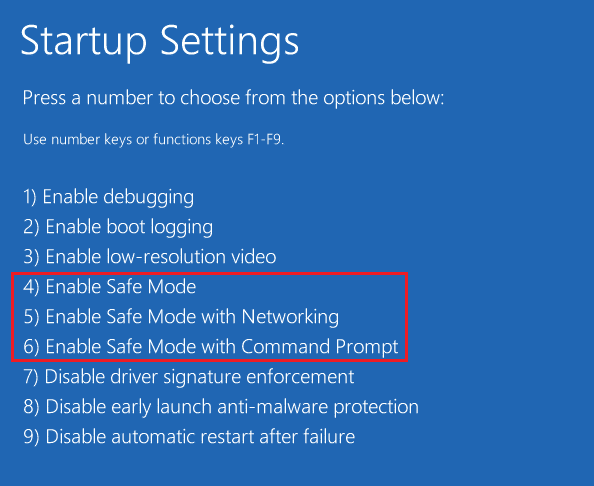
Methode 2: Start op in de veilige modus en maak ruimte vrij
As some users have discovered, this issue can also occur when the system does not have enough capacity to start. Several individuals in a similar position have overcome the problem by running their machines in Safe Mode and freeing up some space. Follow our guide on How to Boot to Safe Mode in Windows 10.
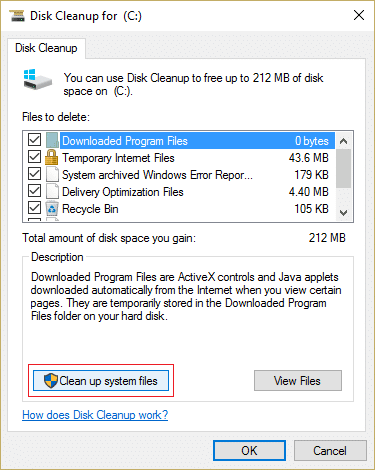
Then, perform Disk cleanup by following our guide to run Disk Cleanup.
If diagnosing your PC Windows 10 problem persists, follow the next procedure below.
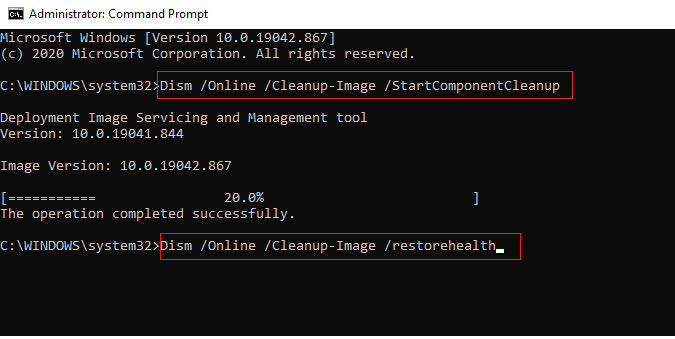
Methode 3: Systeembestanden repareren
It’s also possible that this problem is caused by System File corruption. These corrupted files might prevent the booting procedure from finishing. You’ll have to run the scans before the Booting phase since you can’t go beyond the Diagnostics page. Read our guide on How to Repair System Files on Windows 10.
Lees ook: Fix Computer werd niet opnieuw gesynchroniseerd omdat er geen tijdgegevens beschikbaar waren
Method 4: Run System Restore Utility
You may be dealing with a serious corruption problem that can’t be treated traditionally. When faced with a circumstance like this, the best action is to take a damage-control strategy. Most start-up troubles caused by system file corruption can be resolved by returning the machine to a healthy condition in which all components are working properly. Follow the below steps.
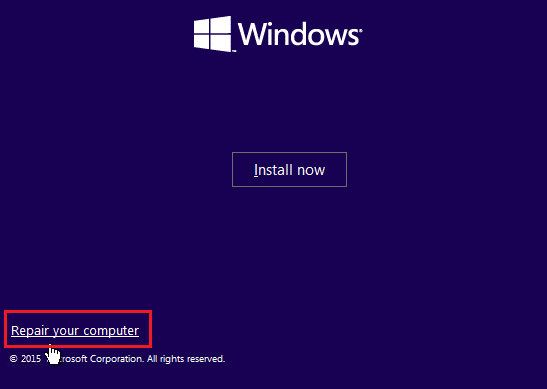
1. Steek de installatie schijf en herstart je pc.
2. Druk op een willekeurige sleutel to start up the installation media when you see the booting screen.
3. When Windows Setup has finished loading, click on Uw computer herstellen.
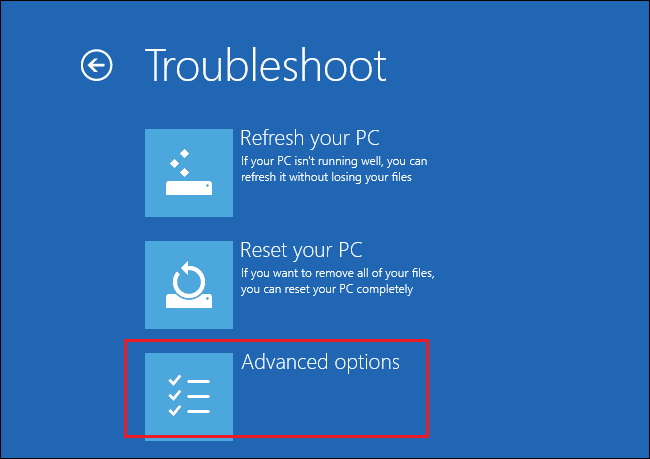
4. Ga naar de Problemen menu from the first repair menu.
5. Klik op geavanceerde opties from the Troubleshoot menu.
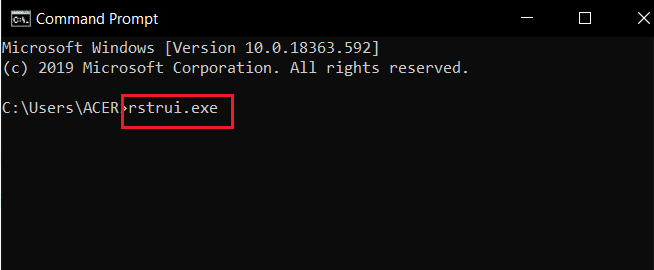
6. Klik vervolgens op Command Prompt from the list of available utilities.
7. Om het Systeemherstel program, type the rstrui.exe commando in het Command Prompt venster en druk op de Enter toets.
8. Klik op Volgende once you’ve reached the first screen.
9. Nu, teek the option labeled Toon meer herstelpunten.
10. Once you’ve done so, go through each restoration momentopname and pick one taken before the Diagnostics problem.
11. To go on to the next option, choose the suitable foto en klik op Volgende.
12. Klik nu op Finish.
Your system will restart automatically after restoring, and the old machine will be fixed at the next system starting.
Methode 5: BCD opnieuw opbouwen
In Windows 10, you’ll get the Preparing Automatic Repair error if the boot files are missing or damaged. As a result, some users will re-build the boot record using the procedures below.
1. Insert the Windows bootable installation CD into the PC displaying the error message Preparing Automatic Repair or Diagnosing your PC.
2. Start your computer by booting from the cd installeren.
3. To continue, choose your taal instellingen en klik op de Volgende knop.
4. kiezen Reparatie jouw computer.
5. kiezen Problemen.
6. kiezen Command Prompt.
7. Enter the instructions below into the prompt, and press the Enter toets na elke een.
bootrec / fixmbr
bootrec / fixboot
bootrec / scanos
bootrec / RebuildBcd
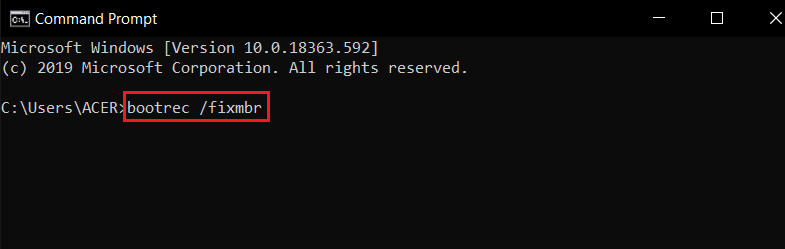
8. Then, type the command afrit en druk op de Enter toets.
9. Ten slotte start de pc opnieuw op.
Lees ook: Hoe u Windows Update-fout 80072ee2 kunt oplossen
Methode 6: Automatische opstartreparatie uitschakelen
If this happens, the Automatic Start-up Repair software will launch at every system start-up. However, if the utility is broken, you might not be able to go past the start-up screen. Therefore, disabling this software would prevent the Diagnosing your PC screen from appearing.
1. As soon as you see the introductory screen, press the F8 key repeatedly to get to the Geavanceerde opstartopties menu.
2. kiezen veilige modus met netwerken from the Advanced Boot Options menu by pressing the F5-toets or using the arrow keys.
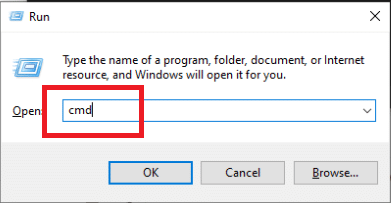
3. When the booting routine is complete, press Windows + I-toetsen om de. te starten Uitvoeren dialoogvenster.
4. Type cmd en druk op Ctrl + Shift + Enter-toetsen openen verhoogde opdrachtprompt.
5. Klik op Ja in de prompt.
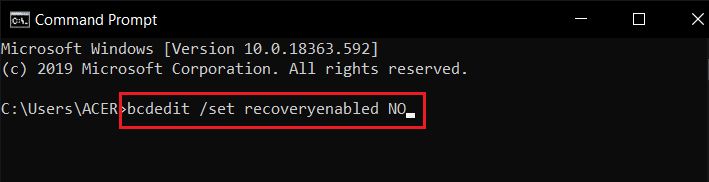
6. Voer het volgende in: commando en druk op Enter toets.
bcdedit / set recoveryenabled NO
7. Zodra het proces is voltooid, restart jouw apparaat.
If diagnosing your PC Windows 10 problem persists or you don’t get a different error, continue the next procedure.
Methode 7: Updates verwijderen
If the update fails to install properly on your device, you might face this issue. Follow the below steps to resolve the discussed issue.
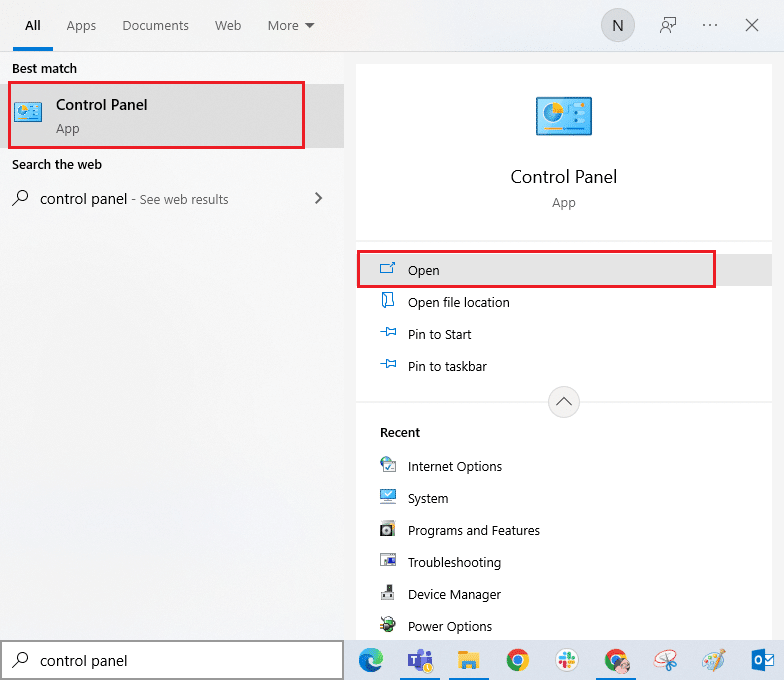
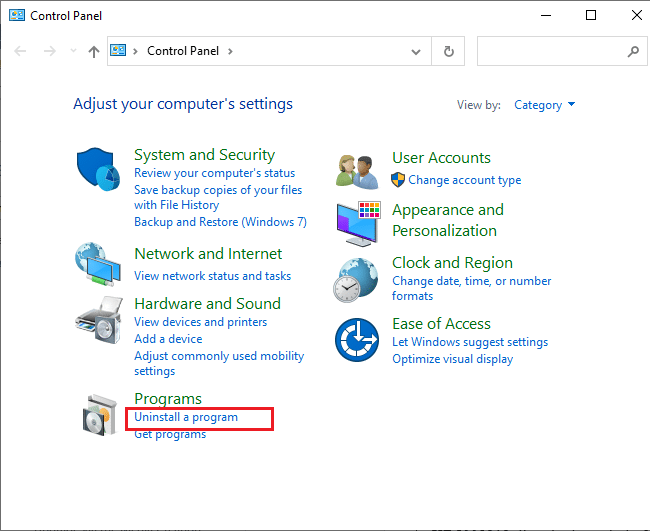
1. Druk op de Windows-toets en het type control panel, klik dan op Openen.
2. Klik nu op Een programma verwijderen optie onder de Programma's menukaart zoals afgebeeld.
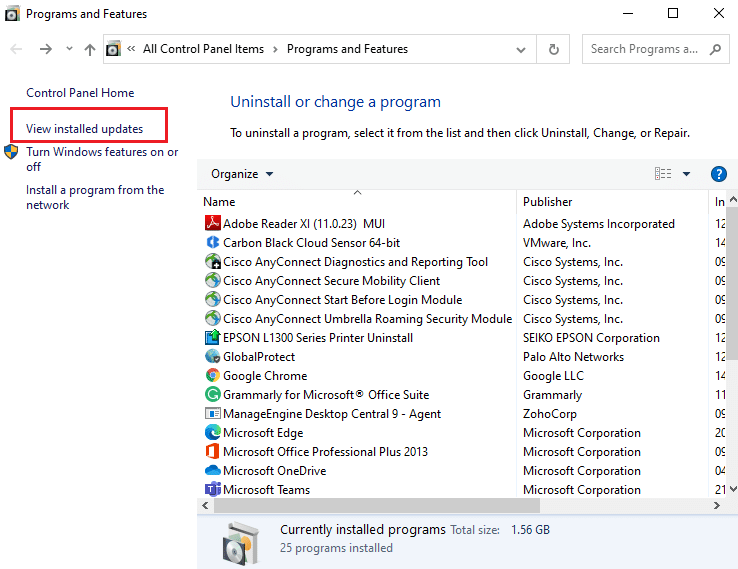
3. Klik nu op Geïnstalleerde updates in het linkerdeelvenster, zoals weergegeven.
4. Zoek en selecteer nu de meest recente update door te verwijzen naar Geïnstalleerd op de datum en klik op Installatie ongedaan maken optie zoals hieronder weergegeven.
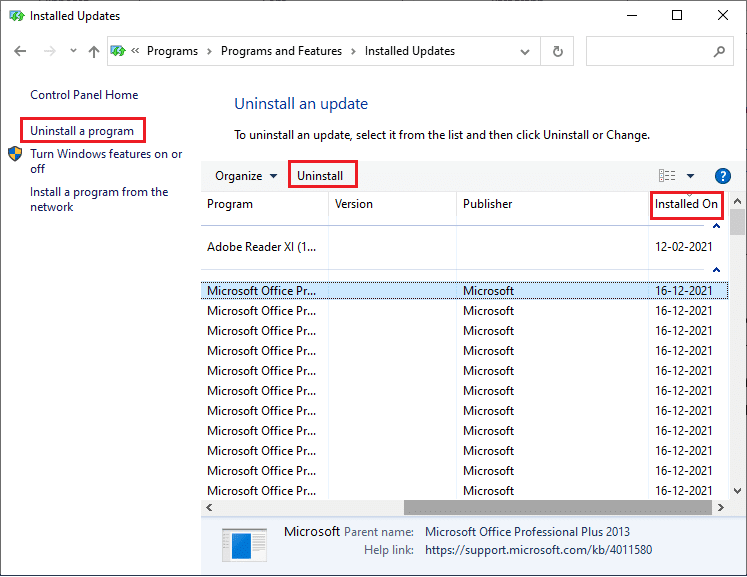
5. Bevestig ten slotte elke vraag en start de pc opnieuw op.
Check if diagnosing your PC stuck issue persists or not.
Lees ook: 7 manieren om de BSOD-fout iaStorA.sys op Windows 10 op te lossen
Method 8: Perform Repair Install
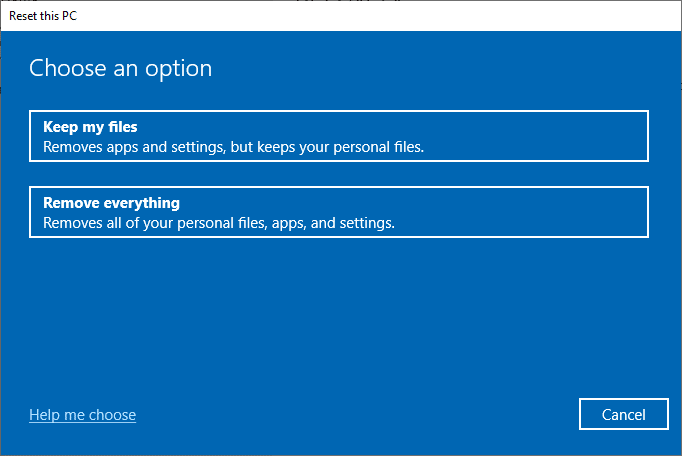
If none of the above-mentioned repair methods have worked, you’re probably dealing with a serious case of system corruption that can’t be fixed using normal methods. In this case, the only way to repair the problem is to reset every Windows component, including any booting-related tasks causing the Automatic Repair loop. You may always perform a clean installation but bear in mind that doing so will lose any saved data within your Windows system. If you choose a clean install, all your personal data, applications, games, documents, and other media will disappear. Read our guide on How to do a Clean Install of Windows 10 and implement the same.
Aanbevolen:
We hope you found this information useful and that you were able to resolve stuck on diagnosing your PC in Windows 10 problem. Please let us know which technique was the most beneficial for you. Please use the form below if you have any queries or comments. Also, let us know what you want to learn next.

