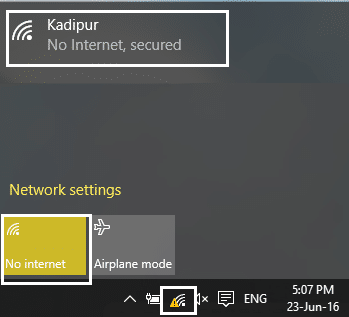
If a WiFi network has the ‘limited connectivity’ sign next to it, it means that you’re connected to the network but do not have access to the internet. The main reason for this issue is that the DHCP server is not responding. And when the DHCP server doesn’t respond the computer automatically assigns an IP address to itself because the DHCP server was unable to assign the IP address. Hence the ‘Limited or No connectivity’ error.
Fiks WiFi-problemer med begrenset tilgang eller ingen tilkobling
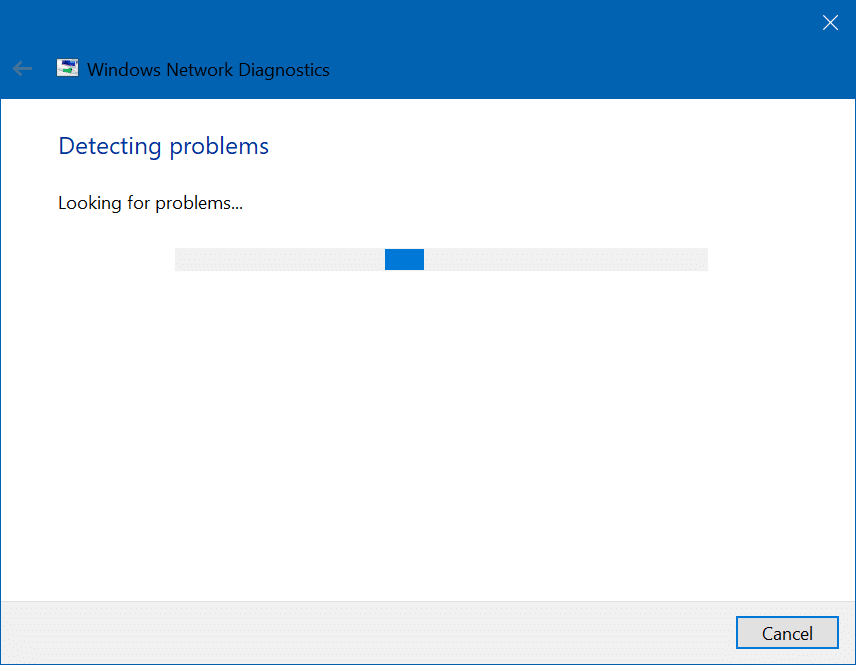
Metode 1: Kjør nettverksfeilsøking
1. Høyreklikk på nettverksikon på oppgavelinjen og klikk på Feilsøk problemer.
![]()
2. Nettverksdiagnostikk-vinduet åpnes. Følg instruksjonene på skjermen for å kjøre feilsøkingsprogrammet.
Metode 2: Tilbakestill TCP / IP
1. Right-click on the Windows button and select “Command Prompt(Admin).”

2. Skriv inn følgende kommando: netsh int ip reset c:resetlog.txt
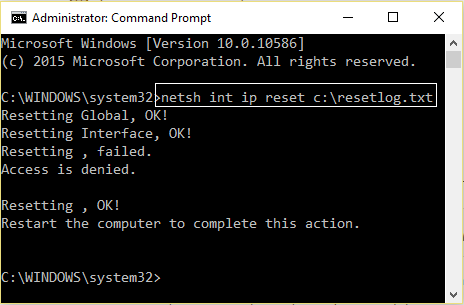
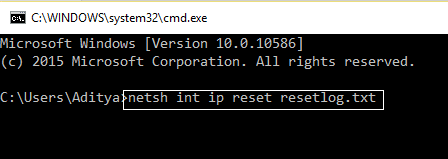
3. If you don’t want to specify the directory path then use this command: Netsh int ip reset resetlog.txt
4. Start PCen på nytt.
Metode 3: Endre Bitdefender brannmurinnstillinger (eller antivirusbrannmuren din)
1. Open Settings of Bitdefender Internet Security and choose Brannmur.
2. Klikk på “Avanserte innstillinger"-Knappen.
3. Pass på at "Aktiver deling av Internett-tilkobling” er sjekket.
NOTAT: If you don’t have the above setting then disable “Block Internet Connection Sharing” instead of above.
4. Click the OK button to save changes.
5. And if it doesn’t work try disabling your Antivirus Firewall and enabling Windows Firewall.
For maximum people changing firewall settings fixes the limited access or no connectivity WiFi problem, but if it didn’t work for you don’t lose hope we still have a long way to go, so follow the next method.
Method 4: Change adapter settings
1. Open the Bitdefender, then select Beskyttelsesmodul og klikk på Firewall feature.
2. Make sure the Firewall is turned ON and then go to the Adapters tab and perform the following changes:
Set Network type to "Home/Office"
Set Stealth Mode to "Off"
Set Generic to "On"
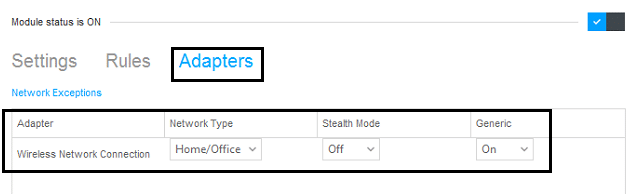
3. Restart your PC to apply these changes.
Method 5: Wake up your Wi-Fi Adapter
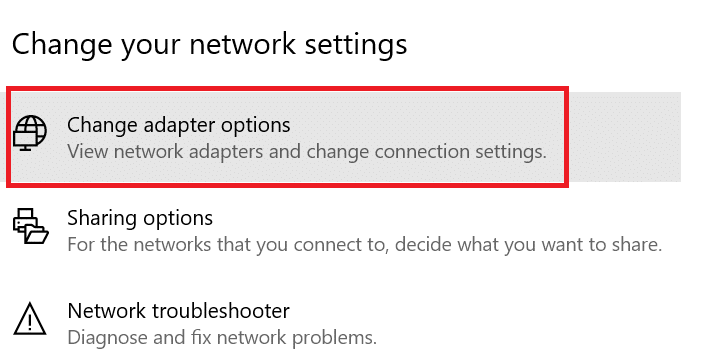
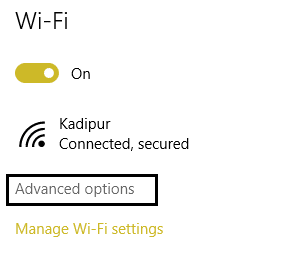
1. Høyreklikk på nettverksikonet i systemstatusfeltet og velg Åpen Nettverk og Internett-innstillinger.

2. Under Endre nettverksinnstillingene, klikk på Endre adapteralternativer.
3. Klikk på WiFi-nettverk og velg Egenskaper.
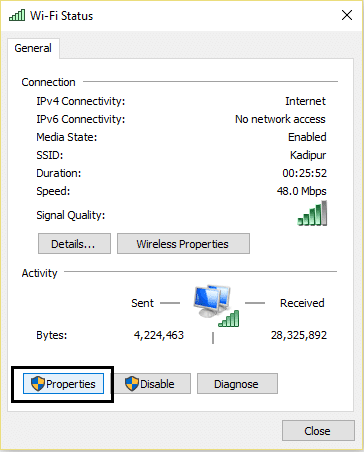
4. Now in WiFi-egenskaper Klikk på Konfigurer.
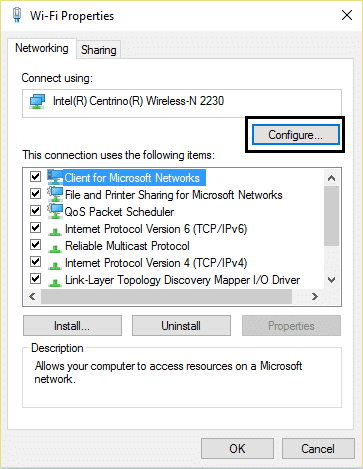
5. Go to the Power Management tab and uncheck “La datamaskinen slå av denne enheten for å spare strøm."
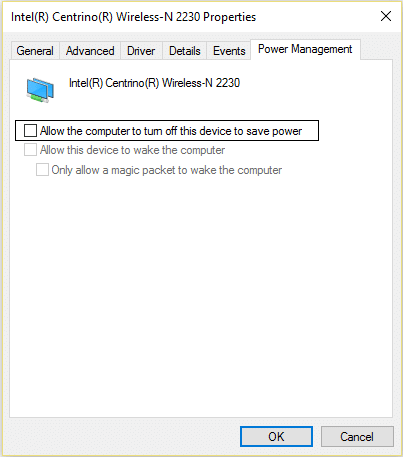
6. Start datamaskinen på nytt.
Metode 6: Bruk Google DNS
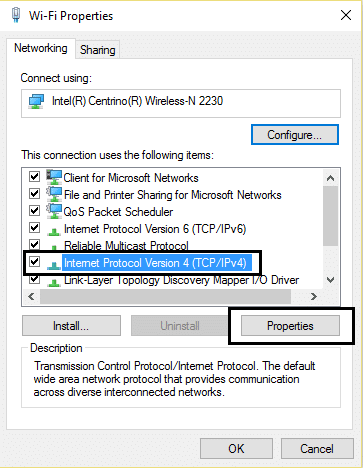
1. Again go to your Wi-Fi properties.
2. Velg nå 4 Internet Protocol versjon (TCP / IPv4) og klikk Egenskaper.
3. Check the box saying “Bruk følgende DNS server adresser” and enter the following:
Foretrukket DNS-server: 8.8.8.8
Alternativ DNS-server: 8.8.4.4
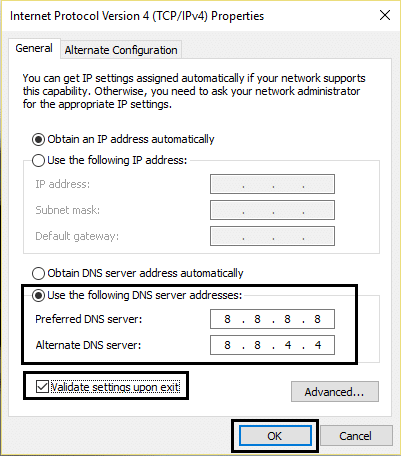
4. Click OK to save, then click close and restart din PC.
Method 7: Reset TCP/IP Auto-tuning
1. Right-click on the Windows key and select “Ledetekst (Admin)."
2. Skriv inn følgende kommandoer:
netsh int tcp set heuristics deaktivert netsh int tcp set global autotuninglevel=deaktivert netsh int tcp set global rss=aktivert
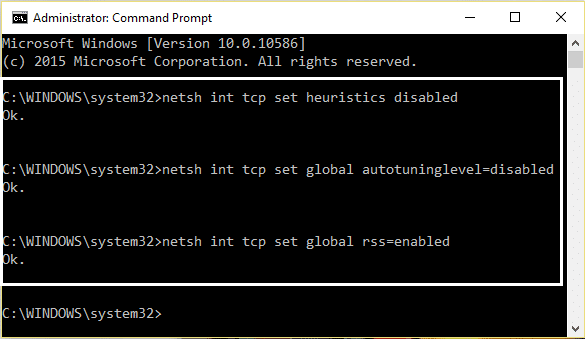
3. Start datamaskinen på nytt.
Method 8: Enable Download over metered connections
1. Klikk på Windows-tasten og velg Innstillinger.
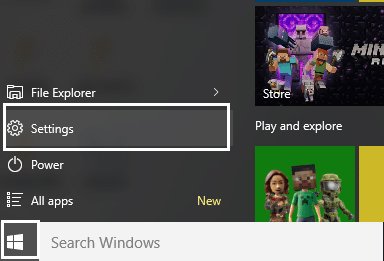
2. Now in settings click on Nettverk og Internett.

3. Here you will see Avanserte alternativer, klikk på den.
4. Sørg for at din Metered connection is set to PÅ.
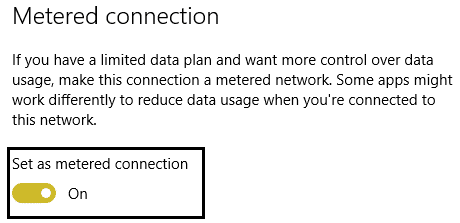
5. Reboot å bruke endringer.
Yeah, I admit, this is a stupid step but hey for some people it worked out so why not try it and who knows your limited access or no connectivity WiFi issues may be fixed.
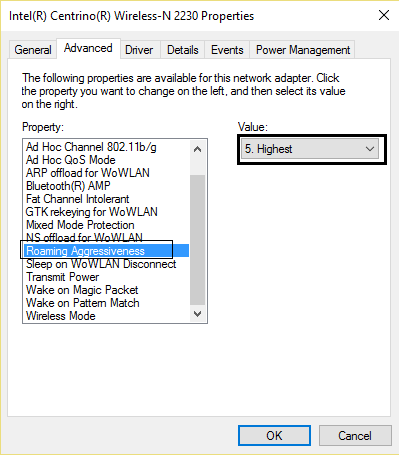
Method 9: Set Roaming Aggressiveness to Maximum
1. Høyreklikk på nettverksikonet i systemstatusfeltet og velg Åpen Nettverk og Internett-innstillinger.
2. Under Endre nettverksinnstillingene, klikk på Endre adapteralternativer.
3. Velg nå din Wi-Fi og klikk på Egenskaper.
4. Inside Wi-Fi properties click on Konfigurer.
5. Navigere til kategorien Avansert og finne Roaming aggressivitet innstilling.
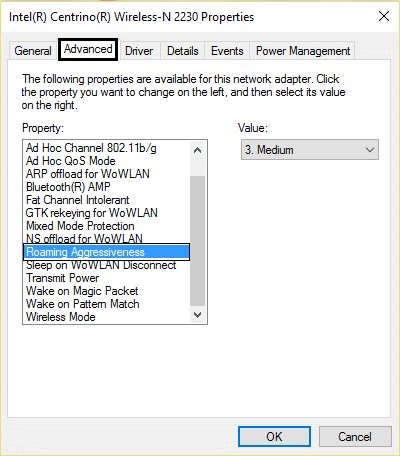
6. Change the value from Medium to Highest og klikk på OK.
7. Reboot å bruke endringer.
Metode 10: Oppdater drivere
1. Trykk på Windows-tasten + R og skriv "devmgmt.msc” in Run dialogue box to open the Enhetsbehandling.

2. Utvid nettverkskort, og høyreklikk deretter på din Wi-Fi-kontroller(for eksempel Broadcom eller Intel) og velg Oppdater drivere.

3. In the Update Driver Software Windows, select “Bla gjennom datamaskinen min for driverprogramvare."

4. Velg nå "La meg velge fra en liste over enhetsdrivere på datamaskinen."

5. Prøv å oppdatere drivere fra de oppførte versjonene.
6. If the above didn’t work then go to the produsentens nettsted for å oppdatere drivere: https://downloadcenter.intel.com/
7. Reboot å bruke endringer.
Du kan også gjerne:
I hope by now any one of the methods must have worked for you to fix limited access or no connectivity WiFi issues. If you still have any queries regarding this guide please feel free to ask them in the comments.
![[SOLVED] keyboard has stopped working on Windows 10](https://lbsite.org/wp-content/uploads/2023/01/Solved-keyboard-has-stopped-working-on-Windows-10.png "[SOLVED] keyboard has stopped working on Windows 10")
