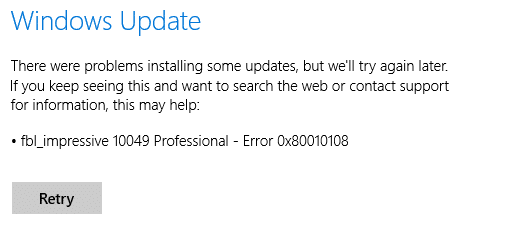
If you face Error 0x80010108 while trying to update your Windows 10, you are at the right place as today we are going discuss how to resolve this error. Also, running Windows Update Troubleshooter will not help, but it’s worth a try, as in some cases it can fix the underlying issue. The main cause of this error seems to be Windows Update Service.
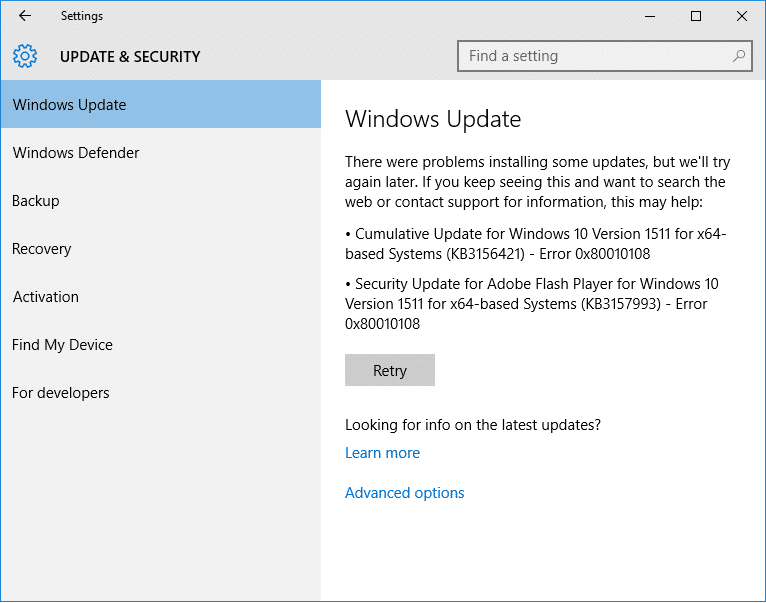
This error can be fixed by restarting Windows Update Service and then re-registering the wups2.dll. So without wasting any time let’s see how to actually Fix Windows Update Error 0x80010108 with the help of below-listed troubleshooting guide.
[FIXED] Windows Update Error 0x80010108
Sørg for å opprette et gjenopprettingspunkt i tilfelle noe går galt.
Metode 1: Kjør Windows Update-feilsøking
1. Open control panel and Search Troubleshoot in the search bar and click on Feilsøking.
![Search Troubleshoot and click on Troubleshooting | [FIXED] Windows Update Error 0x80010108](https://lbsite.org/wp-content/uploads/2023/02/Search-Troubleshoot-and-click-on-Troubleshooting.jpg)
2. Deretter, fra venstre vindu, velger du rute Se alt.
3. Velg deretter fra listen Feilsøk datamaskinproblemer Windows Update.

4. Follow on-screen instruction and let the Windows Update Troubleshoot run.

5. Start PC-en på nytt og se om du kan fix Windows Update Error 0x80010108.
Method 2: Restart Windows Update Service
1. Trykk Windows-tast + R og skriv deretter services.msc og trykk Enter.
![services windows | [FIXED] Windows Update Error 0x80010108](https://lbsite.org/wp-content/uploads/2023/01/services-windows.png)
2. Locate the following services:
Background Intelligent Transfer Service (BITS)
Kryptografisk tjeneste
Windows Update
MSI Installer
3. Right-click on each of them and then select Properties. Make sure their Oppstartstypen er satt til Automatic.

4. Now if any of the above services are stopped, make sure to click on Start under Service Status.
5. Next, right-click on Windows Update service and select Start.

6. Click Apply, followed by OK and then reboot your PC to save changes.
Se om du kan Fix Windows Update Error 0x80010108, if not then continue with the next method.
Method 3: Re-register wups2.dll
1. Åpent Ledetekst. Brukeren kan utføre dette trinnet ved å søke etter 'cmd' Og trykk deretter på Enter.
![Open Command Prompt. The user can perform this step by searching for ‘cmd’ and then press Enter | [FIXED] Windows Update Error 0x80010108](https://lbsite.org/wp-content/uploads/2023/02/Open-Command-Prompt.-The-user-can-perform-this-step-by-searching-for-%E2%80%98cmd-and-then-press-Enter..jpg)
2. Skriv inn følgende kommando i cmd og trykk Enter:
regsvr32 wups2.dll /s
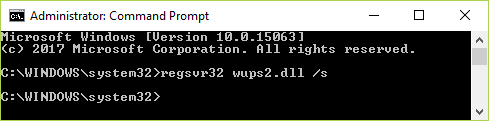
3. This would re-register wups2.dll. Reboot your PC to save changes.
Metode 4: Utfør en ren oppstart
Sometimes 3rd party software can conflict with Windows Update and therefore cause Windows Update Error 0x80010108. To fikse dette problemet, you need to perform a clean boot in your PC and diagnose the issue step by step. Once your system starts in Clean Boot again try to update Windows and see if you can resolve the error code 0x80010108.

Metode 5: Deaktiver antivirus og brannmur midlertidig
Sometimes the Antivirus program can cause an error. To verify this is not the case here; you need to disable your antivirus for a limited time so that you can check if the error still appears when the antivirus is off.
1. Høyreklikk på Antivirusprogramikon fra systemstatusfeltet og velg Deaktiver.

2. Next, select the time frame for which the Antivirus forblir deaktivert.

Note: Choose the smallest amount of time possible, for example, 15 minutes or 30 minutes.
3. Once done, again try to connect to open Google Chrome and check if the error resolves or not.
4. Søk etter kontrollpanelet fra startmenyen, og klikk på det for å åpne Kontrollpanel.
![Type Control Panel in the search bar and press enter | [FIXED] Windows Update Error 0x80010108](https://lbsite.org/wp-content/uploads/2023/01/Type-Control-Panel-in-the-search-bar-and-press-enter.png)
5. Klikk deretter på System og sikkerhet then click on Windows brannmur.

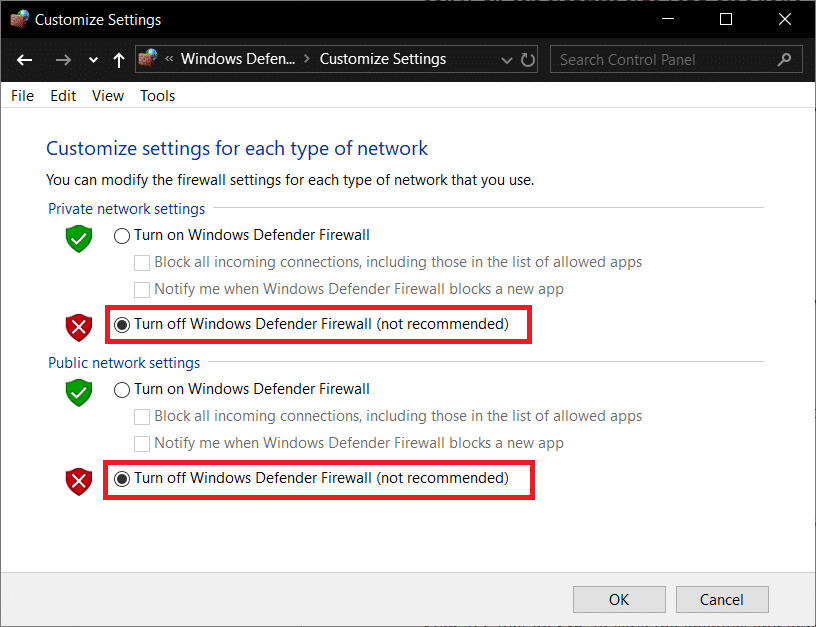
6. Klikk nå på fra venstre vindusrute Slå Windows-brannmuren på eller av.
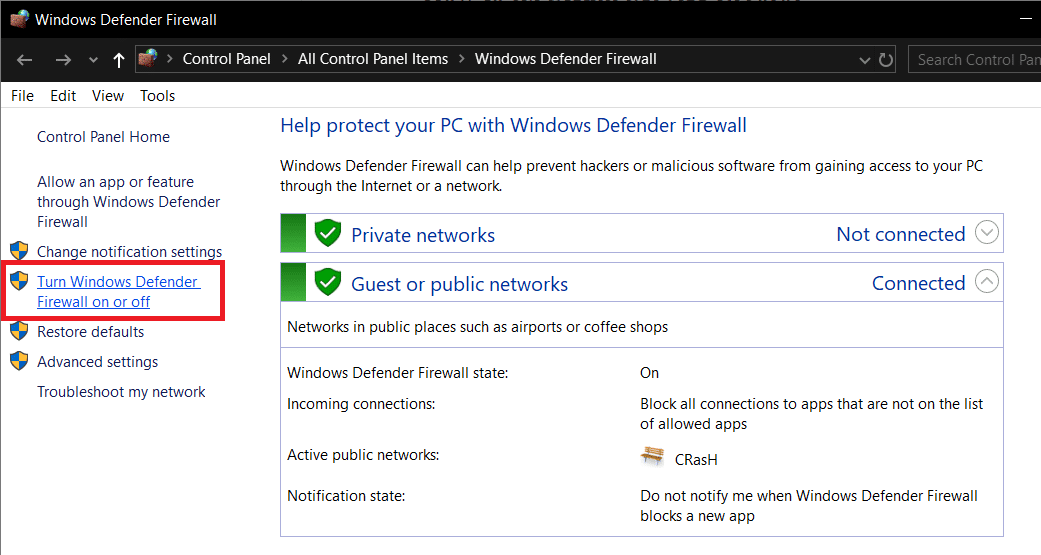
7. Velg Slå av Windows-brannmuren og start PC-en på nytt.
Again try to open Google Chrome and visit the web page, which was earlier showing an feil. If the above method doesn’t work, please follow the same steps to turn on your Firewall again.
If the above method doesn’t work, please follow the same steps to turn on your Firewall again.
Metode 6: Reparer Installer Windows 10
This method is the last resort because if nothing works out, then, this method will surely repair all problems with your PC. Repair Install using an in-place upgrade to repair issues with the system without deleting user data present on the system. So follow this article to see How to Repair Install Windows 10 Easily.
![choose what to keep windows 10 | [FIXED] Windows Update Error 0x80010108](https://lbsite.org/wp-content/uploads/2023/01/choose-what-to-keep.png)
Anbefalt for deg:
Det er det du har lykkes med Løs Windows Update Error 0x80010108 men hvis du fortsatt har spørsmål angående denne veiledningen, kan du gjerne spørre dem i kommentarfeltet.

