Fix High Ping on Windows 10: It becomes really irritating for online gamers who use the internet for playing games to have a high ping on your system. And having a high ping is definitely not good for your system and while playing online having high ping doesn’t help at all. Sometimes, you will get such pings when you have high configuration system. Ping can be defined as the computational speed of your connection or, more particularly, the czas oczekiwania of its connection. If you facing problems while playing the game due to the interruption of such above-mentioned issue, here is an article for you that will show some methods through which you can reduce ping latency on your Windows 10 system.
5 Ways to Fix High Ping on Windows 10
Pamiętaj, aby utworzyć punkt przywracania na wypadek, gdyby coś poszło nie tak.
Method 1: Disable Network Throttling using Registry
1.Press Windows Key + R to open Run then type regedit i naciśnij Enter, aby otworzyć Edytor rejestru.

2. Przejdź do następującego klucza rejestru:
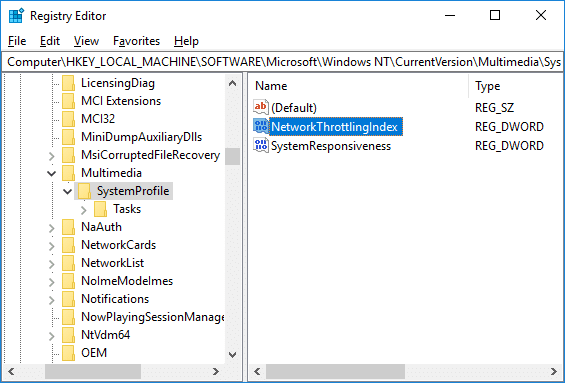
HKEY_LOCAL_MACHINESOFTWAREMicrosoftWindows NTCurrentVersionMultimediaSystemProfile
3.Select Profil systemowy then in the right window pane double-click on “Indeks ograniczania przepustowości sieci".
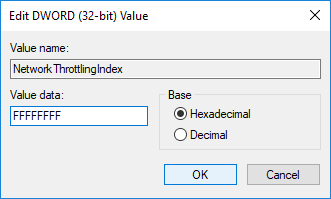
4.First, make sure the Base is selected as “Szesnastkowy” then in the value data field type “FFFFFFFF”I kliknij OK.
5.Now navigate to the following registry key:
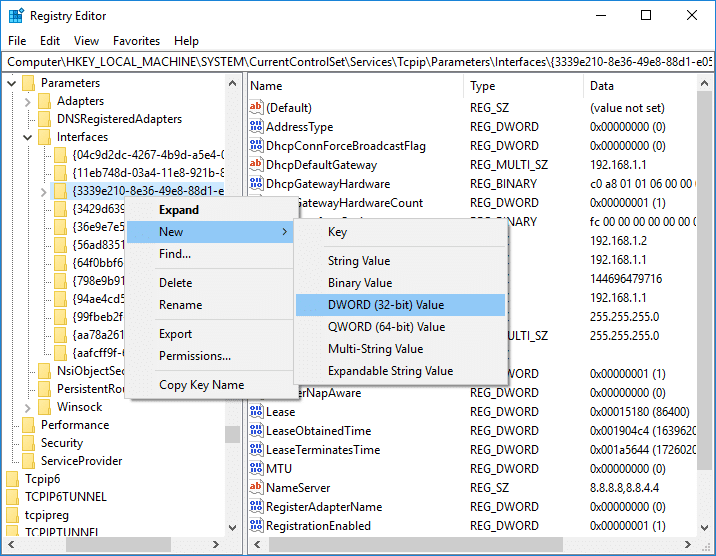
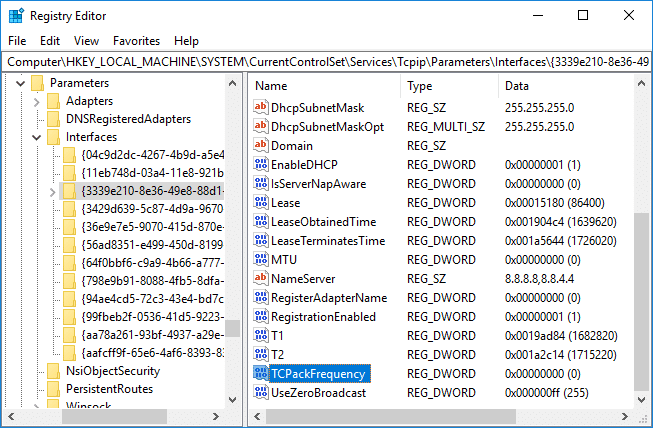
HKEY_LOCAL_MACHINESYSTEMCurrentControlSetServicesTcpipParametersInterfejsy
6.Here you need to select a podklucz (folder) which represents your połączenie internetowe. To identify the correct folder you need to check the subkey for your IP address, gateway, etc information.

7.Now right-click on the above subkey then select Nowy > Wartość DWORD (32-bitowa).
8.Name this newly created DWORD as “TCPackFrequency”I naciśnij Enter.
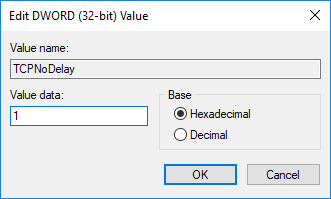
9.Similarly, again create a new DWORD and name it as “TCPBez opóźnienia".
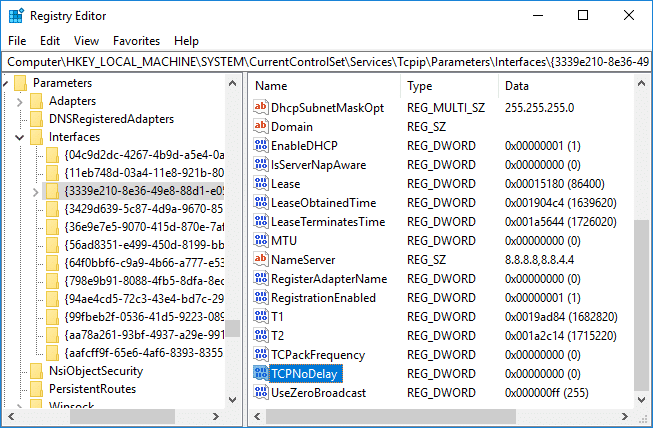
10.Set the Value of both “TCPackFrequency” & “TCPBez opóźnienia” DWORD to 1 & click OK to save changes.

11. Następnie przejdź do następującego klucza rejestru:
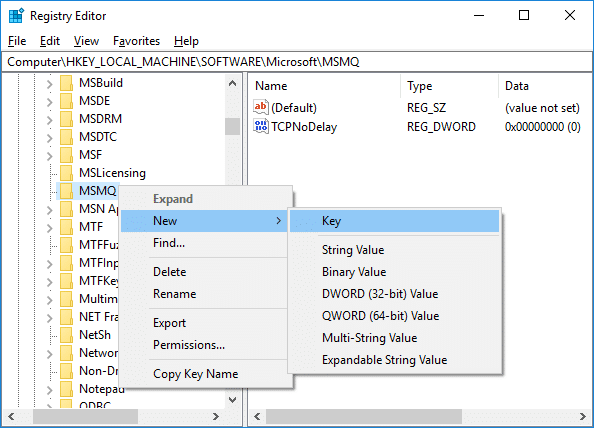
HKEY_LOCAL_MACHINESOFTWAREMicrosoftMSMQ
12.Right-click on MSMQ then select Nowy > Wartość DWORD (32-bitowa).
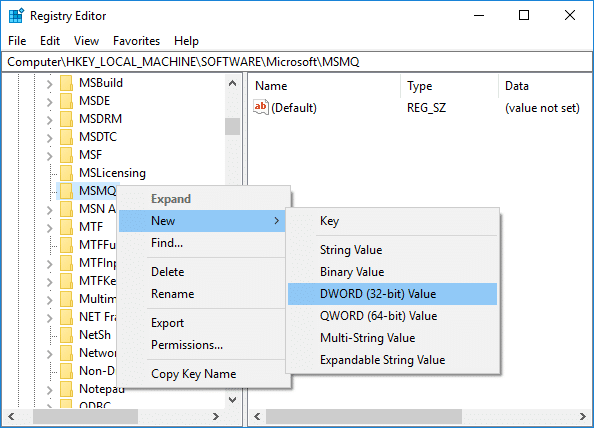
13.Name this DWORD as “TCPBez opóźnienia”I naciśnij Enter.
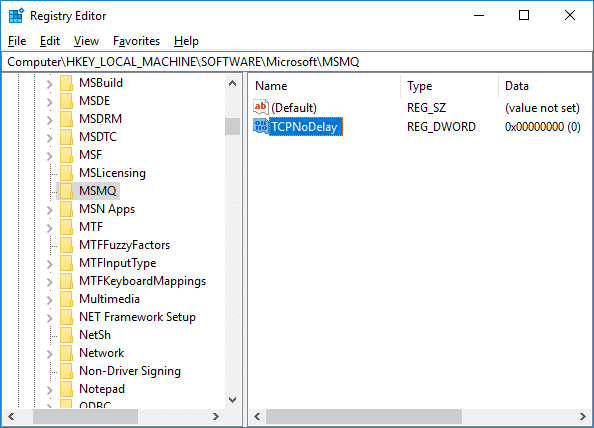
14.Double-click on “TCPBez opóźnienia” then set the value as 1 dla data waluty field and click OK.
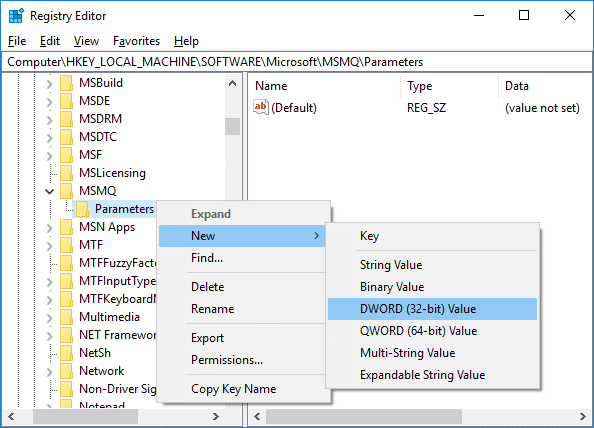
15.Rozwiń MSMQ key and make sure it has parametry podklucz.
16.If you can’t find parametry folder then right-click on MSMQ & Wybierz Nowy > Klucz.
17. Nazwij ten klucz jako parametry & hit Enter.
18. Kliknij prawym przyciskiem myszy parametry & Wybierz Nowy > Wartość DWORD (32-bitowa).
19.Name this DWORD as “TCPBez opóźnienia” and set it’s value to 1.
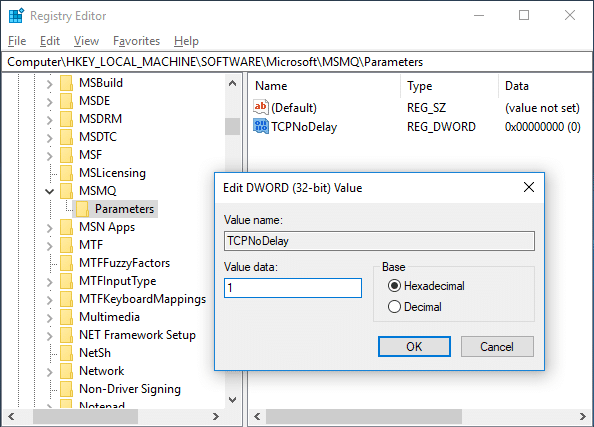
20.Click OK to save changes and reboot your PC.
Method 2: Disable Apps with High Network Usage using Task Manager
Usually, Windows 10 permits its users to observe which applications are employing or eating up the most network bandwidth in the background.
1. Naciśnij Ctrl + Shift + Esc klucze razem, aby otworzyć Menedżer zadań.

2. Kliknij „Szczegóły” to expand Task Manager.
3.You can sort the “Sieć” column of Task Manager in descending order which will allow you to see those applications which are taking the most bandwidth.
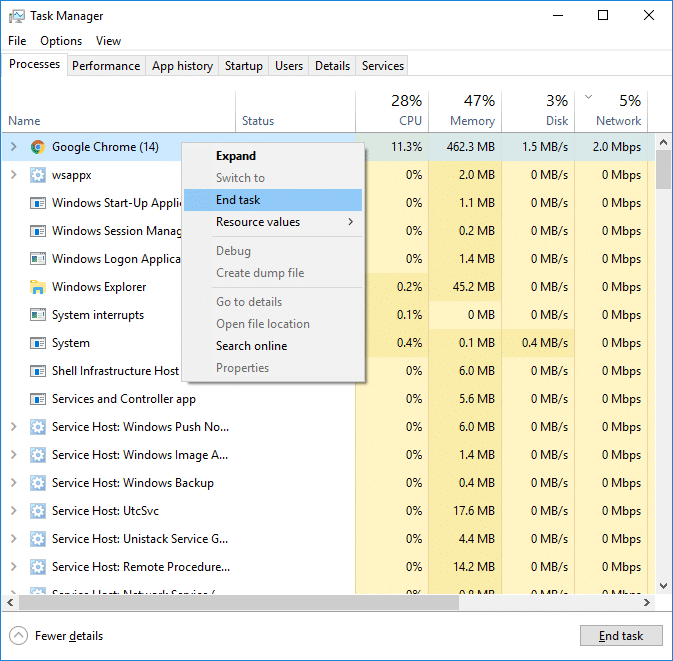
4.Close te aplikacje To jest eating a high amount of bandwidth,
Uwaga: Don’t close the processes which are a system process.
Method 3: Disable Windows Auto-Updates
Windows usually download system updates with no notification or permission. Hence it may eat up your internet with high ping & slow your game. That time you cannot hiatus an update which has already started; & may ruin your online game experience. So you can stop your Windows update so that it doesn’t eat up your internet bandwidth.
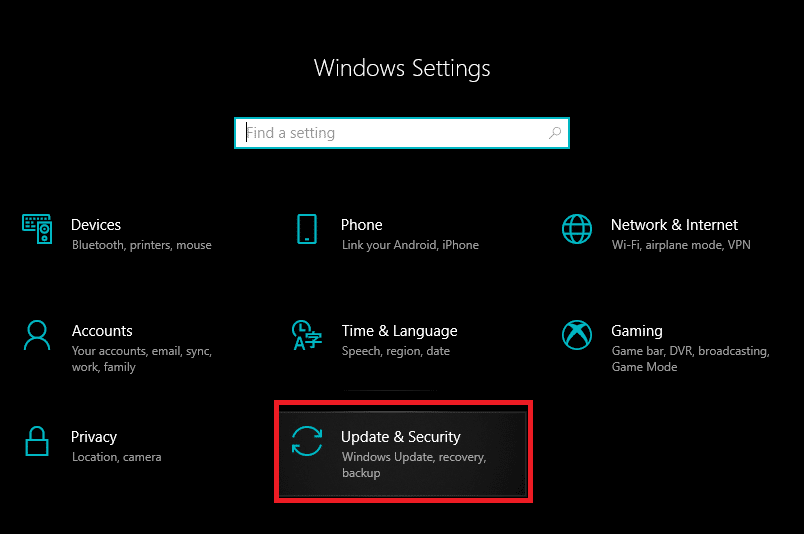
1.Press Windows Key + I to open Settings then click on “Aktualizacja i bezpieczeństwo" Ikona.
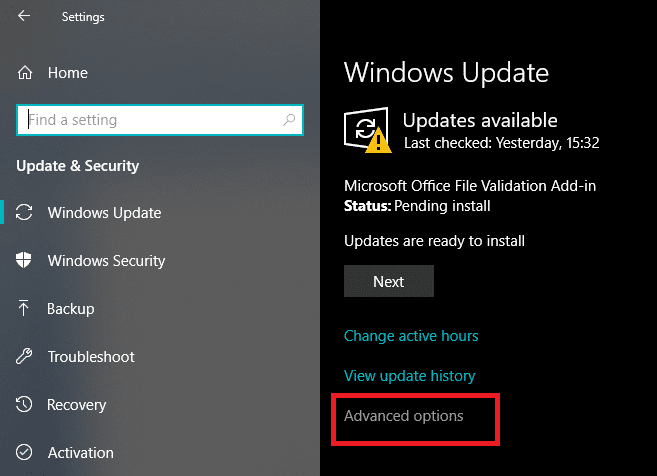
2.From the left-hand window select “Windows Update".
3.Now under Windows Update click on “Zaawansowane"Opcje.
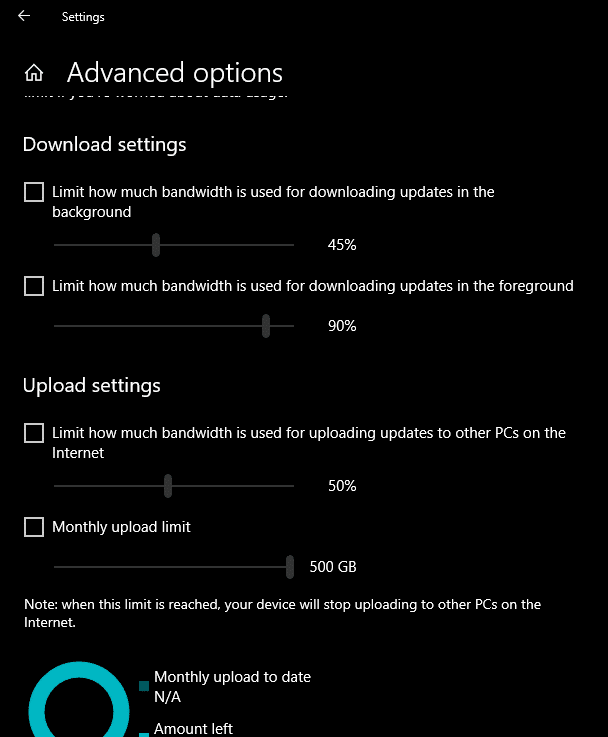
4.Now look for “Optymalizacja dostawy” option & click on it.

5.Again click on “Opcje zaawansowane".

6.Teraz adjust your Download & Upload Bandwidth odsetek.
If you don’t want to mess System updates then another way to Fix High Ping on Windows 10 issue is to set your network connection as Mierzona. This will let system think that you’re on a metered connection and hence it will not download the Windows updates automatically.
1.Kliknij na przycisk Start następnie idź do Ustawienia.
2.From Settings window click on “Sieć i Internet" Ikona.
![]()
3.Now make sure you select Ethernet option from the left window pane.
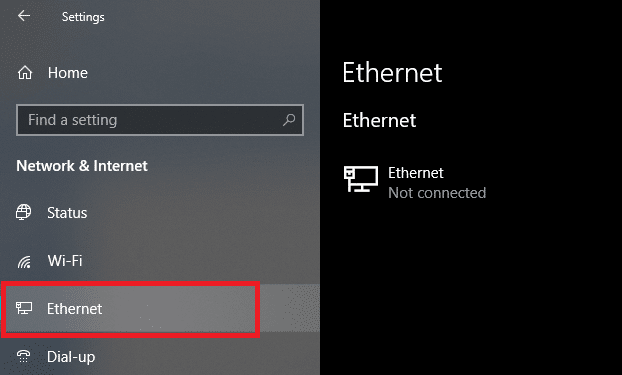
4.Choose the Network which you currently connected to.
5.Turn ON the toggle for “Ustaw jako odmierzone połączenie".

Metoda 4: Zresetuj połączenie sieciowe
1. Naciśnij Klawisz Windows + I, aby otworzyć Ustawienia, a następnie kliknij Sieć i Internet.

2. W lewym okienku kliknij na Status.
3. Przewiń w dół i kliknij Reset sieci.

4. W kolejnym oknie kliknij na Zresetuj teraz.

5.Jeśli pojawi się pytanie o potwierdzenie, wybierz Tak.
6. Uruchom ponownie komputer, aby zapisać zmiany i sprawdzić, czy jesteś w stanie Fix High Ping on Windows 10 Issue.
Method 5: Disable WiFi Sense
1. Naciśnij Klawisz Windows + I, aby otworzyć Ustawienia, a następnie kliknij Sieć i Internet.
2. Teraz kliknij Wi-Fi from the left window pane and make sure to Disable everything under Wi-Fi Sense.
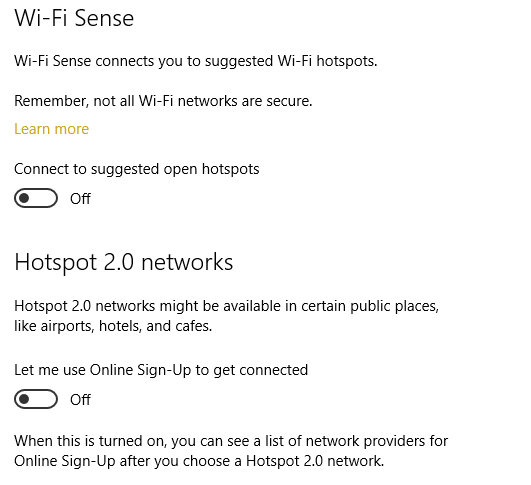
3.Also, make sure to disable Hotspot 2.0 networks and Paid Wi-Fi services.
Polecamy:
Mam nadzieję, że ten artykuł był pomocny i teraz możesz to łatwo zrobić Fix High Ping on Windows 10, Jeśli jednak nadal masz jakieś pytania dotyczące tego przewodnika, możesz je zadać w sekcji komentarzy.
")
