When you try to install apps on Windows Store, you may face Error Code 0x80073cf9, which can be very frustrating as Windows Store is a reliable source to install apps. If you try to install 3rd party apps from any other source, you risk your machine to malware or infections but what other option you have if you cannot install apps from Windows Store. Well, that’s where you’re wrong this error can be fixed, and that’s what exactly we are going to teach you in this article.
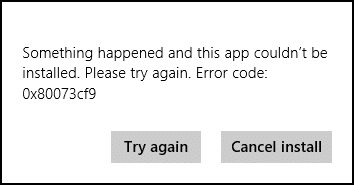
Something happened, and this app couldn’t be installed. Please try again. Error code: 0x80073cf9
There is no single cause as to why this error occurs so that various methods can fix this error. Most of the times it completely depends on the user machine configuration as to which method might work for them, so without wasting any time, let’s see how to fix this error.

Napraw błąd sklepu Windows 10 0x80073cf9
Upewnij się, że utworzyłeś punkt przywracania na wypadek, gdyby coś poszło nie tak.
Method 1: Create A Folder AppReadiness
1. Naciśnij klawisz Windows + R, a następnie wpisz C: Windows i naciśnij Enter.
2. Znajdź folder AppReadniess in the Windows folder, if you can’t follow the next step.
3. Right-click in an empty area and select Nowy > Folder.
4. Name the newly created folder as Gotowość aplikacji i naciśnij Enter.
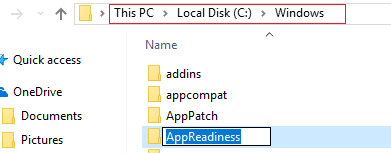
5. Reboot your PC to save changes. Again try to access the Store, and this time it might work perfectly.
Metoda 2: Zainstaluj ponownie Sklep Windows
1. Open Command Prompt as an administrator.

2. Run below PowerShell command
Get-AppxPackage -AllUsers | Foreach {Add-AppxPackage -DisableDevelopmentMode -Register „$ ($ _. InstallLocation) AppXManifest.xml”}

3. Once done, close command prompt and Restart your PC.
This step re-register Windows Store apps which should automatically Fix Windows 10 Store Error 0x80073cf9.
Method 3: Create a folder AUInstallAgent
1. Naciśnij klawisz Windows + R, a następnie wpisz C: Windows i naciśnij Enter.
2. Znajdź folder AUIInstallAgent in the Windows folder, if you can’t then follow the next step.
3. Right-click in an empty area and select Nowy > Folder.
4. Name the newly created folder as AAUInstallAgent i naciśnij Enter.
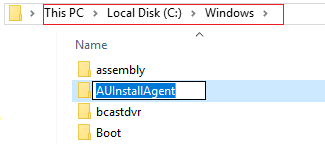
5. Reboot your PC to save changes. This step may fix Windows 10 Store Error 0x80D05001 or 0x80073cf9 but if it didn’t then continue.
Method 4: Allow Full System Access to Packages in AppRepository
1. Naciśnij klawisz Windows + R, a następnie wpisz C: ProgramDataMicrosoftWindows i naciśnij Enter.
2. Now double click on AppRepository folder to open it, but you will receive an error:
You have been denied permission to access this folder.
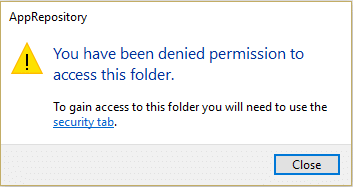
3. This means you need to take ownership of this folder before you can access it.
4. You can take ownership of the folder via the following method: How To Fix Destination Folder Access Denied Error.
5. Now you need to give the SYSTEM account, and the APPLICATION PACKAGES account full control on the folder C:ProgramDataMicrosoftWindowsAppRepositoryPackages. To this follow the next step.
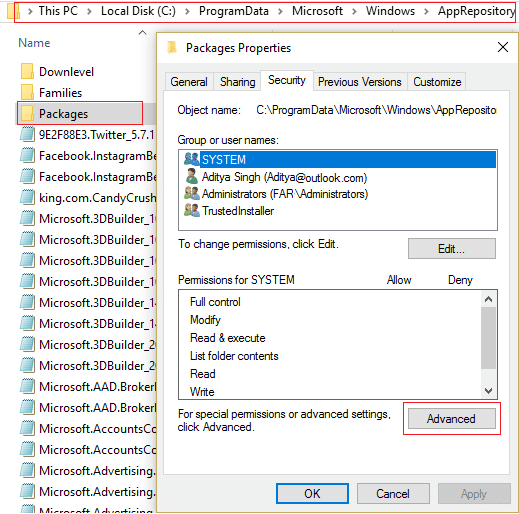
6. Kliknij prawym przyciskiem myszy plik Packages folder i wybierz Nieruchomości.
7. Wybierz Karta Zabezpieczenia a następnie kliknij Zaawansowane.
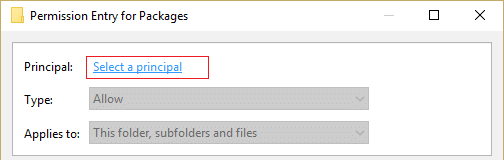
8. In Advanced Security Settings, click Dodaj and click on Select a główny.
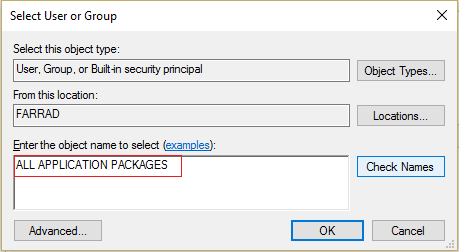
9. Następnie wpisz „WSZYSTKIE PAKIETY APLIKACJI” (without quote) in the field Enter the object name to select and click OK.
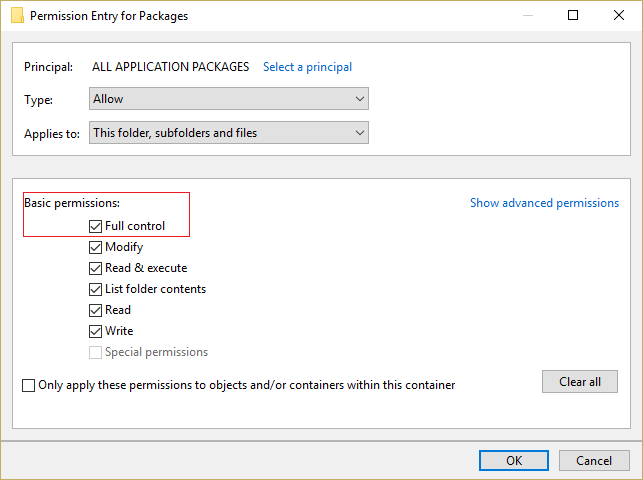
10. Now, on the next window check mark Full control and then click OK.
11. Do the same with the SYSTEM account. Reboot your PC to save changes.
Method 5: Rename Software Distribution Folder
1. Press Windows Key + Q to open Charms Bar and type cmd.
2. Right-click on cmd and select Uruchom jako administrator.
3. Type these commands and hit enter:
net stop wuauserv
ren c:windowsSoftwareDistribution softwaredistribution.old
net start wuauserv
exit
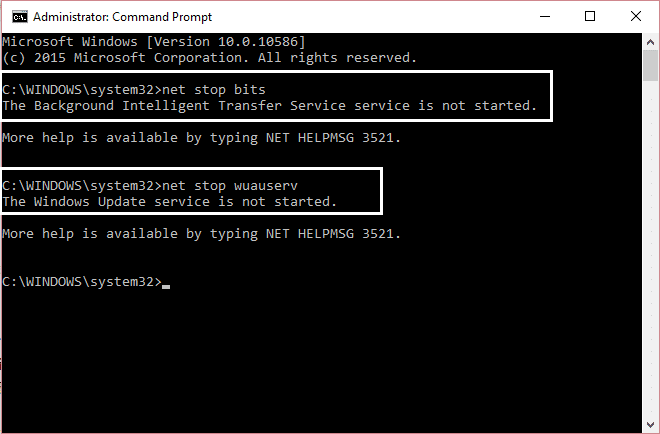
4. Reboot your PC to saves changes and again try to download updates.
Metoda 6: Uruchom DISM (Obsługa i zarządzanie obrazami wdrażania)
1. Naciśnij klawisz Windows + X, a następnie wybierz Wiersz polecenia (administrator).

2. Enter the following command in cmd and hit enter:
Ważne: Do wykonania DISM potrzebny jest nośnik instalacyjny systemu Windows.
DISM.exe /Online /Cleanup-Image /RestoreHealth /Source:C:RepairSourceWindows /LimitAccess
Uwaga: Zastąp C:RepairSourceWindows lokalizacją źródła naprawy

3. Press enter to run the above command and wait for the process to complete; usually, it takes 15-20 minutes.
UWAGA: Jeśli powyższe polecenie nie działa, wypróbuj poniższe: Dism /Image:C:offline /Cleanup-Image /RestoreHealth /Source:c:testmountwindows Dism /Online /Cleanup-Image /RestoreHealth /Source:c:testmountwindows /LimitAccess
4. After the DISM process is complete, type the following in the cmd and hit Enter: sfc / scannow
5. Let System File Checker run and once it’s complete, restart your PC.
Metoda 7: Uruchom CCleaner i Malwarebytes
1. Ściągnij i zainstaluj CCleaner & Malwarebytes.
2. Uruchom Malwarebytes i pozwól mu przeskanować Twój system w poszukiwaniu szkodliwych plików. Jeśli zostanie znalezione złośliwe oprogramowanie, automatycznie je usunie.

3. Teraz uruchom CCleaner i wybierz Niestandardowe czyszczenie.
4. W obszarze Czyszczenie niestandardowe wybierz Karta Okna i zaznacz wartości domyślne i kliknij Analizować.

5. Po zakończeniu analizy upewnij się, że na pewno usuniesz pliki do usunięcia.

6. Na koniec kliknij Uruchom Cleaner i pozwól CCleanerowi działać.
7. Aby jeszcze bardziej wyczyścić system, wybierz zakładkę Rejestri upewnij się, że zostały sprawdzone następujące elementy:

8. Kliknij na Skanuj w poszukiwaniu problemów i zezwól CCleaner na skanowanie, a następnie kliknij Napraw zaznaczone problemy przycisk.

9. Gdy CCleaner pyta „Czy chcesz wykonać kopię zapasową zmian w rejestrze?" wybierz Tak.
10. Po zakończeniu tworzenia kopii zapasowej kliknij Napraw wszystkie wybrane problemy przycisk.
11. Uruchom ponownie komputer, aby zapisać zmiany.
Metoda 8: Wyczyść pamięć podręczną Sklepu Windows
1. Naciśnij klawisz Windows + R, a następnie wpisz wsreset.exe i naciśnij enter.
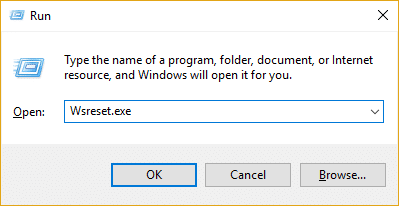
2. One the process is finished restart your PC.
Method 9: Run Windows Update and Windows Store Apps troubleshooter
1. Rodzaj narzędzie do rozwiązywania problemów na pasku wyszukiwania systemu Windows i kliknij Narzędzie do rozwiązywania problemów.
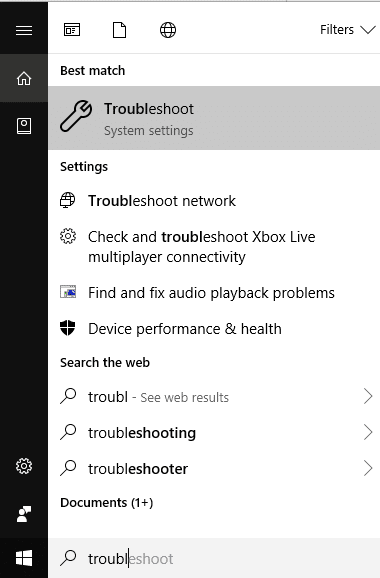
2. Następnie z lewego okna wybierz panel Pokaż wszystkie.
3. Następnie z listy Rozwiązywanie problemów z komputerem wybierz Windows Update.

4. Follow on-screen instruction and let the Windows Update Troubleshoot run.

5. Now again go back to the View all window but this time select Aplikacje Windows Store. Run the troubleshooter and follow on-screen instructions.
6. Uruchom ponownie komputer i jeszcze raz spróbuj zainstalować aplikacje ze Sklepu Windows.
Polecamy:
To wszystko, co udało Ci się pomyślnie Napraw błąd sklepu Windows 10 0x80073cf9 ale jeśli nadal masz jakieś pytania dotyczące tego posta, możesz je zadać w sekcji komentarzy.

