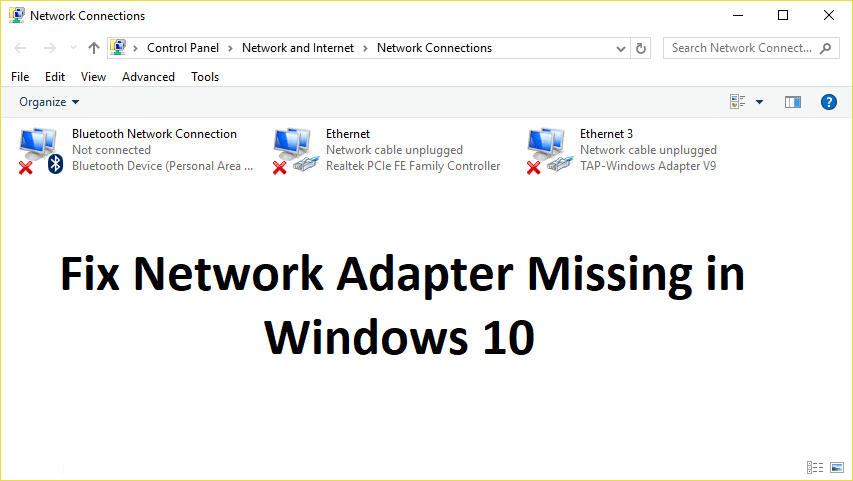
If you don’t see Wireless Adapter under Network Connections neither there is a Network adapter tab under device manager then it seems like your Network Adapter is missing or not detected on your Windows 10 which is a serious issue because you won’t be able to access the Internet until the issue is resolved. In short, when you click on the Wireless icon on the system tray there won’t be any device listed in order to connect to the Internet and if you open Device Manager then you won’t see the Network Adapter tab.
These are the reasons behind the Network Adapter missing issue:
- Network adapter missing in Device manager
- No Network Adapters showing in Device Manager
- Network Adapter Not Detected
- Network Adapter Not Found Windows 10
- No Network Adapter In Device Manager
The main cause of this issue seems to be outdated, incompatible or corrupted Network Adapter drivers. If you have recently upgraded from previous versions of Windows then it’s possible that the old drivers will not work with the new Windows and hence the issue. So without wasting any time let’s see how to actually Fix Network Adapter Missing in Windows 10 issue with the below-listed troubleshooting steps.
Note: Just make sure to uninstall any VPN software on your PC before continuing.
Napraw brakującą kartę sieciową w systemie Windows 10
Pamiętaj, aby utworzyć punkt przywracania na wypadek, gdyby coś poszło nie tak.
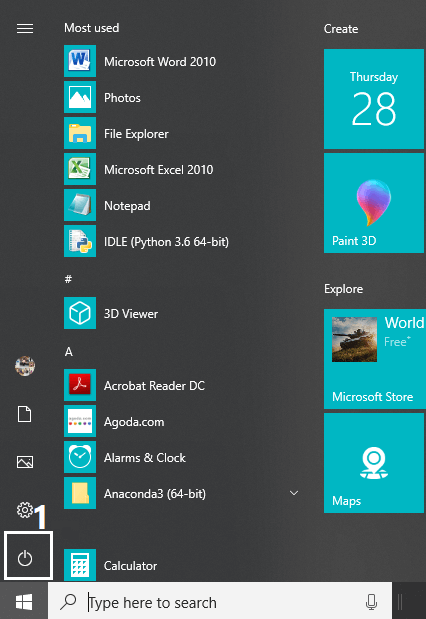
Method 1: Reboot your Computer
Most of us know about this very basic trick. Rebooting your computer can sometimes fix any software conflict by giving it a fresh start. So if you are someone who would rather put their computer on sleep, restarting your computer is a good idea.
1. Kliknij na menu start a następnie kliknij przycisk zasilania available at the bottom left corner.
2. Następnie kliknij restart option and your computer will restart itself.
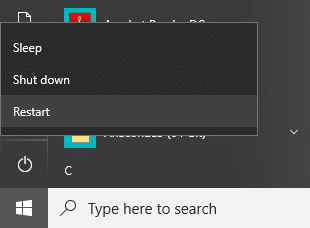
After the computer restarts, check if your problem is resolved or not.
Method 2: Flush DNS and Reset Winsock Components
1. Open elevated Command Prompt.
2. Teraz wpisz następujące polecenie i po każdym naciśnij klawisz Enter:
ipconfig / release
ipconfig / flushdns
ipconfig / renew

3. Again open Command Prompt and type the following command one by one and hit enter after each one:
ipconfig /flushdns nbtstat –r netsh int reset ip netsh reset winsock
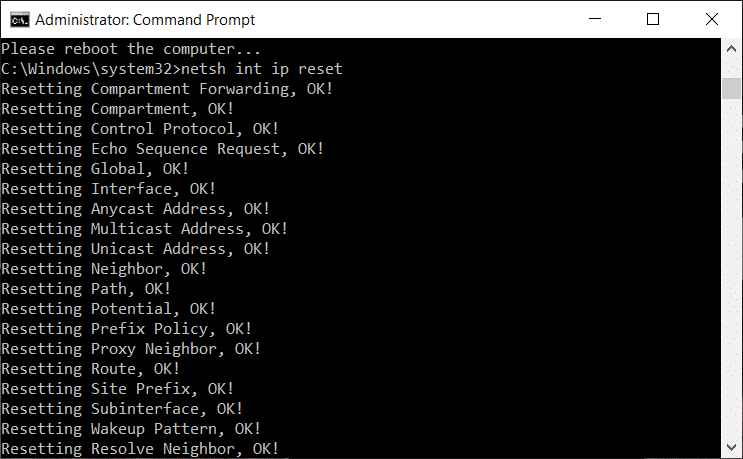
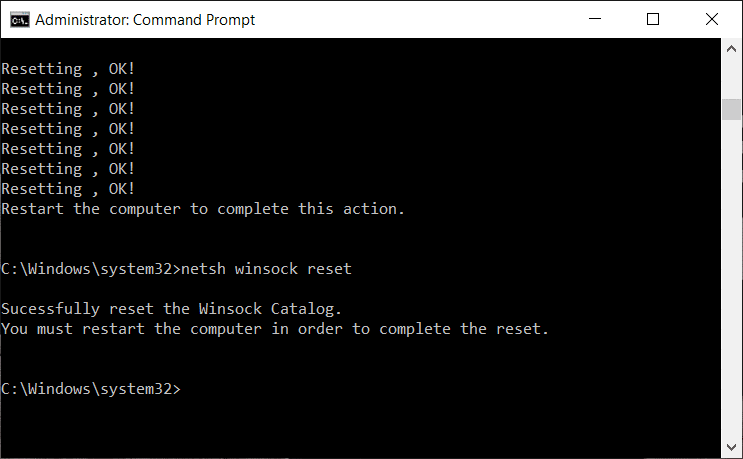
4. Uruchom ponownie, aby zastosować zmiany. Wydaje się, że opróżnianie DNS Fix Network Adapter Driver Issues on Windows 10.
Method 3: Run WWAN AutoConfig Service
1. Naciśnij klawisz Windows + R, a następnie wpisz services.msc i naciśnij Enter.

2. Odnaleźć WWAN AutoConfig Service in the list (press W to reach to the end of the list quickly).
3. Kliknij dwukrotnie WWAN AutoConfig Service.
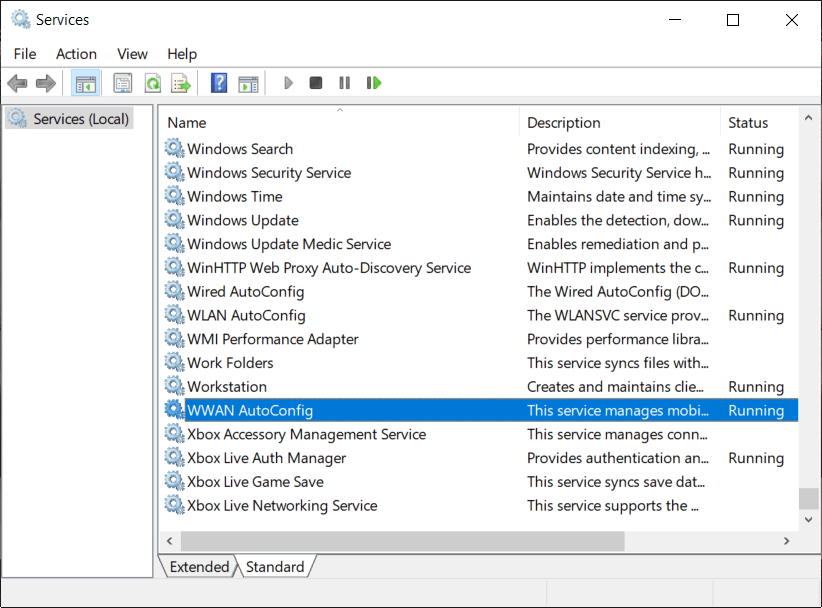
4. If the service is already running then click on Stop, then from the Startup type drop-down select Automatyczny.
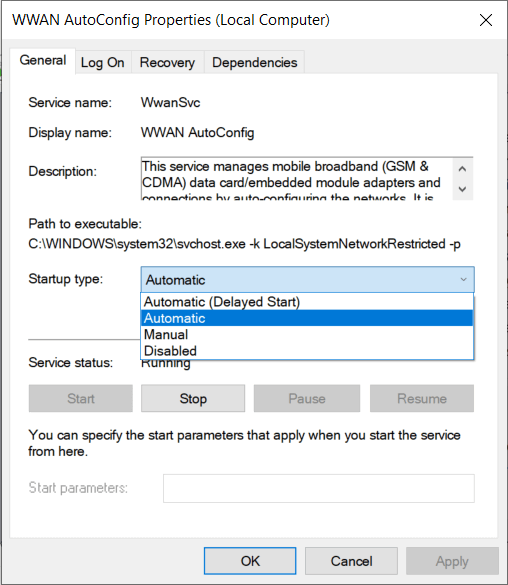
5. Click Apply followed by OK.
6. Kliknij prawym przyciskiem myszy plik WWAN AutoConfig Service i wybierz Początek.
Metoda 4: Zaktualizuj sterowniki karty sieciowej
1. Naciśnij klawisz Windows + R i wpisz „devmgmt.msc” in Run dialogue box to open menadżer urządzeń.

2. Rozwiń Adaptery sieciowe, a następnie kliknij prawym przyciskiem myszy swój kontroler WiFi (na przykład Broadcom lub Intel) i wybierz Zaktualizuj oprogramowanie sterownika.

3. Teraz wybierz „Wyszukaj automatycznie zaktualizowane oprogramowanie sterownika".
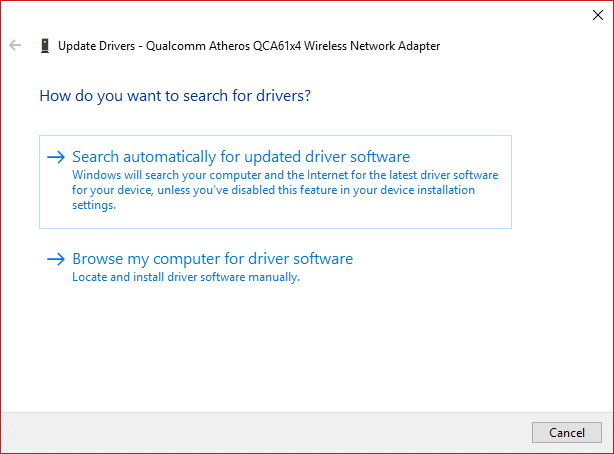
4. Teraz Windows will automatically search for the Network driver update and if new update is found, it will automatically download and install it.
5. Once finished, close everything and reboot your PC.
6. If you’re still facing the Network Adapter Missing in Windows 10 issue, then again right-click on your WiFi controller and select Uaktualnij sterownik w Menedżerze urządzeń.
7. Now, in the Update Driver Software Windows, select “Przeglądaj mój komputer w poszukiwaniu oprogramowania sterownika."

8. Teraz wybierz „Pozwól mi wybrać z listy dostępnych sterowników na moim komputerze."

9. Spróbuj update drivers from the listed versions (make sure to checkmark compatible hardware).
10. If the above didn’t work then go to strona producenta zaktualizować sterowniki.

11. Download and install the latest driver from the manufacturer’s website then restart your PC.
Method 5: Uninstall Network Adapter Drivers
1. Naciśnij klawisz Windows + R, a następnie wpisz „devmgmt.msc” i naciśnij Enter, aby otworzyć Menedżera urządzeń.
2. Rozwiń opcję Karty sieciowe i znajdź nazwę karty sieciowej.
3. Upewnij się zanotuj nazwę adaptera na wypadek, gdyby coś poszło nie tak.
4. Right-click on your network adapter and uninstall it.

5. It will ask for confirmation wybierz Tak.
6. Restart your PC and Windows will automatically install the network adapter drivers again.
7. If the drivers are not installed automatically then again open the Device Manager.
8. From the Device Manager menu, click on Działania następnie kliknij „Skanuj w poszukiwaniu zmian sprzętu".

Metoda 6: Upewnij się, że system Windows jest aktualny
1. naciśnij Klawisz Windows + I to open Settings then click on Aktualizacja i bezpieczeństwo.
![]()
2. From the left-hand side, menu click on Windows Update.
3. Teraz kliknij „Sprawdź aktualizacje”, aby sprawdzić dostępne aktualizacje.

4. If any updates are pending then click on Pobierz i zainstaluj aktualizacje.

5. Once the updates are downloaded, install them and your Windows will become up-to-date.
6. After the updates are installed reboot your PC to save changes.
Metoda 7: Uruchom narzędzie do rozwiązywania problemów z kartą sieciową
1. Naciśnij Klawisz Windows + I, aby otworzyć Ustawienia, a następnie kliknij Aktualizacja i bezpieczeństwo.
![]()
2. From the left-hand menu select Rozwiązywanie problemów.
3. Under Troubleshoot click on Połączenia internetowe a następnie kliknij Uruchom narzędzie do rozwiązywania problemów.

4. Postępuj zgodnie z dalszymi instrukcjami wyświetlanymi na ekranie, aby uruchomić narzędzie do rozwiązywania problemów.
5. If the above didn’t fix the issue then from the Troubleshoot window, click on Network Adapter a następnie kliknij Uruchom narzędzie do rozwiązywania problemów.
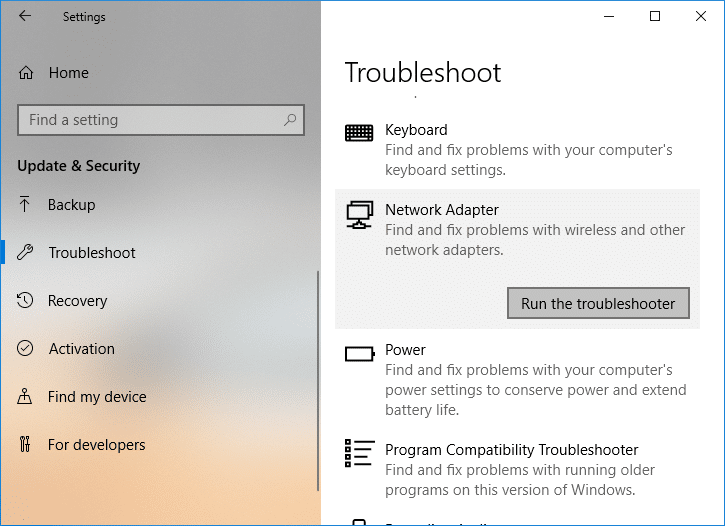
5. Uruchom ponownie komputer, aby zapisać zmiany i sprawdź, czy możesz fix the Network Adapter Missing issue.
Metoda 8: Zainstaluj oprogramowanie Intel PROSet/Wireless
Czasami przyczyną problemu jest przestarzałe oprogramowanie Intel PROSet, dlatego wydaje się, że aktualizacja fix Network Adapter Missing in Windows 10 issue, Dlatego przejdź tutaj i pobierz najnowszą wersję oprogramowania PROSet/Wireless i zainstaluj ją. Jest to oprogramowanie innej firmy, które zarządza połączeniem Wi-Fi zamiast systemu Windows i jeśli oprogramowanie PROset/Wireless jest nieaktualne, może powodować problemy ze sterownikami Bezprzewodowa karta sieciowa. Hence, read How to Update Network Adapter Drivers on Windows 10.
Metoda 9: Zresetuj połączenie sieciowe
1. Naciśnij Klawisz Windows + I, aby otworzyć Ustawienia, a następnie kliknij Sieć i Internet.

2. From the left-hand menu select Status.
3. Now scroll down and click on Resetowanie sieci na dnie.

4. Ponownie kliknij „Zresetuj teraz” under Network reset section.

5. This will successfully reset your network adapter and once it is complete the system will be restarted.
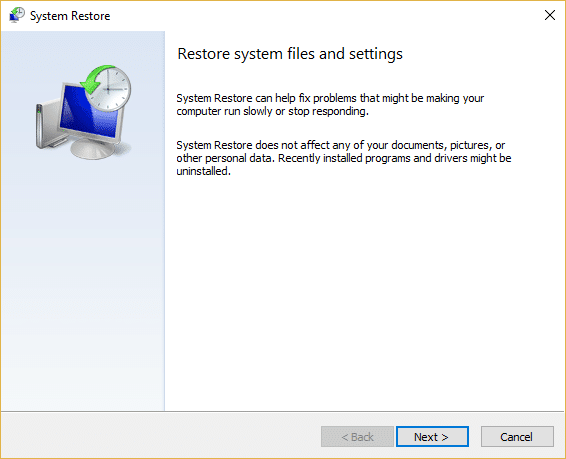
Metoda 10: Wykonaj przywracanie systemu
Przywracanie systemu zawsze pomaga w rozwiązaniu problemu, dlatego Przywracanie systemu z pewnością może pomóc w naprawieniu tego błędu. Więc nie marnując czasu, uruchom przywracanie systemu, aby to zrobić resolve Network Adapter Missing issue.
Method 11: Using elevated Command Prompt
1. Naciśnij klawisz Windows + X, a następnie wybierz Wiersz polecenia (administrator).

2. Wpisz następujące polecenie w cmd i naciśnij Enter:
netcfg -sn
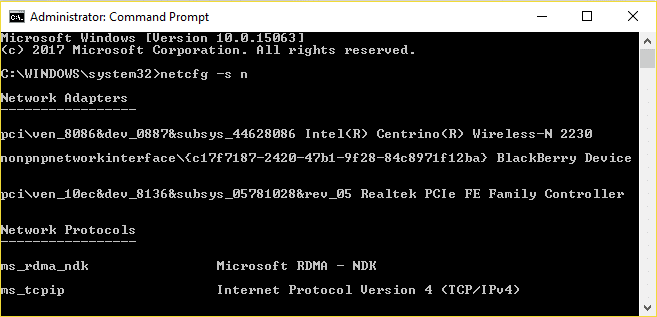
3. This will display a list of networking protocols and in that list find DNI_DNE.
4. If DNI_DNE is listed then type the following command into cmd:
reg usuń HKCRCLSID {988248f3-a1ad-49bf-9170-676cbbc36ba3} / va / f
netcfg -v -u dni_dne
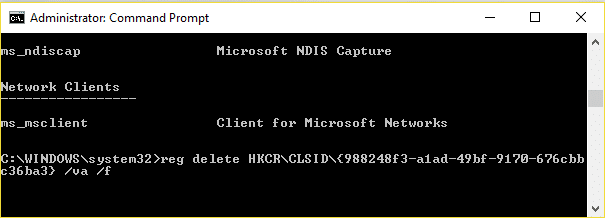
5. If you don’t see DNI_DNE listed then only run the command netcfg -v -u dzień_dzień.
6. Now if you receive the error 0x80004002 after trying to run the above command then you need to delete the above key manually.
7. Naciśnij klawisz Windows + R, a następnie wpisz regedit i naciśnij Enter.

8. Navigate to the following Registry Key:
HKEY_CLASSES_ROOTCLSID{988248f3-a1ad-49bf-9170-676cbbc36ba3}
9. Delete this key and then again type netcfg -v -u dni_dne command in cmd.
10. Uruchom ponownie komputer, aby zapisać zmiany.
Polecany dla Ciebie:
To wszystko, co udało Ci się pomyślnie Napraw brakującą kartę sieciową w systemie Windows 10 ale jeśli nadal masz jakieś pytania dotyczące tego posta, możesz je zadać w sekcji komentarzy.

