The autofill feature is an important part of the Outlook program. AutoComplete allows you to enter an entire email while composing a message with just one email initial. This feature helps you save time and gives you quick access to emails. However, sometimes users may experience Outlook AutoComplete not working issue; this issue can be caused for various reasons, such as an outdated Office version or bugs with the Outlook program. In this guide, we will discuss methods to resolve Outlook Address AutoComplete not working issue on your Outlook.
How to Fix Outlook AutoComplete Not Working Correctly
There can be various reasons for Outlook Autofill email address not working on your Outlook account; some of the most common reasons are mentioned here.
- If you have disabled AutoComplete in Outlook, you won’t be able to use this feature.
- Bugs and glitches with the Outlook program can also cause this issue.
- Issues with a user profile can also cause AutoComplete feature not working issue.
- Corrupt Outlook Add-ins can also cause this issue.
- Corrupt Outlook data PST files can also cause this issue with Outlook.
- Outdated or corrupt Microsoft Office updates can also cause this issue.
- A corrupt RoamCache folder can also cause this issue with Outlook.
Following are the troubleshooting methods to solve this problem.
Method 1: Enable AutoComplete in Outlook
If you have not enabled the AutoComplete feature in Outlook, you will not be able to use this feature. You will have to manually enable AutoComplete to resolve this Outlook address AutoComplete not working issue. You can follow these simple steps to enable AutoComplete in Outlook.
1. د پرانیستې لید ، او ویې ویل د دوتنې from the top-left side of the window.
2. Here, from the left-side panel, click on غوراوي.

3. ته لاړ شه Mail ټب.
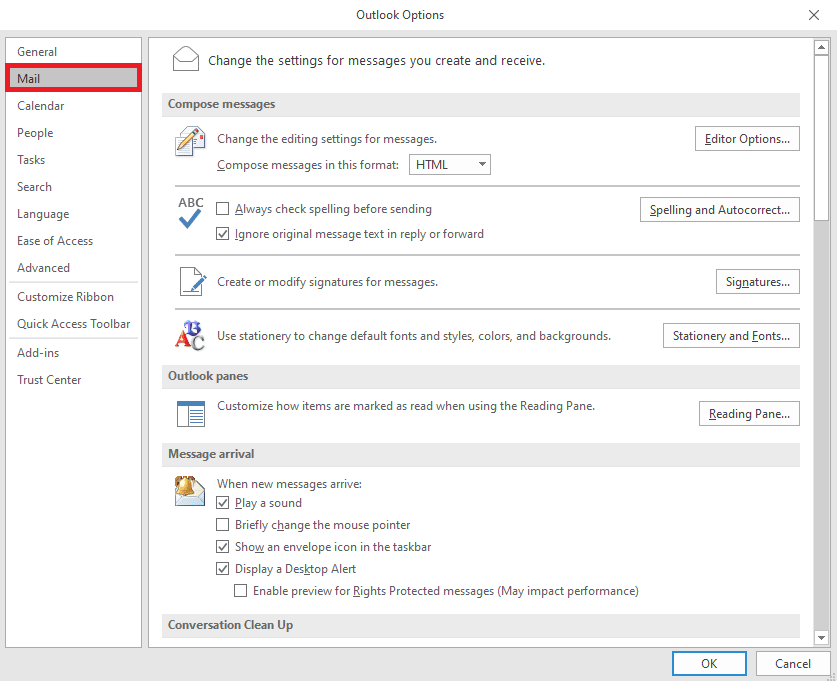
4. Scroll down here, and locate پیغامونه واستوئ انتخابونه.
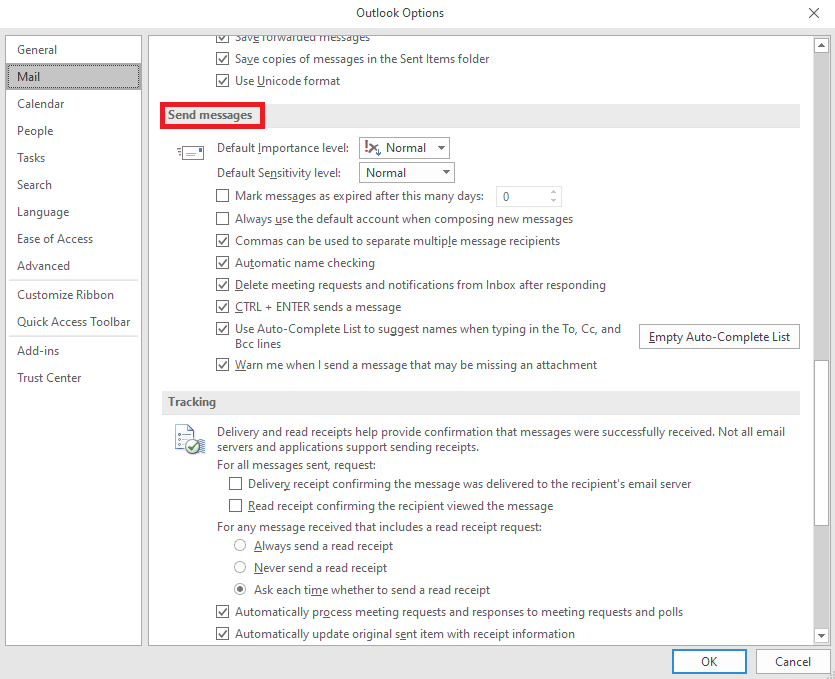
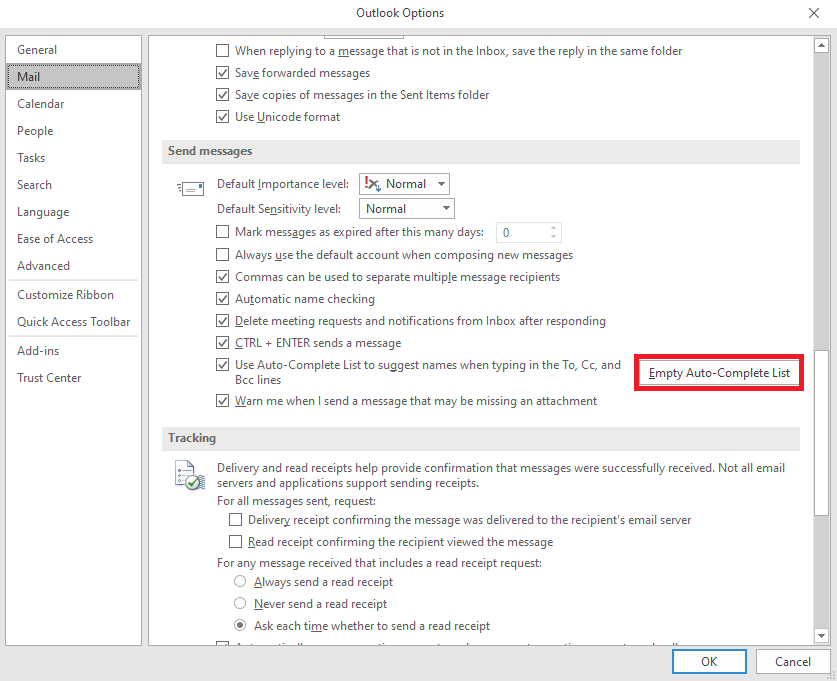
5. Here, check the Use Auto-Complete List to suggest names when typing in the To, Cc, and Bcc lines.
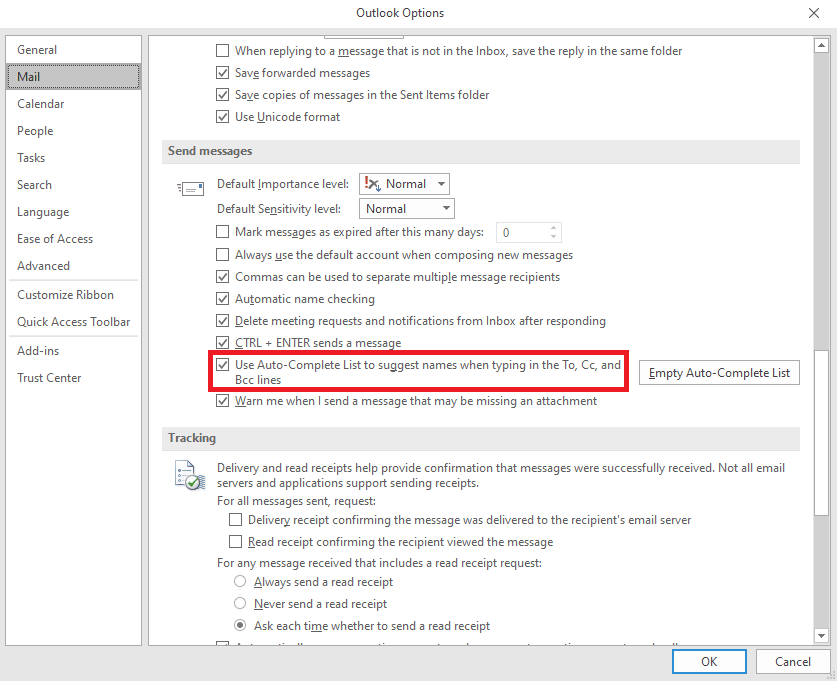
6. If you find this option already checked, click on the د اتوماتیک بشپړ لیست خالي کړئ.
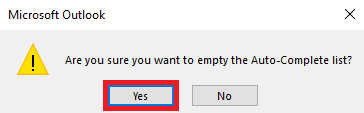
7. ټک وکړئ هو د عمل تایید لپاره.
Method 2: Run Outlook in Safe Mode
Running programs in safe mode can help you avoid various issues. You can use safe mode to make the troubleshooting process easier and avoid hardware issues. You can follow these simple steps to run Outlook in safe mode to resolve Outlook autocomplete not working issue.
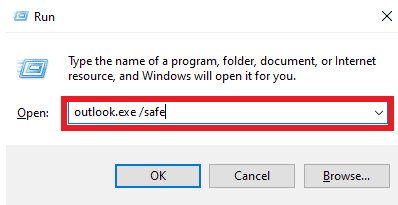
1. مطبوعات د وینډوز + R کیلي د خلاصولو لپاره Run dialog box.
2. In the Run dialog box, type Outlook.exe/safe او پرانیزي کیلي دننه کړئ.
دا هم ولولئ: Fix Outlook Trying to Connect to Server on Windows 10
Method 3: Run Outlook with Different Profile
Make sure the Outlook issue is happening only in your Outlook program and not on the entire system. You can try to log in to Outlook with a different profile. You can also add a different account on Outlook.
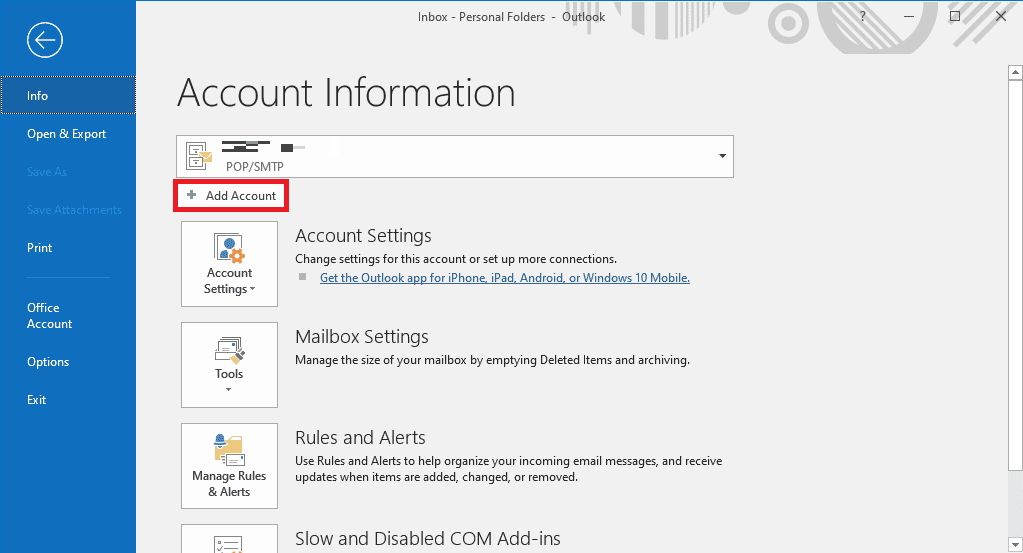
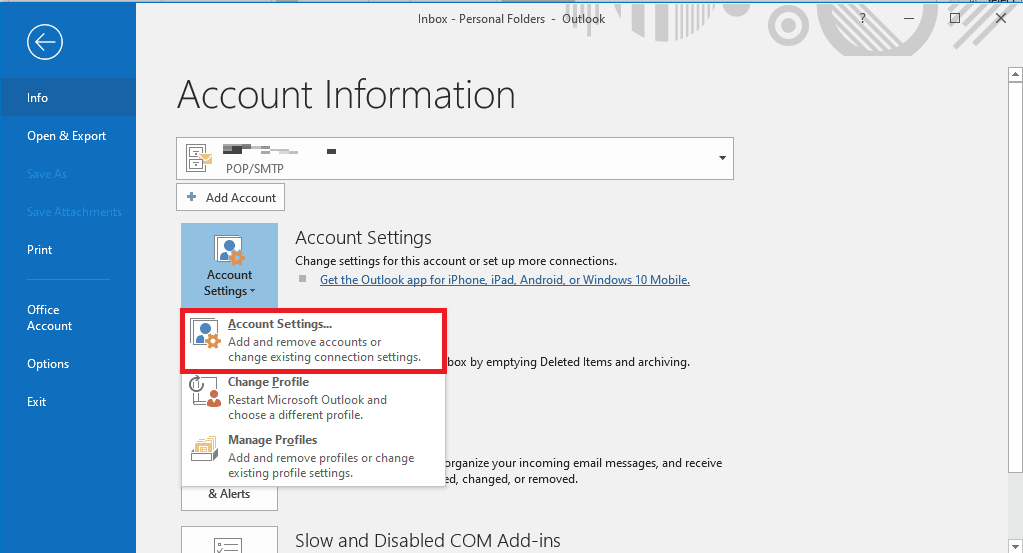
1. د پرانیستې Outlook on your computer, and click on د دوتنې.
2. په د حساب معلومات page, locate and click on حساب اضافه کړئ.
3. ننوتل د ننوتنی سندونه for a different account.
Method 4: Disable Outlook Add-Ins
Sometimes, the issue can be caused by an Outlook Add-in. Ad-ins can be very useful and help you organize your Outlook application. However, if Outlook Add-ins get corrupt for some reason, you may experience various issues, such as AutoComplete not working on Outlook. To resolve these issues, you can try to disable Outlook Add-ins. You can follow these simple steps to disable Outlook Add-ins.
1. د پرانیستې Outlook on your computer and navigate to د دوتنې.

2. Here, from the left-side panel, click on غوراوي.
3. Now, locate and navigate to اضافه.

4. Here, locate the سمبالول پرېښودل او انتخاب کړئ COM اډ - انز.
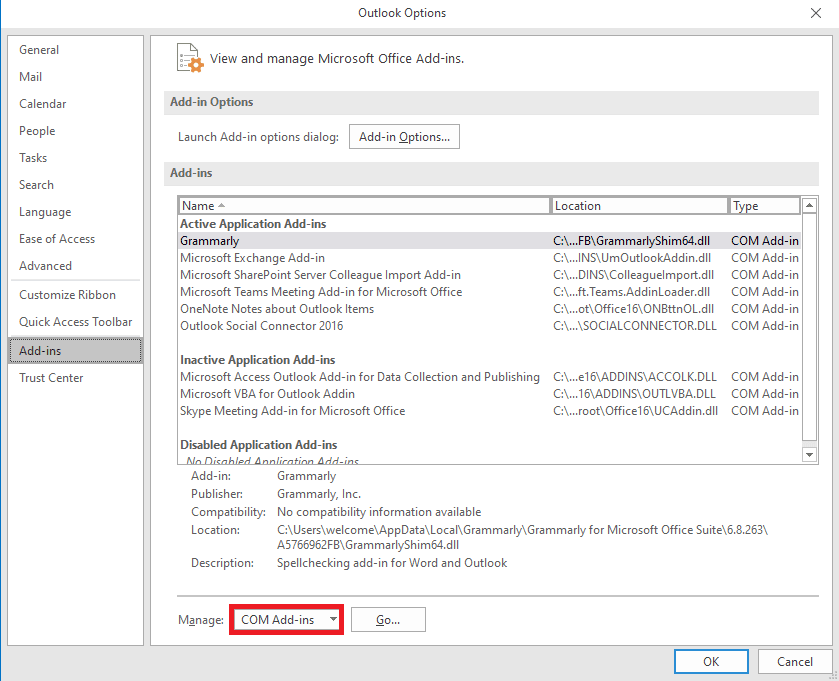
5. اوس، کلیک وکړئ Go.
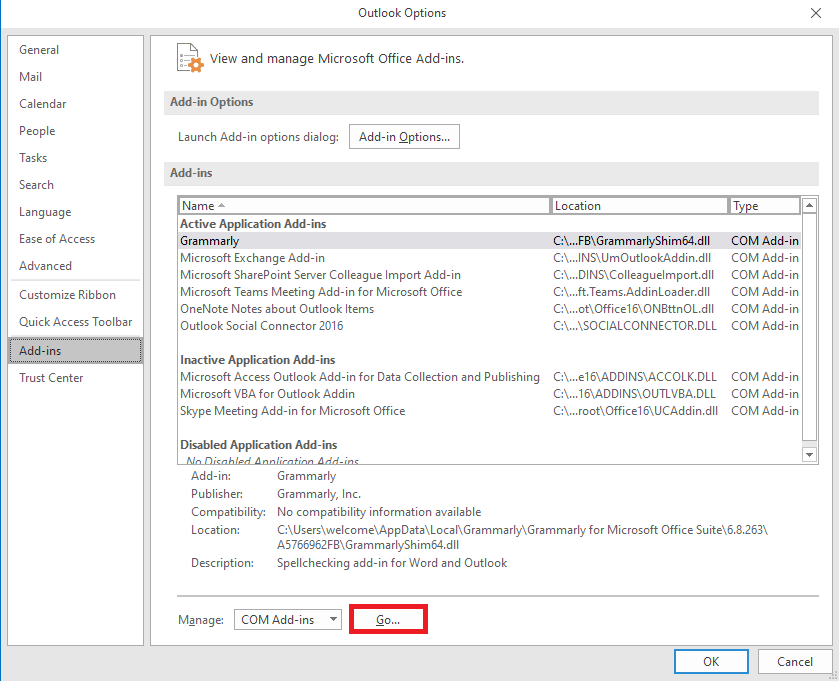
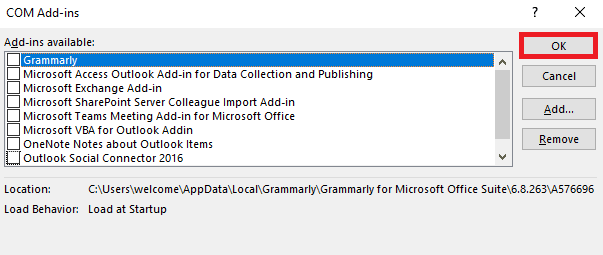
6. دلته، ناباوره all the Add-ins and then click OK.
Method 5: Repair Outlook Data PST File
PST, or Personal Table Storage, files store Outlook emails; if this file is corrupt or causing issues, you may experience Outlook address AutoComplete not working error. You can use the Inbox repair tool to help you figure out a solution for this issue. Follow these simple steps to execute this method.
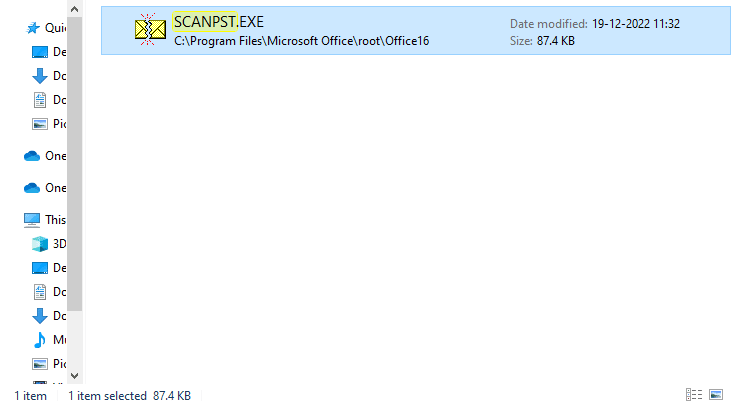
1. دابرخه دکتابتون د Outlook فولډر آن د دوتنې کړکۍ.
C: د پروګرام فایلونه Microsoft OfficeootOffice16
2. په کلیک وکړئ SCANPST.EXE ارائه کړي.
3. اوس، غوره کړئ څريدل د ښارونو له option to locate the file you wish to scan.
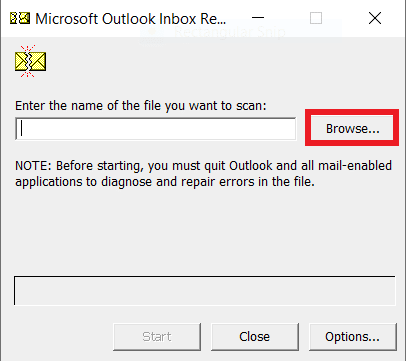
4. In the new dialog box, click on د پیل.
5. په پای کې، کلیک وکړئ ترمیم to fix all the PST file issues.
If this method does not fix Outlook autocomplete not working issue, move on to the next method.
دا هم ولولئ: How to Recover Deleted Draft in Outlook 365
Method 6: Update Microsoft Office
If the Microsoft Office program is experiencing bugs and glitches, updating it can help you fix the issues. An outdated Microsoft Office can make your Outlook vulnerable to bugs and other application issues. Therefore, manually updating Office is a great way to fix not just the AutoComplete issues but also other underlying issues with the Microsoft Office package. You can follow these simple steps to update Microsoft Office from the Microsoft Outlook program.
1. د پرانیستې Outlook on your computer and navigate to دوتنې.

2. From the left-side panel, click on the د دفتر حساب.
3. Here, locate دفتر تازه معلومات.
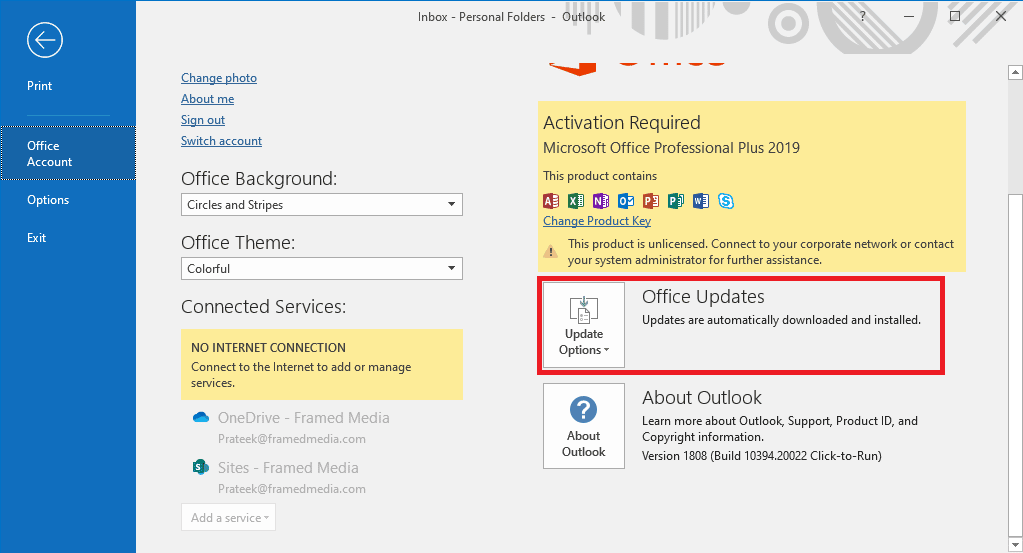
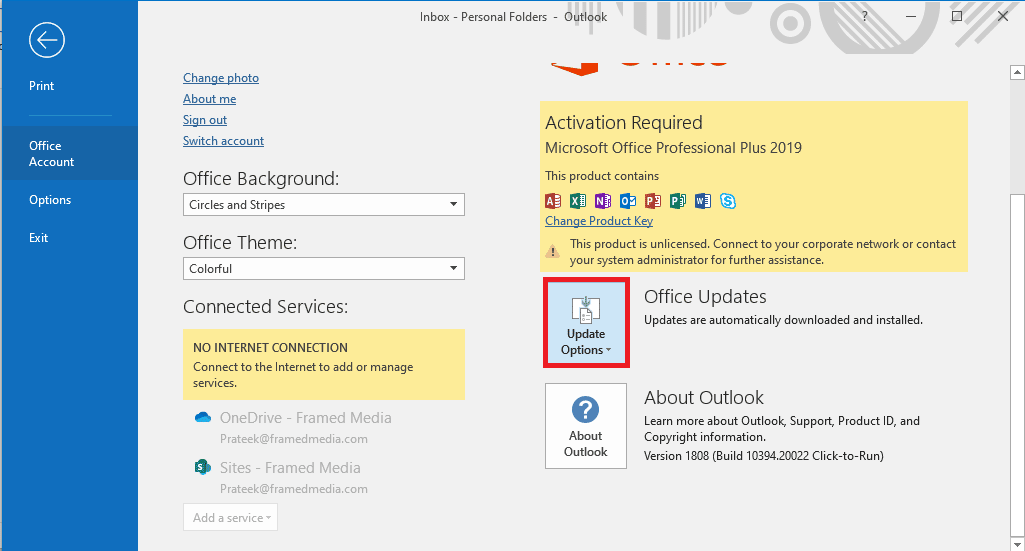
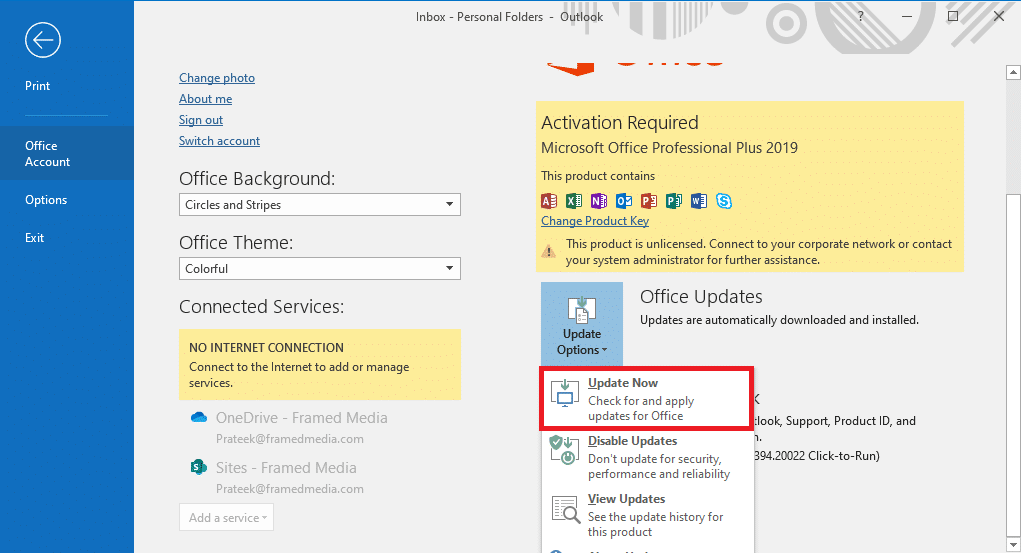
4. اوس، کلیک وکړئ د اوسمهالولو اختیارونه غورځول
5. په پای کې، کلیک وکړئ اوس تازه کول.
If this method does not fix Outlook Autofill email address not working issue, move on to the next method.
Method 7: Rename RoamCache Folder
If you have enabled the AutoComplete feature but still have the issue, it can be due to a corrupt RoamCache folder. You can fix this issue by resetting the AutoComplete folder. You will only need to rename the RoamCache folder in the directory. You can rename the RoamCache folder for both, a home email account and a Microsoft Exchange server account.
Option I: Rename RoamCache Folder for Home Email Account
You can follow these simple steps to rename the RoamCache folder in a home email account.
1. د پرانیستې Outlook on your computer and navigate to د دوتنې.

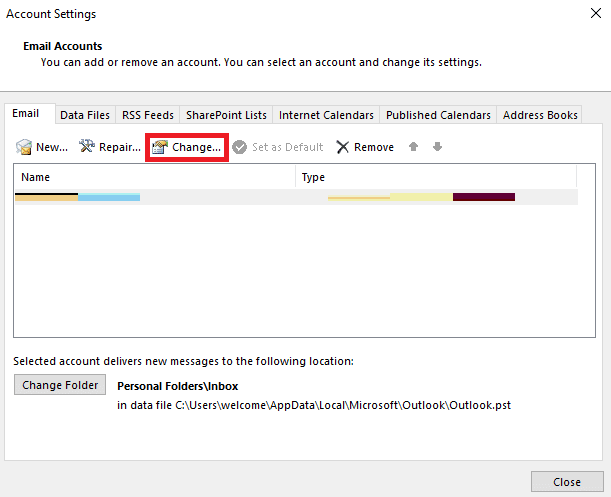
2. اوس، کلیک وکړئ حساب امستنې drop-down and then select حساب امستنې.

3. Here, select your Home Email Account.
4. نژدې the Outlook program.
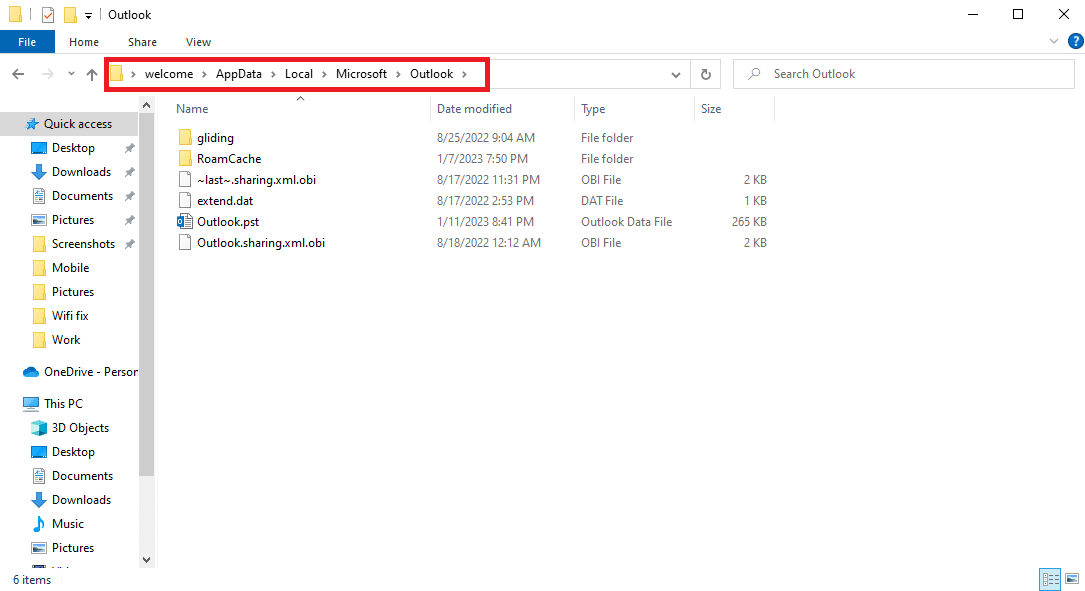
5. مطبوعات Windows + E keys پرانیستل د دوتنې کړکۍ.
6. لاندې ځای ته لاړ شئ لاره.
%LOCALAPPDATA%MicrosoftOutlook

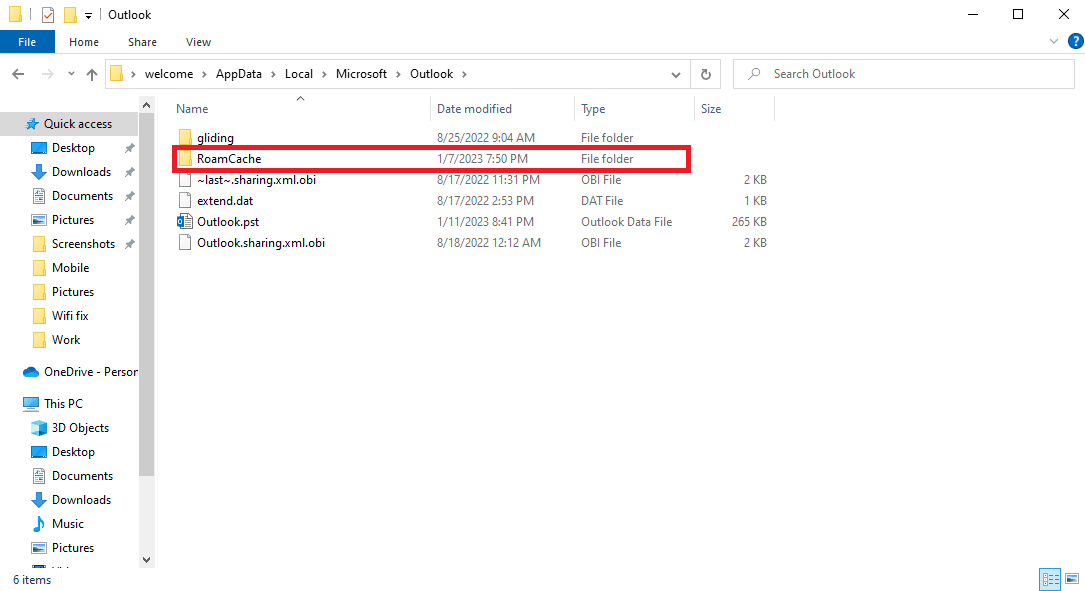
7. Here, locate the RoamCache پوښۍ

8. Rename this folder with a new name.
دا هم ولولئ: Fix Your Microsoft Exchange Administrator Has Blocked This Version of Outlook
Option II: Rename RoamCache Folder for Microsoft Exchange Server Account
You can follow these simple steps to rename the RoamCache folder in a د مایکروسافټ تبادله server account to solve Outlook address AutoComplete not working issue.
1. د پرانیستې Outlook on your computer and navigate to د دوتنې.

2. اوس، کلیک وکړئ حساب امستنې drop-down and then select حساب امستنې.
3. Here, select your Microsoft Exchange Server Account.
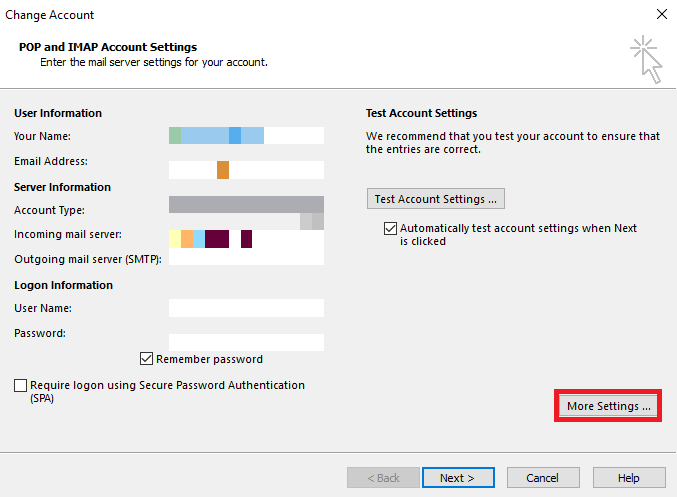
4. اوس، کلیک وکړئ بدل کړئ
5. دلته، کلیک وکړئ نور ترتیبونه.
6. ته لاړ شه ژور ټب.
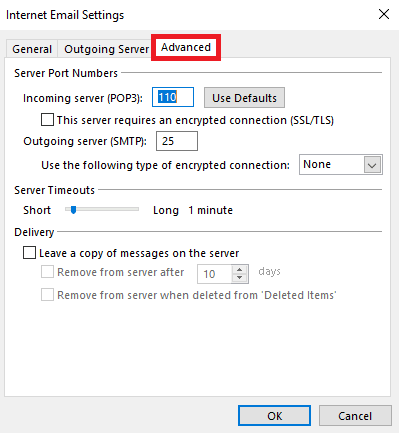
7. Unselect the د ساتل شوي تبادلې حالت وکاروئ بکس او غوره یې کړئ بل.
8. په پای کې، کلیک وکړئ فنلند.
9. بند کړئ Outlook پروګرام.
10. مطبوعات Windows + E keys په ورته وخت کې د خلاصولو لپاره د دوتنې کړکۍ.
11. په د دوتنې کړکۍ, navigate to the following location لاره.
%LOCALAPPDATA%MicrosoftOutlook
12. Here, locate the RoamCache پوښۍ
13. Rename this folder to old_RoamCache.
14. اوس ، خلاص کړئ Outlook program and follow the steps mentioned above to navigate to the د ساتل شوي تبادلې حالت وکاروئ انتخاب.
15. وګوره Use Cached Exchange Mode.
16. په پای کې، د Outlook ایپ بیا پیل کړئ.
سپارښتنه:
موږ امید لرو چې دا لارښود ستاسو لپاره ګټور و او تاسو یې د حل کولو توان درلود Outlook AutoComplete not working مسله اجازه راکړئ پوه شو چې کومه طریقه ستاسو لپاره کار کوي. که تاسو زموږ لپاره کوم وړاندیز یا پوښتنې لرئ، مهرباني وکړئ موږ ته د تبصرې په برخه کې خبر راکړئ.

