A user profile is a place where Windows 10 stores a collection of settings and preferences, making a user account the way it looks for that particular account. All these settings and preferences are stored in a folder called User Profile folder located in C:UsersUser_name. It contains all the settings for screensavers, desktop background, sound settings, display settings and other features. The User Profile also contains users personal files & folders such as Desktop, Documents, Download, Favorites, Links, Music, Pictures etc.
Whenever you add a new user account in Windows 10, a new user profile for that account is automatically created. Since the user profile is automatically created, you don’t get to specify the User Profile folder’s name, so this tutorial will show you How to Rename User Profile Folder in Windows 10.
Rename User Profile Folder in Windows 10
Certifique-se de criar um ponto de restauração caso algo dê errado.
1. Sign out of the user account for which you want to change the name of the user profile folder.
2. Now you need to sign in to any conta de administrador (you don’t want to change this administrator account).
Observação: If you don’t have access to an administrator account, you can enable the built-in Administrator to sign in to Windows and do these steps.
3. Abra o prompt de comando. O usuário pode realizar esta etapa pesquisando por 'cmd' E depois pressione Enter.

4. Digite o seguinte comando em cmd e pressione Enter:
wmic useraccount get name,SID
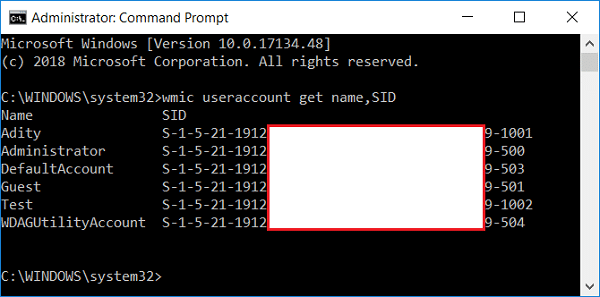
5. Note down the SID of the account you want to change the name of the user profile folder.
6. Pressione a tecla Windows + R e digite regedit e pressione Enter para abrir o Editor do Registro.

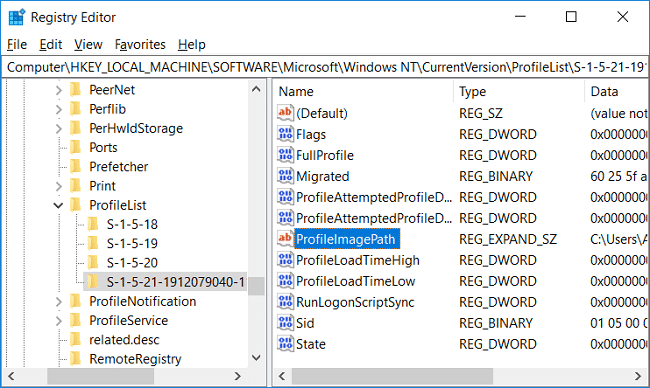
7. Navegue até a seguinte chave de registro:
HKEY_LOCAL_MACHINESOFTWAREMicrosoftWindows NTCurrentVersionProfileList
8. From the left pane, select the SID which you noted in step 5 then in the right window, pane double-click on ProfileImagePath.
9. Now, under Value data field, change the name of the user profile folder de acordo com suas preferências.
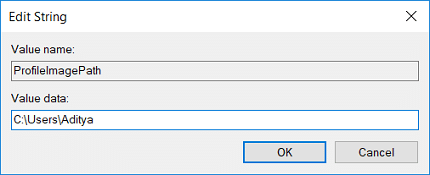
Por exemplo: Se for C:UsersMicrosoft_Windows10 then you could change it to C:UsersWindows10
10. Close Registry Editor then press Tecla Windows + E para abrir o Explorador de Arquivos.
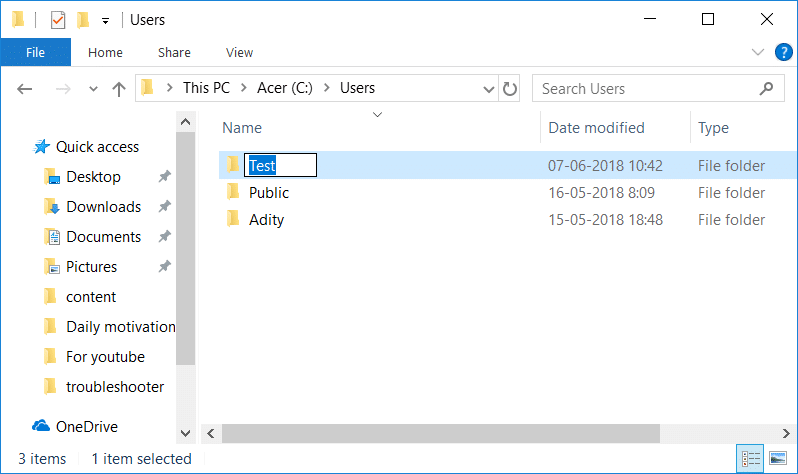
11. Navegue até o C: Users in the Windows File Explorer.
12. Clique com o botão direito do mouse no user profile folder e rename according to the new path to the profile you have renamed in step 9.
13. Feche tudo e reinicie o seu PC para salvar as alterações.
Recomendado:
É isso que você aprendeu com sucesso How to Rename User Profile Folder in Windows 10 mas se você ainda tiver alguma dúvida sobre este tutorial, sinta-se à vontade para perguntar na seção de comentários.

