Windows collects and uses a lot of your private information to provide you with some of its cool default features. While these features have proven to be of great utility, concerns about data privacy and security have also been rising recently. If you are someone who hates being watched over and would rather trade-off those features for your data privacy, this article will take you through a series of steps and methods that you can follow to prevent Windows from accessing your personal data by disabling some or all features that you can survive without.

ونڊوز 10 ۾ ڊيٽا گڏ ڪرڻ کي بند ڪريو (توهان جي رازداري جي حفاظت ڪريو)
پڪ ڪريو ته ھڪڙي بحالي پوائنٽ ٺاھيو صرف صورت ۾ ڪجھ غلط ٿي وڃي.
Method – 1: Turn Off Location Tracking
So most of us know about this piece of private information which is out in the open. Windows gathers your location-related information to provide you with information that can be useful to you like your nearby places, weather forecasts, etc. But all of this at the cost of Windows knowing everywhere you go might not be very favourable. To Disable Data Collection in Windows 10, you need to turn off location tracking,
1. تي ڪلڪ ڪريو شروعاتي بٽڻ توهان جي ٽاسڪ بار تي.
2. تي ڪلڪ ڪريو ڀٽائي آئوٽ above it to open سيٽنگون.
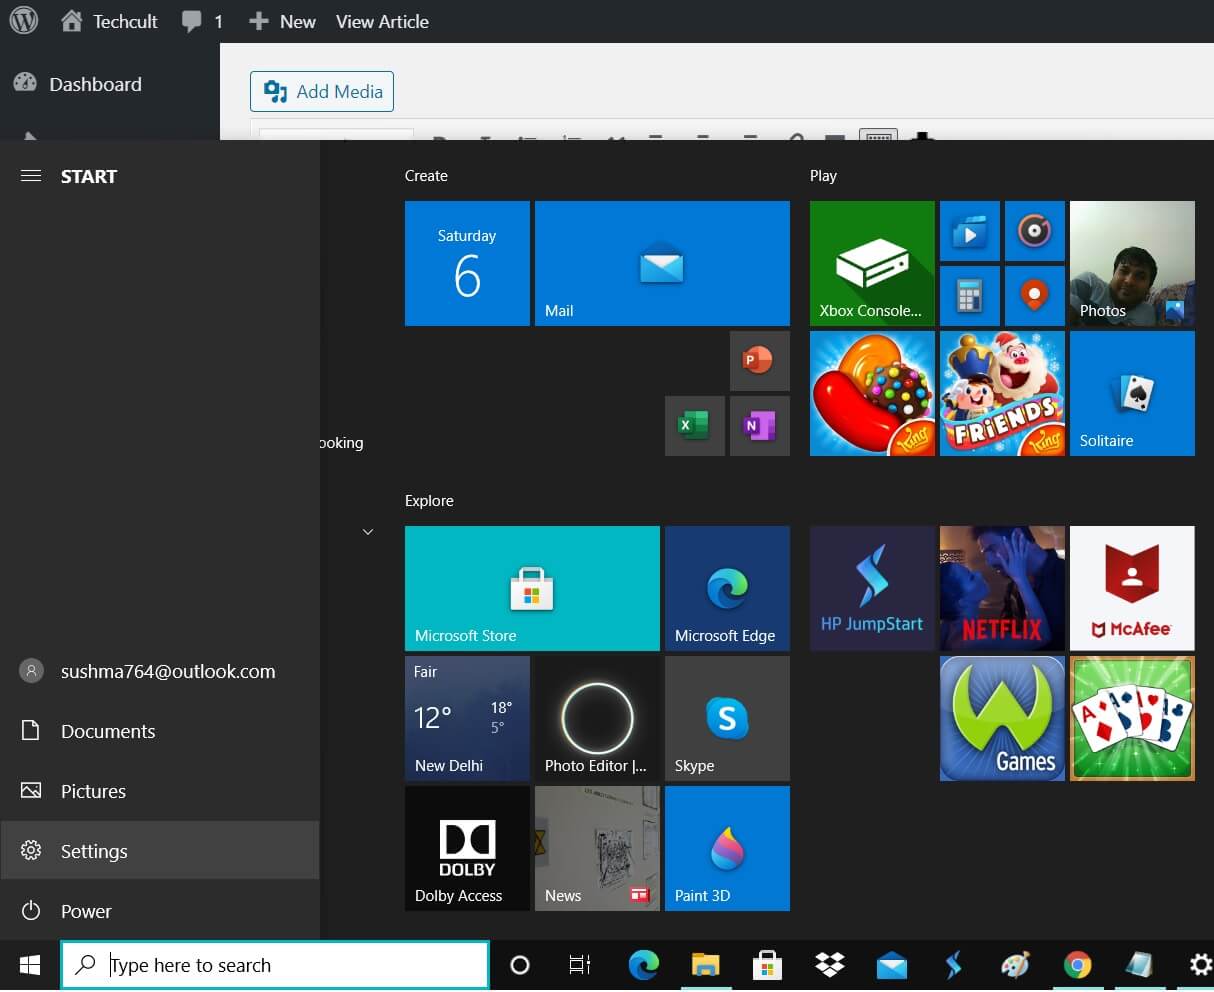
3. هاڻي، تي ڪلڪ ڪريو 'رازداري'۽ چونڊيو'مقام' کاٻي پاسي کان.
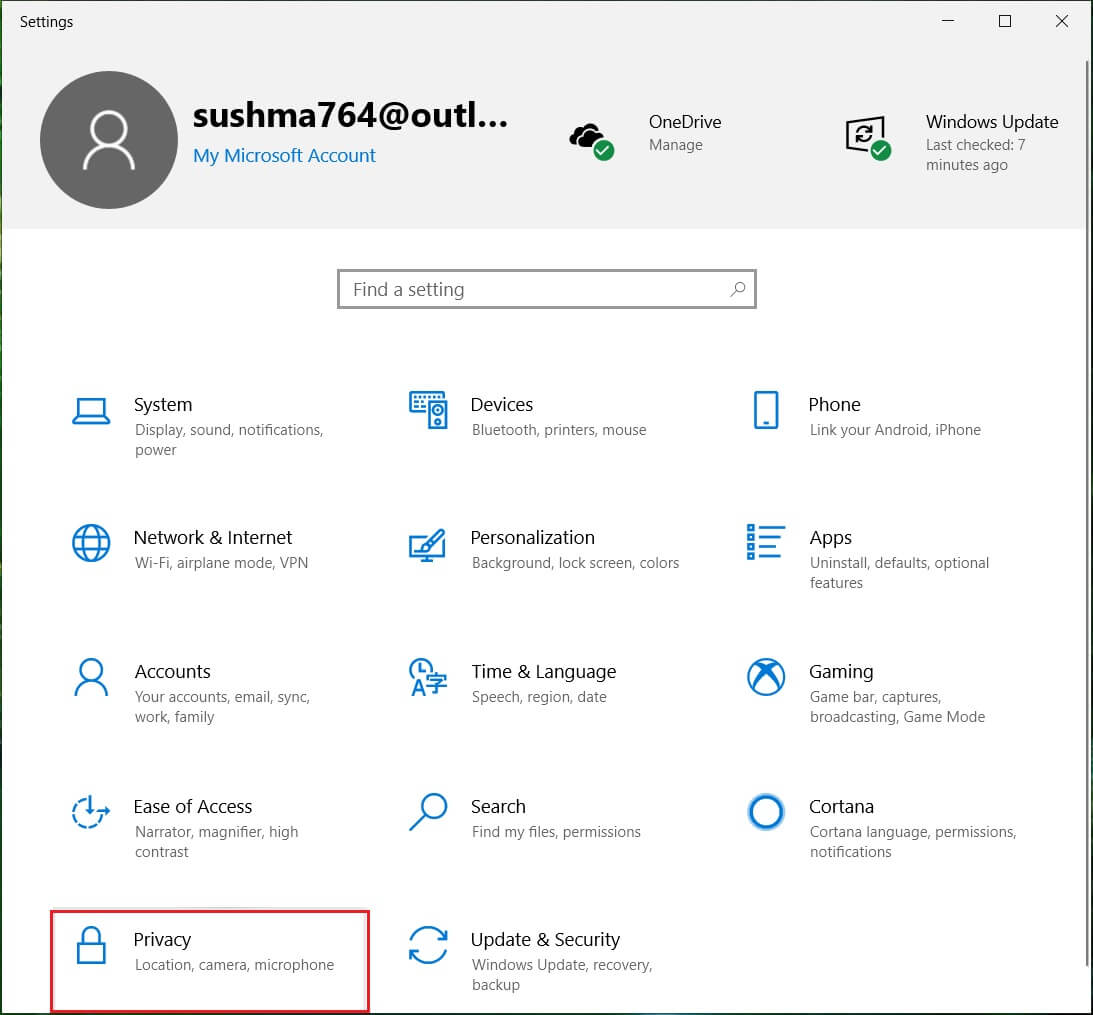
4. تائين turn off location tracking for your account, بند ڪرڻ 'apps access to your location.'
5 you have multiple accounts on the same device, you can turn off location tracking for all of them by clicking on ‘تبديل ڪريو'
![]()
While doing this will disable location tracking in the future, your past location records can still be accessed by Windows. To clear your location records, click on ‘پڌري'هيٺ'جڳھ جي تاريخ’ section on the same page.
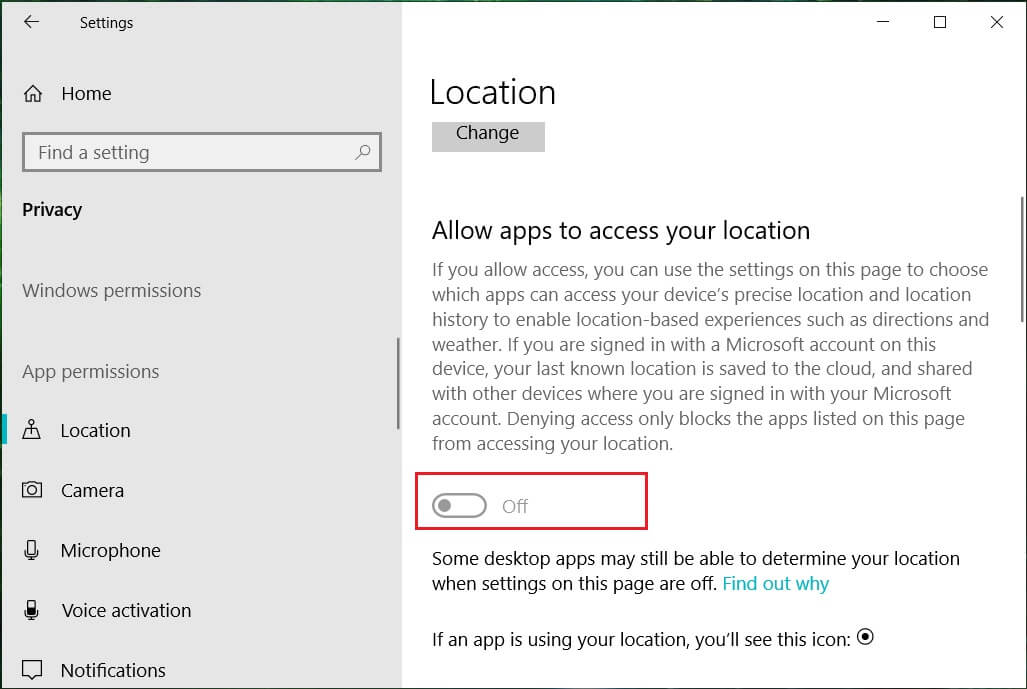
In case you want some particular apps to be able to access your location,
1. Keep your ‘جڳھ جي خدمت' کولڻ.
2. Scroll down to ‘چونڊيو ائپس جيڪي استعمال ڪري سگھن ٿيون توهان جو درست هن'۽ turn on/off the switch for apps as you require.
3. Hence, you will able to allow location access to only the apps of your choice.
طريقو - 2: Turn Off Personalized Advertisements
Have you ever noticed that the ads you see are related to that one particular item you were searching on the web for? Of course! Windows provides you with tailored advertisements by spying on your cookies and gathering your web browsing information. To prevent this sensitive information from being accessed by Windows,
1. سيٽنگ کولڻ لاءِ Windows Key + I کي دٻايو پوءِ ڪلڪ ڪريو رازداري icon.
2. Now make sure to select ‘جنرل’ from the left window pane.
3. Here, it would help if you switched بند 'Let apps use my advertising ID for experience across apps (turning this off will reset your ID)'
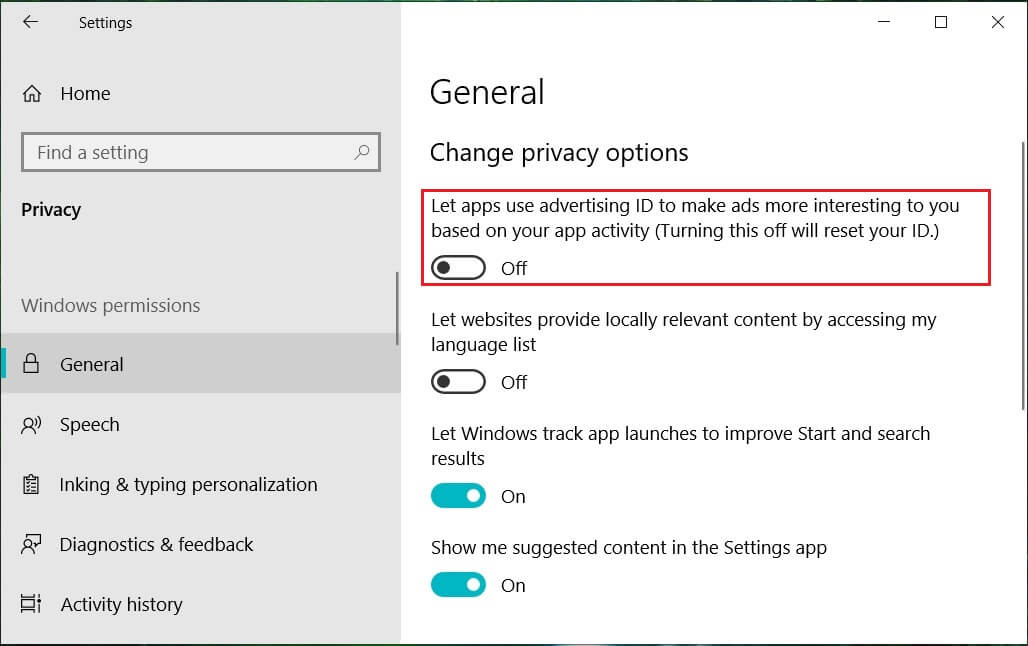
4. Note that this doesn’t stop ads from appearing. You will still see ads, but they will only be general and not personalized.
Further, to prevent Microsoft from being able to access or use this information in any way,
- توھان جي ويب برائوزر تي، ڏانھن وڃو microsoft.com/en-us/opt-out.
- پنهنجي Microsoft اڪائونٽ ۾ لاگ ان ڪريو جيڪڏهن توهان کي ضرورت آهي.
- هاڻي، بند ڪريو “Personalized ads wherever I use my Microsoft account” and “Personalized ads in this browser.”
طريقو - 3: Prevent Cortana From Using Information or Disable Cortana Completely
Cortana is Microsoft’s virtual assistant created for Windows 10. Cortana is designed to provide answers to the users, using the Bing search engine and can perform basic tasks like recognizing natural voice to set reminders, manage calendars, fetch weather or news updates, search for files and documents, etc. For this, Cortana uses your personal information like your voice, writing, location, contacts, calendars, etc. that you may not want to share with it. Now to Disable Data Collection in Windows 10,, you need to prevent Cortana from using your personal information,
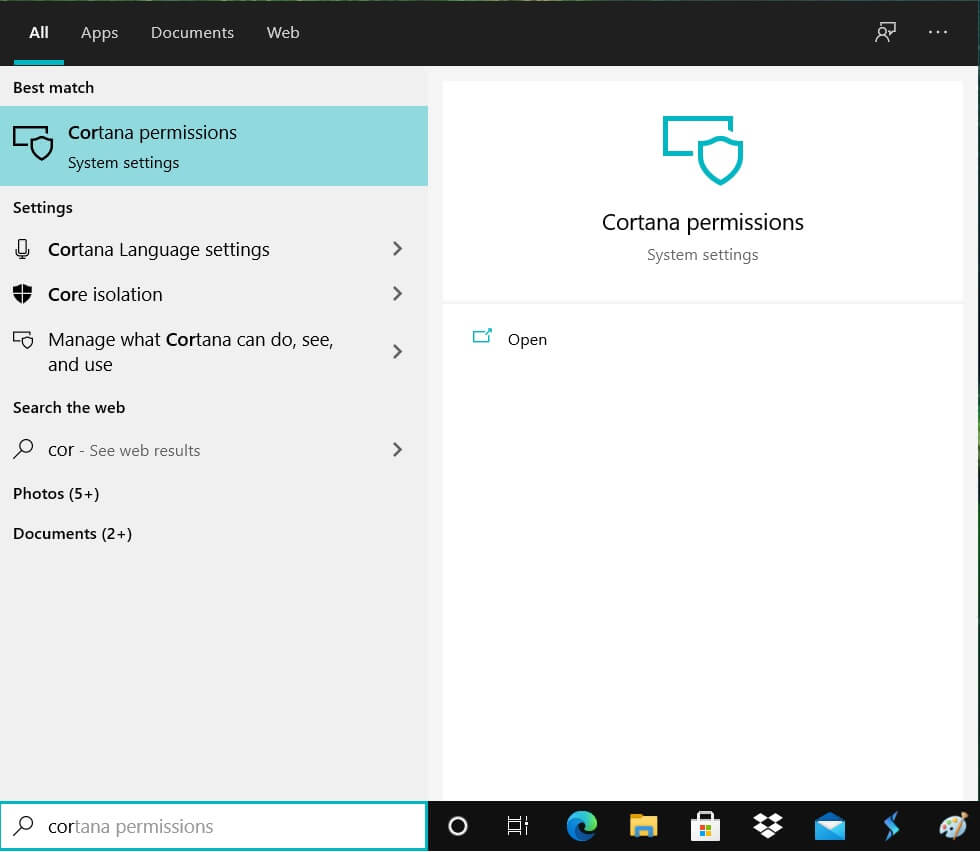
1. In the search field located on your taskbar, search for ‘Cortana Permission’ and open it.
2. ڏانھن وڃو 'اجازتون’ settings from the left pane.
3. تي ڪلڪ ڪريو “Manage the information Cortana can access from this device".
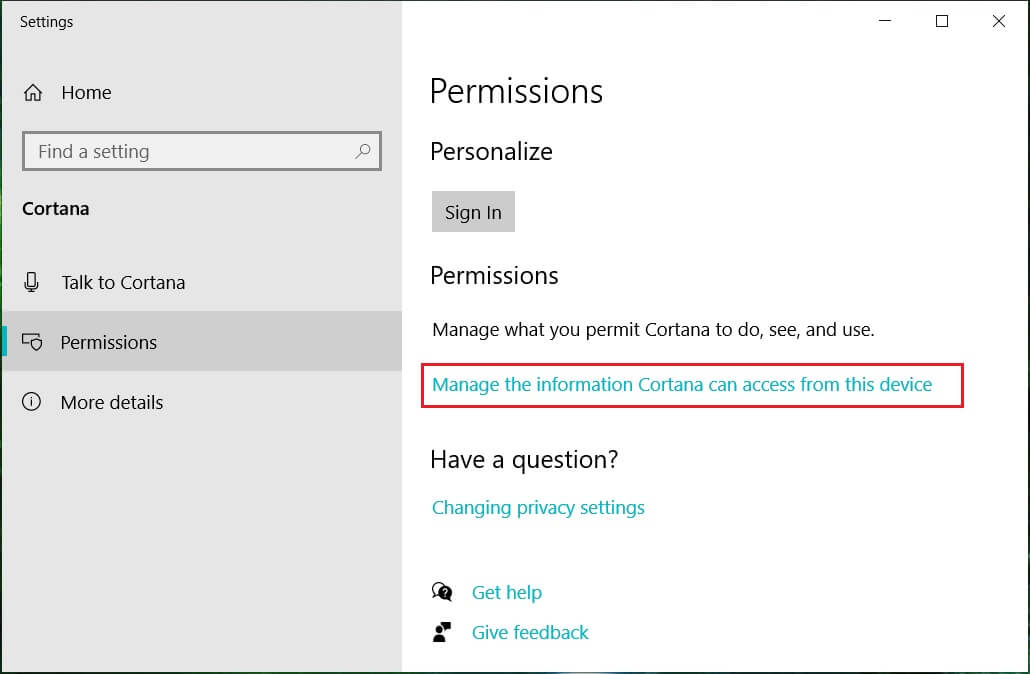
4. هاڻي بند ڪريو 'مقام'،'Contacts, email, calendar & communication history'۽'برائوزنگ تاريخ’. Note that by disabling the permissions, Cortana will not be able to do things that require it to have these permissions.
To further stop Cortana from collecting your personal information,
1. ڏانھن وڃوجوڙ’ on your computer and click on ‘رازداري'
2. ڪلڪ ڪريو 'Speech, inking & typing' کاٻي پاسي کان.
3. هاڻي، تي ڪلڪ ڪريو 'Turn off speech services and typing suggestions’ to stop Cortana from getting to know you.
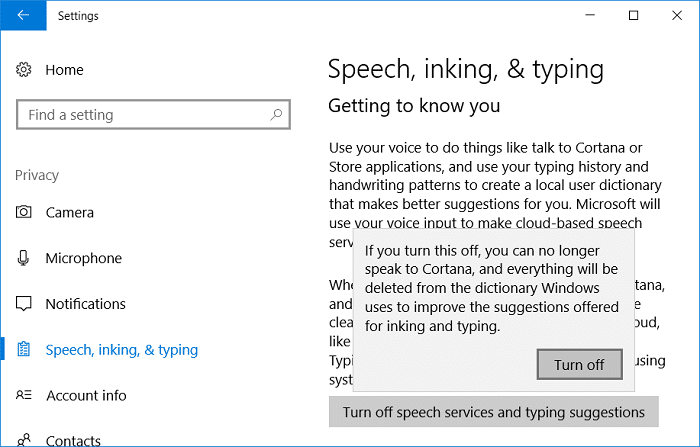
4. هي ڪندو delete collected data stored on your PC, and it also turns off dictation functionality.
To further erase any data that Cortana may have gathered about you,
1. Press Windows Key + I to open Settings then click on ‘ته Cortana'
![]()
2. Open ‘اجازت نامو ۽ تاريخ' کاٻي پاسي کان.
3. Scroll down to ‘History’ and ڪلڪ تي'Clear my device history'

Further, login to your Microsoft account on your web browser and move on to Cortana’s notebook section on the privacy dashboard. Disable the content that you want to from the list provided.
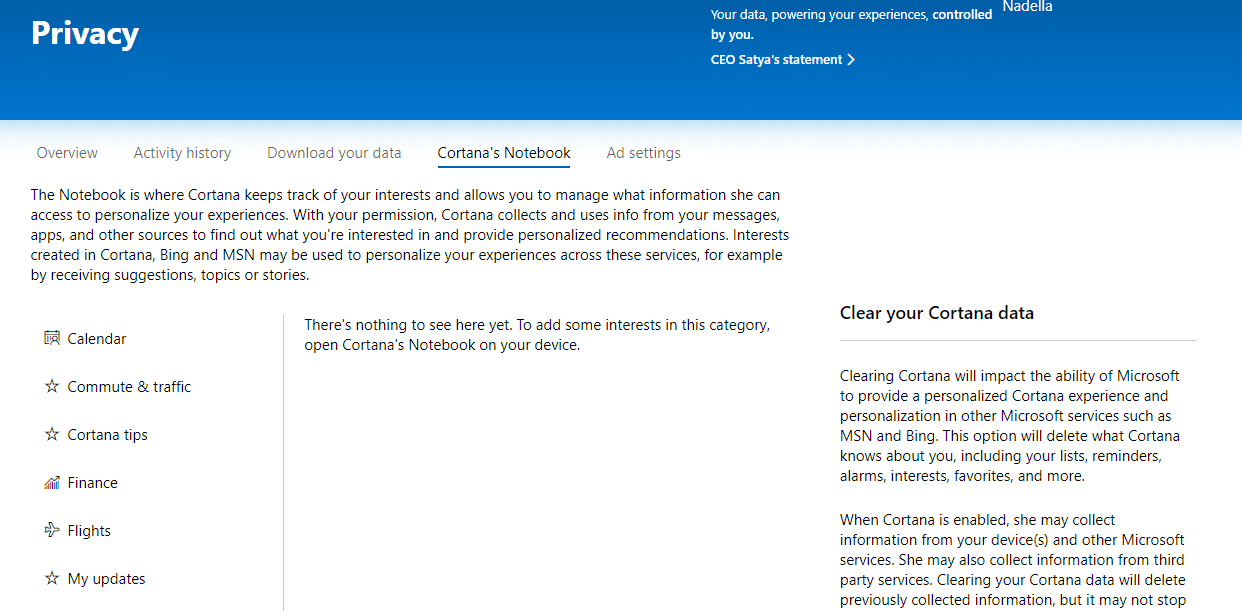
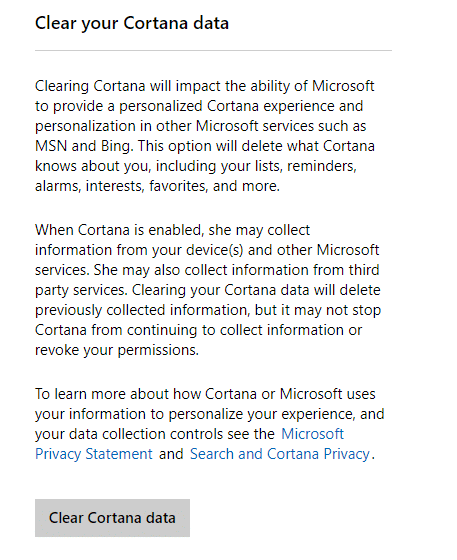
تي ڪلڪ ڪريوClear Cortana data’ on the right side of the page to delete all information that Cortana has about you.
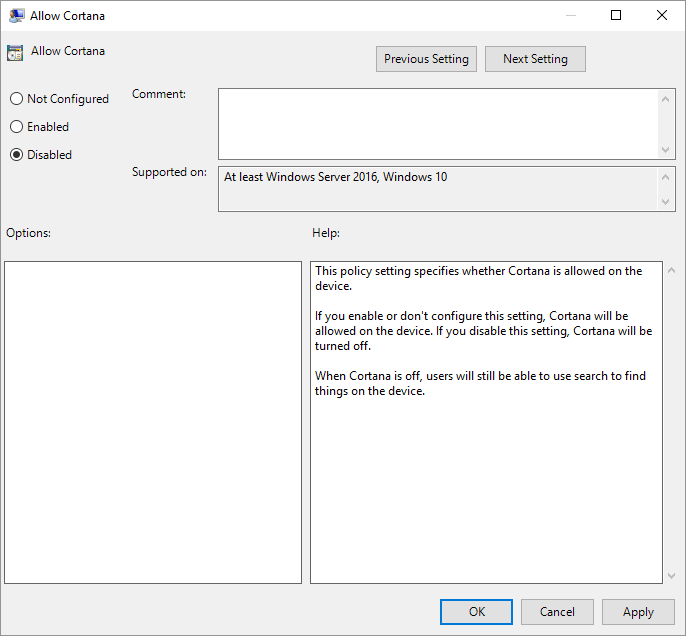
If you don’t like Cortana or don’t want to use it because of privacy reasons, you can permanently disable Cortana on Windows 10.
طريقو - 4: وائي فائي سينس کي بند ڪريو
With Wi-Fi Sense, users can optionally have their device automatically connect to suggested open hotspots, and share their home network’s password with contacts (on Skype, Facebook, etc.) so they may automatically connect to the network on a Windows 10 device without needing to enter its password manually. To turn off Wi-Fi Sense,
1. سيٽنگ کولڻ لاءِ Windows Key + I کي دٻايو پوءِ ڪلڪ ڪريو نيٽ ورڪ ۽ انٽرنيٽ.

2. هاڻي ڪلڪ ڪريو وائي فائي کاٻي ونڊو پين مان ۽ پڪ ڪريو ته وائي فائي احساس جي تحت هر شيء کي بند ڪريو.
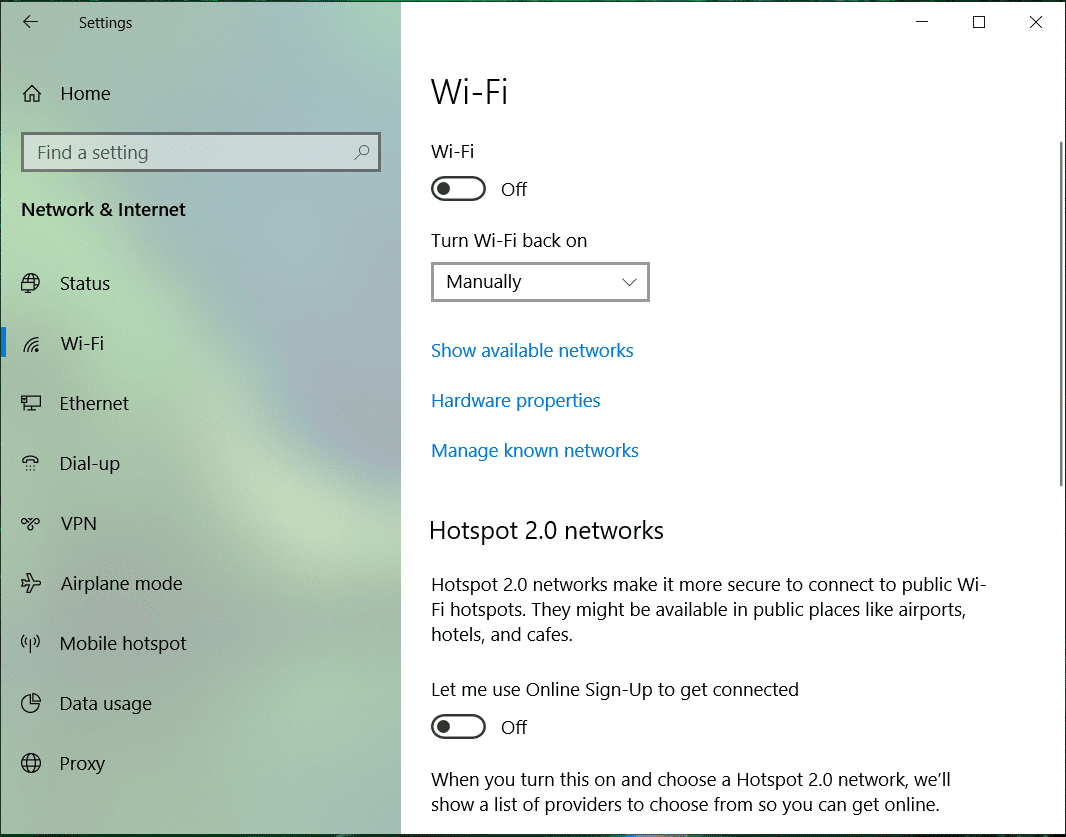
3. Also, make sure to disable Hotspot 2.0 نيٽ ورڪ ۽ ادا ڪيل وائي فائي خدمتون.
Method – 5: Stop Sharing System Files
Windows 10 shares your system files and updates with other users and from other users to you. So it would help if you stopped sharing system files to Disable Data Collection in Windows 10 to protect your privacy:
1. وڃو جوڙ ۽ ڪلڪ ڪريو 'تازه ڪاري ۽ سيڪيورٽي'
![]()
2. چونڊيو 'ونڊوز تازه ڪاري’ from the left pane and click on ‘ڳوڙھي آپشنز'
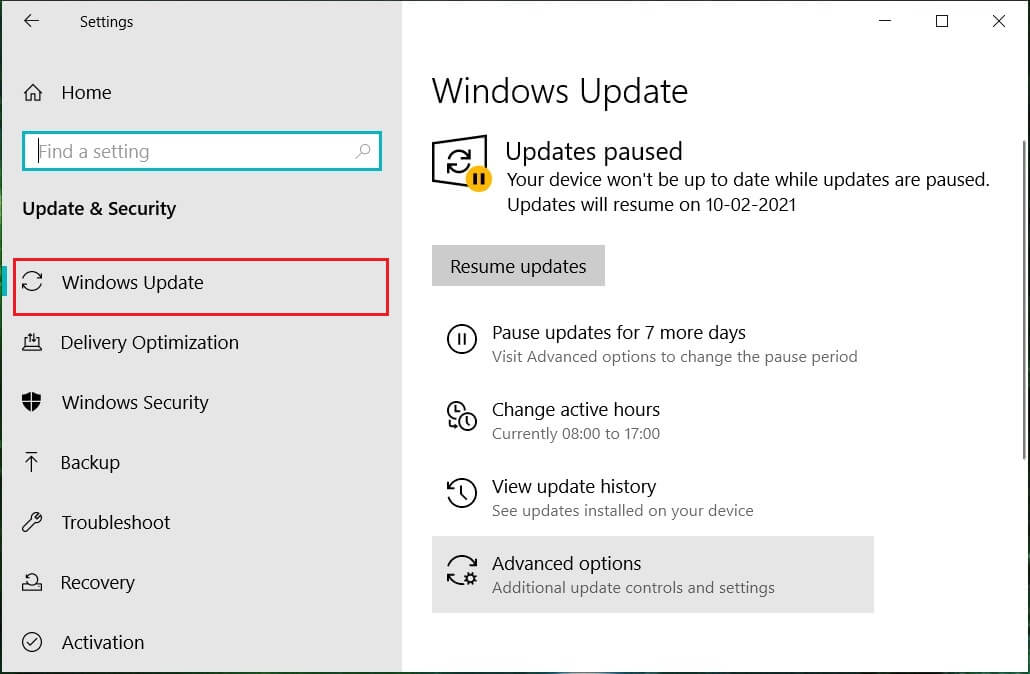
3. ڪلڪ ڪريو 'تقسيم جي واڌاري'
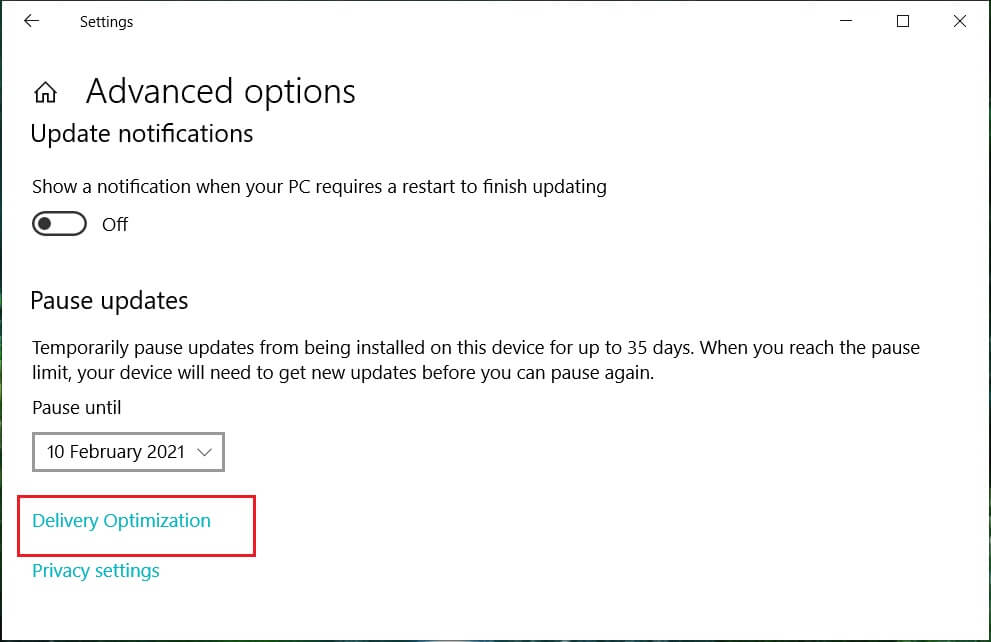
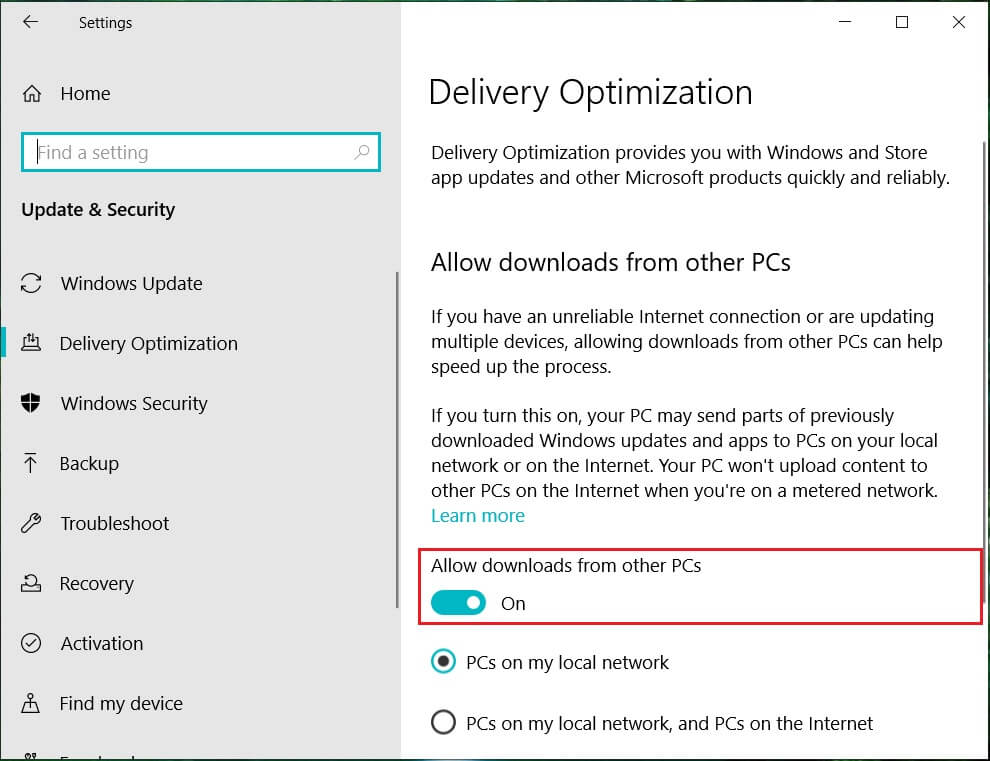
By default, ‘Allow download from other PCs’ is ON. You can turn it off entirely, or decide to choose between ‘منهنجي مقامي نيٽ ورڪ تي پي سي'يا'PCs on my local network and PCs on the Internet'
Method – 6: Disable OneDrive
To stop Windows from storing any of your data on Microsoft’s OneDrive,
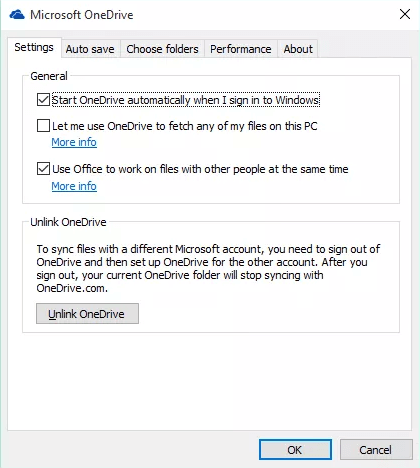
1. In the notification area of your taskbar, صحيح ڪلڪ ڪريو on OneDrive icon and select ‘سيٽنگون'
2. Deselect all three of the following options: ‘جڏهن مان ونڊوز ۾ سائن ان ٿيو آهيان ته OneDrive پاڻمرادو شروع ڪريو'،'مون کي هن PC تي منهنجي فائلن مان ڪي ڪڍڻ لاء OneDrive استعمال ڪريو'۽'Use Office work on files with other people at the same time'.
Method – 7: Turn Off Microsoft Edge
Microsoft’s web browser, Edge, might also be sending your data to Microsoft for its features and predictions. To prevent it from sharing your data,
1. Open Edge then clicks on the ٽي نقطي مينيو on the top right corner of the window and select ‘جوڙ'
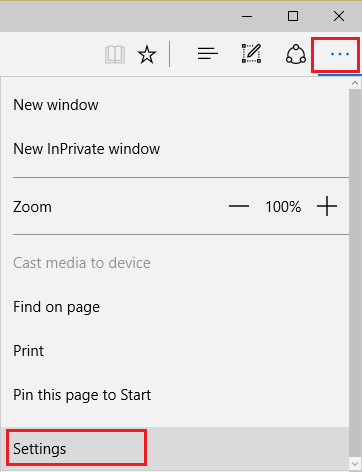
2. ڪلڪ ڪريو 'اعليٰ سيٽنگون ڏسو'

3. In the ‘رازداري ۽ خدمتون’ section, turn off everything you want to like save passwords, Cortana assist, search suggestions, search history, etc.
You can also completely Uninstall Microsoft Edge in Windows 10 if you use Google Chrome or some other browser.
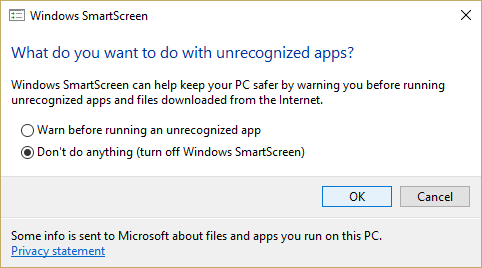
Method – 8: Turn Off Windows SmartScreen
SmartScreen is a بادل تي ٻڌل مخالف فشنگ ۽ مخالف مشهوري component that helps protect users against attacks. To provide this feature, Microsoft collects information about your downloaded and installed programs. While this is a recommended feature, but to disable data collection in Windows 10 you need to turn off Windows SmartScreen filter:
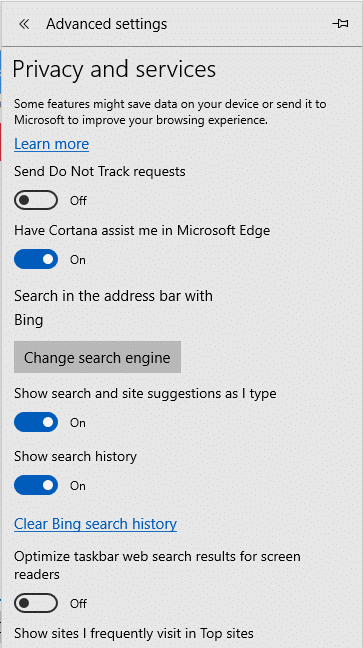
1. In the search field located on your taskbar, type ‘جو ڪنٽرول پينل’ and open it with the given shortcut.

2. ڪلڪ ڪريو 'سسٽم ۽ سيڪيورٽي’ and then click on ‘حفاظت ۽ سار سنڀال'
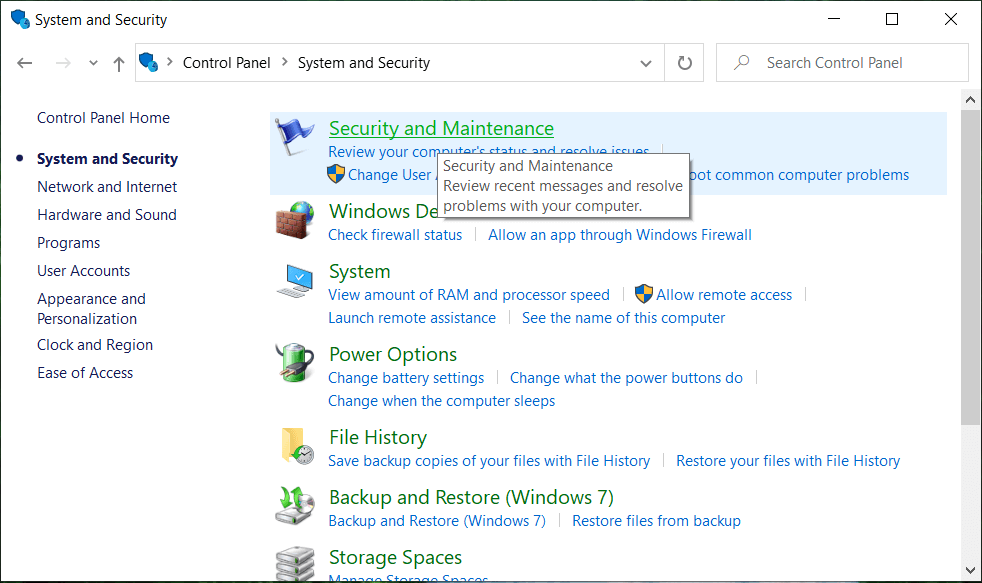
3. چونڊيو 'Change Windows SmartScreen settings’ from the left pane.
4. چونڊيو 'Don’t do anything’ option and click on OK to confirm.
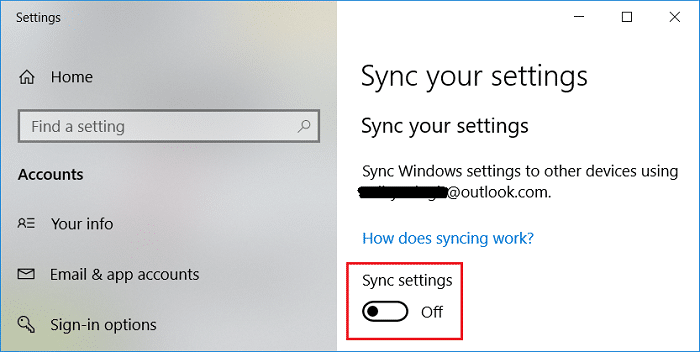
Method – 9: Disable Sync From Settings
To prevent sharing your data to Microsoft for syncing purposes,
1. کوليو جوڙ تي ڪلڪ ڪندي ڀٽائي ۾ آئوٽ شروعاتي مينيو.
2. ڪلڪ ڪريو 'اڪائونٽ’ from the Settings window.
3. چونڊيو 'توهان جي سيٽنگون هم وقت ڪيو' کاٻي پاسي کان.
4. Turn ‘سيٽنگون سيٽنگون' slider off.
There is another SmartScreen filter for Windows Store apps. To turn it off,
- Press Windows Key + I to open جوڙs then click on ‘رازداري'
- منتخب ڪريوGeneral’ کاٻي پاسي کان.
- هاڻي بند ڪريو 'Turn on SmartScreen Filter to check web content (URLs) that Windows Store apps use‘ switch.
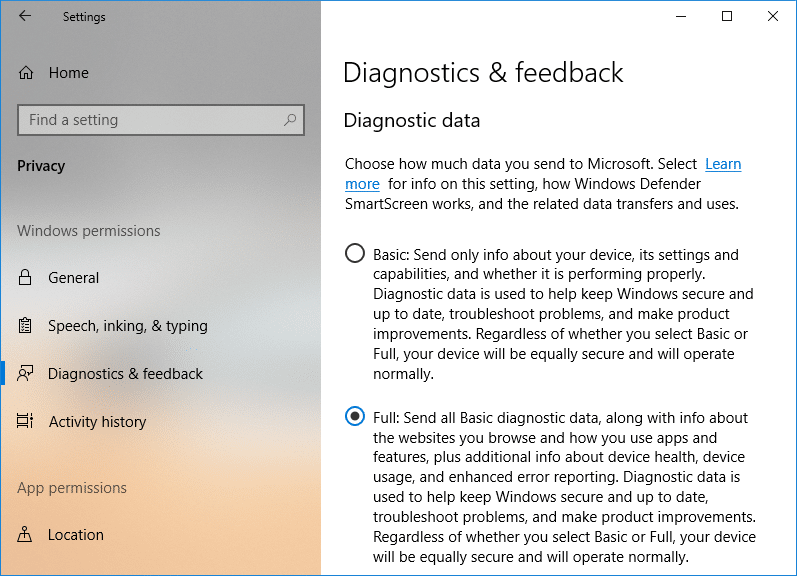
Method – 10: Manage Diagnostic Data
Microsoft uses diagnostic data to keep Windows secure and up to date, troubleshoot problems, and make product improvements. This data is transmitted to Microsoft and stored with unique identifiers that help them recognize an individual user on an individual device and understand its service issues and use patterns. While you can’t entirely stop it from gathering diagnostic data, these are the two options that Microsoft provides:
- بنيادي: This is information about your device, its settings and capabilities, and whether it performs properly.
- مڪمل: This includes all data collected with Basic, along with information about the websites you browse, how you use apps and features, plus additional information about device health, device activity (sometimes referred to as usage), and enhanced error reporting, including others.
To set these settings,
1. سيٽنگ کولڻ لاءِ Windows Key + I کي دٻايو پوءِ ڪلڪ ڪريو 'رازداري'
2. منتخب ڪريوDiagnostics and feedback’ from the left pane and select your desired option.
If you need to know more about these settings then you can read one of our previous posts: Change Diagnostic and Usage Data Settings in Windows 10
Method – 11: Use a Local Account Instead of Microsoft Account
Not just Windows, your personal information is used by Microsoft too. Microsoft uses your account settings and some other information to sync your data and settings over all of your devices. If you do not want Microsoft to use your information, you can stop using your Microsoft account and use a local account instead and this way you can completely disable data collection in Windows 10. For this,
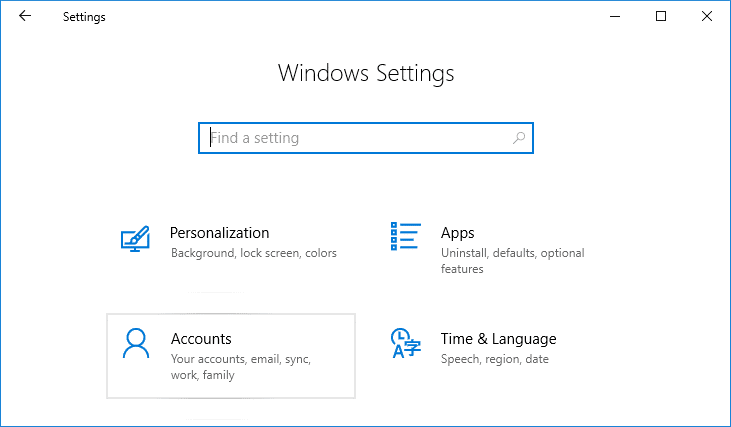
1. تي ڪلڪ ڪريو شروعاتي بٽڻ توهان جي ٽاسڪ بار تي.
2. اڳيون، تي ڪلڪ ڪريو ڀٽائي آئوٽ above it to open سيٽنگون.
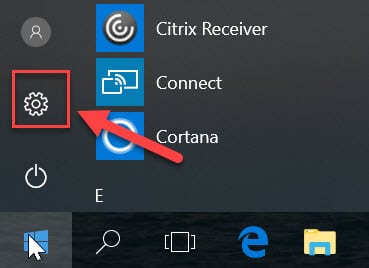
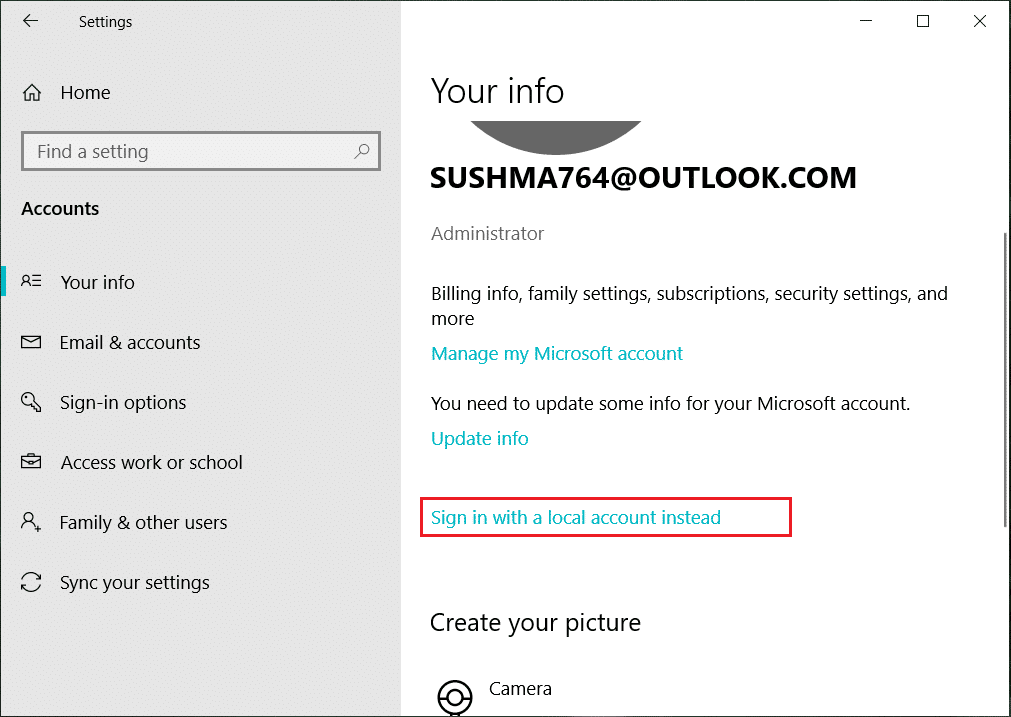
3. ڪلڪ ڪريو 'اڪائونٽ'۽ چونڊيو'توهان جي ڄاڻ' کاٻي پاسي کان.
4. چونڊيو 'ڪنهن مقامي اڪائونٽ سان سائن ان ڪريو’ and follow the instructions.
These were the steps you can take to prevent Windows from invading your privacy and gathering your personal data.
صلاح ڏني ته:
I hope this article was helpful. Now you can easily Disable Data Collection in Windows 10 to Protect Your Privacy, but if you still have any questions regarding this tutorial, please feel free to ask them in the comment’s section.


)