Windows 10 operating system is one of the most used OS around the world. The version is the direct successor to Windows 8.1. This advanced version is preferred by most users due to manifold features that had been missing in the previous updates. However, it is not all a fairytale with Windows 10 version as it has been seen to cause the application-specific permission settings 10016 error in the system logs. In our today’s doc, we will be focusing on D63B10C5 BB46 4990 A94F E40B9D520160 error that does not grant local activation permission. So, let us look at the possible reasons behind the same and possible fixes for event ID 10016 the application-specific permission settings error in the doc.
How to Fix The Application-Specific Permission Settings 10016 Error
- غلط اجازتون are the prominent reason behind the stated error if a specific program or an application cannot access DCOM components indicated in the event log.
- ورهايل اجزاء واري ماڊل، پڻ مشهور آهي DCOM is a Microsoft software that allows components to communicate across different computers over a network.
- اهو قابل بڻائي ٿو استعمال ڪرڻ ۽ reusing of components dynamicallyبغير recompiling, on any available پليٽ فارم, at any وقت, and from any ٻولي.
- This COM extension might not be accessible by some programs on your device and hence can result in the application-specific permission غلطي.
Considering the reasons that can stop certain applications or programs of your system to run because of 9CA88EE3 ACB7 47C8 AFC4 AB702511C276 error, the best possible solutions have been given below. One involves modifying permissions on APPID registry key and another one is modifying permissions on the COM server application. So, let us begin right away with fixing this error right away with the first method below:
Method 1: Modify APPID Registry Key Permissions
The first method to resolve event ID 10016 the application-specific permission settings involves modifying permissions on APPID registry key. As you know by now, this error is triggered when certain programs or processes of your system are unable to access DCOM components. Therefore, you must start by granting access to these DCOM components as listed below in the steps:
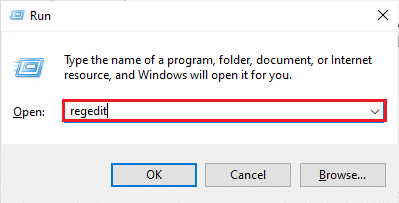
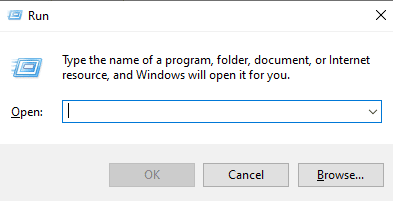
1. کليل هل dialog box, to open it press the Win + R ڪنجيون گڏجي.

2. قسم ريڊيڪل ۽ پريس ڪريو شامل ڪريو اهم شروع ڪرڻ رجسٽري ايڊيٽر.
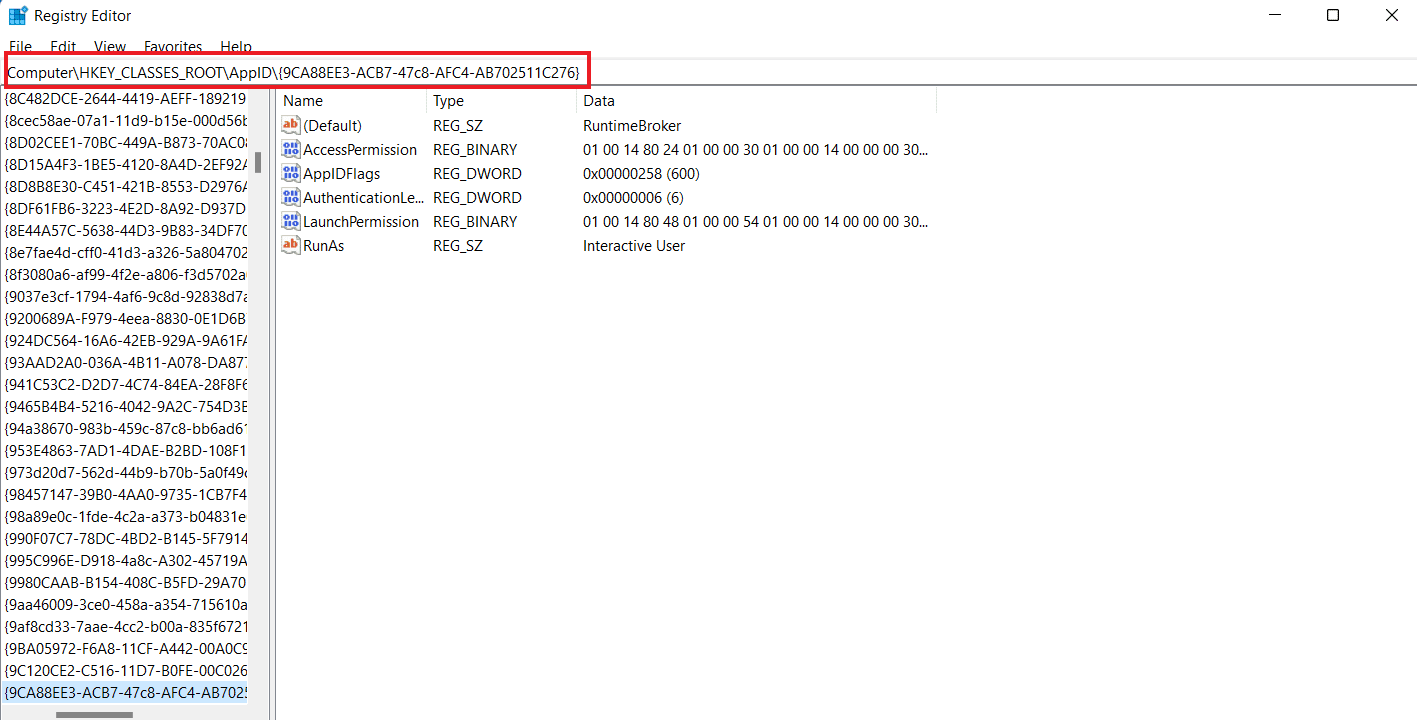
3. Now, navigate to the provided رستو ۾ رجسٽري ايڊيٽر.
ComputerHKEY_CLASSES_ROOTCLSID{D63B10C5-BB46-4990-A94F-E40B9D520160}

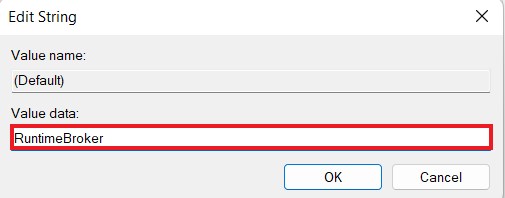
4. Now, double-click on the ھونئن key and note down its ڊيٽا ڄاڻيو.
5. Next, navigate to the provided key folder رستو.
ComputerHKEY_CLASSES_ROOTAppID{9CA88EE3-ACB7-47c8-AFC4-AB702511C276}
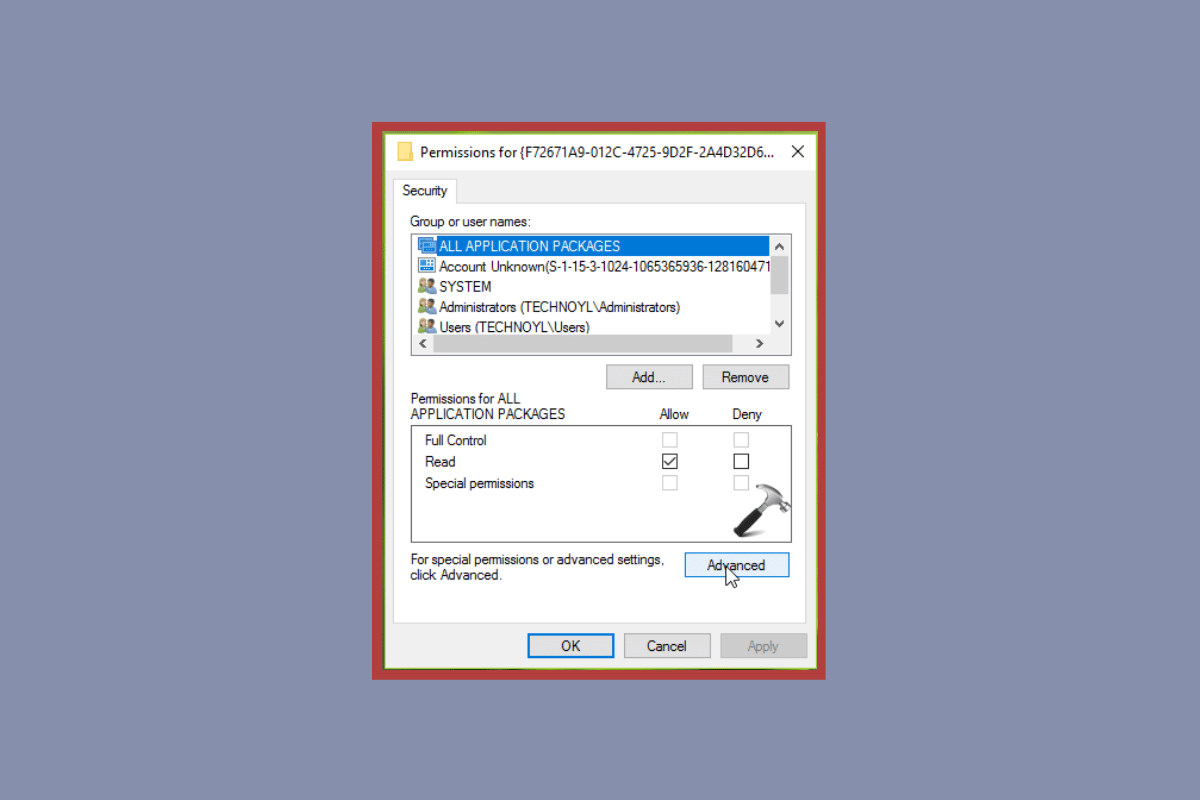
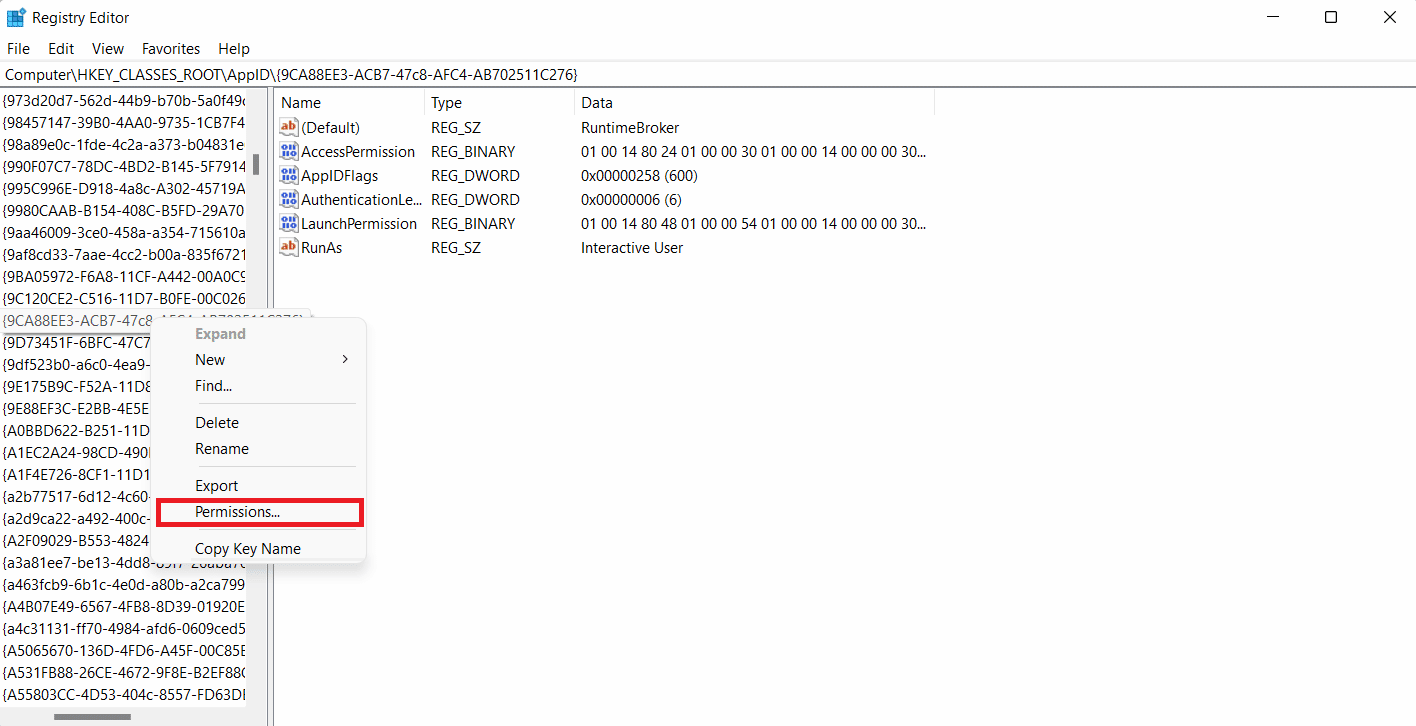
6. ھاڻي، تي صحيح ڪلڪ ڪريو {9CA88EE3-ACB7-47c8-AFC4-AB702511C276} key from the left pane and select اجازتون.
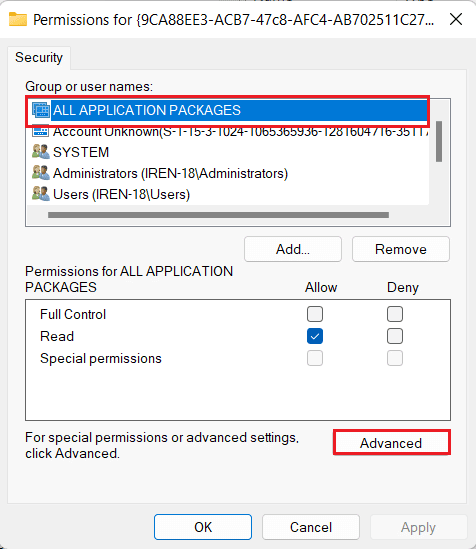
7. چونڊيو ALL APPLICATION PACKAGES ۾ سيڪيورٽي ٽيب تي ڪلڪ ڪريو اعلي درجي.
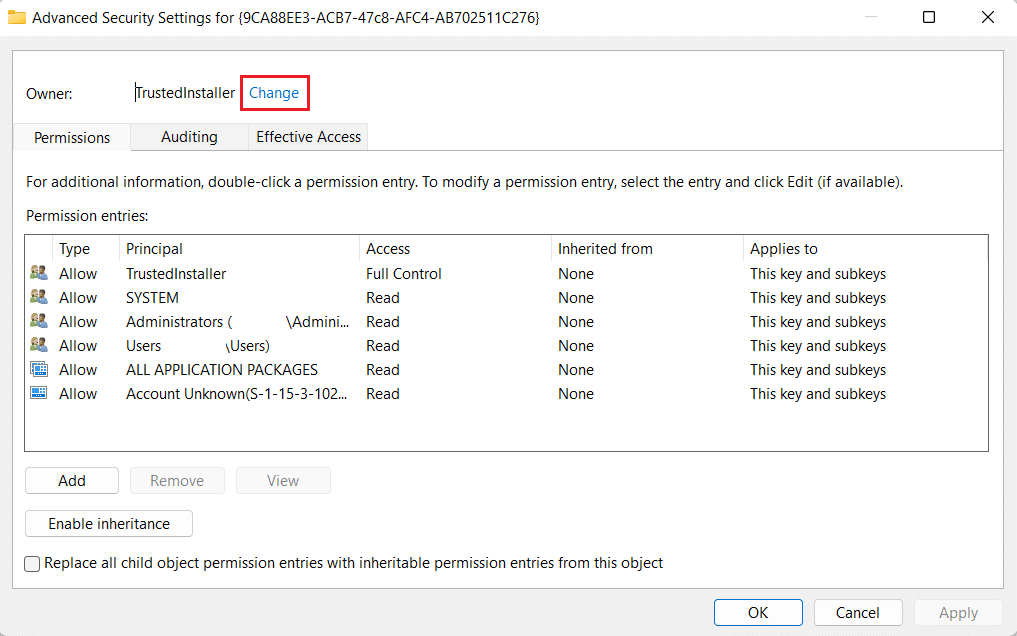
8. اڳيون، ڪلڪ ڪريو تبديل ڪريو اڳيان قابل اعتماد منتظم.
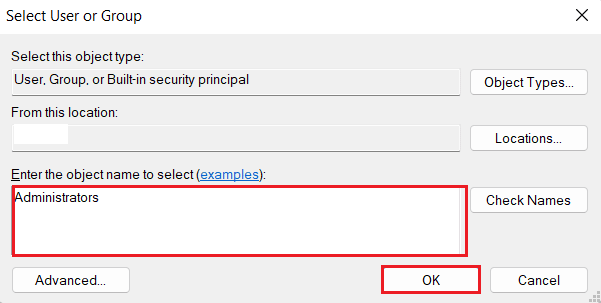
9. هاڻي ، ڪلڪ ڪريو Object Types…
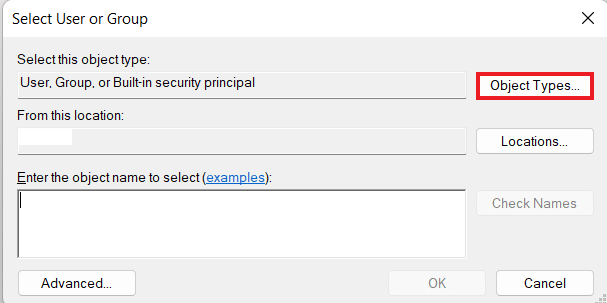
10. قسم ايڊمنسٽريٽرن دٻي ۾ ۽ تي ڪلڪ ڪريو OK.
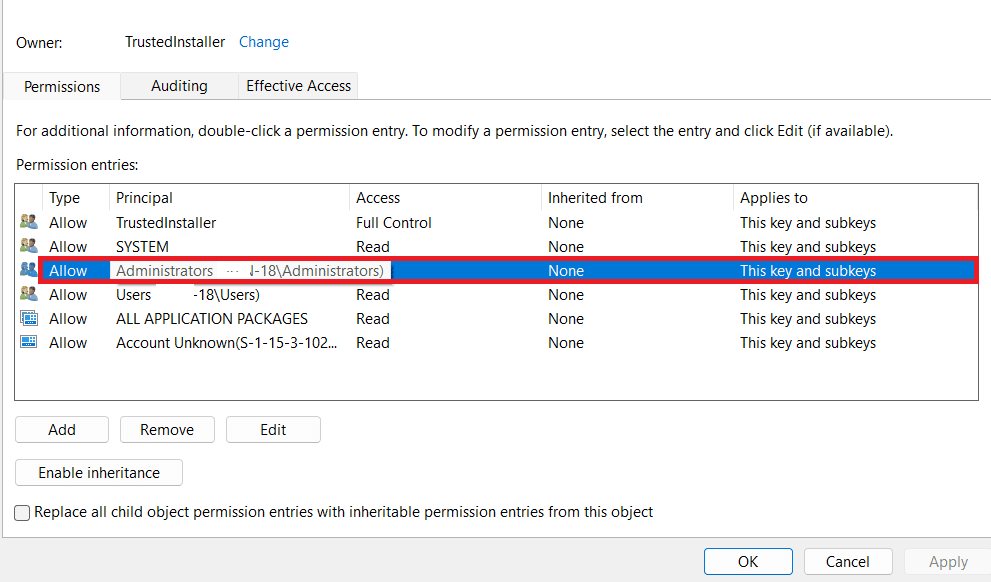
11. Now, check the box for Replace owner or subcontainers and objects ۽ چونڊيو درخواست ڏيو.
12. Next, double-click on the ايڊمنسٽريٽرن to open the entry.
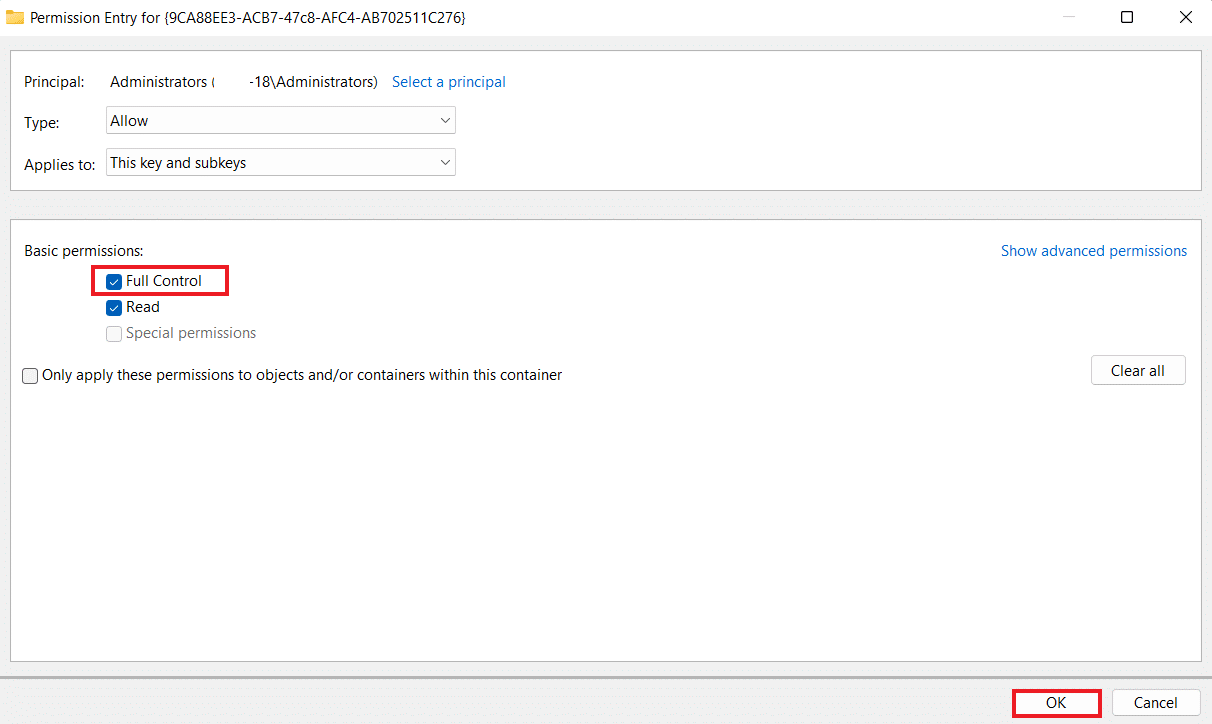
13. ھاڻي، چونڊيو مڪمل ڪنٽرول چيڪ باڪس ۽ ڪلڪ ڪريو OK ٽي دفعا.
14. Finally, close the رجسٽري ايڊيٽر and reboot the PC.
Check if this solves D63B10C5 BB46 4990 A94F E40B9D520160 error or not.
پڻ پڙهو How to Stop Windows 10 From Asking Permission
Method 2: Modify Permissions on COM Server Application with CLSID
Once you have modified the registry key on your device, the next steps are to modify permissions on the COM server to resolve 9CA88EE3 ACB7 47C8 AFC4 AB702511C276 error. To do so, follow the steps provided below:
1. لانچ شروع ڪريو هل دٻي جو دٻو.
2. ھاڻي ٽائيپ ڪريو dcomcnfg command in it and press ڪيٻو داخل ڪريو کولڻ اجتماعي خدمتون.

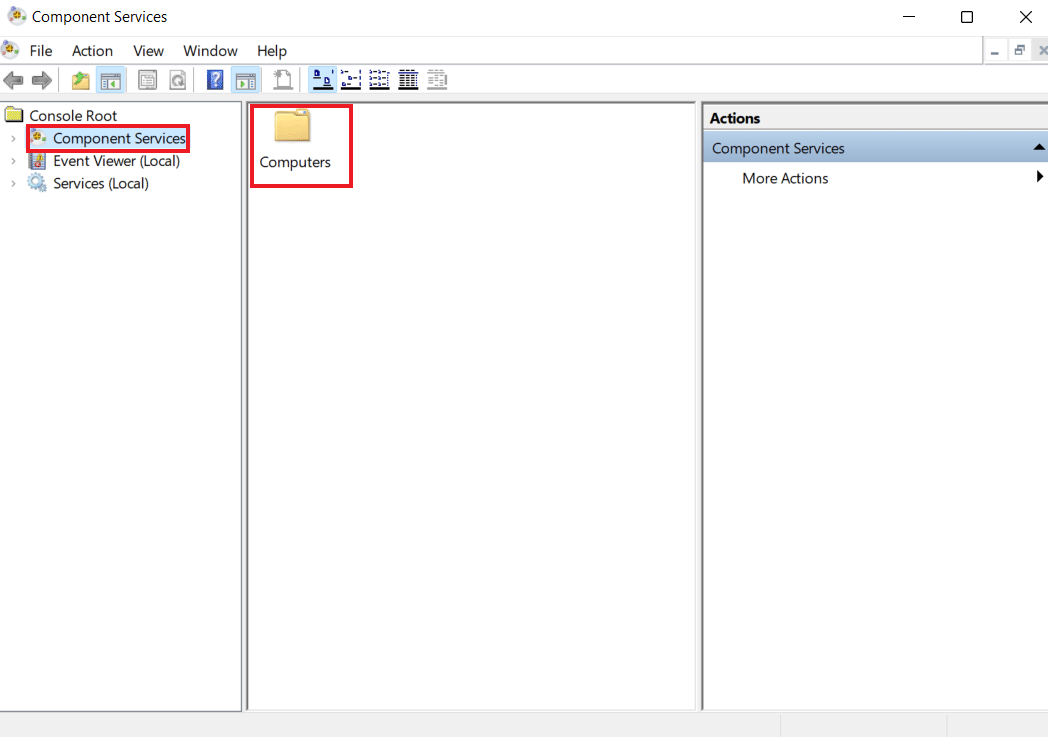
3. اڳيون، وڌايو اجتماعي خدمتون ۽ ڪلڪ ڪريو ڪمپيوٽرن ان ۾.
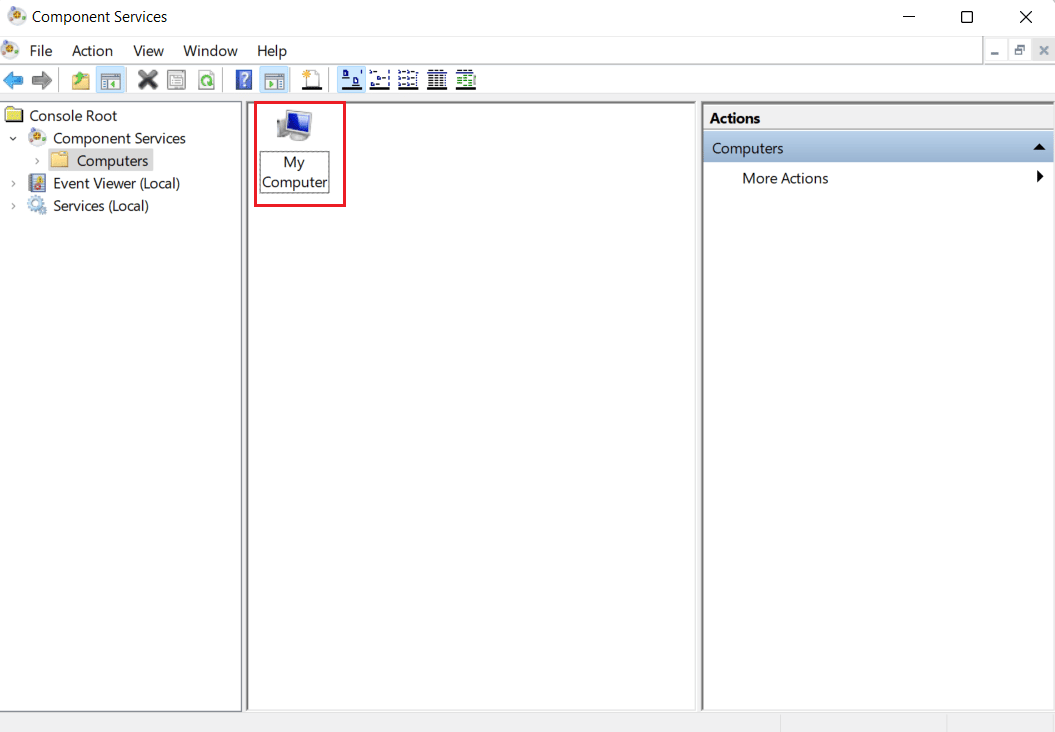
4. تي ڪلڪ ڪريو منهنجو ڪمپيوٽر.
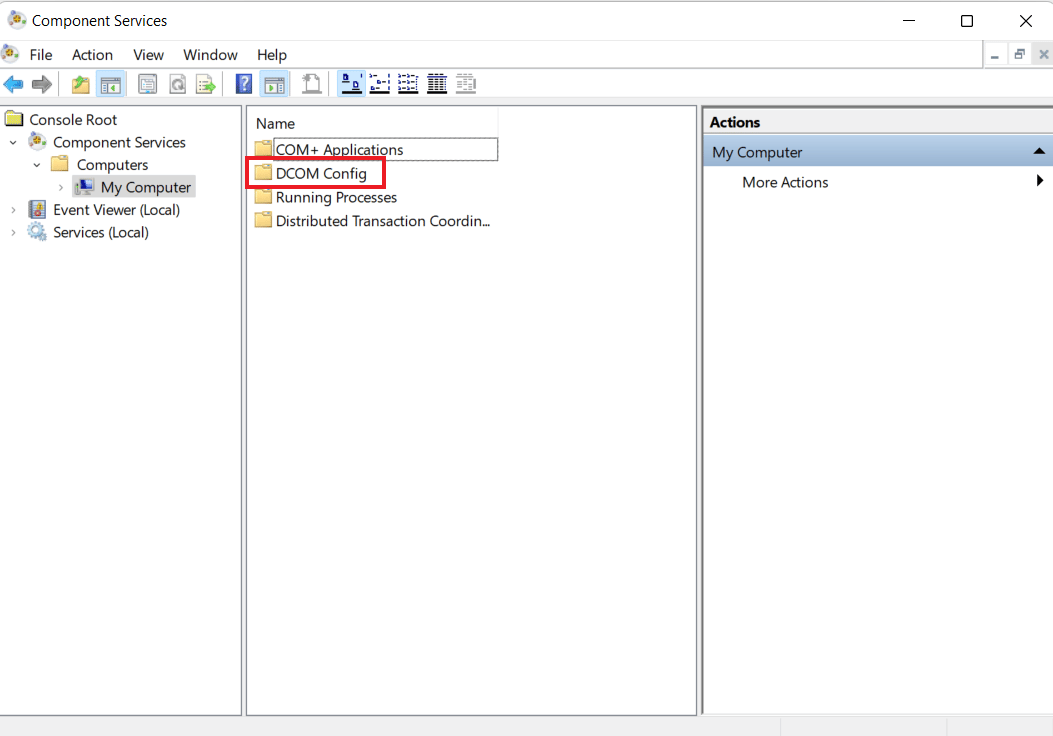
5. اڳيون، وڌايو DCOM config.
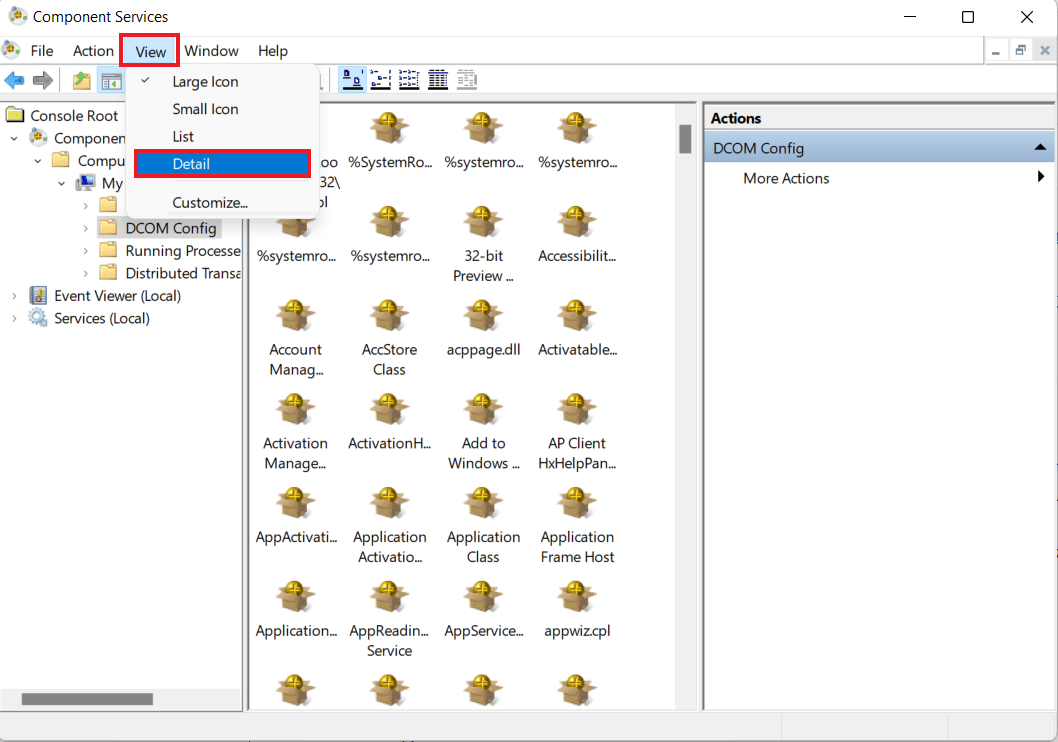
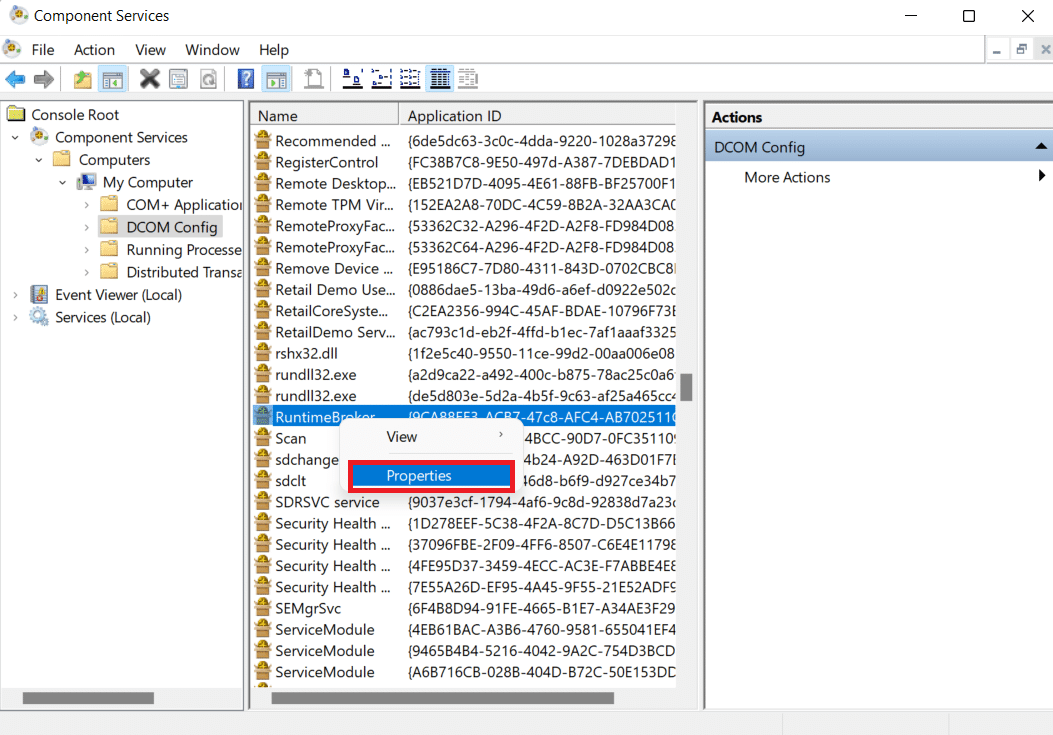
6. Now, from the main menu click on the ڏسو ٽيب ۽ چونڊيو تفصيل.
7. اڳيون، تي صحيح ڪلڪ ڪريو APPID name that you noted down in Method 1 Step 4 ۽ چونڊيو ملڪيت.
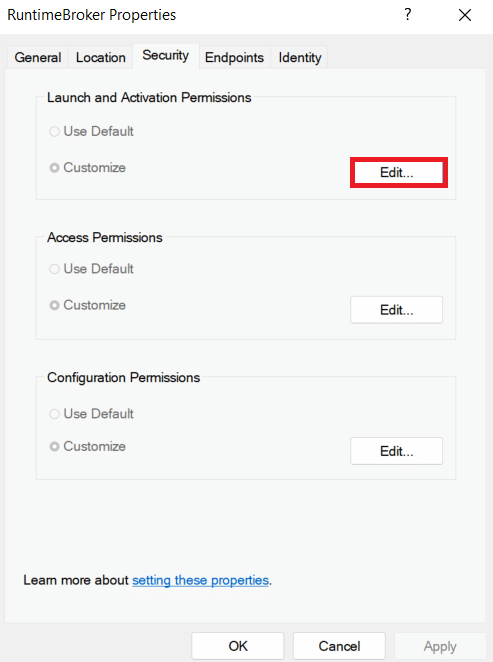
8. ۾ ملڪيت ٽيب، چونڊيو ترميم ڪريو... ۾ لانچ ۽ چالو ڪرڻ جي اجازت نامو سيڪشن.
5. هاڻي، تي ڪلڪ ڪريو شامل ڪريو ... بٽڻ
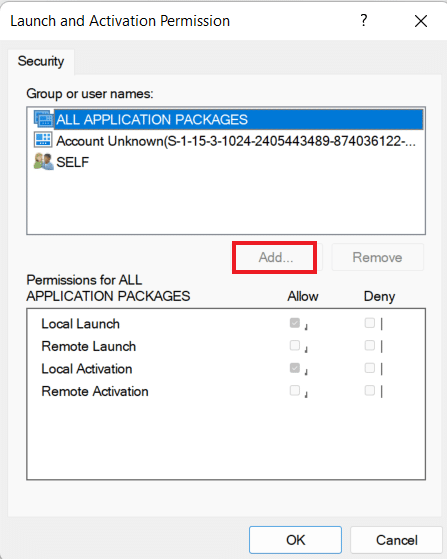
6. In the box type LOCAL SERVICE ۽ ڪلڪ ڪريو OK.
7. منتخب ڪريو مقامي سرگرمي چيڪ باڪس هي جي اجازت ۽ ڪلڪ ڪريو OK ٻيهر.
8. Finally, close the اجتماعي خدمتون ونڊو ۽ شروع ڪر سسٽم.
Now, check if event ID 10016 the application-specific permission settings have been fixed.
پڻ پڙهو ونڊوز 10 ۾ فائل جي اجازتن کي ڪيئن تبديل ڪجي
وچين سوالن جا جواب
Q1. How can I know which application is using Clsid?
جواب. Class ID or CLSID is a serial number that represents a منفرد سڃاڻپ for any program or application component in Windows. Therefore, it is easy to find all registry entries for an application component under the registry key {HKEY_CLASSES_ROOTCLSID{CLSID value}.
Q2. What causes application-specific permission settings error?
جواب. The error is usually caused when a specific process or program does not have enough permissions to access the DCOM components that are provided in the event log.
Q3. What is meant by CLSID on my computer?
جواب. CLSID on your computer is a globally unique identifier that helps identify a COM class object. You need to register a CLSID for each supported class of objects in case your server or container allows linking to its embedded objects.
Q4. How can I know which application server I am using?
جواب. You can know about the application server from the Connection Center.
Q5. What is meant by COM server application?
جواب. COM server application is a server in any object that provides services to clients. These services are present in the form of COM interface implementations that can be called by a client that is able to get a pointer to one of the interfaces on the server object. Two types of servers that are present include in-process and out-of-process.
صلاح ڏني ته:
We hope that our guide on the application-specific permission settings 10016 was helpful and informative enough to help you with resolving D63B10C5 BB46 4990 A94F E40B9D520160 error. Let us know by leaving your comments below if you have other queries, suggestions, or doubts.

