The main cause of this error is still unknown, but there are various reasons why this problem occurs. Few of them are Windows Firewall might be disabled, malware infection, Incorrect date & time configuration, corrupted application package etc. Now Windows Store is an important component of Windows as it enables you to download different kinds of application required for personal or professional use.
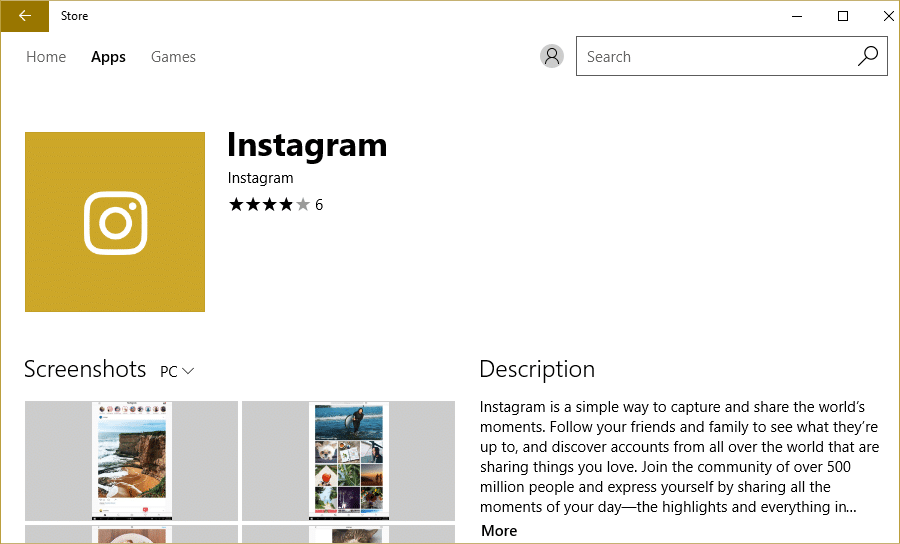
Imagine not being able to download any Windows store application, that’s exactly what happens in this case. But don’t worry troubleshooter is here to fix this issue, follow the below-listed methods one by one and by the end of this guide, Windows Store would be back to normal.
There are few things which you should make sure of before continuing with the below-listed troubleshooting steps:
- Sometimes Family Saftey Settings blocks some apps due to which you may not be able to access the particular app on the Store. Check if the problem occurs on all the other apps or some particular apps. If this issue occurs only on selected apps, then turn off the Family Saftey Settings.
- If you recently made some changes on the system but forgot to restart your PC, you might not access Windows Store. Make sure to restart your system after Windows Update and see if the problem is resolved or not.
වින්ඩෝස් වෙළඳසැලේ ස්ථාපන බොත්තමක් නොමැති බව නිවැරදි කරන්න
යම් දෙයක් වැරදී ගියහොත් ප්රතිසාධන ලක්ෂ්යයක් සෑදීමට වග බලා ගන්න.
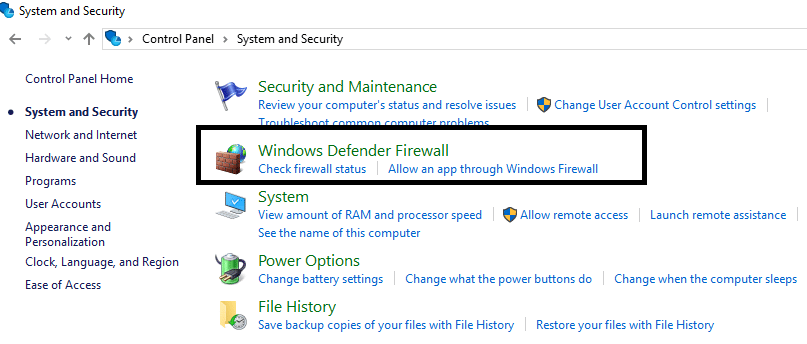
Method 1: Turn ON the Windows Firewall
Windows Store doesn’t let you access the apps until you make sure that the Windows Firewall is enabled.
1.Windows Key + I ඔබන්න ඉන්පසු තෝරන්න පාලන පුවරුව.

2.ඊළඟට, ක්ලික් කරන්න පද්ධතිය සහ ආරක්ෂාව.
3. ඉන්පසු ක්ලික් කරන්න වින්ඩෝස් ෆයර්වෝල්.
4.Now from the left window pane click on වින්ඩෝස් ෆයර්වෝල් සක්රිය හෝ අක්රිය කරන්න.
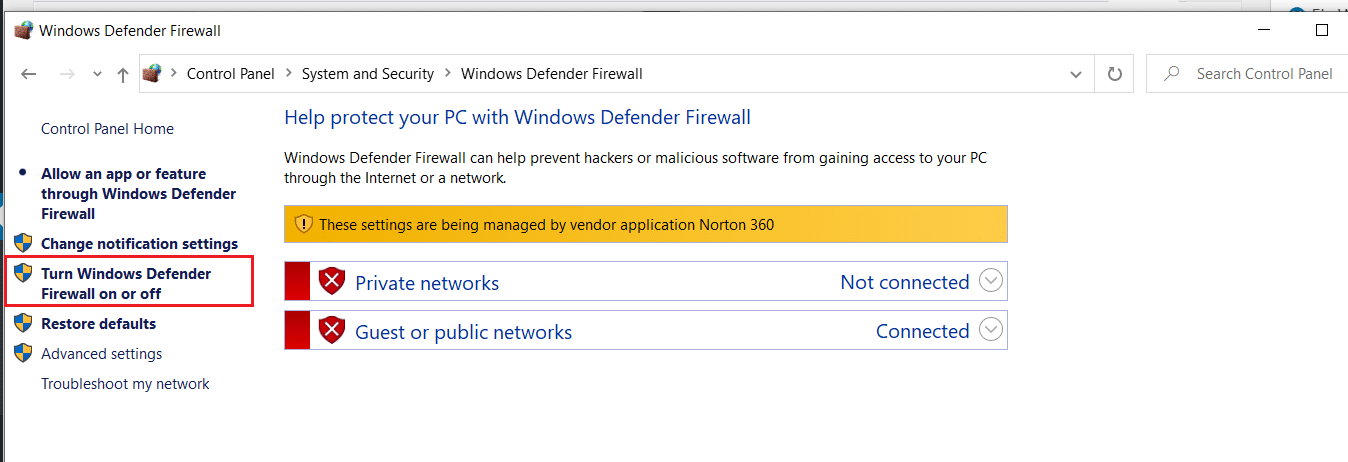
5. තෝරන්න Turn On Windows Firewall for both private and public network settings and then restart your PC
After you are done, try to install the app again on the Windows Store and this time it should work out fine.
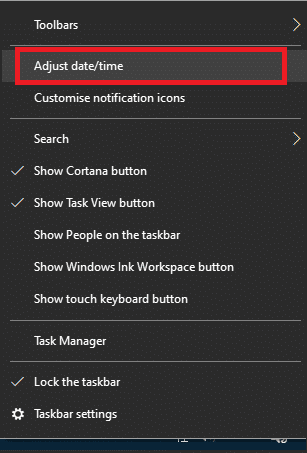
ක්රමය 2: ඔබේ පරිගණකයේ දිනය සහ වේලාව නිවැරදි බවට වග බලා ගන්න
1. දකුණු-ක්ලික් කරන්න on කාලය displayed at the bottom right corner of your screen. Then click on දිනය/වේලාව සකසන්න.
2. Make sure that both options labelled කාලය ස්වයංක්රීයව සකසන්න සහ කාල කලාපය ස්වයංක්රීයව සකසන්න වී ඇත අක්රීයයි. මත ක්ලික් කරන්න වෙනස්.
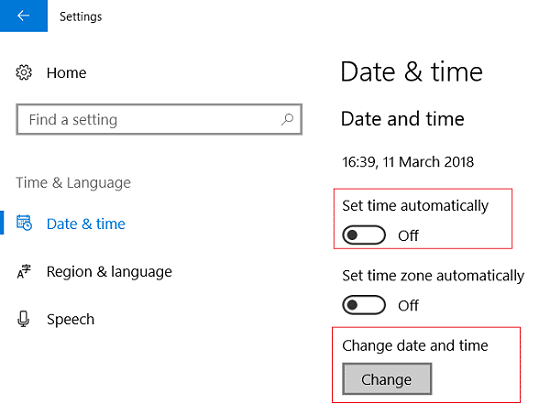
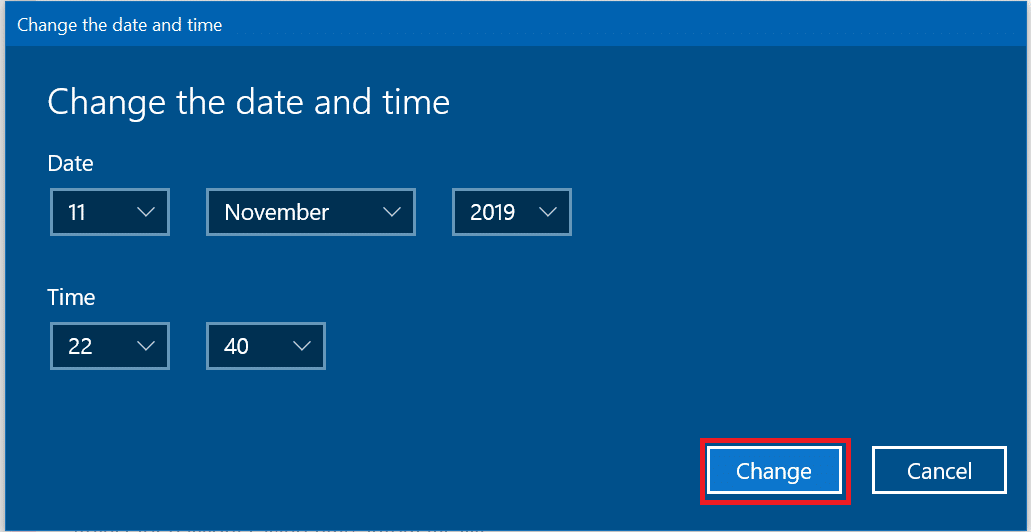
3. ඇතුලත් කරන්න එම correct date and time ඉන්පසු ක්ලික් කරන්න වෙනස් වෙනස්කම් යොදන්න.
4. ඔබට හැකිදැයි බලන්න Fix Your Connection is Not Private Error In Chrome.
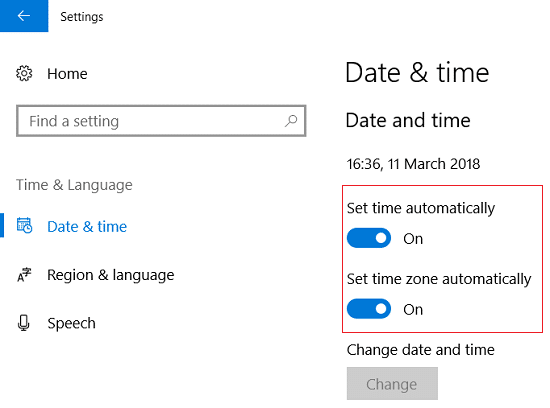
5. If this doesn’t help then සක්රීය කරන්න දෙකම කාල කලාපය සකසන්න ස්වයංක්රීයව සහ Set Date & Time Automatically options. If you have an active internet connection, your Date and Time settings will get updated automatically.
කියවන්න: Windows 4 හි දිනය සහ වේලාව වෙනස් කිරීමට ක්රම 10ක්
ක්රමය 3: වින්ඩෝස් ගබඩා හැඹිලිය හිස් කරන්න
1. Windows Key + R ඔබා ඉන්පසු "ටයිප් කරන්න.Wsreset.exe” සහ enter ඔබන්න.
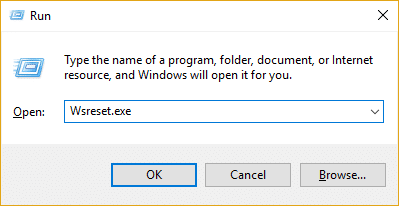
2. එක් ක්රියාවලිය අවසන් වී ඇත ඔබේ පරිගණකය නැවත ආරම්භ කරන්න.
ක්රමය 4: ගබඩා යෙදුම නැවත ලියාපදිංචි කරන්න
1. විවෘත කමාන්ඩ් ප්රොම්ප් පරිපාලකයෙකු ලෙස.

2. PowerShell විධානයට පහළින් ධාවනය කරන්න
PowerShell -ExecutionPolicy Unrestricted -Command “& {$manifest = (Get-AppxPackage Microsoft.WindowsStore).InstallLocation + 'AppxManifest.xml' ; Add-AppxPackage -DisableDevelopmentMode -රෙජිස්ටර් $manifest}”
Or
Get-AppXPackage-සියලු භාවිතා කරන්නන් | Foreach {Add-AppxPackage -DisableDevelopmentMode -Register "$ ($ _. InstallLocation) AppXManifest.xml"}

3. අවසන් වූ පසු, විධාන විමසුම වසා ඔබේ පරිගණකය නැවත ආරම්භ කරන්න.
මෙම පියවර ස්වයංක්රීයව කළ යුතු Windows Store යෙදුම් නැවත ලියාපදිංචි කරන්න වින්ඩෝස් වෙළඳසැලේ ස්ථාපන බොත්තමක් නොමැති බව නිවැරදි කරන්න ගැටලුව.
Method 5: Make sure Windows is Up to Date
1. මුද්රණය කරන්න වින්ඩෝස් යතුර + මම සැකසීම් විවෘත කිරීමට පසුව ක්ලික් කරන්න යාවත්කාලීන කිරීම සහ ආරක්ෂාව.
![]()
2. වම් පස සිට, මෙනුව ක්ලික් කරන්න වින්ඩෝස් යාවත්කාලීන කිරීම.
3. දැන් ක්ලික් කරන්න "යාවත්කාල කිරීම් සඳහා පරීක්ෂා කරන්නලබා ගත හැකි යාවත්කාලීනයන් පරීක්ෂා කිරීමට ” බොත්තම.

4. කිසියම් යාවත්කාලීනයක් පොරොත්තු නම්, පසුව ක්ලික් කරන්න යාවත්කාලීන බාගත කර ස්ථාපනය කරන්න.

5. යාවත්කාලීනයන් බාගත කළ පසු, ඒවා ස්ථාපනය කරන්න, එවිට ඔබේ වින්ඩෝස් යාවත්කාලීන වේ.
ක්රමය 6: CCleaner සහ Malwarebytes ධාවනය කරන්න
1. බාගත කර ස්ථාපනය කරන්න CCleaner & Malwarebytes.
2. Malwarebytes ධාවනය කරන්න හානිකර ගොනු සඳහා ඔබේ පද්ධතිය පරිලෝකනය කිරීමට එයට ඉඩ දෙන්න. අනිෂ්ට මෘදුකාංග හමු වුවහොත්, එය ස්වයංක්රීයව ඒවා ඉවත් කරනු ඇත.

3. දැන් CCleaner ධාවනය කර තෝරන්න අභිරුචි පිරිසිදු.
4. Custom Clean යටතේ, තෝරන්න වින්ඩෝස් ටැබ් සහ පෙරනිමි සලකුණු සලකුණු කර ක්ලික් කරන්න විශ්ලේෂණය කරන්න.

5. විශ්ලේෂණය සම්පූර්ණ වූ පසු, මකා දැමිය යුතු ගොනු ඉවත් කිරීමට ඔබ වග බලා ගන්න.

6. අවසාන වශයෙන්, ක්ලික් කරන්න ක්ලීනර් ධාවනය කරන්න බොත්තම සහ CCleaner හට එහි පාඨමාලාව ධාවනය කිරීමට ඉඩ දෙන්න.
7. ඔබේ පද්ධතිය තවදුරටත් පිරිසිදු කිරීමට, රෙජිස්ට්රි ටැබය තෝරන්න, සහ පහත සඳහන් දෑ පරීක්ෂා කර ඇති බවට සහතික වන්න:

8. මත ක්ලික් කරන්න ගැටළු සඳහා ස්කෑන් කරන්න බොත්තම සහ CCleaner ස්කෑන් කිරීමට ඉඩ දෙන්න, ඉන්පසු ක්ලික් කරන්න තෝරාගත් ගැටළු නිරාකරණය කරන්න බොත්තම.

9. CCleaner අසන විට "ඔබට රෙජිස්ට්රියේ උපස්ථ වෙනස්කම් අවශ්යද?" ඔව් තෝරන්න.
10. ඔබගේ උපස්ථය සම්පූර්ණ වූ පසු, මත ක්ලික් කරන්න තෝරාගත් සියලුම ගැටළු නිරාකරණය කරන්න බොත්තම.
11. වෙනස්කම් සුරැකීමට ඔබේ පරිගණකය නැවත ආරම්භ කරන්න.
Method 7: Perform Clean Boot in Windows
Sometimes 3rd party software can conflict with Windows Store and therefore, you should not install any apps from the Windows apps store. In order Fix No Install Button in Windows Store problem, you need to perform a clean boot in your PC and diagnose the issue step by step.
ක්රමය 8: Windows Update සහ Windows Store Apps දෝශ නිරාකරණ ධාවනය කරන්න
1.Type troubleshooting in the Windows Search bar and click on දෝෂගවේෂණය.
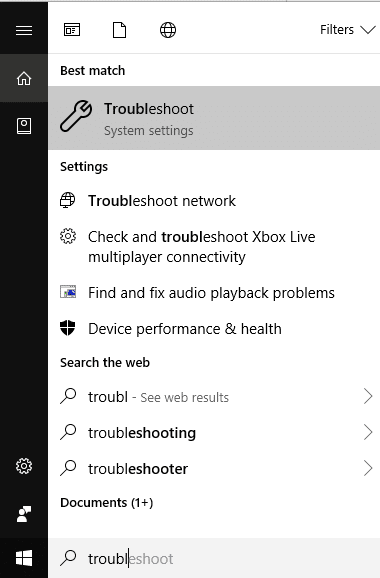
2.ඊළඟට, වම් කවුළු කවුළුවෙන් තෝරන්න සියල්ල බලන්න.
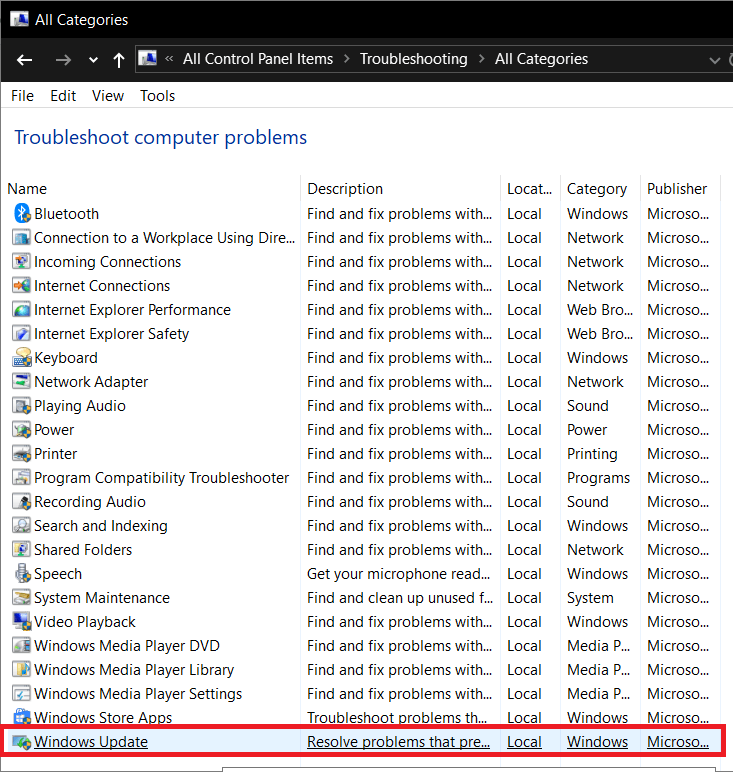
3. ඊට පස්සේ තියෙන Troubleshoot computer problems list එකෙන් තෝරන්න වින්ඩෝස් යාවත්කාලීන කිරීම.
4. තිරයේ උපදෙස් අනුගමනය කර ඉඩ දෙන්න Windows Update Troubleshoot run.

5. Now again go back to the View all window but this time select Windows Store Apps. Run the troubleshooter and follow on-screen instructions.
6. ඔබේ පරිගණකය නැවත ආරම්භ කර නැවත Windows Store වෙතින් යෙදුම් ස්ථාපනය කිරීමට උත්සාහ කරන්න.
නිර්දේශ:
ඔබට සාර්ථක වී ඇත්තේ එයයි වින්ඩෝස් වෙළඳසැලේ ස්ථාපන බොත්තමක් නොමැති බව නිවැරදි කරන්න නමුත් ඔබට තවමත් මෙම සටහන සම්බන්ධයෙන් කිසියම් විමසීමක් ඇත්නම් ඒවා අදහස් දැක්වීමේ කොටසෙහි අසන්න.

