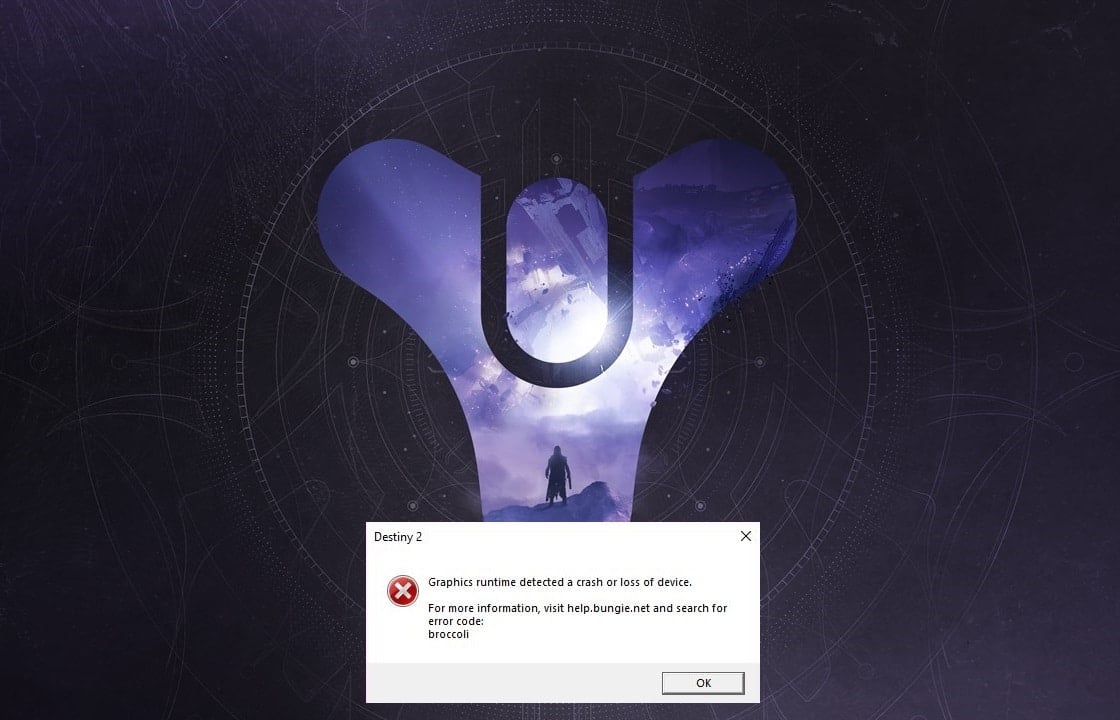
Destiny 2 is a multiplayer shooting game that is hugely popular amongst gamers today. Bungie Inc developed this game and released it in 2017. It is now available on Windows computers along with PlayStation 4/5 and Xbox models – One/X/S. Since it is an online-only game, you would require a stable and high-speed internet connection on your device to play it. Many users reported some issues while playing this game on their Windows systems, majorly: error code broccoli and error code Marionberry. Keep reading to learn more about Destiny 2 Error Code Broccoli and the methods to fix it.
Sida loo Xaqiijiyo aayahooda 2 Error Code Broccoli on Windows 10
Here are the general reasons why this error occurs while playing Destiny 2:
- Overclocked GPU: All Graphics Processing Units are set to run at a particular speed called the xawaaraha salka which is set by the device manufacturer. On some GPUs, users can boost their performance by increasing the GPU speed to a level higher than the base speed. However, overclocking the GPU may cause the Broccoli error.
- Full-screen glitch: You are more likely to face Destiny 2 error code Broccoli if you are using NVIDIA GeForce GPU.
- Outdated Windows version: If the Windows operating system is working on an outdated version, then the system will not update the GPU drivers on the PC. You need to ensure that you have the latest version of Windows installed.
- Corrupted/Outdated Graphics card drivers: The Destiny 2 error code Broccoli can occur if the graphic drivers on your PC are outdated or corrupt. Destiny 2 requires compatible graphics card and updated graphics card drivers so that your gaming experience is smooth and error-free.
To fix Destiny 2 error code Broccoli, try the methods written below, one-by-one, to find a possible solution for your Windows 10 system.
Method 1: Run Game in Windowed Mode (NVIDIA)
This method is applicable only if you use NVIDIA GeForce Khibrad to play Destiny 2. Since GeForce Experience might force the game into Full-screen mode, leading to error code Broccoli learn How to Manually Add Game to GeForce Experience learn How to Manually Add Game to GeForce Experience. Follow the steps below to force the game to run in Windowed Mode instead:
1. La bilaabo NVIDIA Waayo-aragnimada GeForce codsiga.
2. Tag meesha Bogga Hore tab iyo dooro aayahooda 2 from the list of games displayed on the screen.
3. Hoos u dhaadhac oo guji Astaanta qalabka to launch settings.
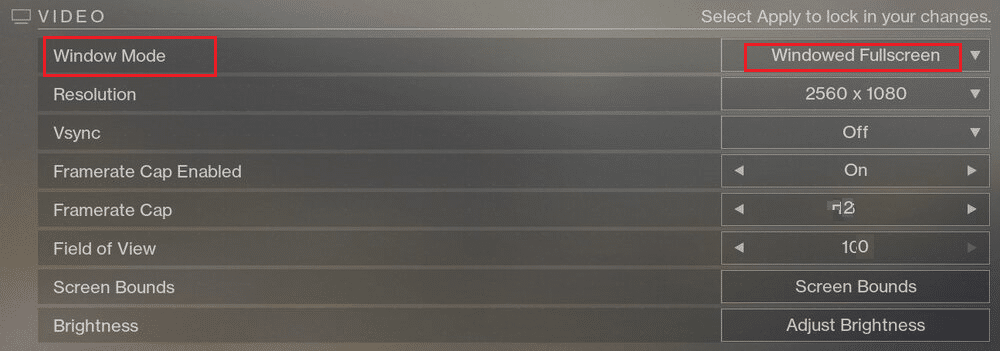
4. Guji Muuqaalka Muuqaalka under Custom Settings dooro Daaqay laga bilaabo liiska hoos-hoosaadka.
5. Ugu dambayn, guji Codso si loo badbaadiyo isbeddelada.
6. Buuxi aayahooda 2 iyo awood Qaab buuxa oo shaashad ah from here instead. Refer highlighted section in the pic below.
Habka 2: Cusbooneysii Windows
The developers named the error code Broccoli to indicate the inconsistencies with the Graphics card drivers and Windows OS. If the graphics card driver updates are handled by the Windows Update service on your PC, it is necessary to ensure that no Windows updates are pending. Follow the given steps to update Windows:
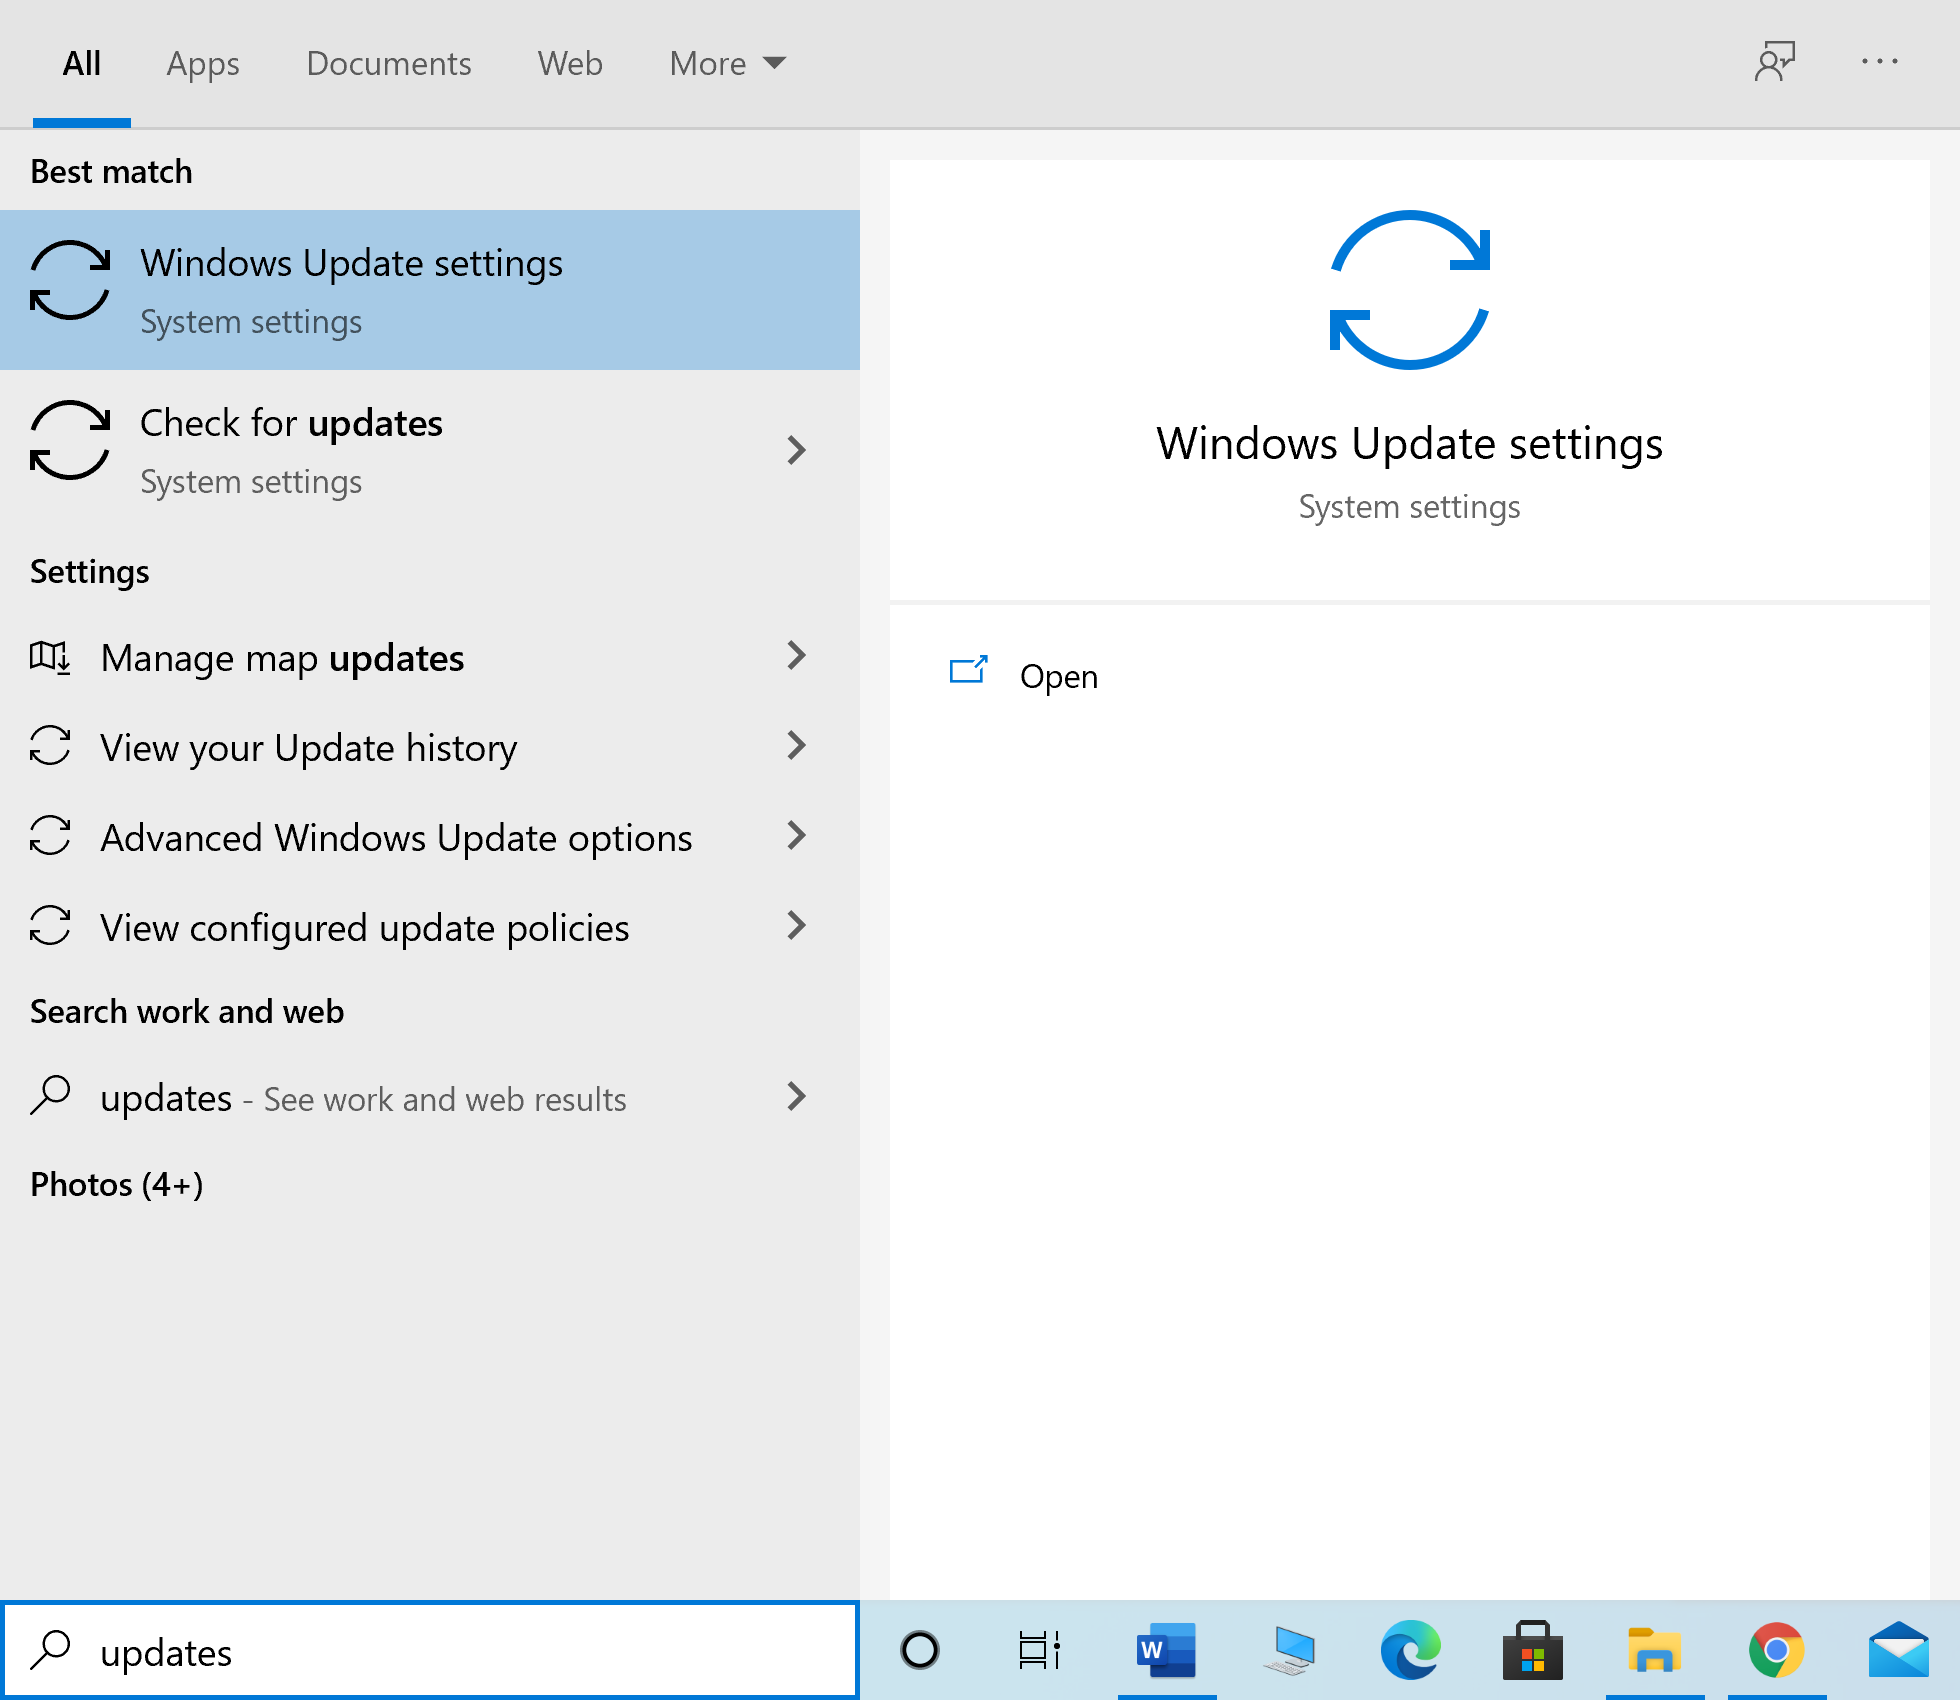
1. Nooca updates in Daaqadaha raadinta box. Launch the Dejinta Cusbooneysiinta Windows from the search result, as shown.
2. Guji Hubi wixii cusbooneysiin ah from the right pane, as depicted.
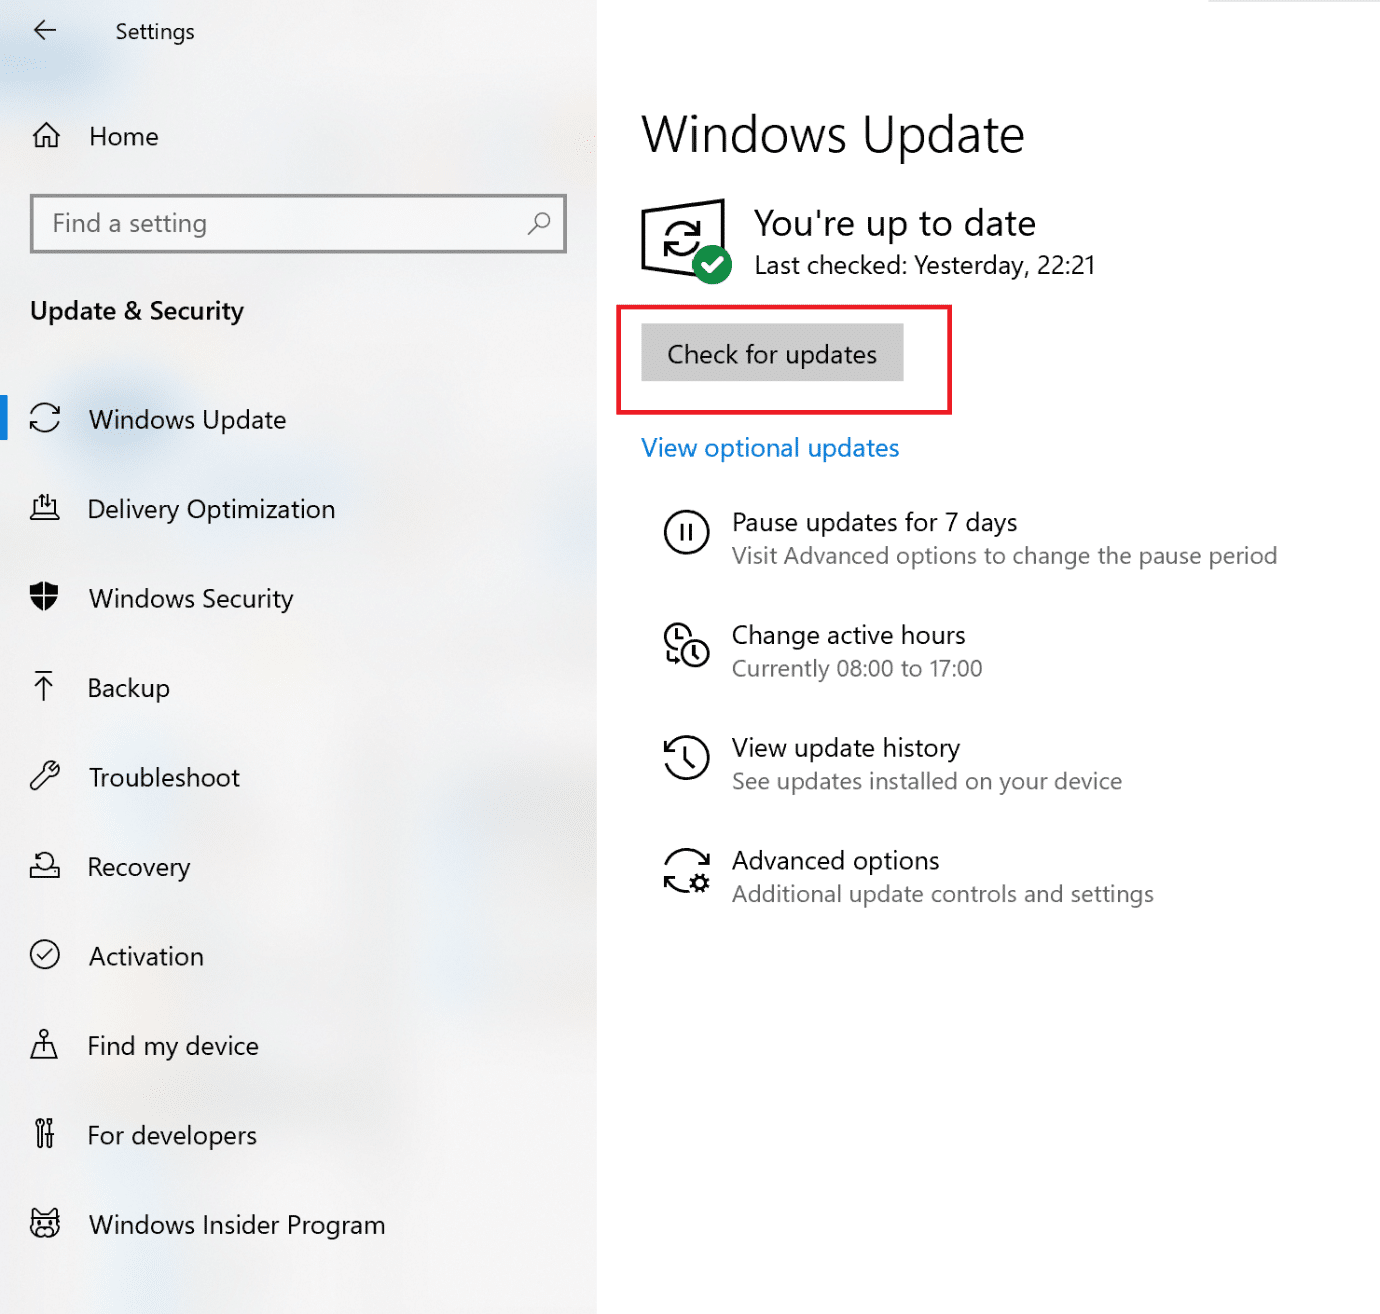
3 Sug for Windows to search for and install any pending updates.
Fiiro gaar ah: Your PC may need to restart several times during the update process. Return to Windows Update settings to install all available updates, after every restart.
After the process is complete, launch Destiny 2 and see if the game launches without Broccoli error. If not, there may be issues with Graphics card drivers which will be dealt with in succeeding methods.
Sidoo kale Akhri: Cusbooneysiinta Windows ma ku dheggan tahay? Waa kuwan dhowr waxyaalood oo aad isku dayi karto!
Method 3: Reinstall Graphics Card Drivers
If the above methods did not work for you, you need to update Graphics card drivers on your PC to eliminate the issue of corrupt and/or outdated drivers. This can possibly resolve Destiny 2 error code Broccoli.
Given below are two options:
- update graphics card drivers using Device Manager.
- update the drivers by reinstalling them manually.
Option 1: Automatically Update Graphics Card Drivers
1. Nooca Maamulaha aaladda ee Daaqadaha raadinta box and launch the app from there.
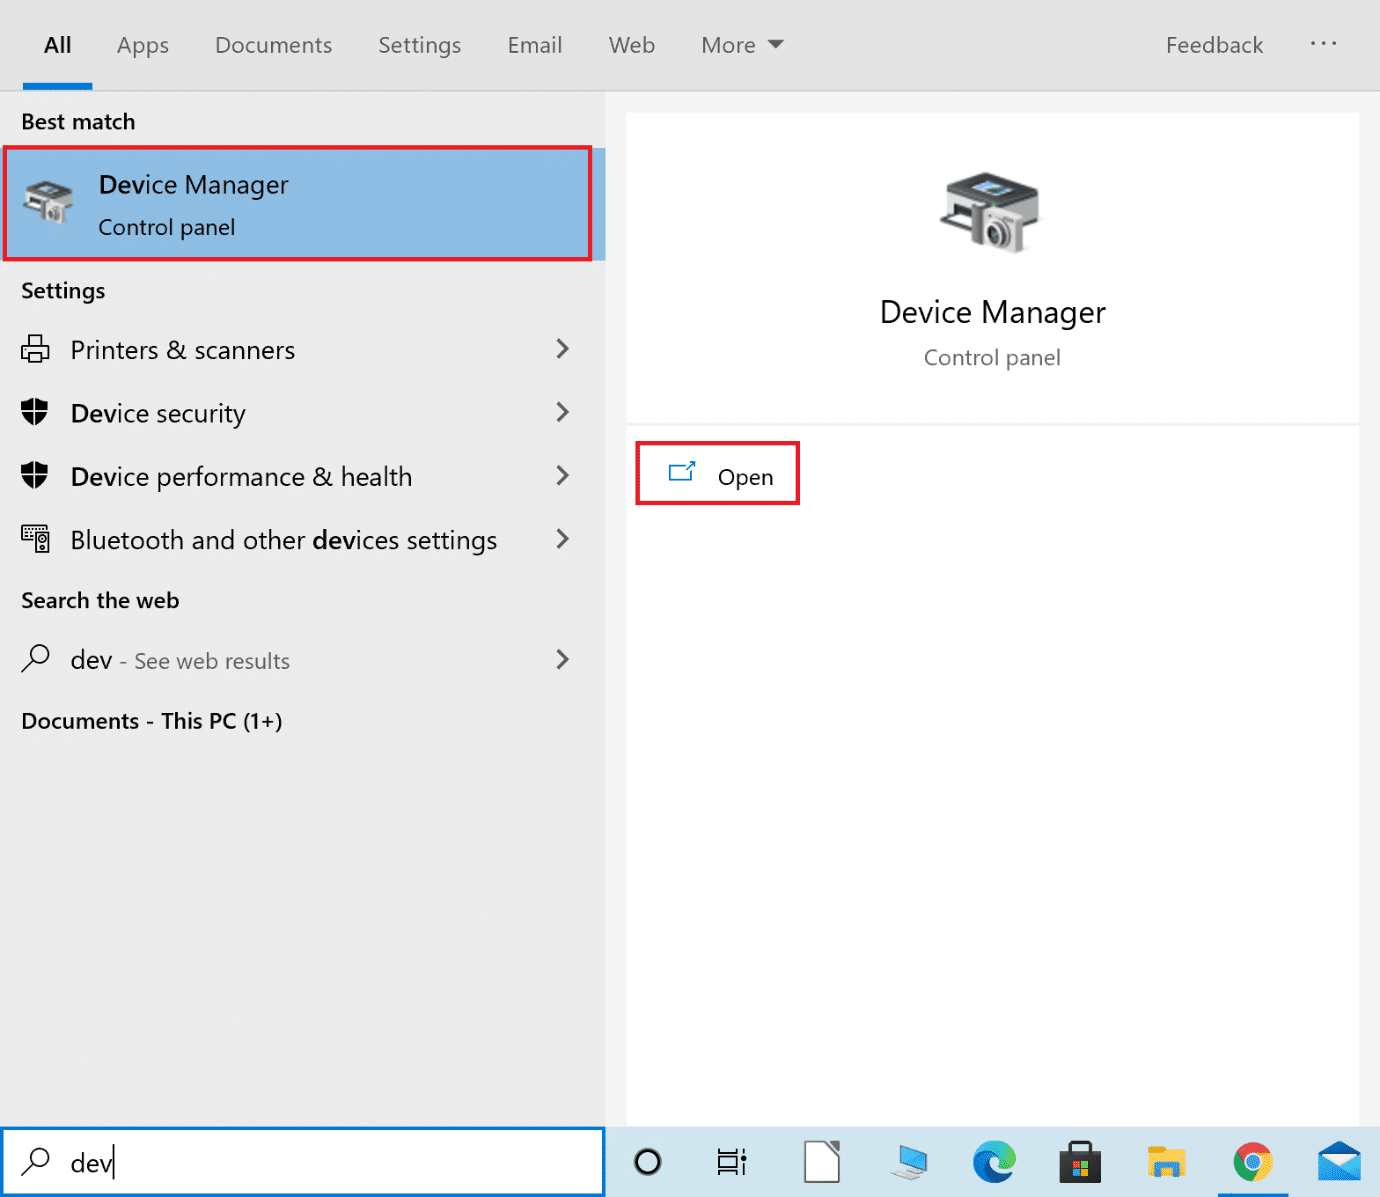
2. Guji bogga gunta hoose u dhaw Muuji sawir qaadayaasha si loo ballaariyo.
3. Right-click on your Graphics card driver and select Kaar wadaha ka menu-hoos u dhaca, sida hoos ku sawiran.
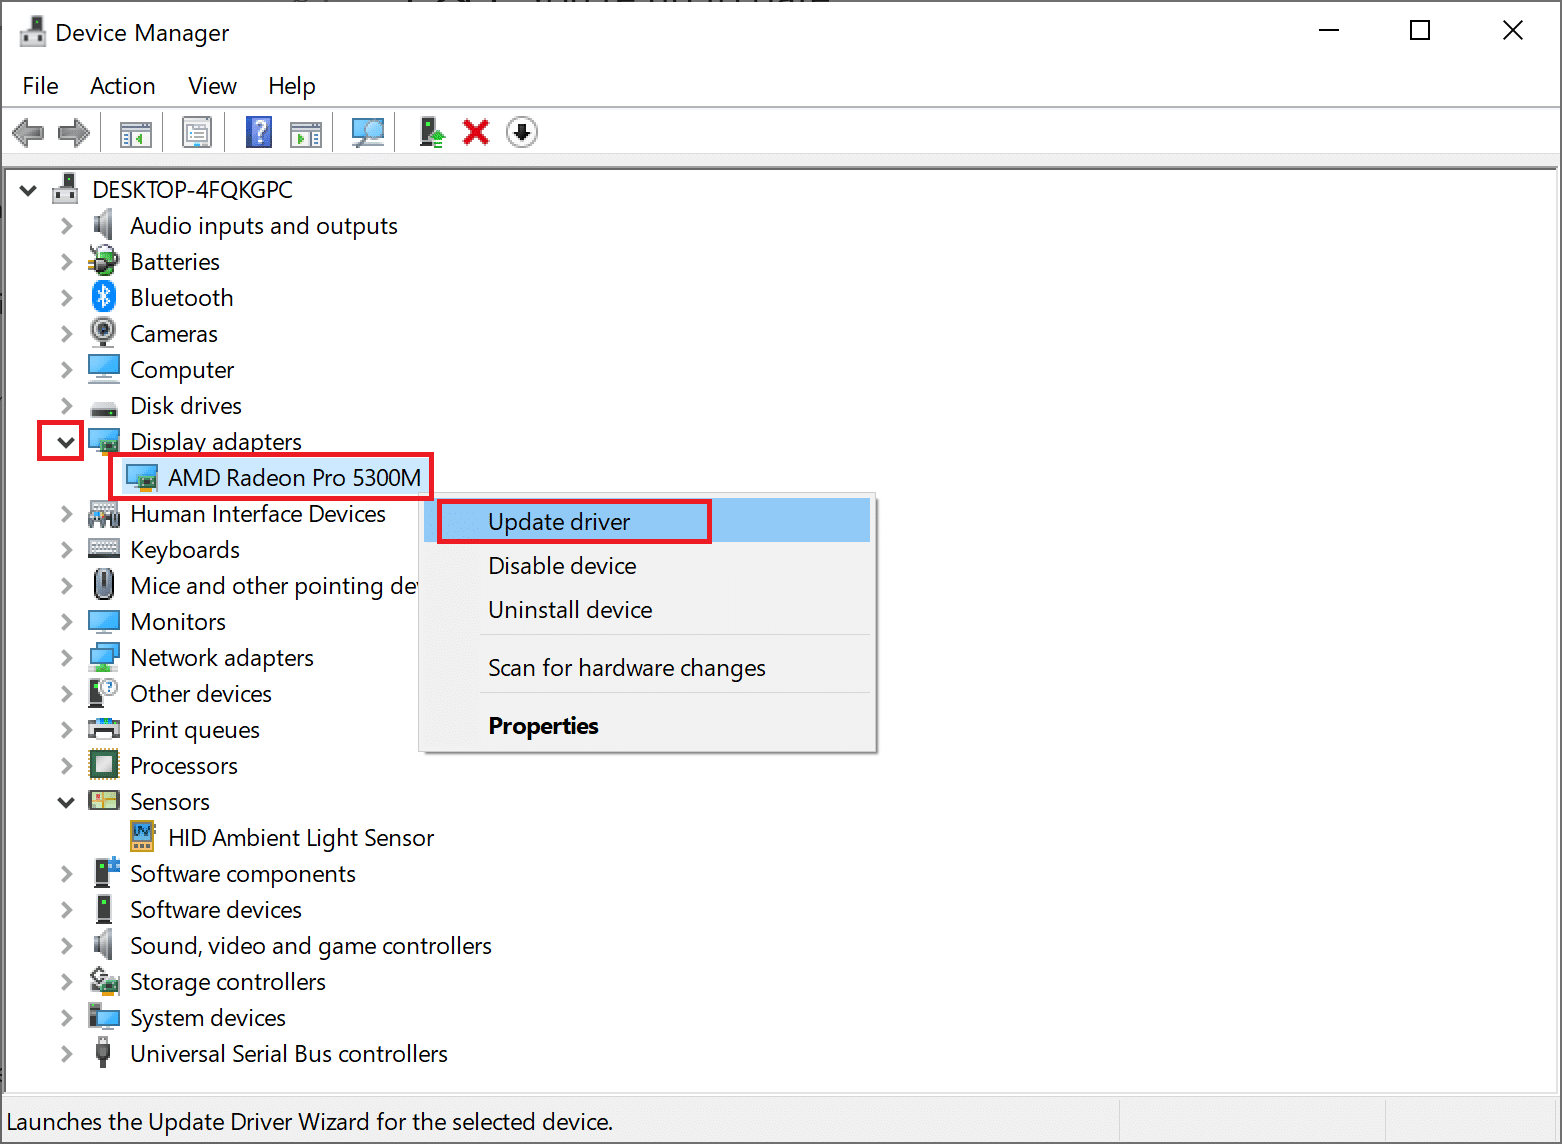
4. In the pop-up box that follows, click on the option titled Si toos ah uga raadi darawalada, sida hoos lagu muujiyey.
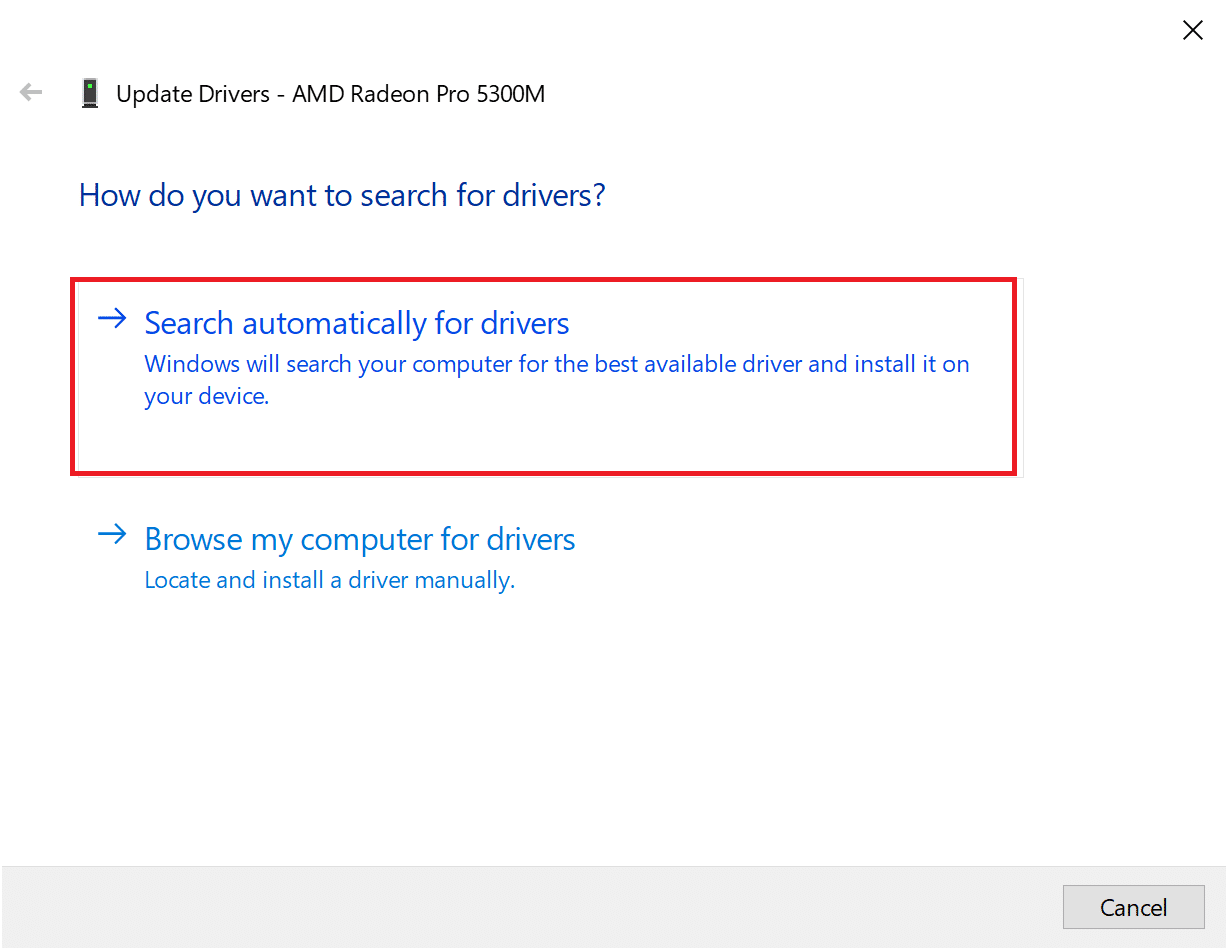
5. Sug for your PC to install updated drivers if any are found.
6. Restart the computer and launch the game.
If the above option did not work, you need to manually update the graphics card drivers by reinstalling them on your computer. Read below to do so.
Option 2: Manually Update Drivers by Reinstallation
This process has been explained for users of AMD graphic cards and NVIDIA graphics cards. If you use any other graphics card, ensure to follow the correct steps to reinstall those.
Reinstall AMD Graphic Drivers
1. Download AMD Cleanup Utility halkan.
2. Once the file is downloaded, right-click on it and select Ku maamul maamulaha.
3. Guji Haa ku saabsan AMD Nadiifinta Utility pop-up box to enter Deegaanka Windows Recovery Environment.
4. Once in Mode Safe, follow the instructions on the screen to complete the uninstallation process.
5. The AMD Cleanup Utility will completely remove AMD drivers without leaving leftover files on your system. Of course, if there are any corrupt AMD files, those will be removed too. After the process is complete, your machine will qeybtii labaad si toos ah. Riix halkan si aad u akhrido wax badan.
6. Booqo official AMD website oo guji bogga Download Now option displayed at the bottom of the screen, to download the latest drivers for your PC.
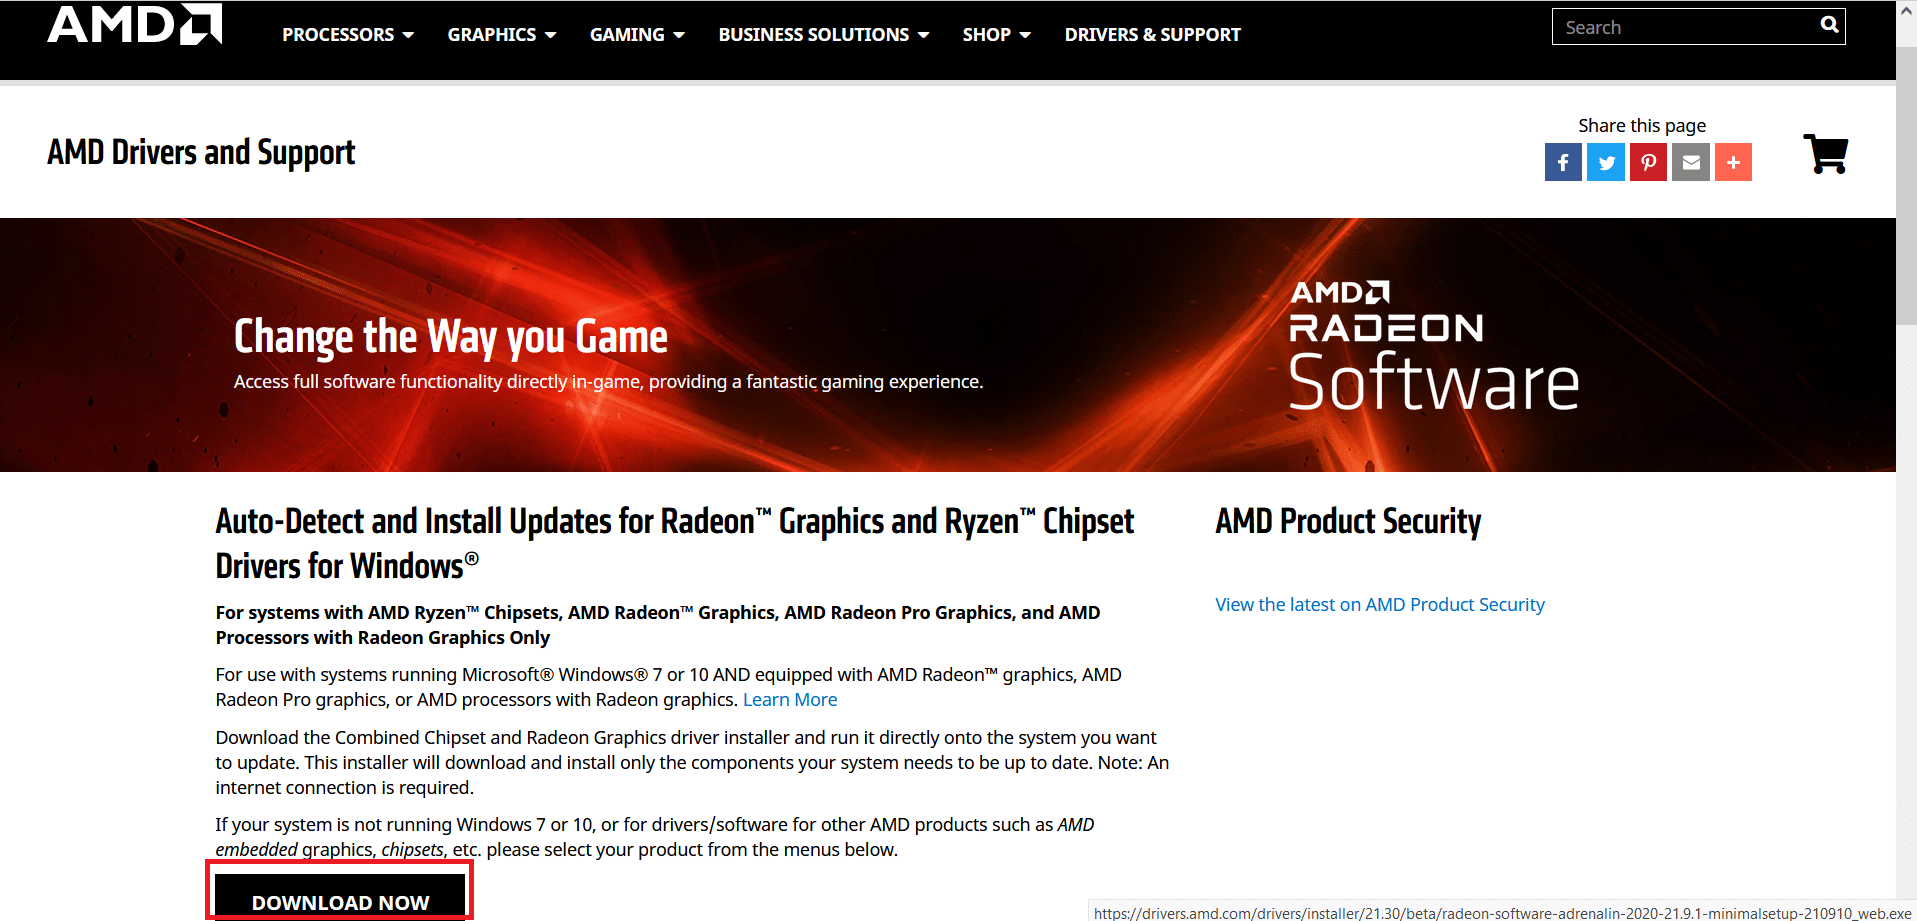
7. On the AMD Radeon Software Installer, click on Recommended Version to determine the most suitable drivers for the AMD hardware on your PC. Ku rakib iyaga.
8. Follow the instruction on-screen to finish the installation. Once done, dib u bilaw kombiyuutarka and enjoy playing Destiny 2.
Reinstall NVIDIA Graphics Cards
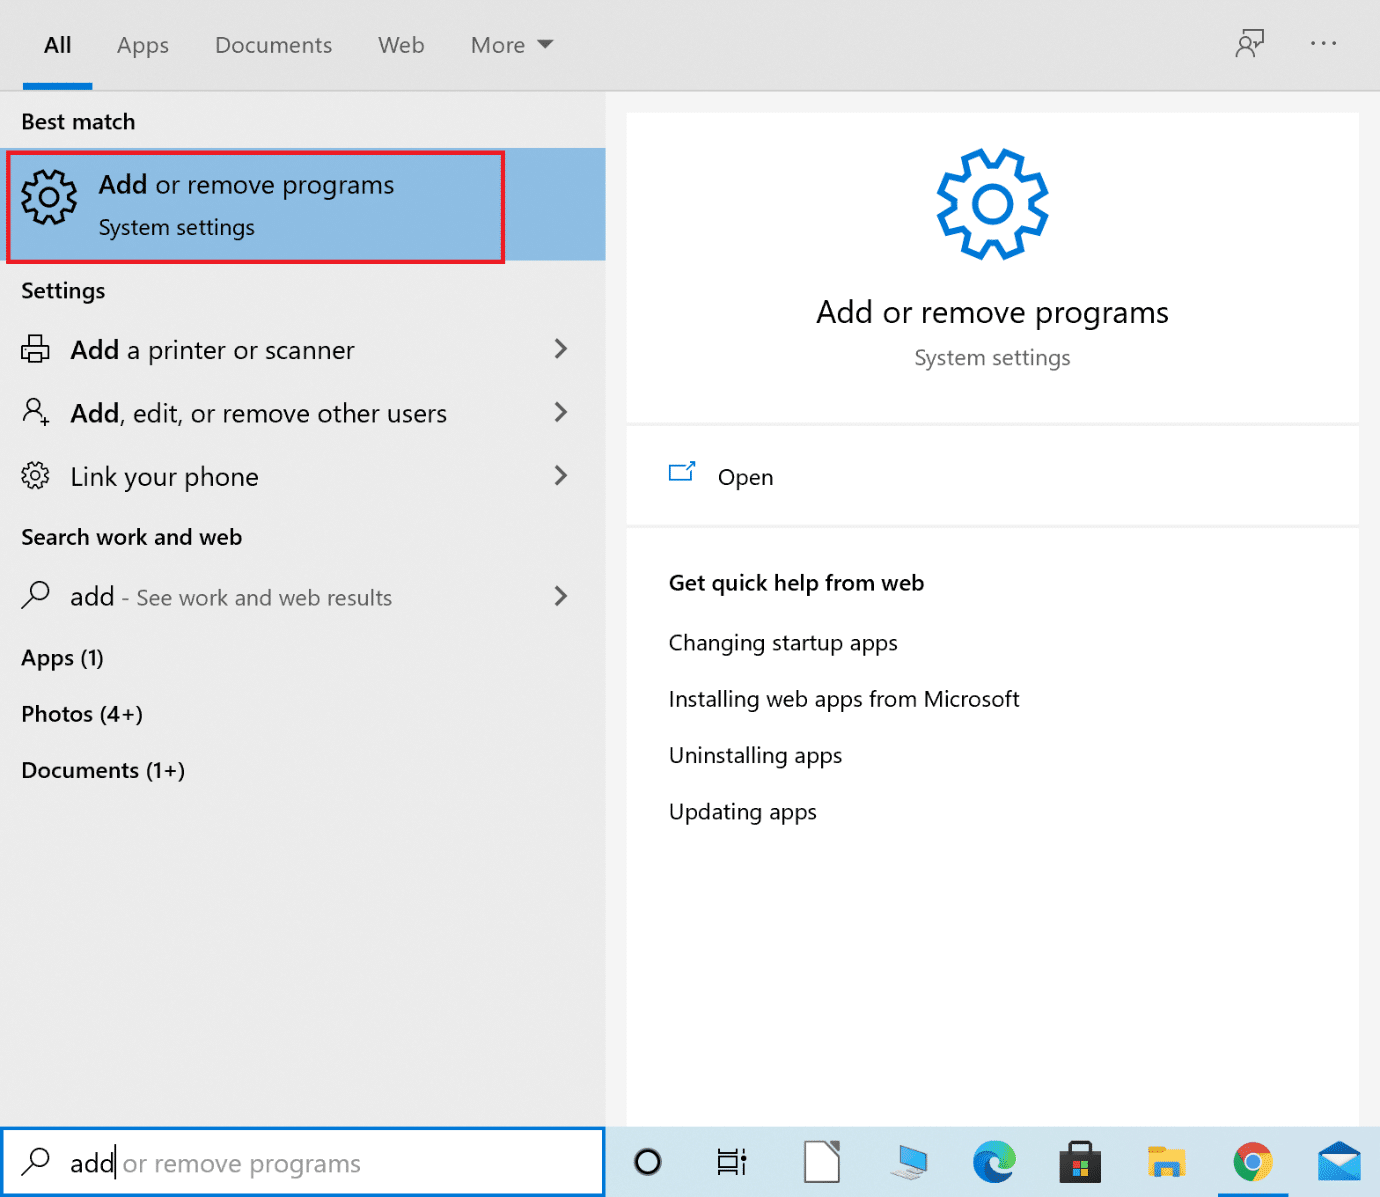
1. Nooca Ku dar ama ka saar barnaamijyada ee Daaqadaha raadinta box and launch it from the search result, as shown.
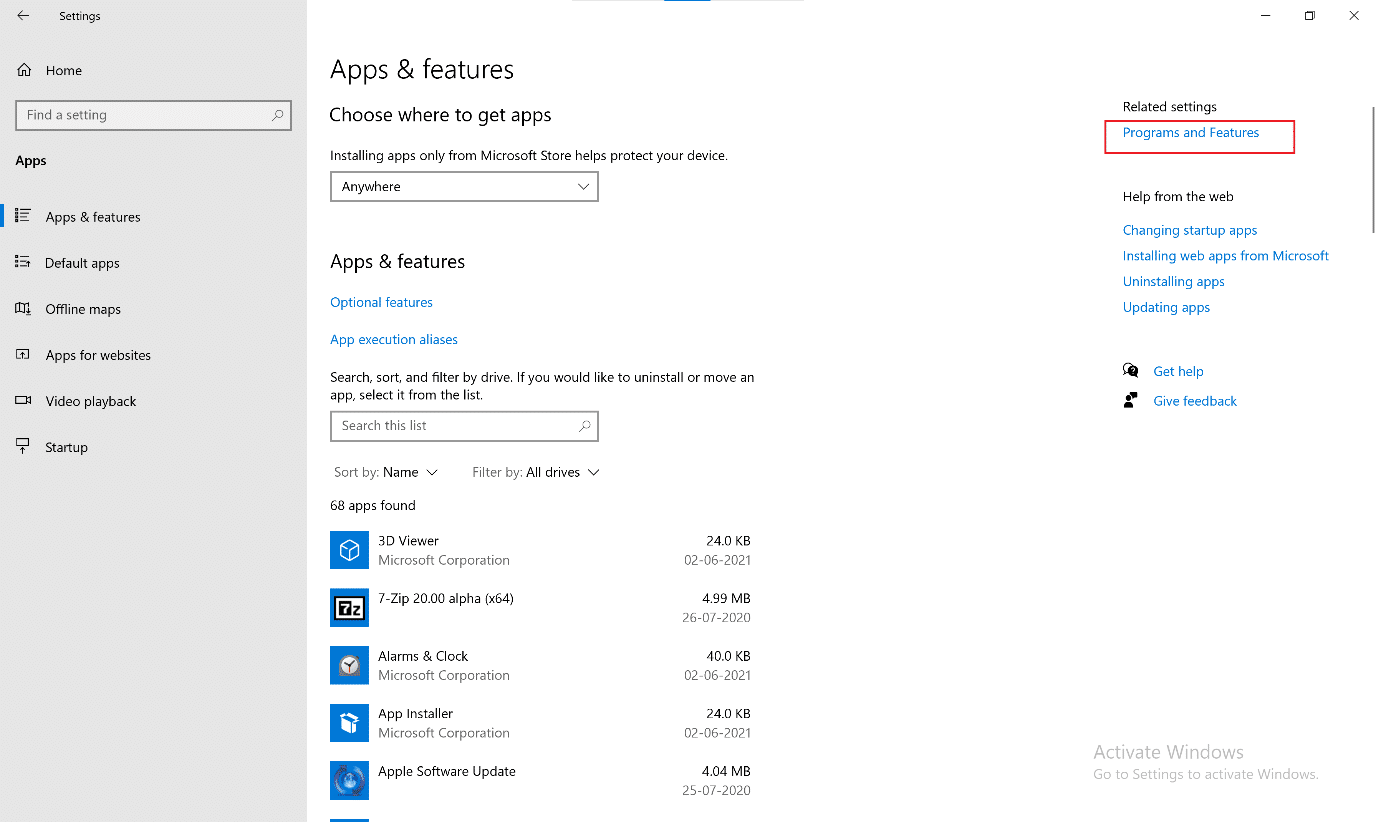
2. Guji Barnaamijyada iyo Features under Goobaha la xidhiidha from the right side of the screen.
3. Guji bogga gunta hoose u dhaw Change your view icon sida muuqata.
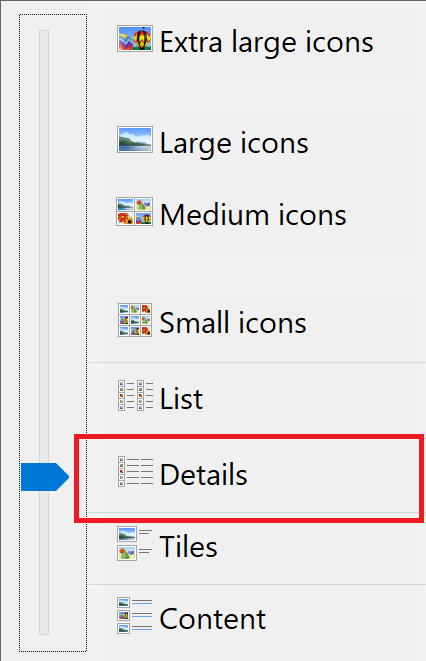
4. Xulo Details from the list to view apps along with the name of the publisher, date of installation, and the version installed.
![]()
5. Select all instances of apps and programs published by NVIDIA. Right-click on each and select uninstall.
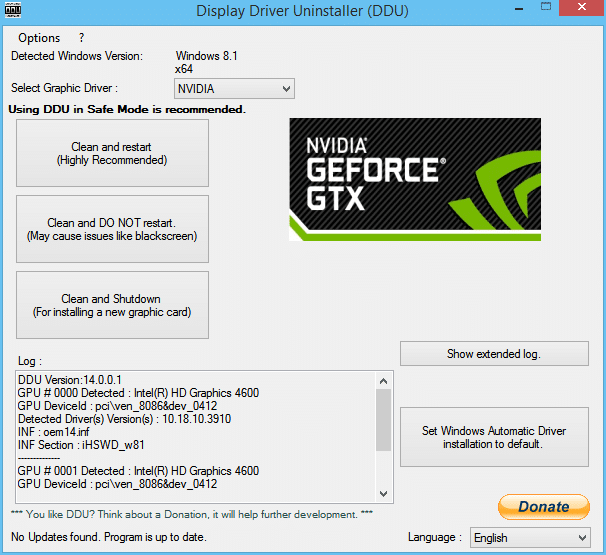
Fiiro gaar ah: Bedelkeeda, waxaad isticmaali kartaa Sheeg Uninstaller Driver to uninstall NVIDIA GeForce as well.
6. Dib u bilow kombiyuutarka mar la sameeyo.
7. Ka dib, booqo Nvidia official website iyo guji Download to download the latest GeForce Experience.

8. Click on the downloaded file to Run the set-up utility.
9. Xiga, gasho to your Nvidia account and click on the Drivers tab. Install all the recommended drivers.
Sidoo kale Akhri: Hagaaji kaadhka garaafyada Aan laga helin Windows 10
Method 4: Toggle off Game Mode
The Windows 10 feature of Game Mode can boost the gaming experience and performance of your PC. Nevertheless, many users have reported that disabling this feature is a potential Destiny 2 error code Broccoli fix. Here’s how you can turn off Game Mode in Windows 10 systems:
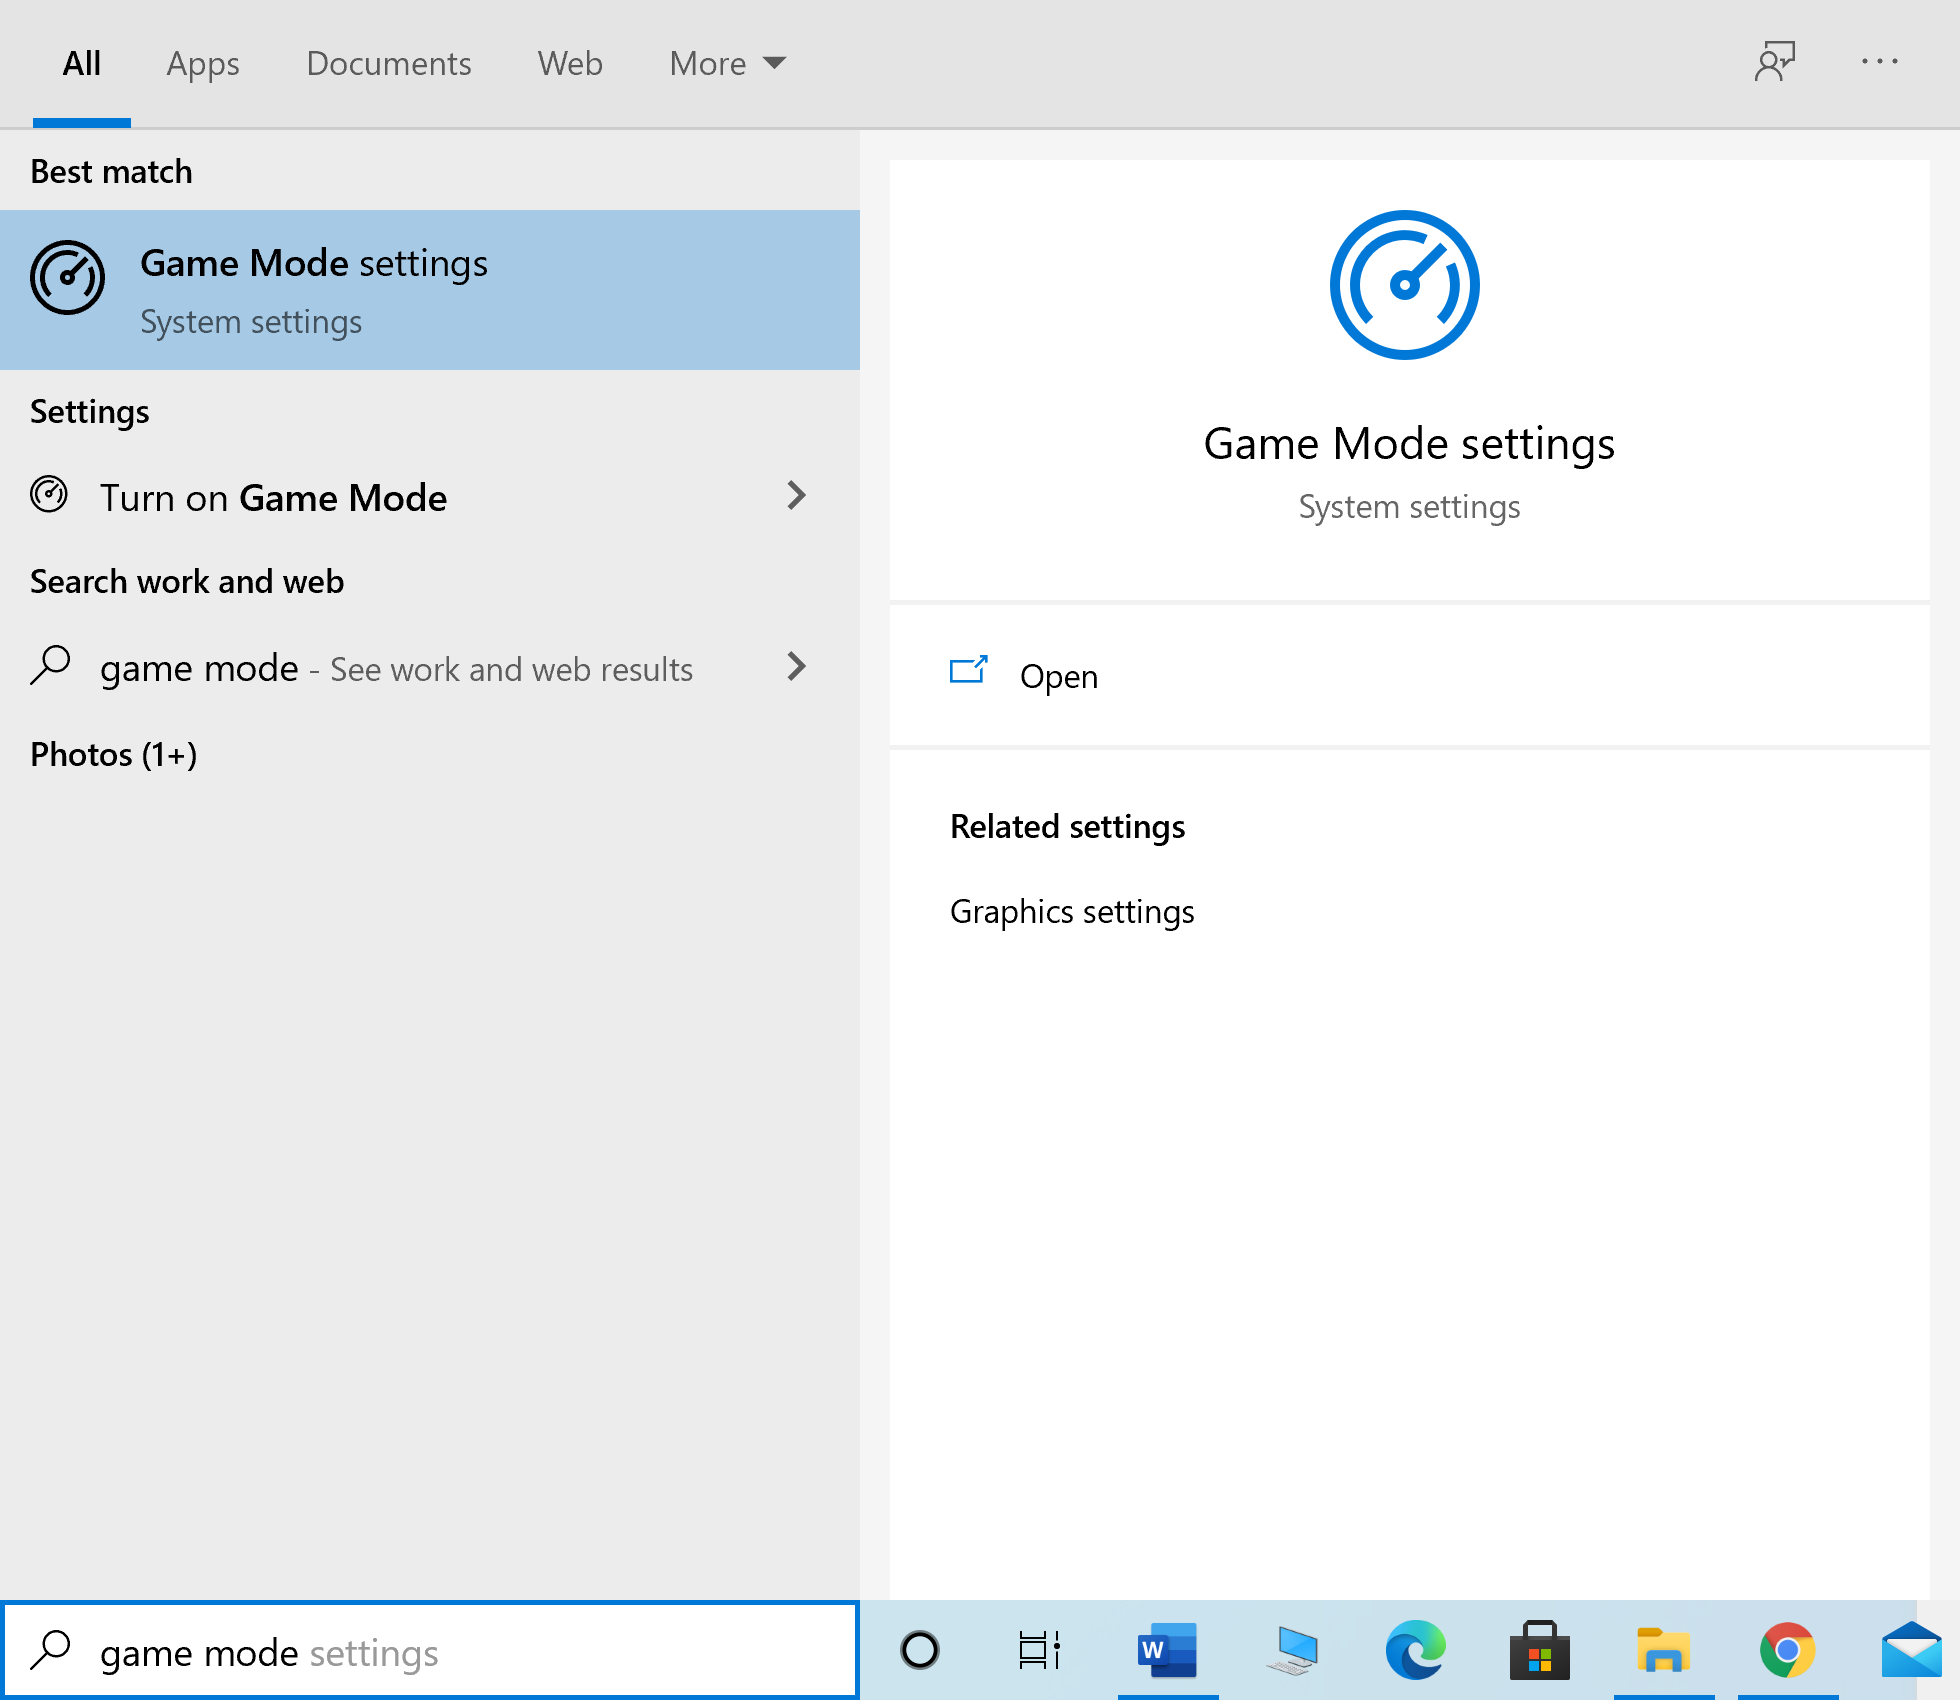
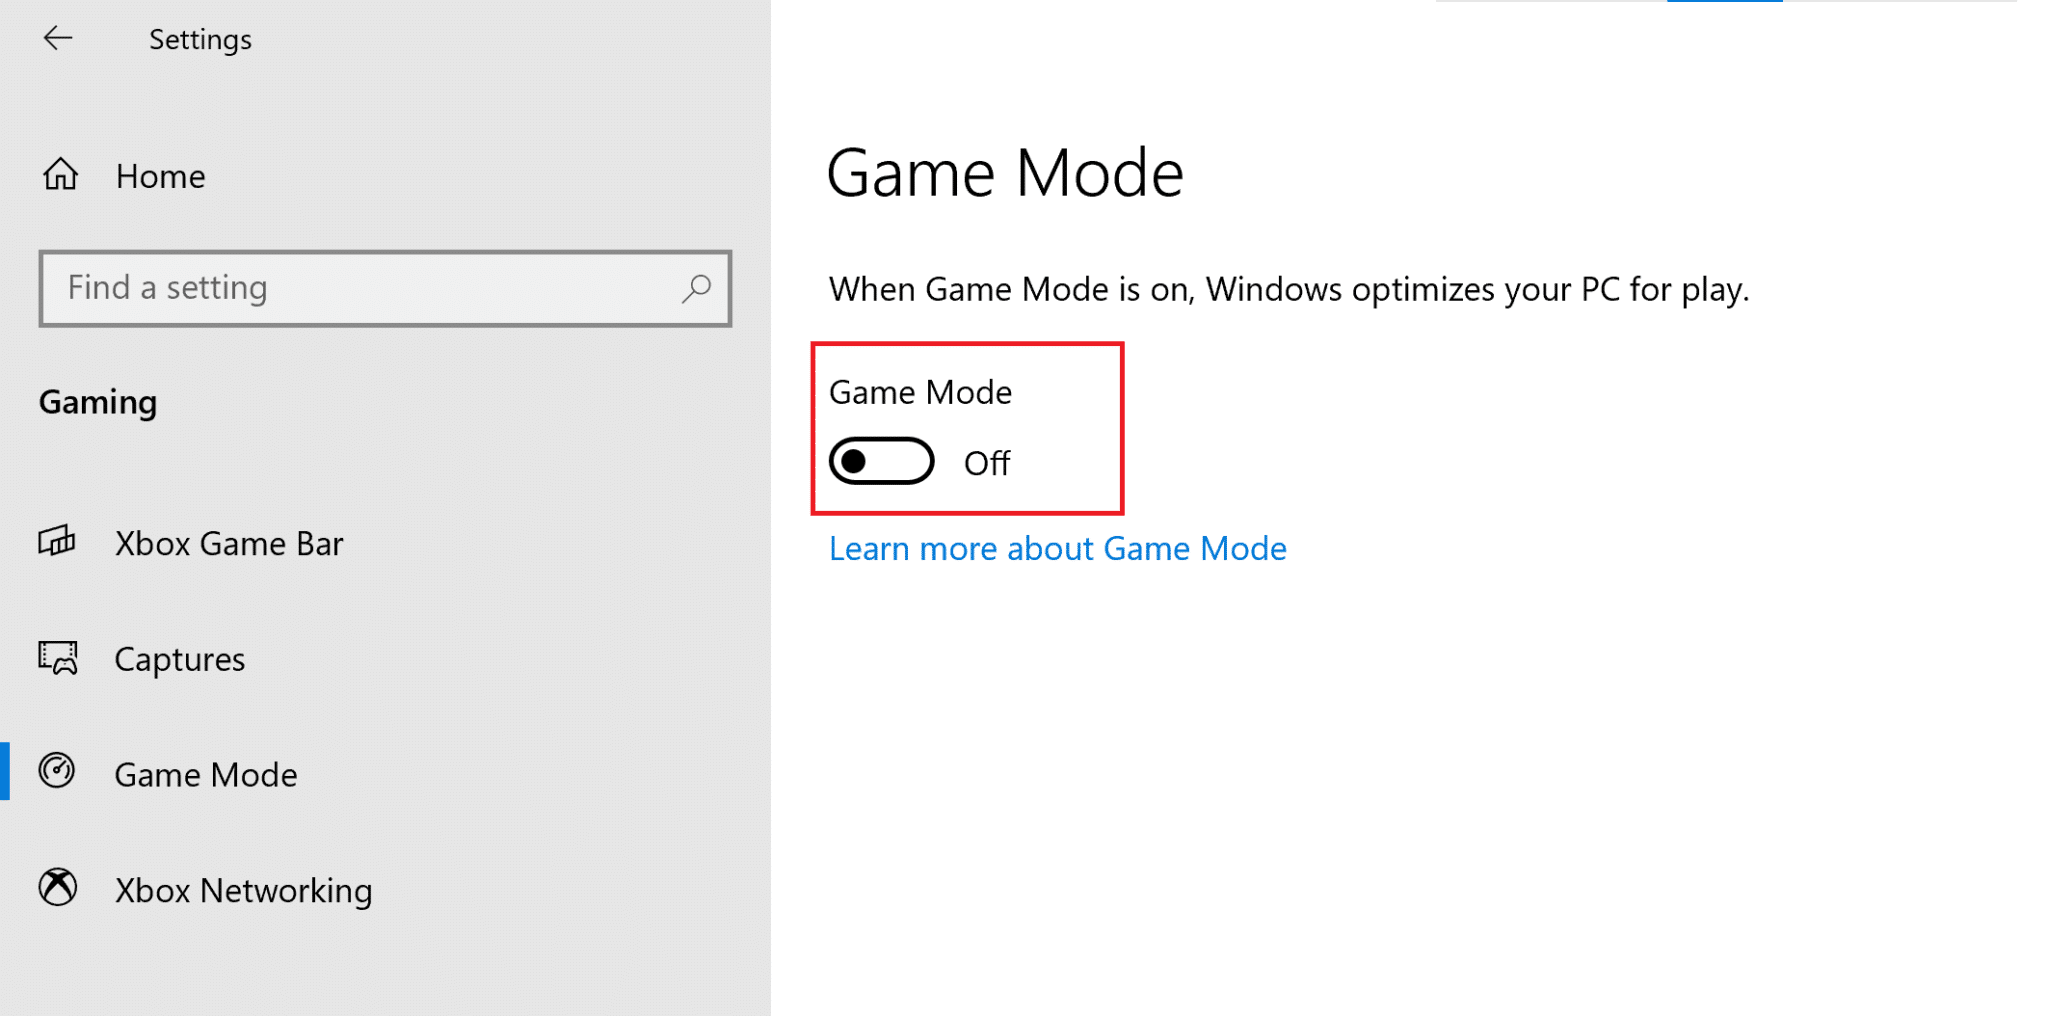
1. Nooca Game mode settings ee Daaqadaha raadinta box. Click on Open from the right window.
2. Beddel Game Mode off sida hoos ku qoran.
Method 5: Check Integrity of Destiny 2 Files (For Steam)
If you use Steam to play Destiny 2, you need to verify the integrity of game files so that the installed version of the game matches the latest version available on Steam servers. Read our guide on How to Verify the Integrity of Game Files on Steam here.
Method 6: Enable Multi-GPU settings (If applicable)
This method is applicable if you use two graphic cards and are facing the Destiny 2 Broccoli error. These settings allow the PC to combine multiple graphic cards and use combined graphics processing power. Follow the listed steps to enable the said settings for NVIDIA and AMD, as the case may be.
Wixii NVIDIA
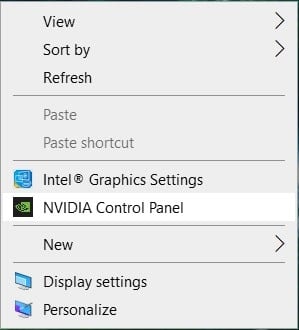
1. Midig-guji desktop dooro Gudiga Xakameynta NVIDIA.
2. Guji Configure SLI, Surround, PhysX, from the left pane of the NVIDIA Control Panel.
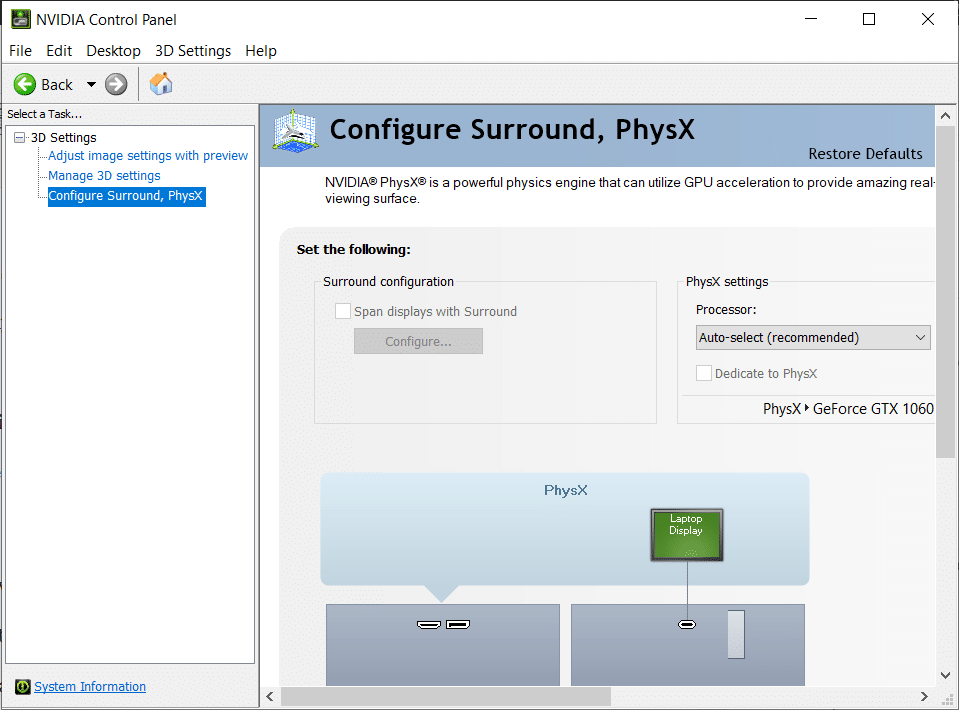
3. Guji Maximize 3D performance under SLI configuration. Save isbedelada.
Fiiro gaar ah: The Scalable Link Interface (SLI) is the brand name for the NVIDIA multi-GPU setting.
4. Dib u bilow nidaamkaaga and launch the game to check if the issue is resolved.
Wixii AMD
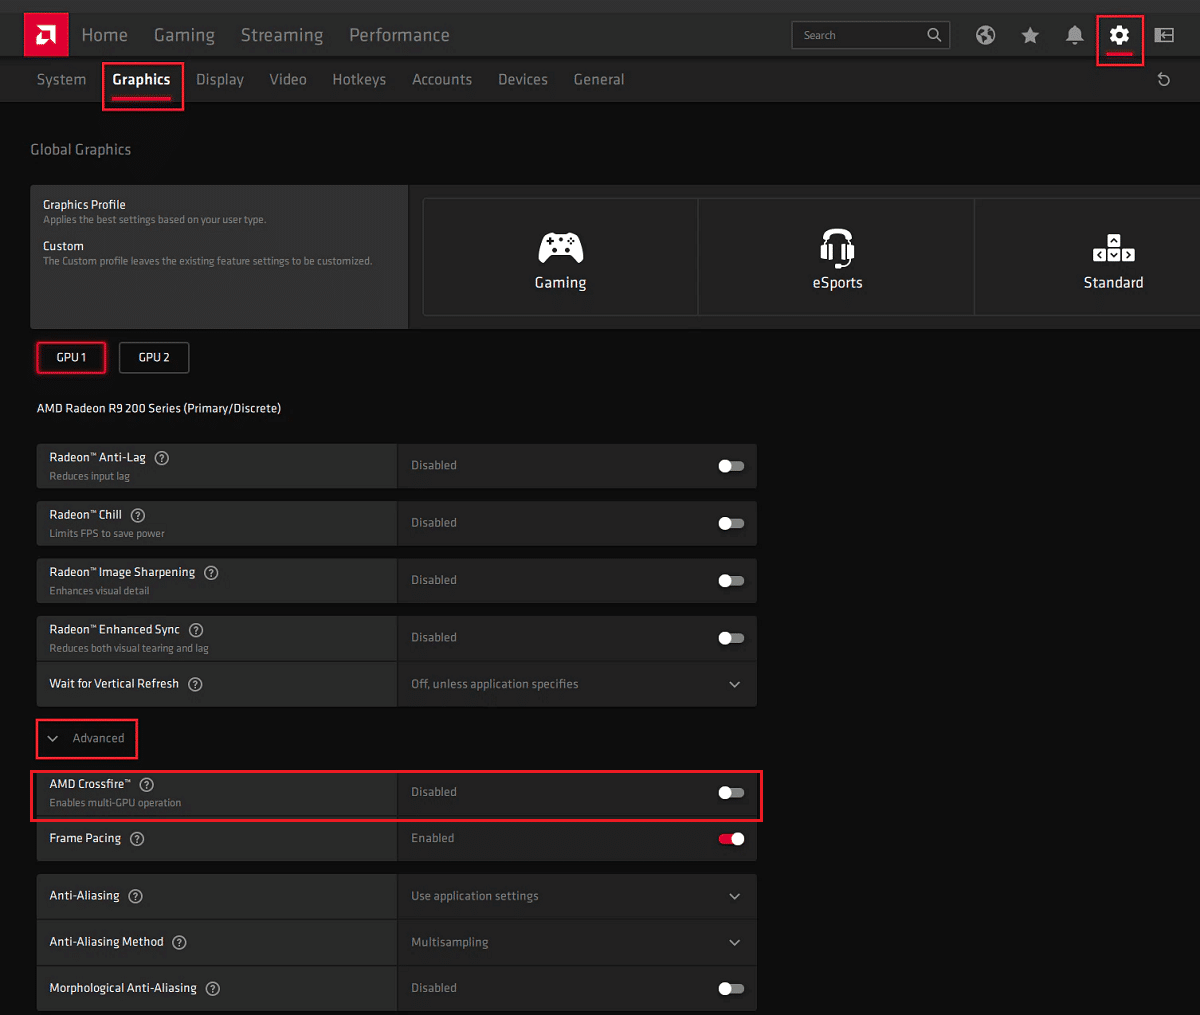
1. Midig ku dhufo kaaga desktop iyo guji AMD Radeon Software.
2. Guji bogga Astaanta goobaha from the top right corner of the AMD Software window.
3. Marka xigta, u tag Graphics tab.
4. Ku dheji Advanced qaybta oo shid AMD Crossfire to enable multi-GPU settings.
Fiiro gaar ah: CrossFire is the brand name for the AMD multi-GPU setting.
5. Dib u bilow the PC, and launch Destiny 2. Check if you’re able to fix Destiny 2 Error Code Broccoli.
Method 7: Change Graphic Settings on Destiny 2
In addition to modifying graphics settings associated with GPU, you can do similar modifications in the game itself. This will help avoid issues arising out of graphics inconsistency like Destiny 2 error code Broccoli. Here’s how to alter graphics settings in Destiny 2:
1. Buuxi aayahooda 2 on PC.
2. Guji Furaha Furaha to view the available settings.
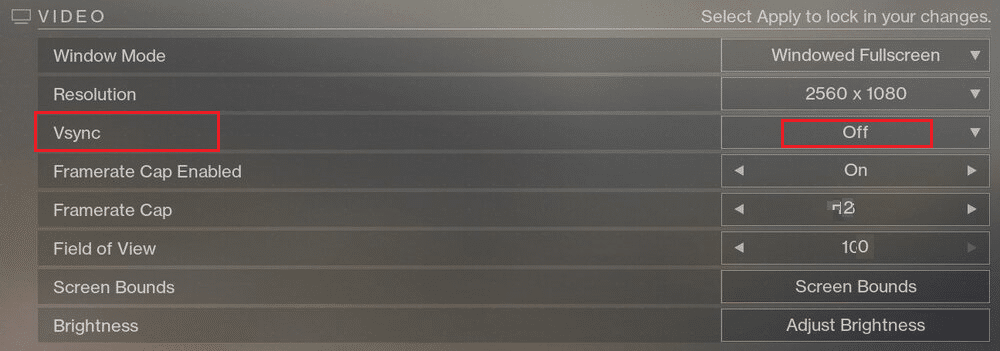
3. Marka xigta, dhagsii Video tab ka samayska bidix.
4. Marka xigta, xulo v-sync from Off to On.
5. Kadib, Enable Framerate Cap oo u dhigay 72 from the drop-down, as illustrated below.
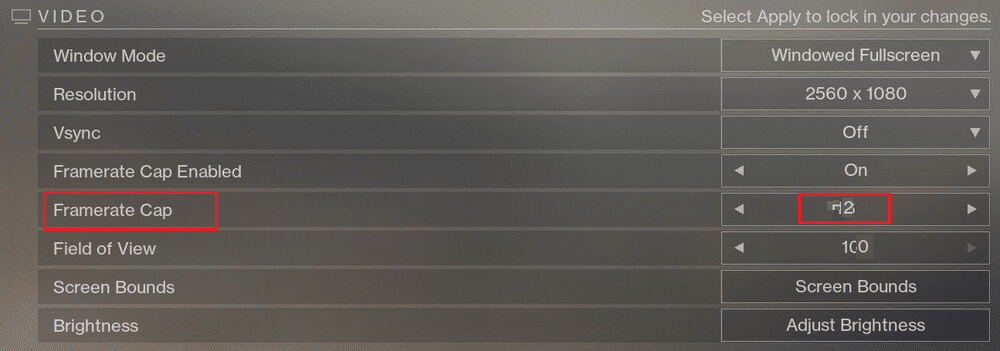
6. Save the settings and launch the game.
Sidoo kale Akhri: Fix Unreal Engine Exiting Due To D3D Device Being Lost
Method 8: Change Game Properties
You can change settings for the executable file of the game to potentially fix the Broccoli error code. Follow the given steps to do the same.
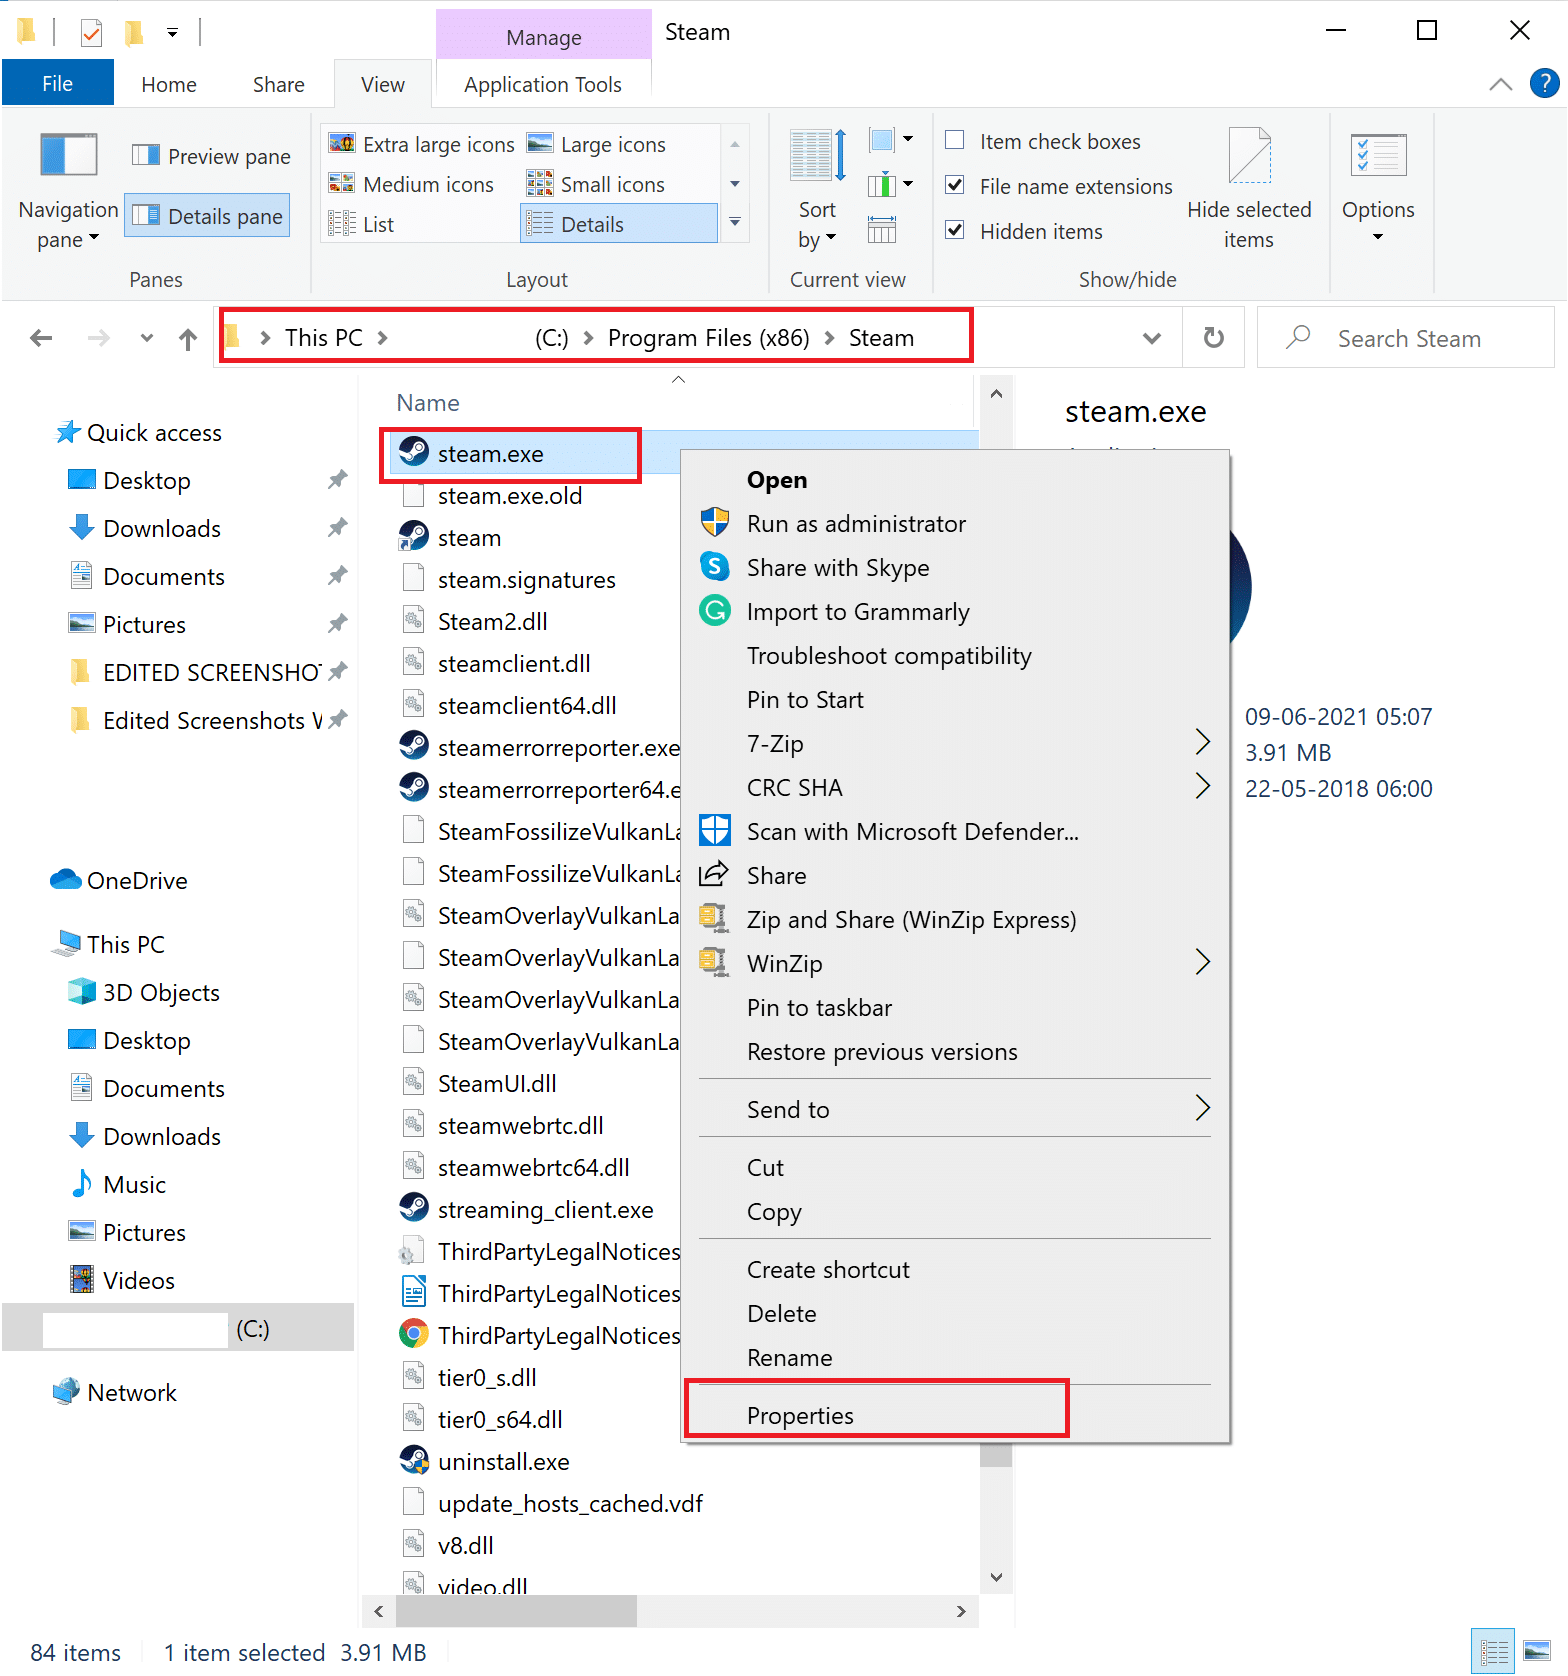
1. Launch File Explorer and go to C: > Program files (x86).
Fiiro gaar ah: If you have installed the game elsewhere, navigate to the appropriate directory.
2. Wuxuu furaa Destiny 2 folder. Midig-guji halka ay ku taal .exe feyl of the game and select Guryaha.
Fiiro gaar ah: Below is an example shown using Steam.
3. Marka xigta, u tag Ammaanka tab ee ku Guryaha window. Click on the option titled Edit.
4. Hubso in Xakameyn buuxda is enabled for all users, as depicted below.
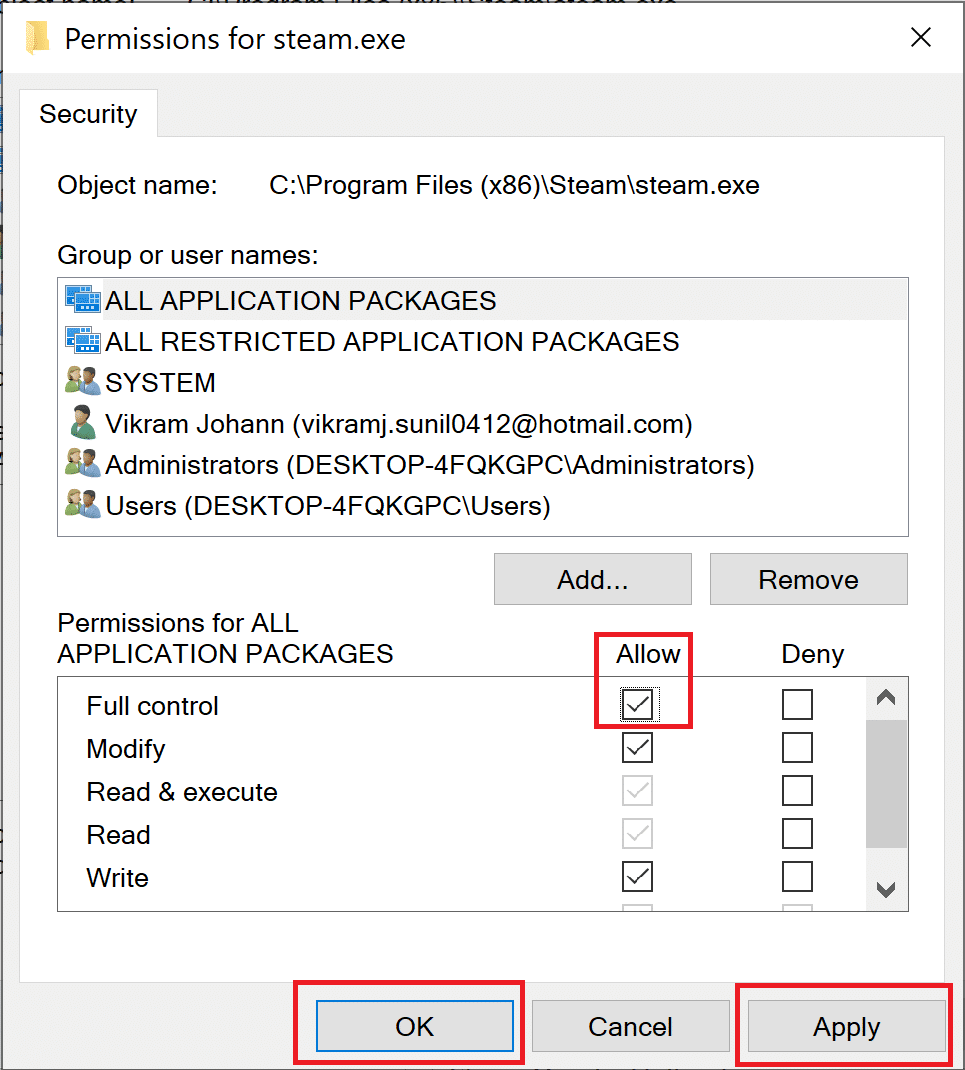
5. Guji Codso> Hagaag to save changes as highlighted above.
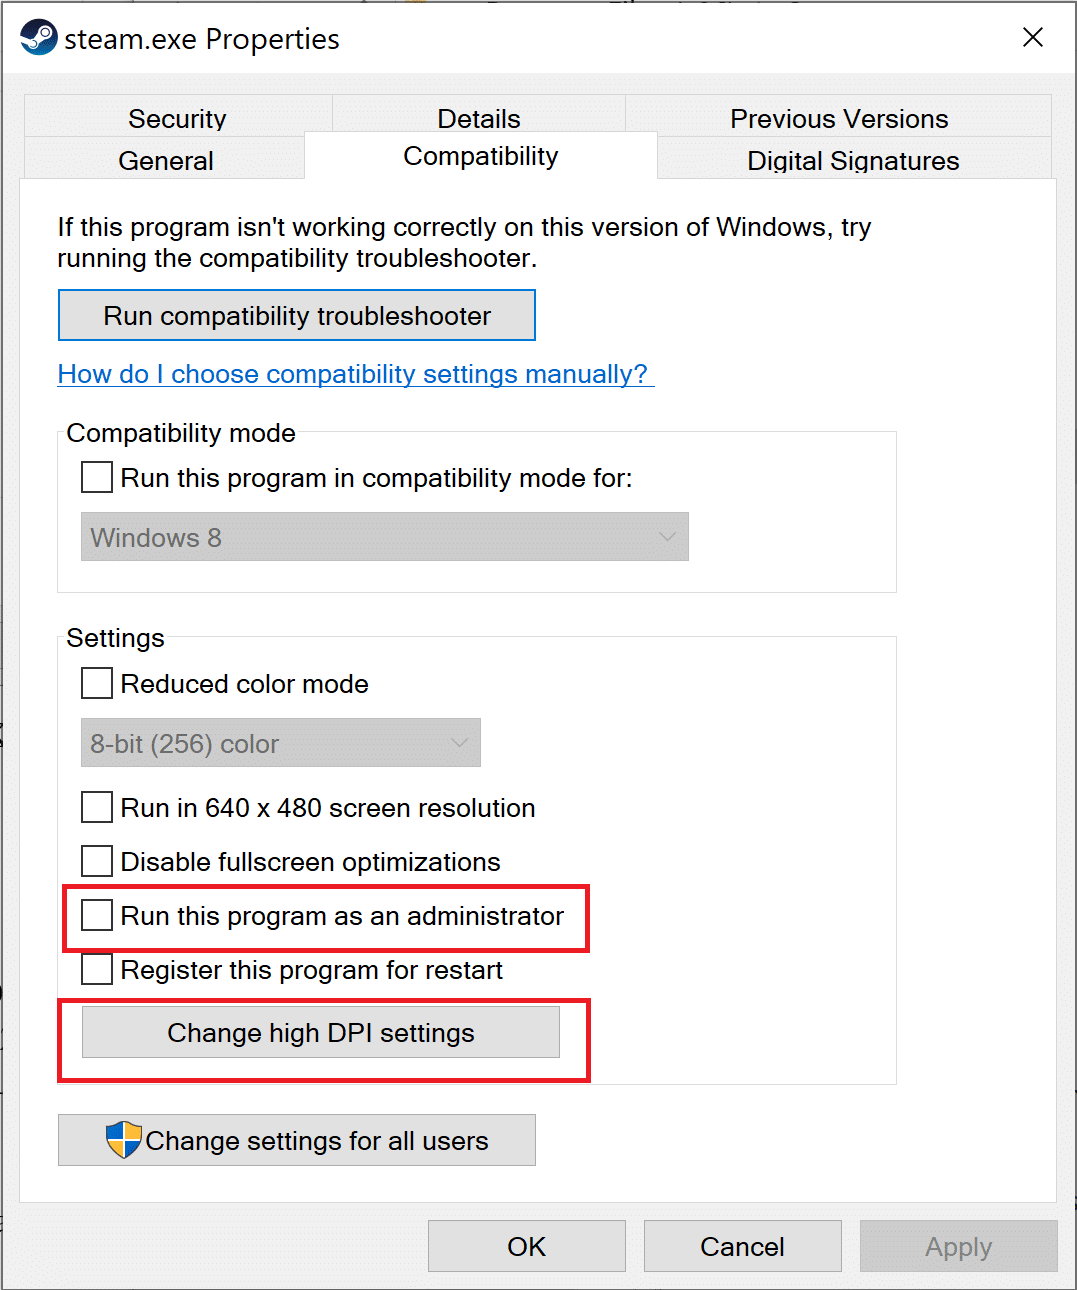
6. Marka xigta, u beddel Dhignaashada tab and check the box next to the option titled U socodsii barnaamijkan maamule ahaan.
7. Dabadeed, dhagsii Beddel goobaha sare ee DPI sida ka muuqata iftiimiyay.
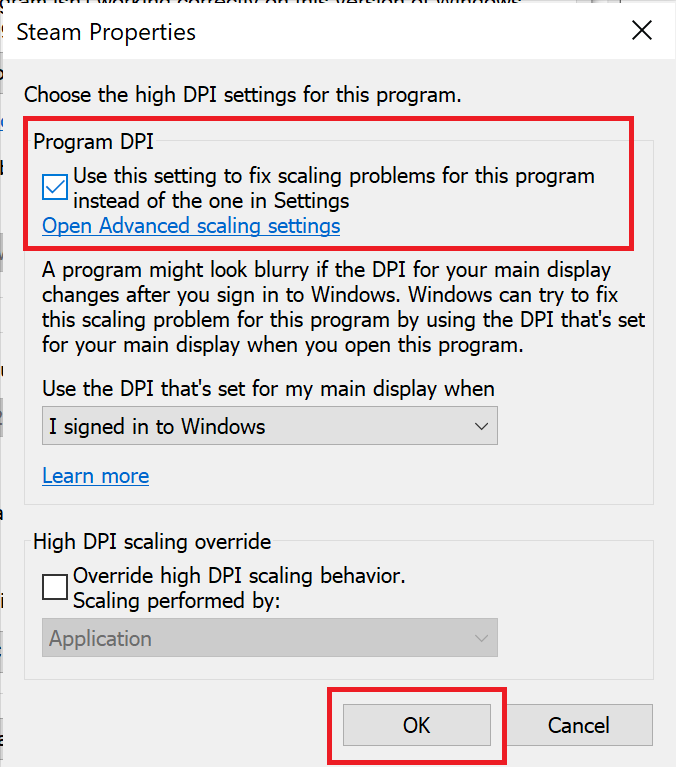
8. Here check the box under Program DPI. Guji OK si loo badbaadiyo goobaha.
Method 9: Set Destiny 2 as High Priority
To ensure that the CPU resources are reserved for Destiny 2 gameplay, you need to set it as a high-priority task in Task Manager. When your PC prefers to utilize the CPU for Destiny 2, there are lesser chances that the game will crash. Follow these steps to prioritize Destiny 2 and in turn, fix Destiny 2 Error Code Broccoli on Windows 10:
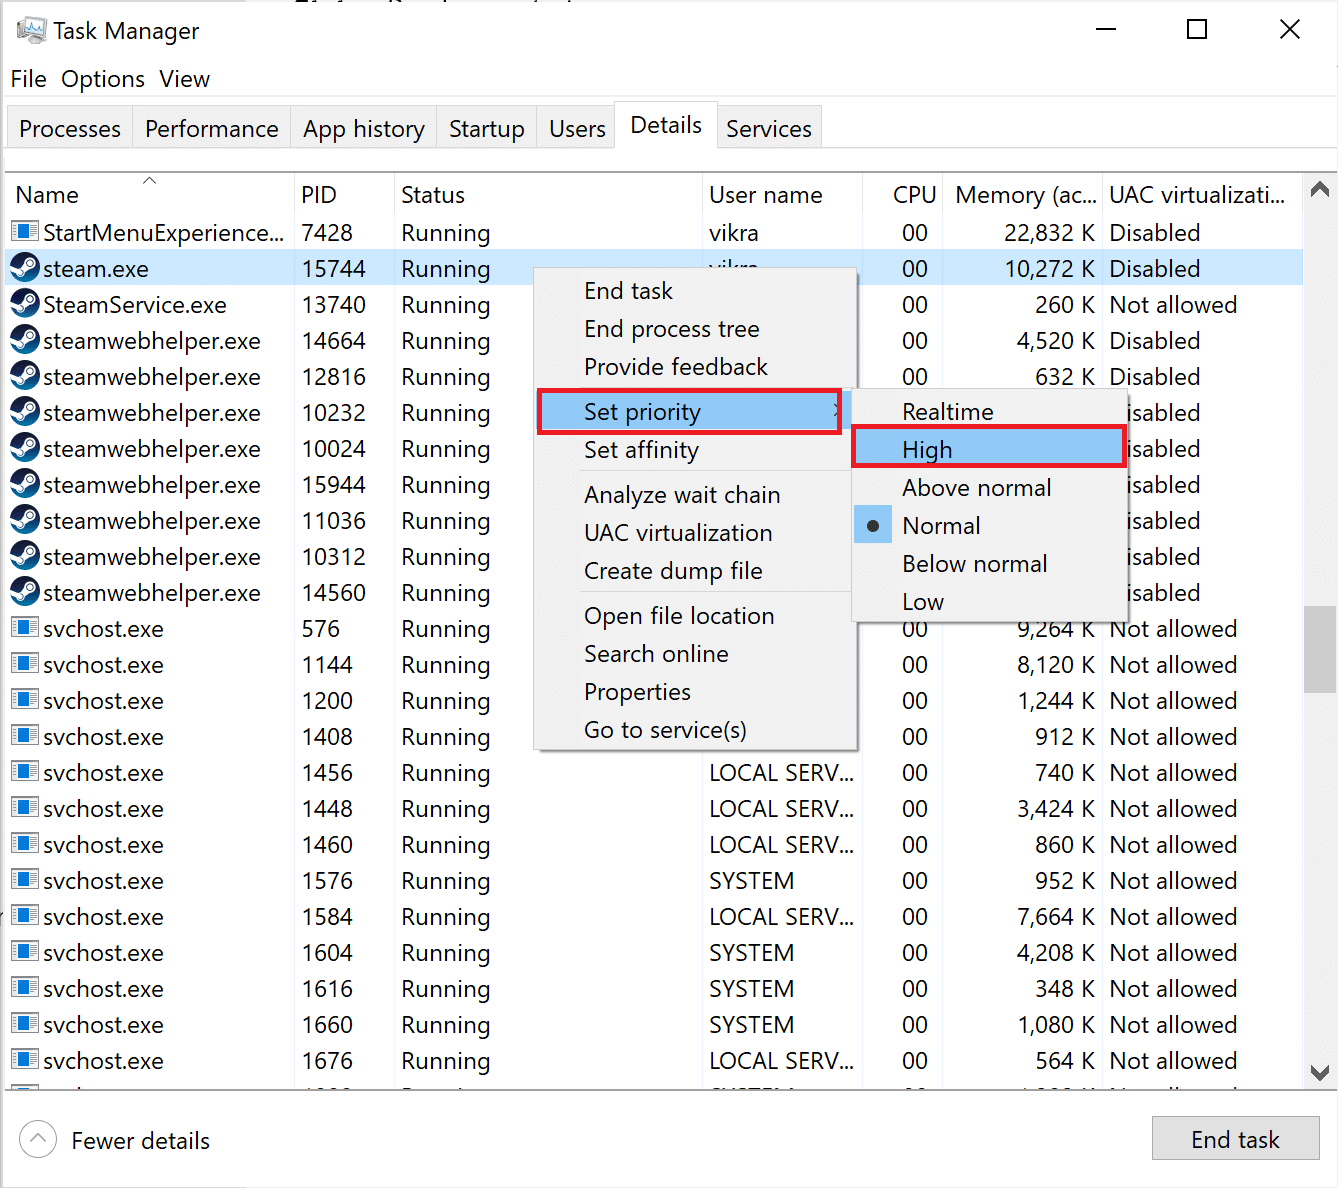
1. Nooca Task Manager in Daaqadaha raadinta box. Launch it from the search result by clicking Open.

2. Tag meesha Details tab ee ku Task Manager furmo suuqa.
3. Midig u guji aayahooda 2 iyo guji Set priority > High, as explained in the given pic.
4. Repeat the same process for Battle.net, Steam, or any application that you use to launch Destiny 2.
Sidoo kale Akhri: Sida loo beddelo mudnaanta nidaamka CPU gudaha Windows 10
Method 10: Reinstall Destiny 2
There might be corrupt installation files or game files. To clean your system of corrupt game files, you need to reinstall the game, as follows:
1. Buuxi Ku dar ama ka saar barnaamijyada window as explained in Habka 3 during Reinstallation of Graphics drivers.
2. Nooca aayahooda 2 ee Ka raadi liiskan text box, as shown.
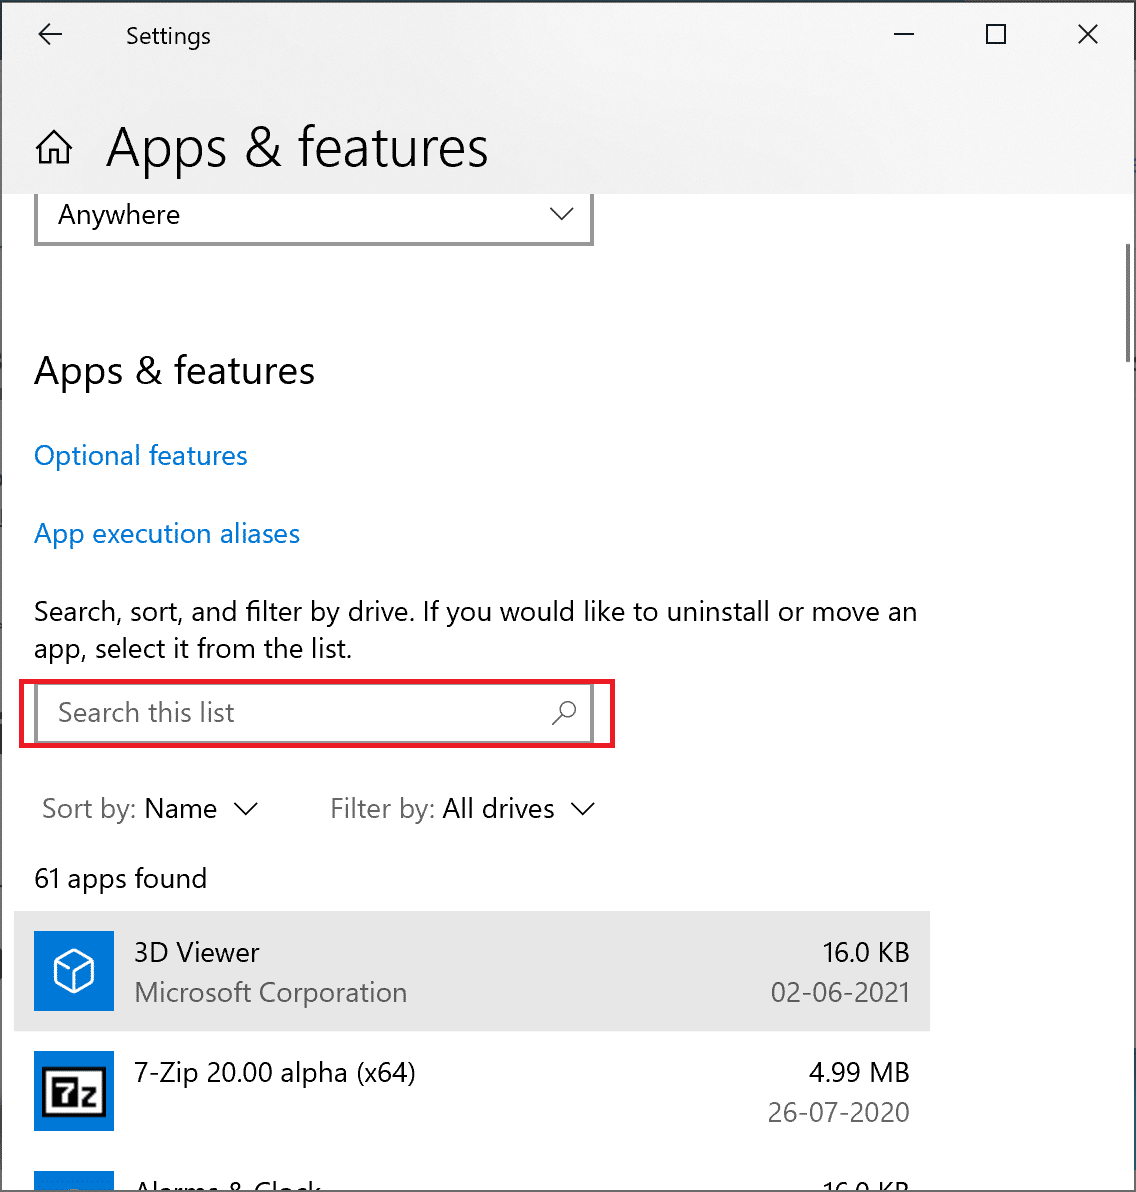
3. Guji aayahooda 2 in the search result and select uninstall.
Fiiro gaar ah: Below is an example is given using Steam.
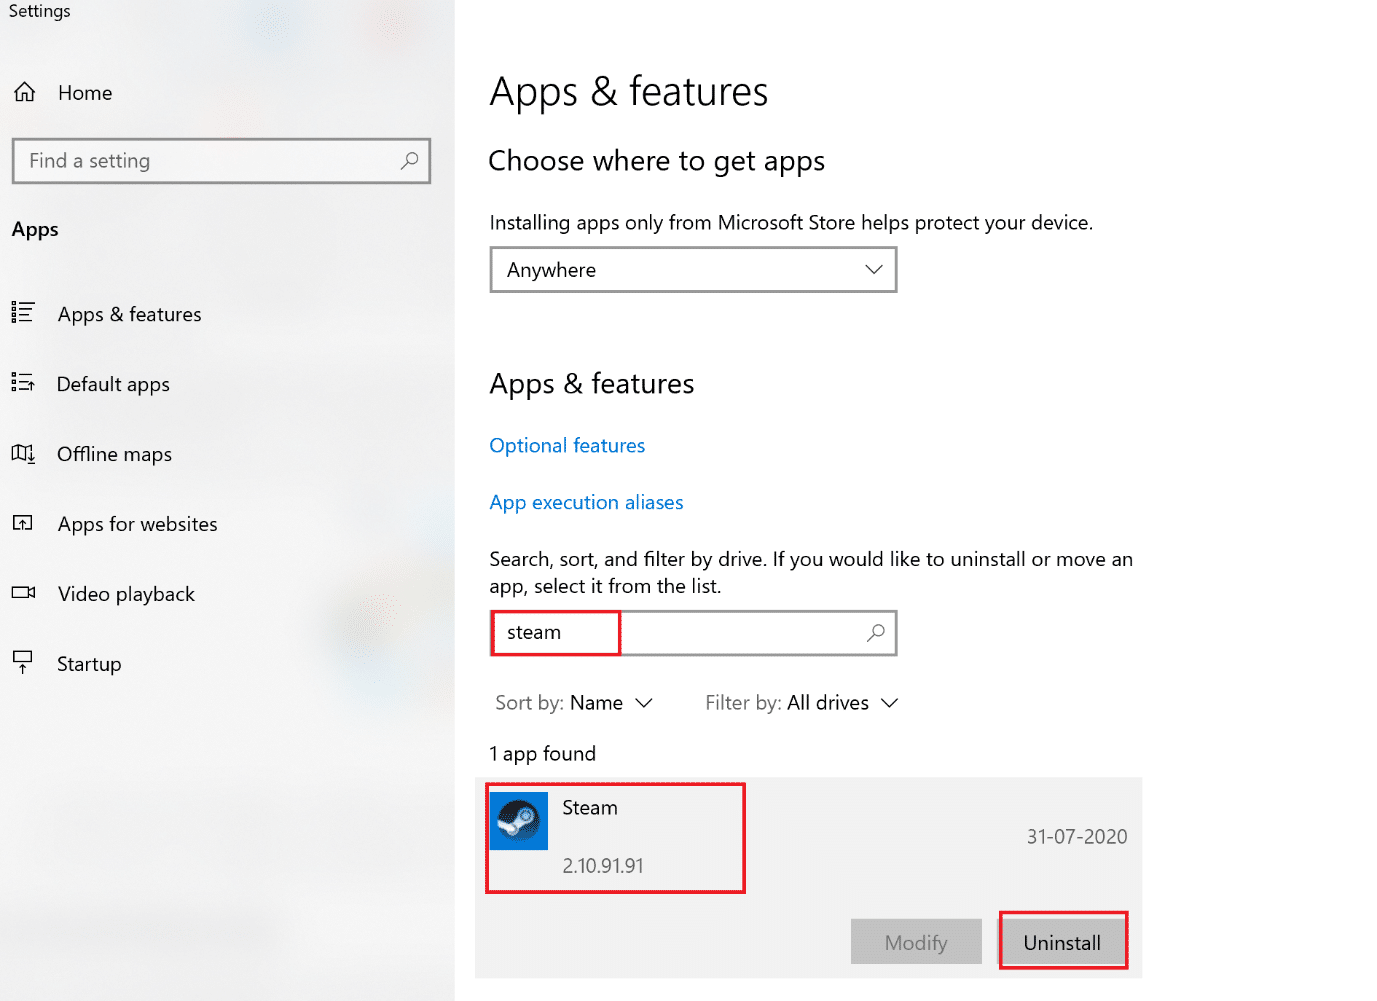
4. Sug for the game to be uninstalled.
5. Bilaw Steam or the application that you use to play games and reinstall Destiny 2.
Corrupt game files on your PC, if any, are now deleted and the Destiny 2 Broccoli error code rectified.
Qaabka 11aad: Run Windows Memory Diagnostic
In case, the said error still persists, there is a probability of hardware problems with your computer. To diagnose these problems, implement this method. The Windows Memory Diagnostic app will scan the hardware components of your computer to search for problems. For example, if the RAM on your PC is malfunctioning, the diagnostic app will give information about it so that you can get the RAM checked or replaced. Similarly, we shall run this tool to have problems diagnosed with system hardware that is affecting gameplay.
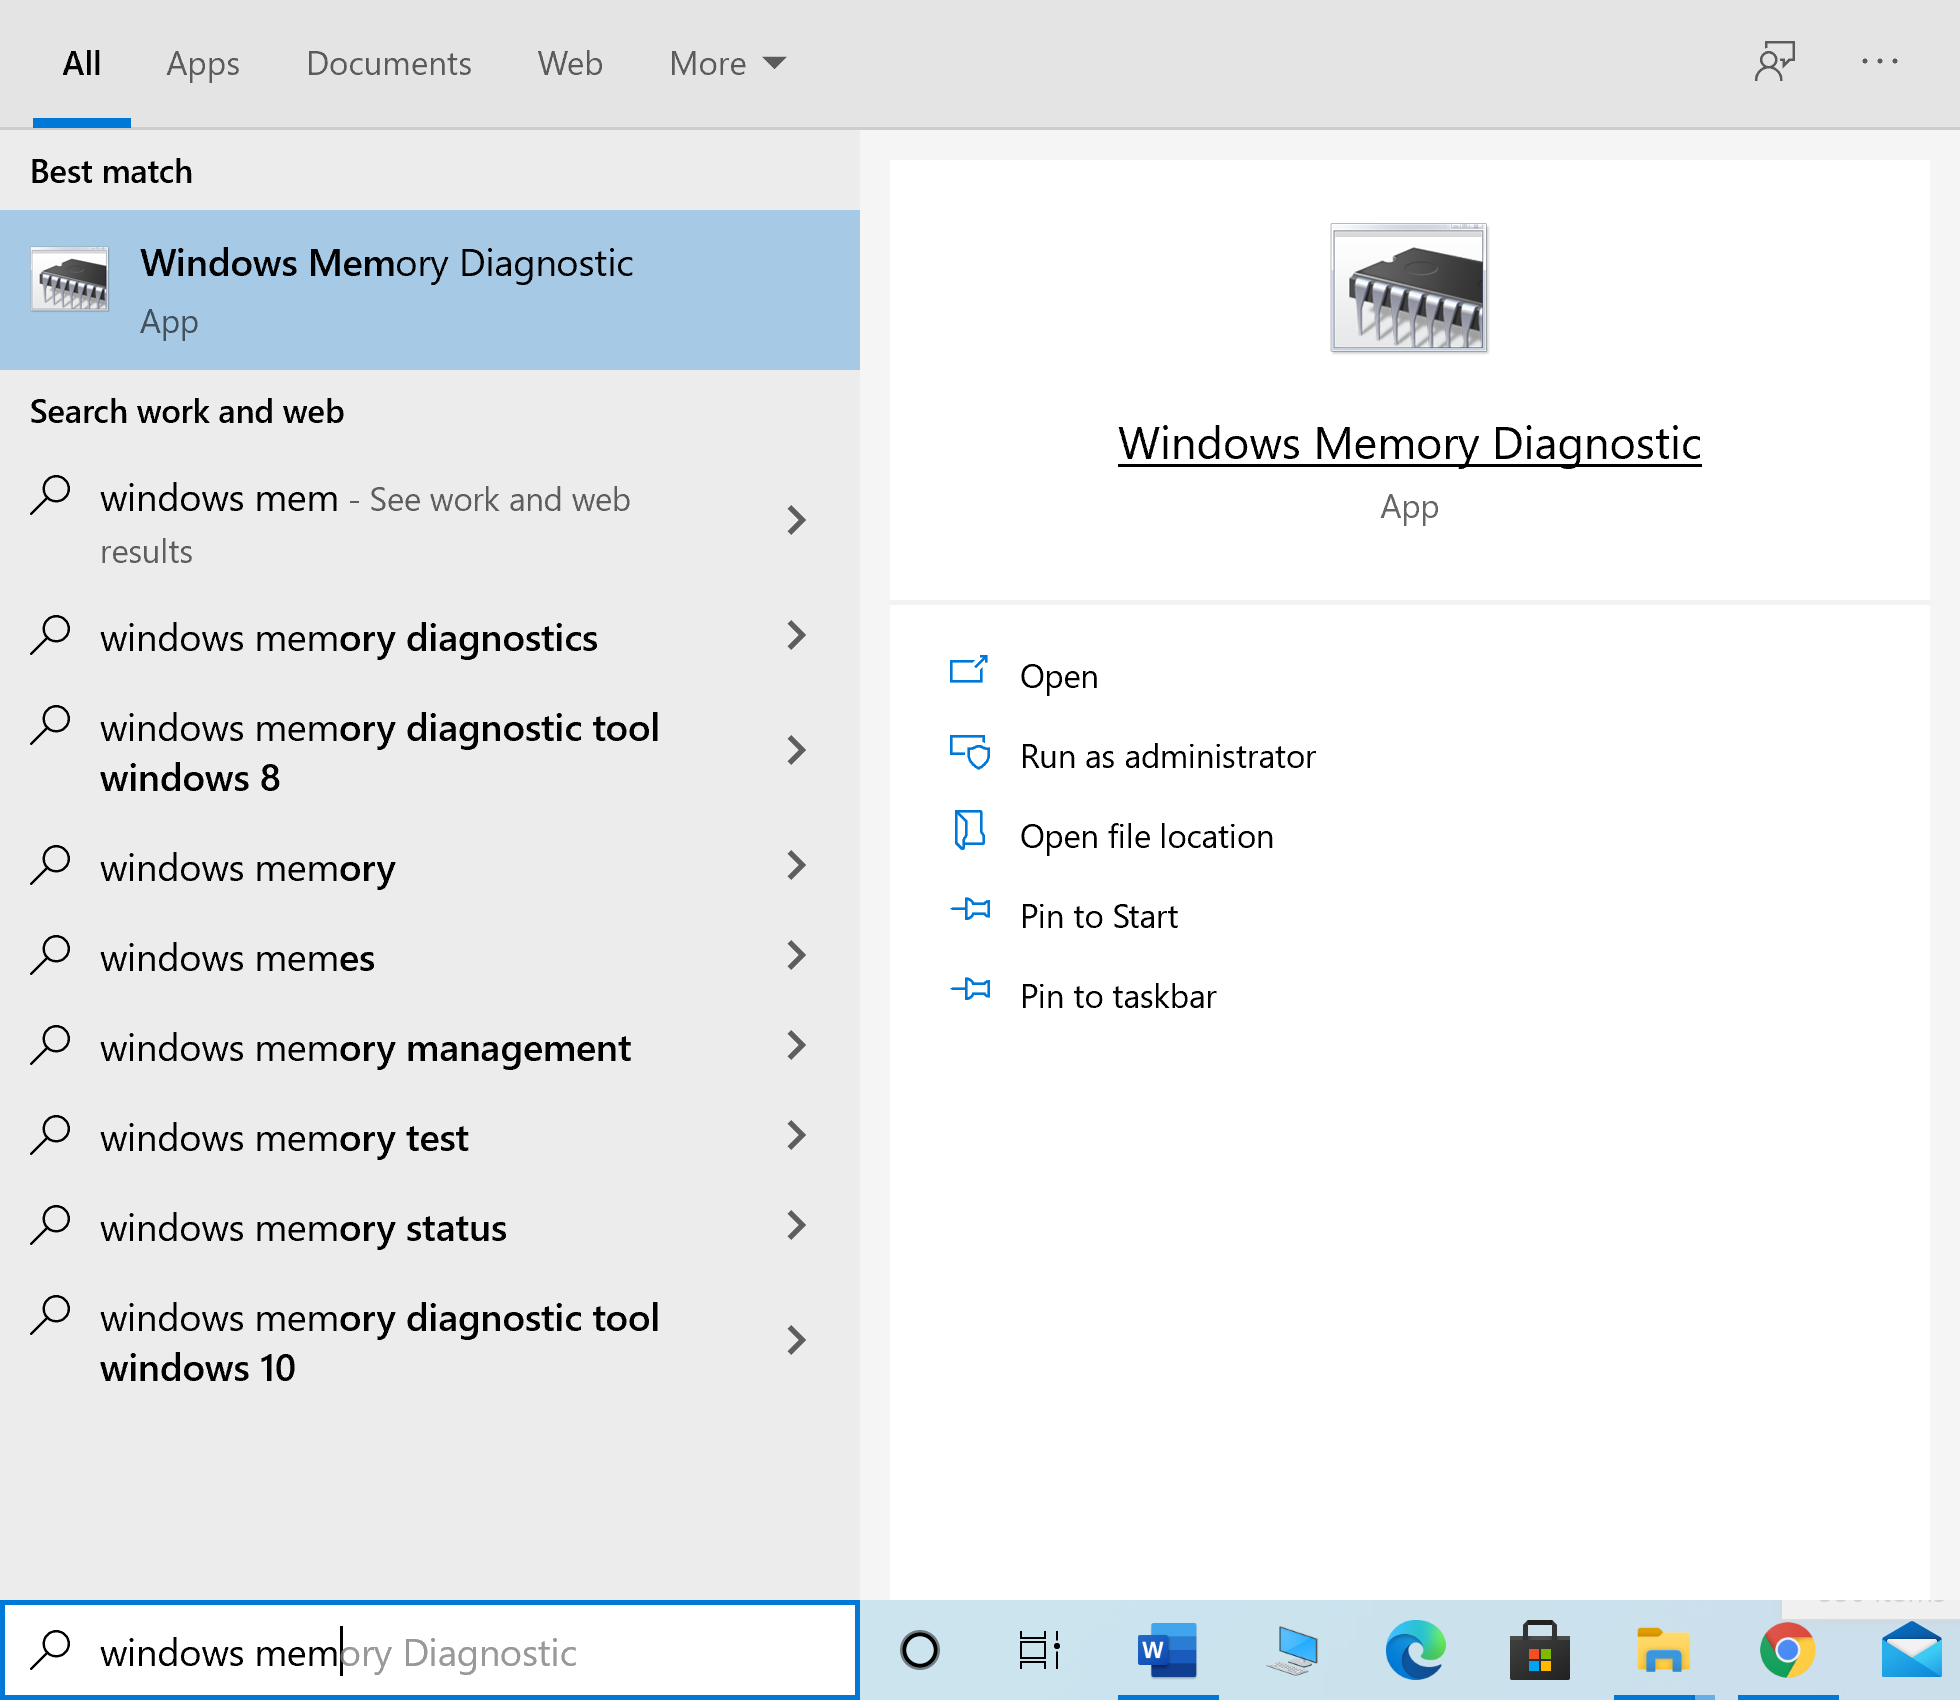
1. Nooca Baadhista Xusuusta Windows ee Daaqadaha raadinta box. Open it from here.
2. Guji Hada dib u bilow oo hubi dhibaatooyinka (lagu taliyay) daaqada pop-up.
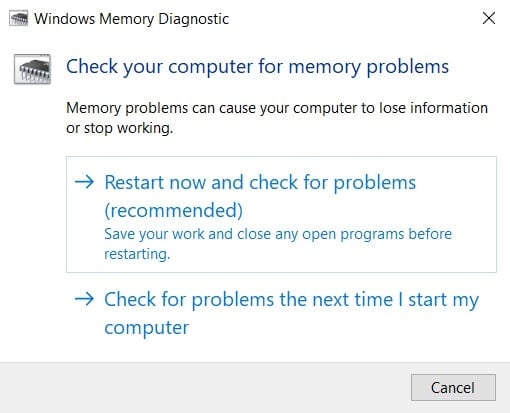
3. The computer will qeybtii labaad and begin the diagnostics.
Fiiro gaar ah: The process may take a while. Do not switch off the machine during the process.
4. The computer will dib u bilow goorta geedi socodku dhammeystiranyahay.
5. To view the diagnostic information, go to Taageeraha Dhacdada, sida ka muuqata.
6. U soco Diiwaanada Windows> Nidaamka from the left pane of the Event Viewer window.
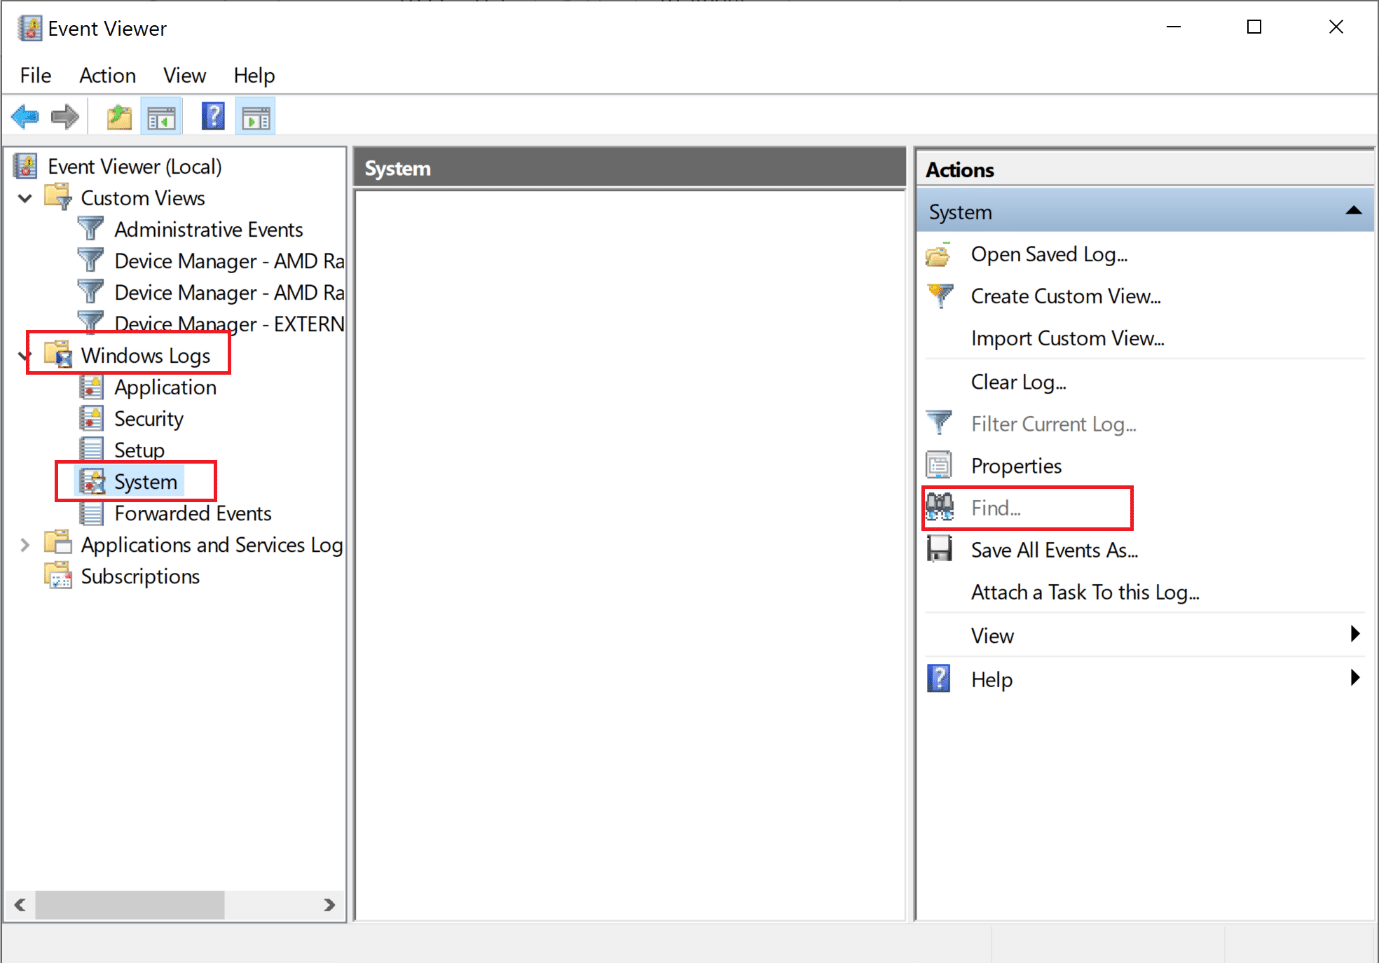
7. Guji Raadi ka Tallaabooyinka pane on the right-hand side.
8. Nooca XasuustaDaagnostic dooro Raadi Next.
9. Check the Event Viewer window for information displayed about qalabka cilladaysan, haddii ay jiraan.
10. If the hardware is found to be defective, get it checked or replaced by a technician.
lagu talinayo:
Waxaan rajeyneynaa in hagahan uu ahaa mid waxtar leh oo aad awoodid fix Destiny 2 error code Broccoli on your Windows 10 laptop/desktop. Do let us know which method worked the best for you. Also, if you have any questions or suggestions regarding this article, feel free to drop them in the comments section below.

