Windows is known to get slower over time. So, it came as a surprise when some users raised concerns about Windows 11 slowing down already. There could be a long list of causes that could be behind this but thankfully, in each scenario, a handful of simple tweaks can significantly enhance system speed. A slow computer is less efficient. However, contrary to popular belief, Windows computers are not designed to slow down with time. If you notice your system is underperforming or apps are taking longer to launch, this could be due to a lack of system storage or an excessive number of background apps, or services. Today, we will guide you on how to speed up Windows 11 PCs. So, let us begin!

Hur man snabbar upp Windows 11 PC
Many factors may affect the performance of your Windows 11 system. Hence, checking its performance through Performance Monitor is the first step to diagnosing the issue.
Diagnose Your System Through Performance Monitor
Performance monitor comes as an inbuilt tool in Windows OS. The tool monitors and identifies apps and processes that are slowing your computer down. Follow the given steps to run the Performance monitor:
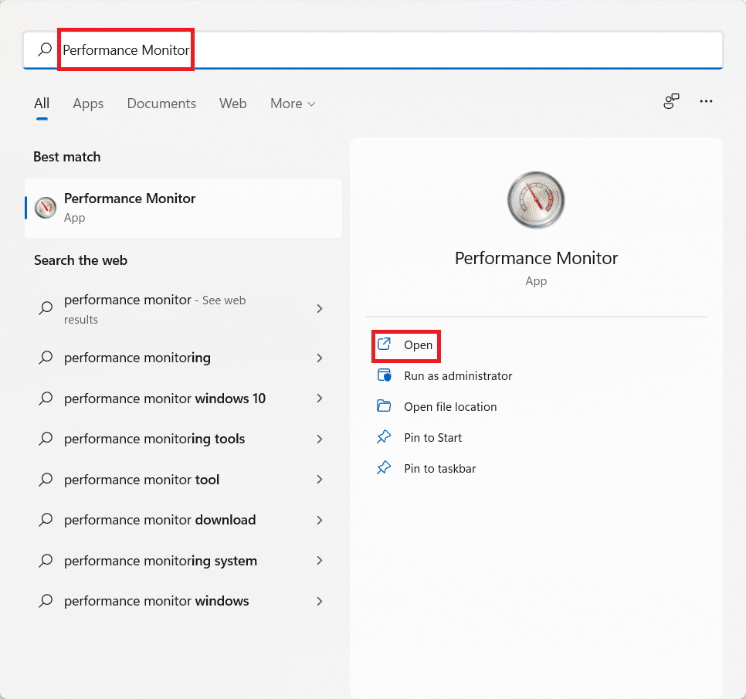
1. Klicka på Sök ikon och typ Prestandamonitor. Klicka på Öppen, som visat.
2. Klicka på i den vänstra rutan Data Collector Sets.
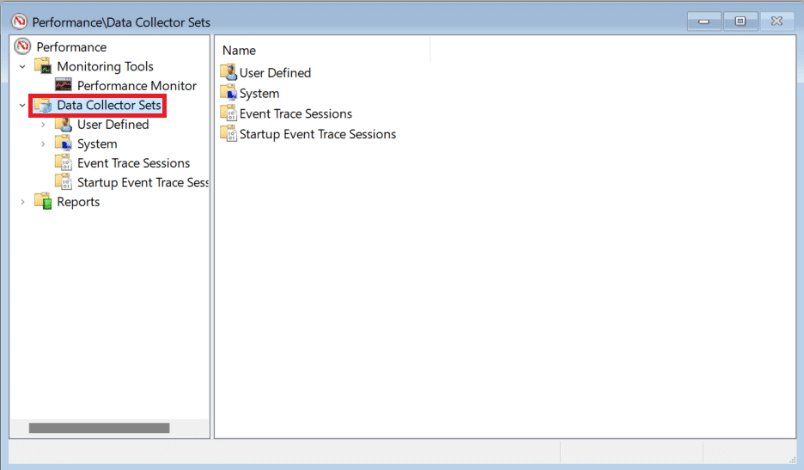
3. Then, double click on Systemkrav ställa.
4. Högerklicka på System prestanda och välj Start from the context menu, as depicted.
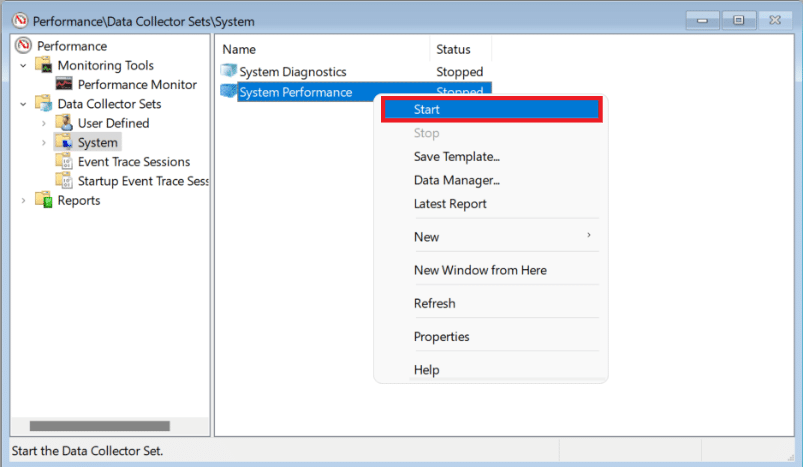
The scan would run and collect data for 60 seconds.
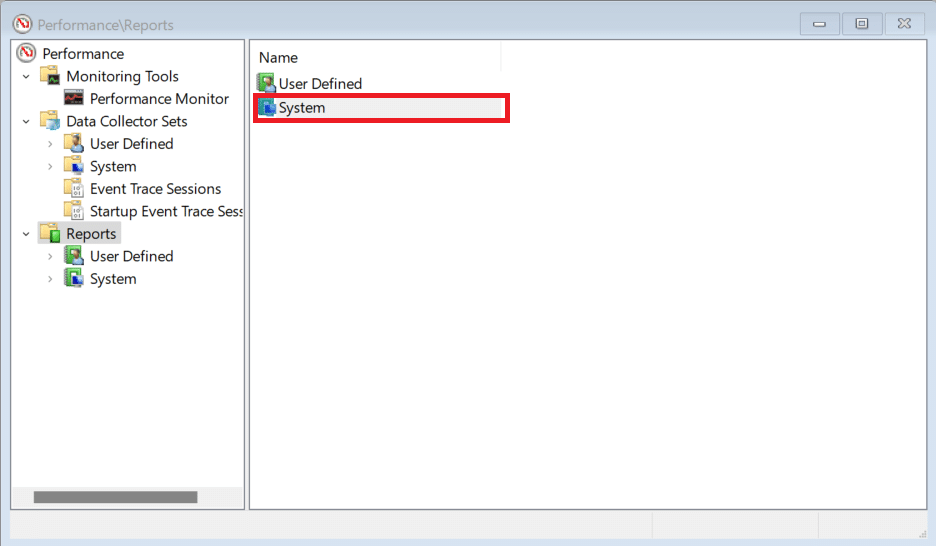
5. After the test is completed, click on Rapport in the left pane. Then, click on Systemkrav in the right pane, as shown.
6. Klicka nu på Systemkrav prestanda.
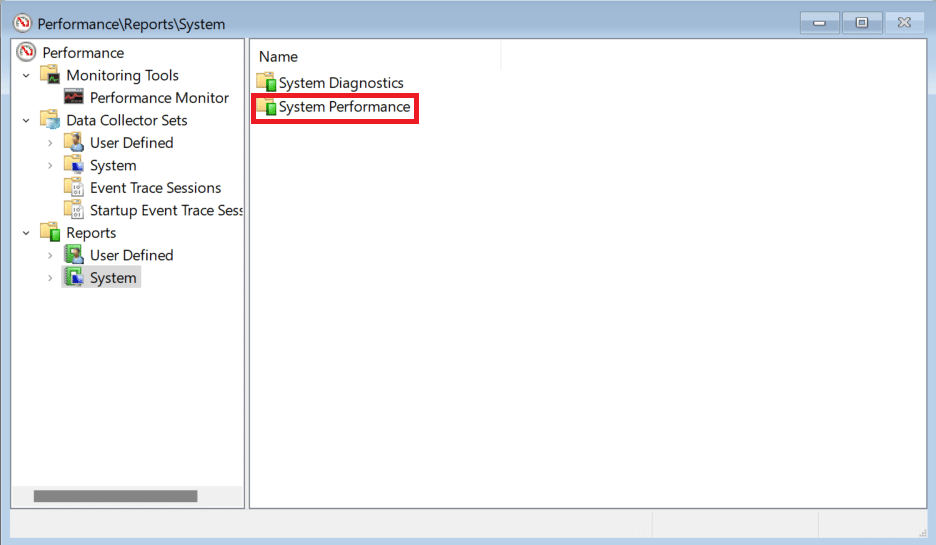
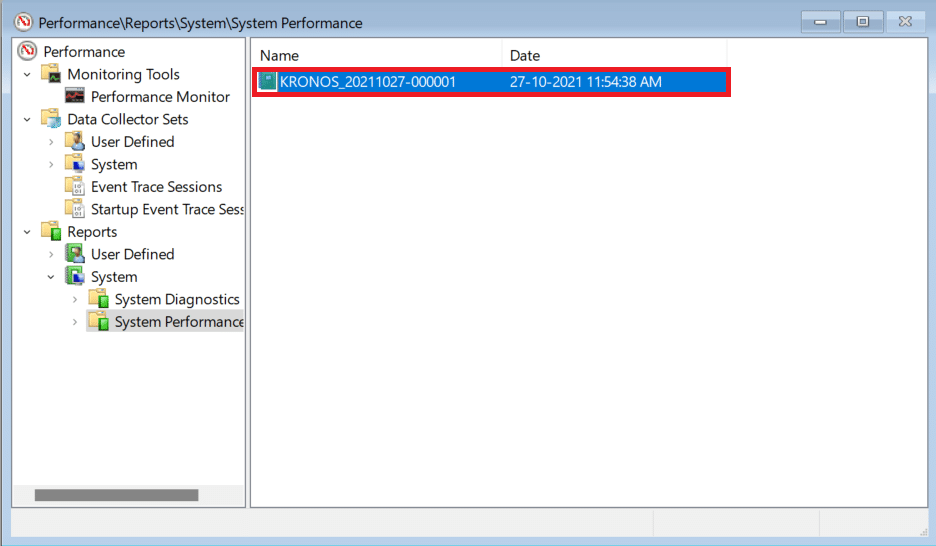
7. Among the list of reports, find the most senaste rapporten of the test you ran earlier.
8. I Sammanfattning section, you can find the processes which are hogging system resources labeled as Top Process Group.
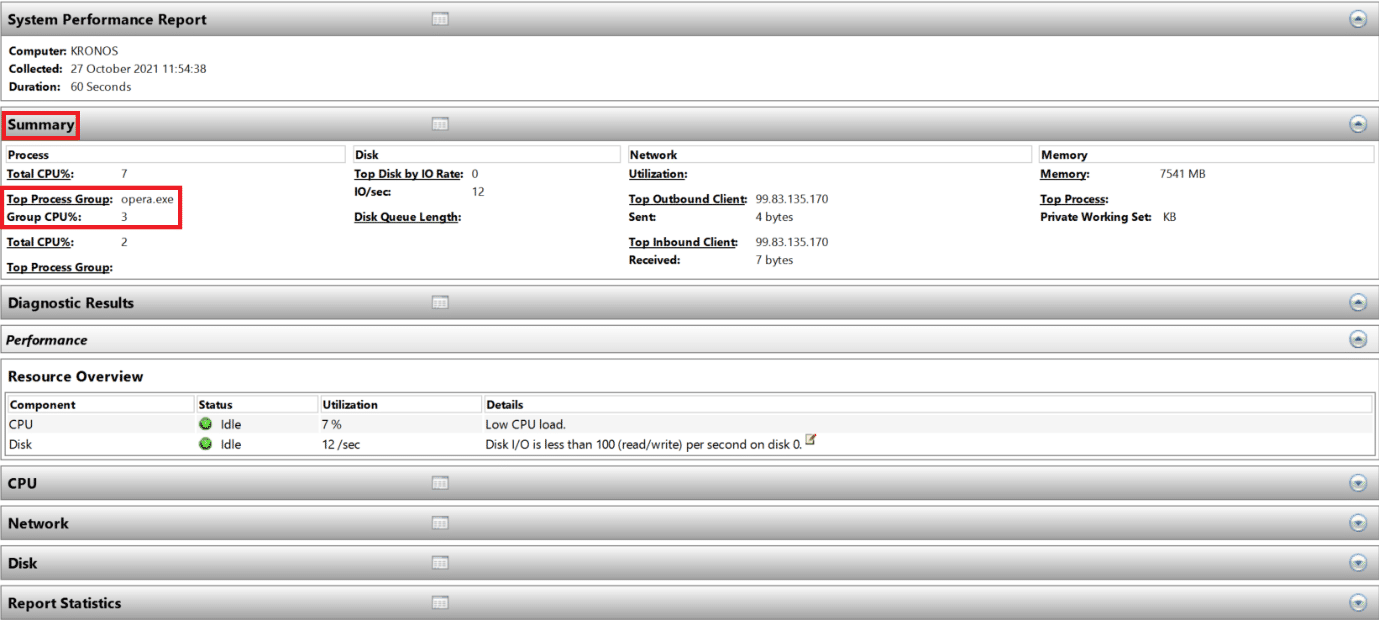
Notera: You can read through other sections of the report to understand the performance of your computer comprehensively.
Metod 1: Starta om din dator
Restarting the PC may seem like a simple thing to do but it acts as a band-aid solution to the problem. It will come in handy to reduce sluggish performance. as your computer performance improves drastically once it is rebooted.
Läs också: Fix Critical Process Died Error in Windows 11
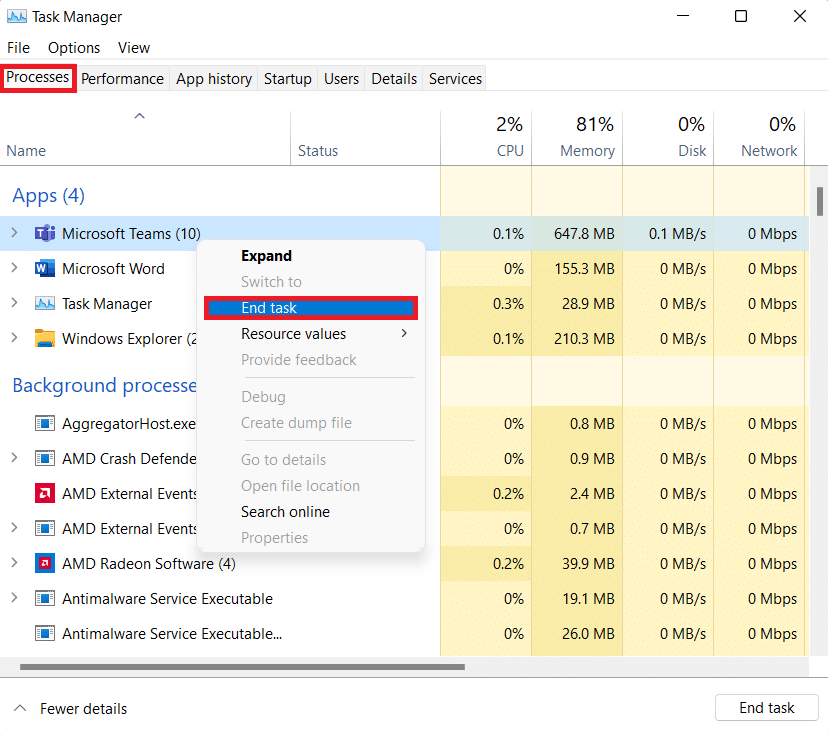
Method 2: End Unwanted Processes
Task manager is your go-to utility tool to monitor and control memory consumption.
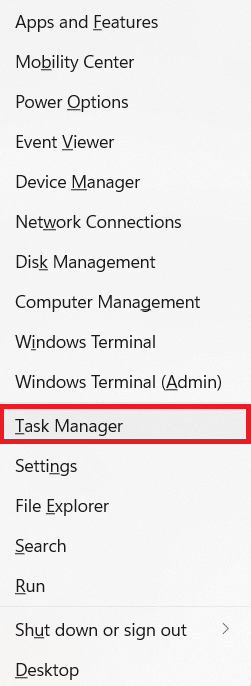
1. Tryck Windows + X keys tillsammans för att öppna Snabb länk meny.
2. välj uppgift chef från listan.
3. I Processer tab, you can see the applications and processes that are consuming a lot of memory resources.
4. Högerklicka på ansökningsprocess (t.ex Microsoft-lag) that you do not need right now.
5. Klicka på Slutet uppgift from the right-click menu, as illustrated below.
Method 3: Disable Startup Applications
Too many applications starting at the time of boot can hog up RAM and can cause Windows OS to slow down. Disabling them will speed up Windows 11. Read our exclusive guide on How to Disable Startup Programs in Windows 11 here.
Method 4: Change Power Plan
Power options may not be that essential in a desktop setup but they could make a ton of difference when set properly on a laptop. To change Power settings, follow these steps:
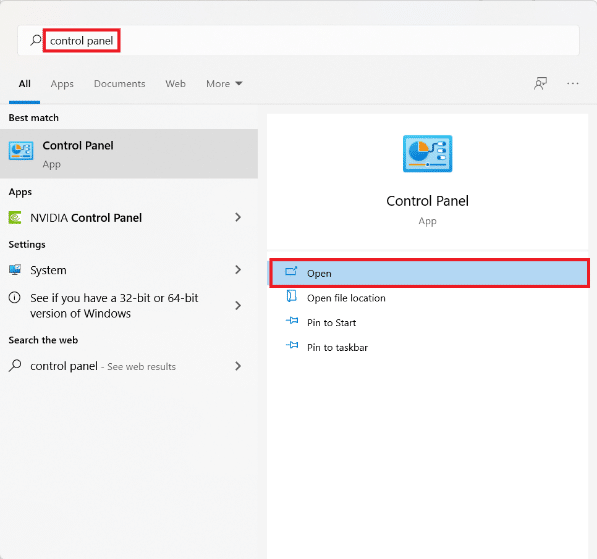
1. Klicka på Sök ikon och typ kontroll panel. Klicka Öppna.
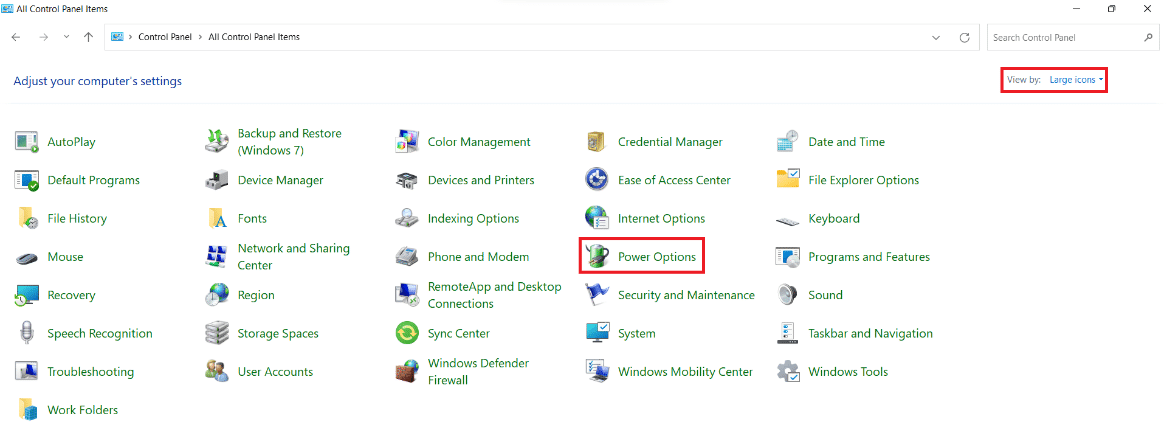
2. Klicka på Effekt Tillbehör.
Anmärkningar: Uppsättning utsikt by > stora ikoner from the top right-hand corner, if you can’t see this option.
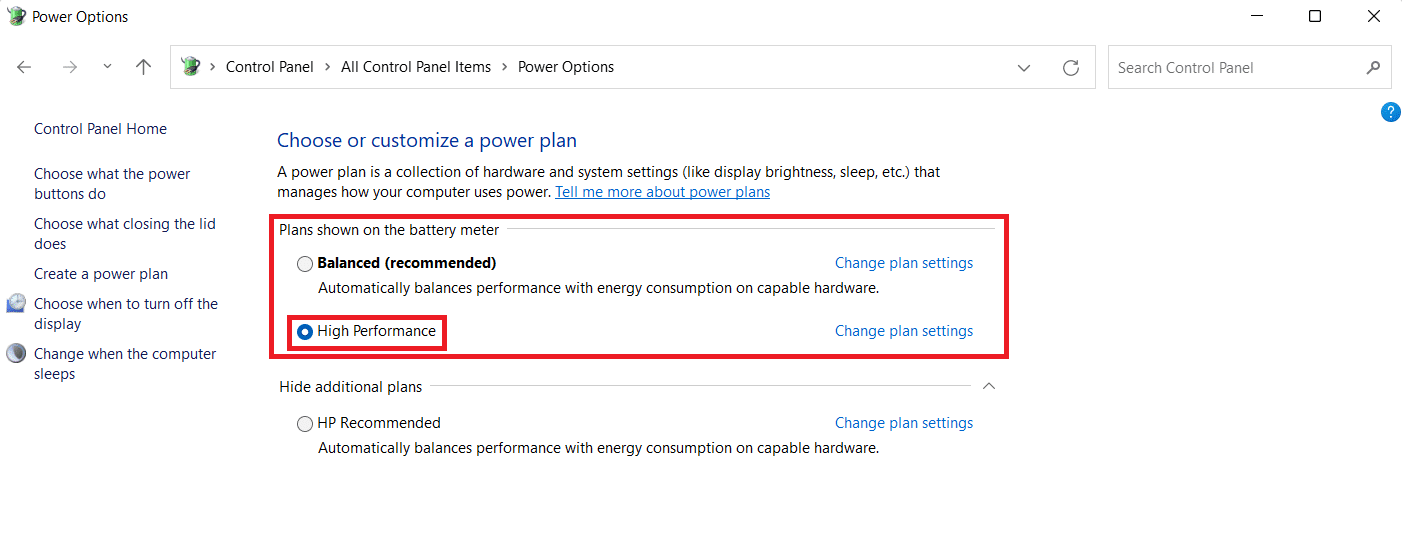
3. You will see three default power plans offered by Windows:
- Effekt Saver: This option gives you the longest battery life from your laptop at the sacrifice of performance. This is an option that should never be selected by desktop users because it would just impair performance while saving very little power.
- Balanserad: When a laptop is not plugged into a power source, this is the best alternative. As the name implies, it offers a decent mix between performance and battery life.
- Hög prestanda: When connected to a power source, you require high performance to accomplish CPU-intensive tasks, this should be the first choice.
4. Välj Hög prestanda power plan, as shown.
Method 5: Delete Temporary files
Lack of space on your Hard drive can also hinder the performance of your computer. To clean up junk files:
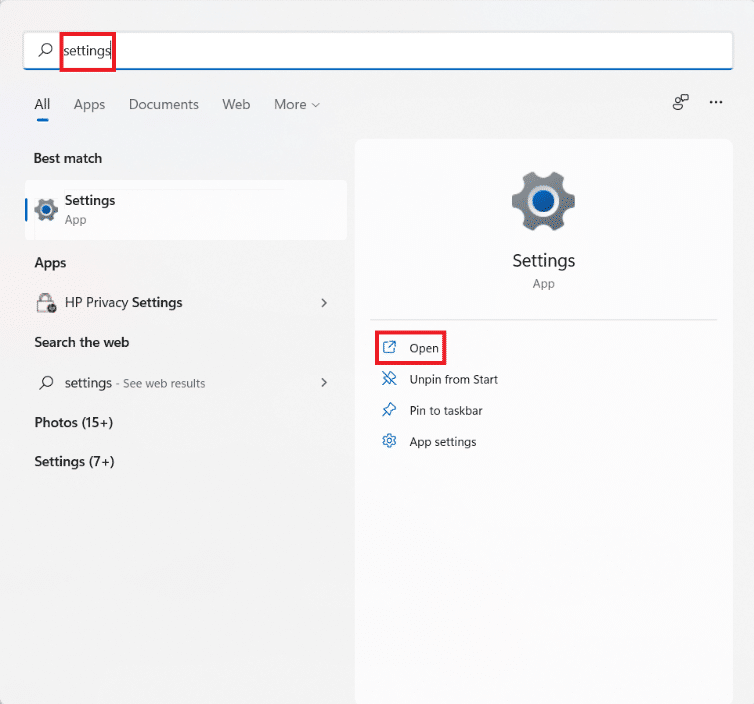
1. Tryck Windows + I-nycklar tillsammans för att öppna Inställningar app.
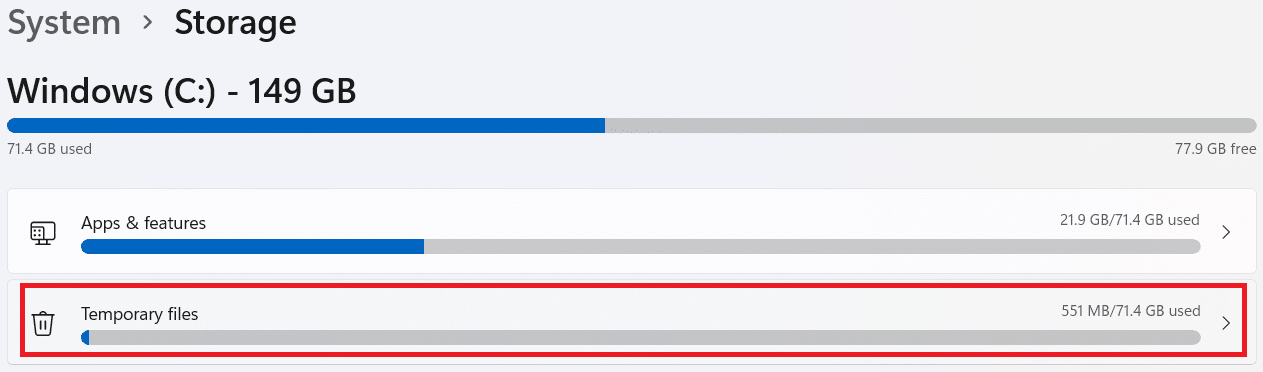
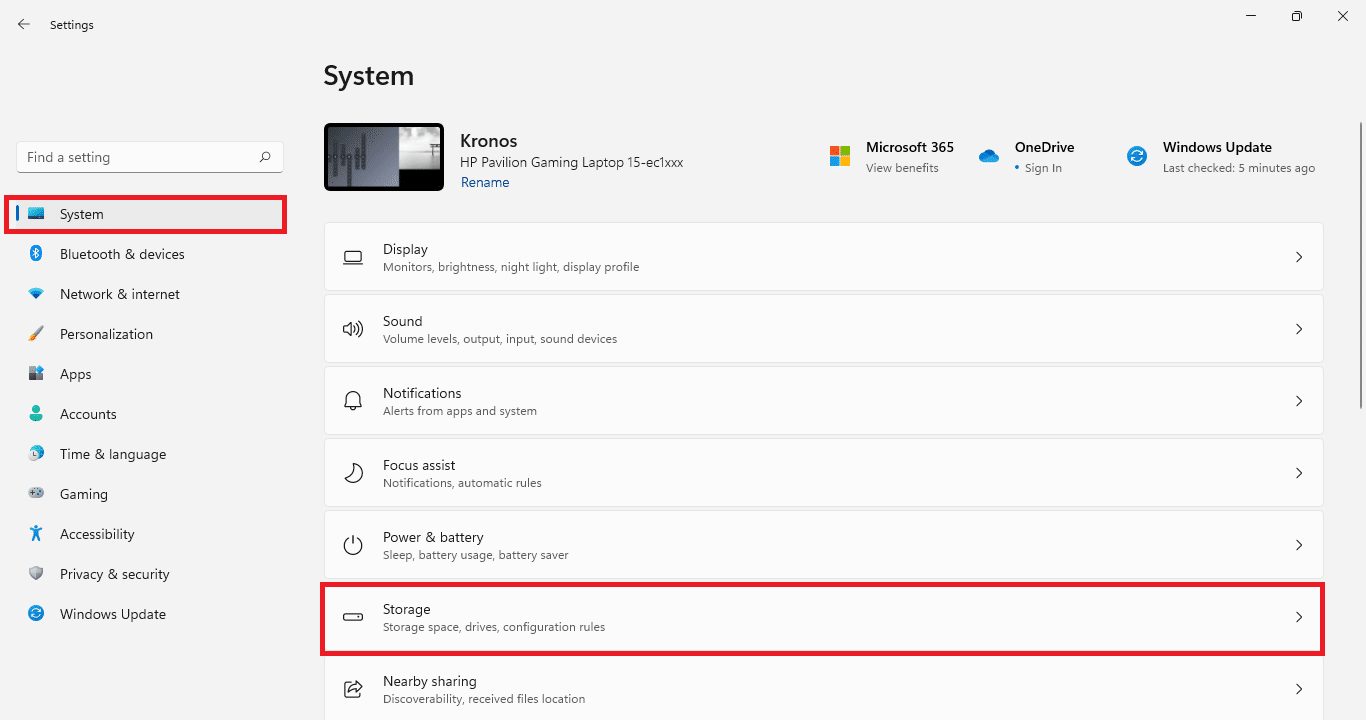
2. I Systemkrav fliken, klicka på lagring, som visat.

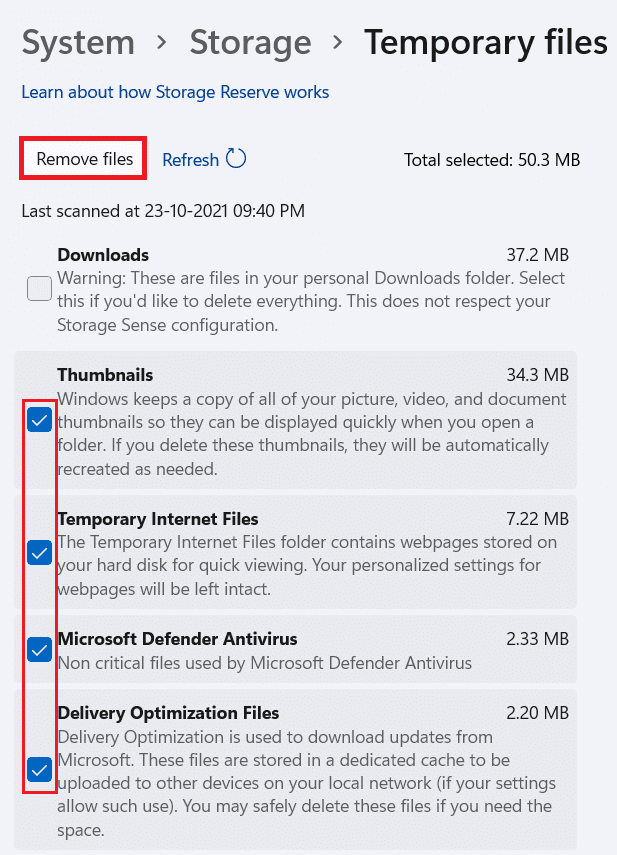
3. Wait for Windows to scan your drives to identify temporary files & junk files. Then, click on tillfällig filer.
4. Mark the checkbox for types of files and data that you no longer need e.g. Thumbnails, Temporary Internet Files, Microsoft Defender Antivirus & Delivery Optimization Files.
Anmärkningar: Make sure you read the description of each file type to avoid deleting important data.
5. Klicka nu på AVLÄGSNA filer shown highlighted.
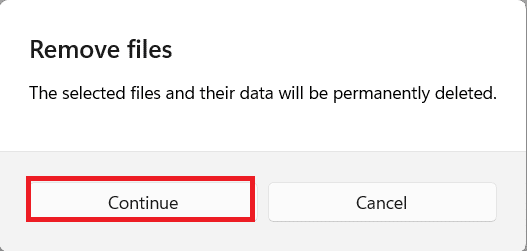
6. Klicka slutligen på Fortsätta i Ta bort filer bekräftelse.
Läs också: Fix appar kan inte öppnas i Windows 11
Method 6: Uninstall Unused Programs
Unused apps can hog up RAM resources in the background. It is recommended to uninstall the application that is not used anymore to free up both storage and memory resources.
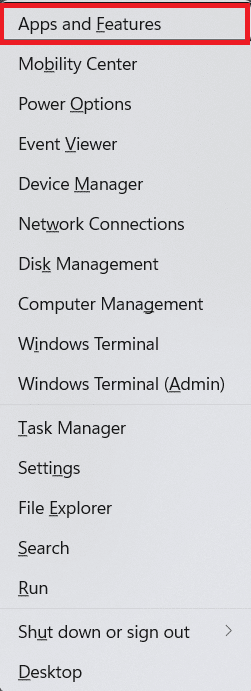
1. Tryck Windows + X keys samtidigt för att öppna Snabb länk meny.
2. Klicka på Appar och funktioner från listan.
3. Bläddra igenom listan över installerade appar och klicka på tre prickar for the app that you want to uninstall. e.g. Genomskinlig TB.
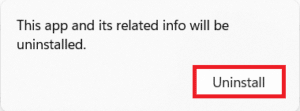
4. Klicka på Avinstallera.

5. Klicka på Avinstallera in the prompt to confirm.
6. Repeat the process for all oönskade appar.
Method 7: Disable Visual Effects
Disabling visual effects can serve you in the long run while cutting down on RAM consumptions. This will also help speed up Windows 11 PC.
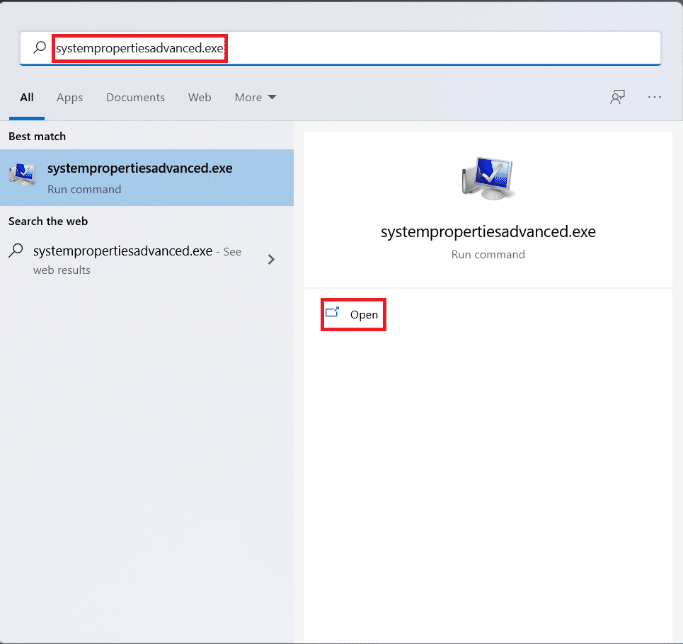
1. Klicka på Sök ikon och typ systempropertiesadvanced.exe.
2. Klicka sedan på Öppen, som visat.
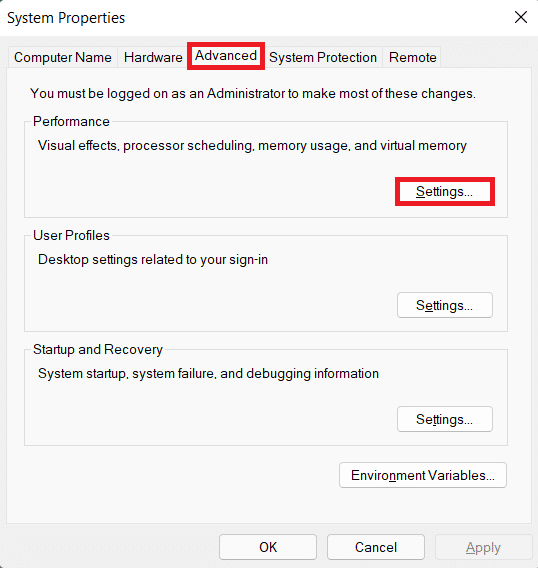
3. Under Advanced Open water fliken, klicka på Inställningar i prestanda sektion.
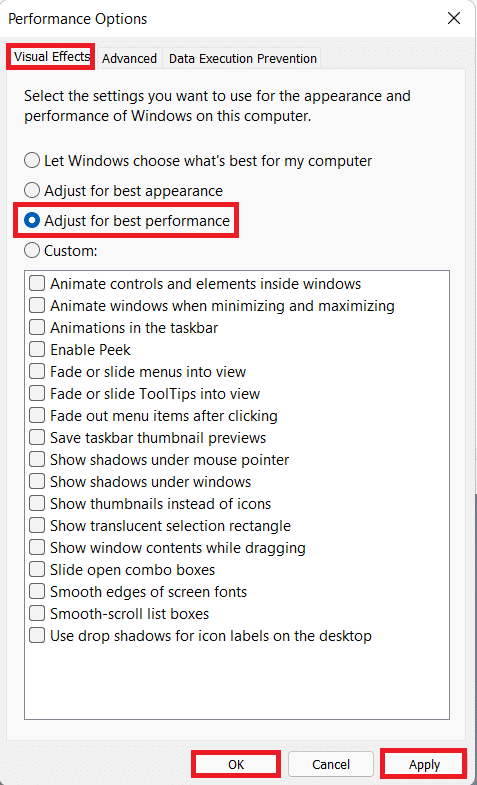
4. I visuella effekter fliken, klicka på Justera för bästa prestanda.
5. Välj sedan Ansök> OK för att spara ändringar.
Läs också: How to Fix Microsoft Store Not Opening on Windows 11
Method 8: Increase Virtual Memory
Virtual memory allows data in RAM to be offloaded to disc storage, accounting for the lack of physical memory in your system. It is a practical solution to the problem of high memory usage. This will certainly speed up Windows 11.
1. Lansera Systemegenskaper window as you did in the previous method.
2. Byt till Advanced Open water Fliken och välj Inställningar under prestanda sektion.
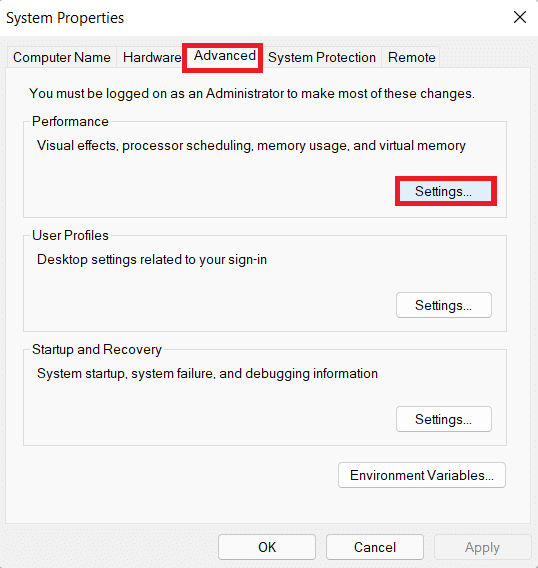
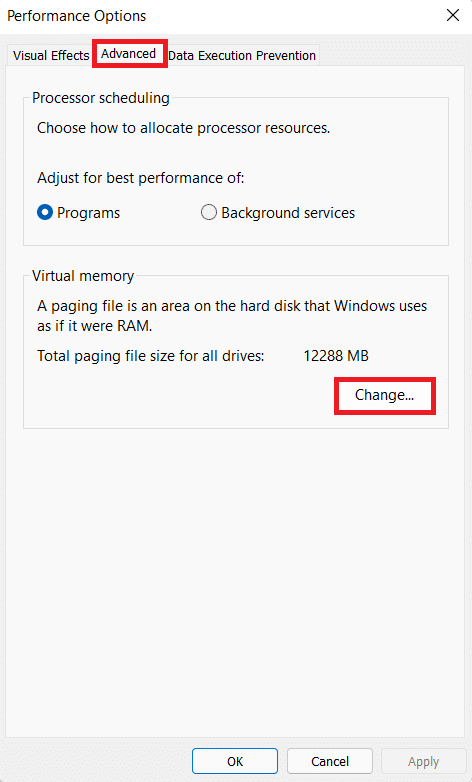
3. I Fönstret Prestationsalternativ, Klicka på Advanced Open water fliken.
4. Klicka sedan på Byta… under Virtuell Minne sektion.
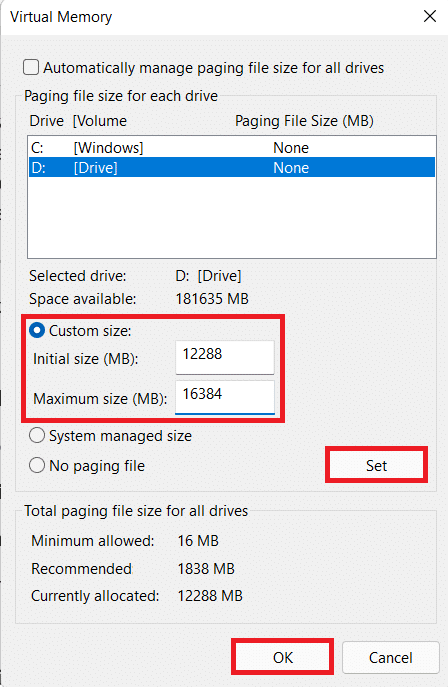
5. Uncheck the box marked Hantera sökningens filstorlek automatiskt för alla enheter.
6. Välj din primära enheten (t.ex C:) from the list and click on Ingen personsökningsfil. Klicka sedan på uppsättning.
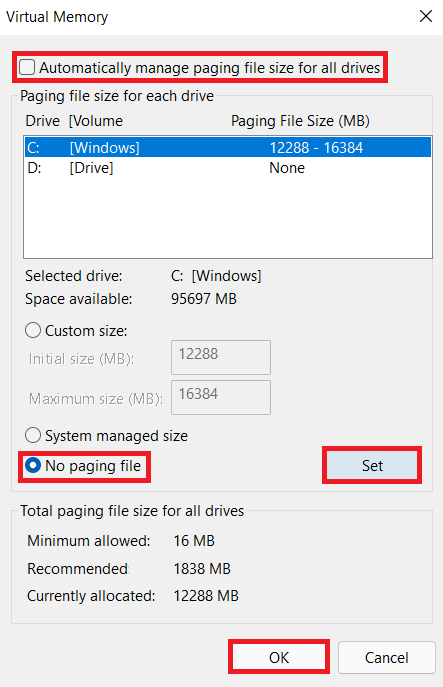
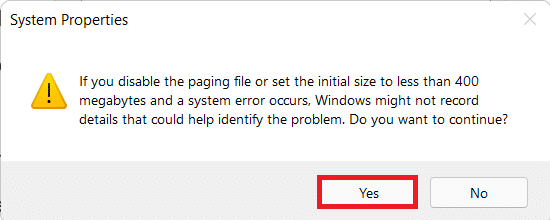
7. Klicka på Ja i bekräftelseprompten som visas.
8. Klicka sedan på non-primary volume (t.ex D:) in the list of drives and select Anpassad storlek.
10. Ange Paging size in MegaBytes (MB).
Notera 1: Enter the same value for both Initial storlek och Max storlek.
Notera 2: The paging size is ideally två gånger the size of your physical memory (RAM).
11. Klicka på uppsättning > OK.
12. Omstart your computer for changes to take effect.
Method 9: Run Virus & Malware scan
Your computer slowing down can be a symptom of a malware attack so it is advised to run an in-depth malware scan. Windows Defender is an inbuilt antivirus to protect Windows system from malware. To run a malware scan, follow the given steps:
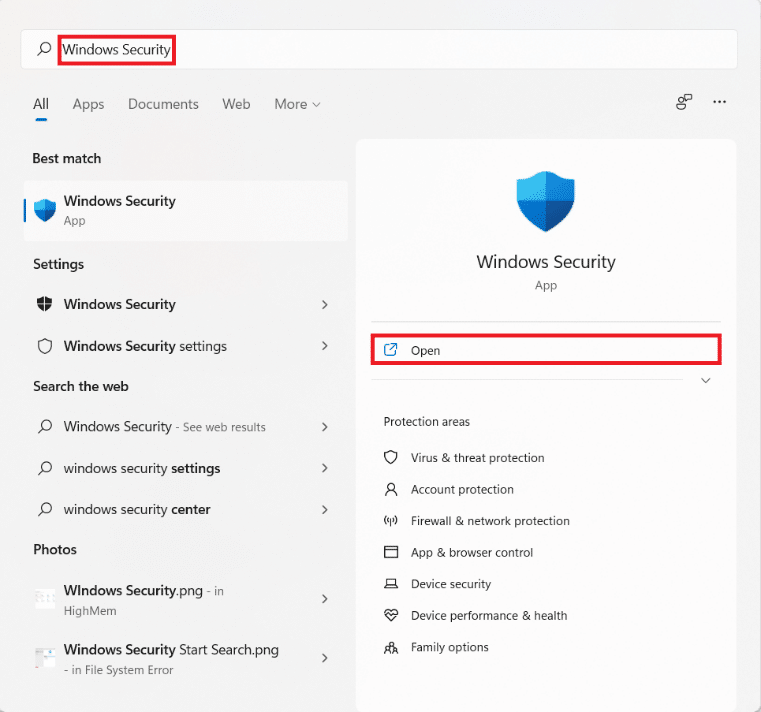
1. Klicka på Sök ikon och typ Windows Security. Klicka sedan på Öppen.
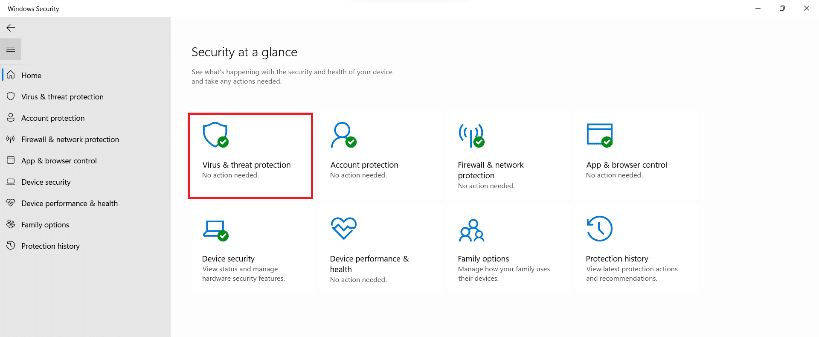
2. Klicka på Virus- och hotskydd.
3. Klicka på Skanningsalternativ.
4. välj fullständig genomsökning och klicka på Skanna nu.
5. Let the scan be completed to get the report. Click on Starta åtgärder, if threats are found.
Method 10: Defragment Storage Drive
When data blocks or fragments that make up a file are spread across the hard disc, is is known as fragmentation. This occurs over time and causes the system to slow down. Defragmentation is the act of bringing these pieces together on the physical space of the hard disc, allowing Windows to access files more quickly. Alternately, to save space you can transfer more data to an external drive and retrieve it when needed. Read our List of Best External Hard Drive for PC Gaming here.
While Windows defragments your hard drive regularly, you can do it manually as well. Furthermore, new SSDs (Solid State Drives) do not require defragmentation, albeit you should do so on HDDs (Hard Disk Drive). Follow the given steps to speed up Windows 11 by defragmenting your drives:
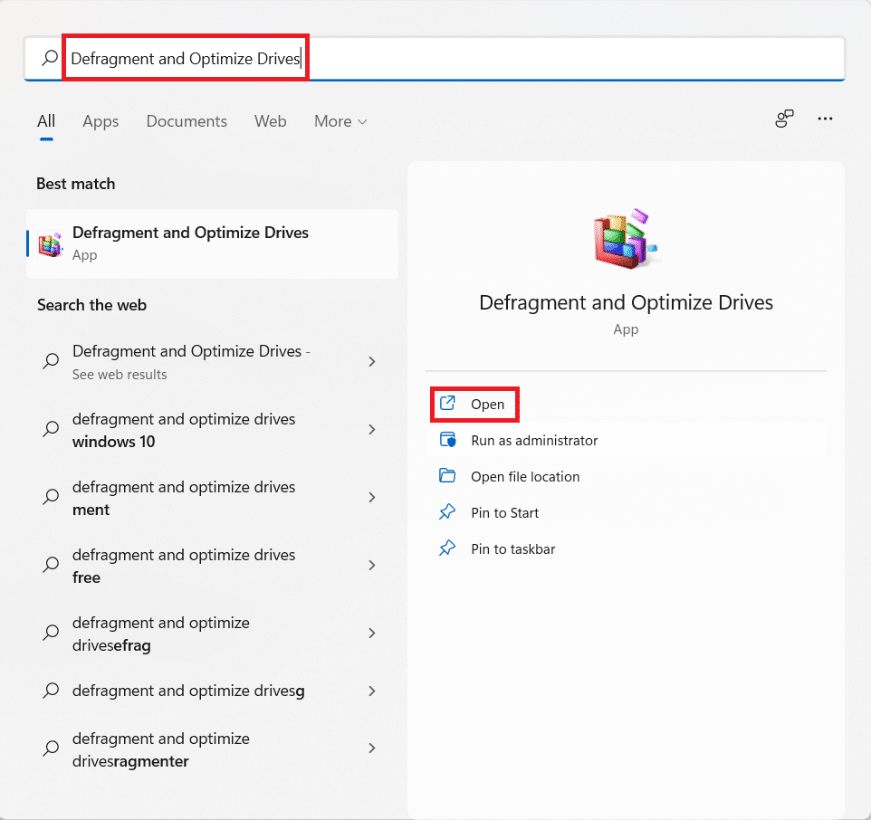
1. Klicka på Sök ikon och typ Defragmentera and Optimize Drives. Klicka sedan på Öppna.
2. Välj driv you want to defragment from the list of drives connected to your computer. e.g. Drive (D:)
3. Klicka sedan på Optimera, som visat.

Läs också: How to Partition Hard Disk Drive in Windows 11
Metod 11: Uppdatera Windows
Windows needs to be regularly updated to work flawlessly. Hence, to speed up Windows 11, update your Windows OS as follows:
1. Lansera Inställningar & Klicka på Windows Update i den vänstra rutan.
2. Klicka sedan på Sök efter uppdateringar.
3. If there is any update available, click on Ladda ner och installera.
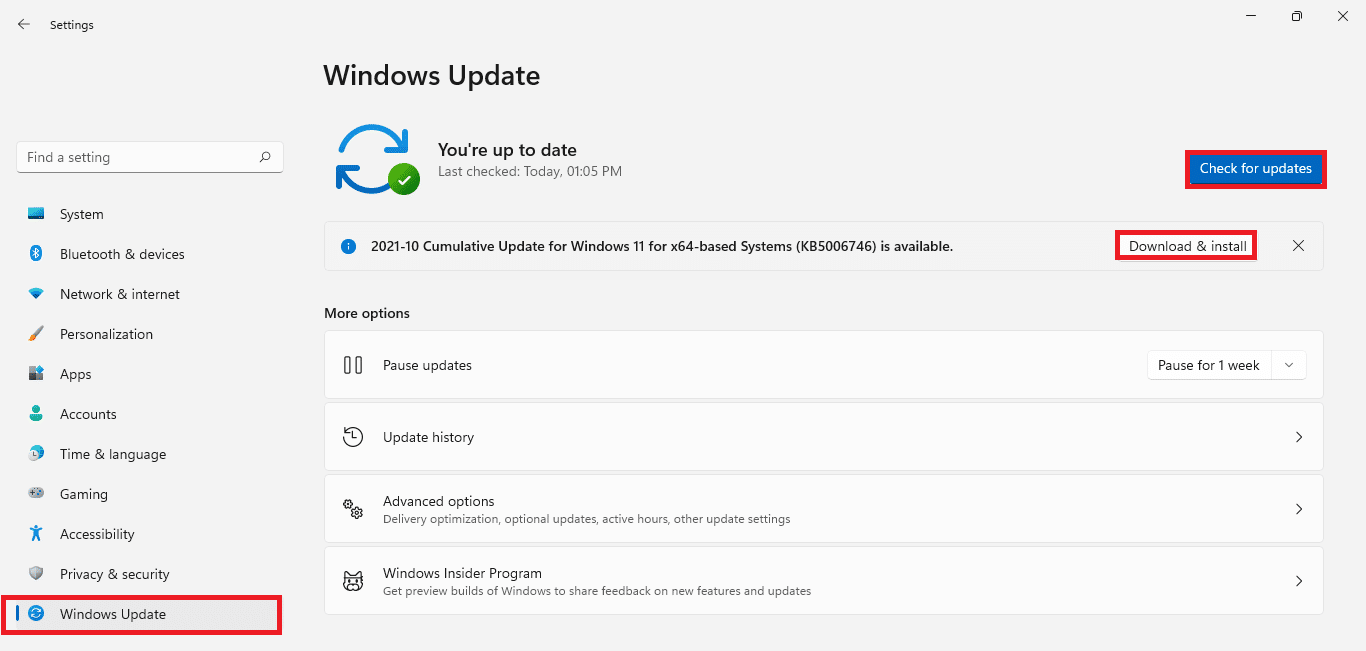
4. Let the install be downloaded and installed. Click on starta nu to implement the update.
Method 12: Update Outdated Drivers
Outdated drivers can also present themselves as obstructions and may slow down your computer. Hence, to speed up Windows 11, update all system drivers by any of the following methods.
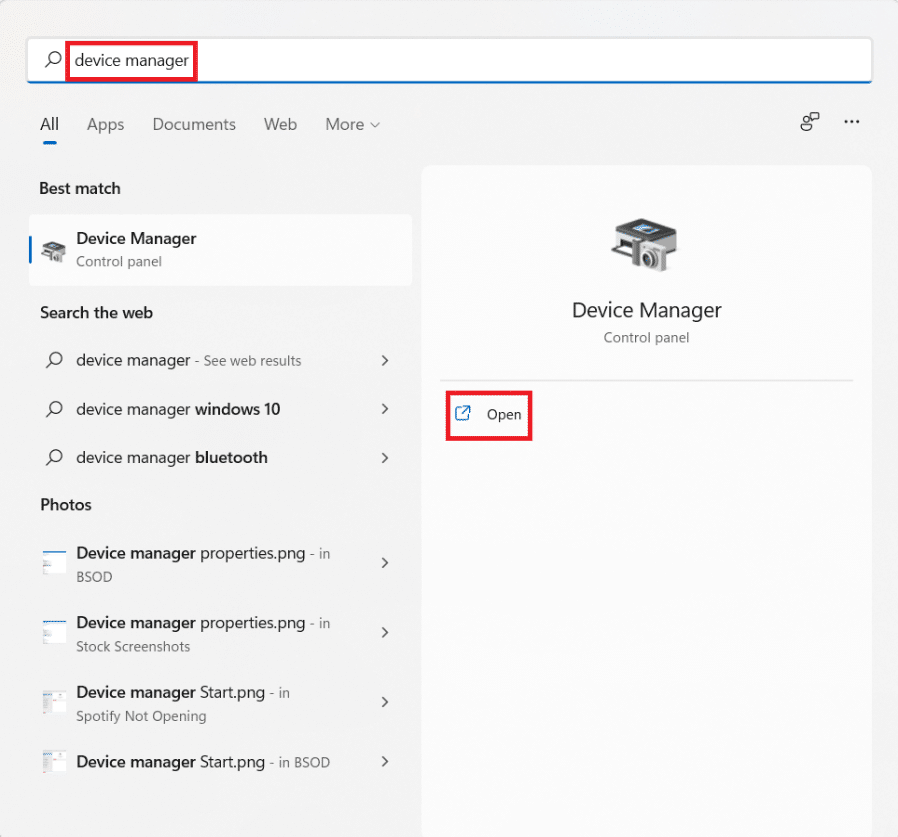
Method 12A: Through Device Manager Window
1. Type, search & launch Enhetshanteraren from search bar, as shown.
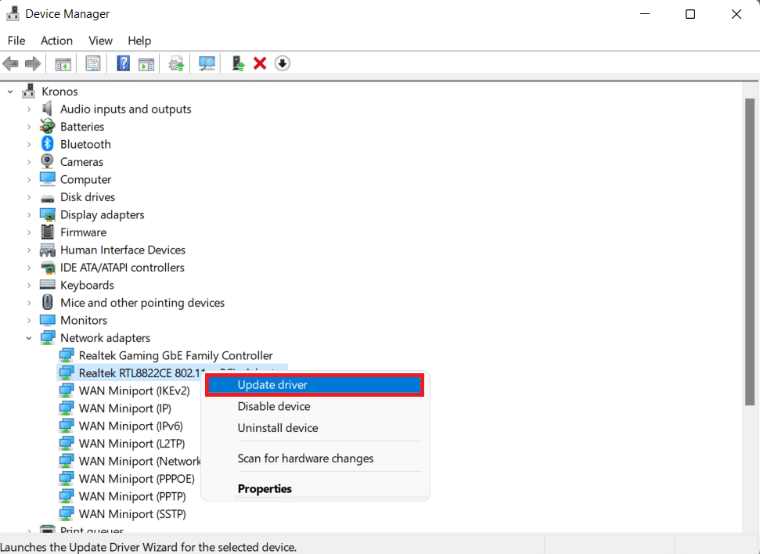
2. Dubbelklicka på chaufförer t.ex nätverkskort that are outdated.
3. Högerklicka på föråldrad drivrutin (t.ex Realtek RTL8822CE 802.11 ac PCIe adapter).
4. Klicka sedan på Uppdatera drivrutinen from the context menu, as shown.
5. Klicka på Sök automatiskt efter drivrutiner.
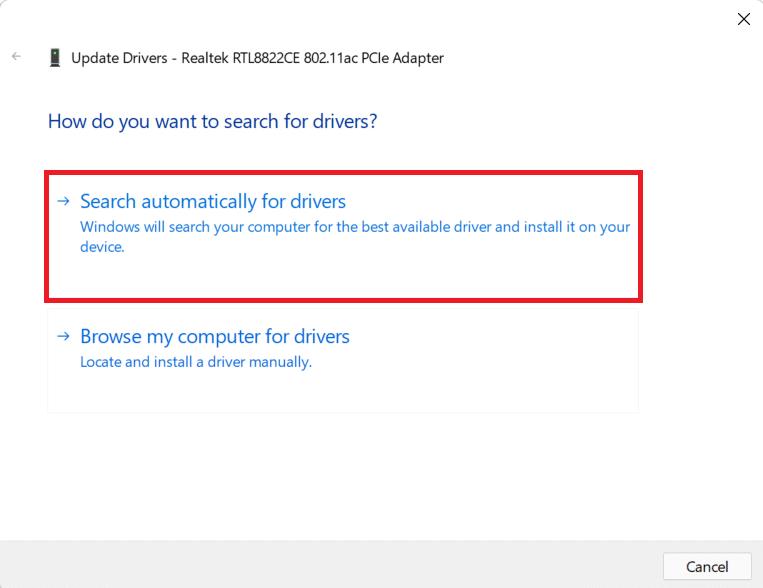
Let the scan run and find the latest driver för din enhet.
6A. If updates are available, the system will install them automatically.
6B. If not, you will be notified about the same via The best drivers for your device are already installed meddelande.
7. After updating, click on Stänga.
8. Repeat the above steps to update all outdated drivers to speed up Windows 11.
Method 12B: Through Windows Update Feature
1. Tryck Windows + I-nycklar samtidigt för att öppna Inställningar app.
2. Klicka på Windows Update i den vänstra rutan.
3. Klicka sedan på Avancerade alternativ, shown highlighted.

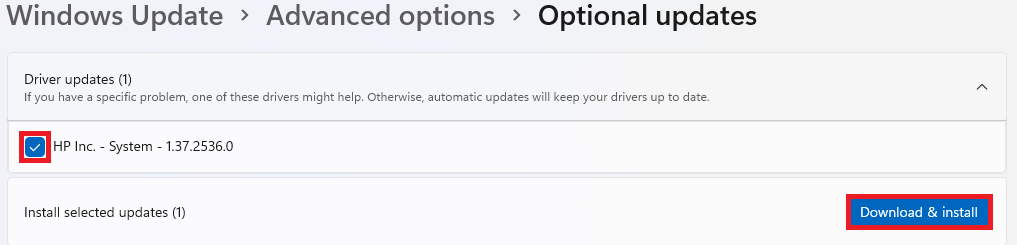
4. Klicka på Valfria uppdateringar under Ytterligare alternativ.
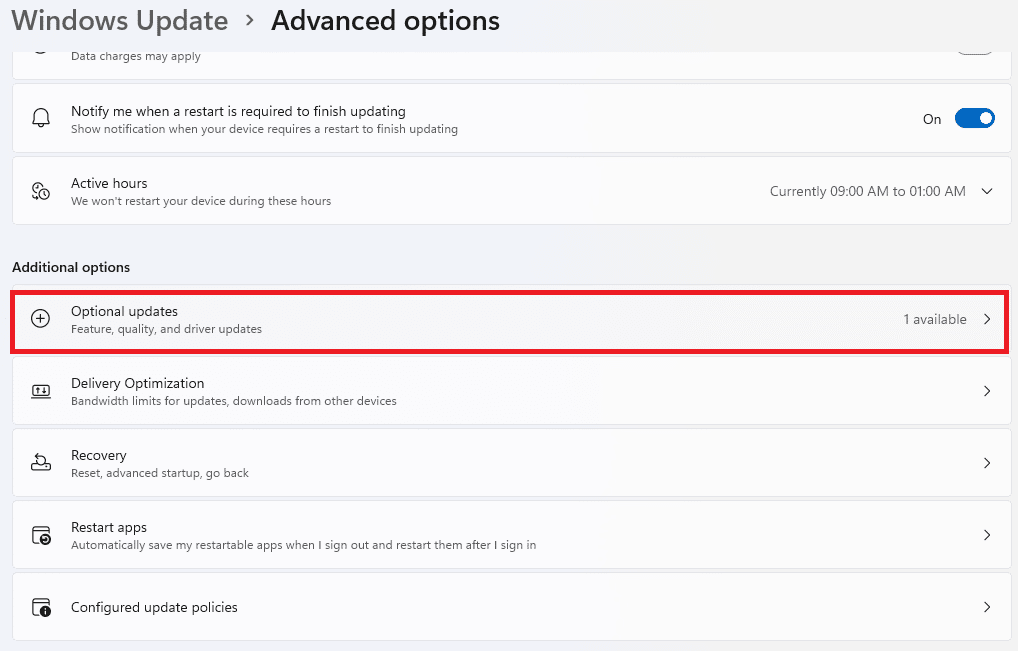
5. Välj Driver uppdateringar alternativ.
6. Check the boxes for available driver updates and click on Ladda ned och installera knapp.
7. Omstart your Windows 11 PC for installation to take place successfully.
Läs också: How to Rollback Driver Updates on Windows 11
Pro Tip: Automate Storage Maintenance using Storage Sense
Automating your storage maintenance will manage your temporary files on your behalf without user intervention. To enable Storage Sense, do as follows:
1. Klicka på Sök ikon och typ Inställningar. Klicka Öppna.
2. I Systemkrav fliken, klicka på lagring.
3. Click on the switch toggle för Lagring Sense att sätta på den.
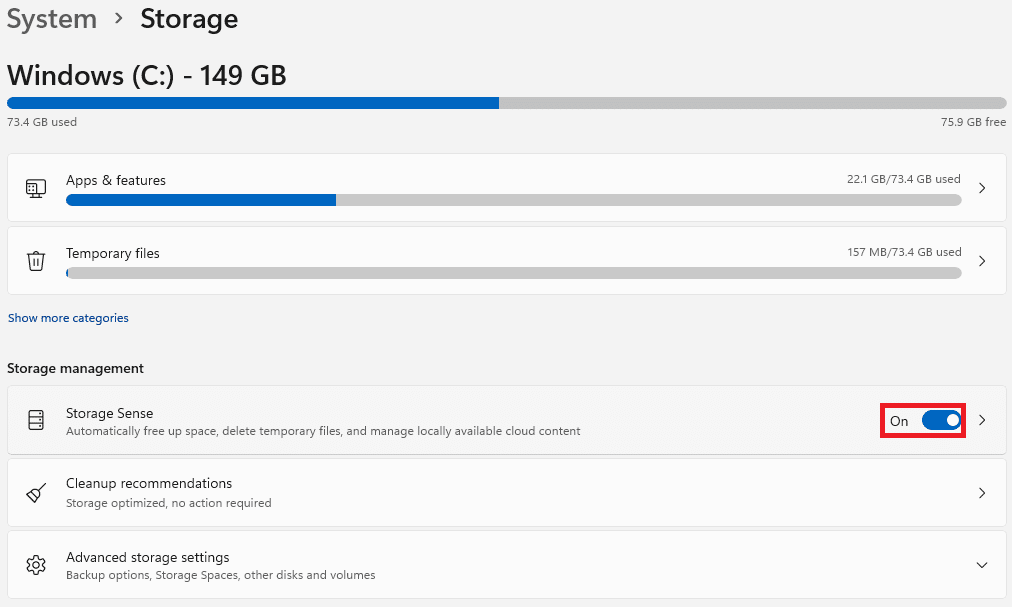
4. Klicka sedan på pilen som pekar åt höger i Lagring Sense bricka.

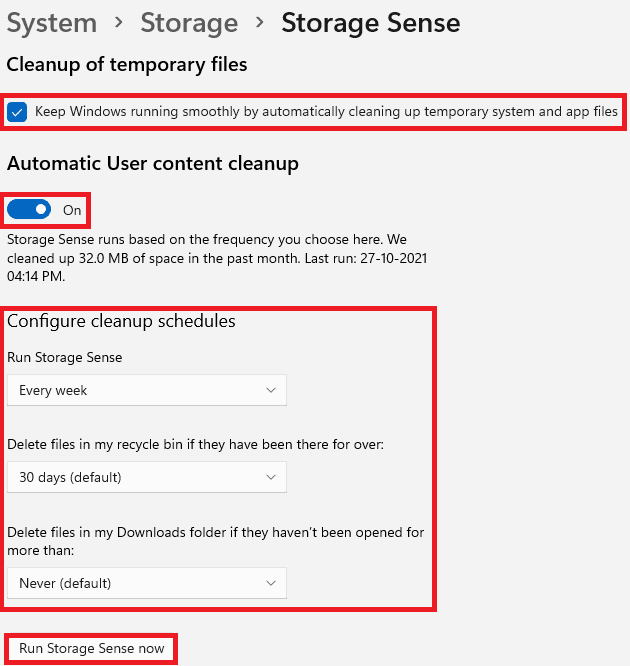
5. Markera här rutan markerad Håll Windows igång smidigt genom att automatiskt rensa upp temporära system- och appfiler.
6. Tun on the toggle under Automatisk rensning av användarinnehåll.
7. Configure settings according to your choice like
- Kör Storage Sense Frekvens
- Delete files in my recycle bin if they have been there for Varaktighet.
- Delete files in my Downloads folders if they haven’t been opened for Varaktighet.
8. Klicka slutligen på Kör Storage Sense nu knappen visas markerad.
Rekommenderas:
We hope you learnt about different ways to speed up Windows 11. You can send your suggestions and queries in the comment section below. We would love to hear from you.

