If you are facing this error, then chances are you may have installed new hardware or software which is causing the issue. Sometimes installing the latest Windows updates seems to cause this issue but you can’t be sure until you troubleshoot the issue. Now as far as software problems are concerned, these might be the possible reasons as to
why you are facing this error:
- Corrupted BCD information
- System File is damaged.
- Loose or faulty SATA/IDE Cable
- Conflicting 3rd party software
- Вирус ё зараровар
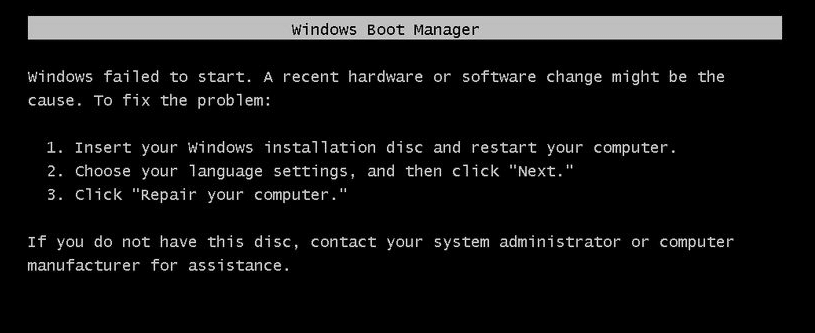
The error which you will get after a reboot will be:
Хатогӣ: Windows failed to start. A recent hardware or software change might have caused the issue after you install Windows Updates
The main problem is that you won’t boot into Windows and you will be stuck at this error message screen. In short, you will be inside a reboot loop as every time you restart your PC you will again face the same error message until you fix the issue. So without wasting any time let’s see how actually to Fix “Windows failed to start. A recent hardware or software change might be the cause” with the below-listed troubleshooting steps.
Fix Windows failed to start. A recent hardware or software change might be the cause.
Method 1: Run Startup/Automatic Repair
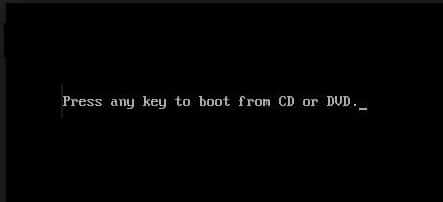
1. Ворид кунед Windows 10 насби пурборшаванда DVD ё Диски барқарорсозӣ ва компютери худро аз нав оғоз кунед.
2. Вақте ки хоҳиш карда мешавад, ки ягон тугмаро пахш кунед, то аз CD ё DVD пурбор кунед, ягон тугмаро пахш кунед идома диҳед.
3. Афзалиятҳои забони худро интихоб кунед ва Next -ро клик кунед. Таъмирро клик кунед компютери шумо дар тарафи чапи поён.

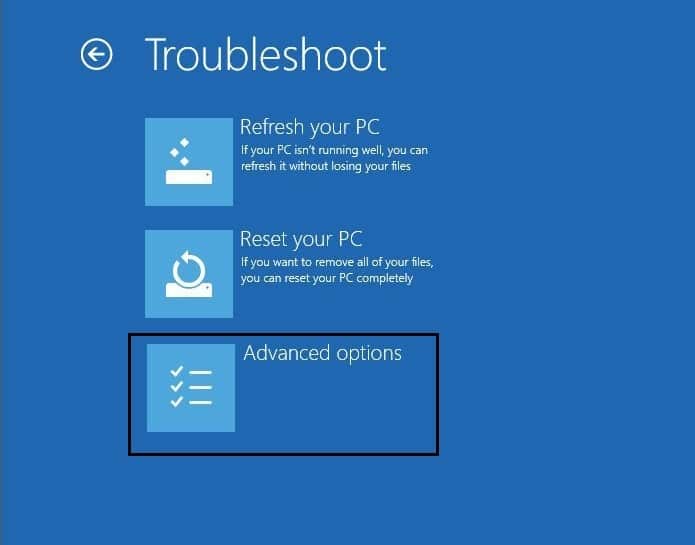
4. Дар экрани интихоб интихоб кунед, клик кунед Муҳофизат кардан.

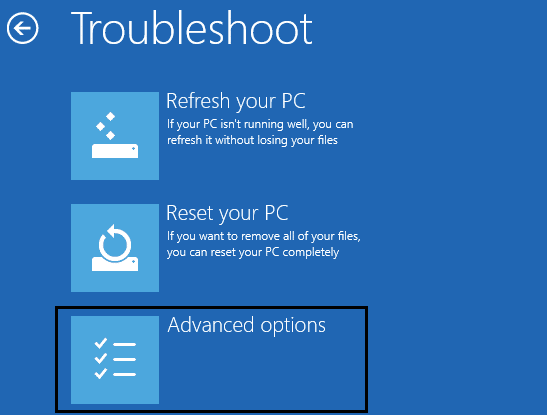
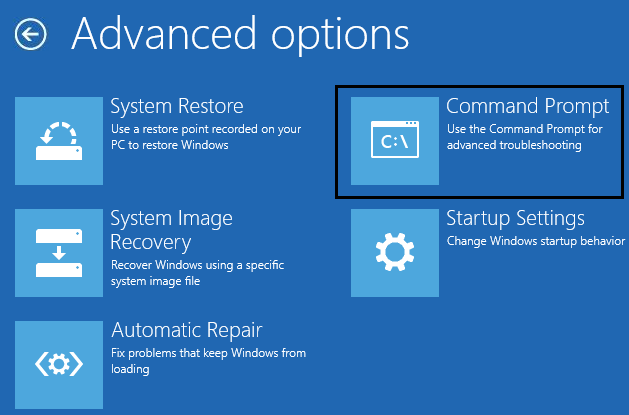
5. Дар экрани ҳалли мушкилот, -ро клик кунед Варианти пешрафта.
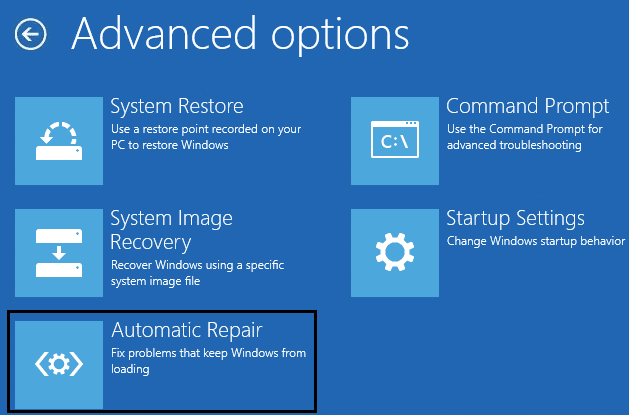
6. Дар экрани имконоти пешрафта, клик кунед Таъмири худкор ё таъмири оғозёбӣ.
7. Wait till the Windows Automatic/Startup Repairs complete.
8. Аз нав оғоз кунед ва шумо бомуваффақият доред Бештар Windows failed to start. A recent hardware or software change might be the cause, агар не, давом диҳед.
Ҳамчунин хонед: Чӣ тавр ислоҳ кардани Таъмири худкор компютери шуморо таъмир карда натавонист.
Method 2: Boot into Last Known Good Configuration
Before going any further let’s discuss how to Enable Legacy Advanced Boot Menu so that you can easily get Boot Options:
1. Restart your Windows 10.
2. As the system restarts enter into BIOS setup and configure your PC to boot from CD/DVD.
3. DVD-и насби пурборшавандаи Windows 10-ро гузоред ва компютери худро бозоғоз намоед.
4. Вақте ки хоҳиш карда мешавад, ки ягон тугмаро пахш кунед то аз CD ё DVD пурбор кунед, барои идома додани ягон тугма пахш кунед.
5. Интихоби худро афзалиятҳои забон, ва Баъдро пахш кунед. Таъмирро клик кунед компютери шумо дар тарафи чапи поён.
6. Дар экрани интихоб интихоб кунед, клик кунед Муҳофизат кардан.
7. Дар экрани ҳалли мушкилот, -ро клик кунед Варианти пешрафта.
8. Дар экрани имконоти пешрафта, клик кунед Фармондеҳ.
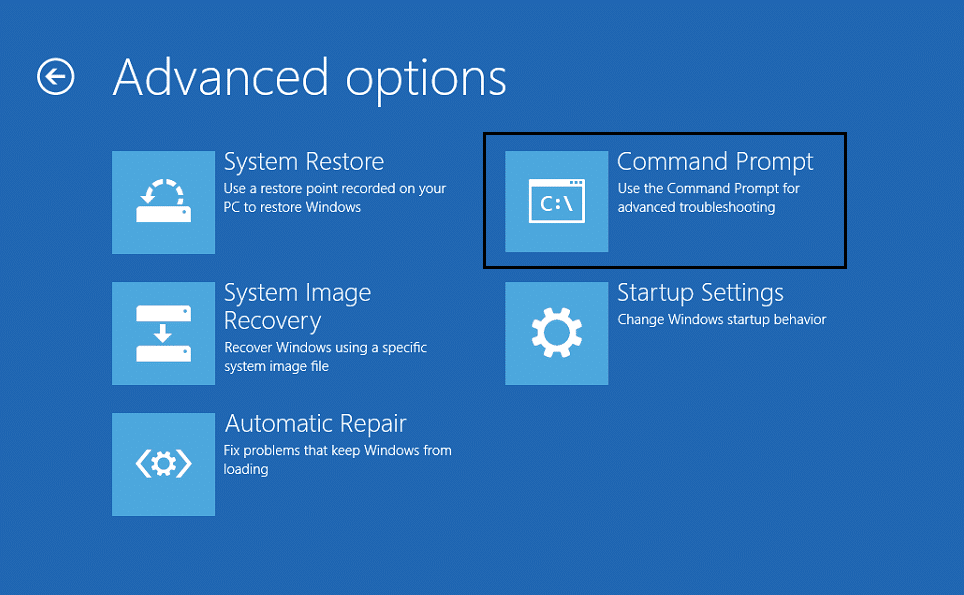
9. When the Command Prompt(CMD) open type C: ва ворид кунед.
10. Акнун фармони зеринро нависед:
BCDEDIT /SET {DEFAULT} МЕРОСИ BOOTMENUPOLICY
11. Ва enter-ро пахш кунед Менюи пешрафтаи боркунӣ Legacy -ро фаъол созед.

12. Close Command Prompt and back on the Choose an option screen, click Continue to restart Windows 10.
13. Finally, don’t forget to eject your Windows 10 installation DVD to get Boot options.
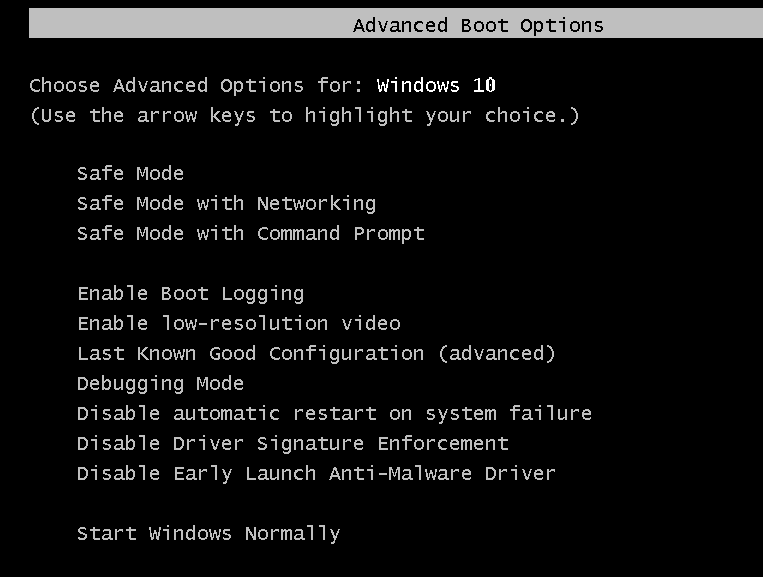
14. On the Boot Options screen, choose “Last Known Good Configuration (Advanced)."
Усули 3: Барқарорсозии системаро иҷро кунед
1. Медиа насби Windows ё Диски барқарорсозӣ/диски таъмири системаро ҷойгир кунед ва l-ро интихоб кунед.афзалиятҳои забон, ва Next -ро пахш кунед
2. ангуштзании таъмир компютери шумо дар поён.
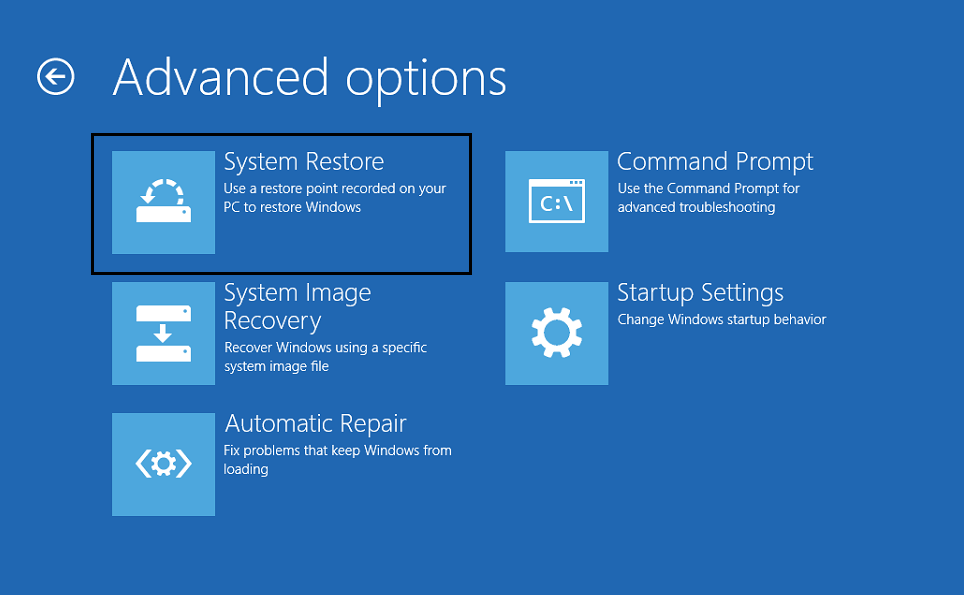
3. Ҳоло, интихоб кунед Муҳофизат кардан ва баъдан Имкониятҳои Advanced.
4. Дар охир, пахш кунед "Барқарорсозии система” ва дастурҳои дар экран бударо иҷро кунед, то барқарорсозӣ анҷом диҳед.
5. Restart your PC to save changes and see if you can fix Windows failed to start. A recent hardware or software change might be the cause error.
Усули 4: SFC ва CHKDSK-ро иҷро кунед
1. Again go to command prompt using the method 1, click on command prompt in the Advanced options screen.
2. Type the following command in cmd and hit enter after each one:
sfc /scannow /offbootdir=c: /offwindir=c:windows
chkdsk C: /f /r /x
Note: Make sure you use the drive letter where Windows is currently installed. Also in the above command C: is the drive on which we want to check disk, /f stands for a flag which chkdsk the permission to fix any errors associated with the drive, /r let chkdsk search for bad sectors and perform recovery and /x instructs the check disk to dismount the drive before beginning the process.

3. Exit the command prompt and restart your PC.
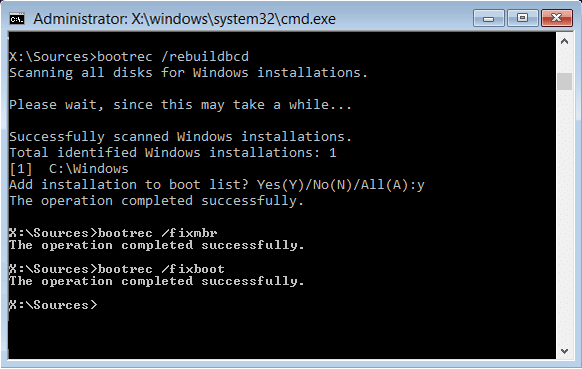
Method 5: Rebuild BCD configuration
1. Using above method open command prompt using Windows installation disk.
2. Now type the following commands one by one and hit enter after each one:
bootrec.exe /FixMbr
bootrec.exe /FixBoot
bootrec.exe /RebuildBcd
3. If the above command fails, then enter the following commands in cmd:
bcdedit /export C:BCD_Backup c: cd boot attrib bcd -s -h -r ren c: bootbcd bcd.old bootrec /RebuildBcd
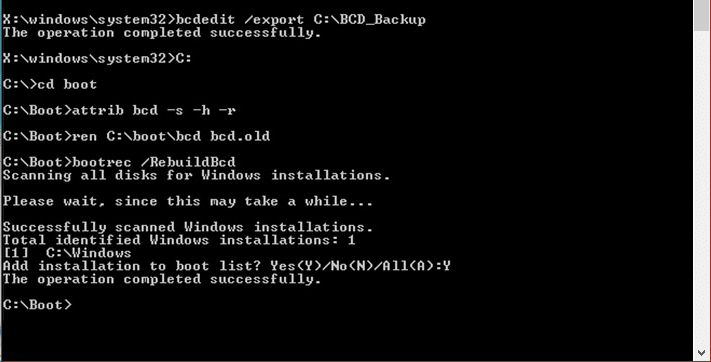
4. Finally, exit the cmd and restart your Windows.
5. This method seems to Fix Windows failed to start. A recent hardware or software change might cause the error, but if it doesn’t work for you, then continue.
Усули 6: Тартиби дурусти боркуниро муқаррар кунед
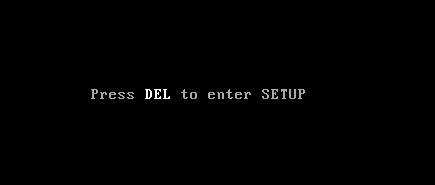
1. When your computer starts (Before the boot screen or the error screen), repeatedly press Delete or F1 or F2 key (Depending upon your computer’s manufacturer) to ба танзимоти BIOS ворид кунед.
2. Once you are in BIOS setup, select the Boot tab from the list of options.
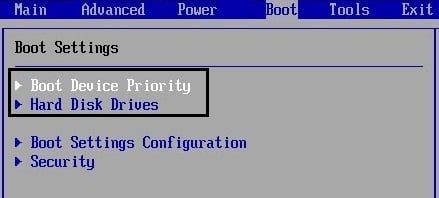
3. Now make sure that the computer Диски сахт ё SSD is set as a top priority in the Boot order. If not, use up or down arrow keys to set hard disk at the top, which means the computer will first boot from it rather than any other source.
4. Finally, press F10 to save this change and exit.
тавсия мешавад:
Ин аст, ки шумо муваффақ ҳастед Fix Windows failed to start. A recent hardware or software change might be the cause, but if you still have any questions regarding this post, please ask them in the comment’s section.

