System Restore creates restore points for your Windows software. If you’ve made changes to your Windows 11 PC that you regret but don’t know how to change, Microsoft’s System Restore feature is your friend.
In this article, we’ll explain how to use the System Restore function on your Windows 11 PC to undo changes or fix software-related issues.
Барқарорсозии система чист?
System Restore is a Microsoft Windows tool that’s designed to back up and restore your PC’s software. System Restore saves the details of your system files and registry as Restore Points so that, when needed, it can help repair Windows 11 and return a system to a working state without you having to reinstall the operating system.
You can use it to restore your system back to its last functional point, uninstall the latest windows update, remove malware, or revert your settings back to before you made unwanted system changes.
All the apps, drivers, and updates installed on the system since the system point was created will be deleted. Fortunately, the System Restore process has no impact on your personal files such as documents or photos.
How to Configure and Enable System Restore In Windows 11
In Windows 10, the System Restore setting is a part of the Advanced System Settings in the Control Panel. Microsoft has made this setting more accessible in Windows 11 by integrating it within the Settings app.
The System Restore feature is not enabled by default so you’ll need to turn it on to start creating restore points. The process is relatively simple.
- In the Windows 11 taskbar, select the search bar and type эҷод a нуқтаи барқароркунӣ then select the top option.

- Select which system drive of your Hard Drive you want to create a System Restore Point for and press the Танзимоти тугмача.
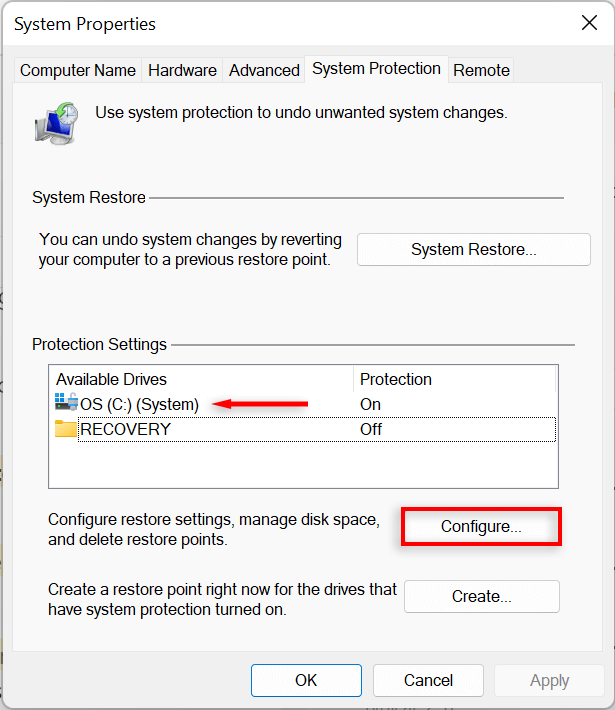
- интихоб Даргирондан system protection option to enable System Restore. Use the Слайдери ҳадди аксар истифода to allocate the maximum disk space you want to use for storing the System Restore Points.
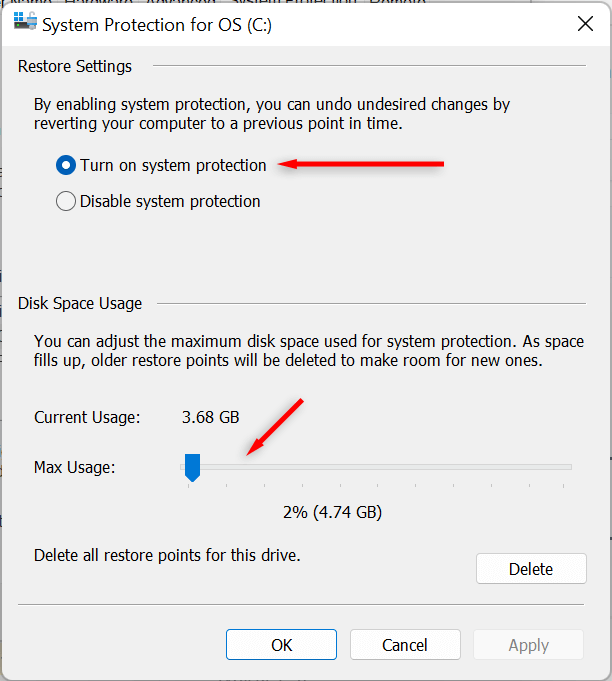
- -ро интихоб кунед Apply. Your system will now start making System Restore Points.
How to Create a System Restore Point for Your Windows 11 System
After enabling System Restore, a new restore point will automatically be created every week or whenever you install a system update or application. It’s also a good idea to manually create System Restore points before making any changes to your system preferences or registry.
Here’s how to create a System Restore Point manually in Windows 11:
- In the Windows 11 taskbar, select the search bar and type эҷод a нуқтаи барқароркунӣ. Пахш кунед кушодан to open the System Properties window.

- Интихоб кунед сохтан тугмача.
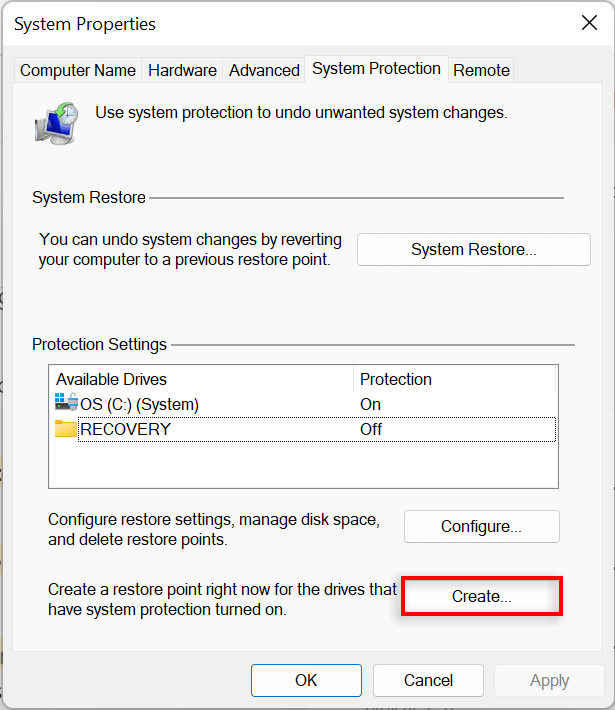
- Name the restore point, and choose сохтан.
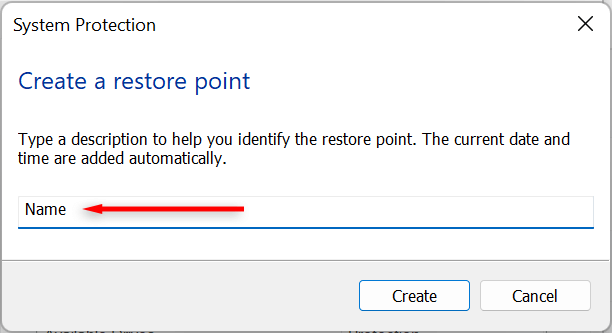
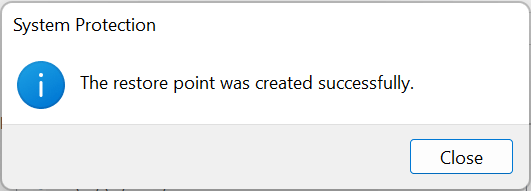
- Wait for the system to finish the process, then select наздик in the dialog box. A new system restore point has now been created.
How to Use System Restore
You can use restore points to revert your Windows PC to an earlier stage and fix any bugs you may be experiencing.
Барои ин:
- In the Windows 11 start menu, select the search bar and type эҷод a нуқтаи барқароркунӣ. Пахш кунед кушодан.
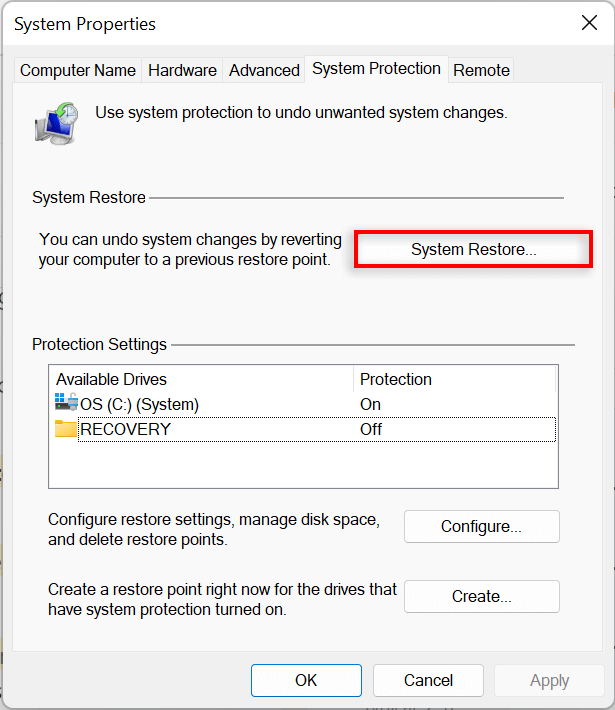
- Интихоб кунед Барқарорсозии система тугмача.
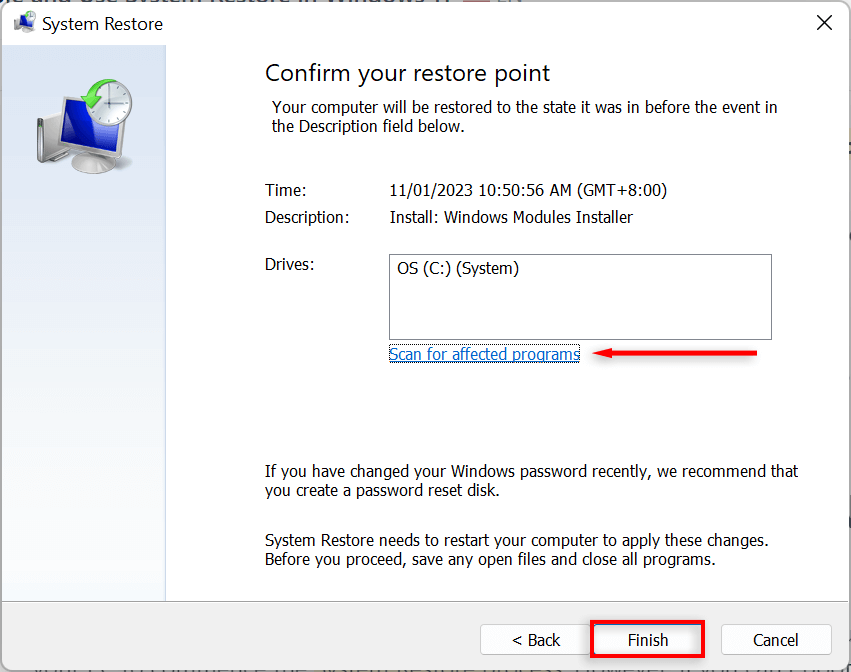
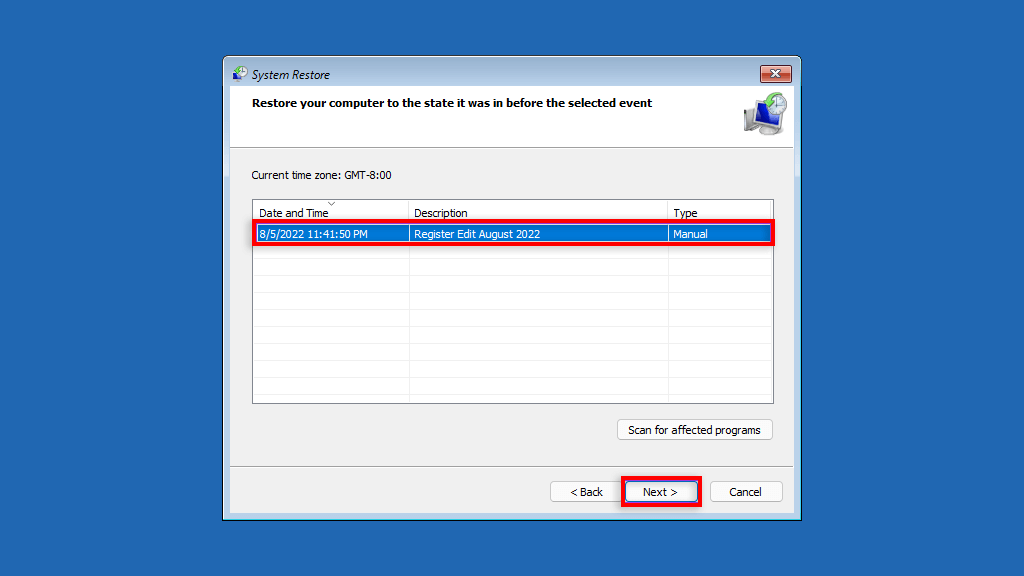
- If you are happy with the recommended restore point, select Recommended restore, дар акси ҳол интихоб кунед Choose a Different Пойнтро барқарор кунед. Интихоб кунед Баъдӣ.
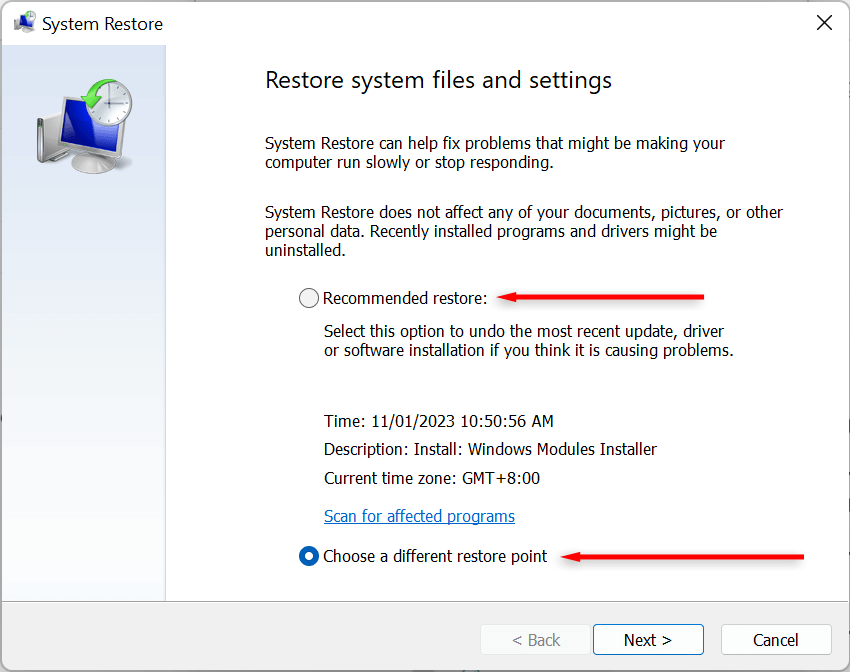
- If you chose to pick another restore point, select the нуқтаи барқароркунӣ you want to use. In the System Restore window, you can now select Барномаҳои зарардидаро скан кунед to see the changes made to the system before the restore point was created.
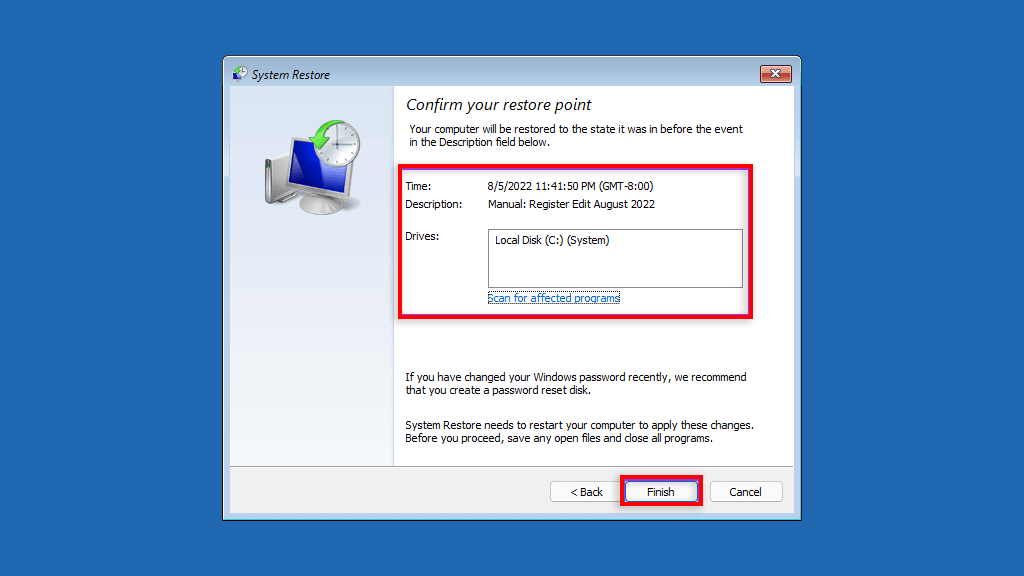
- Confirm the restore point you want to revert your system to. Select тамом кардан барои оғози раванди барқарорсозӣ.
Your PC will now start to apply changes and will restart at least once. This may take a while depending on various factors including the size of the restore point and the age of the PC’s hardware. Do not turn off your computer or use it while the restoration is in progress — just sit back and let it do its thing.
After the restoration process is complete, a window will appear to let you know that you have successfully restored your PC.
Keep in mind that your settings may be different depending on what changes were made since the restore point. Your important and personal files should remain untouched.
If the issues you were experiencing are still present after the restore you may need to restore to an older system restore point or аз нав танзимкунии Windows.
Шарҳ: Шумо низ метавонед create a Windows 11 recovery USB drive in advance to repair your PC in the case that it won’t turn on.
How to Use System Restore When Your Computer Won’t Boot
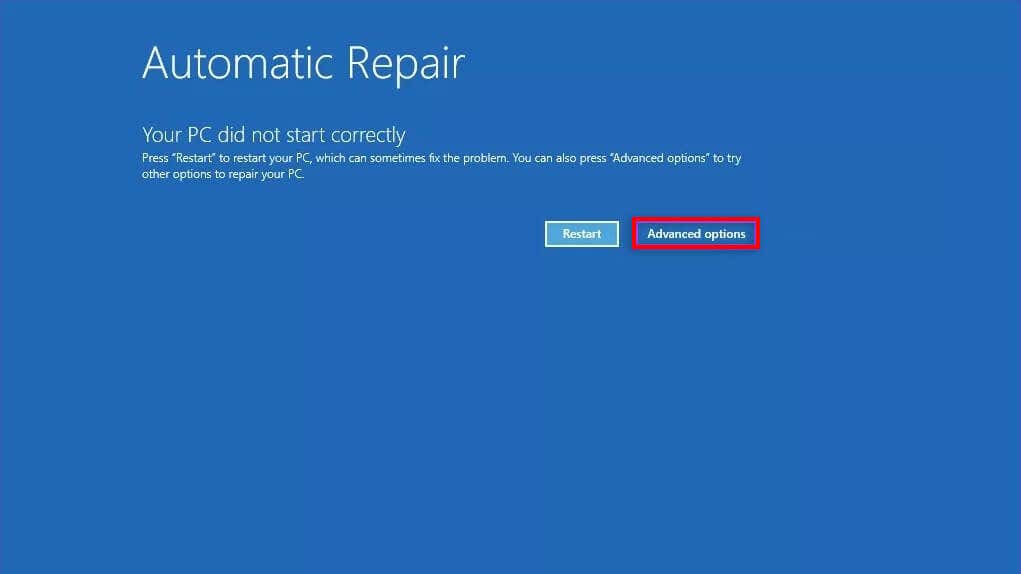
If the bugs you are trying to resolve are preventing you from logging into your PC, there are still ways to commence the System Restore process in the Advanced startup options.
- Start your computer. When you see the Windows logo hold down the тугмаи қувваи барқ until it reboots.
- Continue to force reboot your PC until the Automatic Repair screen appears.
- -ро интихоб кунед Вариантҳои Advanced.
- -ро интихоб кунед Муҳофизат кардан.
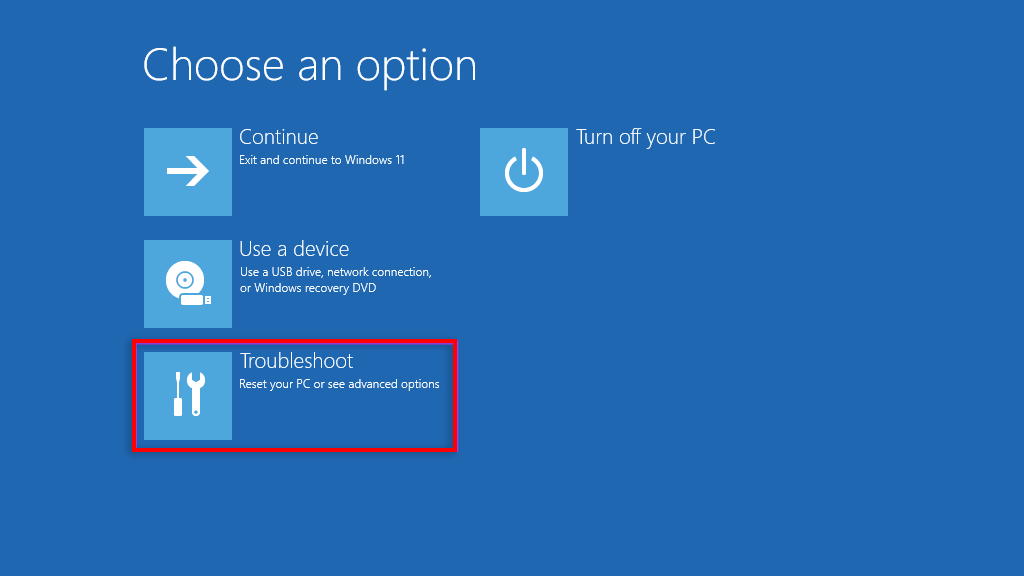
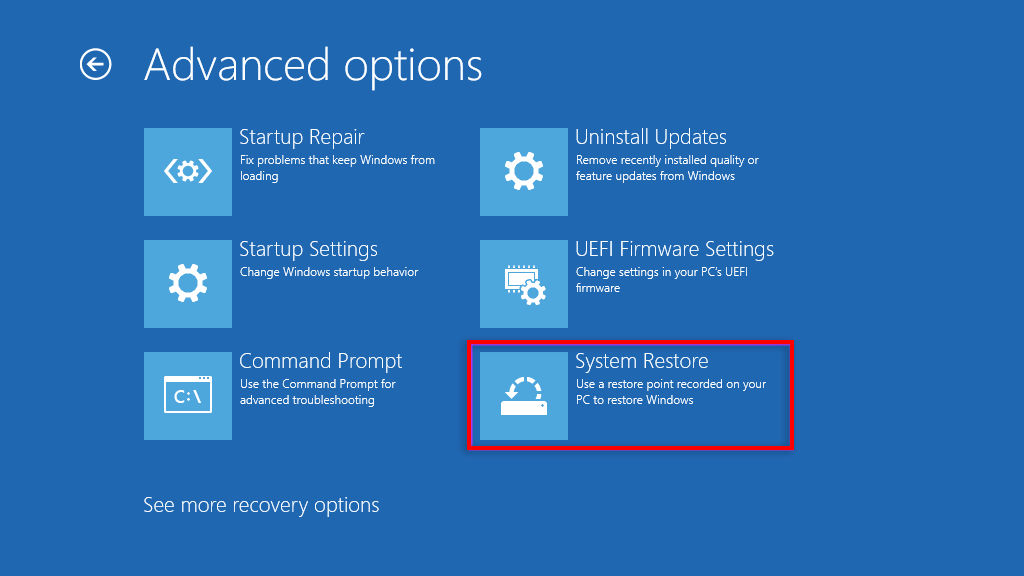
- интихоб кардан Вариантҳои Advanced.

- -ро интихоб кунед Барқарорсозии система.
- Агар дархост карда бошед, дохил кунед Гузарвожаи маъмур пас интихоб кунед давом додан.
- -ро интихоб кунед Баъдӣ if you are happy with the recommended restore point or select Choose a Different Пойнтро барқарор кунед if you would like to choose a different one.
- матбуот Баъдӣ. If you chose to pick another restore point, select the нуқтаи барқароркунӣ you want to use then select Баъдӣ.
- Confirm the restore point you want to revert your system to. Choose тамом кардан to start the system restoration process.
Do not turn your PC off or try to use it while the restoration process takes place. This may take a few hours.
Нусха, нусхабардорӣ, нусхабардорӣ
The System Restore Function is a fantastic recovery tool that allows users to revert their buggy computers to a functional system state. After reading this article, hopefully, you can use your system restore points to avoid bugs and keep your Windows PC running smoothly.

