Logitech is one of the cheap and best platforms where you can get high-quality computing accessories. Few notable products of Logitech include headphones and headsets. If you are a pro player in your games, you would definitely know about Logitech G533. The Logitech G533 microphone provides a high-quality audio effect with more than 15 hours of battery life. One of the most lovable features of this Logitech G533 headphone includes a lightweight design and incredible noise cancellation technology. Amidst all these advantages, few Windows users have complained about Logitech G533 Mic not working issue on Windows 10 PC. If you are also facing the same problem, you are at the right place! This guide will help you fix Logitech G533 microphone not working issue with effective troubleshooting hacks. So, continue reading!
How to Fix Logitech G533 Mic Not Working in Windows 10
If you are facing Logitech G533 microphone not working while enjoying your audio contents, the most probable reason would be due to improper configurations of sound settings. Although this problem affects many versions of Windows, many users are struggling with this issue in หน้าต่าง 10. Here are some common reasons that contribute to the discussed issue on your computer.
- The volume may be muted or very low.
- คุณสมบัติการปรับปรุงเสียงเปิดใช้งานบนพีซี
- แอปพลิเคชันอื่นๆ บนพีซีของคุณกำลังใช้เสียง
- ไดรเวอร์เสียงที่ล้าสมัยในคอมพิวเตอร์
- Damaged cables, plugs, and ports.
- ไม่อนุญาตให้ใช้ไมโครโฟนเข้าถึง
- ระบบปฏิบัติการ Windows ที่ล้าสมัย
- ไดรเวอร์เสียงที่ล้าสมัย/เข้ากันไม่ได้
- การแสดงตนของไฟล์ที่เสียหายบนพีซี
- ไม่ได้เปิดใช้งานบริการ Windows Audio ที่จำเป็นบางอย่าง
Now, move ahead to the next section to fix Logitech G533 microphone issue.
In this section, you will come to know about the troubleshooting methods that will help you fix Windows 10 Logitech G533 microphone audio issues. Implement the methods as instructed in the same order to get perfect results.
การตรวจสอบเบื้องต้น
Before you head towards the advanced troubleshooting methods, a few simple hacks will help you fix Logitech G533 microphone sound not working issue within clicks. Make sure your PC meets all of these preliminary checks and still if you did not attain any fix, move to the next section.
1. เริ่มต้นใหม่ พีซีของคุณ and any temporary glitches associated with the computer will be resolved.
2. Ensure you use a high-quality Logitech G533 microphone and it is set firmly with your PC.
3. Last but not least, ensure that you are not in a noisy environment โดยมีเสียงการจราจรหรือเสียงฝูงชนอยู่เบื้องหลัง
Method 1: Basic Troubeshooting Methods
1A. Check Hardware Damage
If you have not attained any fix from the above preliminary checks, then it’s time to check if there is any external damage to the external speakers, microphone, and other audio devices contributing to the problem.
1. Check your Logitech G533 microphone for any damage or broken stage.
2. Disconnect your device from your computer and unplug all the external devices connected to it.
3. Wait for a while and รีบูตเครื่องพีซีของคุณ.
4. จากนั้น connect your Logitech G533 microphone to your Windows 10 PC and check if this works. If not, move to the next troubleshooting method.
1B. Check Audio Output
เมื่อคุณใช้อุปกรณ์เอาท์พุตเสียงมากกว่าหนึ่งเครื่อง คุณต้องยืนยันเมื่ออุปกรณ์นั้นถูกใช้จนหมดเป็นอุปกรณ์เอาท์พุต หากต้องการตรวจสอบเอาต์พุตเสียงในพีซี Windows 10 ของคุณ ให้ทำตามขั้นตอนที่กล่าวถึงด้านล่าง
1 คลิกที่ ลำโพง ไอคอนที่มุมขวาล่างของหน้าจอ
![]()
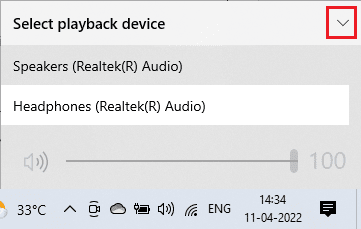
2 ตอนนี้ให้คลิกที่ ไอคอนลูกศร เพื่อขยายรายการอุปกรณ์เสียงที่เชื่อมต่อกับคอมพิวเตอร์
![]()
3. Then, Select playback device (you prefer) and make sure the audio is playing through the selected device.
If this method doesn’t help you to fix Logitech G533 Mic not working issue, move ahead to the next one.
1C. Check Sound Settings
In this method, you have to check if the sound settings are correct and compatible with the audio device you are using. This helps you to fix Logitech headset mic not working issue as you follow the steps instructed below.
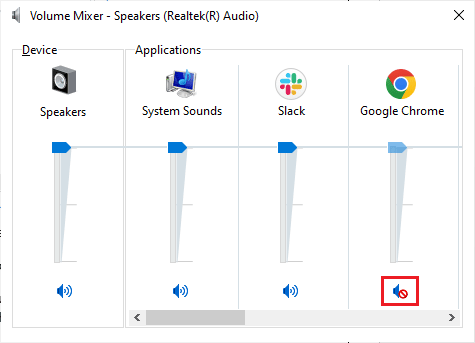
1 คลิกขวาที่ ลำโพง icon at the bottom right corner of the screen and click on เปิดตัวปรับระดับเสียง.
![]()
2. ทีนี้ ชุดของ การควบคุมระดับเสียง จะถูกเปิดขึ้น ตรวจสอบให้แน่ใจว่าระดับเสียงทั้งหมดอยู่ ไม่ได้ปิดเสียง- หากท่านใดพบเห็น วงกลมสีแดงมีเส้น, เปิดเสียงระดับเสียง
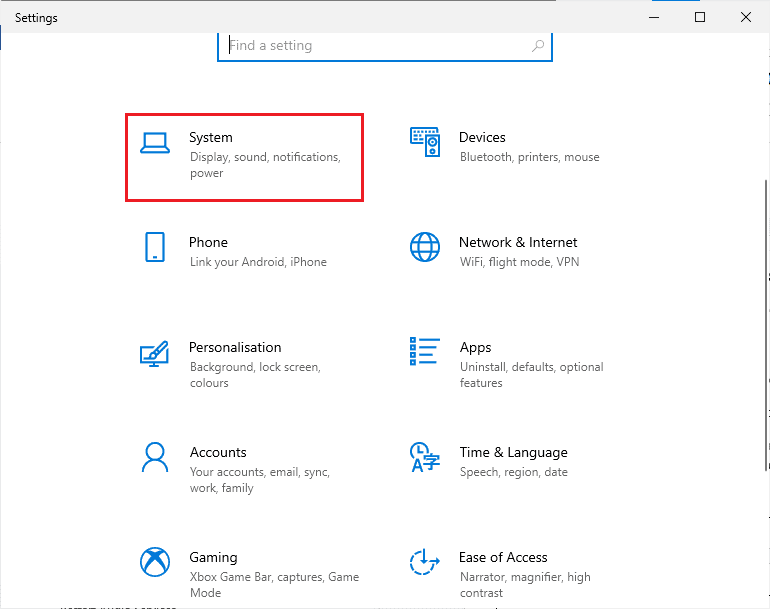
3. ตอนนี้ให้กดปุ่ม ปุ่ม Windows + I ร่วมกันเปิด หน้าต่างการตั้งค่า.
4 ตอนนี้ให้คลิกที่ System การตั้งค่า
5. จากนั้นคลิกที่ เสียง จากบานหน้าต่างด้านซ้ายและคลิกที่ คุณสมบัติอุปกรณ์ ภายใต้ เอาท์พุต เมนูตามที่แสดง
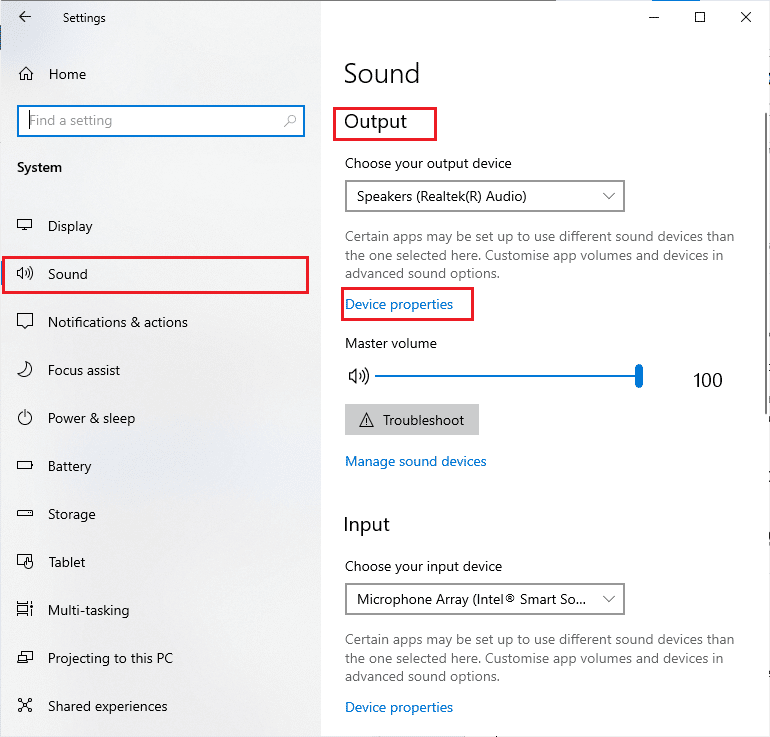
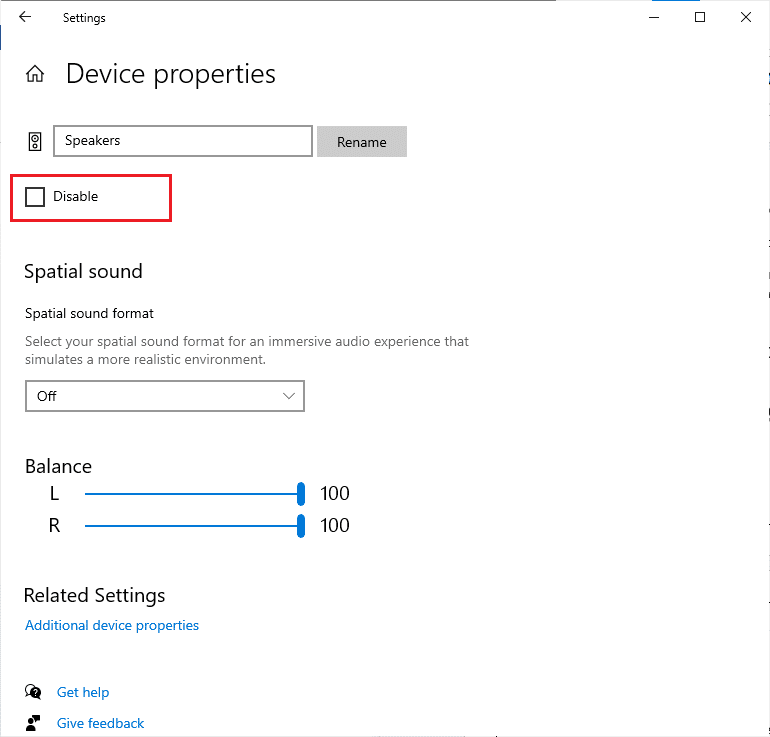
6 ตรวจสอบให้แน่ใจ ปิดการใช้งาน ไม่ได้ทำเครื่องหมายที่ช่อง
7. Repeat Steps 5-6 for input devices as depicted.
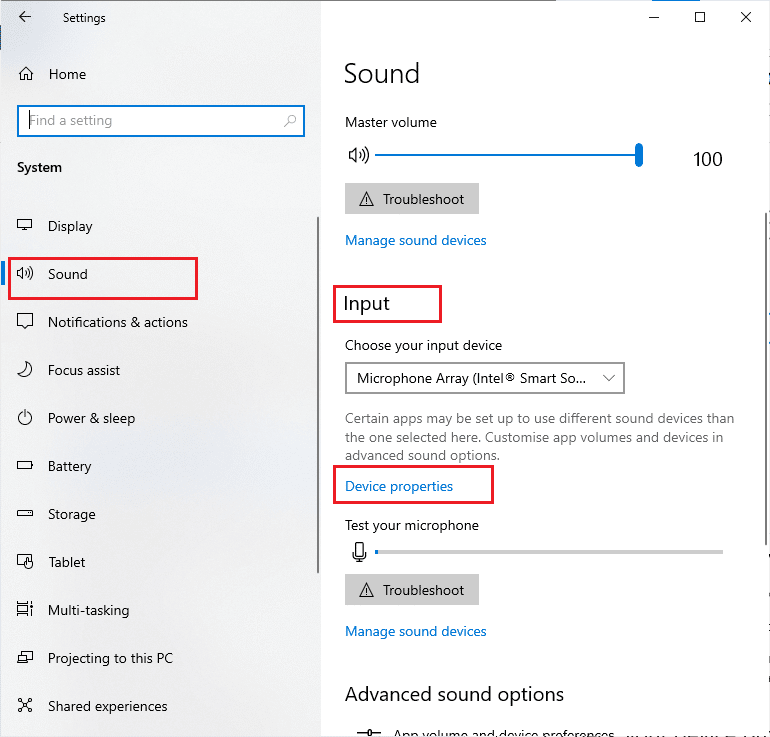
Now, check if you have fixed Windows 10 Logitech G533 microphone audio issues.
ยังอ่าน: แก้ไขไม่มีเสียงใน Firefox บน Windows 10
1D. Repair System Files
For perfect audio quality services, a few essential files and programs must be functioning on your PC. But, if they are corrupt or misconfigured, you will face Logitech headset mic not working issue. Fortunately, all these corrupt misconfigured files can be repaired by using the inbuilt utilities of your Windows 10 PC namely, ตรวจสอบระบบไฟล์ และ การจัดการและให้บริการ Deployment Image- อ่านคำแนะนำของเราเกี่ยวกับวิธีการซ่อมแซมไฟล์ระบบใน Windows 10 และทำตามขั้นตอนตามคำแนะนำเพื่อซ่อมแซมไฟล์ที่เสียหายทั้งหมดของคุณ
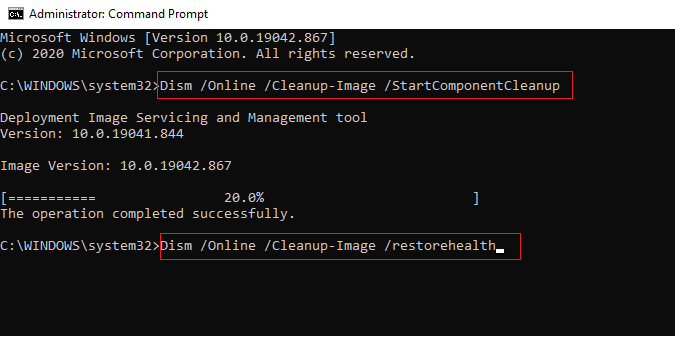
Wait for the commands to be executed and check if you have fixed Logitech G533 microphone sound not working issue.
1จ. อัพเดตวินโดวส์
If there are any new Microsoft updates pending to be installed on your PC, a few bugs and problems cannot be resolved on your computer. As suggested by many users, updating Windows 10 computers will help you resolve Windows 10 audio error Logitech G533 microphone not working issue. Follow our guide How to Download and Install Windows 10 Latest Update to update your Windows 10 computer.
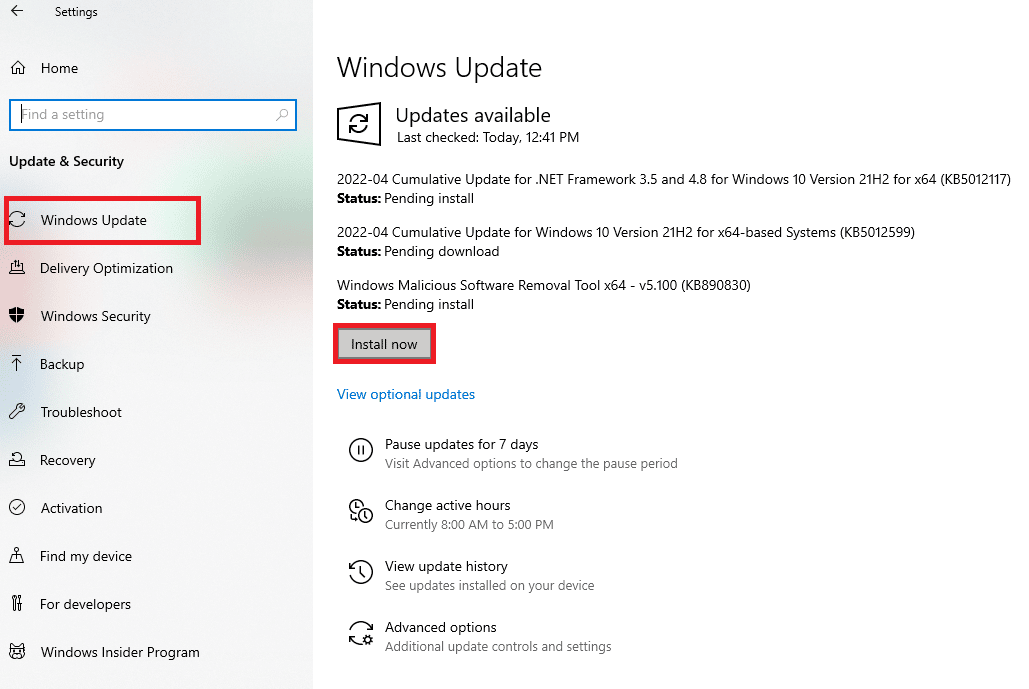
After updating your Windows Operating System, check whether you can access audio in your Windows 10 PC.
วิธีที่ 2: เรียกใช้ตัวแก้ไขปัญหาเสียง
คุณต้องตระหนักถึงความจริงที่ว่าพีซีของคุณมีเครื่องมือแก้ไขปัญหาในตัวเพื่อแก้ไขปัญหาและข้อผิดพลาดที่เกิดขึ้นโดยอัตโนมัติ อุปกรณ์เสียงที่เสียบเข้ากับคอมพิวเตอร์ของคุณและอุปกรณ์เสียงในตัวจะถูกสแกนและปัญหาที่เกี่ยวข้องกับกระบวนการทั้งหมดจะถูกจัดเรียงออก
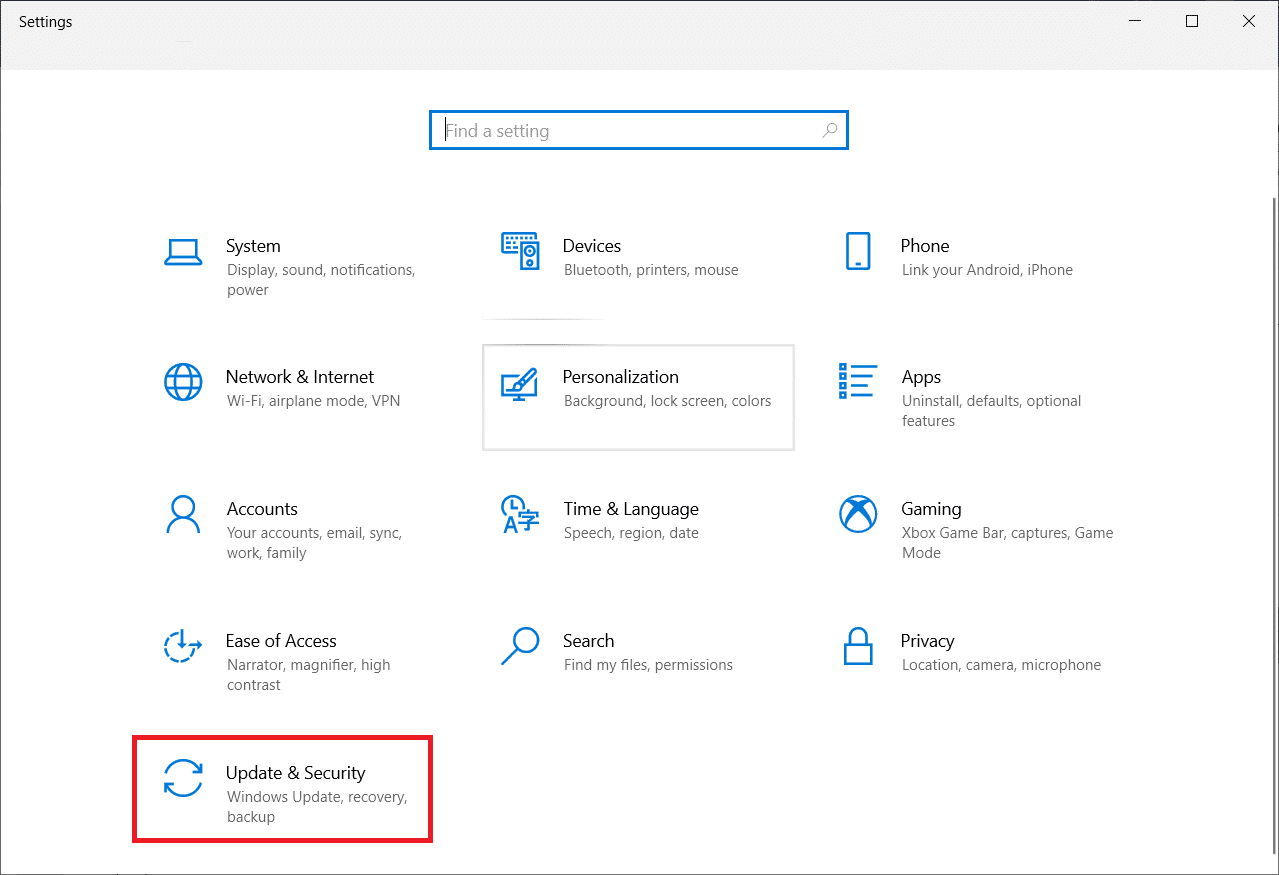
1 เปิดตัว หน้าต่างการตั้งค่า.
ฮิต คลิกที่ อัปเดตและความปลอดภัย การตั้งค่า
3 เลือก การแก้ไขปัญหาการ เมนูจากบานหน้าต่างด้านซ้าย
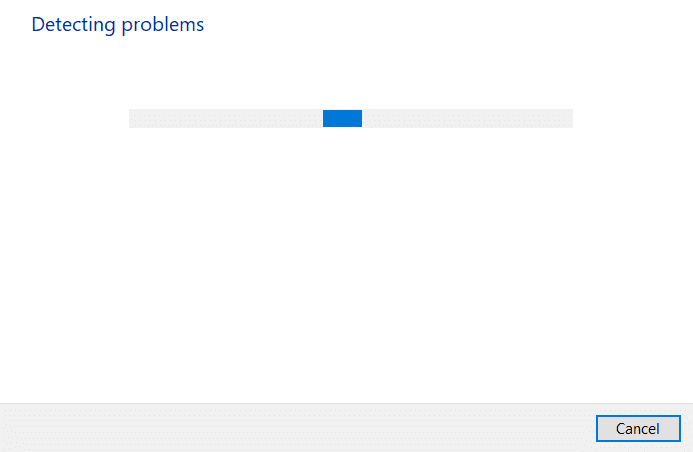
4 จากนั้นเลือก กำลังเล่นเสียง และคลิกที่ เรียกใช้เครื่องมือแก้ปัญหา ตัวเลือก
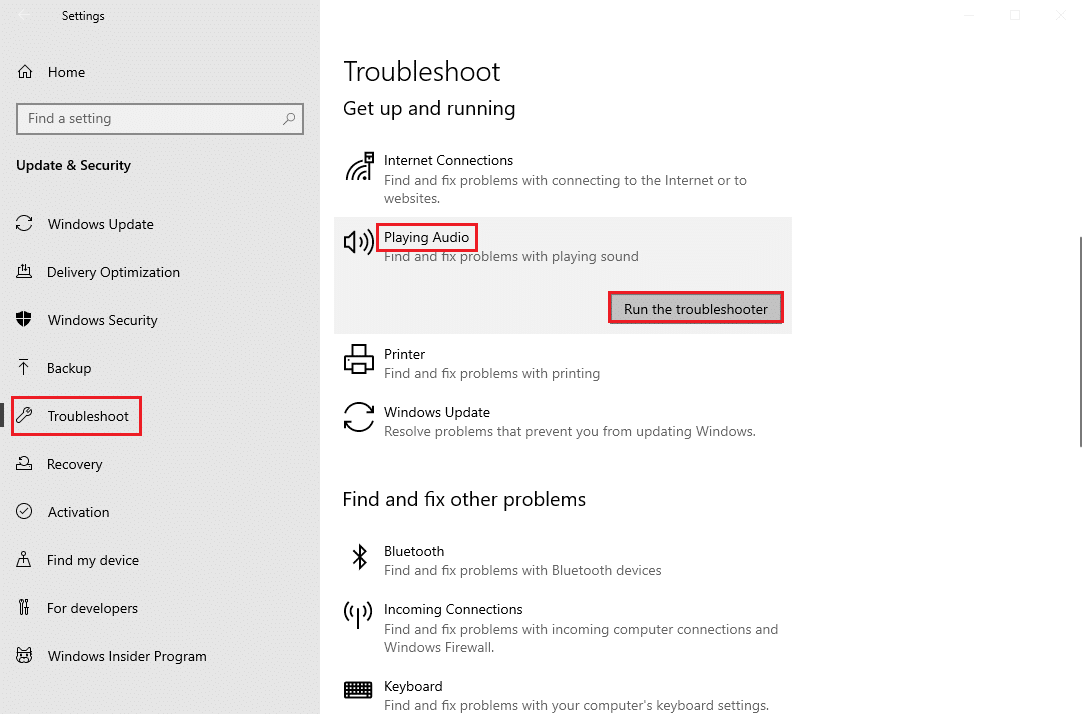
5. Wait for the troubleshooter to detect problems and follow the คำแนะนำบนหน้าจอ to apply the fix.
ยังอ่าน: แก้ไขข้อผิดพลาดไม่มีการติดตั้งอุปกรณ์เอาท์พุตเสียง
Method 3: Close Other Programs using Audio
When the audio utility is used by other programs on your Windows 10 PC, then you may face Logitech G533 microphone audio issues. To resolve the problem, you are advised to close all other programs or applications running in the background one by one or force them to shut down by using Task Manager. To do so, follow our guide on How to End Task in Windows 10.

วิธีที่ 4: รีสตาร์ทกระบวนการ Windows Explorer
Some users have reported that restarting Windows Explorer processes will help to resolve the Logitech G533 Mic not working issue. Follow the below-listed instructions to do the same.
1. กดปุ่ม Ctrl + Shift + Esc คีย์ ร่วมกันเพื่อเปิด ที่ Task Manager.
2 ใน กระบวนการ คลิกที่ windows Explorer และเลือก เริ่มต้นใหม่ ปุ่ม
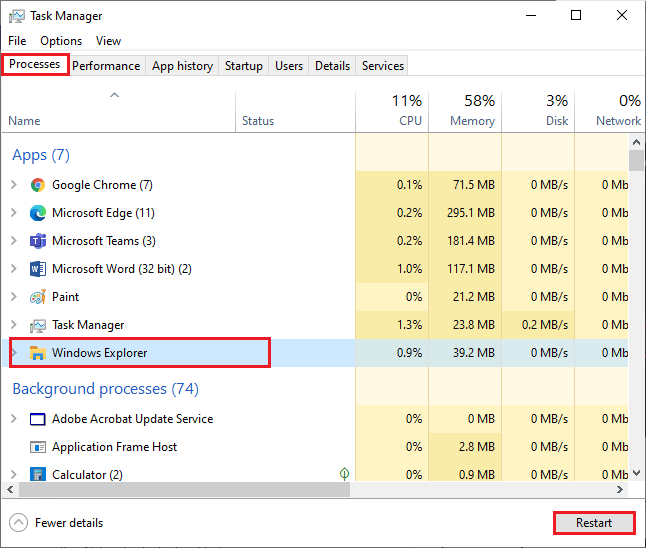
3. Now, Windows Explorer restarts and Windows 10 Logitech G533 microphone issue will be fixed now.
Method 5: Allow Audio Access for Audio Apps
There is a list of applications and programs on your computer that will have access for using audio devices. If your Logitech G533 microphone application is not on the list, you cannot hear any audio content contributing to the discussed error. Therefore, ensure the audio settings are enabled for your game on your PC by following the below-mentioned steps.
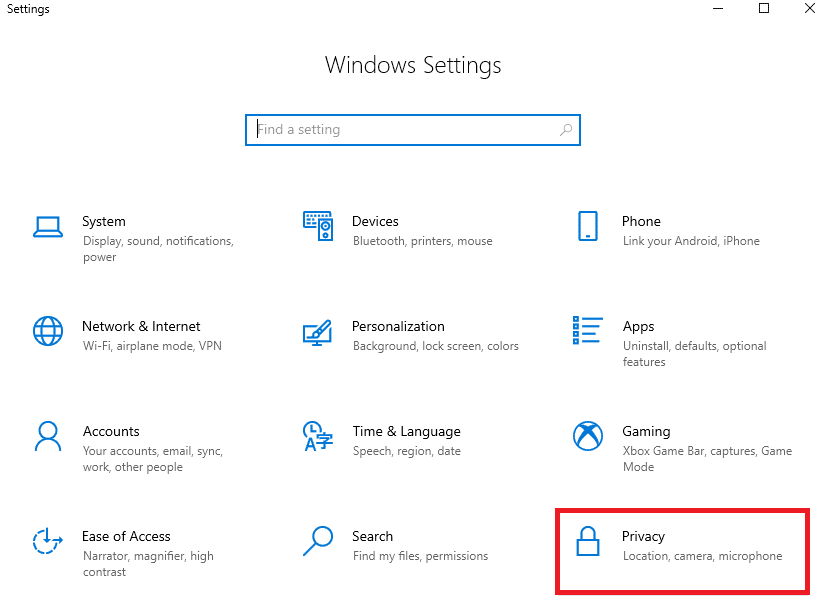
1 เปิดตัว หน้าต่างการตั้งค่า โดยกดปุ่ม ปุ่ม Windows + I ร่วมกัน
2 ตอนนี้ให้คลิกที่ ความเป็นส่วนตัว การตั้งค่า
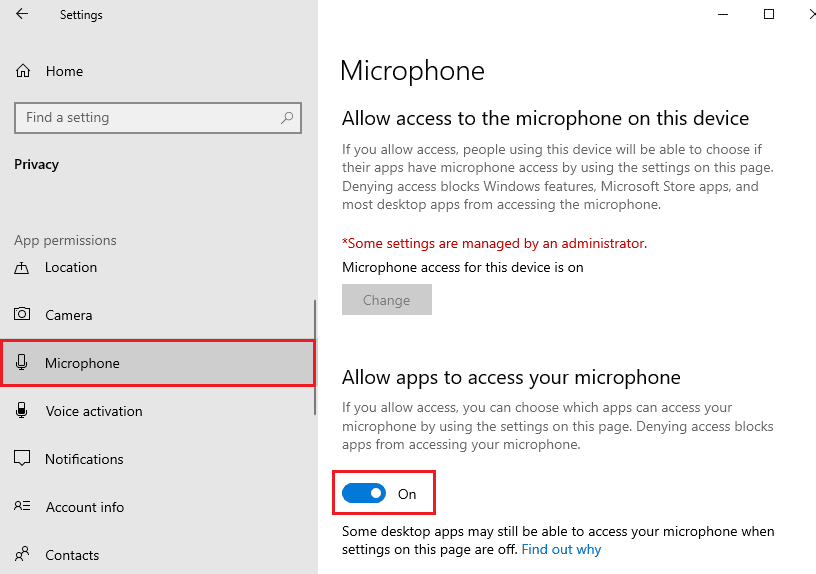
3. Here, scroll down left pane and click the ไมโครโฟน ตัวเลือก. ทำให้มั่นใจ อนุญาตให้แอปเข้าถึงไมโครโฟนของคุณ option are enabled as shown.
หมายเหตุ ยิง การตั้งค่าเสียง from the search menu and select the correct input device (Microphone (2 High-Definition Audio Device)) as default.
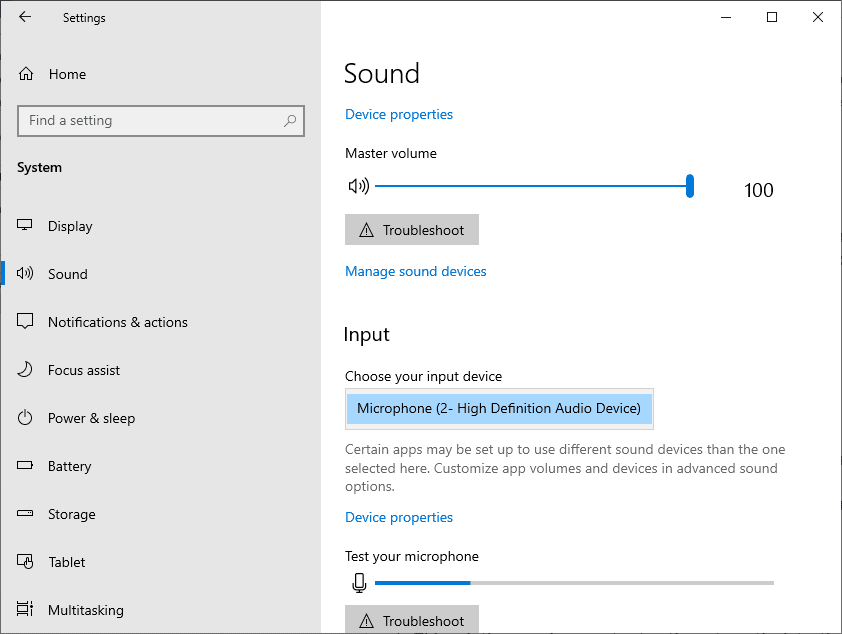
Then, check if you have fixed Logitech G533 microphone sound not working issue.
ยังอ่าน: NVIDIA Virtual Audio Device Wave Extensible คืออะไร
วิธีที่ 6: ตั้งค่าอุปกรณ์เสียงเป็นอุปกรณ์เริ่มต้น
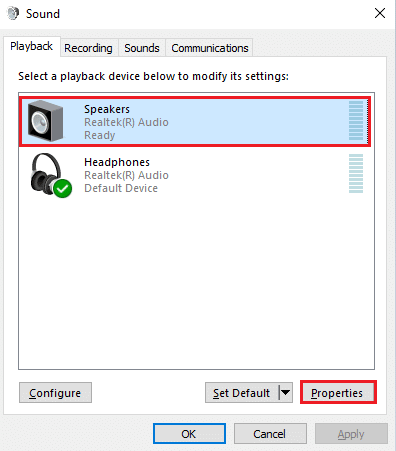
If you are using an audio device like Logitech G533 microphone or speakers, you must ensure whether it is set as a default device or not. Let us assume a case of connecting an external monitor (that does not have built-in speakers) to your PC. If this monitor is set as a default output device, you cannot hear any audio. You have to set your audio device as the default device as instructed below to fix Logitech G533 Mic not working issue.
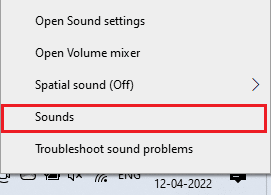
1 คลิกขวาที่ ลำโพง icon at the bottom right corner of the screen and select เสียง ตัวเลือก
![]()
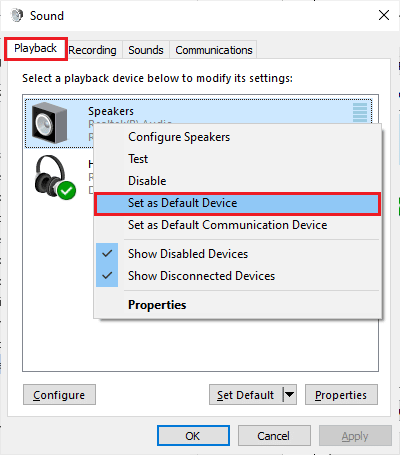
2. จากนั้นสลับไปที่ การเล่น แท็บแล้วคลิกขวาที่ อุปกรณ์เครื่องเสียง คุณต้องการตั้งค่าเป็นค่าเริ่มต้น
3. ตอนนี้เลือก ตั้งค่าเป็นอุปกรณ์เริ่มต้น ตัวเลือกตามที่ไฮไลต์ไว้แล้วคลิก ใช้> ตกลง เพื่อบันทึกการเปลี่ยนแปลง
วิธีที่ 7: เปิดใช้งานการ์ดเสียงอีกครั้ง
You can easily resolve Logitech headset mic not working issue by restarting the sound card as instructed below.
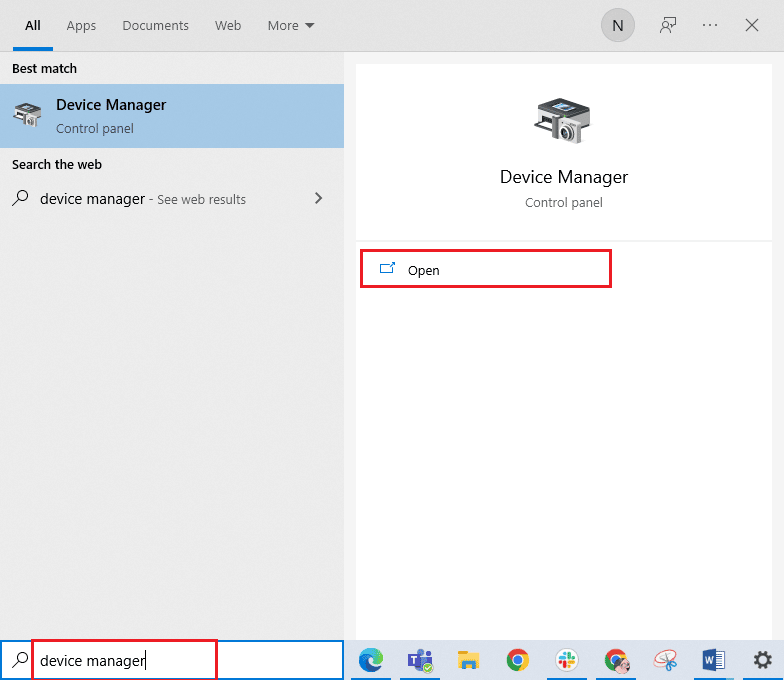
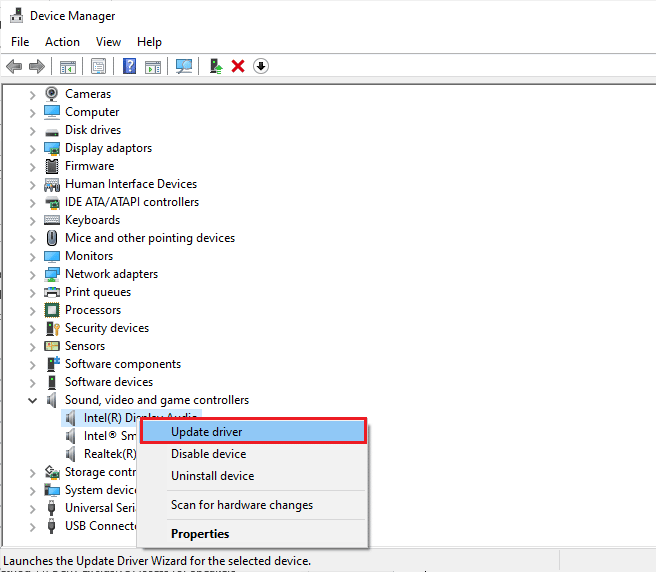
1 ตี ปุ่ม windows และประเภท จัดการอุปกรณ์จากนั้นคลิกที่ จุดเปิด.
2. Then, expand ตัวควบคุมเสียงวิดีโอและเกม โดยดับเบิลคลิกที่มัน
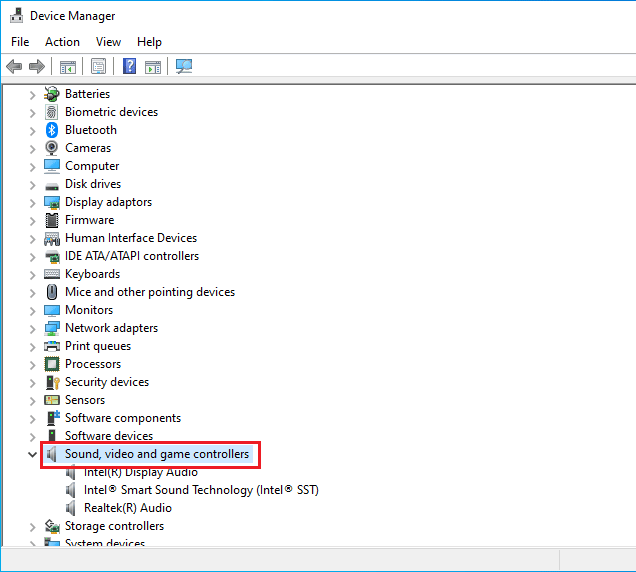
3. จากนั้นคลิกขวาที่ของคุณ การ์ดเสียง และเลือก ปิดใช้งานอุปกรณ์ ตัวเลือก
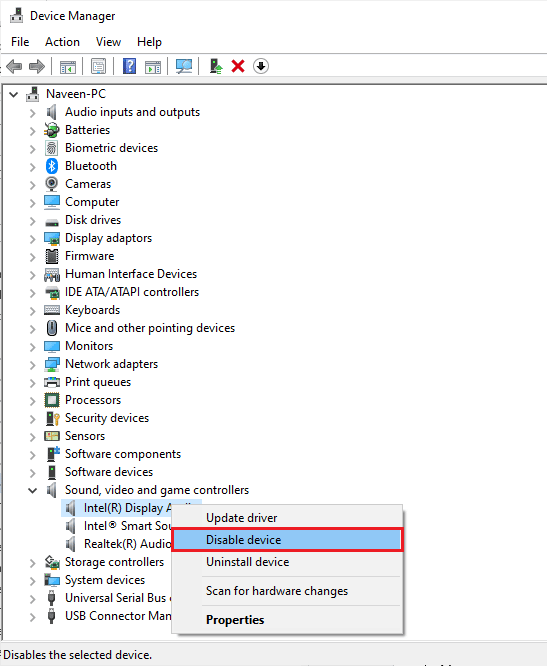
4. ตอนนี้ ยืนยันข้อความแจ้งโดยคลิกที่ ใช่ และ Reboot your computer. Then, repeat Steps 1-2.

5. จากนั้นคลิกขวาที่ของคุณ การ์ดเสียง และเลือก เปิดใช้งานอุปกรณ์ ตัวเลือก
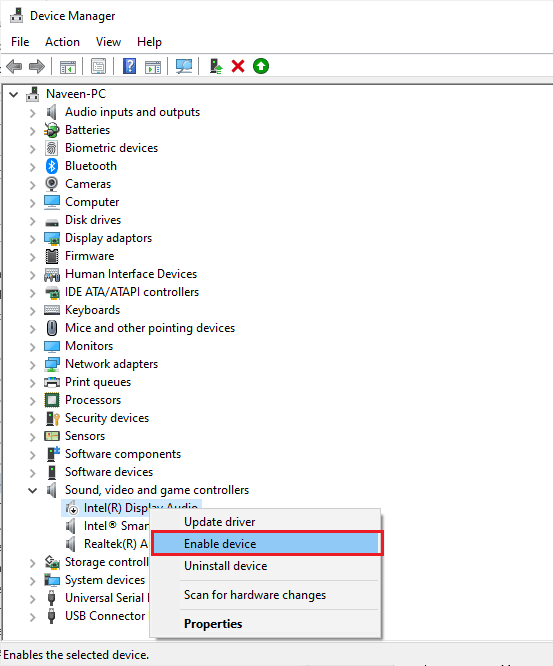
6. ตอนนี้ ลองเล่นเสียงในแอปพลิเคชันเสียงของคุณ และตรวจสอบว่าปัญหาได้รับการแก้ไขหรือไม่
วิธีที่ 8: ปิดใช้งานการปรับปรุงเสียง
If you find your audio working well for other multimedia resources, but the sound seems to be of low quality or noisy in Logitech G533 Mic, you are advised to change the sample rate. A low-frequency sample rate may cause Logitech headset mic not working issue. You can select a higher frequency sample rate by following the below-mentioned steps.
1 คลิกขวาที่ ลำโพง icon at the bottom right corner of the screen and select เสียง ตัวเลือก
![]()
2. จากนั้นสลับไปที่ การเล่น tab and select audio device followed by อสังหาริมทรัพย์ ปุ่มตามที่แสดง

3. จากนั้นสลับไปที่ ระดับสูง และจากเมนูแบบเลื่อนลงด้านล่าง รูปแบบเริ่มต้นตรวจสอบให้แน่ใจว่าคุณได้เลือก ช่วงความถี่สูงสุด (24-bit, 48000 Hz).
หมายเหตุ ให้แน่ใจว่า เปิดใช้งานการเพิ่มประสิทธิภาพเสียง ตัวเลือกจะไม่ถูกทำเครื่องหมายภายใต้ การปรับปรุงสัญญาณ ตามที่ปรากฏ.
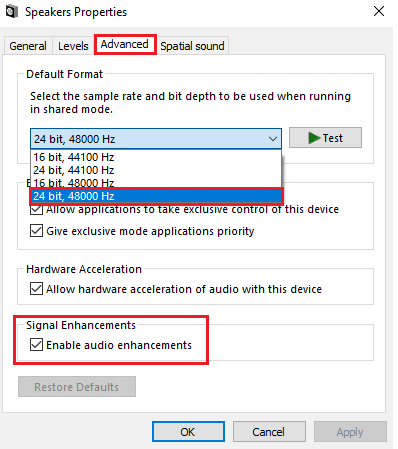
4 คลิกที่ ใช้ แล้วก็ OK เพื่อบันทึกการเปลี่ยนแปลง
Check if you face Logitech G533 Mic not working again. If so, adjust different levels of frequency ranges by repeating these steps and confirm which range solves the problem.
ยังอ่าน: แก้ไขเสียงแคร็กของ Windows 10
วิธีที่ 9: เริ่มบริการเสียงใหม่
Few essential Windows audio services will help you prevent Logitech G533 Mic not working issue. If in case, if these services are turned off, you may face several conflicts. Hence, you are advised to restart a few essential audio services as instructed below steps.
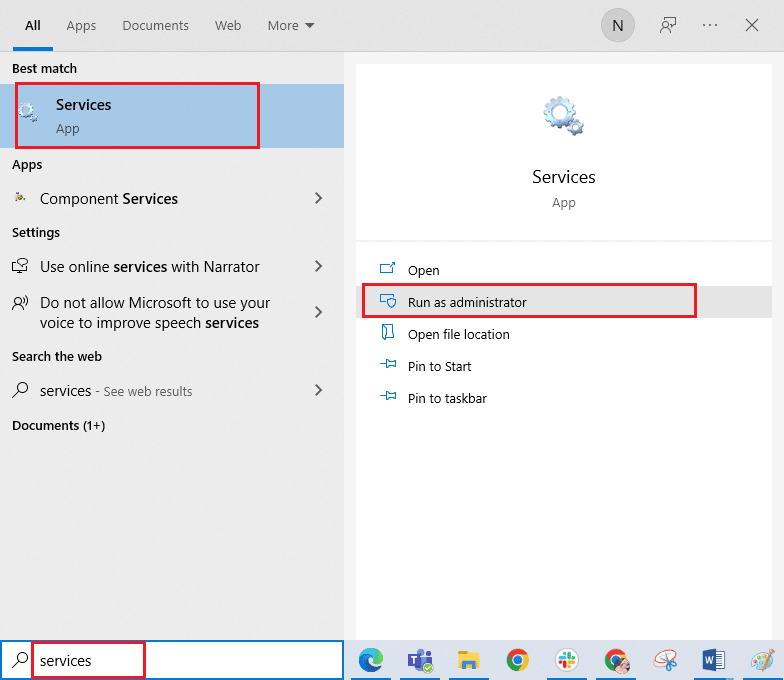
1. กดปุ่ม ปุ่ม windowsพิมพ์ บริการ และคลิกที่ เรียกใช้ในฐานะผู้ดูแล.
2. ตอนนี้เลื่อนลงและดับเบิลคลิกที่ หน้าต่างเสียง บริการ
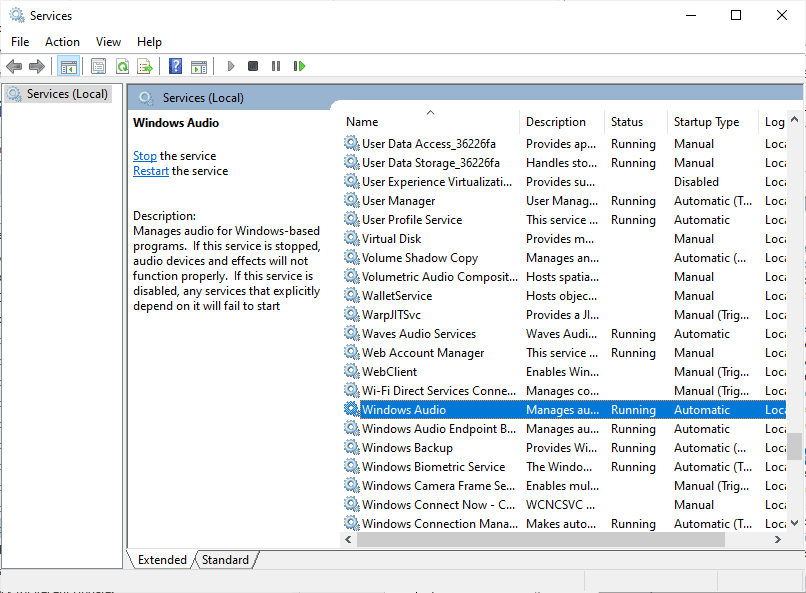
3. Now, in the new popup window, select ชนิดการเริ่มต้น ไปยัง อัตโนมัติตามที่แสดง
หมายเหตุ ถ้า สถานะการบริการ is หยุดจากนั้นคลิกที่ปุ่ม เริ่มต้น ปุ่ม. ถ้า สถานะการบริการ is เล่น, คลิกที่ หยุด และเริ่มใหม่อีกครั้ง
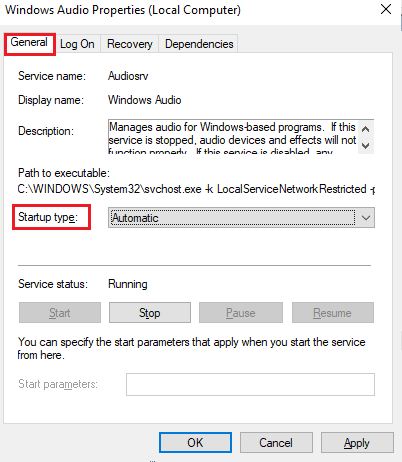
4 คลิกที่ ใช้> ตกลง เพื่อบันทึกการเปลี่ยนแปลง
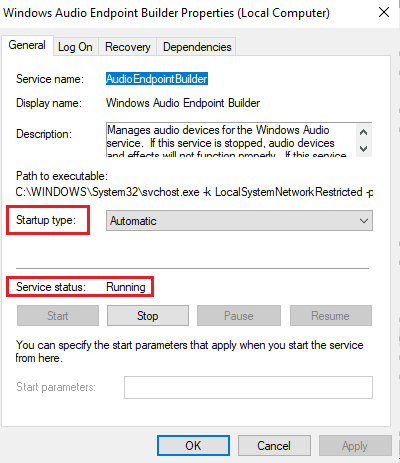
5. ทำซ้ำขั้นตอนเหล่านี้ทั้งหมดสำหรับบริการ Windows อื่น ๆ เช่น ตัวสร้างปลายทางเสียงของ Windows และ การเรียกกระบวนการระยะไกล (RPC) และตรวจสอบว่าคุณได้แก้ไขปัญหาแล้วหรือไม่
Method 10: Deny Exclusive Access for Audio Device
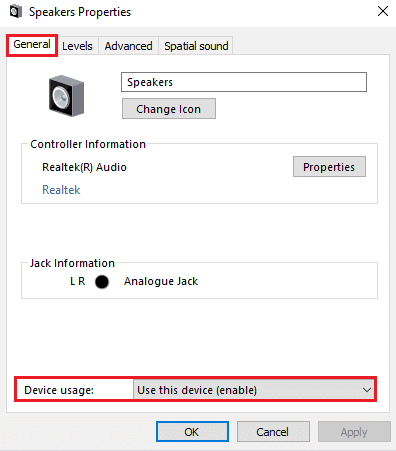
Still, if you are struggling with Logitech G533 microphone not working issue, then you have to ensure no other program is taking the exclusive control of your audio device. You can disable the discussed feature by following the below-mentioned steps to fix Logitech headset mic not working issue.
1 เปิดตัว เสียง การตั้งค่า
2. Then, select your audio device and click on อสังหาริมทรัพย์ ปุ่มตามที่แสดง
3 ใน General แท็บ ตรวจสอบให้แน่ใจว่า การใช้อุปกรณ์ ตั้งค่าตัวเลือกเป็น ใช้อุปกรณ์นี้ (เปิดใช้งาน) ตามที่ปรากฏ. คลิกที่ ใช้> ตกลง หากคุณได้ทำการเปลี่ยนแปลงใดๆ
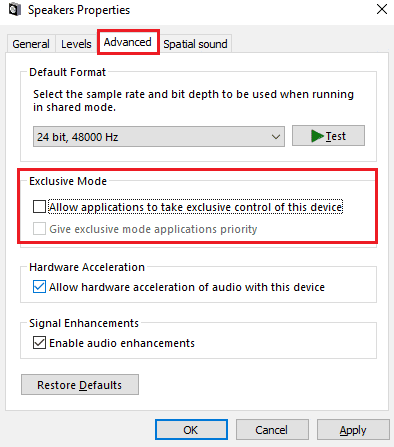
4. ตอนนี้ เปลี่ยนไปที่ ระดับสูง แท็บและใต้ โหมดพิเศษ เมนู ตรวจสอบให้แน่ใจว่าไม่ได้เลือกตัวเลือกต่อไปนี้
- อนุญาตให้แอปพลิเคชันควบคุมอุปกรณ์นี้โดยเฉพาะ.
- ให้ความสำคัญกับแอปพลิเคชันโหมดพิเศษ.
หมายเหตุ ทันทีที่คุณยกเลิกการเลือก อนุญาตให้แอปพลิเคชันควบคุมอุปกรณ์นี้โดยเฉพาะ ตัวเลือก give exclusive mode applications priority ตัวเลือกจะไม่ถูกทำเครื่องหมายโดยอัตโนมัติ
5. สุดท้ายคลิกที่ ใช้> ตกลง to save the changes. Now, you would have fixed Logitech G533 microphone audio issues.
ยังอ่าน: แก้ไขไม่มีเสียงใน Firefox บน Windows 10
Method 11: Update or Roll Back Audio Drivers
Follow the given steps to update or roll back audio drivers to fix Logitech headset mic not working issue.
Option I: Update Audio Drivers
Outdated and incompatible audio drivers will always result in Logitech G533 Mic not working issue. Always ensure you use an updated version of audio drivers and if your computer lacks the latest drivers, you are advised to update them as instructed in our guide How to Update Realtek HD Audio Drivers in Windows 10.
Once you have updated your audio drivers to the latest version, check if you have fixed Logitech G533 microphone audio issues.
Option II: Roll Back Audio Driver Updates
Sometimes, the current version of audio drivers may cause any Logitech G533 audio conflicts and in this case, you have to restore previous versions of installed drivers. This process is called การย้อนกลับของไดรเวอร์ และคุณสามารถย้อนกลับไดรเวอร์คอมพิวเตอร์ของคุณไปสู่สถานะก่อนหน้าได้อย่างง่ายดายโดยทำตามคำแนะนำของเราวิธีการย้อนกลับไดรเวอร์ใน Windows 10
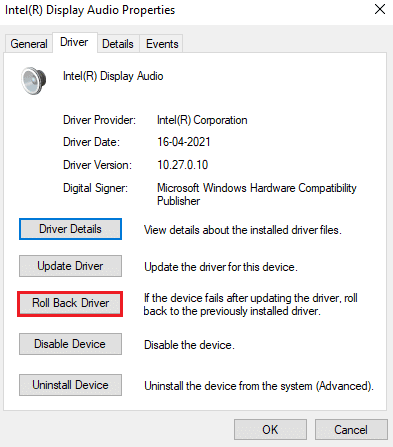
รอจนกระทั่งติดตั้งไดรเวอร์เวอร์ชันก่อนหน้าบนพีซี Windows 10 ของคุณ เมื่อเสร็จแล้วให้ตรวจสอบว่าคุณได้แก้ไขปัญหาแล้วหรือไม่
วิธีที่ 12: ติดตั้งไดรเวอร์เสียงใหม่
Incompatible drivers must be reinstalled to resolve all audio related problems. You are advised to reinstall device drivers only if you cannot attain any fix by updating them. Steps to reinstall drivers are very easy and you can do so by using a third-party application or by implementing the steps manually as instructed in our guide How to Uninstall and Reinstall Drivers on Windows 10
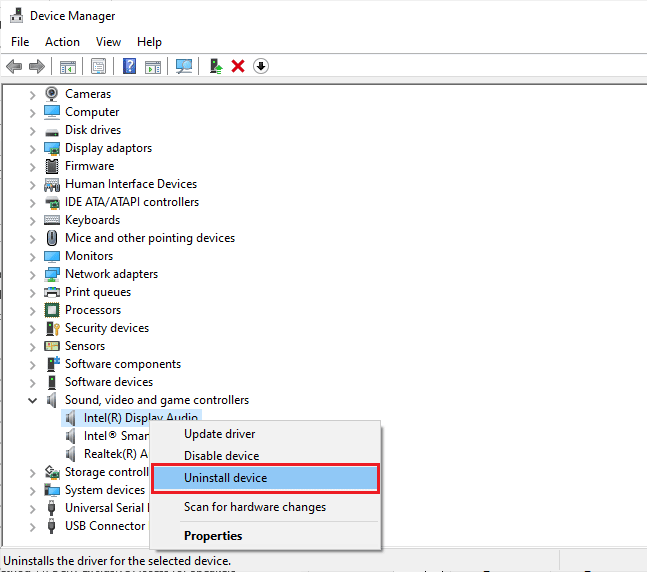
After reinstalling audio drivers, check if you can hear audio while playing them in Logitech G533 device.
ยังอ่าน: แก้ไขไม่มีเสียงใน Firefox บน Windows 10
Method 13: Reinstall Logitech Gaming Software
If none of the methods have helped you to fix Logitech headset mic not working issue, then try uninstalling the Logitech Gaming software and reinstall it again. Reinstalling this Logitech program may fix the bugs with your Logitech devices like microphone. Any common glitches associated with a software program can be resolved when you uninstall the application entirely from your computer and reinstall it. Here are few steps to implement the same.
Step I: Through Control Panel
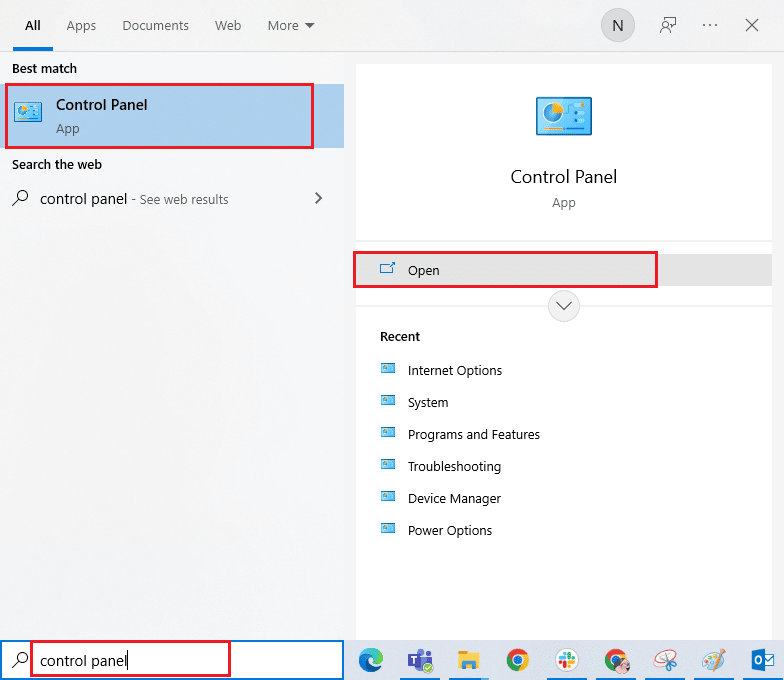
1 ตี ปุ่ม windowsพิมพ์ แผงควบคุม และคลิกที่ จุดเปิด.
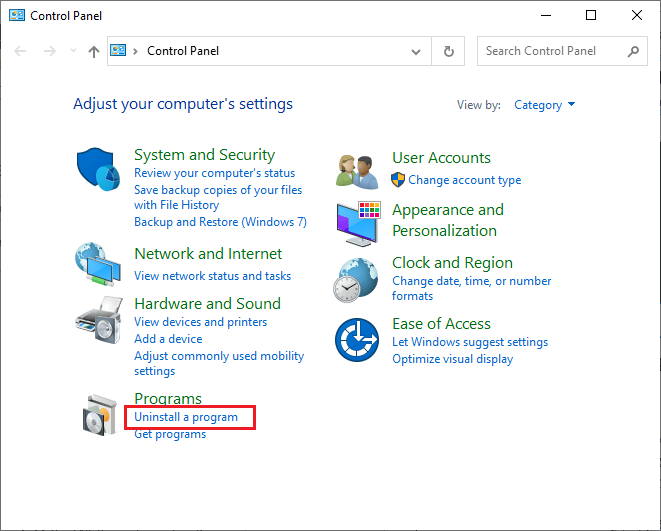
2 ตั้งค่า ดูตาม > หมวดหมู่จากนั้นคลิกที่ ถอนการติดตั้งโปรแกรม ภายใต้ โปรแกรม เมนูตามที่แสดง
ในปี 3 โปรแกรมและคุณลักษณะ ยูทิลิตี้จะเปิดขึ้นและตอนนี้ค้นหา Logitech gaming software.
4 ตอนนี้ให้คลิกที่ Logitech gaming software และคลิก ถอนการติดตั้ง / เปลี่ยนแปลง option from top bar.
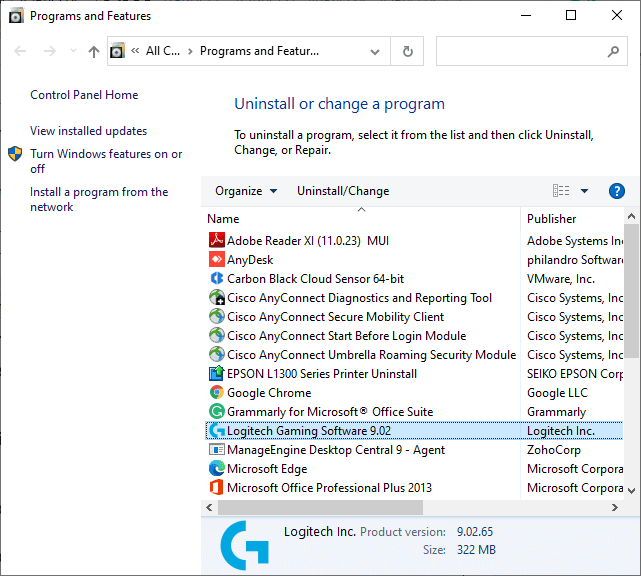
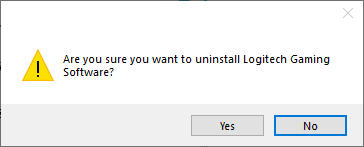
5. ตอนนี้ ยืนยันข้อความแจ้ง Are you sure want to uninstall Logitech Gaming Software? โดยคลิกที่ ใช่. Refer to the pic.
6. เริ่มต้นใหม่ คอมพิวเตอร์เมื่อคุณทำตามขั้นตอนทั้งหมดที่กล่าวมาข้างต้นเสร็จแล้ว
Step II: Delete Cache Files
1 คลิก ช่องค้นหาของ Windows และประเภท % AppData%
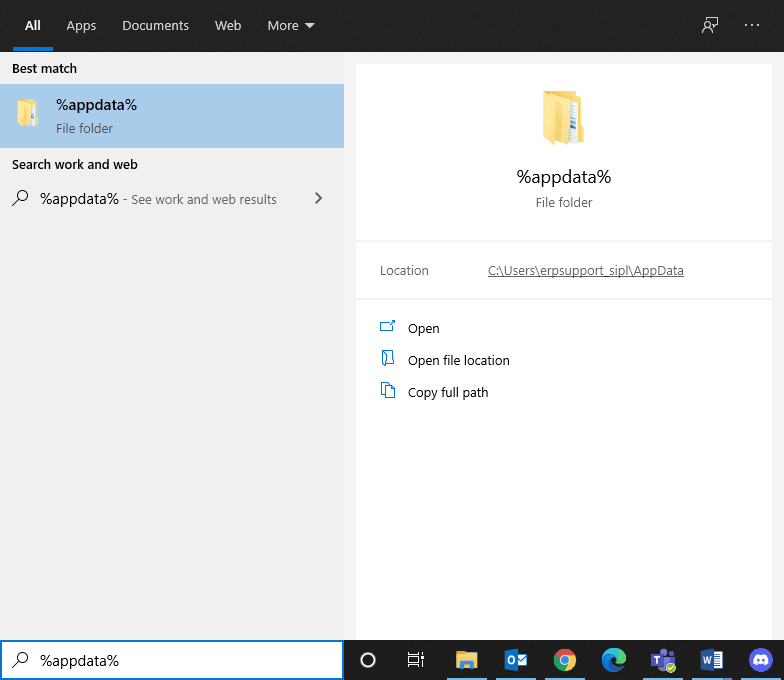
2 เลือก App Data Roaming folder and navigate to the following เส้นทาง.
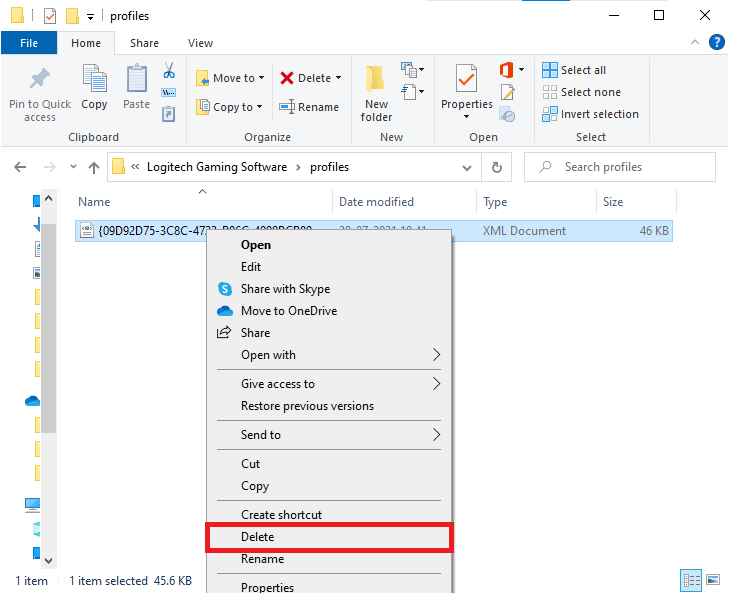
C:UsersUSERNAMEAppDataLocalLogitechLogitech Gaming Softwareprofiles
3. ตอนนี้ คลิกขวา และ ลบ มัน
4 คลิก ช่องค้นหาของ Windows อีกครั้งแล้วพิมพ์ % LocalAppData%
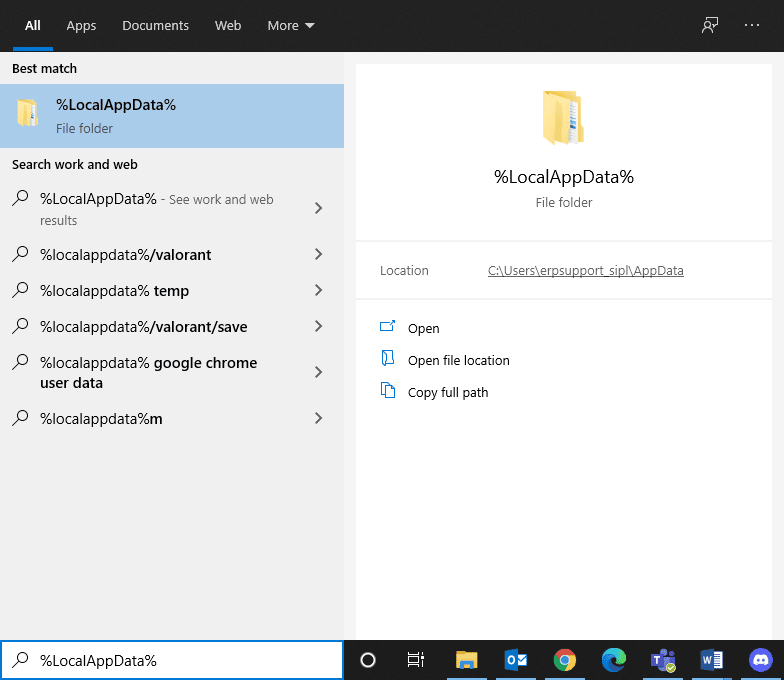
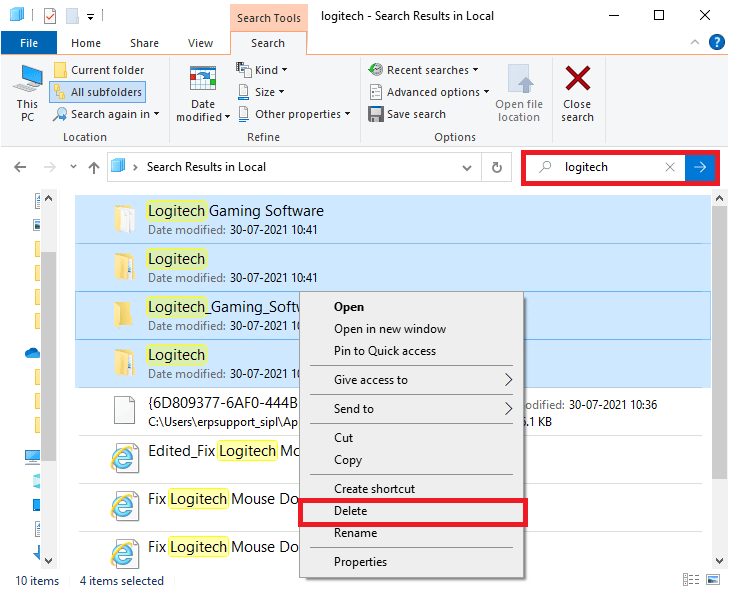
5 หา Logitech Gaming Software folder โดยใช้เมนูค้นหาและ ลบ มัน
Now, you have successfully deleted Logitech gaming software from your PC. Now, follow the below steps to reinstall the same.
Step III: Reinstall Logitech Gaming Software
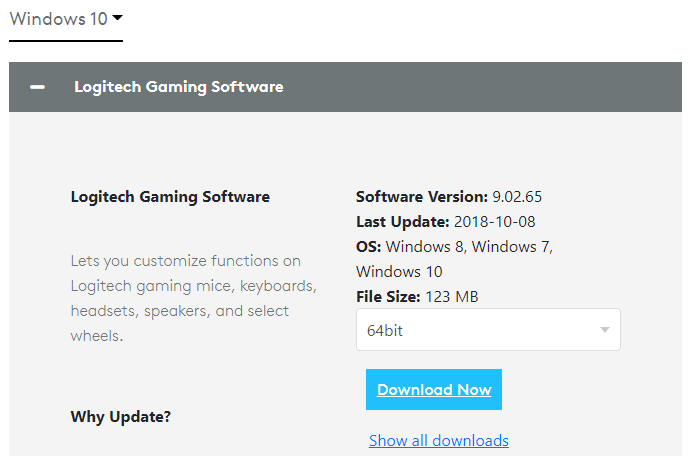
1. เยี่ยมชม official Logitech Gaming software site ไปยัง ติดตั้ง ซอฟต์แวร์บนคอมพิวเตอร์ของคุณ
2 ไปที่ ดาวน์โหลดของฉัน และดับเบิลคลิกที่ LGS_9.02.65_x64_Logitech (it varies according to the version you download) to open it.
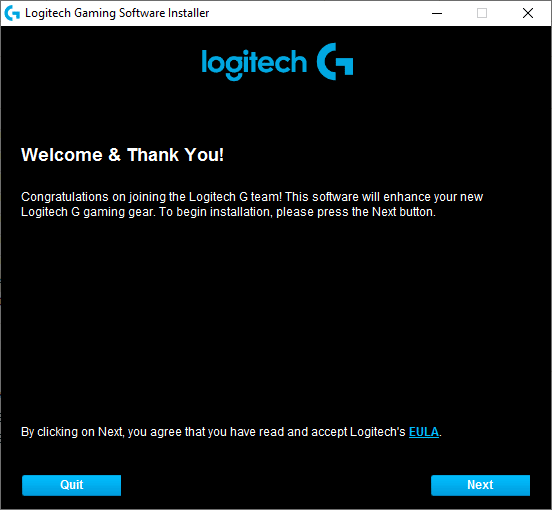
3. ที่นี่ คลิกที่ ถัดไป button until you see the installation process on the screen.
4. Now, once the software is installed, your system may undergo a restart process.
Now, you have successfully reinstalled the Logitech software program on your system. Next, check if Logitech headset mic not working is fixed on Windows PC.
ยังอ่าน: แก้ไขการซูมเสียงไม่ทำงาน Windows 10
วิธีที่ 14: ทำการคืนค่าระบบ
If none of the methods have helped you, then the only option left is to restore your computer to its previous version. To do so, follow our guide on How to use System Restore on Windows 10 and implement the instructions as demonstrated in the section to perform a system restore.
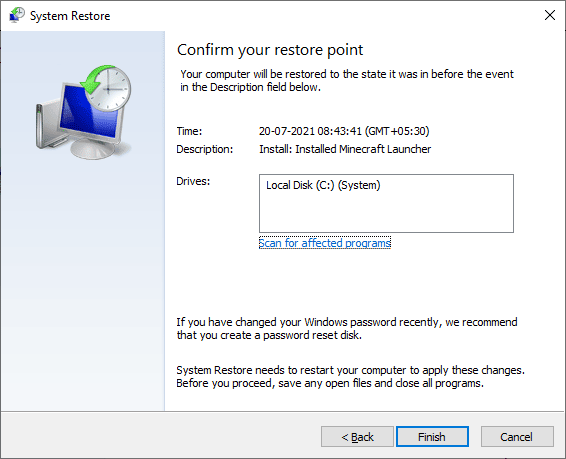
After restoring your Windows 10 PC, check if have fixed Logitech G533 microphone audio issues on your Windows 10 PC.
ที่แนะนำ:
เราหวังว่าคู่มือนี้จะเป็นประโยชน์และคุณสามารถแก้ไขได้ Logitech G533 Mic not working in your device. Feel free to reach out to us with your queries and suggestions via the comments section below.

![แก้ไข WiFi ไม่ทำงานใน Windows 10 [ใช้งานได้ 100%]](https://lbsite.org/wp-content/uploads/2023/02/Fix-WiFi-not-Working-in-Windows-10.jpg "แก้ไข WiFi ไม่ทำงานใน Windows 10 [ใช้งานได้ 100%]")