The main cause of this error is still unknown, but there are various reasons why this problem occurs. Few of them are Windows Firewall might be disabled, malware infection, Incorrect date & time configuration, corrupted application package etc. Now Windows Store is an important component of Windows as it enables you to download different kinds of application required for personal or professional use.
Imagine not being able to download any Windows store application, that’s exactly what happens in this case. But don’t worry troubleshooter is here to fix this issue, follow the below-listed methods one by one and by the end of this guide, Windows Store would be back to normal.
There are few things which you should make sure of before continuing with the below-listed troubleshooting steps:
- Sometimes Family Saftey Settings blocks some apps due to which you may not be able to access the particular app on the Store. Check if the problem occurs on all the other apps or some particular apps. If this issue occurs only on selected apps, then turn off the Family Saftey Settings.
- If you recently made some changes on the system but forgot to restart your PC, you might not access Windows Store. Make sure to restart your system after Windows Update and see if the problem is resolved or not.
แก้ไขไม่มีปุ่มติดตั้งใน Windows Store
ตรวจสอบให้แน่ใจว่าได้สร้างจุดคืนค่าในกรณีที่มีสิ่งผิดปกติเกิดขึ้น
Method 1: Turn ON the Windows Firewall
Windows Store doesn’t let you access the apps until you make sure that the Windows Firewall is enabled.
1.กด Windows Key + I จากนั้นเลือก แผงควบคุม

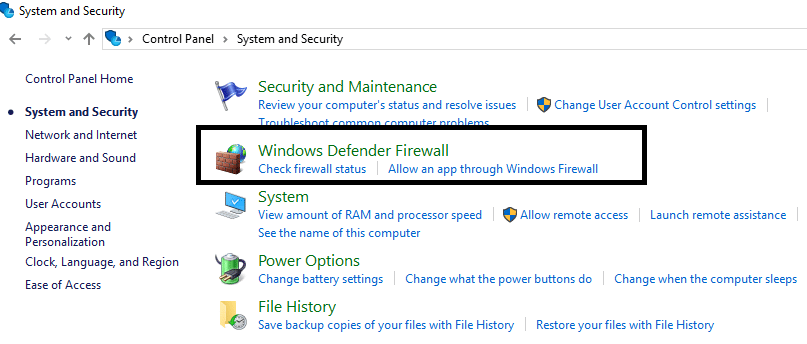
2.ถัดไป คลิกที่ ระบบและความปลอดภัย.
3.จากนั้นคลิกที่ ไฟร์วอลล์หน้าต่าง.
4.Now from the left window pane click on เปิดหรือปิดไฟร์วอลล์ Windows
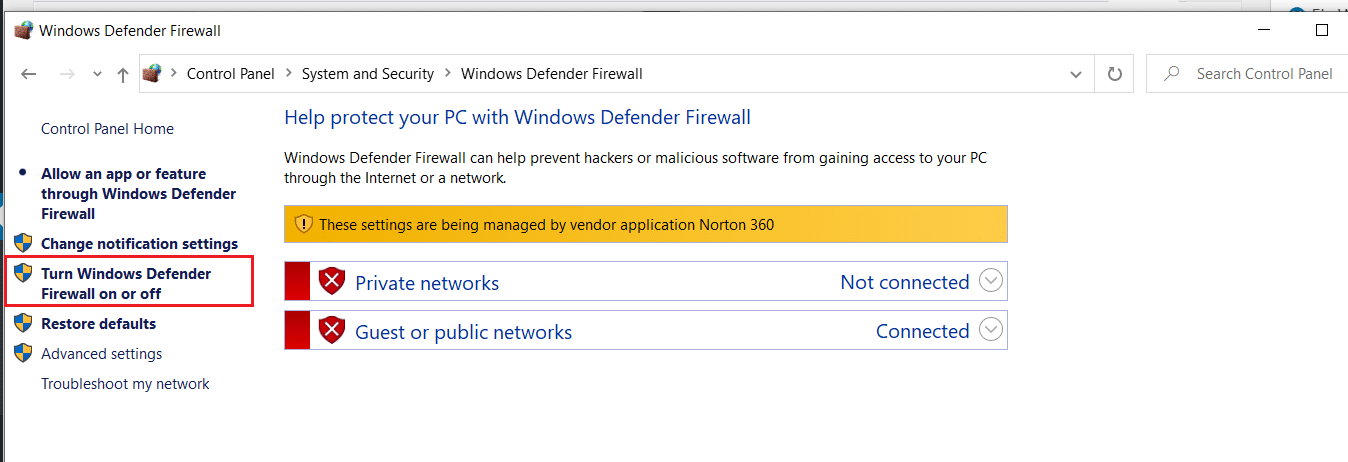
5. เลือก เปิดไฟร์วอลล์ Windows for both private and public network settings and then restart your PC
After you are done, try to install the app again on the Windows Store and this time it should work out fine.
วิธีที่ 2: ตรวจสอบให้แน่ใจว่าวันที่และเวลาของพีซีของคุณถูกต้อง
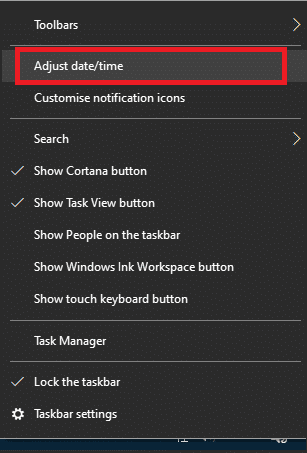
1. คลิกขวาที่ on เวลา displayed at the bottom right corner of your screen. Then click on ปรับวันที่/เวลา
2. Make sure that both options labelled ตั้งเวลาโดยอัตโนมัติ และ ตั้งค่าเขตเวลาโดยอัตโนมัติ ได้รับ พิการ. คลิกที่ เปลี่ยนแปลง.
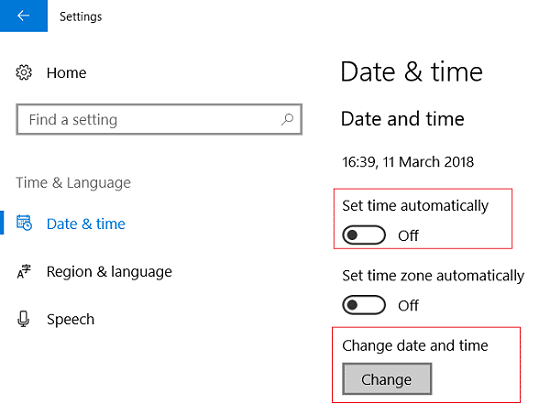
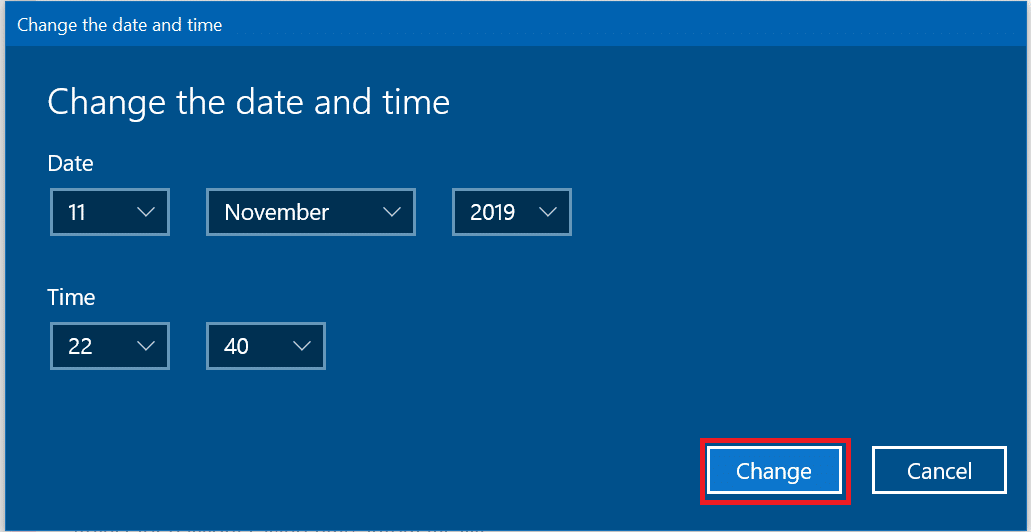
3. เข้าสู่ correct date and time จากนั้นคลิกที่ เปลี่ยนแปลง เพื่อใช้การเปลี่ยนแปลง
4. ดูว่าคุณสามารถทำได้หรือไม่ Fix Your Connection is Not Private Error In Chrome.
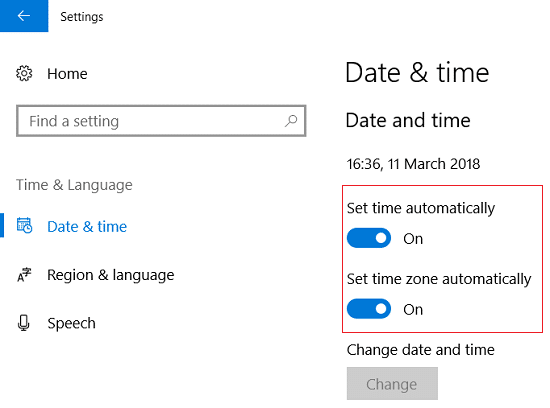
5. If this doesn’t help then ทำให้สามารถ ทั้ง ตั้งค่าเขตเวลา อัตโนมัติ และ Set Date & Time Automatically options. If you have an active internet connection, your Date and Time settings will get updated automatically.
ยังอ่าน: 4 วิธีในการเปลี่ยนวันที่และเวลาใน Windows 10
วิธีที่ 3: ล้างแคช Windows Store
1. กด Windows Key + R จากนั้นพิมพ์ “wsreset.exe” และกด Enter
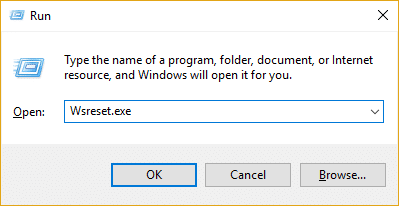
2. One the process is finished restart your PC.
Method 4: Re-register Store app
1 เปิด พร้อมรับคำสั่ง ในฐานะผู้ดูแลระบบ

2. Run below PowerShell command
PowerShell -ExecutionPolicy Unrestricted -Command “& {$manifest = (Get-AppxPackage Microsoft.WindowsStore).InstallLocation + ‘AppxManifest.xml’ ; Add-AppxPackage -DisableDevelopmentMode -Register $manifest}”
Or
รับ - AppXPackage - AllUsers | Foreach {Add-AppxPackage -DisableDevelopmentMode -Register "$ ($ _. InstallLocation) AppXManifest.xml"}

3. Once done, close command prompt and Restart your PC.
This step re-register Windows Store apps which should automatically แก้ไขไม่มีปุ่มติดตั้งใน Windows Store ปัญหา
Method 5: Make sure Windows is Up to Date
1 กด คีย์ Windows + ฉันเปิดการตั้งค่าจากนั้นคลิกที่ อัปเดตและความปลอดภัย
![]()
2. จากด้านซ้ายมือ เมนูให้คลิกที่ Windows Update
3. ตอนนี้คลิกที่ “ตรวจหาการปรับปรุง” เพื่อตรวจสอบการอัปเดตที่มีอยู่

4. หากมีการอัปเดตใด ๆ ที่รอดำเนินการ ให้คลิกที่ ดาวน์โหลดและติดตั้งการอัปเดต

5. เมื่อดาวน์โหลดการอัปเดตแล้ว ให้ติดตั้ง จากนั้น Windows ของคุณจะอัปเดต
วิธีที่ 6: เรียกใช้ CCleaner และ Malwarebytes
1 ดาวน์โหลดและติดตั้ง CCleaner & มัลแวร์ไบต์
2. เรียกใช้ Malwarebytes และปล่อยให้มันสแกนระบบของคุณเพื่อหาไฟล์ที่เป็นอันตราย หากพบมัลแวร์ มันจะลบออกโดยอัตโนมัติ

3. รัน CCleaner แล้วเลือก ทำความสะอาดแบบกำหนดเอง.
4. ภายใต้ Custom Clean ให้เลือก แท็บวินโดวส์ และเครื่องหมายถูกเป็นค่าเริ่มต้นแล้วคลิก วิเคราะห์.

5. เมื่อการวิเคราะห์เสร็จสิ้น ตรวจสอบให้แน่ใจว่าคุณจะลบไฟล์ที่จะลบออกอย่างแน่นอน

6. สุดท้ายคลิกที่ไฟล์ เรียกใช้ Cleaner ปุ่มและปล่อยให้ CCleaner ดำเนินการตามหลักสูตร
7. หากต้องการทำความสะอาดระบบของคุณเพิ่มเติม เลือกแท็บรีจิสทรีและตรวจสอบให้แน่ใจว่ามีการตรวจสอบสิ่งต่อไปนี้:

ฮิต คลิกที่ สแกนหาปัญหา และอนุญาตให้ CCleaner สแกน จากนั้นคลิกที่ แก้ไขปัญหาที่เลือก ปุ่ม

9. เมื่อ CCleaner ถาม “คุณต้องการเปลี่ยนแปลงการสำรองข้อมูลรีจิสทรีหรือไม่?" เลือกใช่.
10. เมื่อการสำรองข้อมูลของคุณเสร็จสิ้นแล้ว ให้คลิกที่ แก้ไขปัญหาที่เลือกทั้งหมด ปุ่ม
11. รีสตาร์ทพีซีของคุณเพื่อบันทึกการเปลี่ยนแปลง
Method 7: Perform Clean Boot in Windows
Sometimes 3rd party software can conflict with Windows Store and therefore, you should not install any apps from the Windows apps store. In order Fix No Install Button in Windows Store problem, you need to perform a clean boot in your PC and diagnose the issue step by step.
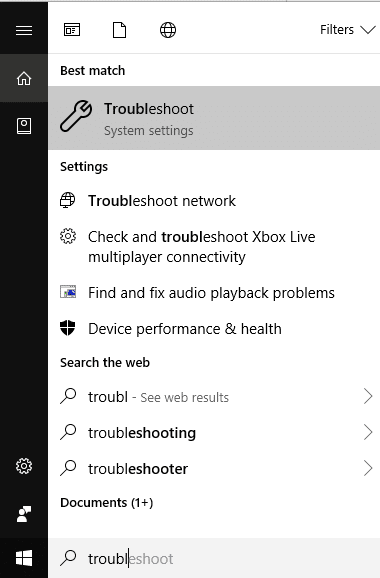
Method 8: Run Windows Update and Windows Store Apps troubleshooter
1.Type troubleshooting in the Windows Search bar and click on การแก้ไขปัญหา.
2.ถัดไป จากบานหน้าต่างด้านซ้าย ให้เลือก ดูทั้งหมด.
3. จากนั้นจากรายการแก้ไขปัญหาคอมพิวเตอร์ ให้เลือก Windows Update
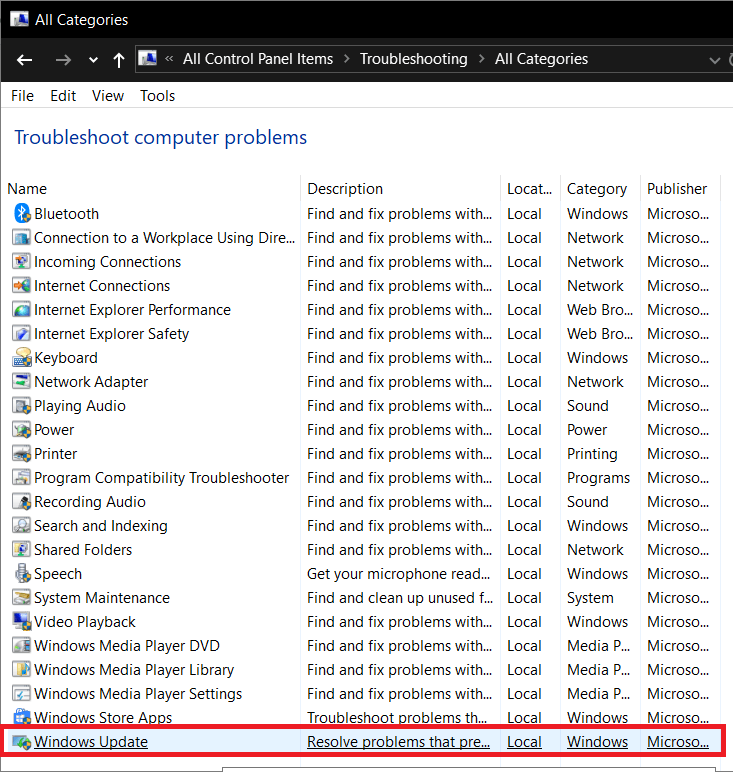
4. Follow on-screen instruction and let the Windows Update Troubleshoot run.

5. Now again go back to the View all window but this time select Windows Store Apps. Run the troubleshooter and follow on-screen instructions.
6. รีสตาร์ทพีซีของคุณแล้วลองติดตั้งแอพจาก Windows Store อีกครั้ง
ที่แนะนำ:
นั่นคือคุณประสบความสำเร็จ แก้ไขไม่มีปุ่มติดตั้งใน Windows Store แต่ถ้าคุณยังมีคำถามใดๆ เกี่ยวกับโพสต์นี้ โปรดถามพวกเขาในส่วนความคิดเห็น

