A user profile is a place where Windows 10 stores a collection of settings and preferences, making a user account the way it looks for that particular account. All these settings and preferences are stored in a folder called User Profile folder located in C:UsersUser_name. It contains all the settings for screensavers, desktop background, sound settings, display settings and other features. The User Profile also contains users personal files & folders such as Desktop, Documents, Download, Favorites, Links, Music, Pictures etc.
Whenever you add a new user account in Windows 10, a new user profile for that account is automatically created. Since the user profile is automatically created, you don’t get to specify the User Profile folder’s name, so this tutorial will show you How to Rename User Profile Folder in Windows 10.
Rename User Profile Folder in Windows 10
ตรวจสอบให้แน่ใจว่าได้สร้างจุดคืนค่าในกรณีที่มีสิ่งผิดปกติเกิดขึ้น
1. Sign out of the user account for which you want to change the name of the user profile folder.
2. Now you need to sign in to any บัญชีผู้ดูแลระบบ (you don’t want to change this administrator account).
หมายเหตุ If you don’t have access to an administrator account, you can enable the built-in Administrator to sign in to Windows and do these steps.
3. เปิดพร้อมรับคำสั่ง ผู้ใช้สามารถดำเนินการขั้นตอนนี้ได้โดยการค้นหา 'cmd' และกด Enter

4. พิมพ์คำสั่งต่อไปนี้ลงใน cmd แล้วกด Enter:
wmic useraccount get name,SID
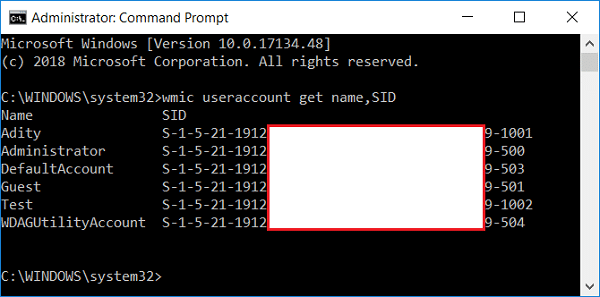
5. Note down the SID of the account you want to change the name of the user profile folder.
6. กด Windows Key + R แล้วพิมพ์ regedit และกด Enter เพื่อเปิด Registry Editor

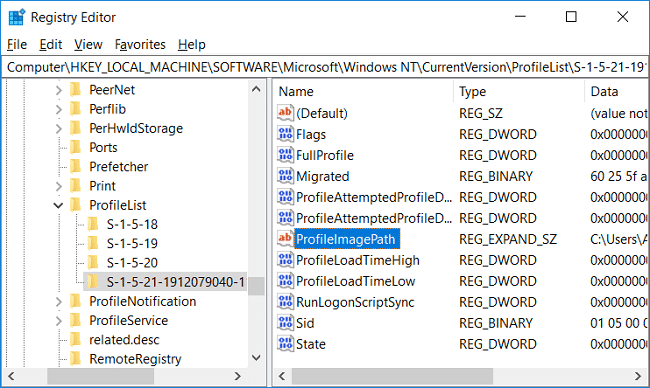
7. ไปที่คีย์รีจิสทรีต่อไปนี้:
HKEY_LOCAL_MACHINESOFTWAREMicrosoftWindows NTcurrentVersionProfileList
8. From the left pane, select the SID which you noted in step 5 then in the right window, pane double-click on ProfileImagePath.
9. Now, under Value data field, change the name of the user profile folder ตามความต้องการของคุณ
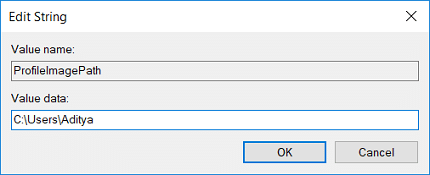
ตัวอย่างเช่น: ถ้ามันเป็น C:UsersMicrosoft_Windows10 then you could change it to C:UsersWindows10
10. Close Registry Editor then press คีย์ Windows + E เพื่อเปิด File Explorer
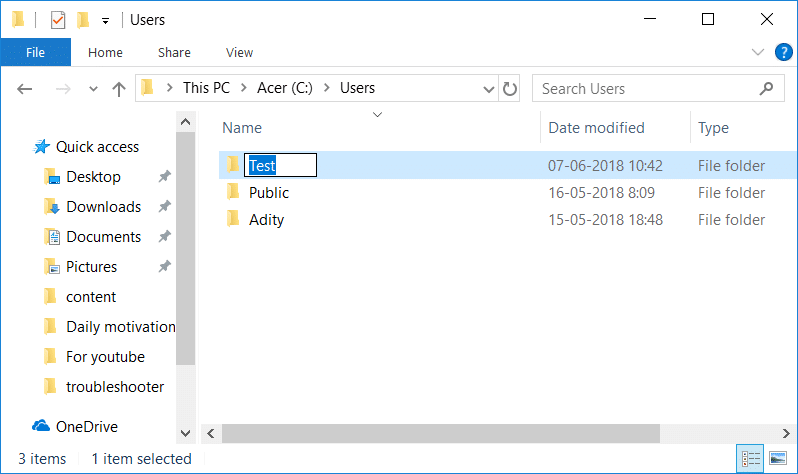
11 ไปที่ C: ผู้ใช้ in the Windows File Explorer.
12. คลิกขวาที่ โฟลเดอร์โปรไฟล์ผู้ใช้ และ rename according to the new path to the profile you have renamed in step 9.
13. Close everything and reboot your PC to save changes.
ที่แนะนำ:
นั่นคือคุณได้เรียนรู้สำเร็จแล้ว How to Rename User Profile Folder in Windows 10 แต่ถ้าคุณยังมีคำถามใดๆ เกี่ยวกับบทช่วยสอนนี้ โปรดอย่าลังเลที่จะถามพวกเขาในส่วนความคิดเห็น

