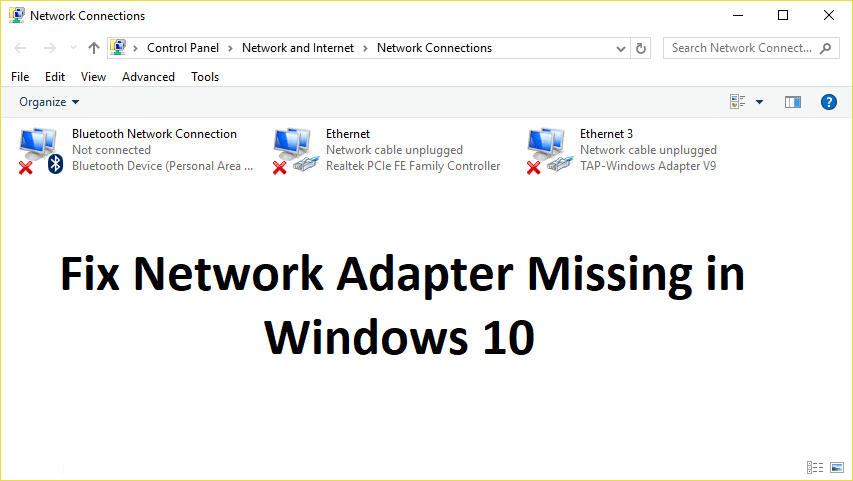
If you don’t see Wireless Adapter under Network Connections neither there is a Network adapter tab under device manager then it seems like your Network Adapter is missing or not detected on your Windows 10 which is a serious issue because you won’t be able to access the Internet until the issue is resolved. In short, when you click on the Wireless icon on the system tray there won’t be any device listed in order to connect to the Internet and if you open Device Manager then you won’t see the Network Adapter tab.
These are the reasons behind the Network Adapter missing issue:
- Network adapter missing in Device manager
- No Network Adapters showing in Device Manager
- Network Adapter Not Detected
- Network Adapter Not Found Windows 10
- No Network Adapter In Device Manager
The main cause of this issue seems to be outdated, incompatible or corrupted Network Adapter drivers. If you have recently upgraded from previous versions of Windows then it’s possible that the old drivers will not work with the new Windows and hence the issue. So without wasting any time let’s see how to actually Fix Network Adapter Missing in Windows 10 issue with the below-listed troubleshooting steps.
Note: Just make sure to uninstall any VPN software on your PC before continuing.
Ayusin ang Network Adapter na Nawawala sa Windows 10
Tiyaking gumawa ng restore point kung sakaling may magkamali.
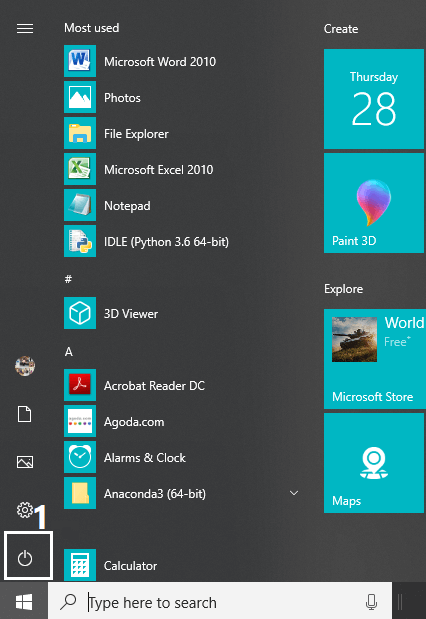
Method 1: Reboot your Computer
Karamihan sa atin ay alam ang tungkol sa pinakasimpleng trick na ito. Ang pag-reboot ng iyong computer kung minsan ay maaaring ayusin ang anumang salungatan sa software sa pamamagitan ng pagbibigay dito ng panibagong simula. Kaya't kung ikaw ay isang taong mas gugustuhin na ilagay ang kanilang computer sa pagtulog, ang pag-restart ng iyong computer ay isang magandang ideya.
1. Mag-click sa Start menu at pagkatapos ay mag-click sa Power button available sa ibabang kaliwang sulok.
2. Susunod, i-click ang restart opsyon at ang iyong computer ay magre-restart mismo.
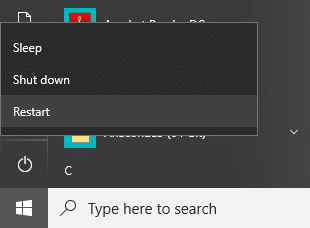
Pagkatapos mag-restart ang computer, suriin kung nalutas ang iyong problema o hindi.
Method 2: Flush DNS and Reset Winsock Components
1. Open elevated Command Prompt.
2. Ngayon i-type ang sumusunod na command at pindutin ang Enter pagkatapos ng bawat isa:
ipconfig / release
ipconfig / flushdns
ipconfig / renew

3. Muli buksan ang Command Prompt at i-type ang sumusunod na command isa-isa at pindutin ang enter pagkatapos ng bawat isa:
ipconfig /flushdns
nbtstat –r
netsh int ip reset
netsh winsock reset
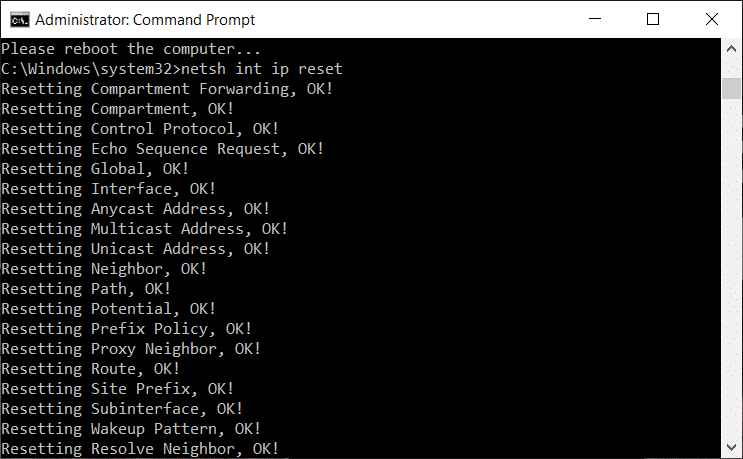
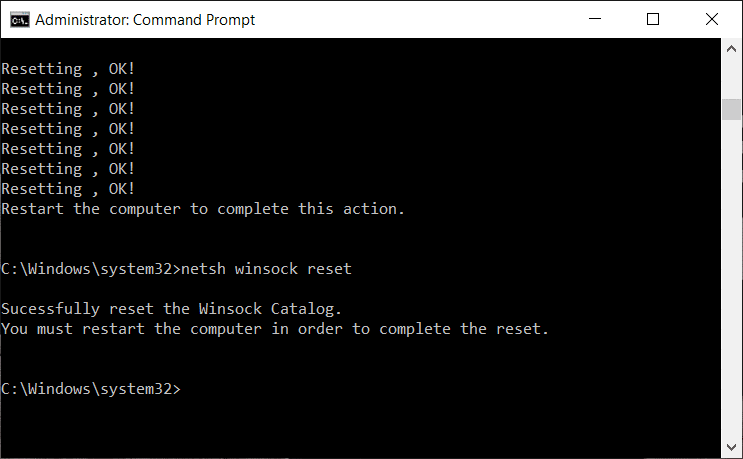
4. Reboot to apply changes. Flushing DNS seems to Fix Network Adapter Driver Issues on Windows 10.
Method 3: Run WWAN AutoConfig Service
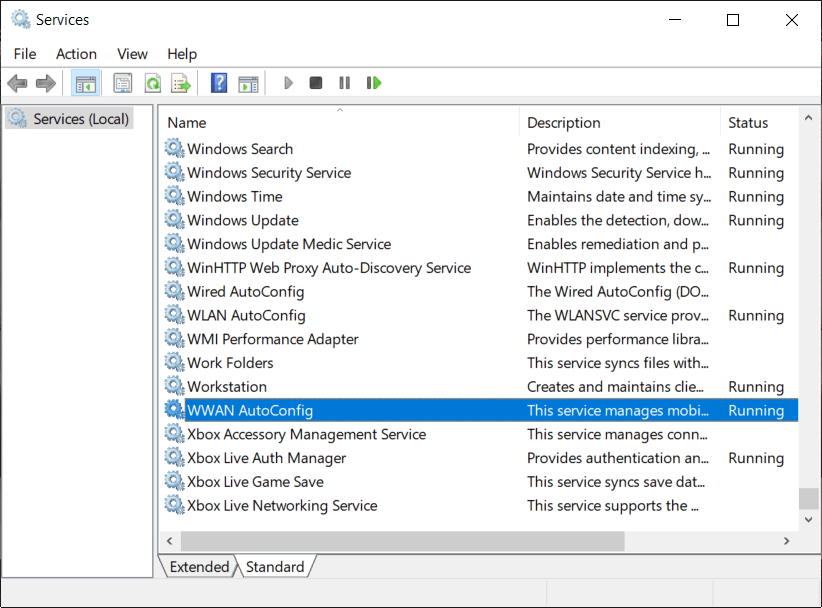
1. Pindutin ang Windows Key + R pagkatapos ay i-type services.msc at pindutin ang Enter.

2. Hanapin WWAN AutoConfig Service in the list (press W to reach to the end of the list quickly).
3. Mag-double click sa WWAN AutoConfig Service.
4. If the service is already running then click on Stop, then from the Startup type drop-down select Awtomatikong.
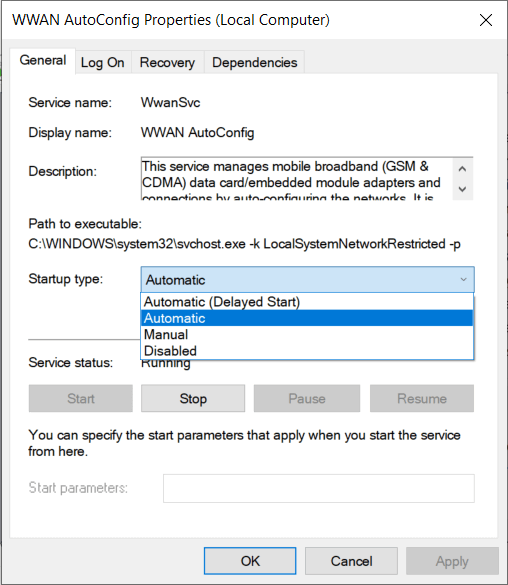
5. Click Apply followed by OK.
6. Mag-right click sa WWAN AutoConfig Service at piliin ang Magsimula.
Paraan 4: I-update ang Mga Driver ng Network Adapter
1. Pindutin ang Windows key + R at i-type ang “devmgmt.msc” sa Run dialogue box para buksan tagapamahala ng aparato.

2. Palawakin Mga adapter ng network, pagkatapos ay i-right-click sa iyong Wi-Fi controller (halimbawa Broadcom o Intel) at piliin I-update ang Driver Software.

3. Ngayon piliin ang "Awtomatikong maghanap para sa na-update na software ng driver".
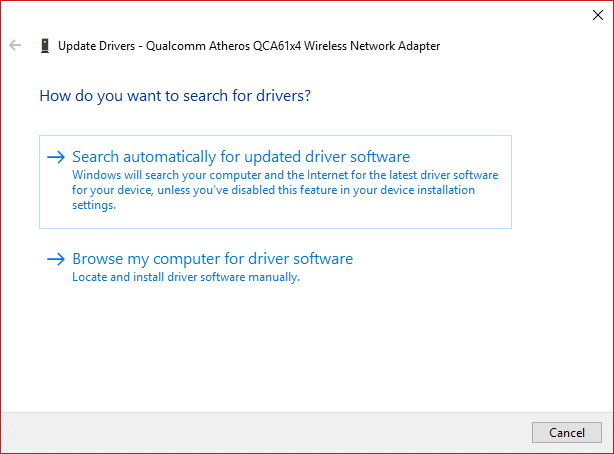
4. Ngayon Windows will automatically search for the Network driver update and if new update is found, it will automatically download and install it.
5. Kapag tapos na, isara ang lahat at i-reboot ang iyong PC.
6. Kung kaharap mo pa rin ang Network Adapter Missing in Windows 10 issue, then again right-click on your WiFi controller and select I-update ang driver sa Device Manager.
7. Ngayon, sa Update Driver Software Windows, piliin ang “I-browse ang aking computer para sa driver ng software."

8. Ngayon piliin ang "Hayaan akong pumili mula sa isang listahan ng mga available na driver sa aking computer."

9. Subukan mong i-update ang mga driver mula sa mga nakalistang bersyon (siguraduhing i-checkmark ang compatible na hardware).
10. Kung ang nasa itaas ay hindi gumana pagkatapos ay pumunta sa website ng tagagawa upang i-update ang mga driver.

11. I-download at i-install ang pinakabagong driver mula sa website ng gumawa pagkatapos ay i-restart ang iyong PC.
Method 5: Uninstall Network Adapter Drivers
1. Pindutin ang Windows Key + R pagkatapos ay i-type ang “devmgmt.msc” at pindutin ang Enter upang buksan ang Device Manager.
2. Expand Network Adapters and find pangalan ng iyong network adapter.
3. Siguraduhin na ikaw tandaan ang pangalan ng adaptor kung sakaling may mali ang isang bagay.
4. Right-click on your network adapter and uninstall it.

5. It will ask for confirmation piliin ang Oo.
6. Restart your PC and Windows will automatically install the network adapter drivers again.
7. If the drivers are not installed automatically then again open the Device Manager.
8. From the Device Manager menu, click on aksyon pagkatapos ay i-click ang "I-scan para sa mga pagbabago sa hardware".

Paraan 6: Tiyaking napapanahon ang Windows
1. Pindutin ang Windows Key+ Ako upang buksan ang Mga Setting pagkatapos ay mag-click sa Update at Security.
![]()
2. From the left-hand side, menu click on Pag-update ng Windows.
3. Ngayon mag-click sa “Suriin ang mga update” button para tingnan ang anumang available na update.

4. If any updates are pending then click on I-download at I-install ang mga update.

5. Once the updates are downloaded, install them and your Windows will become up-to-date.
6. After the updates are installed reboot your PC to save changes.
Method 7: Run Network Adapter Troubleshooter
1. Pindutin ang Windows Key + I upang buksan ang Mga Setting pagkatapos ay mag-click sa Update at Security.
![]()
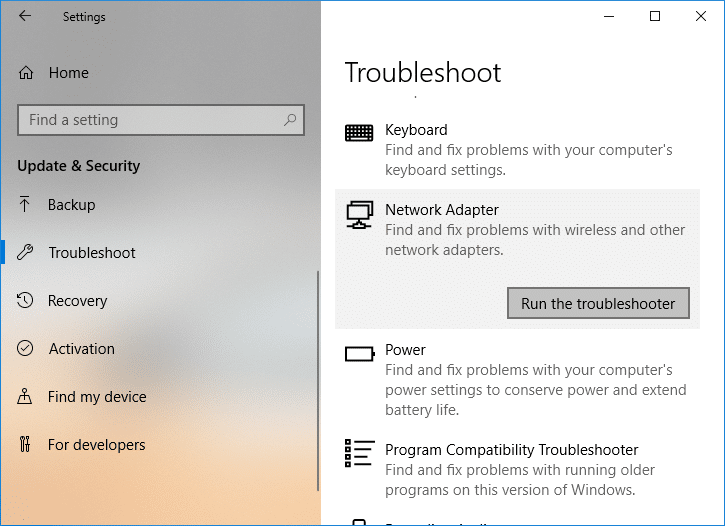
2. Mula sa kaliwang menu piliin I-troubleshoot.
3. Sa ilalim ng Troubleshoot i-click ang Mga Koneksyon sa Internet at pagkatapos ay mag-click Patakbuhin ang troubleshooter.

4. Sundin ang mga karagdagang tagubilin sa screen upang patakbuhin ang troubleshooter.
5. Kung hindi naayos ng nasa itaas ang isyu pagkatapos ay mula sa Troubleshoot window, mag-click sa Network adaptor at pagkatapos ay mag-click sa Patakbuhin ang troubleshooter.
5. I-reboot ang iyong PC upang i-save ang mga pagbabago at tingnan kung magagawa mo fix the Network Adapter Missing issue.
Paraan 8: I-install ang Intel PROSet/Wireless Software
Minsan ang problema ay sanhi dahil sa hindi napapanahong Intel PROSet Software, kaya ang pag-update ay tila fix Network Adapter Missing in Windows 10 issue. Samakatuwid, pumunta dito at i-download ang pinakabagong bersyon ng PROSet/Wireless Software at i-install ito. Ito ay isang third party na software na namamahala sa iyong koneksyon sa WiFi sa halip na Windows at kung ang PROset/Wireless Software ay luma na ay maaaring magdulot ng isyu sa mga driver sa Wireless Network Adaptor. Hence, read How to Update Network Adapter Drivers on Windows 10.
Paraan 9: I-reset ang Koneksyon sa Network
1. Pindutin ang Windows Key + I upang buksan ang Mga Setting pagkatapos ay mag-click sa Network at Internet.

2. Mula sa kaliwang menu piliin Katayuan.
3. Ngayon mag-scroll pababa at mag-click sa I-reset ang network sa ilalim.

4. Muli mag-click sa “I-reset ngayon” sa ilalim ng seksyong Pag-reset ng network.

5. This will successfully reset your network adapter and once it is complete the system will be restarted.
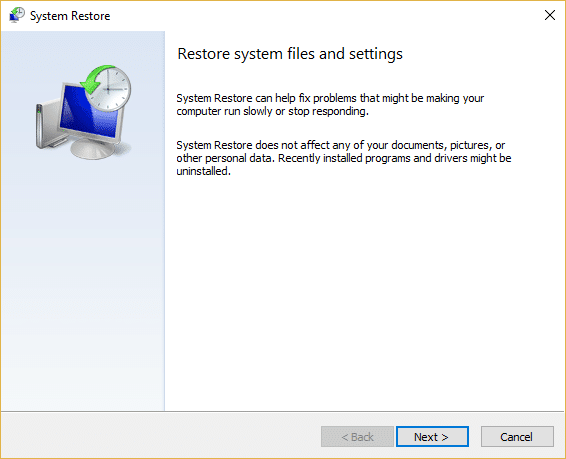
Paraan 10: Magsagawa ng System Restore
Palaging gumagana ang System Restore sa paglutas ng error, samakatuwid ang System Restore ay tiyak na makakatulong sa iyo sa pag-aayos ng error na ito. Kaya nang walang pag-aaksaya ng anumang oras magpatakbo ng system restore upang resolve Network Adapter Missing issue.
Method 11: Using elevated Command Prompt
1. Pindutin ang Windows Key + X pagkatapos ay piliin Command Prompt (Admin).

2. I-type ang sumusunod na command sa cmd at pindutin ang Enter:
netcfg –s n
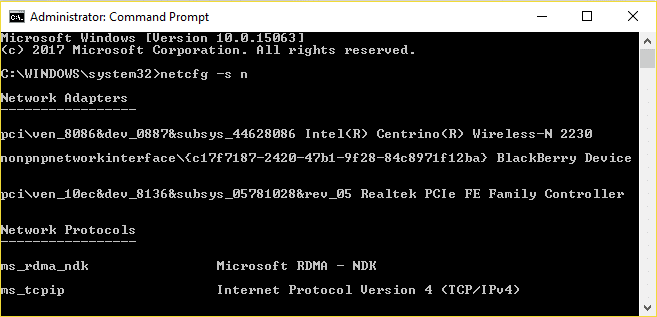
3. This will display a list of networking protocols and in that list find DNI_DNE.
4. If DNI_DNE is listed then type the following command into cmd:
reg tanggalin ang HKCRCLSID {988248f3-a1ad-49bf-9170-676cbbc36ba3} / va / f
netcfg -v -u araw_araw
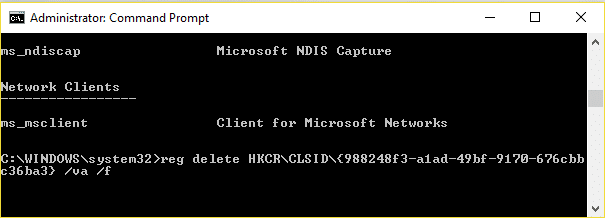
5. If you don’t see DNI_DNE listed then only run the command netcfg -v -u araw_araw.
6. Now if you receive the error 0x80004002 after trying to run the above command then you need to delete the above key manually.
7. Pindutin ang Windows Key + R pagkatapos ay i-type regedit at pindutin ang Enter.

8. Navigate to the following Registry Key:
HKEY_CLASSES_ROOTCLSID{988248f3-a1ad-49bf-9170-676cbbc36ba3}
9. Delete this key and then again type netcfg -v -u araw_araw command in cmd.
10. I-reboot ang iyong PC upang i-save ang mga pagbabago.
Inirerekomenda para sa iyo:
Iyan na ang iyong matagumpay Ayusin ang Network Adapter na Nawawala sa Windows 10 ngunit kung mayroon ka pa ring mga katanungan tungkol sa post na ito, huwag mag-atubiling tanungin sila sa seksyon ng komento.

