Enable or Disable Secure Login in Windows 10: Secure Login is a security feature of Windows 10 which when enabled requires users to press Ctrl + Alt + delete on the lock screen before they can sign in using their username and password in Windows 10. Secure Sign just adds an extra layer of security to your sign-in screen which is always a good thing to make your PC is more secure. The main problem occurs when a virus or malware programs mimic a sign-in screen in order to retrieve username & password information from users. In such cases, Ctrl + Alt + delete ensures that you are seeing the authentic sign-in screen.

This security setting is disabled by default and thus you need to follow this tutorial in order to enable the secure logon. There are many additionals benefit of using secure logon so it’s recommended you enable it. So without wasting any time let’s see How to Enable or Disable Secure Login in Windows 10 which requires the user to press Ctrl+Alt+Delete on the lock screen before signing in to Windows 10.
Enable or Disable Secure Login in Windows 10
کچھ غلط ہونے کی صورت میں بحالی پوائنٹ بنانا یقینی بنائیں۔
Method 1: Enable or Disable Secure Sign-in in Netplwiz
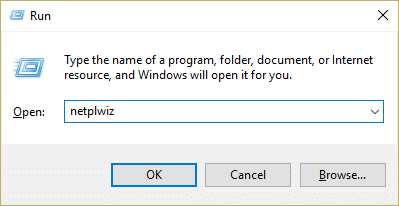
1. ونڈوز کی + R دبائیں پھر ٹائپ کریں۔ netplwiz اور کھولنے کے لئے درج کریں پر دبائیں صارف اکاؤنٹس.
2. پر سوئچ کریں۔ اعلی درجے کی ٹیب اور checkmark “Require users to press Ctrl+Alt+Delete” box at the bottom under the Secure sign-in to enable secure login in Windows 10.
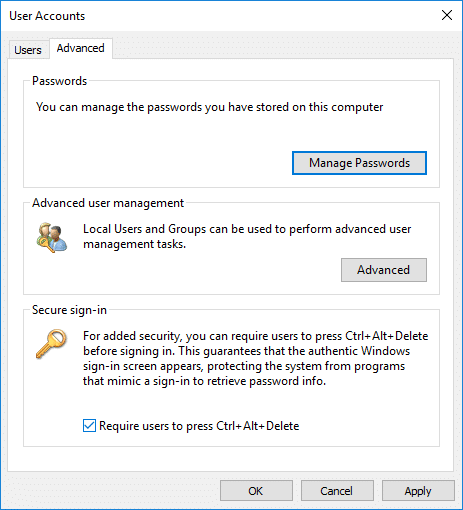
3. OK کے بعد اپلائی پر کلک کریں۔
4.If in future you need to disable secure login then simply نشان زد کریں "Require users to press Ctrl+Alt+Delete" ڈبہ.
Method 2: Enable or Disable Secure Login in Local Security Policy
نوٹ: This method will only work for Windows Pro, Education and Enterprise edition. For Windows 10 Home users, you can follow skip tis method inseatd follow method 3.
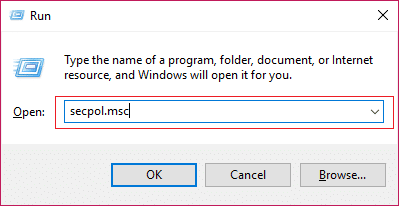
1. ونڈوز کی + R دبائیں پھر ٹائپ کریں۔ secpol.msc اور داخل کریں.
2.Navigate to the following policy:
مقامی پالیسیاں> سیکیورٹی کے اختیارات
3. منتخب کرنا یقینی بنائیں سیکیورٹی کے اختیارات then in the right window pane double-click on “Interactive Logon: Do not require CTRL+ALT+DEL” to open its properties.
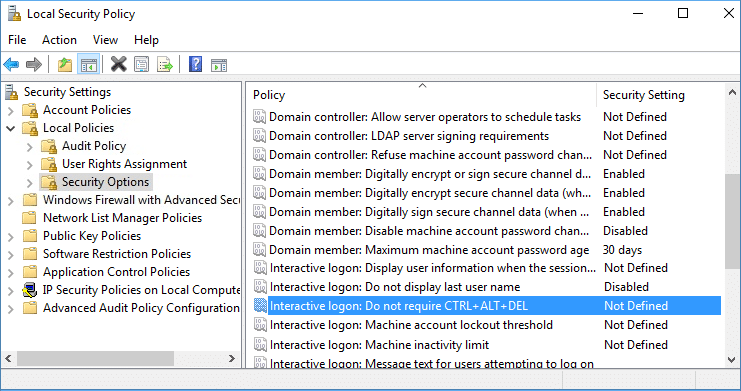
4.Now to enable secure login in Windows 10منتخب غیر فعال کر دیا اور پھر اپلائی پر کلک کریں اور اس کے بعد ٹھیک ہے۔
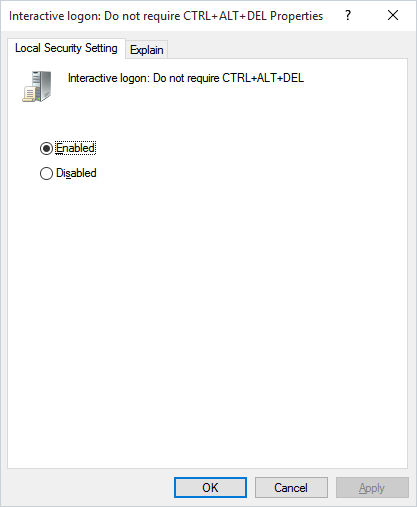
5.If you need to disable secure login then select Enabled and click OK.
6.Close Local Security Policy window and restart your PC.
Method 3: Enable or Disable Secure Login in Windows 10 using Registry Editor
1. ونڈوز کی + R دبائیں پھر ٹائپ کریں۔ کی regedit اور داخل کریں.

2. درج ذیل رجسٹری کلید پر جائیں:
HKEY_LOCAL_MACHINESOFTWAREMicrosoftWindows NTCurrentVersionWinlogon
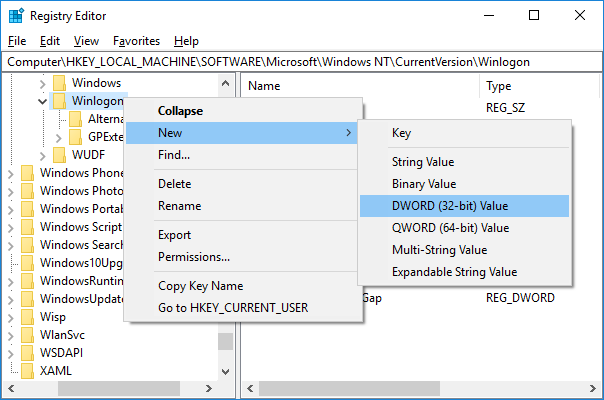
3. منتخب کرنا یقینی بنائیں Winlogon then in the right window pane double-click on DisableCAD.

نوٹ: If you can’t find the DisableCAD then right-click on Winlogon then select نیا> DWORD (32 بٹ) قدر and name this DWORD as DisableCAD.
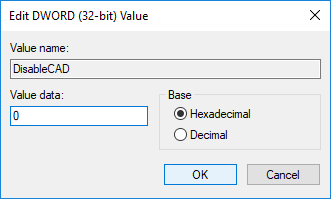
4.Now in the value data field type the following and click OK:
To Disable Secure Logon: 1
To Enable Secure Logon: 0
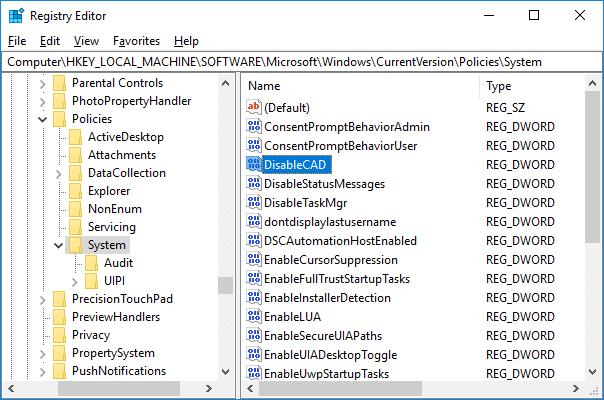
5.Next, navigate to the following registry key and follow the steps 3 & 4 here:
HKEY_LOCAL_MACHINESOFTWAREMicrosoftWindowsCurrentVersionPoliciesSystem
6.Close Registry Editor then restart your PC to save changes.
سفارش کی جاتی ہے:
یہ آپ نے کامیابی سے سیکھا ہے۔ How to Enable or Disable Secure Login in Windows 10 لیکن اگر آپ کے پاس اب بھی اس ٹیوٹوریل کے حوالے سے کوئی سوالات ہیں تو بلا جھجھک ان سے تبصرے کے سیکشن میں پوچھیں۔

![Add a Printer in Windows 10 [GUIDE]](https://lbsite.org/wp-content/uploads/2023/02/Add-a-Printer-in-Windows-10.png "Add a Printer in Windows 10 [GUIDE]")