When you try to install apps on Windows Store, you may face Error Code 0x80073cf9, which can be very frustrating as Windows Store is a reliable source to install apps. If you try to install 3rd party apps from any other source, you risk your machine to malware or infections but what other option you have if you cannot install apps from Windows Store. Well, that’s where you’re wrong this error can be fixed, and that’s what exactly we are going to teach you in this article.
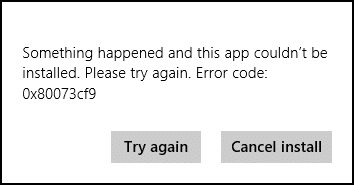
Something happened, and this app couldn’t be installed. Please try again. Error code: 0x80073cf9
There is no single cause as to why this error occurs so that various methods can fix this error. Most of the times it completely depends on the user machine configuration as to which method might work for them, so without wasting any time, let’s see how to fix this error.

Fix Windows 10 Store Error 0x80073cf9
کچھ غلط ہونے کی صورت میں بحالی پوائنٹ بنانا یقینی بنائیں۔
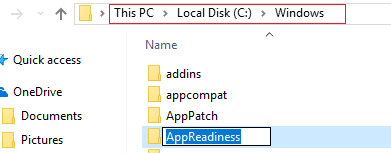
Method 1: Create A Folder AppReadiness
1. Windows Key + R دبائیں پھر ٹائپ کریں۔ سی: ونڈوز اور داخل کریں.
2. Find the folder AppReadniess in the Windows folder, if you can’t follow the next step.
3. Right-click in an empty area and select نیا > فولڈر۔
4. Name the newly created folder as AppReadness اور داخل کریں.
5. Reboot your PC to save changes. Again try to access the Store, and this time it might work perfectly.
طریقہ 2: ونڈوز اسٹور کو دوبارہ انسٹال کریں۔
1. Open Command Prompt as an ایڈمنسٹریٹر۔

2. Run below PowerShell command
گیٹ-ایپیکس پیکج -تمام صارف | پیش گوئی {شامل کریں۔

3. Once done, close command prompt and Restart your PC.
This step re-register Windows Store apps which should automatically Fix Windows 10 Store Error 0x80073cf9.
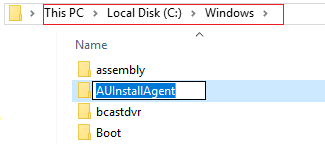
Method 3: Create a folder AUInstallAgent
1. Windows Key + R دبائیں پھر ٹائپ کریں۔ سی: ونڈوز اور داخل کریں.
2. Find the folder AUInstallAgent in the Windows folder, if you can’t then follow the next step.
3. Right-click in an empty area and select نیا > فولڈر۔
4. Name the newly created folder as AAUInstallAgent اور داخل کریں.
5. Reboot your PC to save changes. This step may fix Windows 10 Store Error 0x80D05001 or 0x80073cf9 but if it didn’t then continue.
Method 4: Allow Full System Access to Packages in AppRepository
1. ونڈوز کی + R دبائیں پھر ٹائپ کریں۔ C: پروگرام ڈیٹا مائیکروسافٹ ونڈوز اور داخل کریں.
2. Now double click on AppRepository folder to open it, but you will receive an error:
You have been denied permission to access this folder.
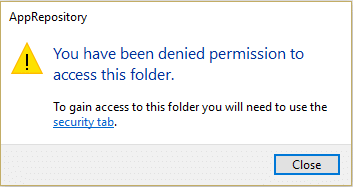
3. This means you need to take ownership of this folder before you can access it.
4. You can take ownership of the folder via the following method: How To Fix Destination Folder Access Denied Error.
5. Now you need to give the SYSTEM account, and the APPLICATION PACKAGES account full control on the folder C:ProgramDataMicrosoftWindowsAppRepositoryPackages. To this follow the next step.
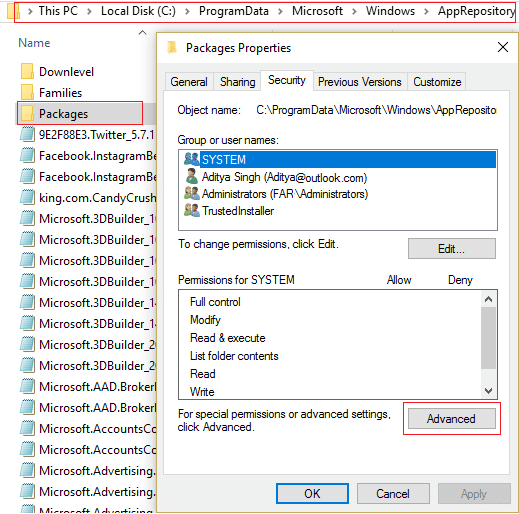
6. پر دائیں کلک کریں Packages folder اور منتخب کریں پراپرٹیز.
7. منتخب کریں سیکورٹی ٹیب اور پھر کلک کریں اعلی درجے کی.
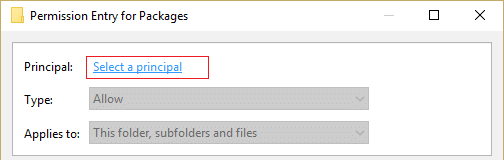
8. In Advanced Security Settings, click شامل کریں and click on Select a اہم.
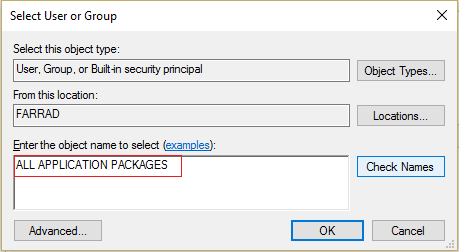
9. اگلا، ٹائپ کریں "تمام اطلاق کے پیکیجز” (without quote) in the field Enter the object name to select and click OK.
10. Now, on the next window check mark Full control and then click OK.
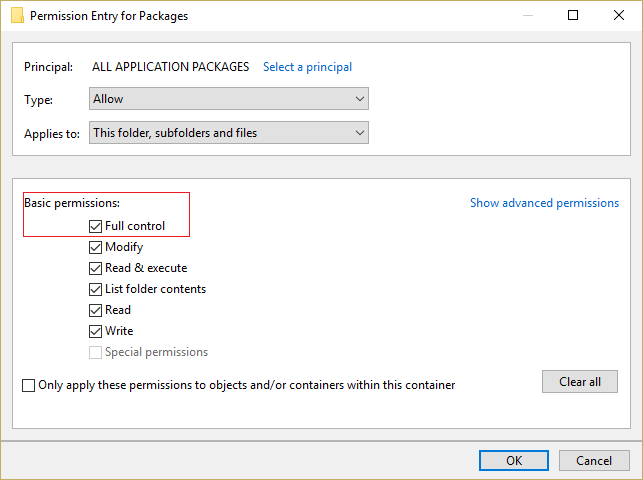
11. Do the same with the SYSTEM account. Reboot your PC to save changes.
Method 5: Rename Software Distribution Folder
1. Press Windows Key + Q to open Charms Bar and type سینٹی میٹر
2. Right-click on cmd and select انتظامیہ کے طورپر چلانا.
3. Type these commands and hit enter:
net stop wuauserv
ren c:windowsSoftwareDistribution softwaredistribution.old
net start wuauserv
exit
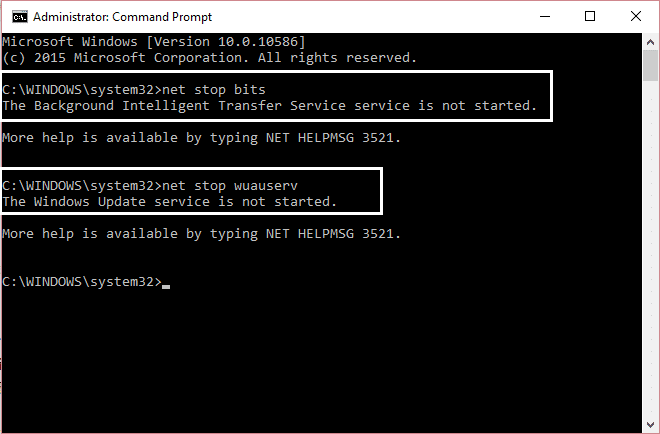
4. Reboot your PC to saves changes and again try to download updates.
طریقہ 6: DISM چلائیں (تعیناتی امیج سروسنگ اور مینجمنٹ)
1. Windows Key + X دبائیں پھر منتخب کریں۔ کمانڈ پرامپٹ (ایڈمن)۔

2. Enter the following command in cmd and hit enter:
اہم: جب آپ DISM کرتے ہیں تو آپ کو ونڈوز انسٹالیشن میڈیا تیار رکھنے کی ضرورت ہوتی ہے۔
DISM.exe/Online/Cleanup-Image/RestoreHealth/Source:C:RepairSourceWindows/LimitAccess
نوٹ: C:RepairSourceWindows کو اپنے مرمت کے ذریعہ کے مقام سے تبدیل کریں۔

3. Press enter to run the above command and wait for the process to complete; usually, it takes 15-20 minutes.
نوٹ: اگر مندرجہ بالا کمانڈ کام نہیں کرتی ہے تو نیچے کی کوشش کریں: Dism/Image:C:offline/Cleanup-Image/RestoreHealth/Source:c:testmountwindows Dism/Online/Cleanup-Image/RestoreHealth/Source:c:testmountwindows/Limit
4. After the DISM process is complete, type the following in the cmd and hit Enter: ایس ایف سی / اسکانانو
5. Let System File Checker run and once it’s complete, restart your PC.
طریقہ 7: CCleaner اور Malwarebytes چلائیں۔
1. ڈاؤن لوڈ اور انسٹال کریں CCleaner اور مال ویئر بائٹس۔
2. Malwarebytes چلائیں۔ اور اسے آپ کے سسٹم کو نقصان دہ فائلوں کے لیے اسکین کرنے دیں۔ اگر میلویئر پایا جاتا ہے، تو یہ انہیں خود بخود ہٹا دے گا۔

3. اب CCleaner چلائیں اور منتخب کریں۔ کسٹم کلین.
4. کسٹم کلین کے تحت، منتخب کریں۔ ونڈوز ٹیب اور ڈیفالٹس کو چیک کریں اور کلک کریں۔ تجزیہ.

5. تجزیہ مکمل ہونے کے بعد، اس بات کو یقینی بنائیں کہ آپ حذف ہونے والی فائلوں کو ہٹانے کے لیے یقینی ہیں۔

6. آخر میں ، پر کلک کریں کلینر چلائیں۔ بٹن اور CCleaner کو اپنا کورس چلانے دیں۔
7. اپنے سسٹم کو مزید صاف کرنے کے لیے، رجسٹری ٹیب کو منتخب کریں۔، اور یقینی بنائیں کہ درج ذیل چیک کیے گئے ہیں:

8. پر کلک کریں مسائل کے لیے اسکین کریں۔ بٹن دبائیں اور CCleaner کو اسکین کرنے کی اجازت دیں، پھر کلک کریں۔ منتخب کردہ مسائل کو درست کریں۔ بٹن پر کلک کرنا ہے۔

9. جب CCleaner پوچھتا ہے "کیا آپ رجسٹری میں بیک اپ تبدیلیاں چاہتے ہیں؟" ہاں منتخب کریں.
10. آپ کا بیک اپ مکمل ہونے کے بعد، پر کلک کریں۔ تمام منتخب مسائل کو ٹھیک کریں۔ بٹن پر کلک کرنا ہے۔
11. تبدیلیاں محفوظ کرنے کے لیے اپنے کمپیوٹر کو دوبارہ شروع کریں۔
طریقہ 8: ونڈوز اسٹور کیشے کو صاف کریں۔
1. Windows Key + R دبائیں پھر ٹائپ کریں۔ wsreset.exe اور داخل ہو جاؤ.
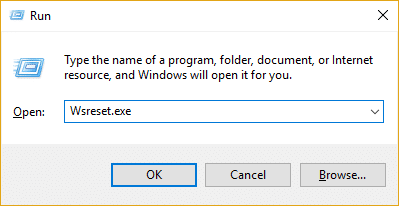
2. ایک عمل مکمل ہو جائے تو اپنے کمپیوٹر کو دوبارہ شروع کریں۔
Method 9: Run Windows Update and Windows Store Apps troubleshooter
1. ٹائپ کریں مشکلات کا سامنا کرنا پڑتا ہے in the Windows Search bar and click on خرابیوں کا سراغ لگانے والا۔
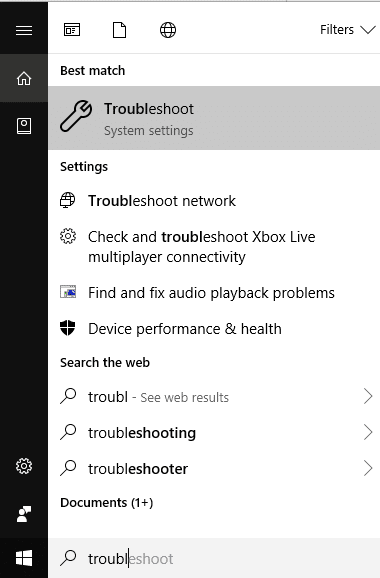
2. اگلا، بائیں ونڈو سے، پین کو منتخب کریں۔ سب دیکھیں.
3. پھر کمپیوٹر کے مسائل حل کرنے کی فہرست سے منتخب کریں۔ ونڈوز اپ ڈیٹ.

4. Follow on-screen instruction and let the Windows Update Troubleshoot run.

5. Now again go back to the View all window but this time select ونڈوز اسٹور ایپس. Run the troubleshooter and follow on-screen instructions.
6. Restart your PC and again try to install apps from Windows Store.
سفارش کی جاتی ہے:
یہ آپ نے کامیابی سے حاصل کی ہے۔ Fix Windows 10 Store Error 0x80073cf9 but if you still have any queries regarding this post feel free to ask them in comment’s section.

