How to fix Printer not activated Error Code 20: If you’re facing the error message “Printer not activated – Error Code 20” then you’re at the right place as today we are going to see how to fix the issue. The issue is generally seen in systems in which user have upgraded from earlier version of Windows or using the QuickBooks software. In anyway case, let’s see how to fix Printer not activated Error Code 20 with the help of the below-listed guide.
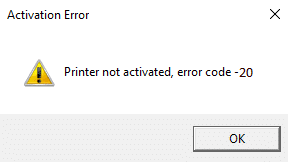
How to fix Printer not activated Error Code 20
کچھ غلط ہونے کی صورت میں بحالی پوائنٹ بنانا یقینی بنائیں۔
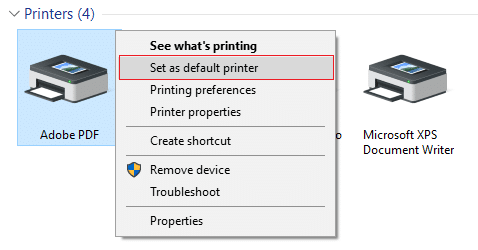
Method 1: Set the Default Printer
1. ونڈوز سرچ میں کنٹرول ٹائپ کریں پھر کلک کریں۔ کنٹرول پینل.

2.Cick ہارڈ ویئر اور آواز اور پھر منتخب کریں ڈیوائسز اور پرنٹرز۔

3.Right-click on your printer and select Set as a default printer.
4. تبدیلیاں محفوظ کرنے کے لیے اپنے کمپیوٹر کو دوبارہ شروع کریں۔
Method 2: Re-install the USB Composite Device from Device Manager
1. ونڈوز کی + R دبائیں پھر ٹائپ کریں۔ devmgmt.msc اور داخل کریں.

2. توسیع کریں۔ Universal Serial Bus Controllers.
3. پر دائیں کلک کریں۔ USB Composite Device اور منتخب کریں انسٹال کریں.
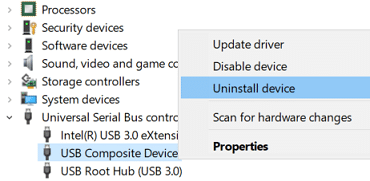
4.If asks for confirmation select Yes/OK.
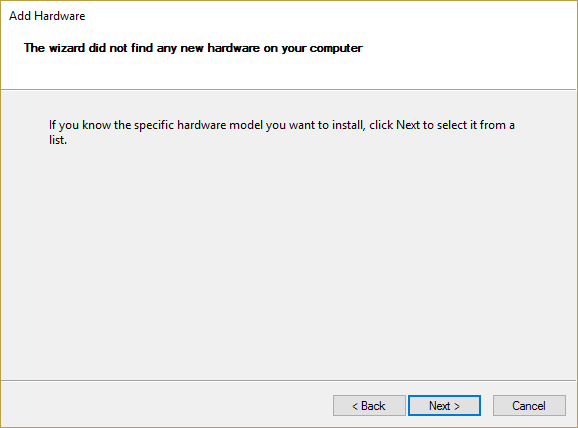
5.Disconnect the Printer USB from the PC and then reconnect it.
6.Follow the instructions in the Found New Hardware wizard ڈرائیوروں کو انسٹال کرنے کے لیے۔
7.Right-click the printer icon, and then click ٹیسٹ کا صفحہ پرنٹ کریں۔ to print a Windows self-test page.
8. تبدیلیاں محفوظ کرنے کے لیے اپنے کمپیوٹر کو دوبارہ شروع کریں۔
طریقہ 3: پرنٹر ٹربل شوٹر چلائیں۔
1.type “troubleshooting” in Windows Search bar and click on خرابیوں کا سراغ لگانا.

6. اگلا، بائیں ونڈو پین سے منتخب کریں۔ سب دیکھیں.
7. پھر کمپیوٹر کے مسائل حل کرنے کی فہرست سے منتخب کریں۔ پرنٹر۔
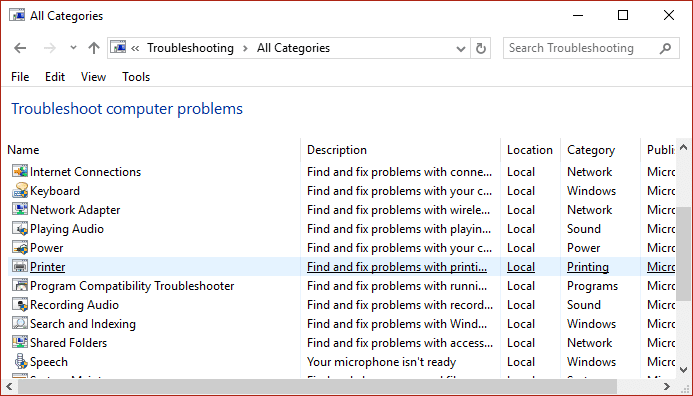
8. آن اسکرین ہدایات پر عمل کریں اور پرنٹر ٹربل شوٹر کو چلنے دیں۔
9.Restart your PC and you may be able to Fix Printer not activated Error Code 20.
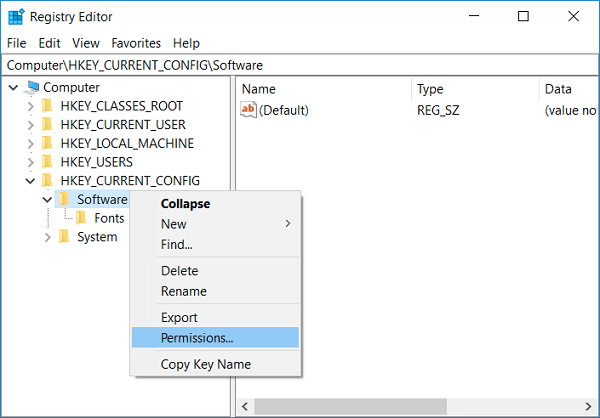
طریقہ 4: رجسٹری درست کریں۔
1. ونڈوز کی + R دبائیں پھر ٹائپ کریں۔ کی regedit اور رجسٹری ایڈیٹر کھولنے کے لیے Enter کو دبائیں۔

2. درج ذیل رجسٹری کلید پر جائیں:
HKEY_CURRENT_CONFIG سافٹ ویئر
3.Right-click on Software folder then select اجازت
4.Now in the permission window, ensure that Administrator and users ہے مکمل کنٹرول checked, if not then checkmark them.
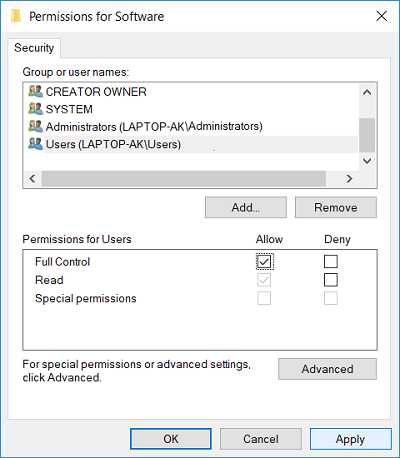
5. OK کے بعد اپلائی پر کلک کریں۔
6.Restart your PC to save changes and see if you’re able to fix the issue.
Method 5: Grant Permission using PowerShell
1 ٹائپ پاورشیل ونڈوز سرچ میں پھر دائیں کلک کریں۔ پاورشیل اور منتخب کریں انتظامیہ کے طورپر چلانا.
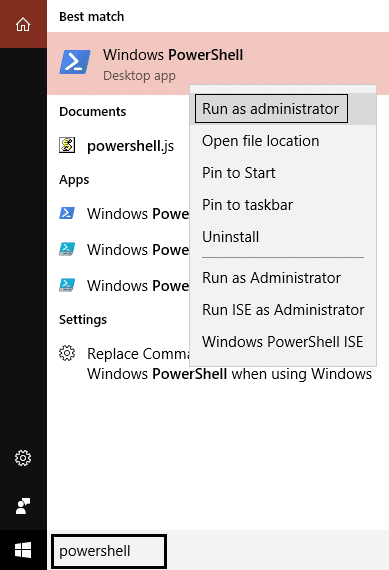
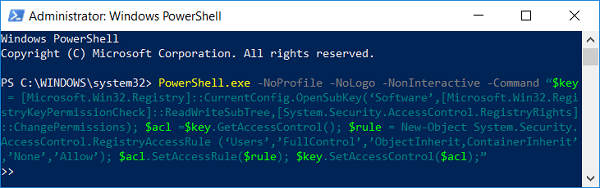
2.Now type the following command in PowerShell and hit Enter:
PowerShell.exe -NoProfile -NoLogo -NonInteractive -Command “$key = [Microsoft.Win32.Registry]::CurrentConfig.OpenSubKey(‘Software’,[Microsoft.Win32.RegistryKeyPermissionCheck]::ReadWriteSubTree,[System.Security.AccessControl.RegistryRights]::ChangePermissions); $acl =$key.GetAccessControl(); $rule = New-Object System.Security.AccessControl.RegistryAccessRule (‘Users’,’FullControl’,’ObjectInherit,ContainerInherit’,’None’,’Allow’); $acl.SetAccessRule($rule); $key.SetAccessControl($acl);”
3. تبدیلیوں کو بچانے کے لیے اپنے کمپیوٹر کو دوبارہ بوٹ کریں۔
Method 6: Reinstall QuickBook
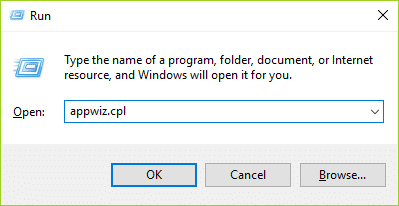
1. ونڈوز کی + R دبائیں پھر ٹائپ کریں۔ Appwiz.cpl اور داخل کریں.
2.Find QuickBook from the list and uninstall it.
3. اگلا، download QuickBooks from here.
4.Run the installer and follow on-screen instructions to install QuickBook.
5. اپنے پی سی کو دوبارہ شروع کریں۔
سفارش کی جاتی ہے:
یہ آپ نے کامیابی سے حاصل کی ہے۔ Fix Printer not activated Error Code 20 لیکن اگر آپ کے پاس اب بھی اس پوسٹ کے حوالے سے کوئی سوالات ہیں تو بلا جھجھک ان سے تبصرے کے سیکشن میں پوچھیں۔

