Windows 10 has a serious bug since it’s inception which makes text blurred on users PC and the problem is faced system-wide by the user. So it doesn’t matter if you go to System Settings, Windows Explorer or Control Panel, all the text will be somewhat blurred because of the DPI Scaling Level for Displays feature in Windows 10. So today we are going to discuss How To Change DPI Scaling Level for Displays in Windows 10.
Change DPI Scaling Level for Displays in Windows 10
Đảm bảo tạo điểm khôi phục đề phòng trường hợp xảy ra sự cố.
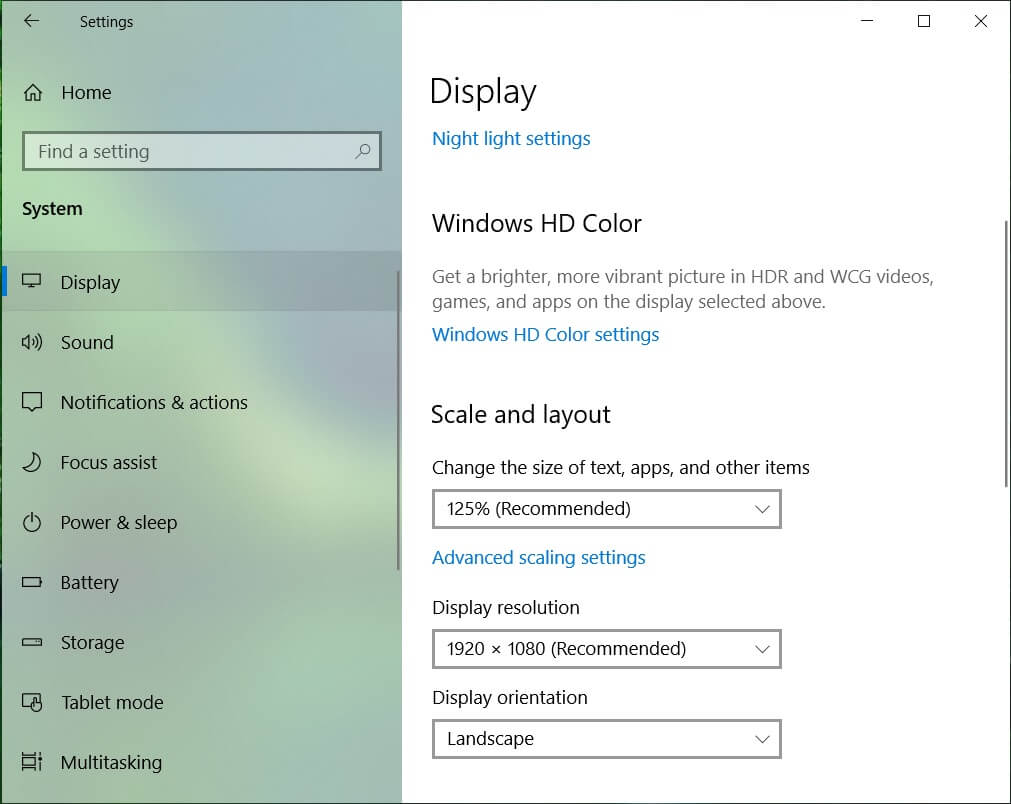
Method 1: Change DPI Scaling Level for Displays Using Settings App
1. Press Windows Key + I to open Settings and then click on Hệ thống.

2. From the left-hand menu, make sure to select Trưng bày.
3. If you have more than one display, then select your display at the top.
4. Bây giờ dưới Thay đổi kích thước của văn bản, ứng dụng và các mục khác, chọn nút DPI percentage từ thả xuống
5. Click on the Sign out now link to save changes.
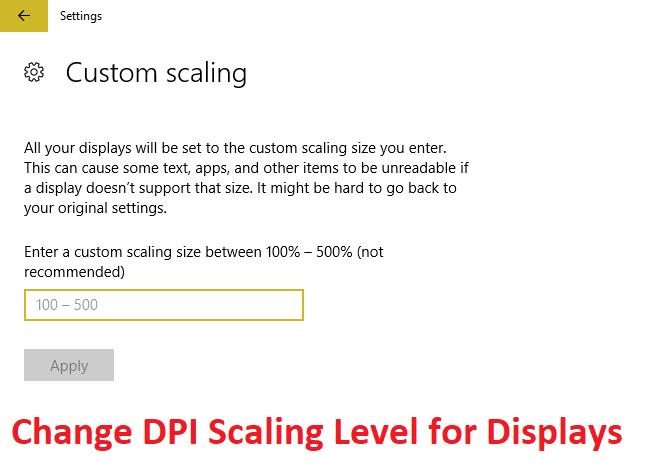
Method 2: Change Custom DPI Scaling Level for All Displays in Settings
1. Press Windows Key + I to open Settings and then click on Hệ thống.
2. From the left-hand menu, make sure to select Trưng bày.
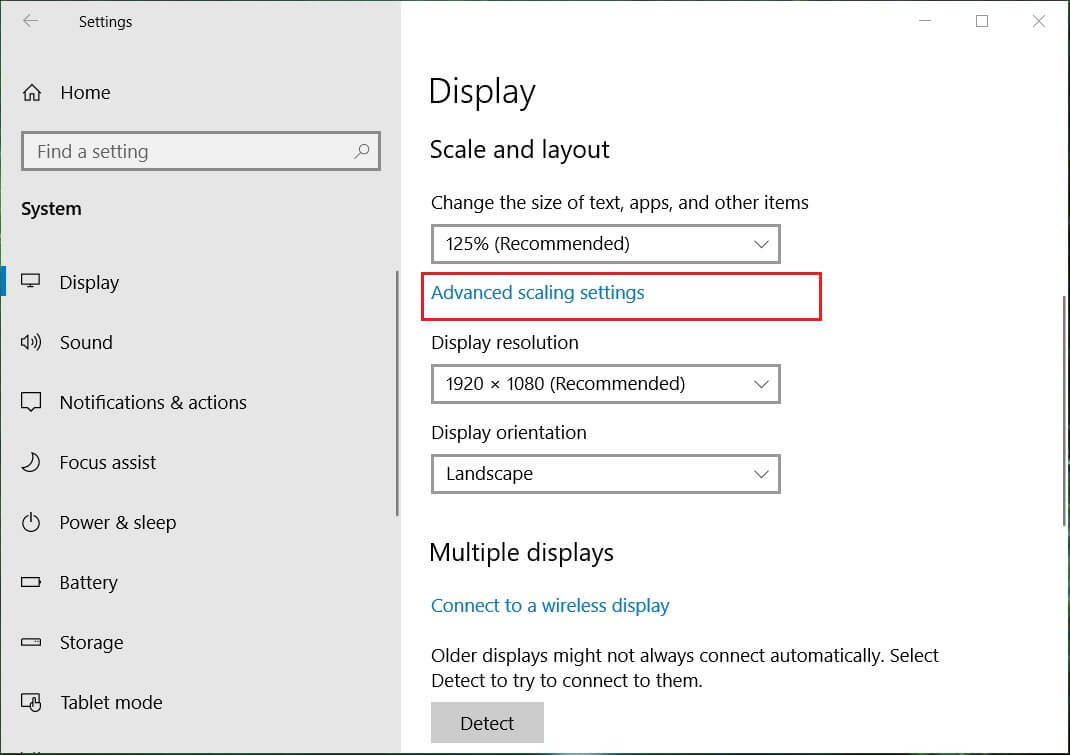
3. Now under Scale and layout click Custom scaling.
4. Enter a custom scaling size between 100% - 500% for all the displays and click on Apply.

5. Click on Sign out now to save changes.
Method 3: Change Custom DPI Scaling Level for All Displays in Registry Editor
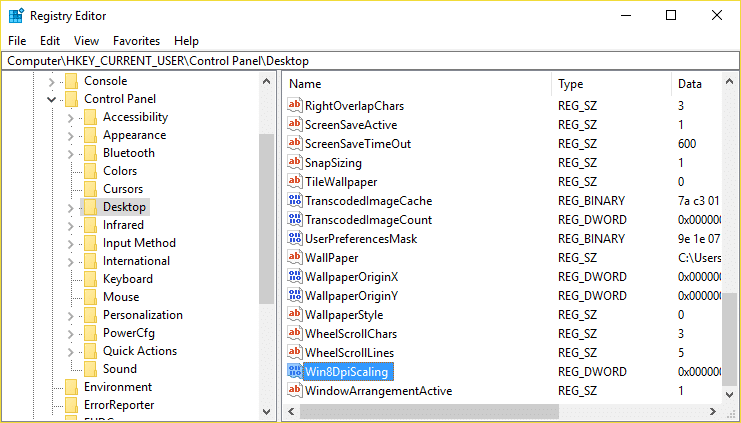
1. Nhấn phím Windows + R rồi gõ regedit và nhấn Enter.

2. Navigate to the following Registry key:
HKEY_CURRENT_USERControl PanelDesktop
3. Make sure you have highlighted Máy tính để bàn in the left window pane and then in the right window pane double click on LogPixels DWORD.
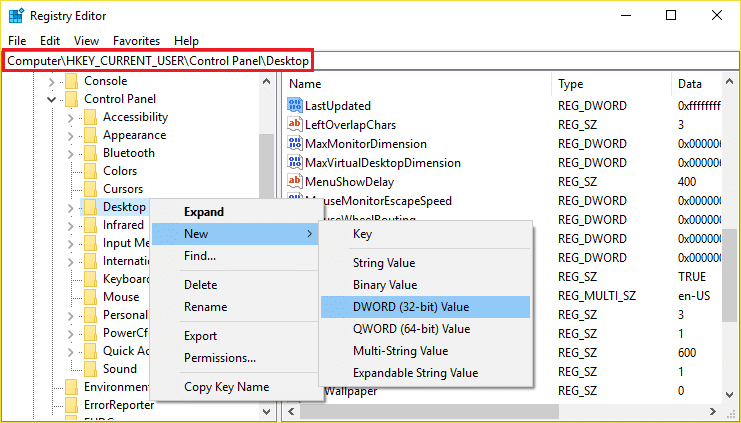
Lưu ý: If the above DWORD doesn’t exist, you need to create one, right-click on Desktop and select New > DWORD (32-bit) value. Name this newly created DWORD as LogPixels.
4. Lựa chọn Số Thập Phân under Base then change its value to any of the following data and then click OK:
| DPI Scaling Level |
Ngày giá trị |
| Smaller 100% (default) | 96 |
| Medium 125% | 120 |
| Larger 150% | 144 |
| Extra Large 200% | 192 |
| Custom 250% | 240 |
| Custom 300% | 288 |
| Custom 400% | 384 |
| Custom 500% | 480 |
![]()
5. Again make sure Desktop is highlighted and in the right window pane double click on Win8DpiScaling.
Lưu ý: If the above DWORD doesn’t exist, you need to create one, right-click on Desktop and select New > DWORD (32-bit) value. Name this DWORD as Win8DpiScaling.
6. Now change its value to 0 if you have chosen 96 from the above table for LogPixels DWORD but if you have chosen any other value from the table then set its giá trị về 1.
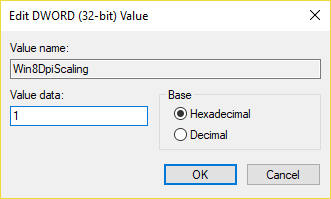
7. Click OK and close Registry Editor.
8. Khởi động lại PC của bạn để lưu các thay đổi.
Đề nghị:
Thế là bạn đã học thành công How To Change DPI Scaling Level for Displays in Windows 10 nhưng nếu bạn vẫn có bất kỳ câu hỏi nào liên quan đến bài đăng này thì vui lòng hỏi họ trong phần bình luận.
")
