Accessing a few web pages in your favorite browser might seem difficult due to some errors. If you are using the Microsoft Edge browser, you might have faced Microsoft Edge ERR NETWORK CHANGED error while surfing through any web pages. Nevertheless, this guide will help you fix a network change was detected Windows 10 error with effective troubleshooting steps. The methods in this article also apply to your Android device and other browsers too. So, what are you waiting for? Continue reading the article.
How to Fix Microsoft Edge ERR NETWORK CHANGED in Windows 10
Apart from network conflicts in your Windows 10 PC, a few other reasons cause a network change was detected Windows 10 error. They are listed below.
- Change in IP address.
- Router conflicts.
- Corrupt cache in browser.
- Conflicts from third-party extensions.
- Outdated Operating System.
- Cài đặt trình duyệt không tương thích.
- Malware/virus attack.
- Interference from VPN/proxy servers.
- Trình duyệt lỗi thời.
- Incompatible Network Adapters.
- Corrupt data in WLAN profiles.
- Restrictions from VPN, ISP, website owners, and proxy servers.
Although there is a huge list of reasons that cause your connection was interrupted a network change was detected an error in Microsoft Edge, you can easily resolve them all by following the below-discussed methods.
We have compiled a list of methods that will help you fix this error in the Edge in this article. Follow the below-mentioned methods in the same order to attain perfect results.
Phương pháp khắc phục sự cố cơ bản
Before trying any advanced troubleshooting methods, try the following basic troubleshooting methods. A basic and easy troubleshooting method may help in resolving the issue quickly.
- Tải lại (Reload) the page by pressing the Phím F5 or Phím Fn + F5 với nhau.
- Khởi động lại trình duyệt by closing all the browser windows and opening them.
- Khởi động lại của bạn hệ thống because a simple restarting might help in fixing the issue.
- Hãy thử sử dụng different Internet browsers such as Google Chrome, Opera, and Firefox.
Phương pháp 1: Chạy trình gỡ rối mạng
To analyze and fix all the connection problems, the in-built network troubleshooter will help you. All the network problems will be fixed, and the network operations will be improvised by running a network troubleshooter. Here are a few instructions to run the network troubleshooter on Windows 10 PC.
1. Nhấn vào Chốt cửa sổ. Kiểu Khắc phục sự cố cài đặt trong thanh tìm kiếm và mở nó.

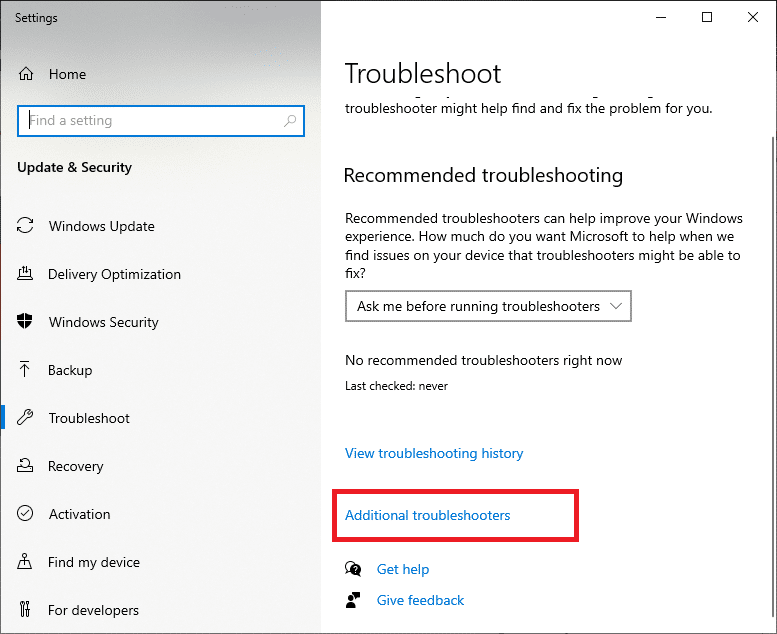
2. Bây giờ, click on Additional troubleshooters as depicted below.
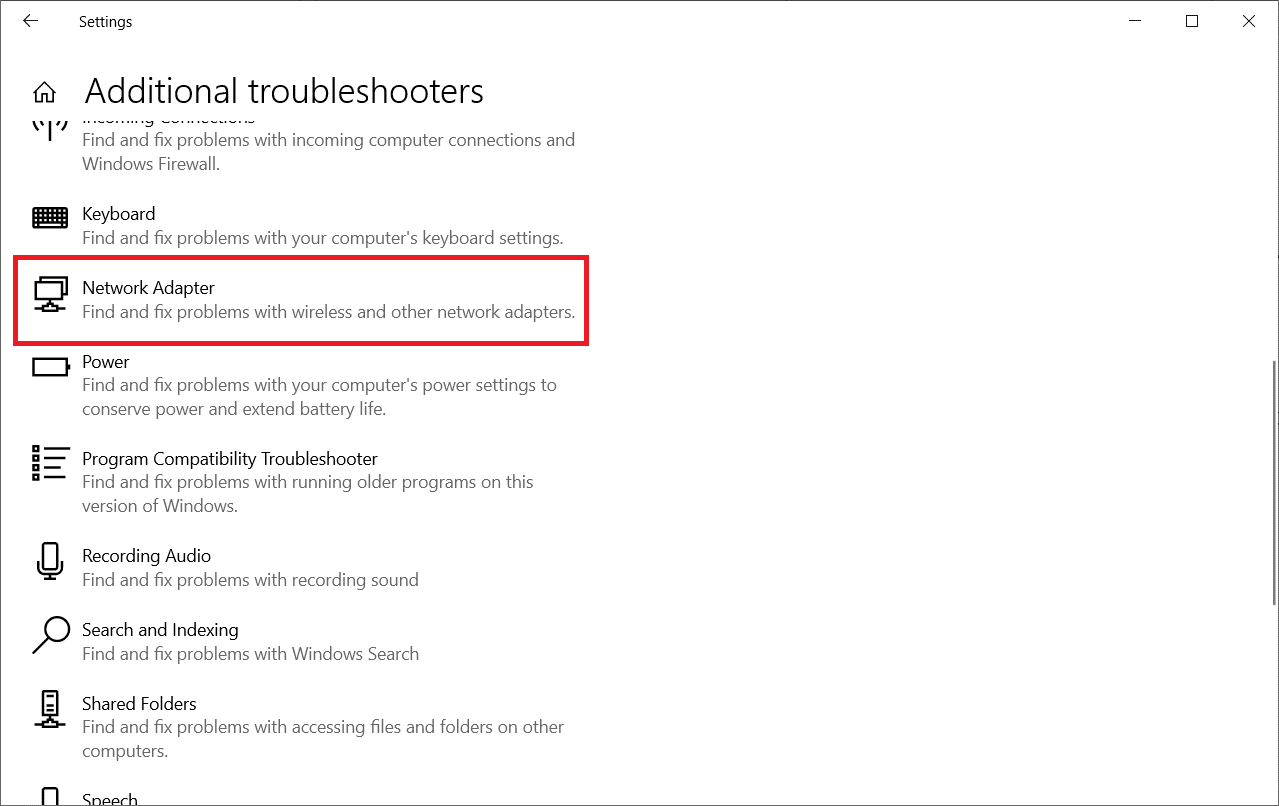
3. Bây giờ, hãy chọn Network Adapter, which is displayed under Find, and fix other problems.
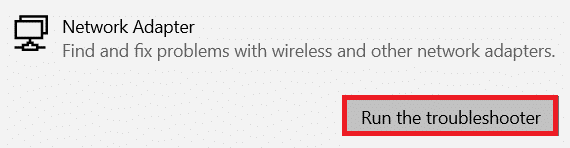
4. Lựa chọn Run the troubleshooter, and the Network Adapter troubleshooter will be launched now.
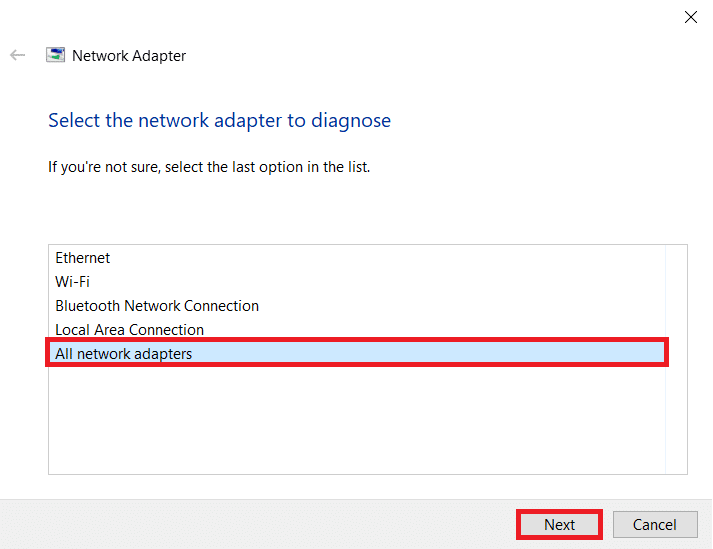
5. Lựa chọn All network adapters và nhấp Sau.
6. If there is an issue, click on Áp dụng bản sửa lỗi này and follow the instructions given in the successive prompts.
Method 2: Disable Proxy
Using proxy servers will divert the internet connection to a different tunnel. This will trigger ERR NETWORK CHANGED Windows 10 error message. There are so many error messages to disable proxy servers on your computer. Yet, the simplest method is explained below.
Lưu ý: Thoát khỏi Microsoft cạnh and make sure you close all the applications related to Edge from Task Manager.
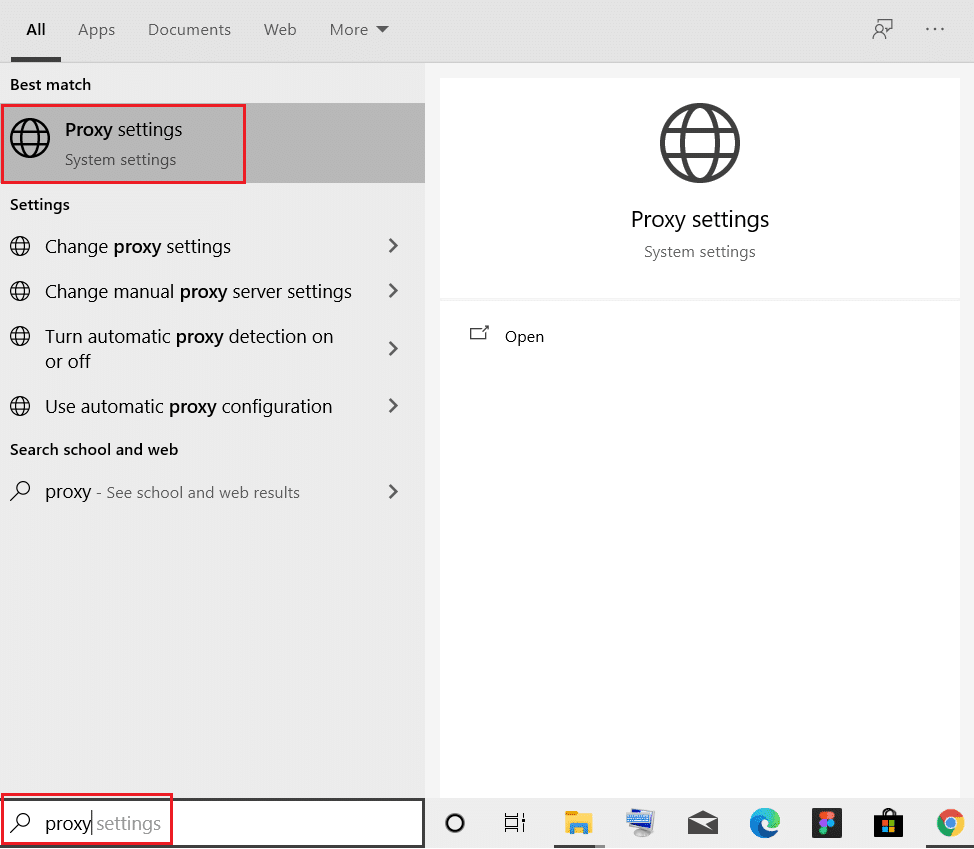
1. Now, hit the Windows nút. Kiểu Proxy and open as highlighted below.
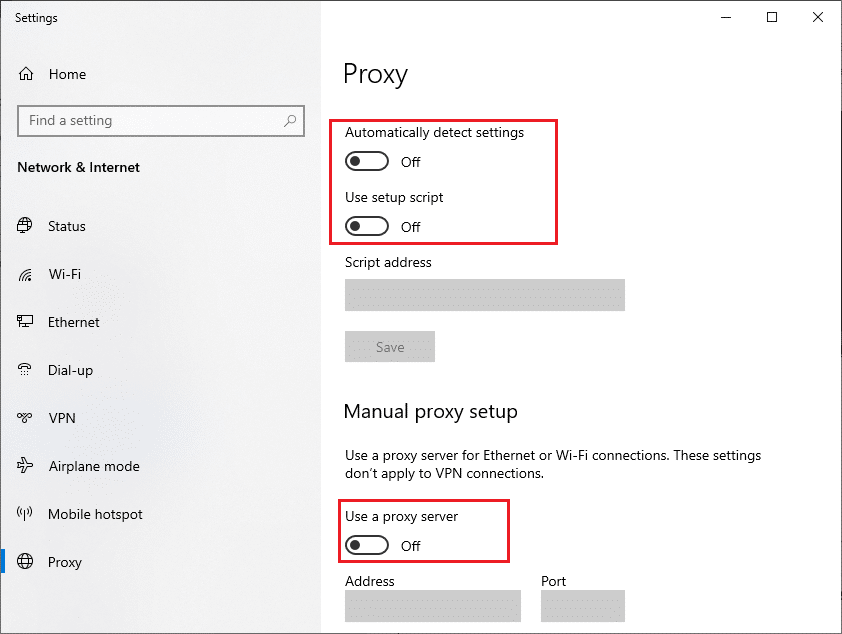
2. Here, toggle TẮT the following settings.
- Tự động phát hiện các thiết lập
- Sử dụng tập lệnh thiết lập
- Sử dụng máy chủ proxy
3. Now, relaunch the Trình duyệt cạnh and try if you can visit web pages.
4. If not, use a VPN client and check if your problem is fixed. If not, try connecting your PC to another network like Wi-Fi hoặc một điểm truy cập di động.
Cũng đọc: How to set up a VPN on Windows 10
Phương pháp 3: Vô hiệu hóa VPN
When your PC is disconnected from VPN, the original location of your computer will be mapped with the browser, leading to a network change was detected Windows 10 error. Hence, in this case, you are advised to disable your VPN client as instructed below.
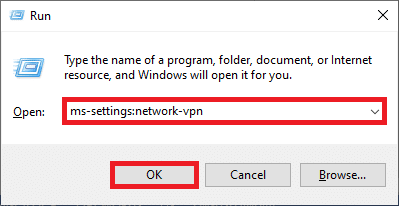
1. To use the chạy hộp thoại, nhấn Windows +R keys.
2. Kiểu cài đặt ms: mạng-vpn và nhấp vào OK .
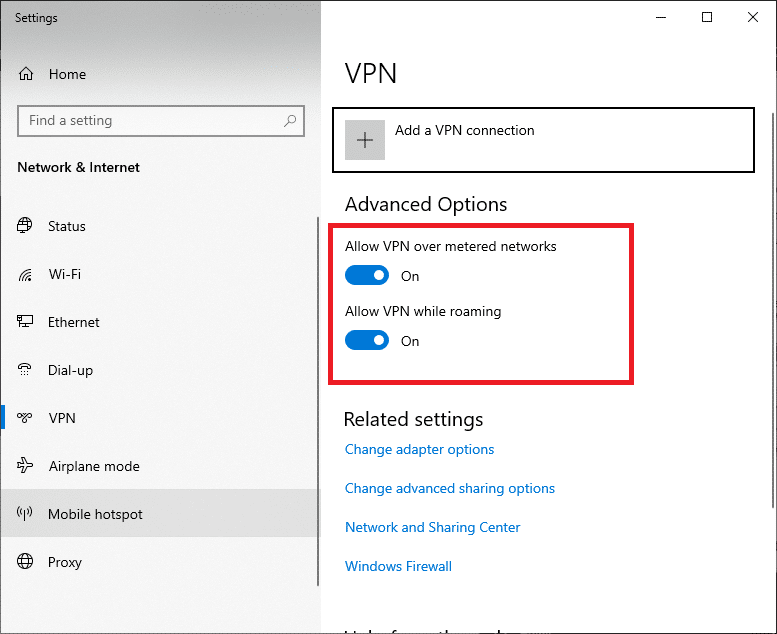
3. bên trong Cài đặt window, disconnect the active VPN service and toggle off the Tùy chọn VPN trong Tùy chọn nâng cao.
Method 4: Clear Edge Browser History
More often, corrupt browser cache leads to several browser errors rather than ERR NETWORK CHANGED Windows 10. A bulk of cookies and cache will slow down your internet experience and affects the loading responses. You can clear them all in a single shot by following the below-mentioned steps.
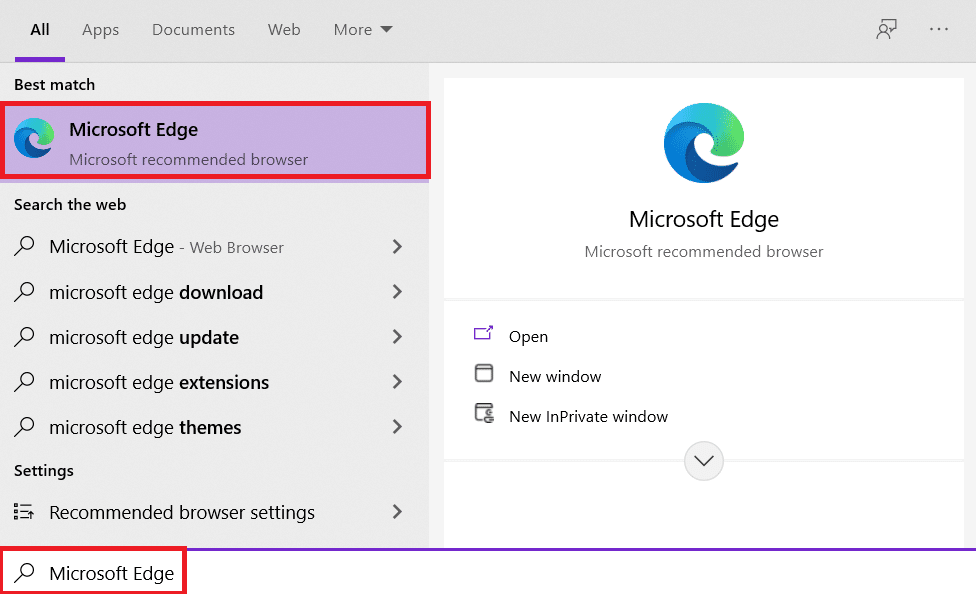
1. Nhấn nút Windows chìa khóa. Kiểu Cạnh và mở nó.
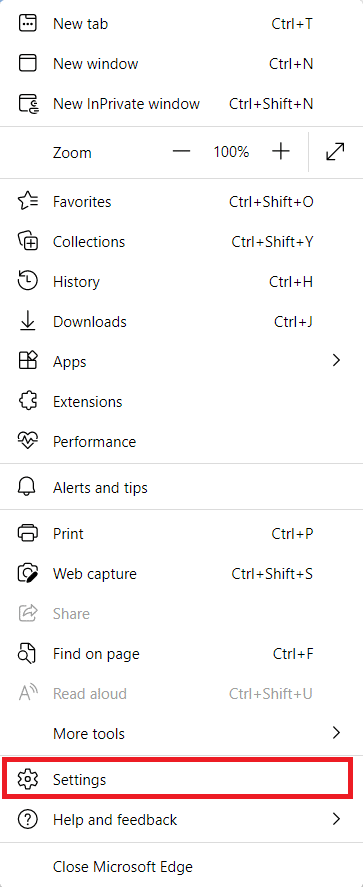
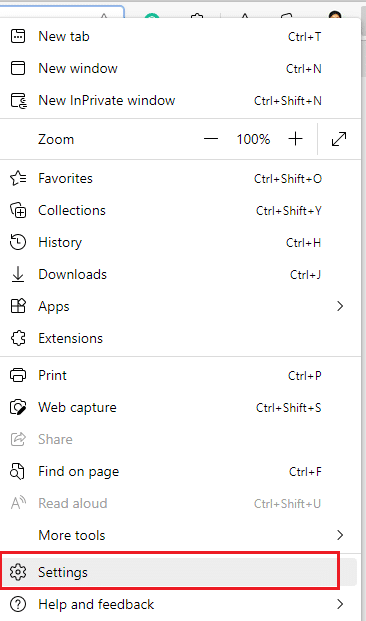
2. Bấm vào biểu tượng ba chấm near your profile image as you did earlier.
![]()
3. nhấp chuột Cài đặt.
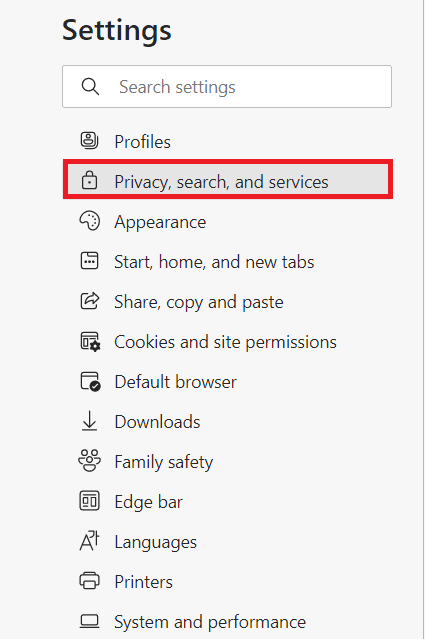
4. Bây giờ, hãy điều hướng đến Quyền riêng tư, tìm kiếm và dịch vụ option in the left pane as shown.
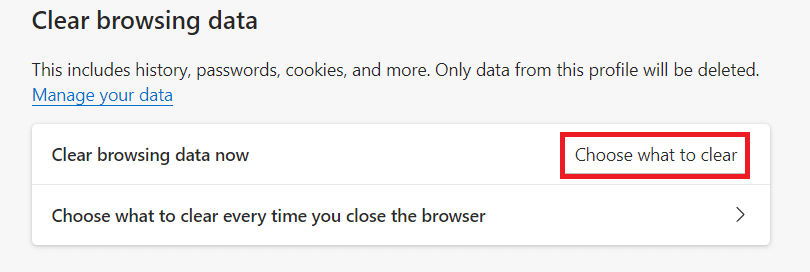
5. Then, scroll down the right screen and click on Chọn những gì để rõ ràng tùy chọn theo Xóa dữ liệu truy cập như hình.
Lưu ý: You can directly navigate the page to delete browsing history in the Edge by typing edge: // settings / clearBrowserData trong thanh tìm kiếm.
6. In the next window, select the boxes according to your preferences like Browsing history, Cookies, and other site datavà Hình ảnh và tập tin lưu trữ, và nhấp vào Xóa ngay bây giờ như được đánh dấu bên dưới.
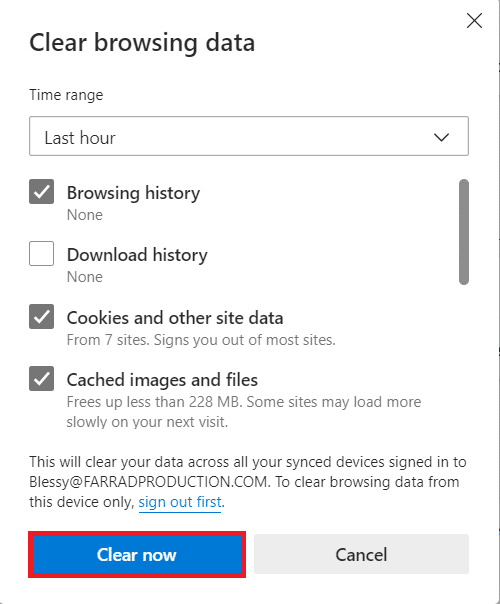
Finally, all your browsing data will be cleared now.
Cũng đọc: How to Fix Firefox Not Loading Pages
Method 5: Disable Extensions (If Applicable)
If you have installed any third-party extensions in your browser, you may face a network change was detected Windows 10 error. You can try closing all the unnecessary tabs and restarting your system. If you have closed all the tabs and still face the issue, try to disable all the extensions.
1. Phóng Trình duyệt cạnh và bấm vào biểu tượng ba chấm ở góc trên cùng bên phải.
![]()
2. Bây giờ, hãy nhấp vào Phần mở rộng như được đánh dấu bên dưới.
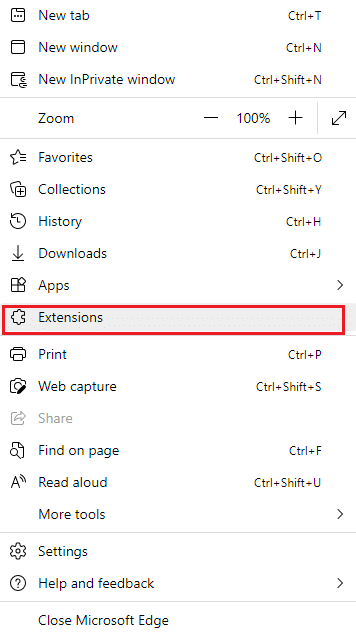
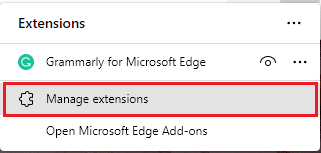
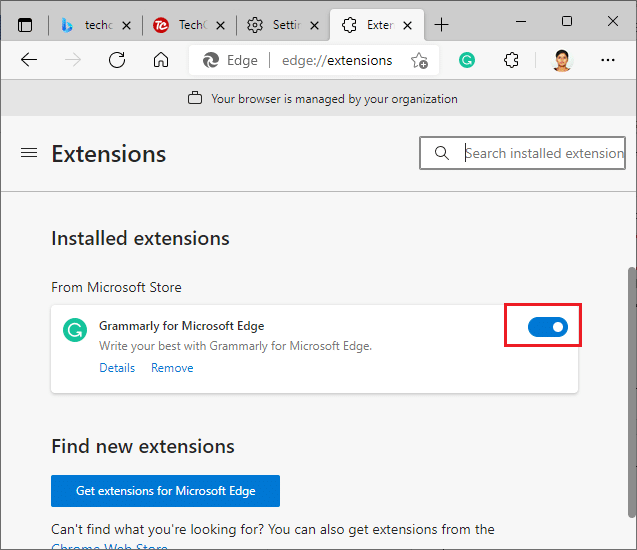
3. Now, all of your added extensions will pop up on the screen. Click on Quản lý tiện ích mở rộng như hình.
4. Now, toggle off the extension and check if you face the error again.
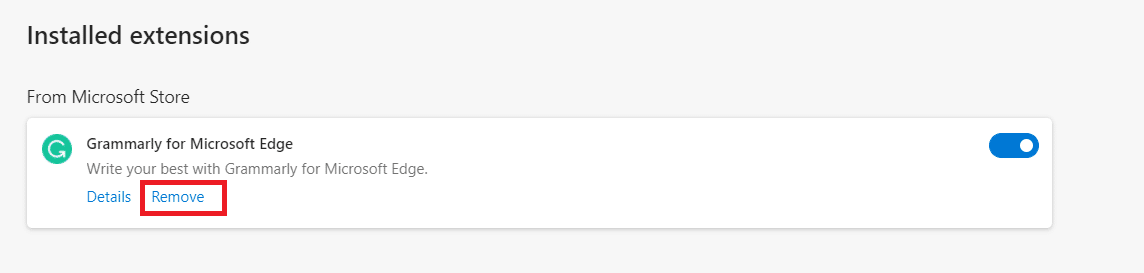
5. If you find the error does not pop up after removing any particular extension, then uninstall it completely from your browser. Then, select Hủy bỏ.
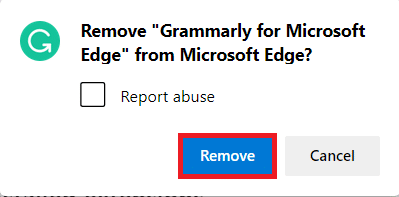
6. Bây giờ, hãy xác nhận lời nhắc bằng cách nhấp vào Hủy bỏ như hình.
Lưu ý: If you face the again, hit F12 hoặc nhấn và giữ Ctrl + Shift + I keys together on your webpage. This will open công cụ phát triển on the right side. Now, reload the page.
Method 6: Update Microsoft Edge
Outdated browser is always a problem. Updates are released to fix the bugs and errors, and if you fail to update them, you may face several errors. Follow the below instructions to update the Microsoft Edge browser.
1. As you did earlier, launch the Cạnh trình duyệt và nhấp vào biểu tượng ba chấm.
![]()
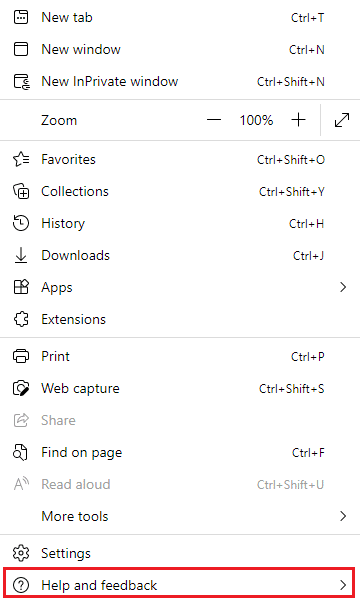
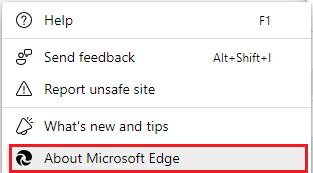
2. Bây giờ, hãy nhấp vào Giúp đỡ và phản hồi tùy chọn như được đánh dấu.
3. Sau đó, nhấp vào Giới thiệu về Microsoft Edge như hình.
Lưu ý: Bạn cũng có thể gõ cạnh: // cài đặt / trợ giúp khởi động About Microsoft Edge page trực tiếp.
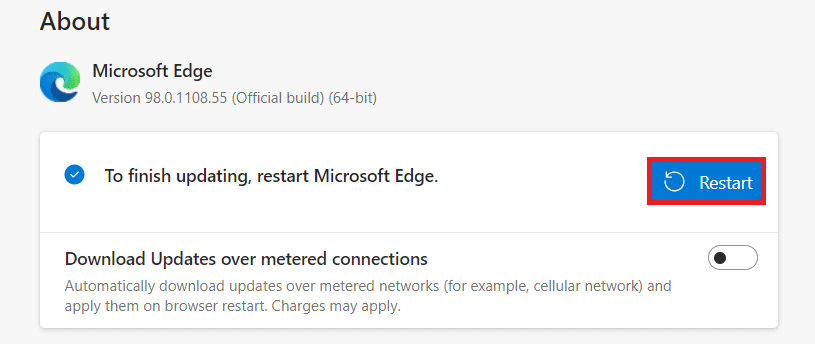
4A. If a new update is available, the browser will automatically update the browser to the latest version. Click Khởi động lại to update and restart the browser.
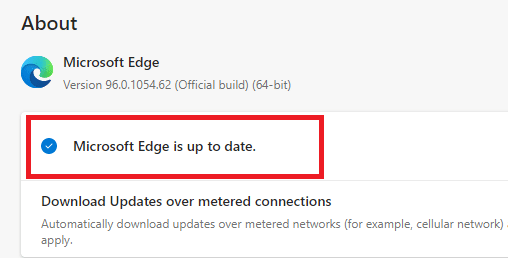
4B. If the browser is up-to-date, it will show that Microsoft Edge is up to date.
5. Finally, launch your webpage in the latest version of your browser and check if Microsoft Edge ERR NETWORK CHANGED Windows 10 issue recurs.
Cũng đọc: Sửa lỗi Google Chrome không cập nhật
Method 7: Update or Reinstall Drivers
You cannot access your web pages properly if you have incompatible or outdated USB drivers on your PC. Follow the instructions to update your drivers and check if a network change was detected Windows 10 problem is resolved. If not, you can try reinstalling them.
Option I: Update Network Drivers
Installing the latest version of drivers helps your computer to fix the driver conflicts, thereby improving the stability of the PC. By following the below-mentioned steps, you can solve all network-related issues concerning ERR NETWORK CHANGED error.
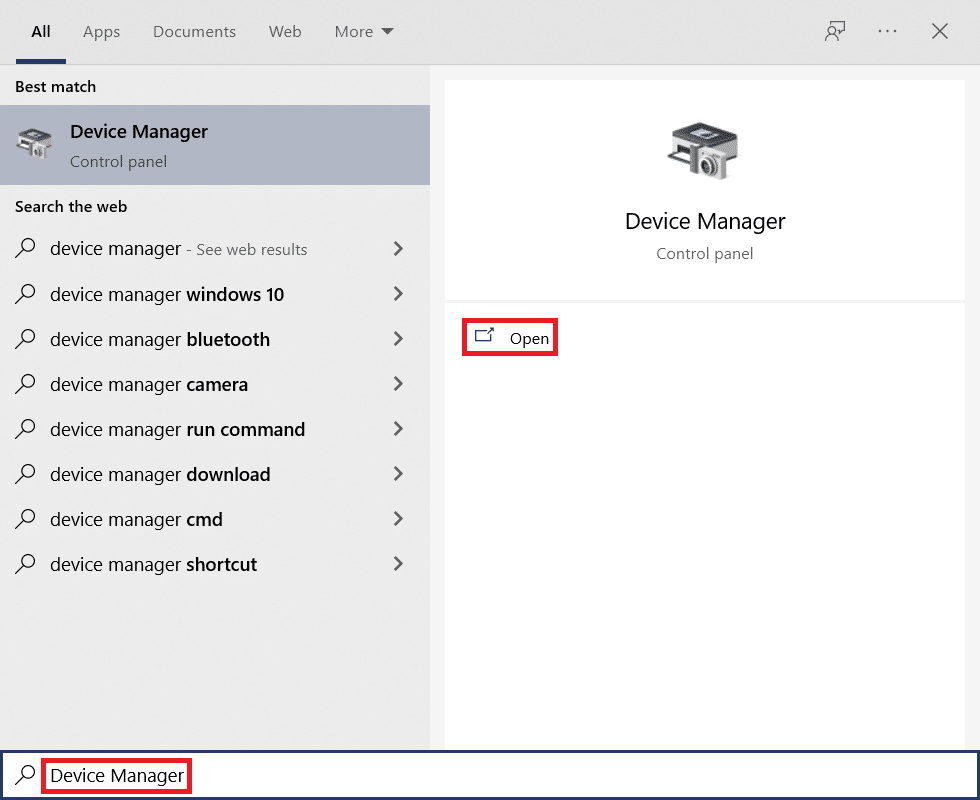
1. Nhấn vào Chốt cửa sổ và loại Device Manager, bấm vào Mở.
2. Bạn sẽ thấy Card mạng on the main panel; double-click on it to expand it.
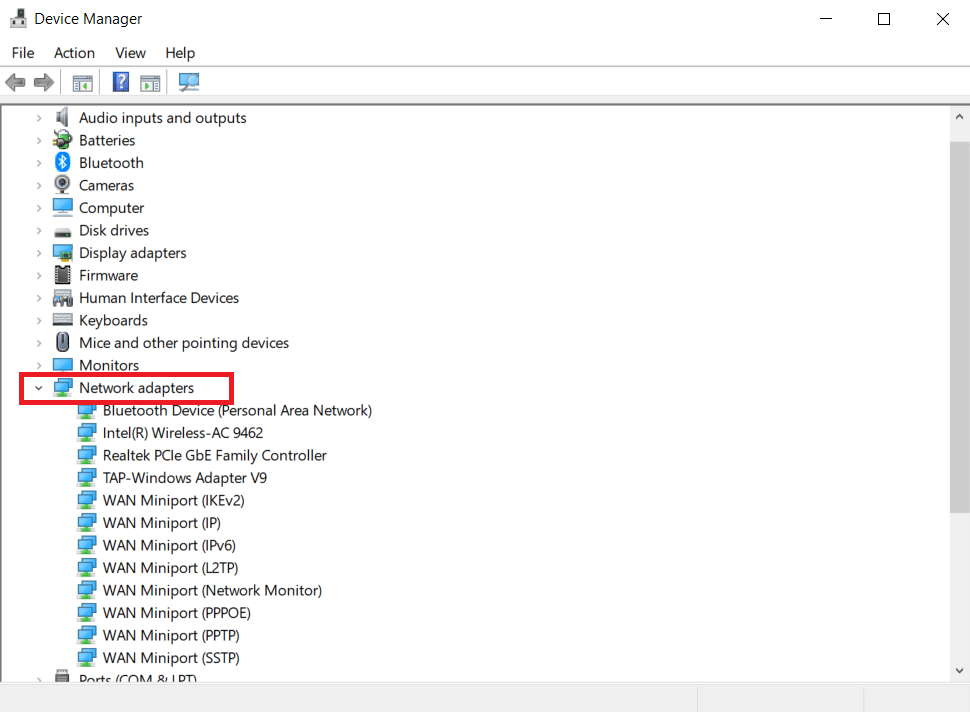
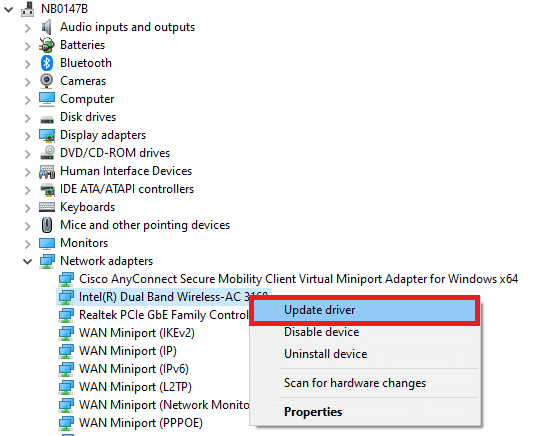
3. Bây giờ, nhấp chuột phải vào trình điều khiển mạng (ví dụ Intel (R) Dual Band Wireless-AC 3168) và nhấp Cập nhật driver.
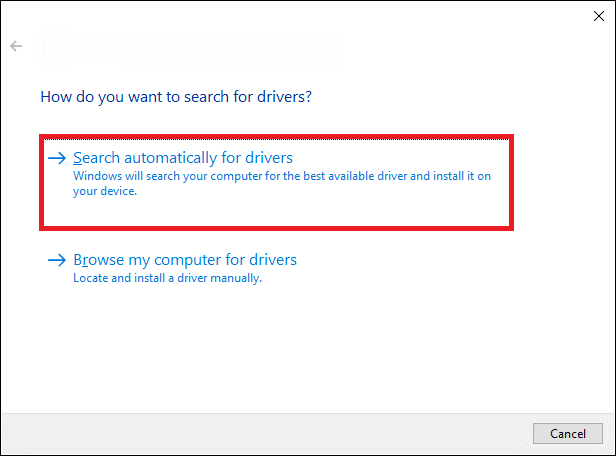
4. Bây giờ, hãy nhấp vào Tự động tìm kiếm trình điều khiển options to locate and install a driver automatically.
5A. Now, the drivers will be updated to the latest version if they are not updated.
5B. If they are already in an updated stage, the screen displays the following message, Trình điều khiển tốt nhất cho thiết bị của bạn đã được cài đặt.
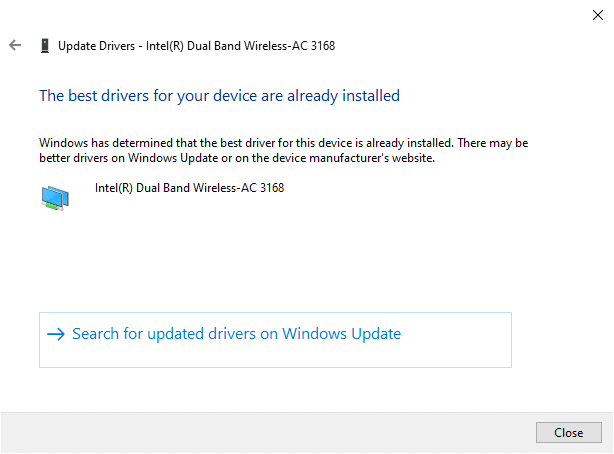
6. Nhấp vào Đóng để thoát khỏi cửa sổ.
Option II: Reinstall Drivers
If you did not attain any fix to a network change was detected Windows 10 error by updating the drivers, then you can try reinstalling them as instructed below.
1. Khởi chạy Device Manager using the steps mentioned above.
2. Mở rộng Card mạng by double-clicking on them.
3. Bây giờ, nhấp chuột phải vào trình điều khiển và chọn Gỡ cài đặt thiết bị.
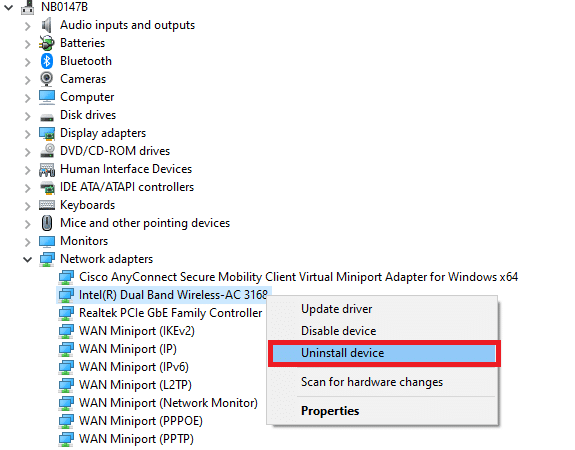
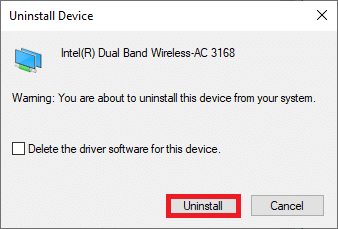
4. Now, a warning prompt will be displayed on the screen. Check the box Xóa các phần mềm điều khiển cho thiết bị này and confirm the prompt by clicking Gỡ bỏ cài đặt.
5. Visit the manufacturer’s website (e.g. Intel) to download the driver manually.
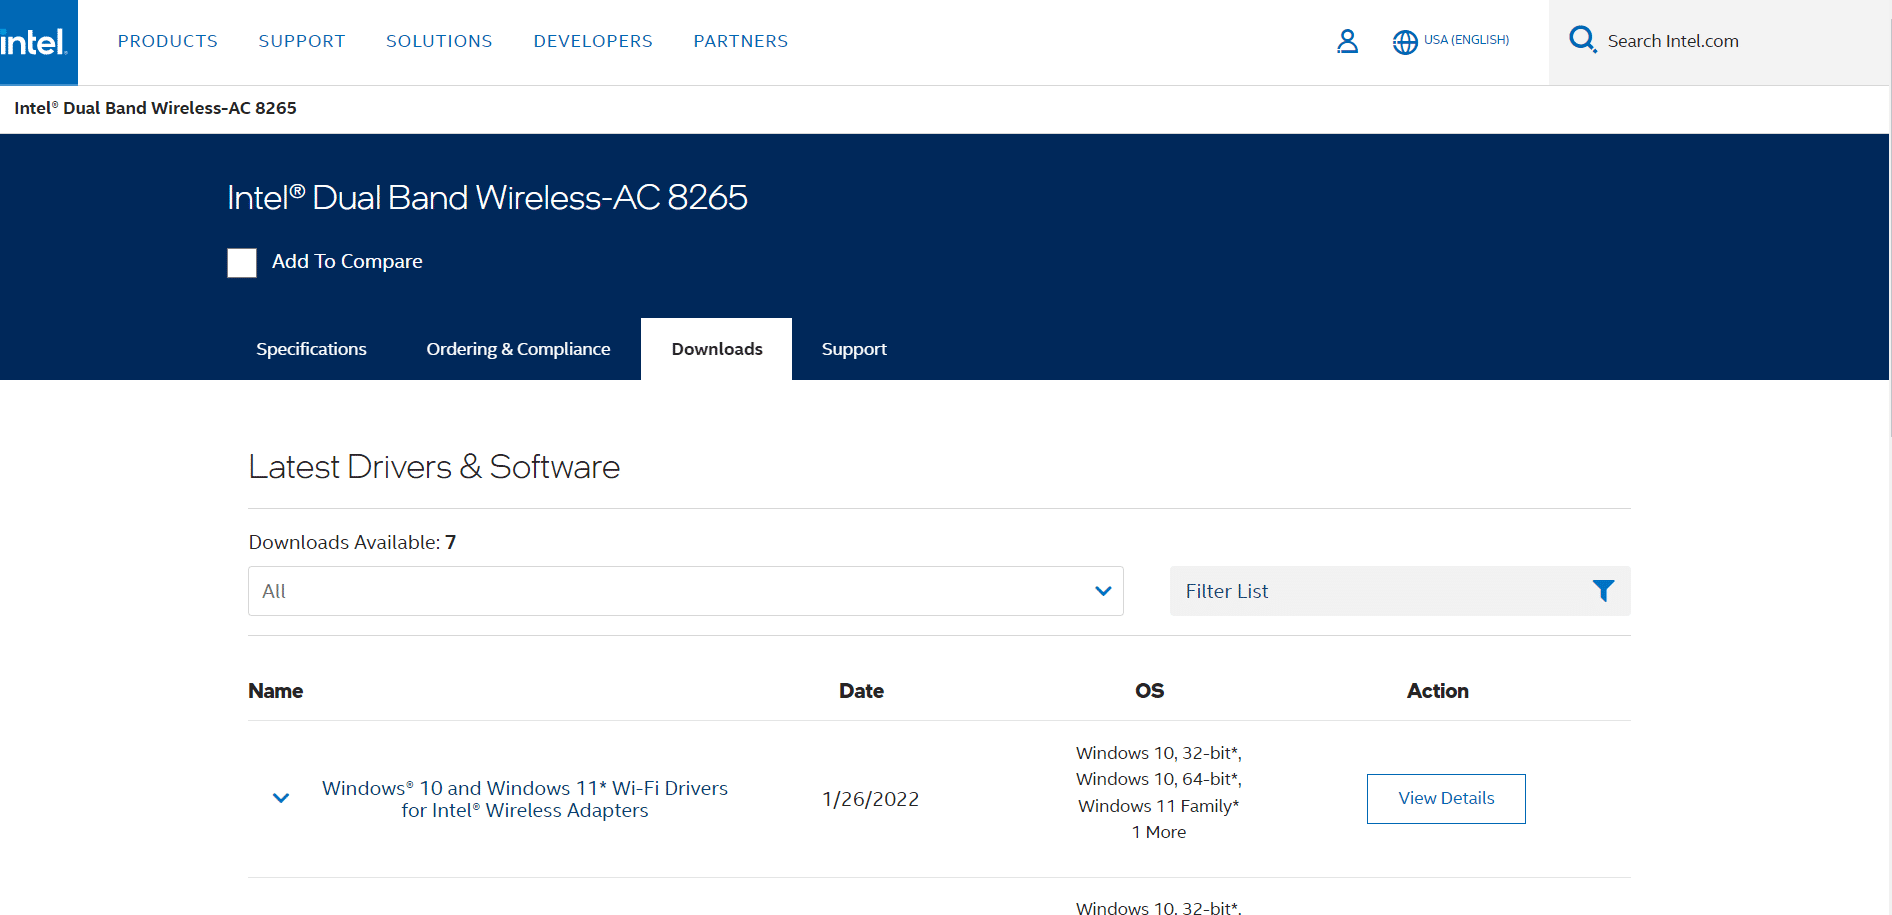
6. Once downloaded, double-click on the tập tin tải về and follow the given instructions to install it.
Phương pháp 8: Cập nhật Windows
Regular updates are not only necessary for your browsers but also for your operating systems too. You can fix the bugs and update problems in your Windows 10 computer by updating it periodically. Follow the below-mentioned steps to update your Windows PC.
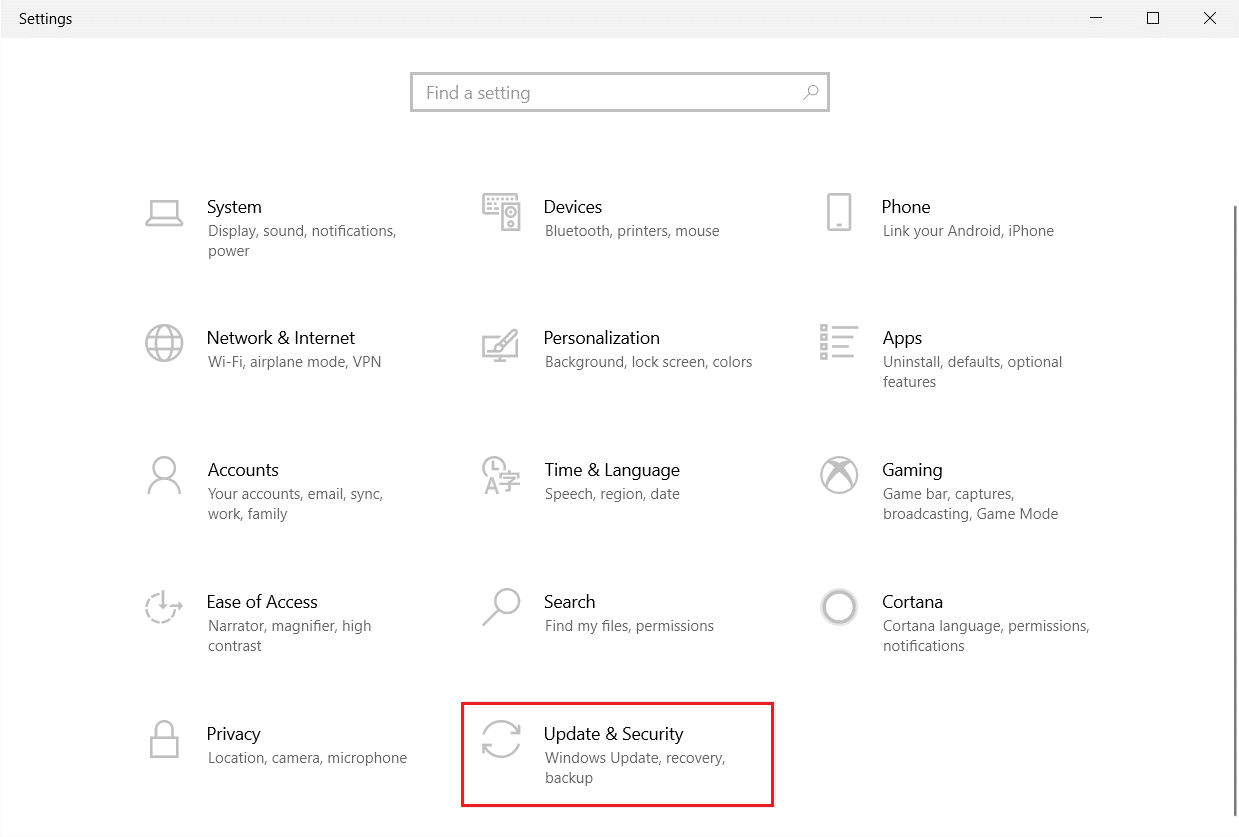
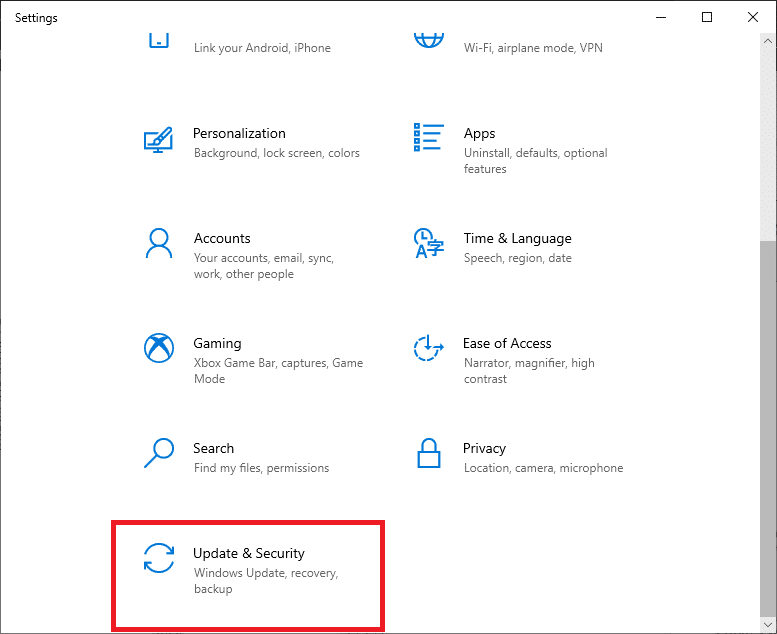
1. nhấn Các phím Windows + I đồng loạt khởi động Cài đặt.
2. Bấm vào Cập nhật & Bảo mật gạch, như được hiển thị.
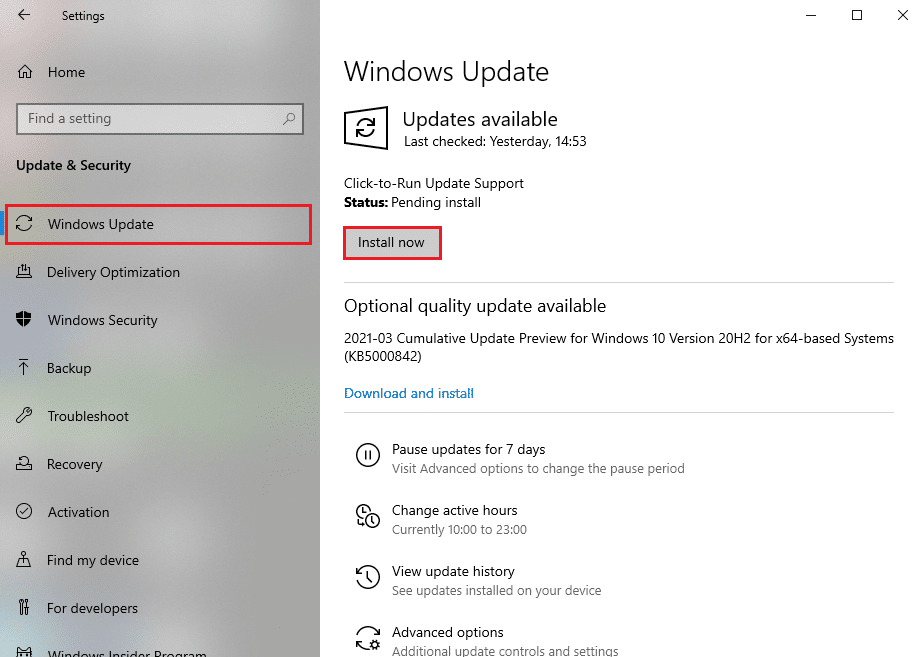
3. bên trong Windows Update tab, nhấp vào Kiểm tra cập nhật .
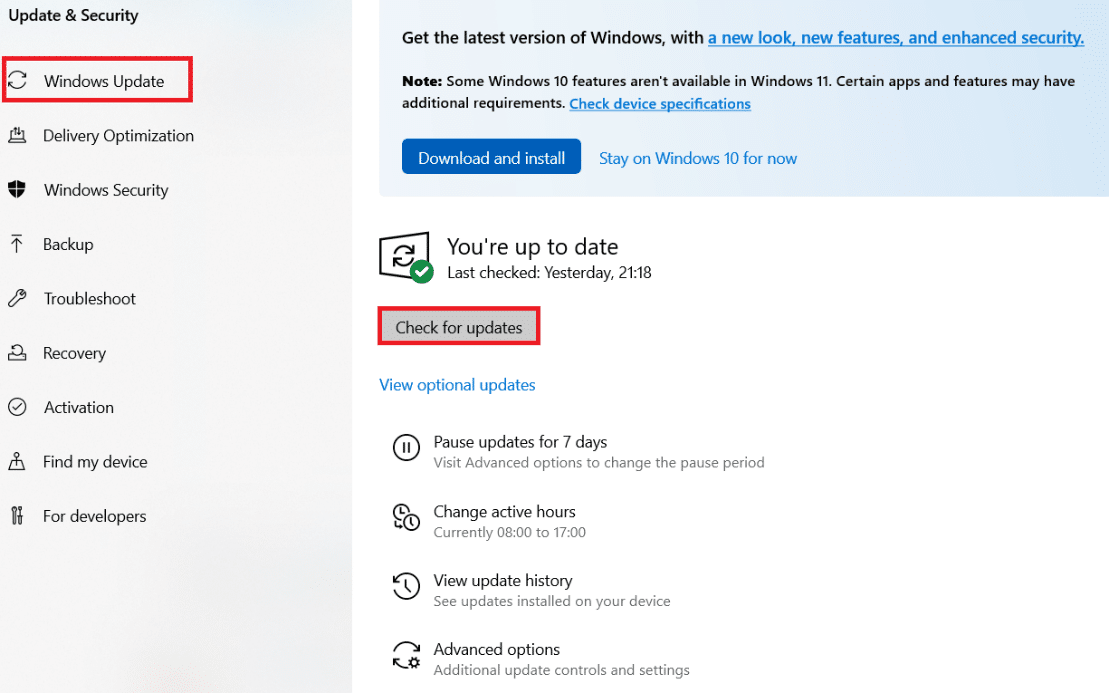
4A. Nếu có bản cập nhật mới thì bấm vào Cài đặt bây giờ and follow the on-screen instructions. Restart your PC when done.
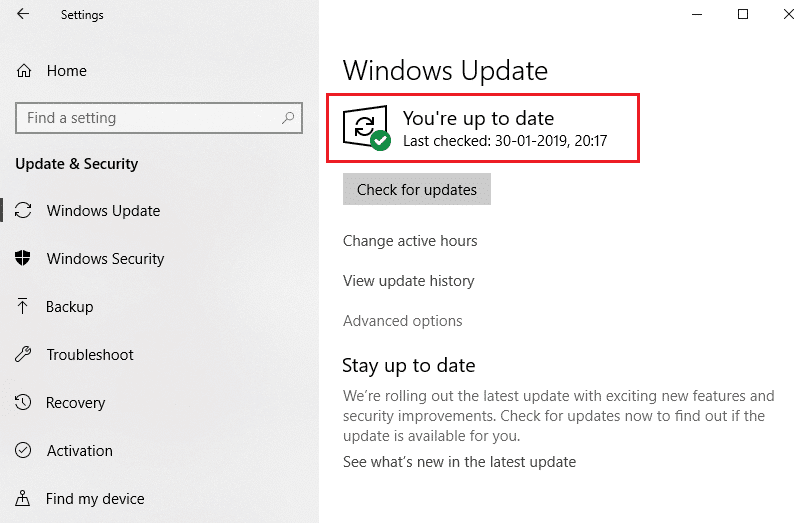
4B. Otherwise, it will show Bạn đã cập nhật message as shown.
Cũng đọc: 14 Ways to Fix Chrome Profile Error
Method 9: Run Antivirus Scan
If you are getting your connection was interrupted a network change was detected an error, there may be some chances that your PC has a malware infection. Follow the below-mentioned steps to run a full system scan that offers incredible protection to fix all of your problems.
1. Nhấn và giữ Các phím Windows + I cùng nhau mở Cài đặt.
2. Tại đây, hãy nhấp vào Cập nhật & Bảo mật, như được hiển thị.
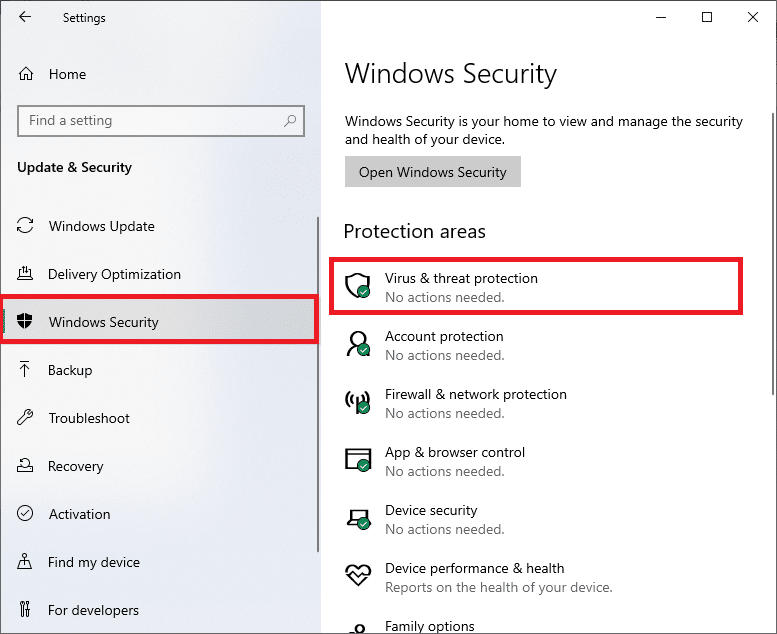
3. Sau đó, chọn Windows Security trong ngăn bên trái.
4. Tiếp theo, chọn Chống vi-rút và mối đe dọa tùy chọn theo Khu vực bảo vệ.
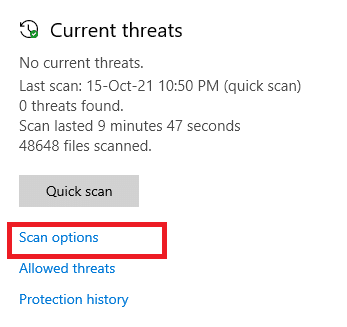
5. Nhấp vào Tùy chọn quét, như được hiển thị.
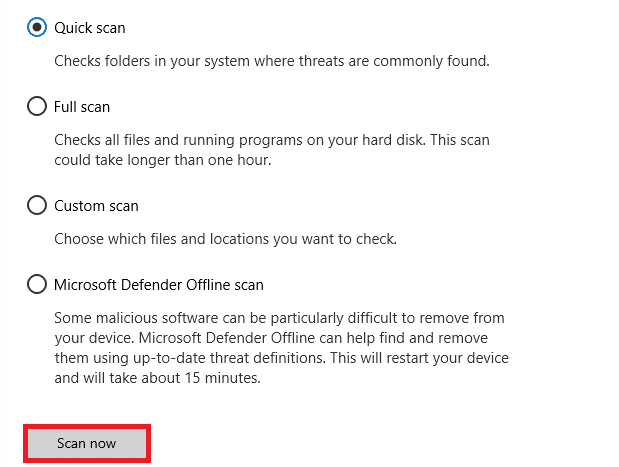
6. Choose a scan option as per your preference and click on Quét ngay.
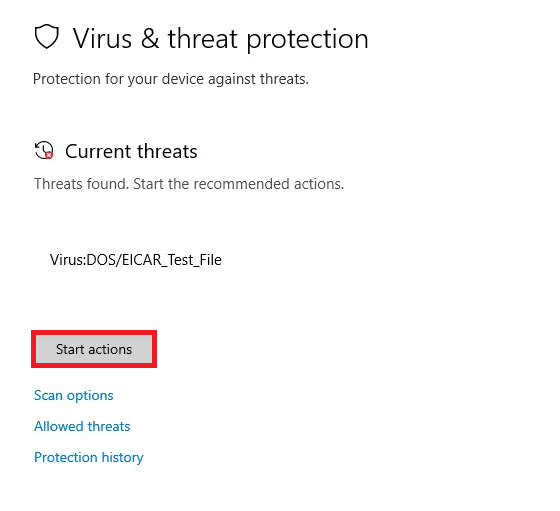
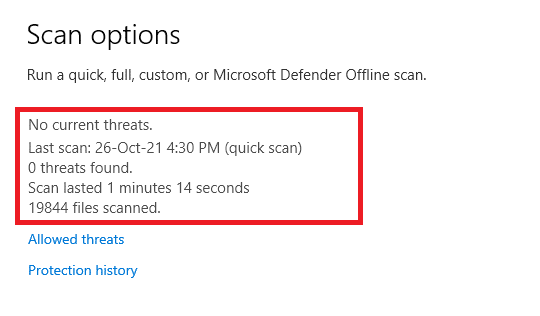
7A. If there are threats, have a glance at all the threats listed in the window. Here, click on Start Actions Dưới Các mối đe dọa hiện tại.
7B. If you do not have any threats in your system, the system will show the No actions needed alert as highlighted below.
Method 10: Whitelist URL or Disable Antivirus Temporarily
If you face this error in Edge even after your computer is malware-free and Windows is up to date, then there are some chances that the super-security suite might prevent you from accessing any content-specific URL. Here are some instructions to whitelist URLs in the antivirus program.
Lưu ý: Ở đây, diệt virus miễn phí is taken as an example. Do follow the steps according to your Antivirus program.
Option I: Whitelist the URL
If you do not want Avast to block any particular website, you can also whitelist the URL by following the below-mentioned steps and fix A network change was detected Windows 10 error.
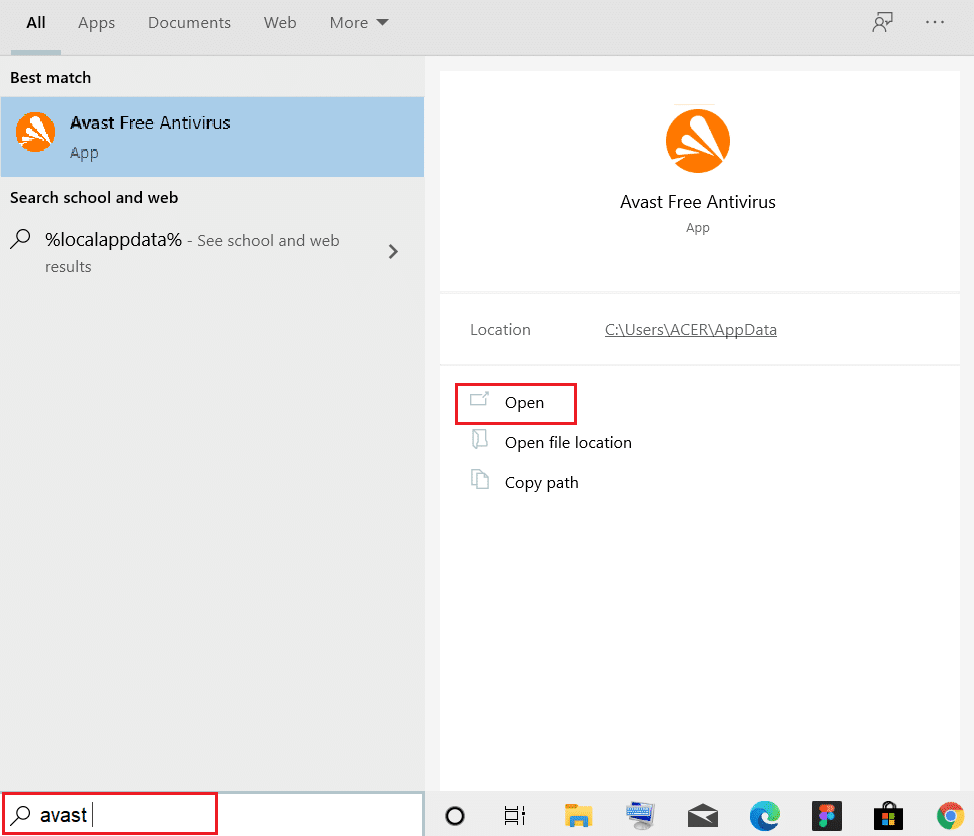
1. Navigate to the search menu, type Avast và click vào Mở.
2. Bây giờ, hãy nhấp vào thực đơn option at the top right corner, as shown below.

3. Bây giờ, hãy nhấp vào Cài đặt từ danh sách thả xuống.

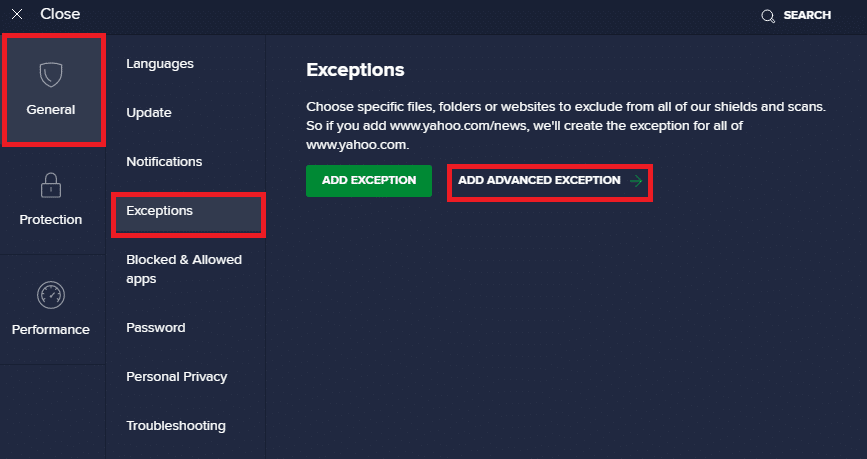
4. bên trong Tab chung, chuyển sang Trường hợp ngoại lệ tab và nhấp vào THÊM NGOẠI TRỪ NÂNG CAO theo Trường hợp ngoại lệ trường.
5. Bây giờ, hãy nhấp vào Website/Domain trong cửa sổ mới.
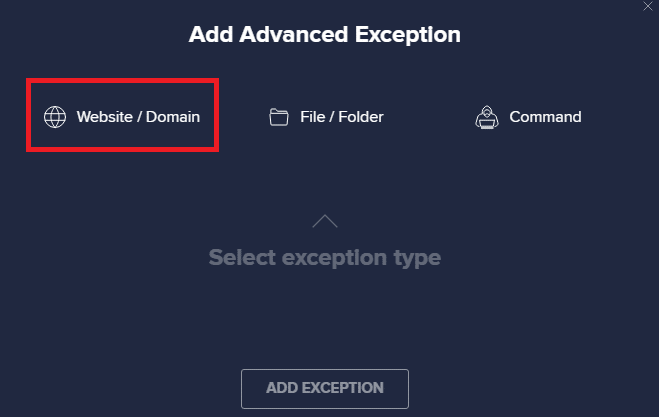
6. Now, paste the URL in the Nhập đường dẫn url. Tiếp theo, nhấp vào ADD EXCEPTION tùy chọn.
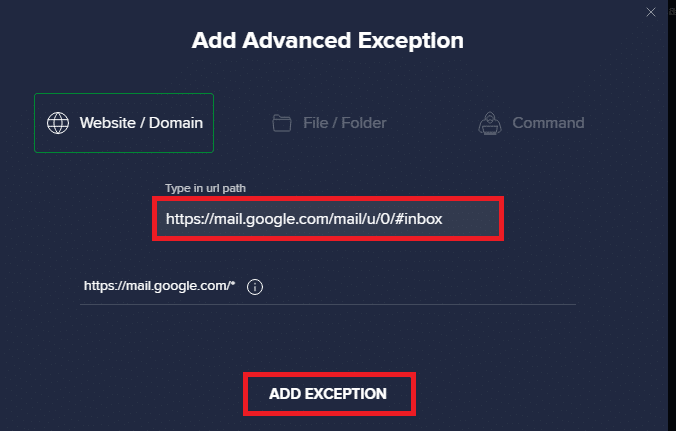
Lưu ý: If you want to remove the URL from the Avast whitelist, hover over your URL in the main Settings window and click on the Trash icon as depicted below.
![]()
Option II: Disable Antivirus Temporarily
If you did not fix it by adding an exception to the URL in your antivirus program, you could disable them by implementing the steps as instructed below.
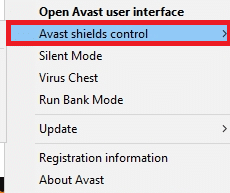
1. Điều hướng đến Biểu tượng chống vi-rút in the Taskbar and nhấp chuột phải trên đó.
![]()
2. Bây giờ, chọn Kiểm soát lá chắn Avast tùy chọn.
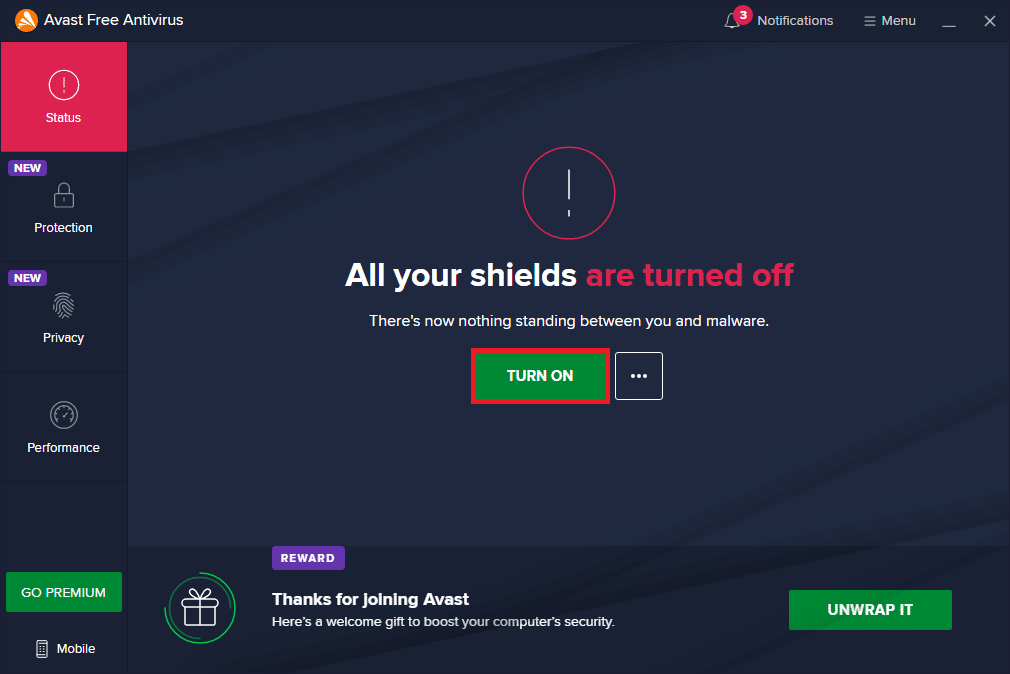
3. Choose the option according to your convenience and confirm the prompt displayed on the screen.
- Disable for 10 minutes
- Disable for 1 hour
- Disable until computer is restarted
- Disable permanently

Lưu ý: Now, go back to the main window. Here, you have turned off all shields from Avast. To activate the settings, click on BẬT.
Cũng đọc: Fix Chrome Blocking Download Issue
Method 11: Reset Browser Settings
If you are not satisfied with the above fixes, then try resetting your browser to its default settings. First, follow the below-mentioned steps to reset Microsoft Edge, then check if a network change was detected Windows 10 problem is resolved.
1. Phóng Trình duyệt cạnh và điều hướng đến Cài đặt.
2. Bây giờ, ở khung bên trái, hãy nhấp vào Đặt lại cài đặt như hình.
Lưu ý: Bạn cũng có thể gõ edge://settings/reset để khởi động Reset Edge page trực tiếp.
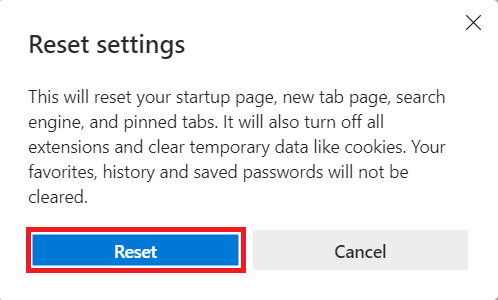
3. Bây giờ, hãy nhấp vào Khôi phục cài đặt về giá trị mặc định của chúng tùy chọn như được hiển thị.
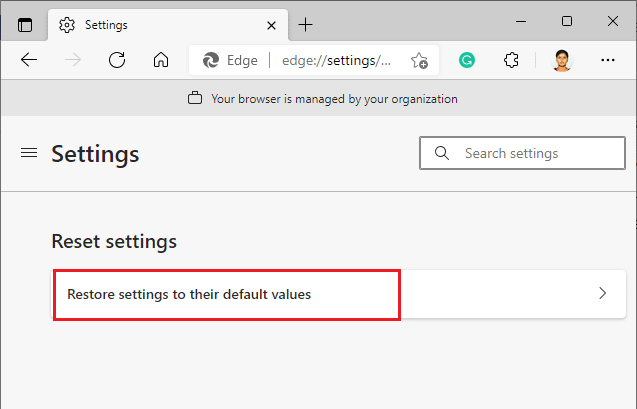
4. Bây giờ, hãy xác nhận lời nhắc bằng cách nhấp vào Xóa và làm lại như hình.
Cũng đọc: How to Enable DNS over HTTPS in Chrome
Method 12: Repair Microsoft Edge
If none of those mentioned above methods has helped you fix a network change was detected Windows 10 error, try repairing Microsoft Edge. Doing this will fix all the relevant issues with the search engine, updates, or other related problems triggering this ERR NETWORK CHANGED Windows 10 error.
Lưu ý: Close Microsoft Edge browser if it is opened.
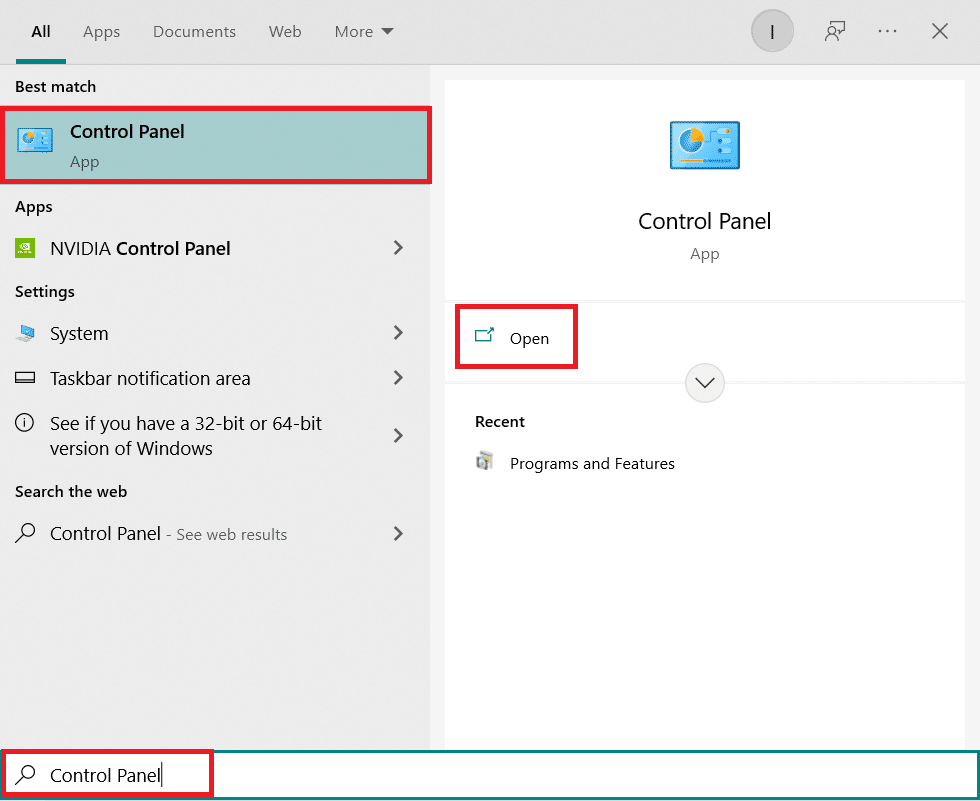
1. Nhấn nút Windows chính, kiểu Bảng điều khiển và click vào Mở.
KHAI THÁC. Đặt Xem theo as Phân loại và nhấp Gỡ bỏ cài đặt một chương trình.
3. Search and click on Microsoft cạnh Và chọn Thay đổi option as depicted in the below picture.
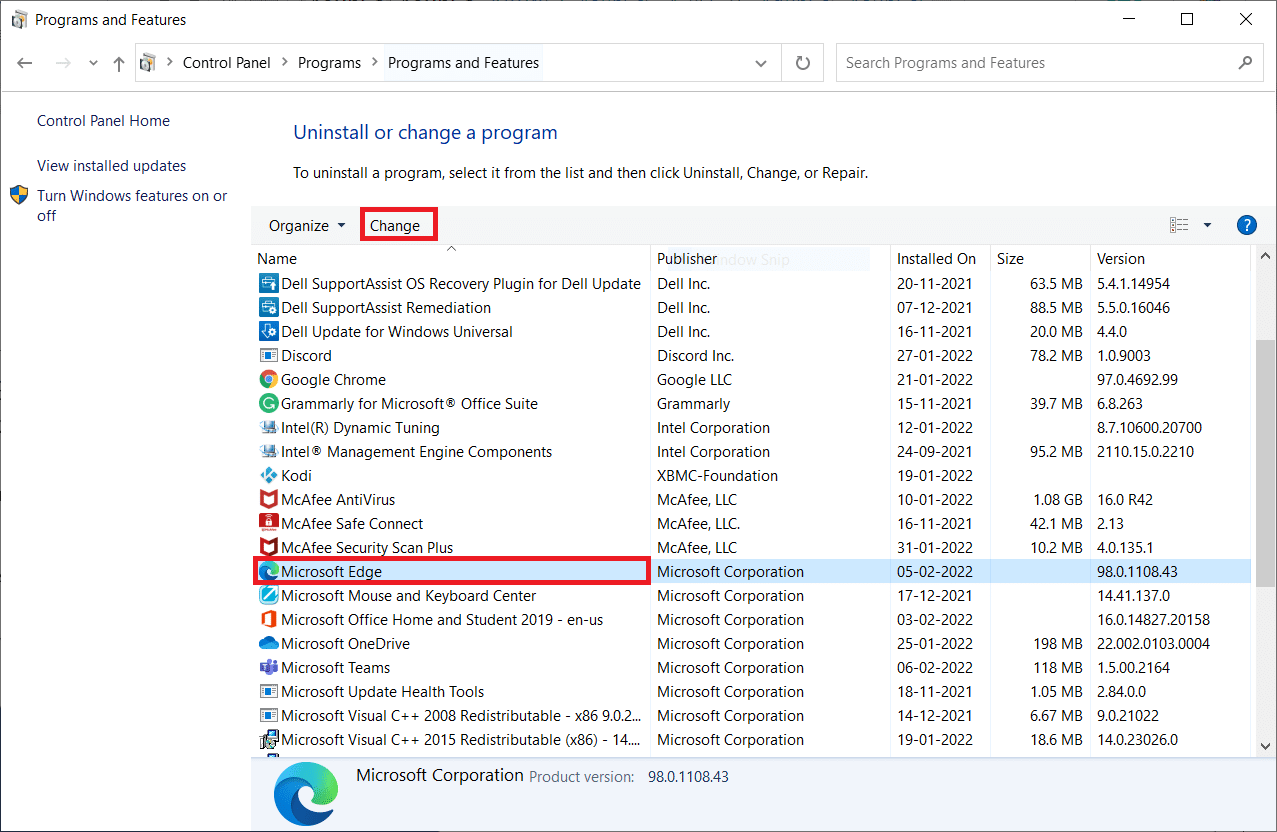
4. nhấp chuột Có trong lời nhắc.
5. Bây giờ, hãy xác nhận lời nhắc bằng cách nhấp vào Sửa chửa.
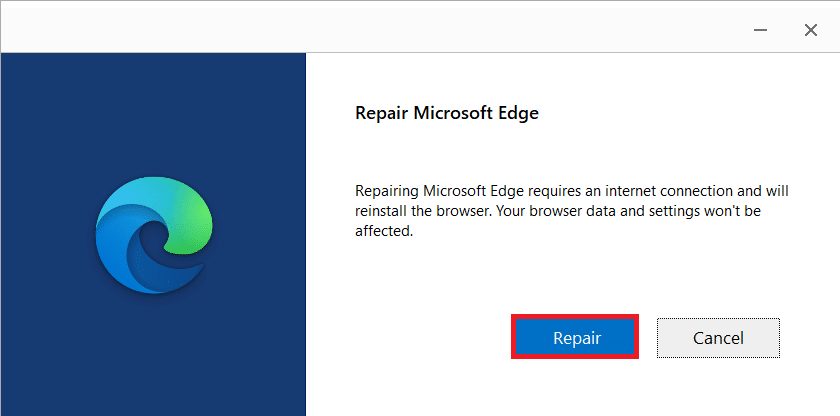
6. Khởi động lại the computer once you complete all the steps mentioned above.
7. Now, the new version of Microsoft cạnh will be installed on your PC. Launch a site and check if Your connection was interrupted error is fixed now.
Cũng đọc: Fix Microsoft Edge Not Working in Windows 10
Phương pháp 13: Thực hiện khởi động sạch
If all of these methods fail to give you a fix to a network change was detected Windows 10 error, then you can try resetting your PC or restoring it to the previous version. This helps you resolve any software incompatibility issues, thereby fixing your connection was interrupted a network change was detected an error in the Edge browser. Here are a few steps to clean boot your Windows 10 PC to fix Microsoft Edge ERR NETWORK CHANGED Windows 10 issue.
Lưu ý: Make sure you log in as an administrator to clean boot your PC.
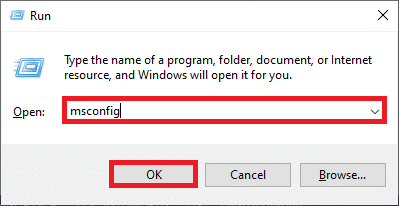
1. Để khởi chạy Chạy hộp thoại, nhấn Phím Windows + R với nhau.
2. Kiểu msconfig Và nhấp vào OK button to open System Configuration.
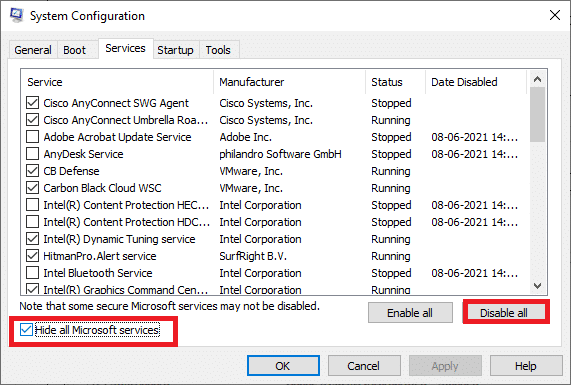
3. Bây giờ, chuyển sang DỊCH VỤ tab trong Cấu hình hệ thống cửa sổ.
4. Chọn hộp bên cạnh Ẩn tất cả các dịch vụ của Microsoft, và nhấp vào Vô hiệu hóa tất cả button as shown highlighted.
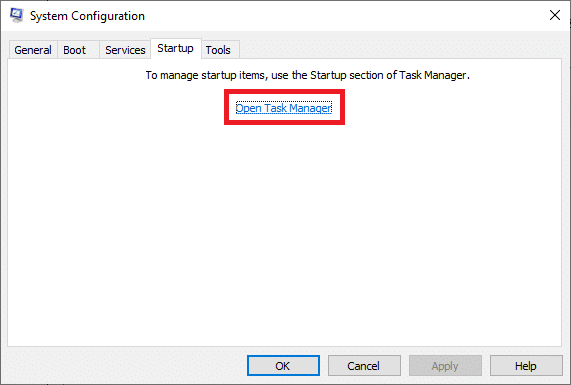
5. Bây giờ, chuyển sang Tab khởi động and click the link to Mở Task Manager as depicted below.
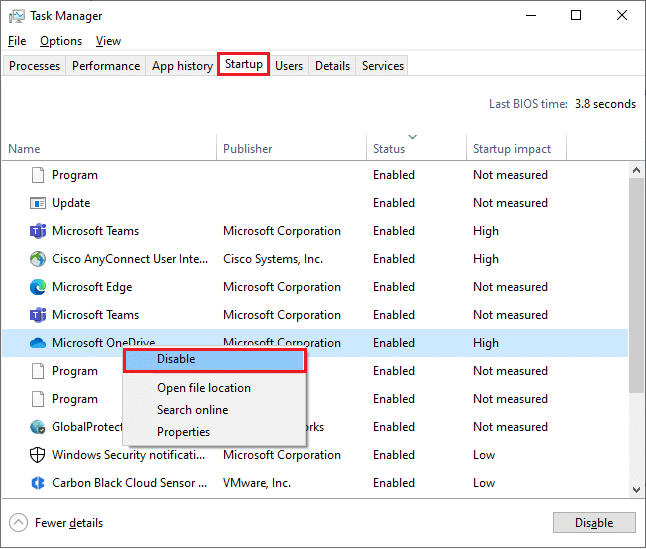
6. Next, right-click on the startup tasks which are not required and click on Vô hiệu hoá tùy chọn như được hiển thị.
7. Đóng Task Manager và Cấu hình hệ thống cửa sổ.
8. Cuối cùng, khởi động lại máy tính của bạn.
Đề nghị:
Chúng tôi hy vọng rằng hướng dẫn này hữu ích và bạn có thể khắc phục ERR NETWORK CHANGED error in your device. Let us know which method worked for you the best. Also, if you have any queries or suggestions regarding this article, then feel free to drop them in the comments section.

