The autofill feature is an important part of the Outlook program. AutoComplete allows you to enter an entire email while composing a message with just one email initial. This feature helps you save time and gives you quick access to emails. However, sometimes users may experience Outlook AutoComplete not working issue; this issue can be caused for various reasons, such as an outdated Office version or bugs with the Outlook program. In this guide, we will discuss methods to resolve Outlook Address AutoComplete not working issue on your Outlook.
How to Fix Outlook AutoComplete Not Working Correctly
There can be various reasons for Outlook Autofill email address not working on your Outlook account; some of the most common reasons are mentioned here.
- If you have disabled AutoComplete in Outlook, you won’t be able to use this feature.
- Bugs and glitches with the Outlook program can also cause this issue.
- Issues with a user profile can also cause AutoComplete feature not working issue.
- Corrupt Outlook Add-ins can also cause this issue.
- Corrupt Outlook data PST files can also cause this issue with Outlook.
- Outdated or corrupt Microsoft Office updates can also cause this issue.
- A corrupt RoamCache folder can also cause this issue with Outlook.
Following are the troubleshooting methods to solve this problem.
Method 1: Enable AutoComplete in Outlook
If you have not enabled the AutoComplete feature in Outlook, you will not be able to use this feature. You will have to manually enable AutoComplete to resolve this Outlook address AutoComplete not working issue. You can follow these simple steps to enable AutoComplete in Outlook.
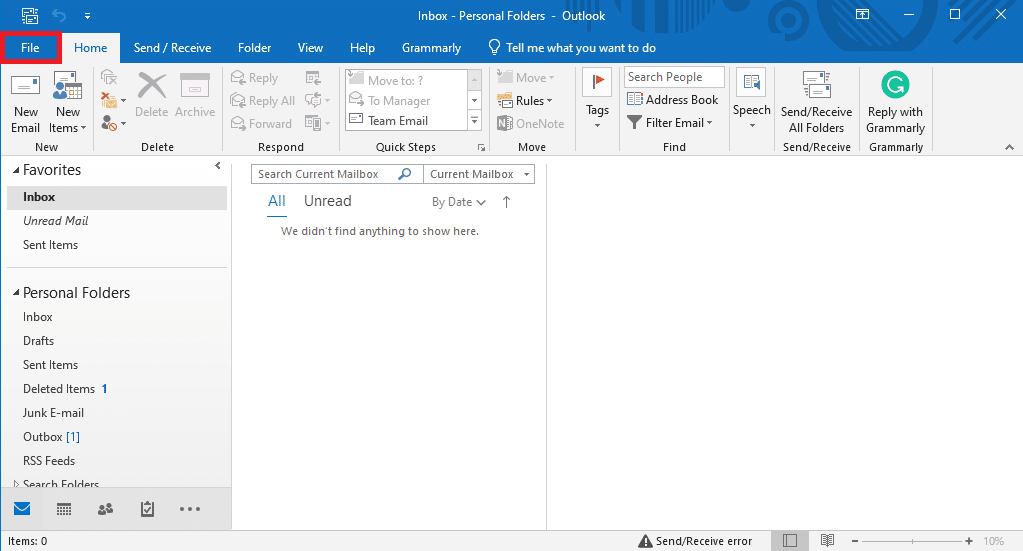
1. Công khai Triển vọng và điều hướng đến Tập tin from the top-left side of the window.
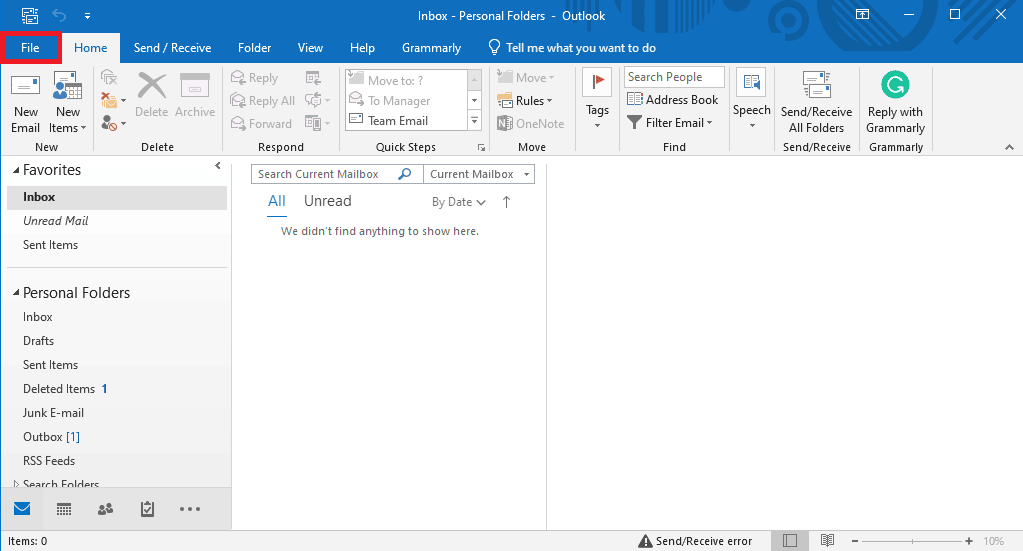
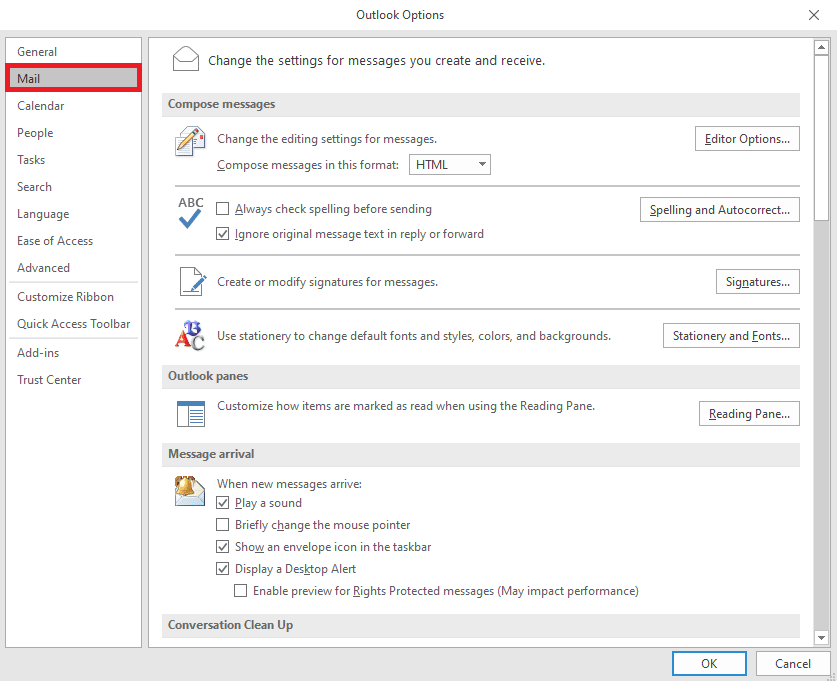
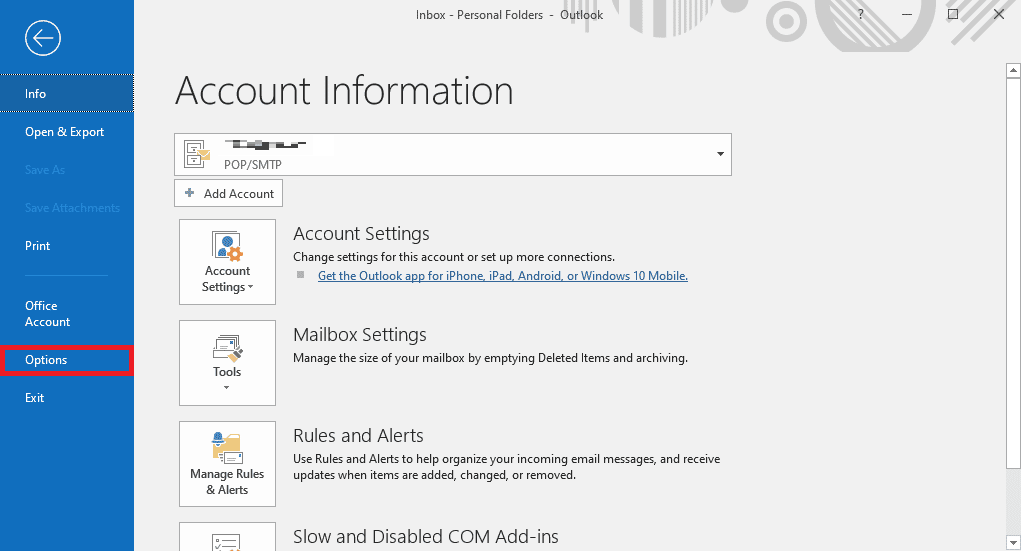
2. Here, from the left-side panel, click on Các lựa chọn.

3. Điều hướng đến email tab.
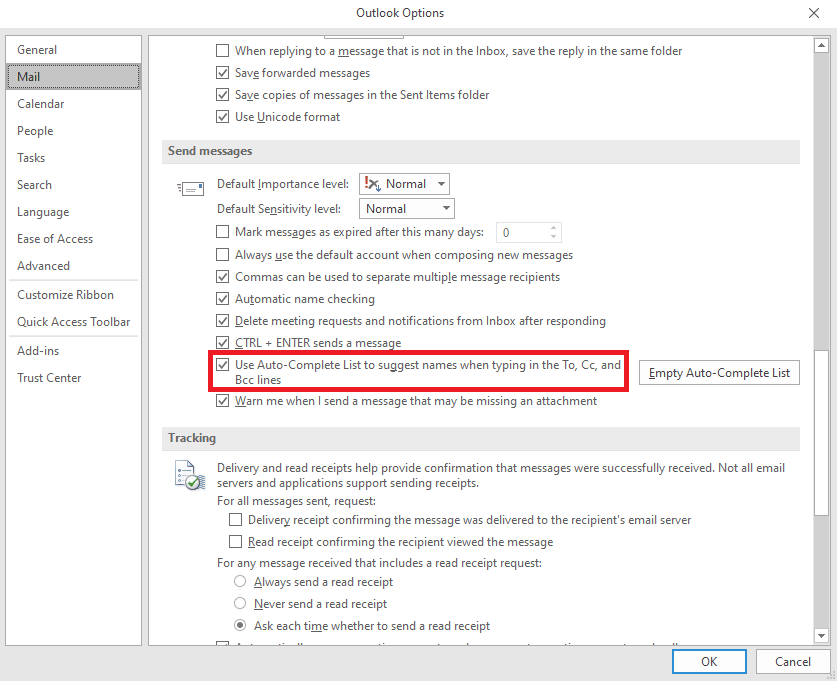
4. Scroll down here, and locate Gửi tin nhắn tùy chọn.
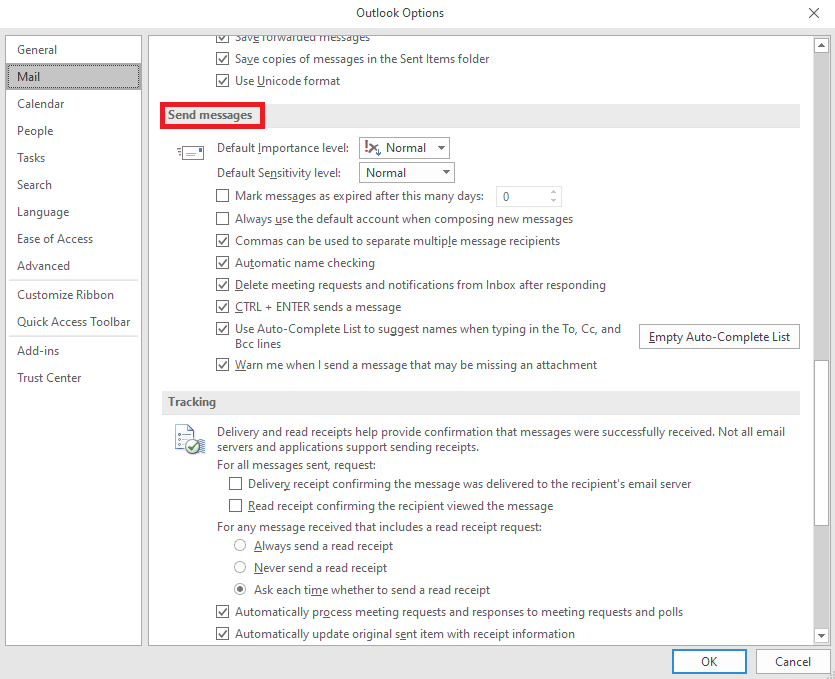
5. Here, check the Sử dụng Danh sách Tự động Hoàn thành để đề xuất tên khi nhập vào các dòng Tới, Cc và Bcc.
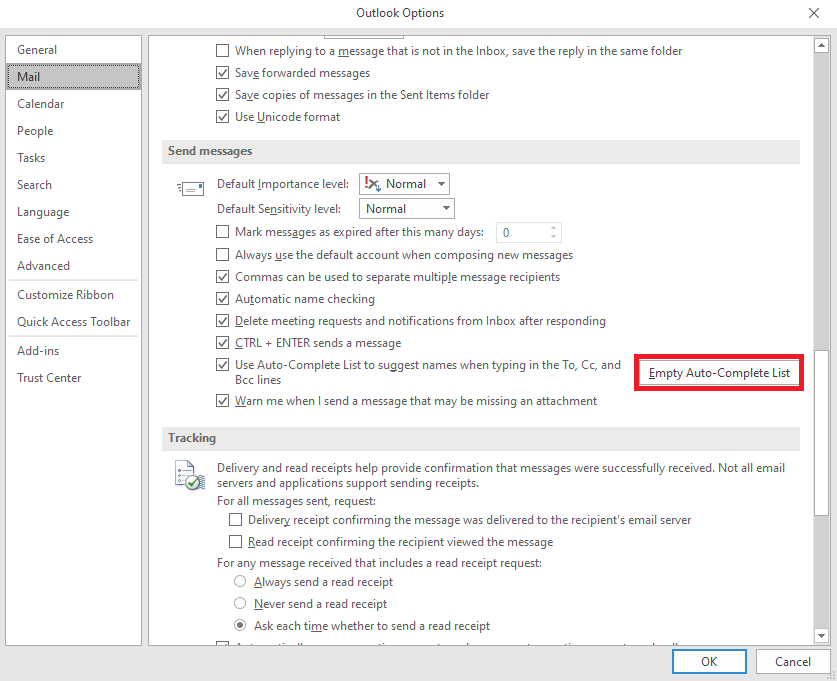
6. If you find this option already checked, click on the Danh sách tự động hoàn thành trống.
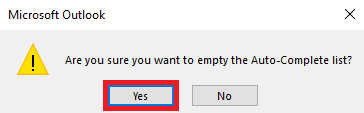
7. nhấp chuột Có để xác nhận hành động.
Method 2: Run Outlook in Safe Mode
Running programs in safe mode can help you avoid various issues. You can use safe mode to make the troubleshooting process easier and avoid hardware issues. You can follow these simple steps to run Outlook in safe mode to resolve Outlook autocomplete not working issue.
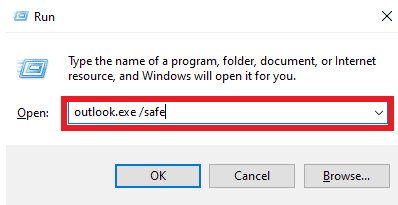
1. nhấn Phím Windows + R để mở Run dialog box.
2. Trong hộp thoại Run, nhập Outlook.exe/an toàn và nhấn Nhập khóa.
Cũng đọc: Fix Outlook Trying to Connect to Server on Windows 10
Method 3: Run Outlook with Different Profile
Make sure the Outlook issue is happening only in your Outlook program and not on the entire system. You can try to log in to Outlook with a different profile. You can also add a different account on Outlook.
1. Công khai Outlook on your computer, and click on Tập tin.
2. bên trong Thông tin tài khoản (Account Information) page, locate and click on Thêm tài khoản.
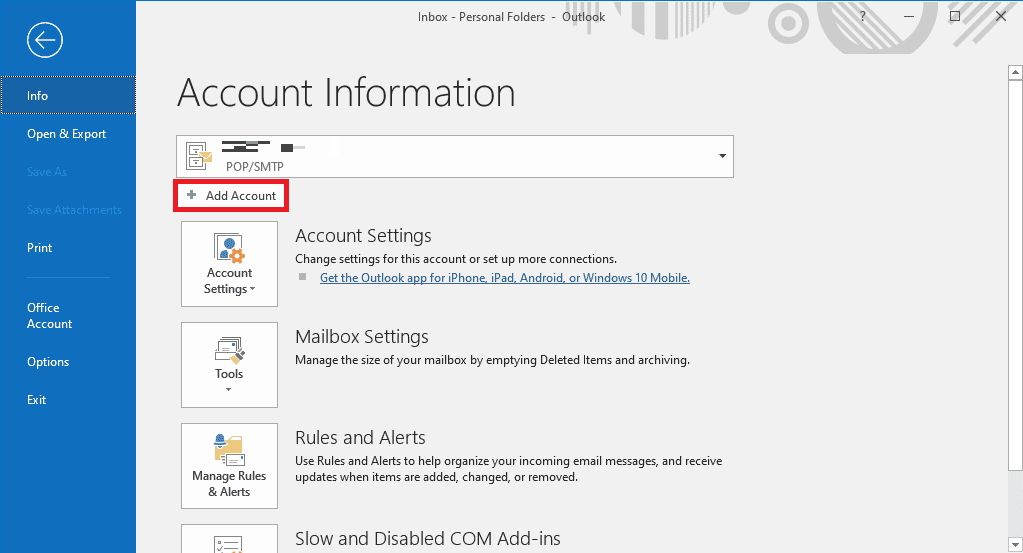
3. Nhập Thông tin đăng nhập for a different account.
Method 4: Disable Outlook Add-Ins
Sometimes, the issue can be caused by an Outlook Add-in. Ad-ins can be very useful and help you organize your Outlook application. However, if Outlook Add-ins get corrupt for some reason, you may experience various issues, such as AutoComplete not working on Outlook. To resolve these issues, you can try to disable Outlook Add-ins. You can follow these simple steps to disable Outlook Add-ins.
1. Công khai Outlook on your computer and navigate to Tập tin.

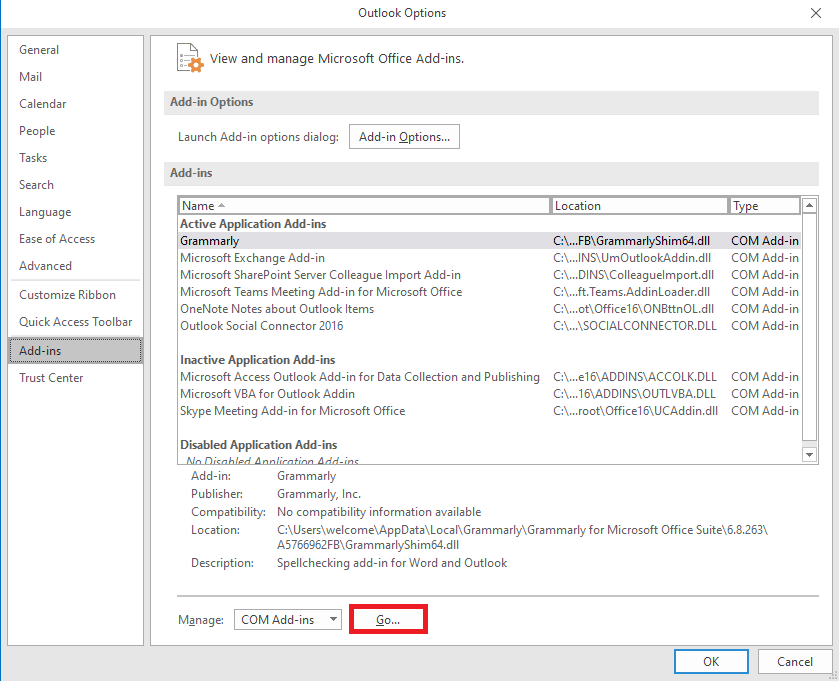
2. Here, from the left-side panel, click on Các lựa chọn.
3. Now, locate and navigate to Thêm vào.

4. Here, locate the Quản lý thả xuống và chọn COM Add-ins.
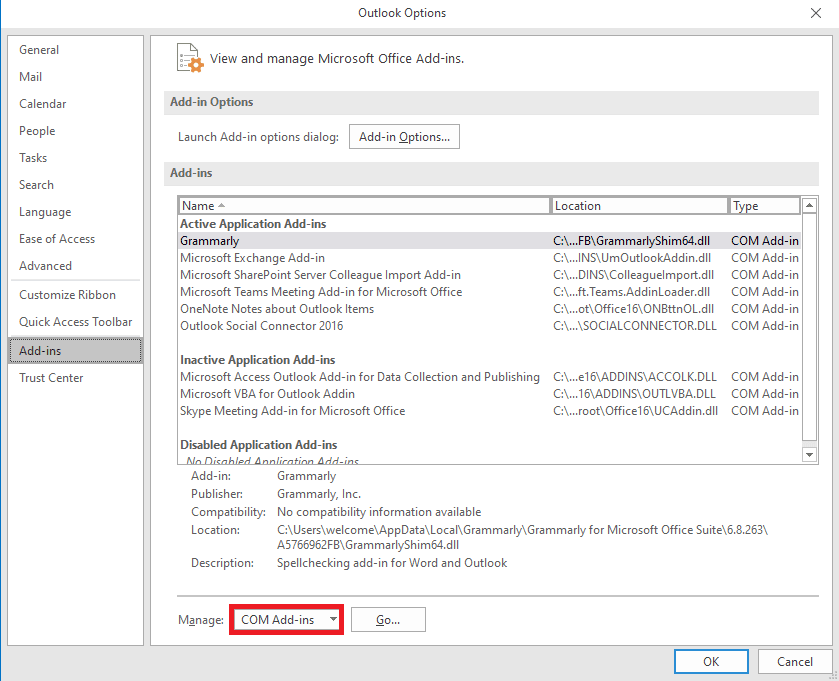
5. Bây giờ, hãy nhấp vào Go.
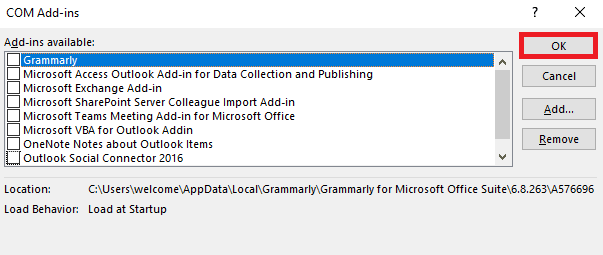
6. Đây, bỏ chọn all the Add-ins and then click OK.
Method 5: Repair Outlook Data PST File
PST, or Personal Table Storage, files store Outlook emails; if this file is corrupt or causing issues, you may experience Outlook address AutoComplete not working error. You can use the Inbox repair tool to help you figure out a solution for this issue. Follow these simple steps to execute this method.
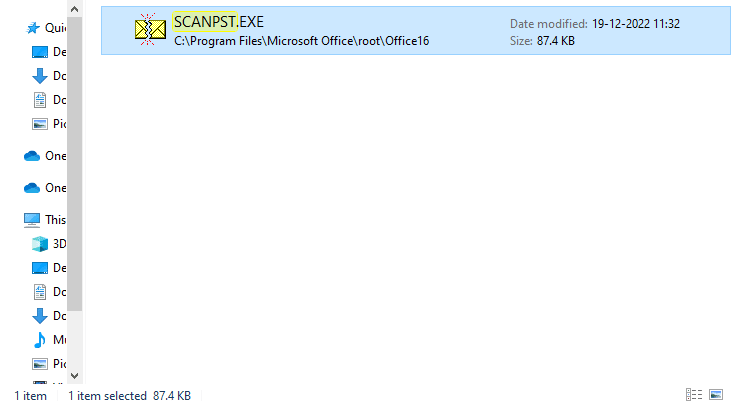
1. Mở Outlook thư mục trên File Explorer.
C: Chương trình FilesMicrosoft Cán bộ Trình duyệt16
2. Bấm vào QUÉT.EXE tập tin.
3. Bây giờ, chọn Xem option to locate the file you wish to scan.
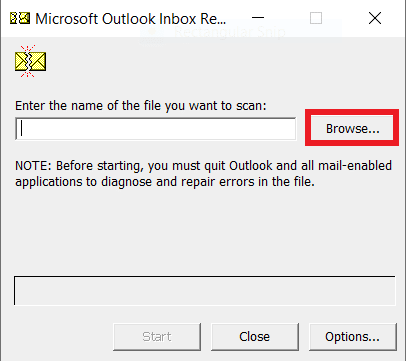
4. In the new dialog box, click on Bắt đầu.
5. Cuối cùng, nhấp vào Sửa chửa to fix all the PST file issues.
If this method does not fix Outlook autocomplete not working issue, move on to the next method.
Cũng đọc: How to Recover Deleted Draft in Outlook 365
Method 6: Update Microsoft Office
If the Microsoft Office program is experiencing bugs and glitches, updating it can help you fix the issues. An outdated Microsoft Office can make your Outlook vulnerable to bugs and other application issues. Therefore, manually updating Office is a great way to fix not just the AutoComplete issues but also other underlying issues with the Microsoft Office package. You can follow these simple steps to update Microsoft Office from the Microsoft Outlook program.
1. Công khai Outlook on your computer and navigate to Các tập tin.

2. From the left-side panel, click on the Tài khoản Office.
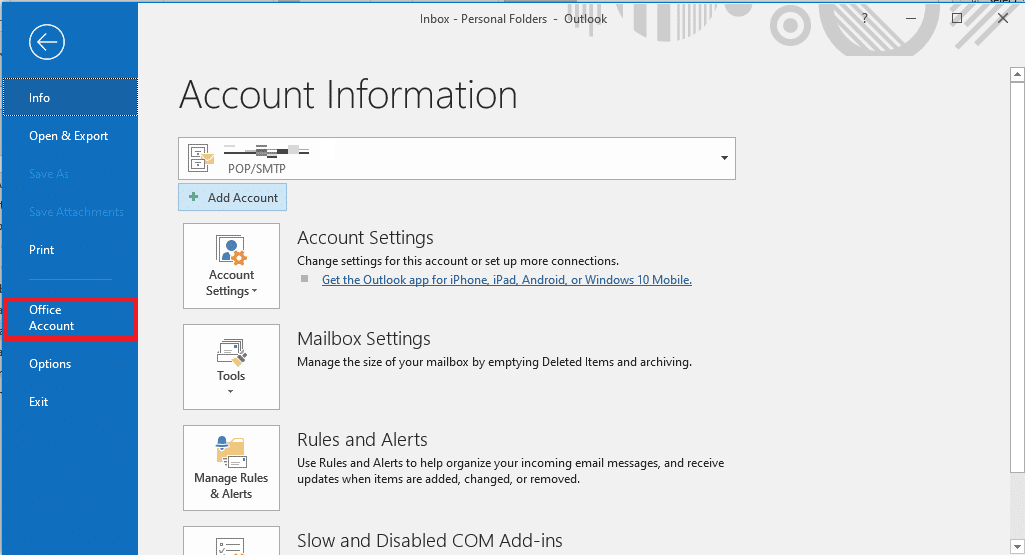
3. Here, locate Office Cập nhật.
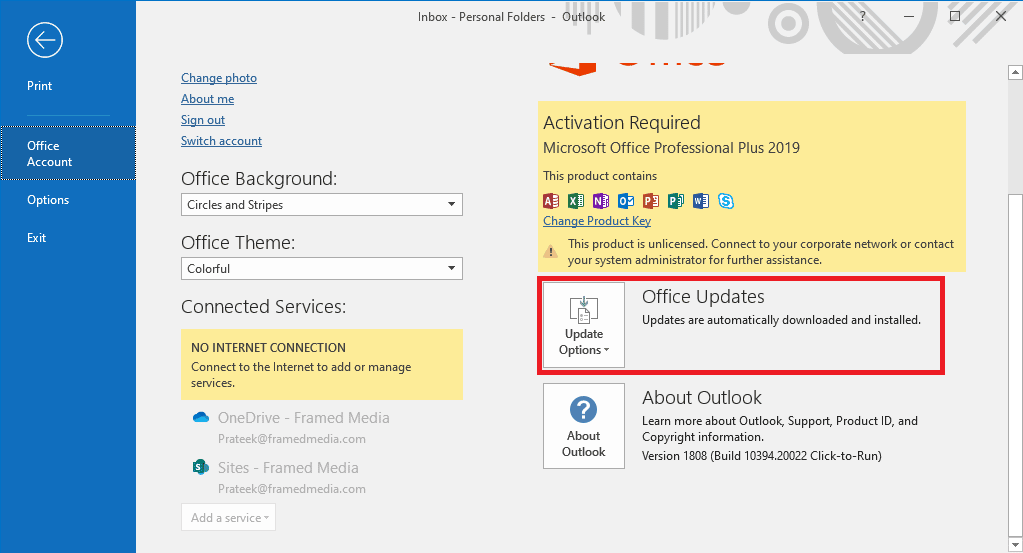
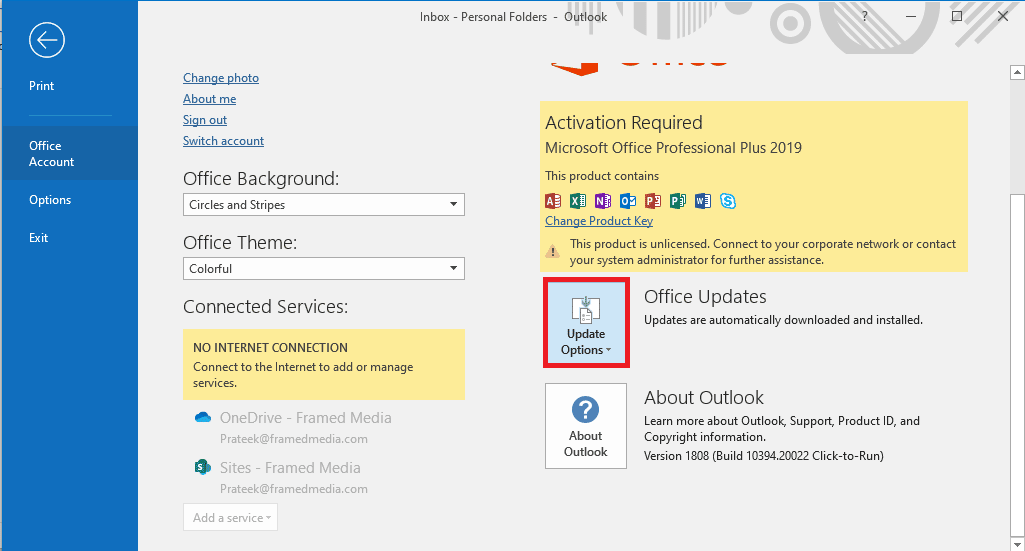
4. Bây giờ, hãy nhấp vào cập nhật tùy chọn thả xuống.
5. Cuối cùng, nhấp vào Cập nhật bây giờ.
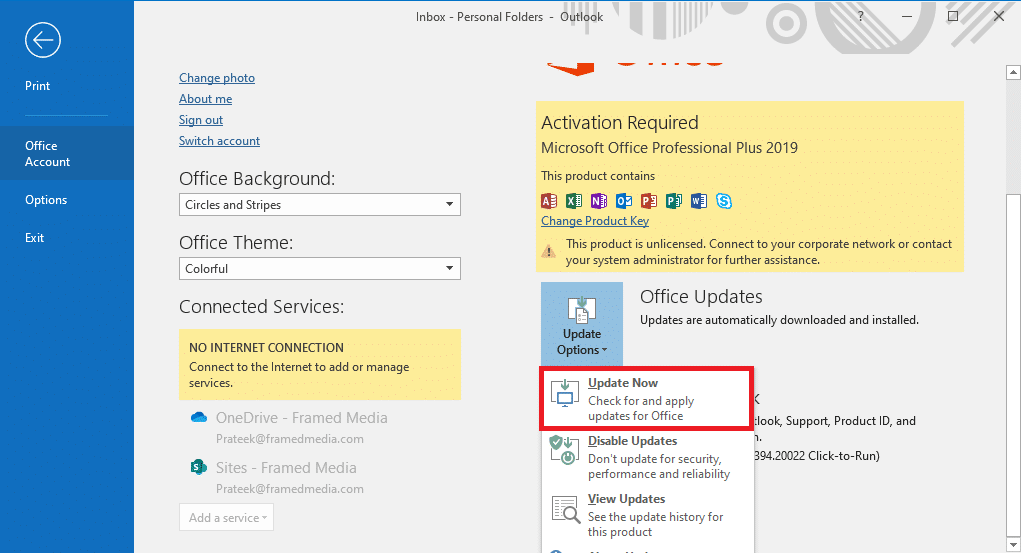
If this method does not fix Outlook Autofill email address not working issue, move on to the next method.
Method 7: Rename RoamCache Folder
If you have enabled the AutoComplete feature but still have the issue, it can be due to a corrupt RoamCache folder. You can fix this issue by resetting the AutoComplete folder. You will only need to rename the RoamCache folder in the directory. You can rename the RoamCache folder for both, a home email account and a Microsoft Exchange server account.
Option I: Rename RoamCache Folder for Home Email Account
You can follow these simple steps to rename the RoamCache folder in a home email account.
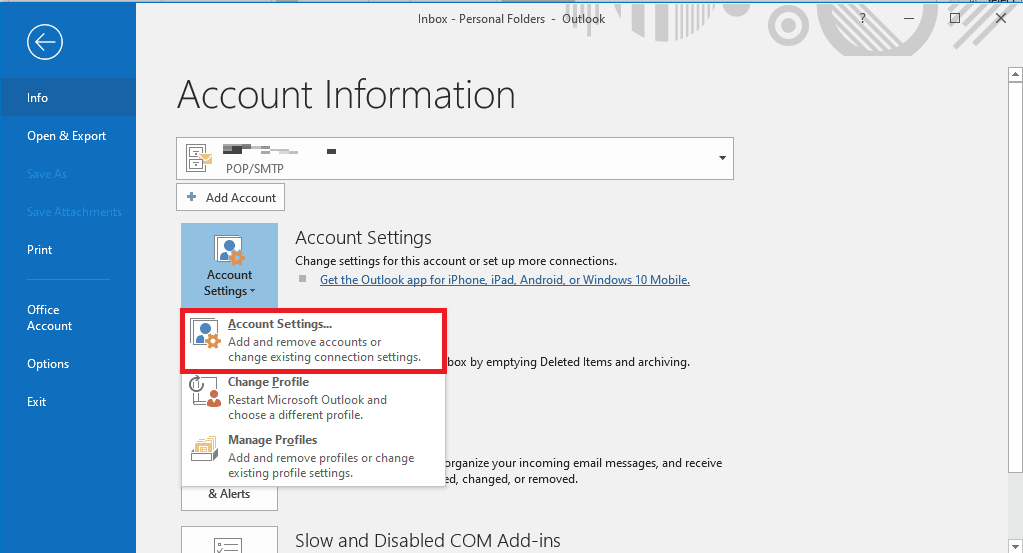
1. Công khai Outlook on your computer and navigate to Tập tin.

2. Bây giờ, hãy nhấp vào Cài đặt tài khoản drop-down and then select Cài đặt tài khoản.

3. Here, select your Home Email Account.
4. Đóng the Outlook program.
5. nhấn Windows + E keys để mở File Explorer.
6. Điều hướng đến vị trí sau con đường.
%LOCALAPPDATA%MicrosoftOutlook

7. Here, locate the RoamCache thư mục.

8. Rename this folder with a new name.
Cũng đọc: Fix Your Microsoft Exchange Administrator Has Blocked This Version of Outlook
Option II: Rename RoamCache Folder for Microsoft Exchange Server Account
You can follow these simple steps to rename the RoamCache folder in a Microsoft Exchange server account to solve Outlook address AutoComplete not working issue.
1. Công khai Outlook on your computer and navigate to Tập tin.

2. Bây giờ, hãy nhấp vào Cài đặt tài khoản drop-down and then select Cài đặt tài khoản.
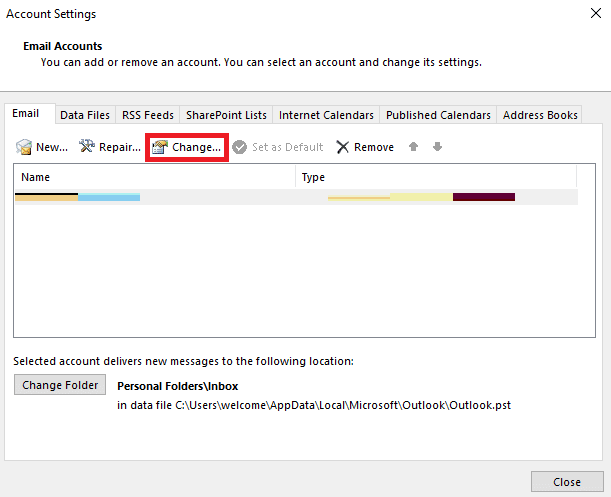
3. Here, select your Microsoft Exchange Server Account.
4. Bây giờ, hãy nhấp vào Thay đổi.
5. Tại đây, hãy nhấp vào More Settings.
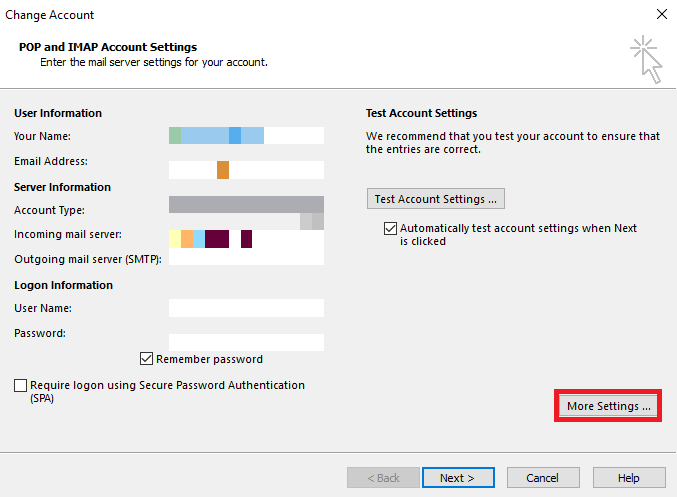
6. Điều hướng đến Nâng cao tab.
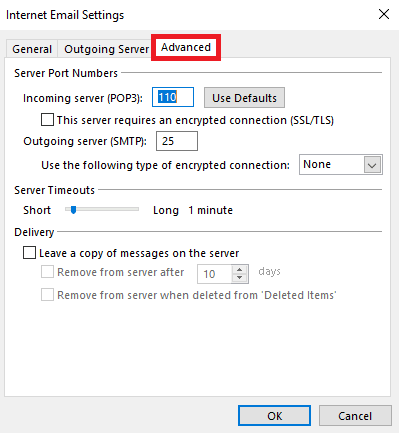
7. Unselect the Sử dụng chế độ đệm ẩn Exchange hộp và chọn Sau.
8. Cuối cùng, nhấp vào Kết thúc.
9. Đóng Outlook chương trình.
10. nhấn Windows + E keys đồng thời mở File Explorer.
11. bên trong File Explorer, navigate to the following location con đường.
%LOCALAPPDATA%MicrosoftOutlook
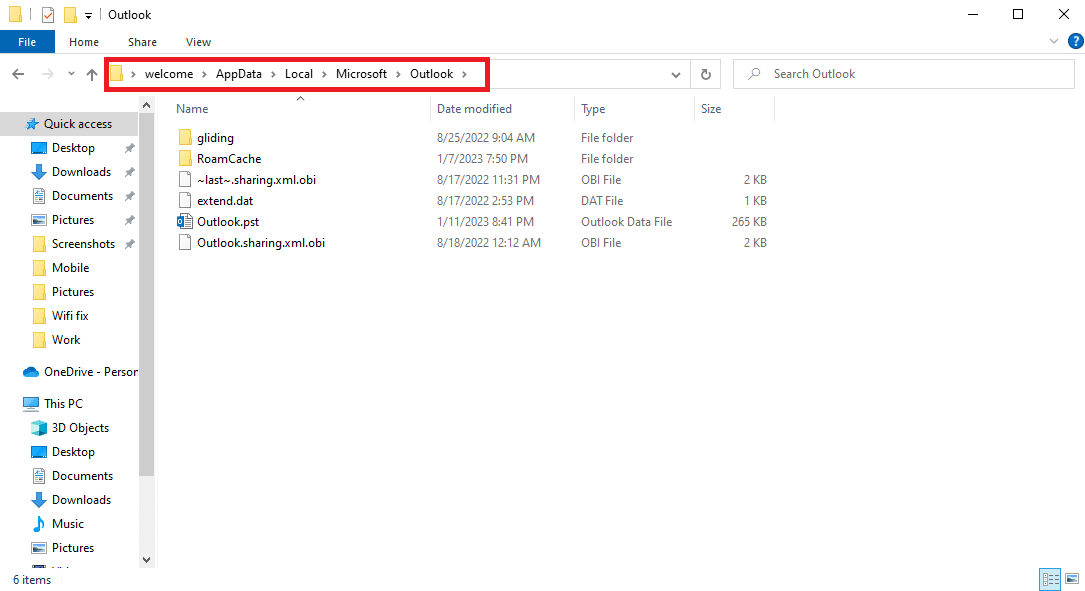
12. Here, locate the RoamCache thư mục.
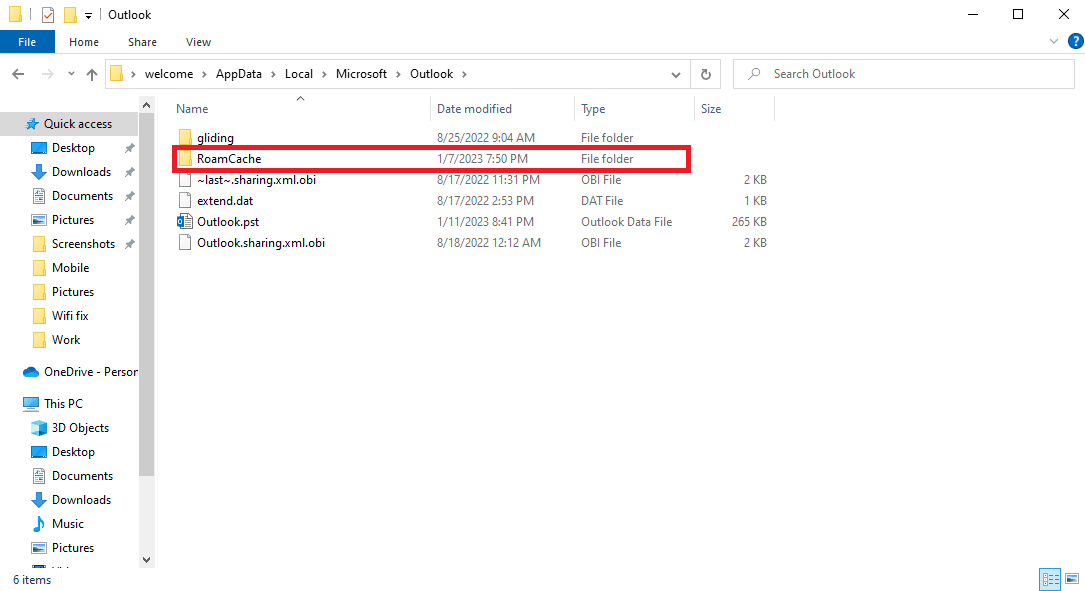
13. Rename this folder to old_RoamCache.
14. Bây giờ, hãy mở Outlook program and follow the steps mentioned above to navigate to the Sử dụng chế độ đệm ẩn Exchange tùy chọn.
15. Kiểm tra Use Cached Exchange Mode.
16. Cuối cùng, khởi động lại ứng dụng Outlook.
Đề nghị:
Chúng tôi hy vọng hướng dẫn này hữu ích cho bạn và bạn có thể khắc phục Outlook AutoComplete not working vấn đề. Hãy cho chúng tôi biết phương pháp nào hiệu quả với bạn. Nếu bạn có bất kỳ đề xuất hoặc thắc mắc nào cho chúng tôi, vui lòng cho chúng tôi biết trong phần bình luận.

