Windows 10 operating system is one of the most used OS around the world. The version is the direct successor to Windows 8.1. This advanced version is preferred by most users due to manifold features that had been missing in the previous updates. However, it is not all a fairytale with Windows 10 version as it has been seen to cause the application-specific permission settings 10016 error in the system logs. In our today’s doc, we will be focusing on D63B10C5 BB46 4990 A94F E40B9D520160 error that does not grant local activation permission. So, let us look at the possible reasons behind the same and possible fixes for event ID 10016 the application-specific permission settings error in the doc.
How to Fix The Application-Specific Permission Settings 10016 Error
- quyền không hợp lệ are the prominent reason behind the stated error if a specific program or an application cannot access DCOM components indicated in the event log.
- Mô hình đối tượng thành phần phân tán, còn được biết là DCOM is a Microsoft software that allows components to communicate across different computers over a network.
- Nó cho phép sử dụng và reusing of components dynamically, không có recompiling, on any available nền tảng, at any thời gian, and from any Ngôn ngữ.
- This COM extension might not be accessible by some programs on your device and hence can result in the application-specific permission lỗi.
Considering the reasons that can stop certain applications or programs of your system to run because of 9CA88EE3 ACB7 47C8 AFC4 AB702511C276 error, the best possible solutions have been given below. One involves modifying permissions on APPID registry key and another one is modifying permissions on the COM server application. So, let us begin right away with fixing this error right away with the first method below:
Method 1: Modify APPID Registry Key Permissions
The first method to resolve event ID 10016 the application-specific permission settings involves modifying permissions on APPID registry key. As you know by now, this error is triggered when certain programs or processes of your system are unable to access DCOM components. Therefore, you must start by granting access to these DCOM components as listed below in the steps:
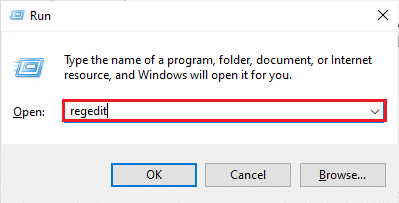
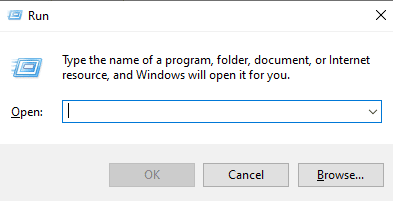
1. Mở chạy dialog box, to open it press the Win + R phím với nhau.

2. Kiểu regedit và báo chí đăng ký hạng mục thi chính ra mắt Registry Editor.
3. Now, navigate to the provided con đường trong Registry Editor.
ComputerHKEY_CLASSES_ROOTCLSID{D63B10C5-BB46-4990-A94F-E40B9D520160}

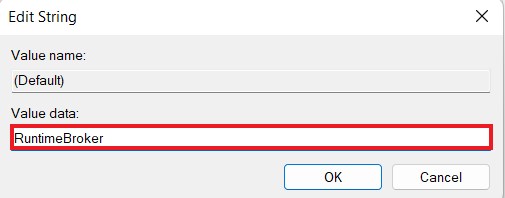
4. Now, double-click on the Mặc định key and note down its Dữ liệu giá trị.
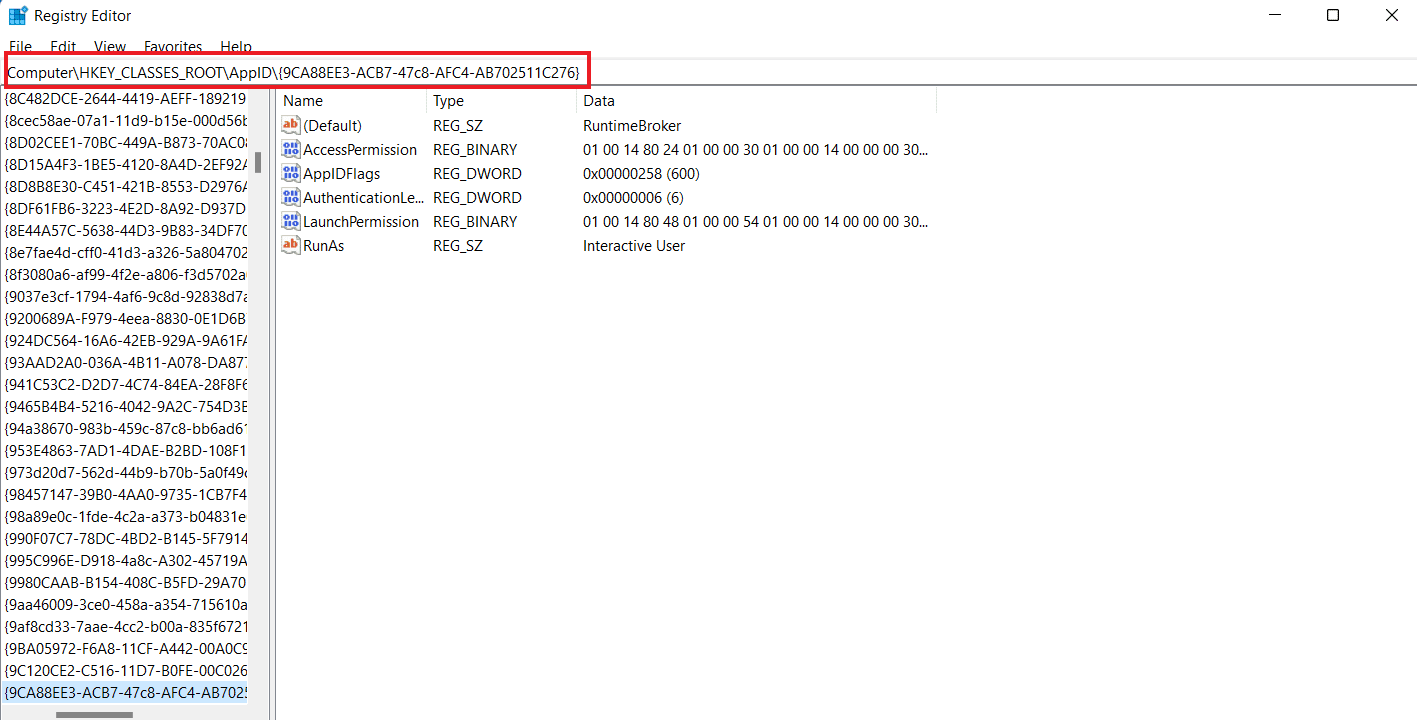
5. Next, navigate to the provided key folder con đường.
ComputerHKEY_CLASSES_ROOTAppID{9CA88EE3-ACB7-47c8-AFC4-AB702511C276}
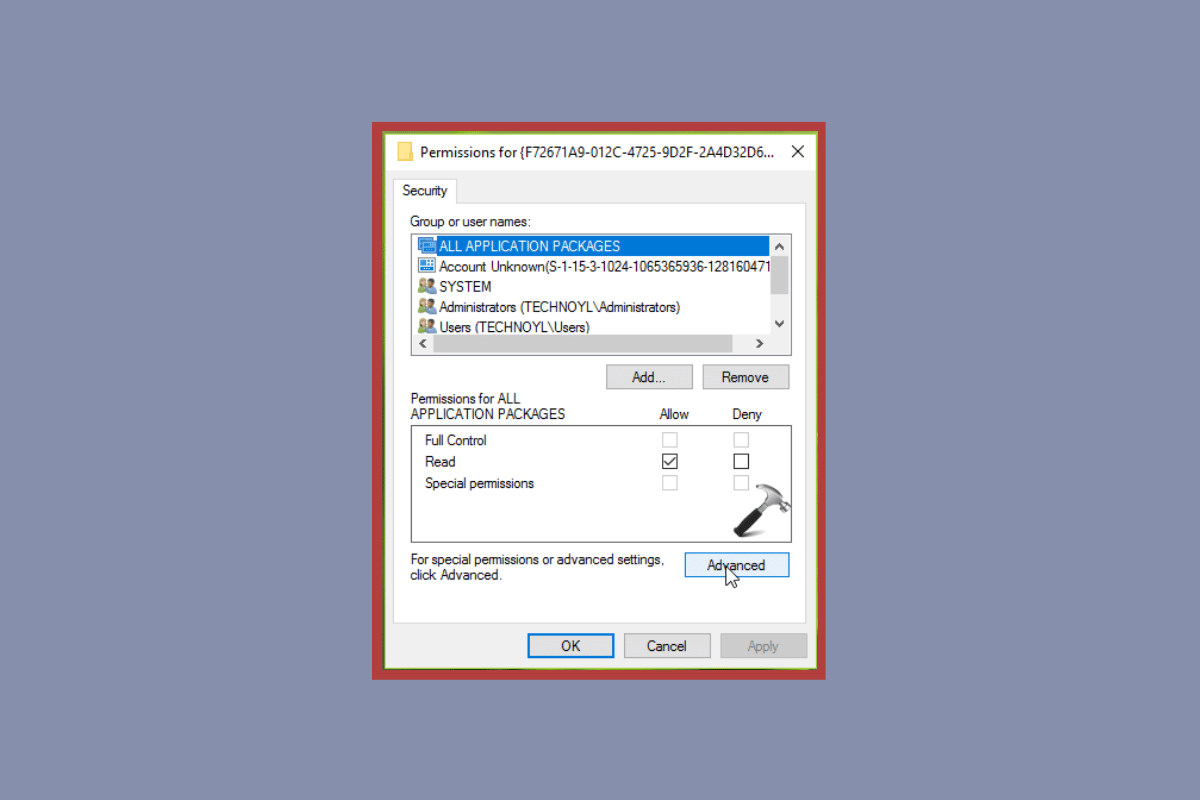
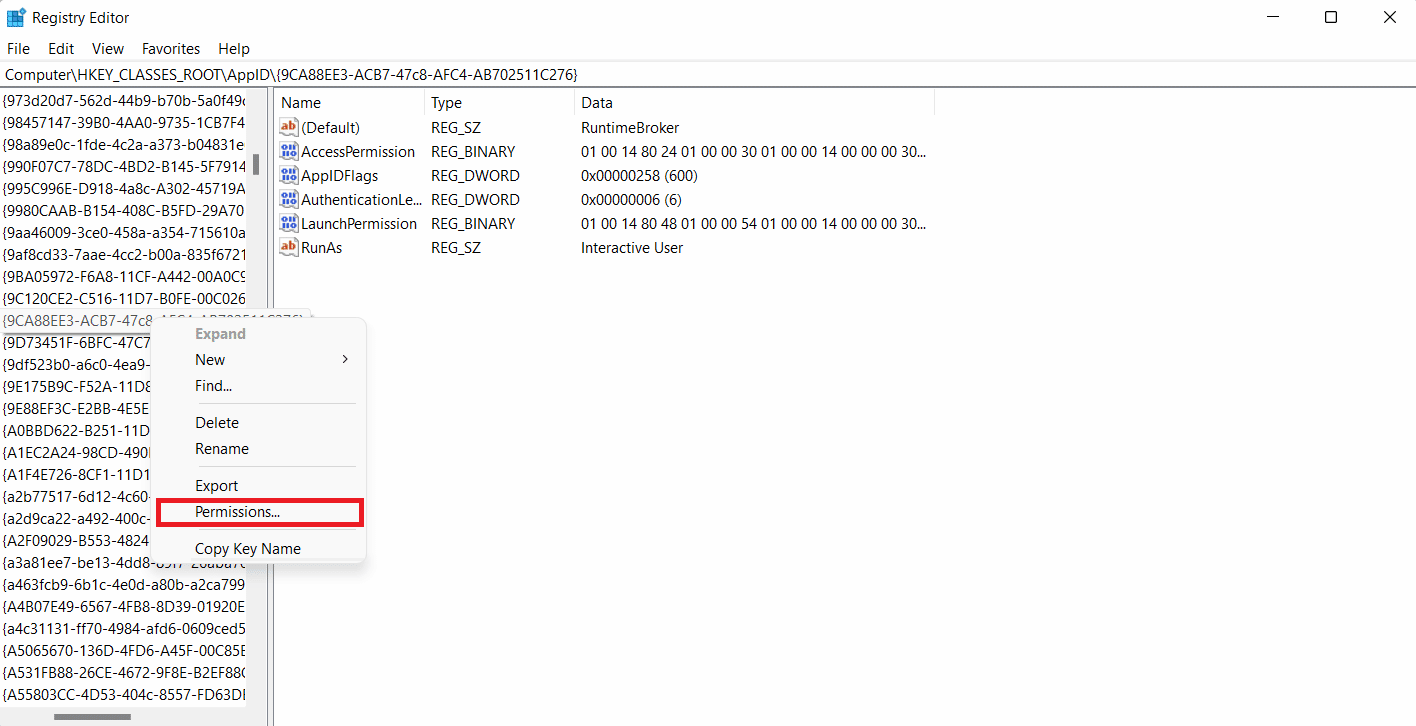
6. Bây giờ, nhấp chuột phải vào {9CA88EE3-ACB7-47c8-AFC4-AB702511C276} key from the left pane and select Quyền.
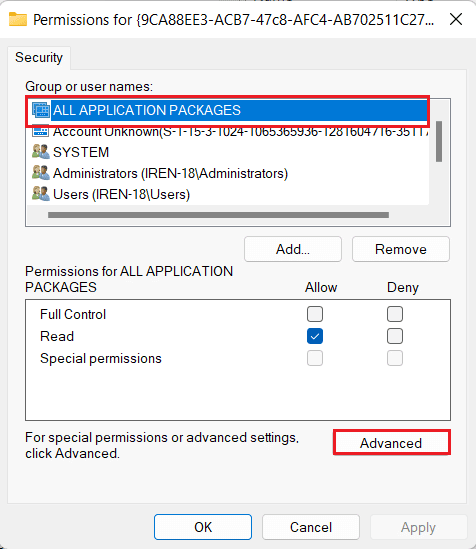
7. Lựa chọn ALL APPLICATION PACKAGES trong Bảo mật tab và nhấp vào Nâng cao.
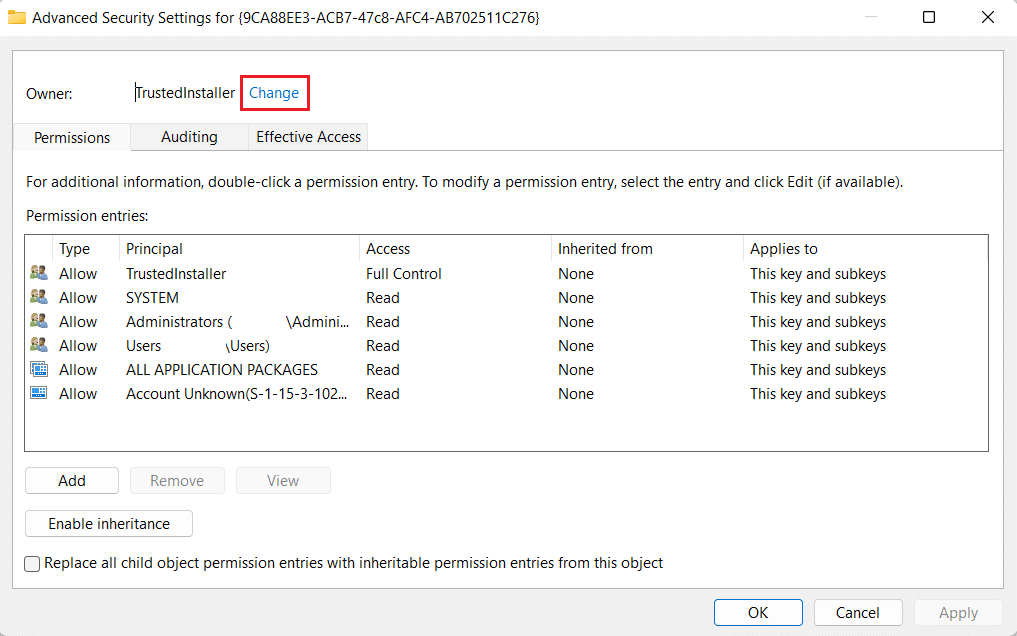
KHAI THÁC. Tiếp theo, nhấp vào Thay đổi bên cạnh các TrustedInstaller.
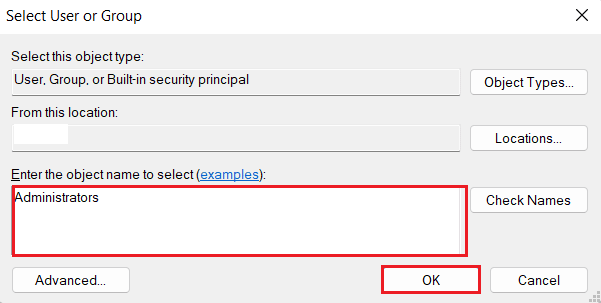
9. Bây giờ, hãy nhấp vào Object Types…
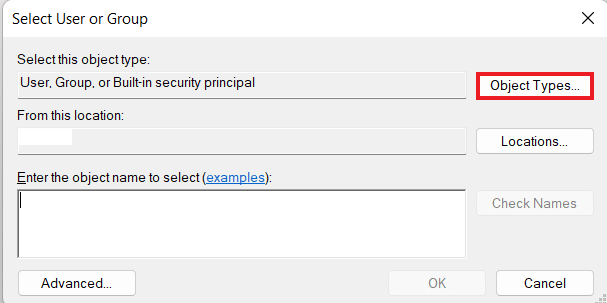
10. Kiểu Quản trị viên vào hộp và bấm vào OK.
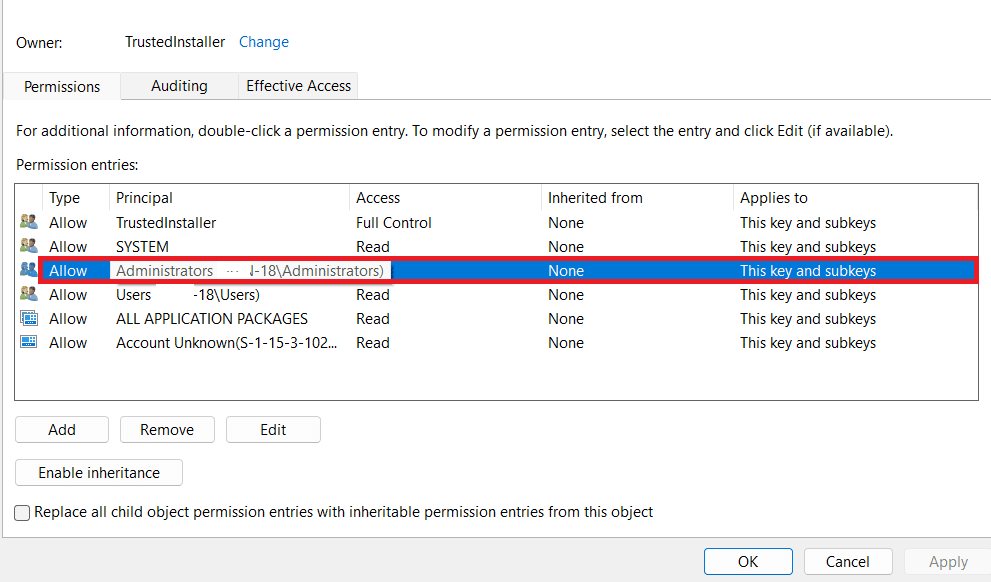
11. Now, check the box for Replace owner or subcontainers and objects và chọn Đăng Nhập.
12. Next, double-click on the Quản trị viên to open the entry.
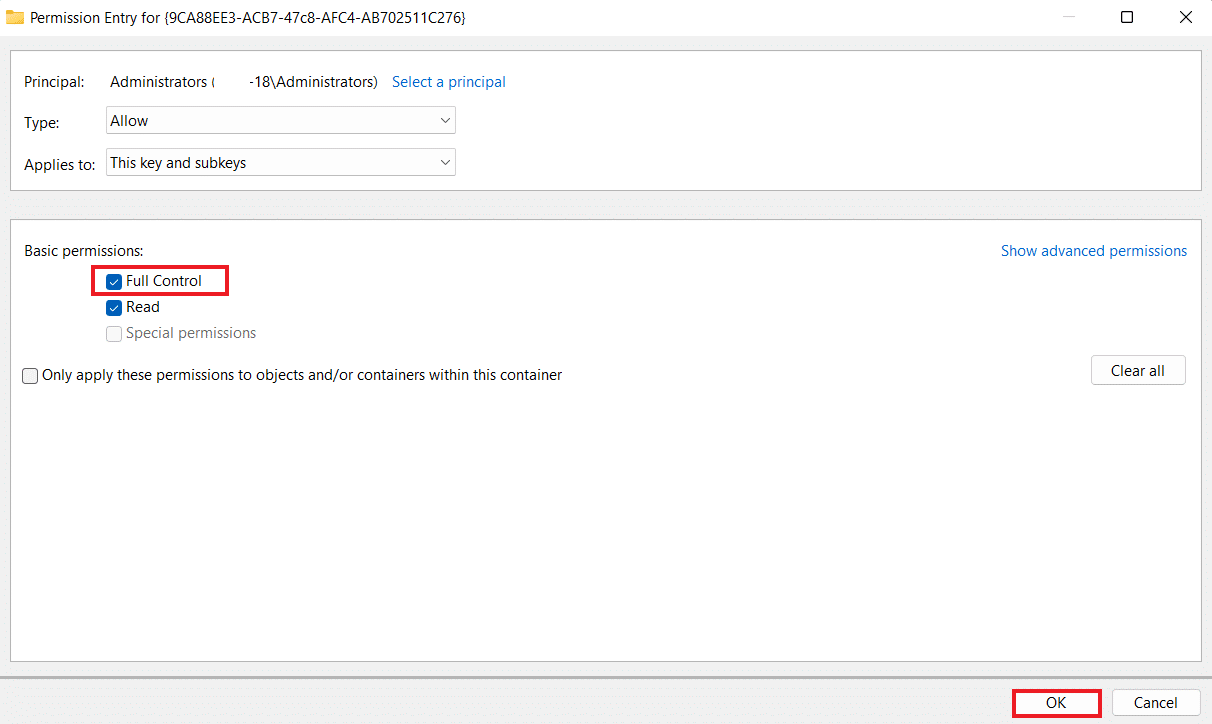
13. Bây giờ, chọn Full Control hộp kiểm và nhấp vào OK ba lần.
14. Finally, close the Registry Editor and reboot the PC.
Check if this solves D63B10C5 BB46 4990 A94F E40B9D520160 error or not.
Cũng đọc: How to Stop Windows 10 From Asking Permission
Method 2: Modify Permissions on COM Server Application with CLSID
Once you have modified the registry key on your device, the next steps are to modify permissions on the COM server to resolve 9CA88EE3 ACB7 47C8 AFC4 AB702511C276 error. To do so, follow the steps provided below:
1. Khởi chạy chạy hộp thoại.
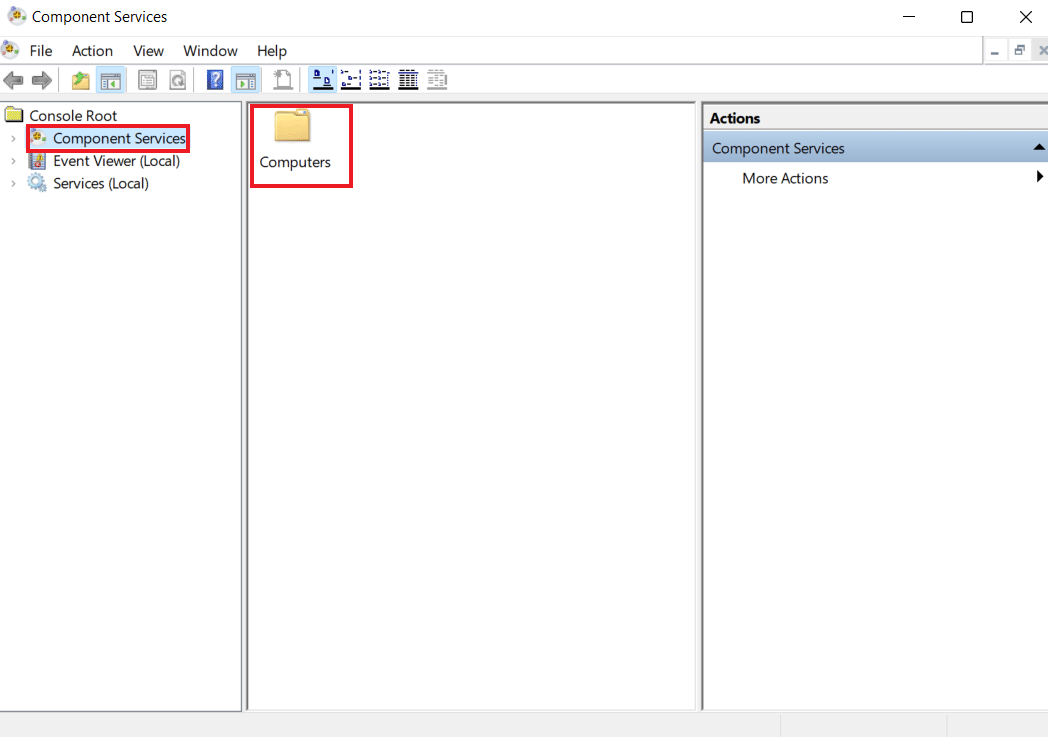
2. Bây giờ, gõ dcomcnfg command in it and press Nhập khóa để mở Dịch vụ thành phần.

3. Tiếp theo, mở rộng Dịch vụ thành phần và click vào Máy vi tính trong đó.
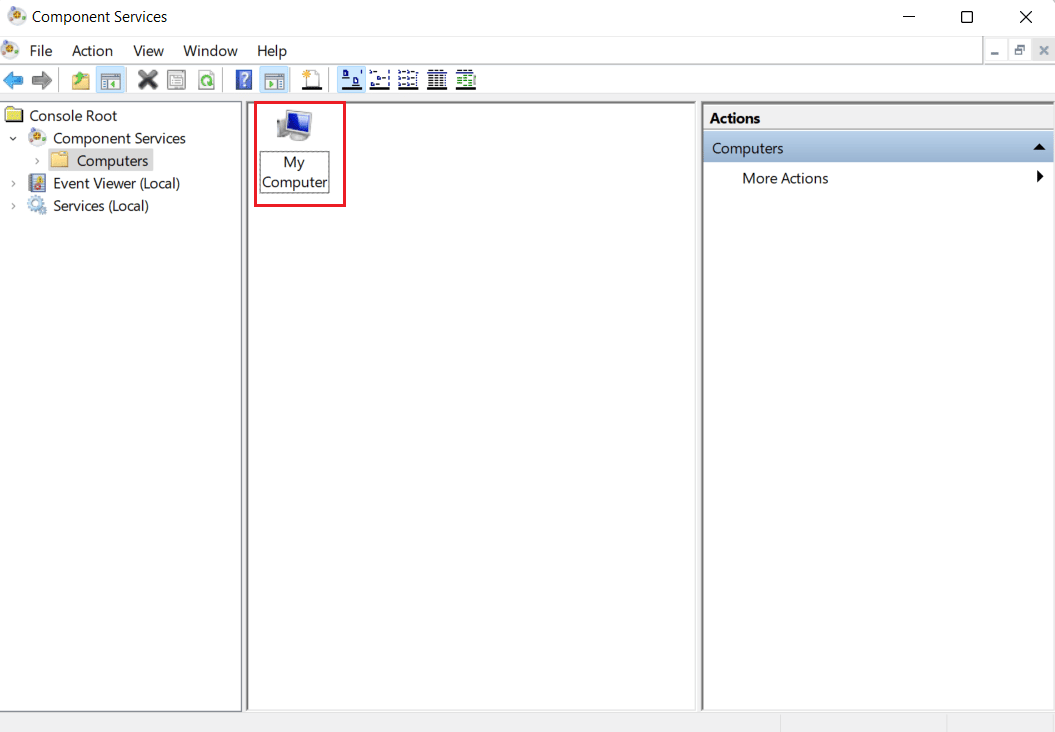
4. Nhấp vào Máy tính của tôi.
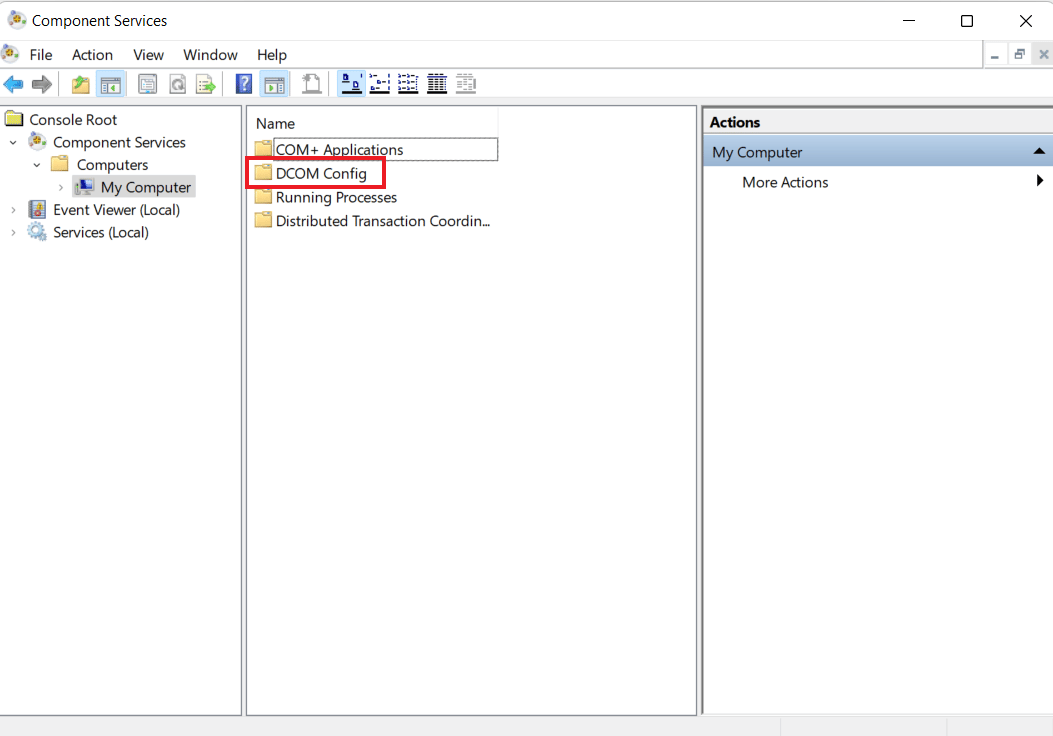
5. Tiếp theo, mở rộng DCOM config.
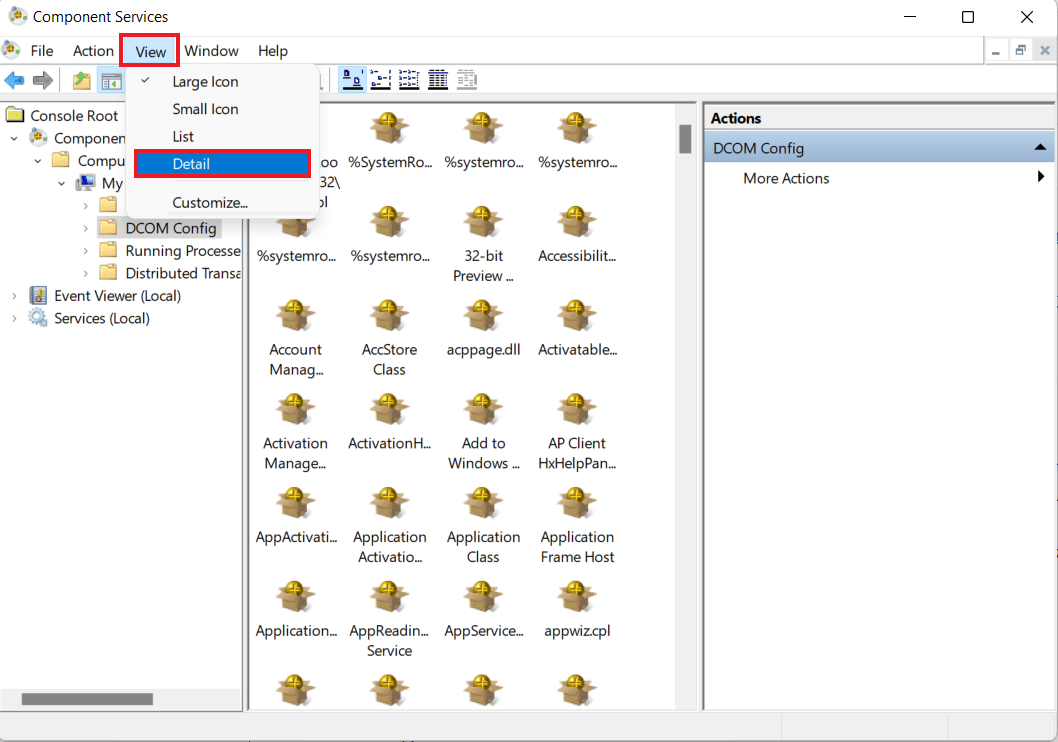
6. Now, from the main menu click on the Xem Tab và chọn Chi tiết.
7. Tiếp theo, nhấp chuột phải vào APPID name that you noted down in Method 1 Step 4 và chọn Bất động sản.
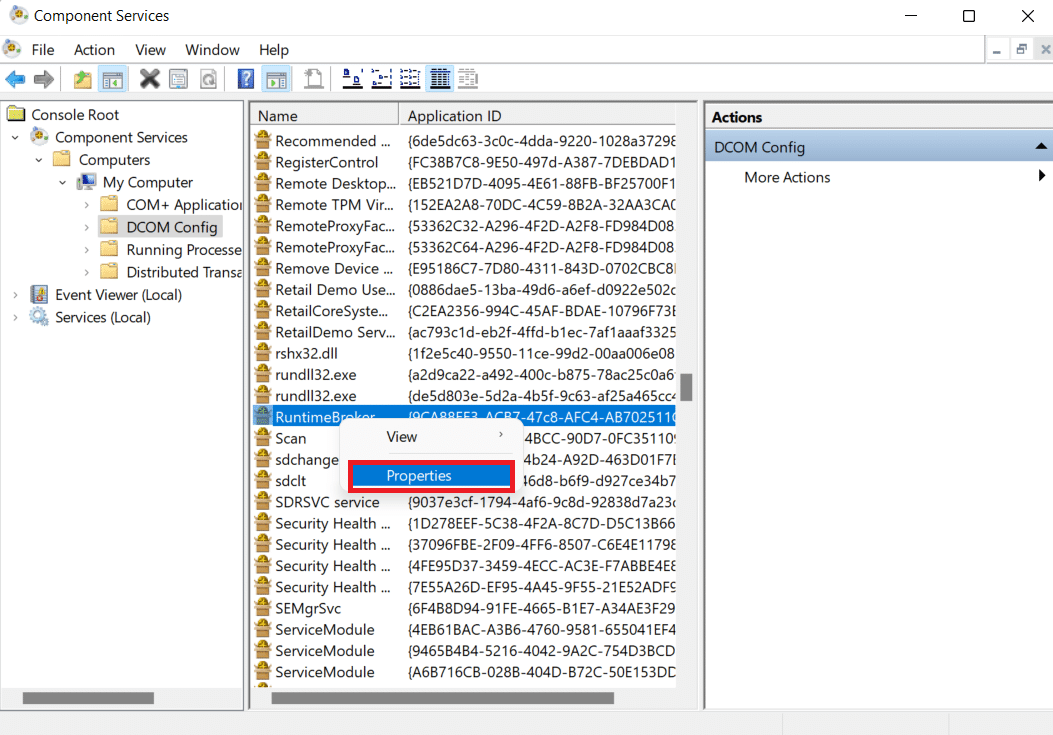
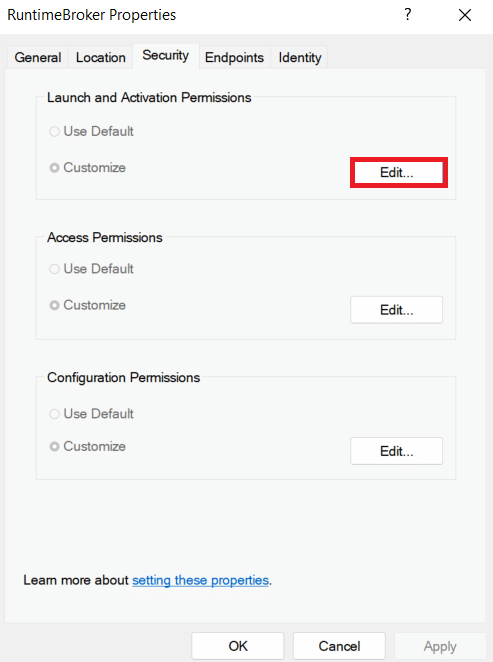
8. bên trong Bất động sản tab, chọn Biên tập… trong Quyền khởi chạy và kích hoạt phần.
5. Bây giờ, hãy nhấp vào Thêm ... .
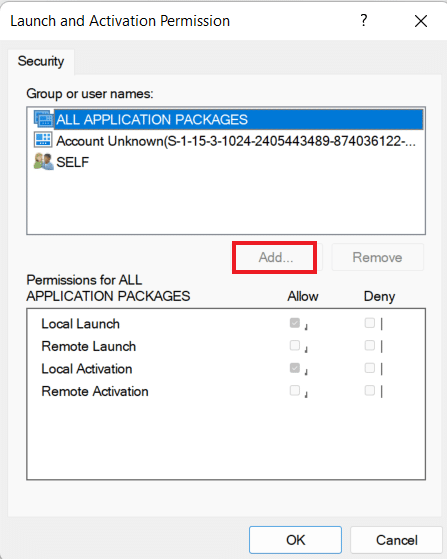
6. In the box type LOCAL SERVICE và click vào OK.
7. Chọn Kích hoạt cục bộ hộp kiểm dưới Cho phép và click vào OK hai lần.
8. Finally, close the Dịch vụ thành phần cửa sổ và khởi động lại hệ thống.
Now, check if event ID 10016 the application-specific permission settings have been fixed.
Cũng đọc: Cách thay đổi quyền truy cập tệp trong Windows 10
Những câu hỏi thường gặp (FAQs)
Q1. How can I know which application is using Clsid?
Ans. Class ID or CLSID is a serial number that represents a ID duy nhất for any program or application component in Windows. Therefore, it is easy to find all registry entries for an application component under the registry key {HKEY_CLASSES_ROOTCLSID{CLSID value}.
Q2. What causes application-specific permission settings error?
Ans. The error is usually caused when a specific process or program does not have enough permissions to access the DCOM components that are provided in the event log.
Q3. What is meant by CLSID on my computer?
Ans. CLSID on your computer is a globally unique identifier that helps identify a COM class object. You need to register a CLSID for each supported class of objects in case your server or container allows linking to its embedded objects.
Q4. How can I know which application server I am using?
Ans. You can know about the application server from the Connection Center.
Q5. What is meant by COM server application?
Ans. COM server application is a server in any object that provides services to clients. These services are present in the form of COM interface implementations that can be called by a client that is able to get a pointer to one of the interfaces on the server object. Two types of servers that are present include in-process and out-of-process.
Đề nghị:
We hope that our guide on the application-specific permission settings 10016 was helpful and informative enough to help you with resolving D63B10C5 BB46 4990 A94F E40B9D520160 error. Let us know by leaving your comments below if you have other queries, suggestions, or doubts.

