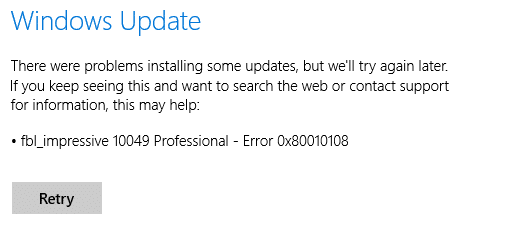
If you face Error 0x80010108 while trying to update your Windows 10, you are at the right place as today we are going discuss how to resolve this error. Also, running Windows Update Troubleshooter will not help, but it’s worth a try, as in some cases it can fix the underlying issue. The main cause of this error seems to be Windows Update Service.
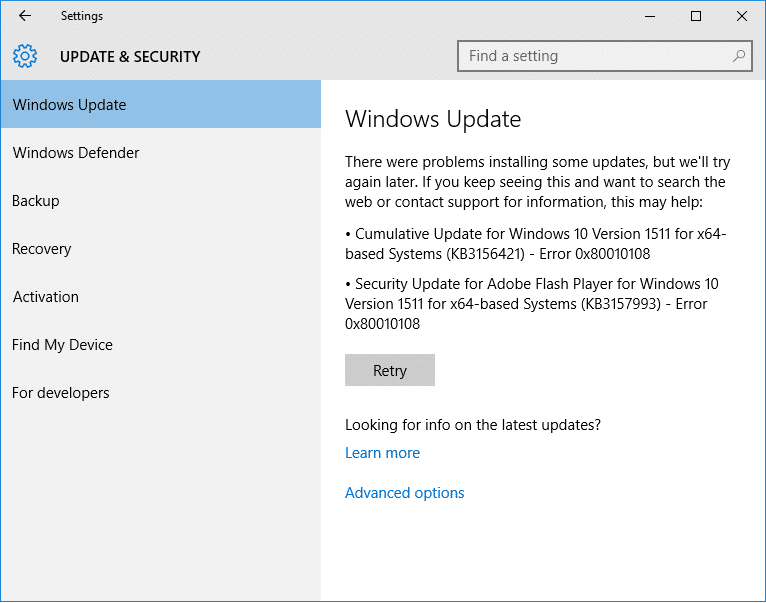
This error can be fixed by restarting Windows Update Service and then re-registering the wups2.dll. So without wasting any time let’s see how to actually Fix Windows Update Error 0x80010108 with the help of below-listed troubleshooting guide.
[FIXED] Windows Update Error 0x80010108
Đảm bảo tạo điểm khôi phục đề phòng trường hợp xảy ra sự cố.
Phương pháp 1: Chạy Trình khắc phục sự cố Windows Update
1. Open control panel and Search Troubleshoot in the search bar and click on Xử lý sự cố.
![Search Troubleshoot and click on Troubleshooting | [FIXED] Windows Update Error 0x80010108](https://lbsite.org/wp-content/uploads/2023/02/Search-Troubleshoot-and-click-on-Troubleshooting.jpg)
2. Tiếp theo, từ cửa sổ bên trái, chọn Xem tất cả.
3. Sau đó, từ danh sách Khắc phục sự cố máy tính, hãy chọn Windows Update.

4. Follow on-screen instruction and let the Windows Update Troubleshoot run.

5. Khởi động lại PC của bạn và xem liệu bạn có thể fix Windows Update Error 0x80010108.
Method 2: Restart Windows Update Service
1. Nhấn phím Windows + R rồi gõ services.msc và nhấn Enter.
![services windows | [FIXED] Windows Update Error 0x80010108](https://lbsite.org/wp-content/uploads/2023/01/services-windows.png)
2. Locate the following services:
Dịch vụ chuyển tiếp nền thông minh (BITS)
Dịch vụ Mật mã
Windows Update
Trình cài đặt MSI
3. Right-click on each of them and then select Properties. Make sure their Kiểu khởi động được thiết lập để Automatic.

4. Now if any of the above services are stopped, make sure to click on Start under Service Status.
5. Next, right-click on Windows Update service and select Khởi động lại.

6. Click Apply, followed by OK and then reboot your PC to save changes.
See if you can Fix Windows Update Error 0x80010108, if not then continue with the next method.
Method 3: Re-register wups2.dll
1. Công khai Command Prompt. Người dùng có thể thực hiện bước này bằng cách tìm kiếm 'cmd' Và sau đó nhấn Enter.
![Open Command Prompt. The user can perform this step by searching for ‘cmd’ and then press Enter | [FIXED] Windows Update Error 0x80010108](https://lbsite.org/wp-content/uploads/2023/02/Open-Command-Prompt.-The-user-can-perform-this-step-by-searching-for-%E2%80%98cmd-and-then-press-Enter..jpg)
2. Gõ lệnh sau vào cmd rồi nhấn Enter:
regsvr32 wups2.dll /s
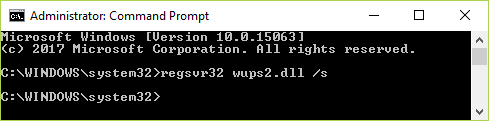
3. This would re-register wups2.dll. Reboot your PC to save changes.
Phương pháp 4: Thực hiện Khởi động sạch
Sometimes 3rd party software can conflict with Windows Update and therefore cause Windows Update Error 0x80010108. To khắc phục vấn đề này, you need to perform a clean boot in your PC and diagnose the issue step by step. Once your system starts in Clean Boot again try to update Windows and see if you can resolve the error code 0x80010108.

Phương pháp 5: Tạm thời vô hiệu hóa phần mềm chống vi-rút và tường lửa
Sometimes the Antivirus program can cause an error. To verify this is not the case here; you need to disable your antivirus for a limited time so that you can check if the error still appears when the antivirus is off.
1. Nhấp chuột phải vào Biểu tượng chương trình chống vi-rút từ khay hệ thống và chọn Vô hiệu hóa.

2. Next, select the time frame for which the Phần mềm chống vi-rút sẽ vẫn bị vô hiệu hóa.

Note: Choose the smallest amount of time possible, for example, 15 minutes or 30 minutes.
3. Once done, again try to connect to open Google Chrome and check if the error resolves or not.
4. Tìm kiếm control panel từ thanh tìm kiếm Start Menu và nhấp vào nó để mở Bảng điều khiển.
![Type Control Panel in the search bar and press enter | [FIXED] Windows Update Error 0x80010108](https://lbsite.org/wp-content/uploads/2023/01/Type-Control-Panel-in-the-search-bar-and-press-enter.png)
KHAI THÁC. Tiếp theo, nhấp vào Hệ thống và bảo mật then click on Tường lửa của Windows.

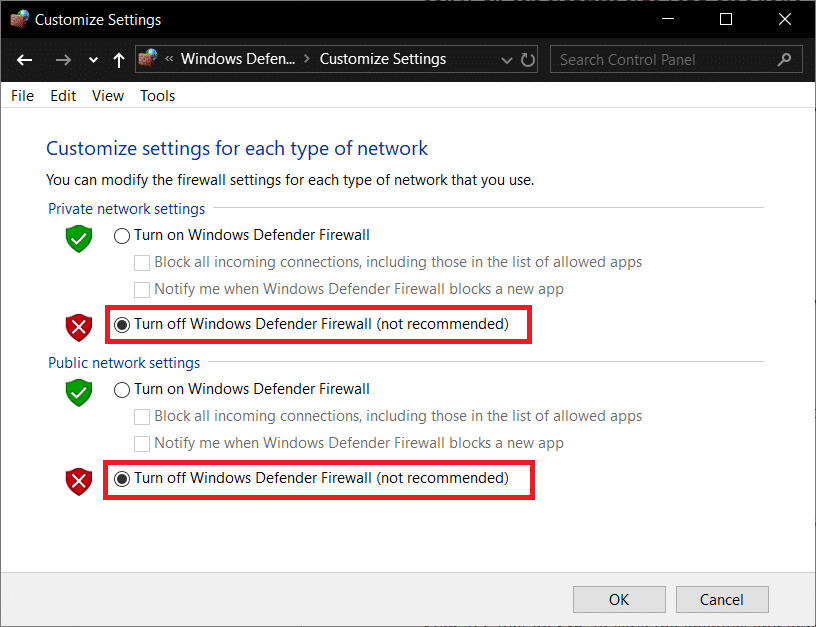
6. Bây giờ từ khung cửa sổ bên trái hãy nhấp vào Bật hoặc tắt Tường lửa Windows.
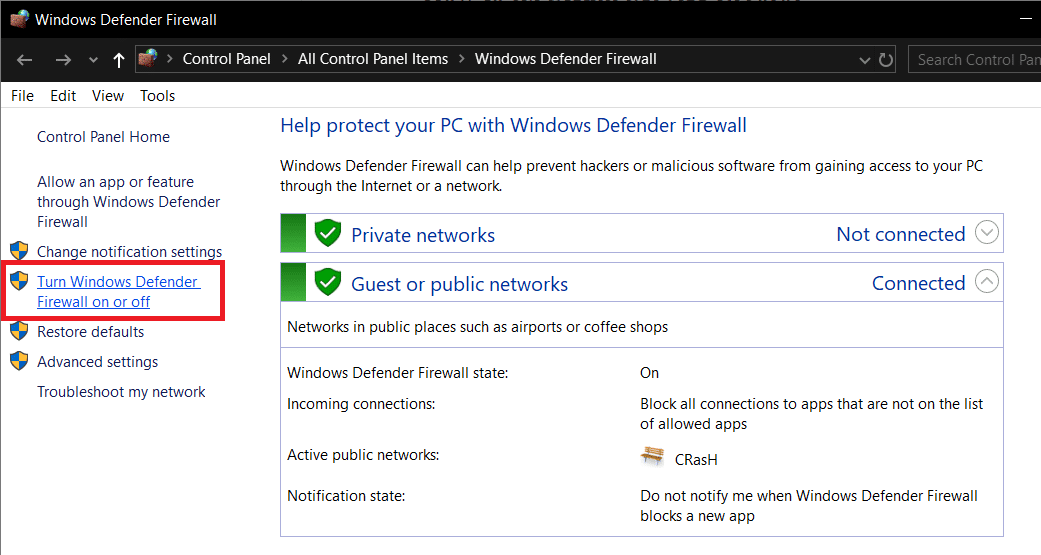
7. Chọn Tắt Tường lửa Windows và khởi động lại PC của bạn.
Again try to open Google Chrome and visit the web page, which was earlier showing an lỗi. If the above method doesn’t work, please follow the same steps to turn on your Firewall again.
If the above method doesn’t work, please follow the same steps to turn on your Firewall again.
Cách 6: Sửa chữa Cài đặt Windows 10
This method is the last resort because if nothing works out, then, this method will surely repair all problems with your PC. Repair Install using an in-place upgrade to repair issues with the system without deleting user data present on the system. So follow this article to see How to Repair Install Windows 10 Easily.
![choose what to keep windows 10 | [FIXED] Windows Update Error 0x80010108](https://lbsite.org/wp-content/uploads/2023/01/choose-what-to-keep.png)
Đề xuất cho bạn:
Thế là bạn đã thành công Sửa lỗi cập nhật Windows 0x80010108 nhưng nếu bạn vẫn có bất kỳ thắc mắc nào liên quan đến hướng dẫn này thì vui lòng hỏi họ trong phần bình luận.

