Windows 11 provides many new computer management tools, allowing users to customize their accounts to best fit their needs. For example, you can easily adjust the account type, personalize features, and optimize your PC’s security settings.
In this tutorial, we’ll explain how to manage your user account settings on the Windows 11 operating system.
How to Add Accounts on Windows 11
cửa sổ 11 allows you to easily share the device with multiple people while maintaining your own settings and keeping your personal files private. All you need to do is add an account.
How to Add a Microsoft Account
- In the Start menu, open the Cài đặt ứng dụng.
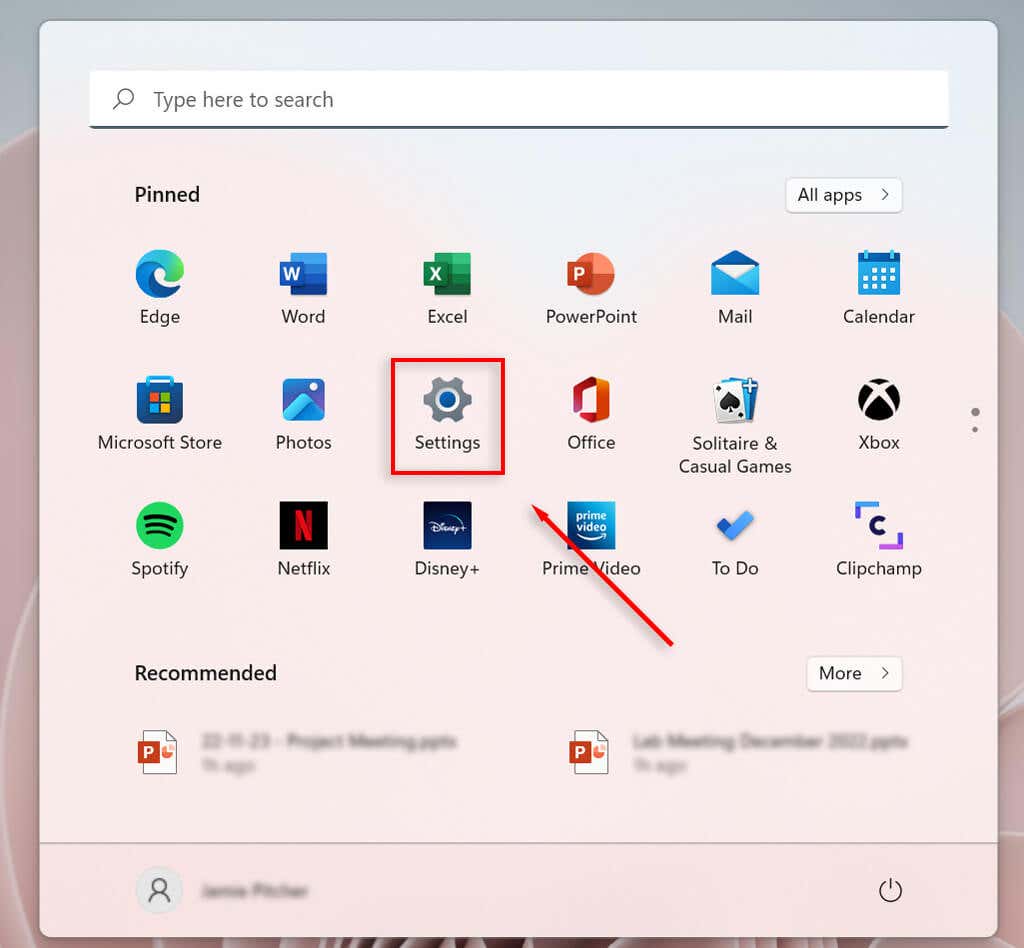
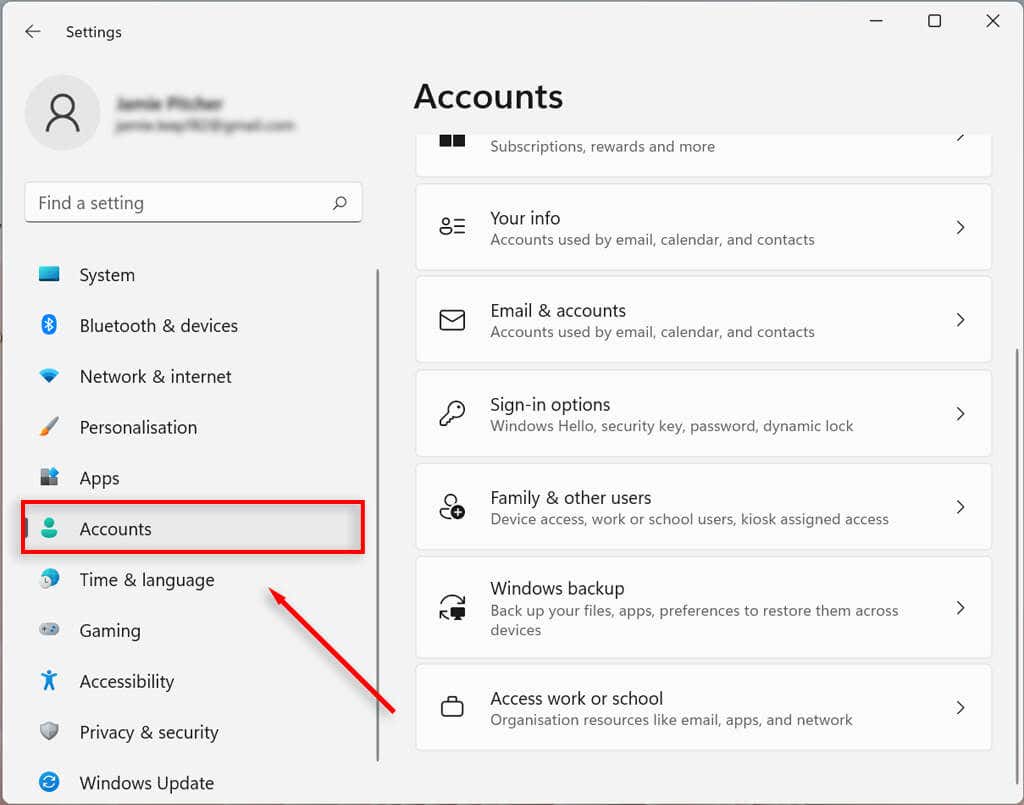
- Chọn Trợ Lý Giám Đốc.

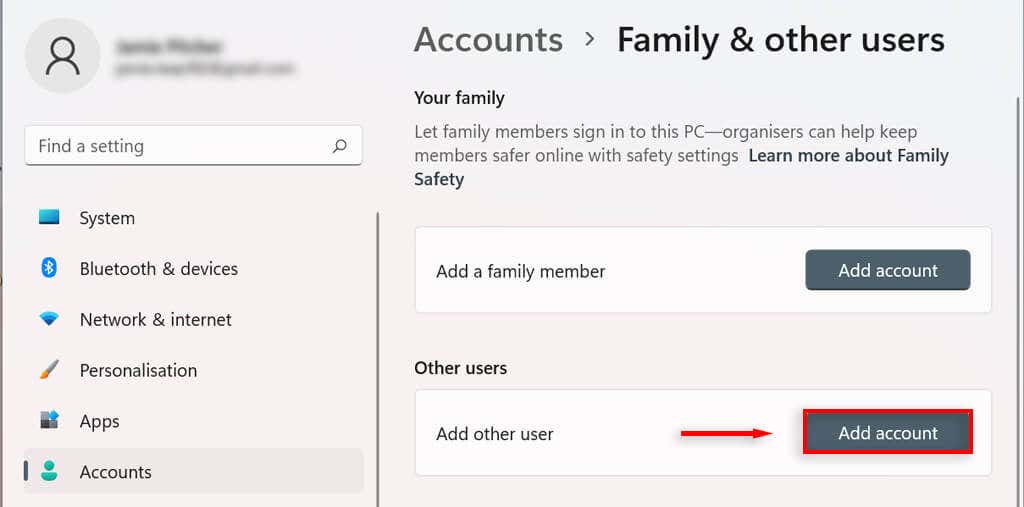
- Chọn Gia đình và những người dùng khác (This may show up as “Family”).

- Bên dưới Nền tảng khác Người sử dụng phần, chọn Thêm tài khoản.
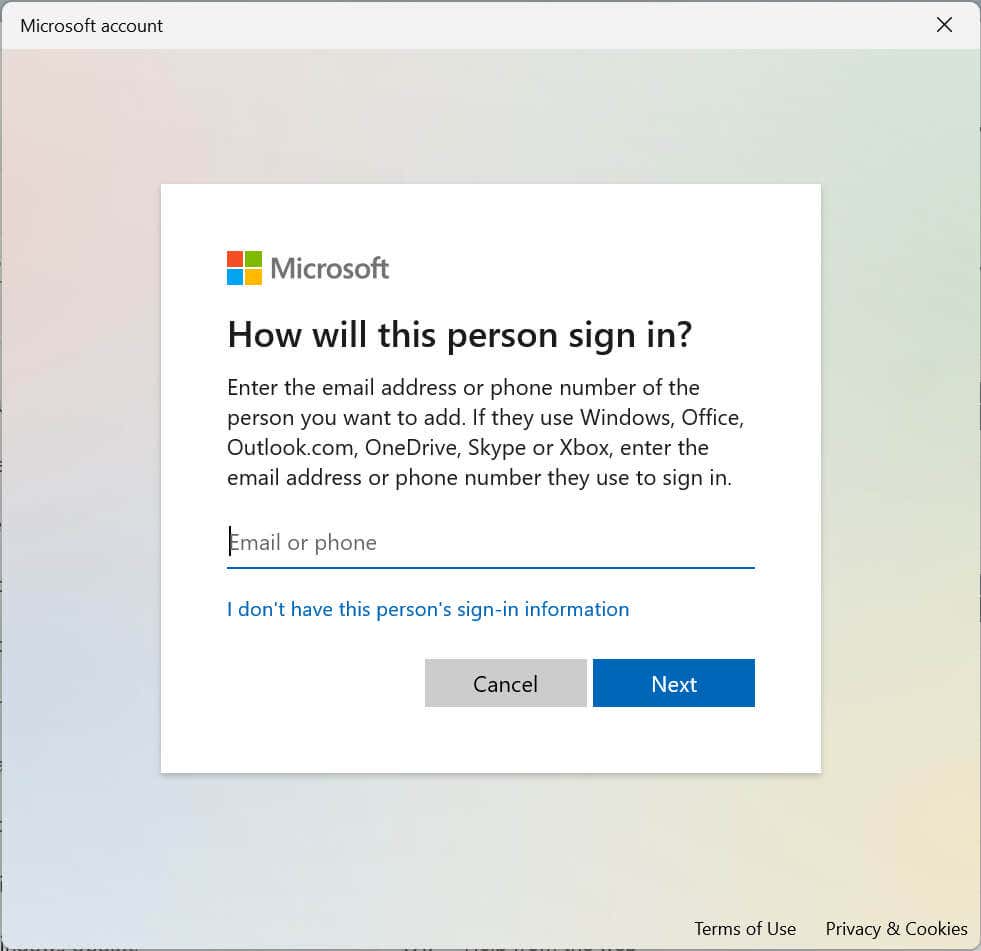
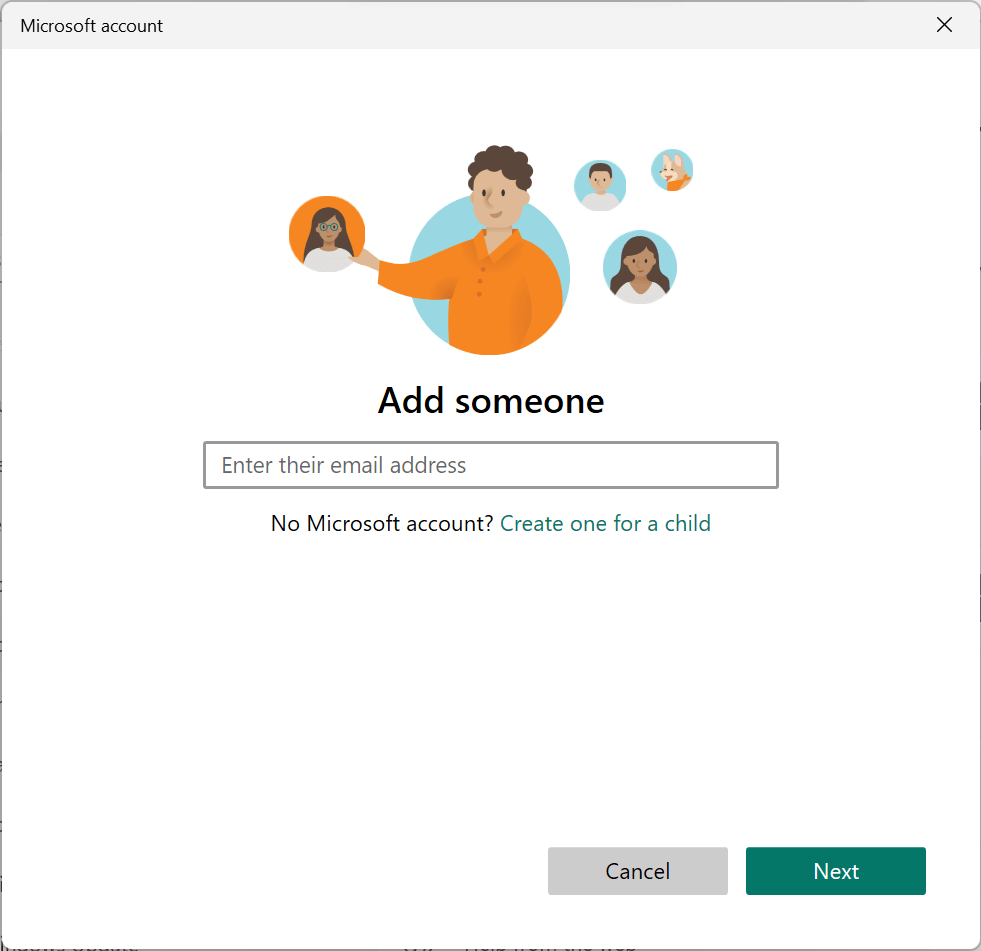
- Enter the email address or phone number of the new user and select Sau.
- Chọn Kết thúc.
How to Create a Local Account
You can create a local or offline account without needing a Microsoft account. This account can only be accessed on the computer it was created on.
- Mở Cài đặt.
- Chọn Trợ Lý Giám Đốc.
- Chọn Gia đình và những người dùng khác.
- Theo Other users, bên cạnh Add other người sử dụng chọn Thêm tài khoản.
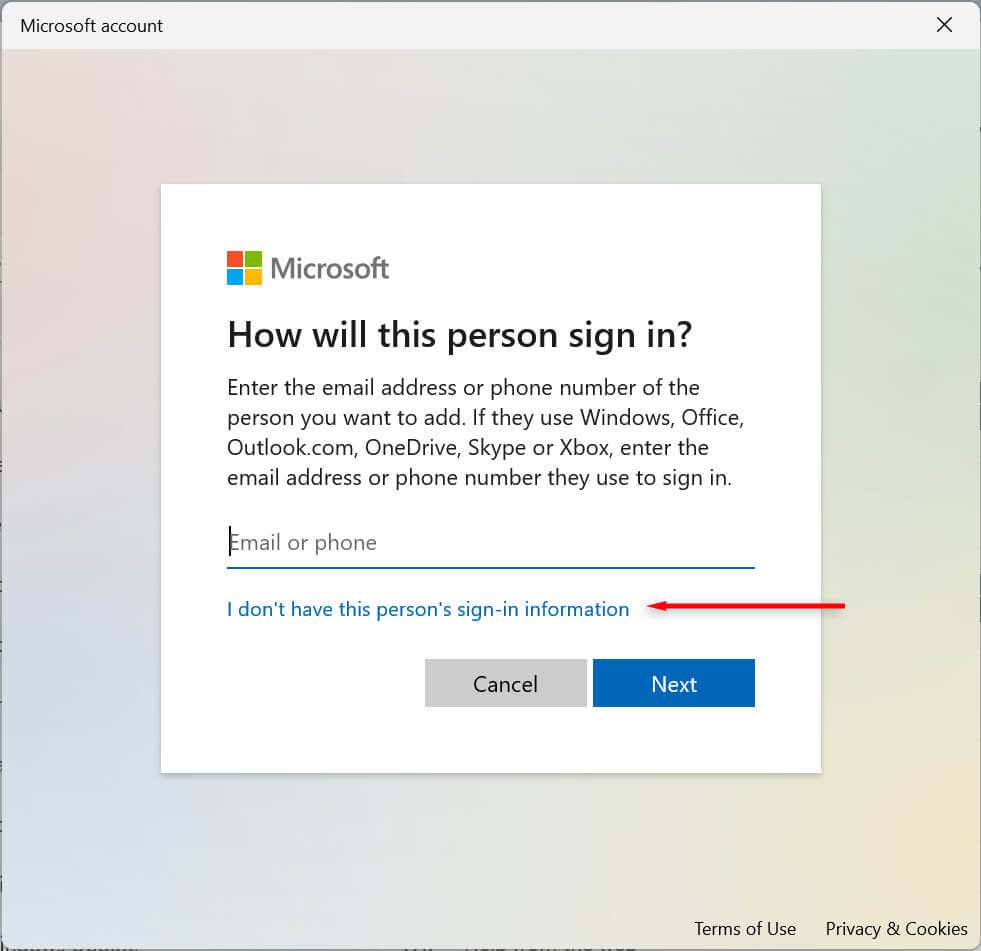
- In the new dialog box, choose I don’t have this person’s sign-in information.
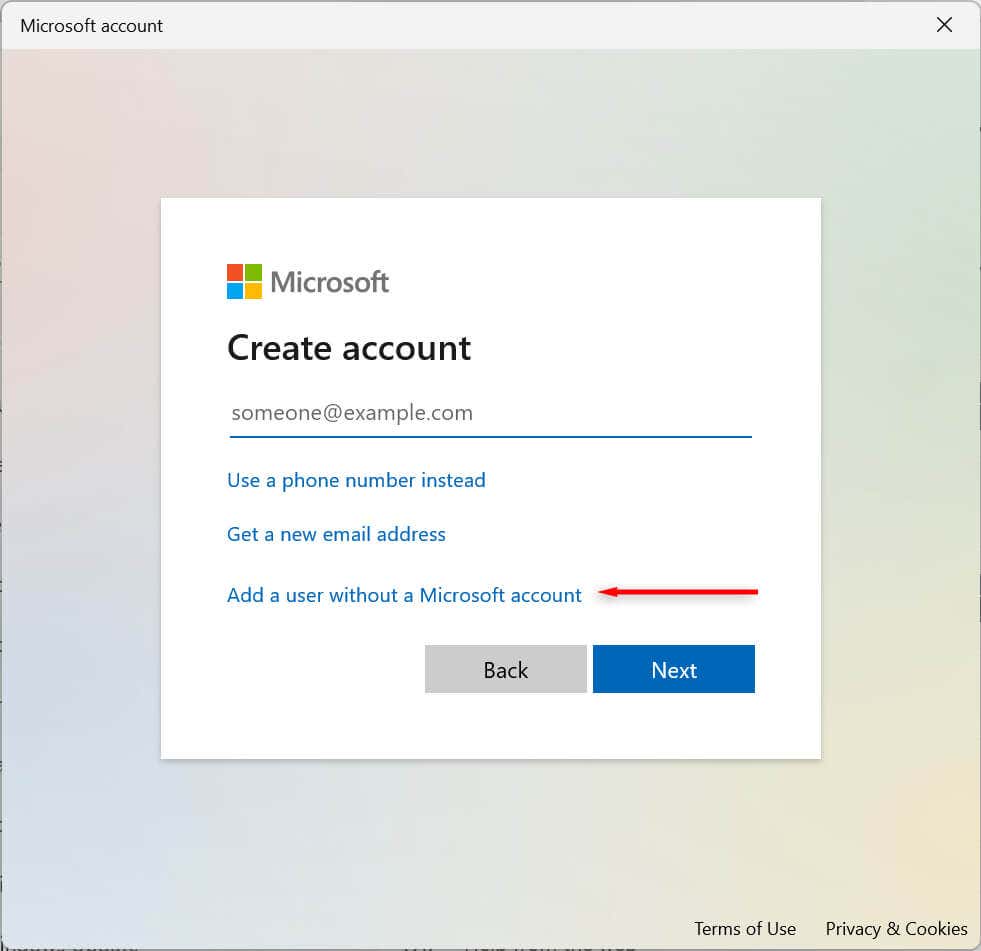
- Chọn Thêm người dùng mà không cần Tài khoản Microsoft.
- Enter the account name, create a password for the account, and fill in the security questions. Then, choose Sau.
How to Add a Family Member Account
You can also manage your family members, allowing each person to have their own desktop, settings, apps, and personal files. There are two family account types: Child and Adult.
A Child account offers a controlled environment. The child can use the device as normal, but the organizer sets their permissions and activities, enforces limits on apps and games, limits screen time, and tracks user activity.
An Adult account is the same as a traditional local account, but enables control over Child accounts.
To add a family member account:
- Mở Cài đặt.
- Chọn Trợ Lý Giám Đốc.
- Chọn Gia đình và những người dùng khác.
- Ở cạnh Thêm một thành viên gia đình, lựa chọn Thêm tài khoản.
- Confirm the email address of the person you want to add.
- Chọn Sau.
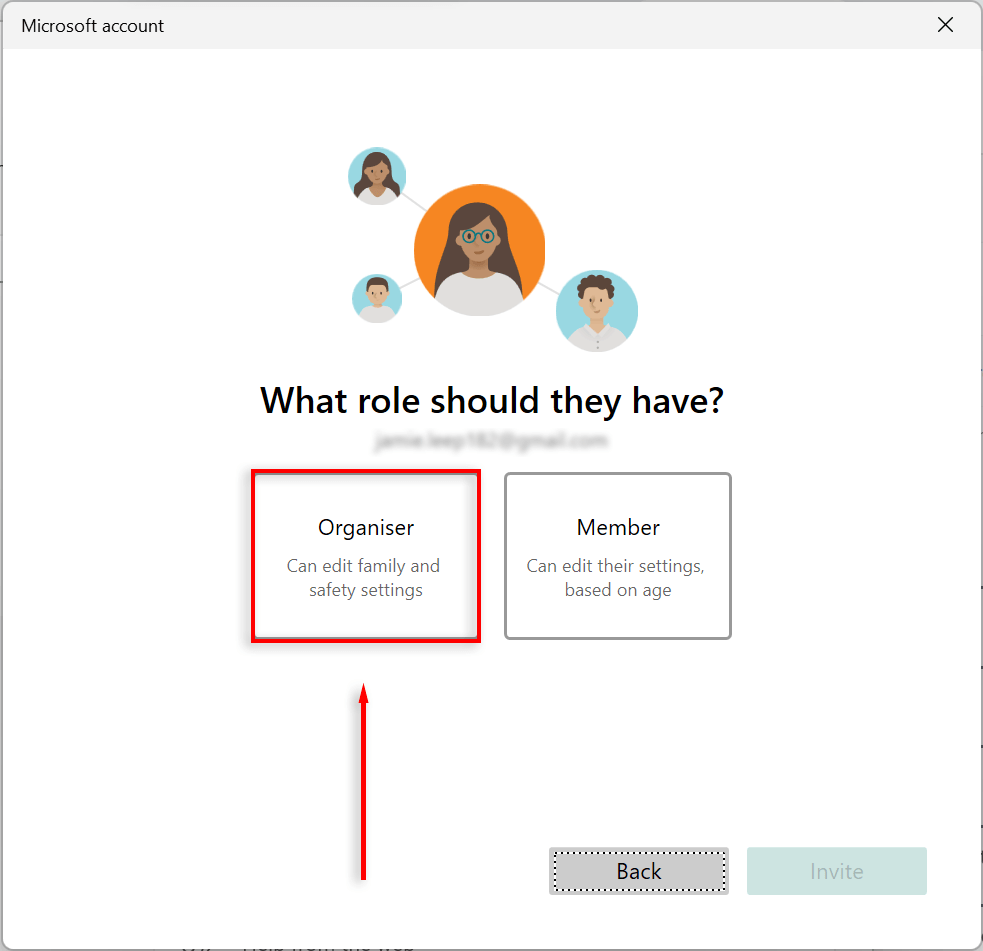
- Chọn hình ba gạch Thành viên option to add a child account, and select Đơn vị tổ chức to add an adult one. Then, Press the Mời gọi .
- Mở invitation email you received and press Chấp nhận lời mời sau đó Tham gia ngay. This may not be necessary.
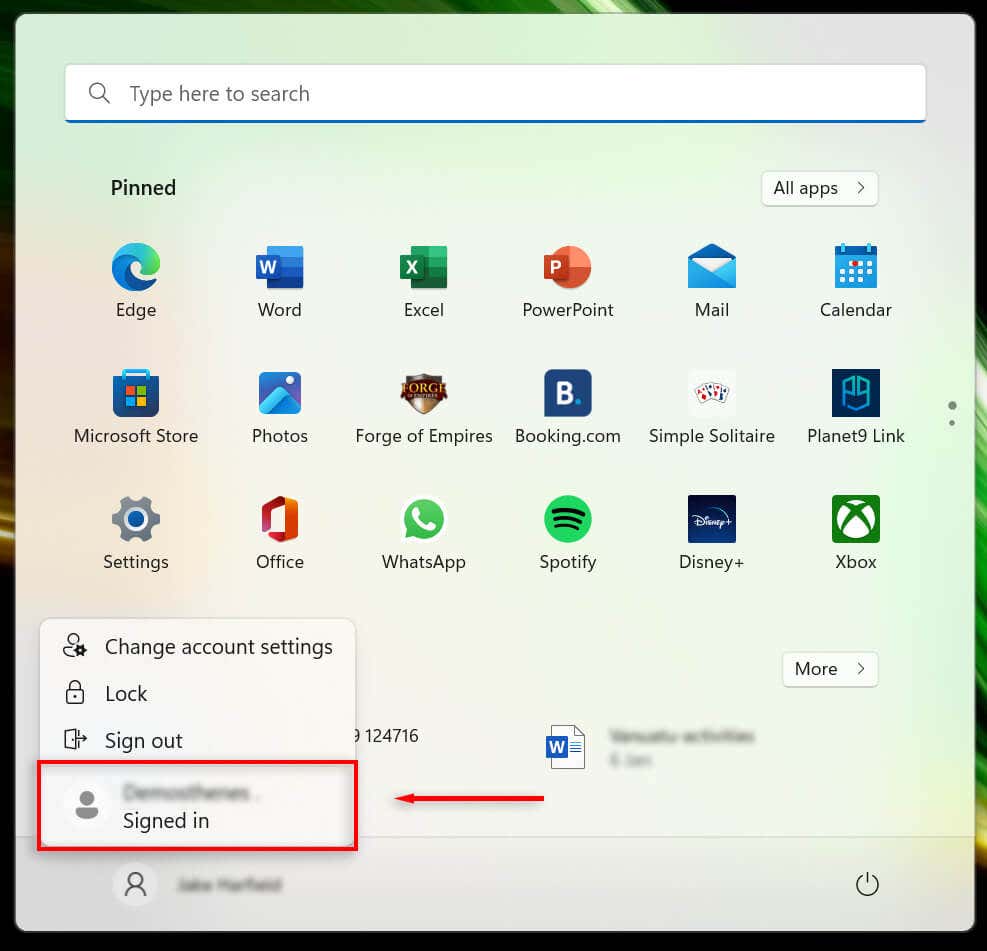
- Nhấn Start Menu, nhấp vào của bạn biểu tượng người dùng, and select the added family account to sign out of your current account.
- Sign in with the family account’s Microsoft account credentials and let the PC set up your new user account. This may take some time.
- Chọn hình ba gạch Bỏ qua ngay bây giờ option or set up your account as desired. Create a PIN if you’d like one. Finally, select OK.
Lưu ý: There’re many ways to add accounts in Windows 11, including by using the netplwiz tool and Command Prompt. See our tutorial on creating local users and groups to explore these options.
How to View Account Details
Windows 11 lets you view and customize your account details. To see your account details:
- Mở Cài đặt.
- Chọn Trợ Lý Giám Đốc.
- Chọn Thông tin của bạn.
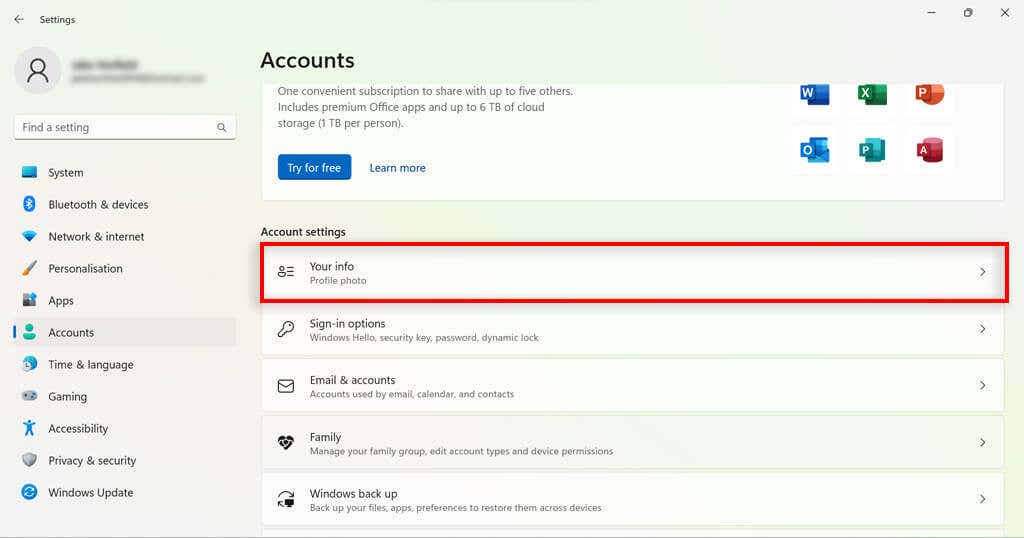
- Confirm your account details.
How to Change User Account Type on Windows 11
Windows 11 allows you to change standard user accounts to administrator accounts and vice versa.
- Mở Cài đặt.
- Chọn Trợ Lý Giám Đốc.
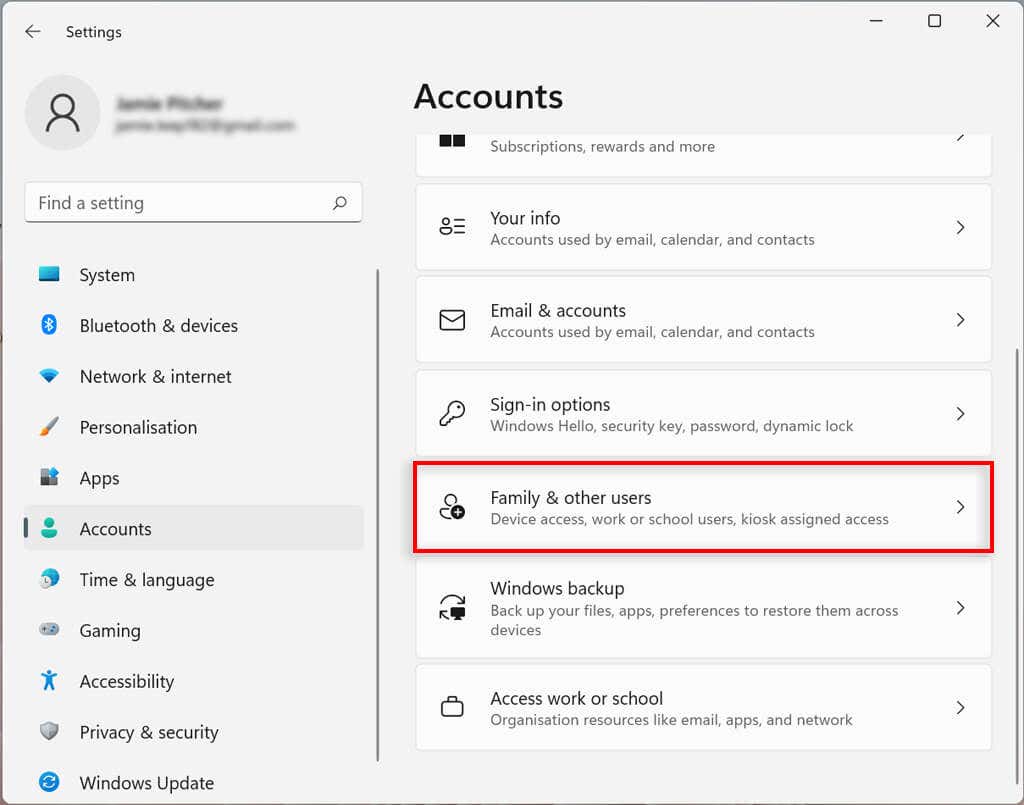
- Chọn Gia đình và những người dùng khác.
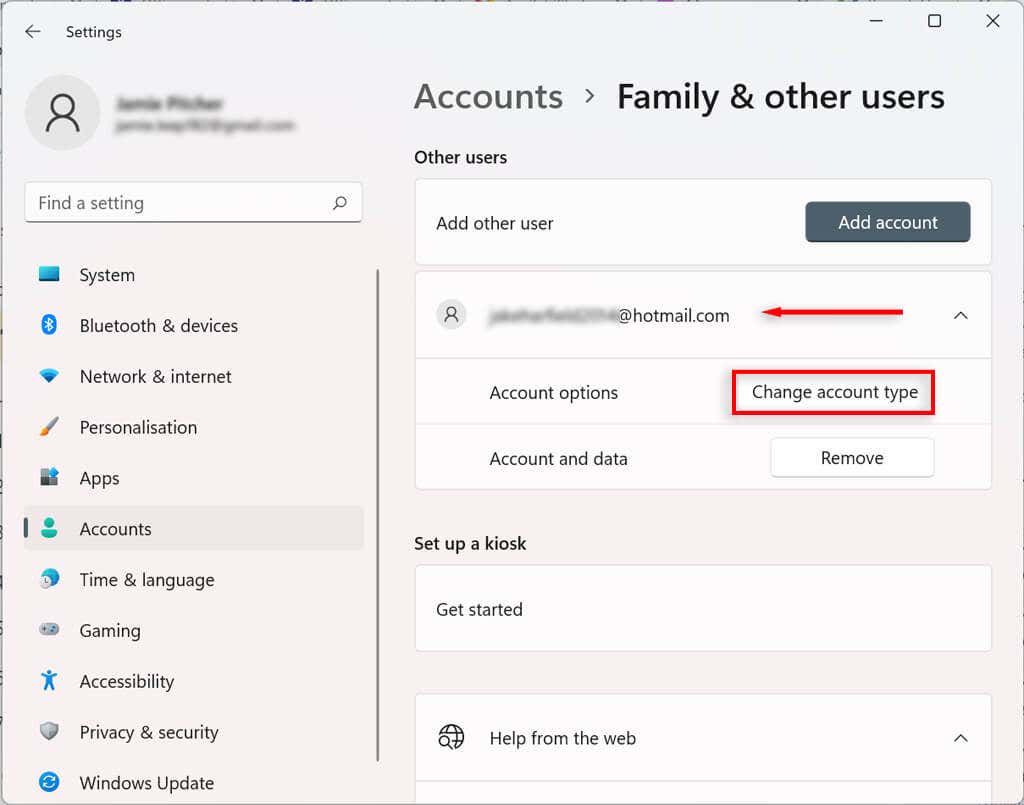
- Theo Người dùng khác, select the account you would like to change and select Thay đổi loại tài khoản.
- Select the account type you’d like.
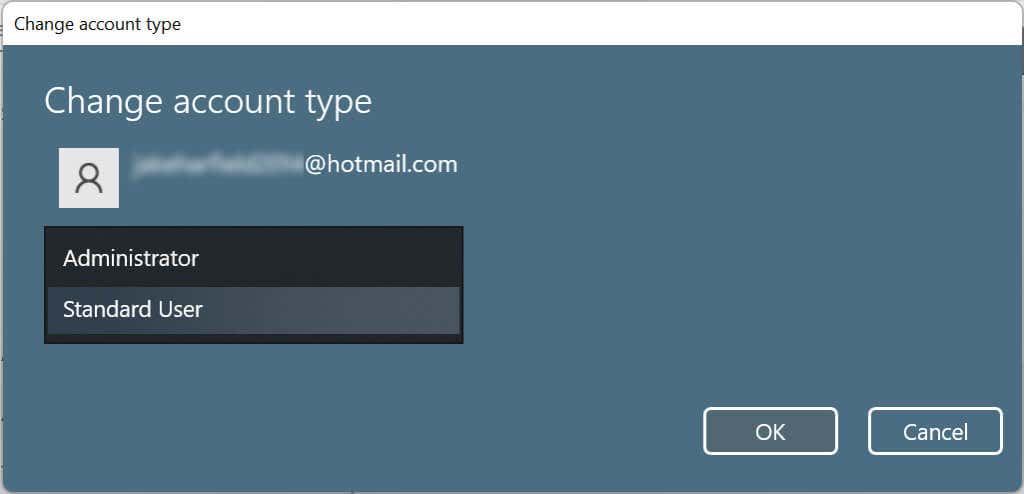
- Ấn Bản OK.
Once you complete the steps, the new account type will dictate the user’s access permissions.
How To Delete an Account On Windows 11
If you no longer need an account, you can easily delete it and all related data.
How to Delete a Family Account
- Mở Cài đặt.
- Chọn Trợ Lý Giám Đốc.
- Chọn Gia đình và những người dùng khác.
- Theo Người dùng khác, select the user you want to delete and select Hủy bỏ. You may need to sign in to confirm your decision.
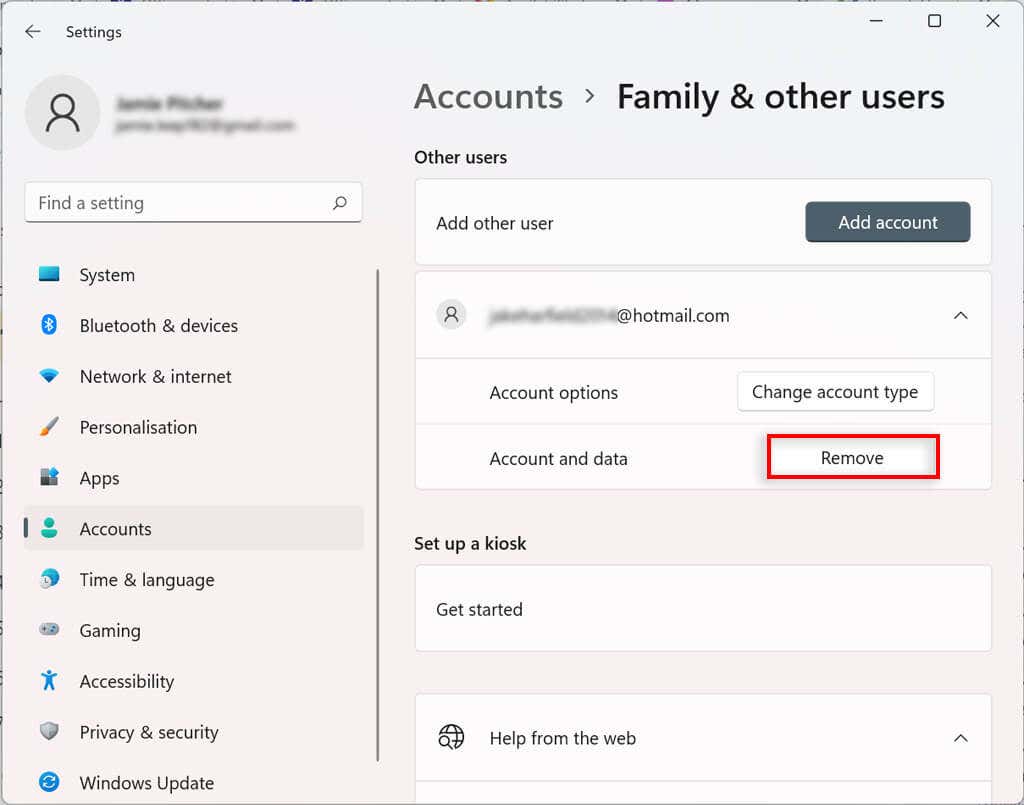
- Chọn Hủy bỏ.
How to Link Additional Emails to Mail, Calendar, and Contacts Apps to a Windows 11 User Account
You can add other email accounts to your Windows 11 user account. This way, you can automatically link the information on other apps, such as Mail, Calendar, and contacts, without having to add your details separately.
- Mở Cài đặt.
- Chọn Trợ Lý Giám Đốc.

- Chọn Các tài khoản email.
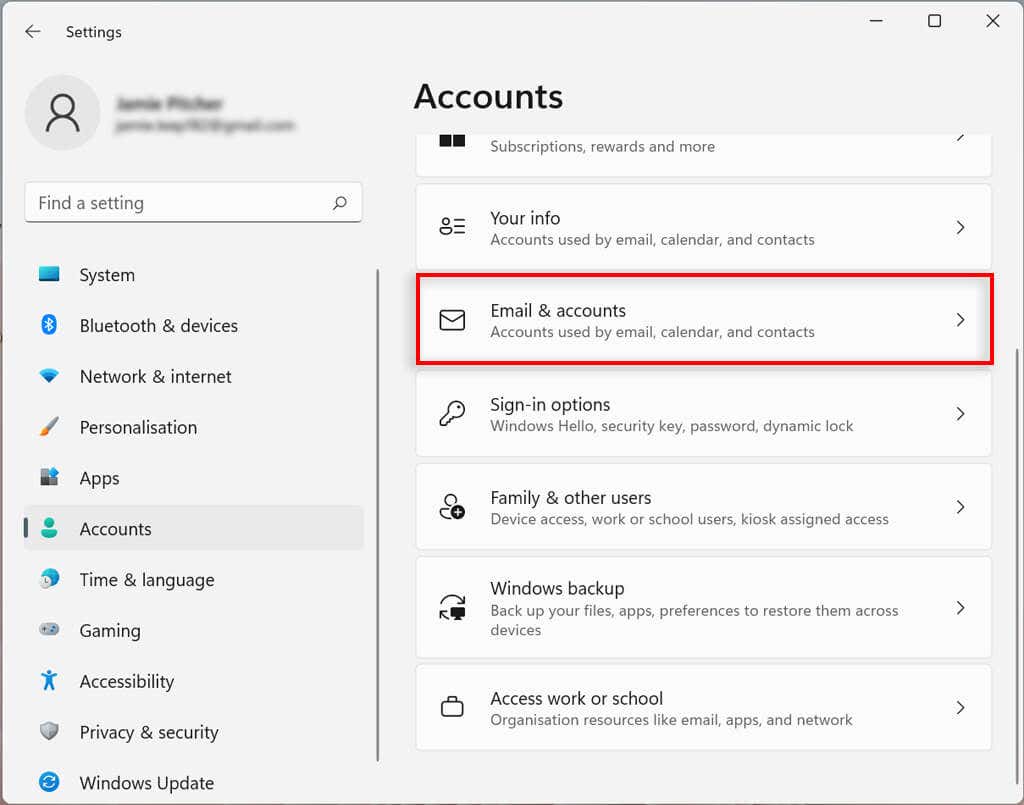
- Theo Accounts used by email, calendar, and contacts, lựa chọn Thêm một tài khoản.
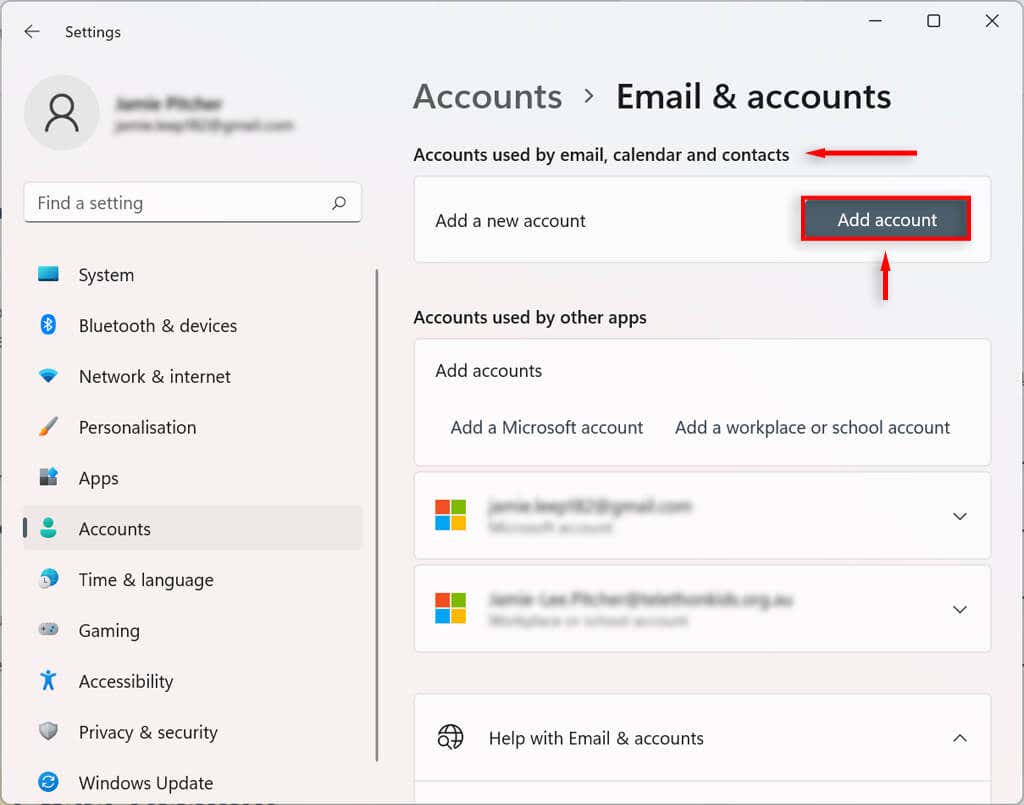
- Select the email service provider (such as Outlook, Google, or iCloud).
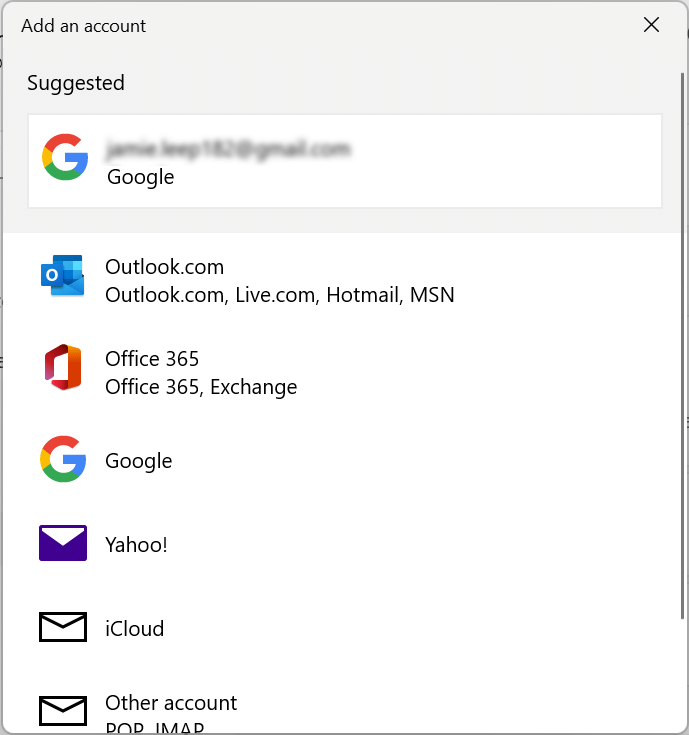
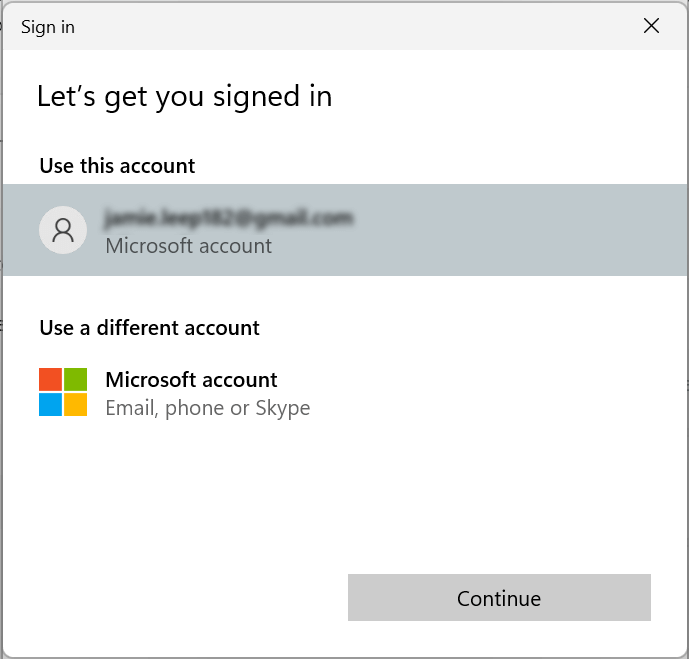
- Select the account you would like to add the email to and click Tiếp tục.
How to Link a Workplace or School Account to a Windows 11 User Account
You can also add workplace and school accounts to your Windows 11 user account. This will allow you to use apps such as OneDrive.
- Mở Cài đặt.
- Chọn Trợ Lý Giám Đốc.
- Chọn Các tài khoản email.

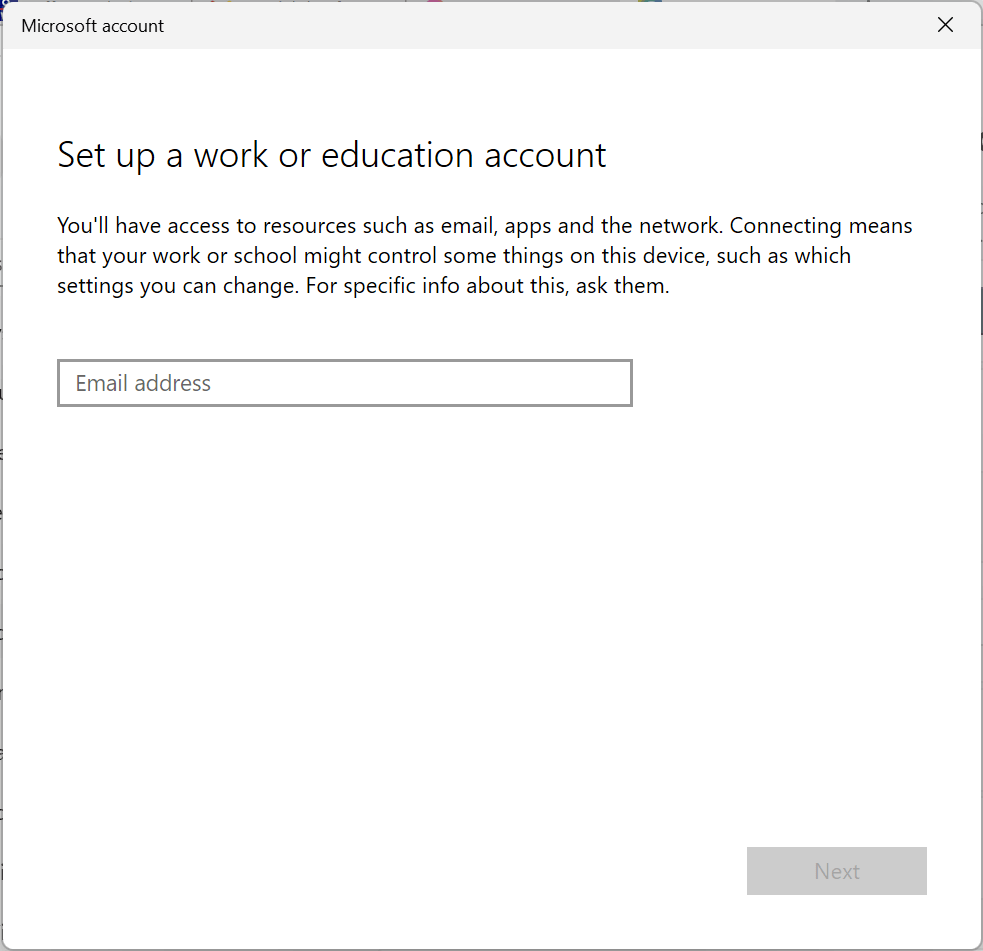
- Theo Accounts used by other ứng dụng, lựa chọn Add a workplace or school account.
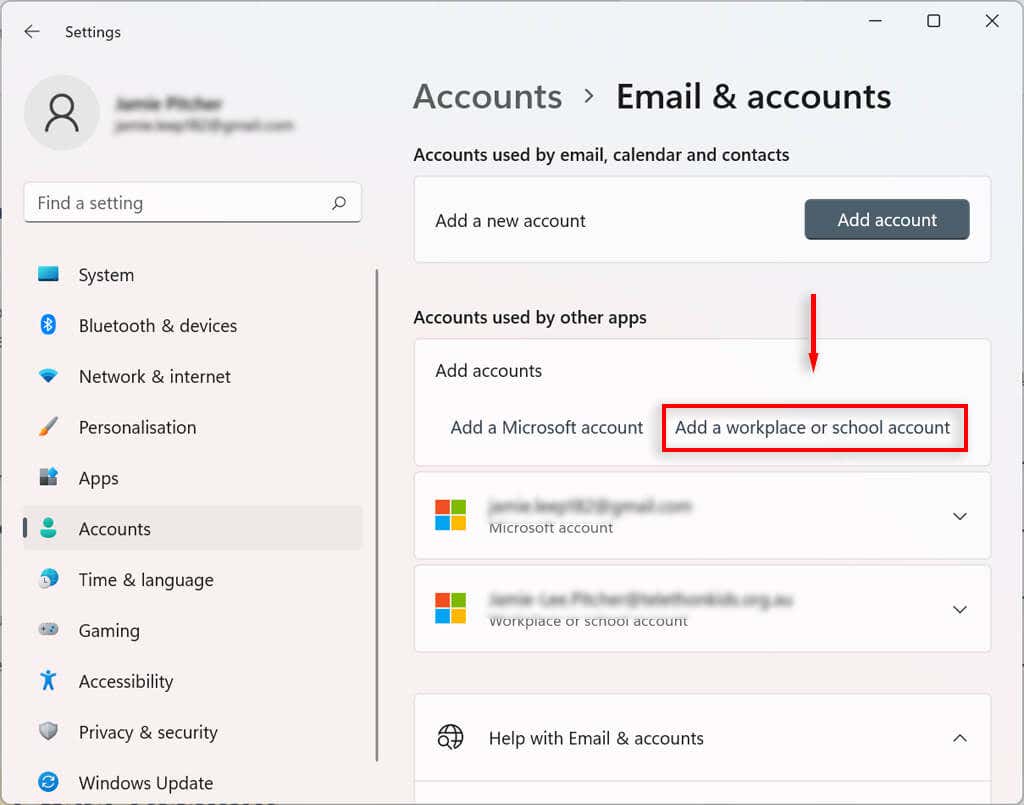
- Enter the email address for the relevant account and sign in.
How to Change Sign-In Options on Windows 11
Windows 11 allows you to customize your sign-in preferences making use of Windows Hello. Windows Hello is a more personal way to access your devices via a PIN, fingerprint, or facial recognition. You can also enable sign-in with a physical key.
Configure or Change Windows Hello Authentication Sign-In Method
- Mở Cài đặt.
- Chọn Trợ Lý Giám Đốc.
- Chọn Tuỳ chọn đăng nhập.
- Theo Các cách đăng nhập, select your desired way to sign in.
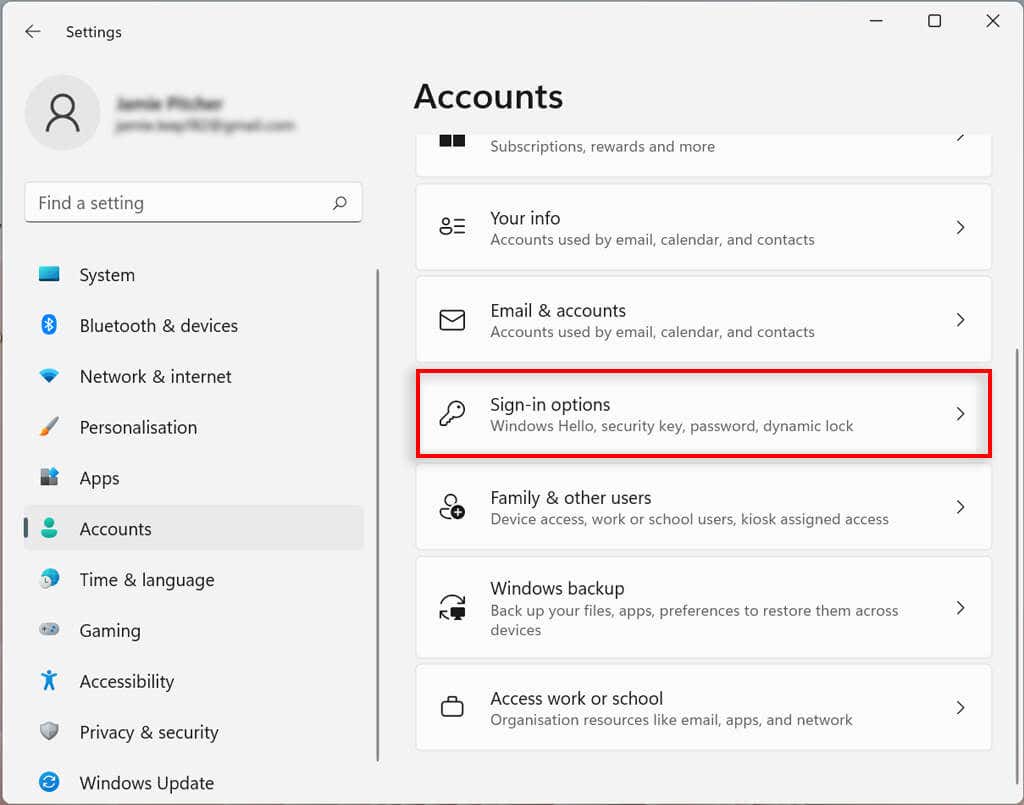
- Ấn Bản Thiết lập or Thay đổi.
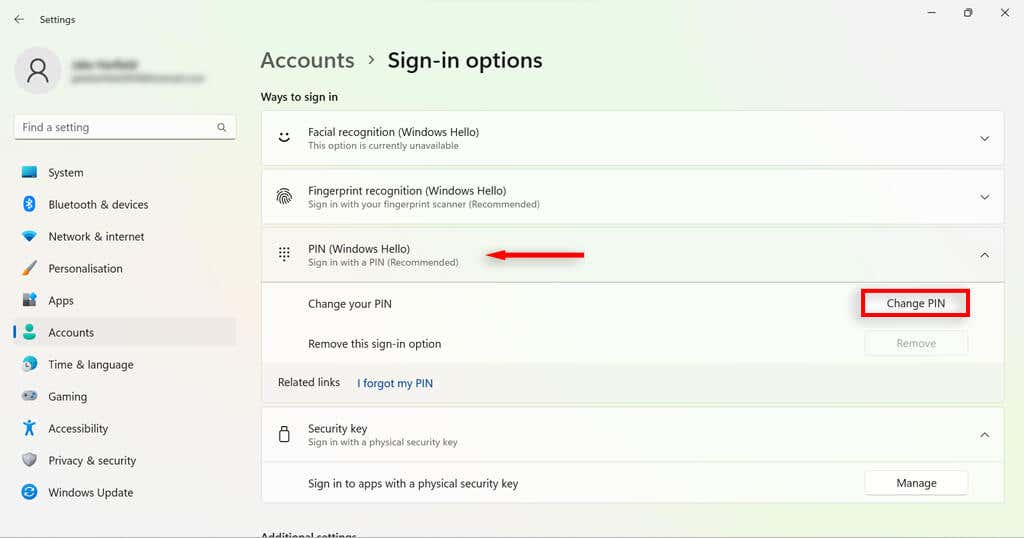
- Confirm your account password (whether it’s a PIN or biometrics).
- Chọn OK.
- Proceed through the on-screen instructions to set up your new sign-in options.
Enable Sign-In Upon Waking Up in Windows 11
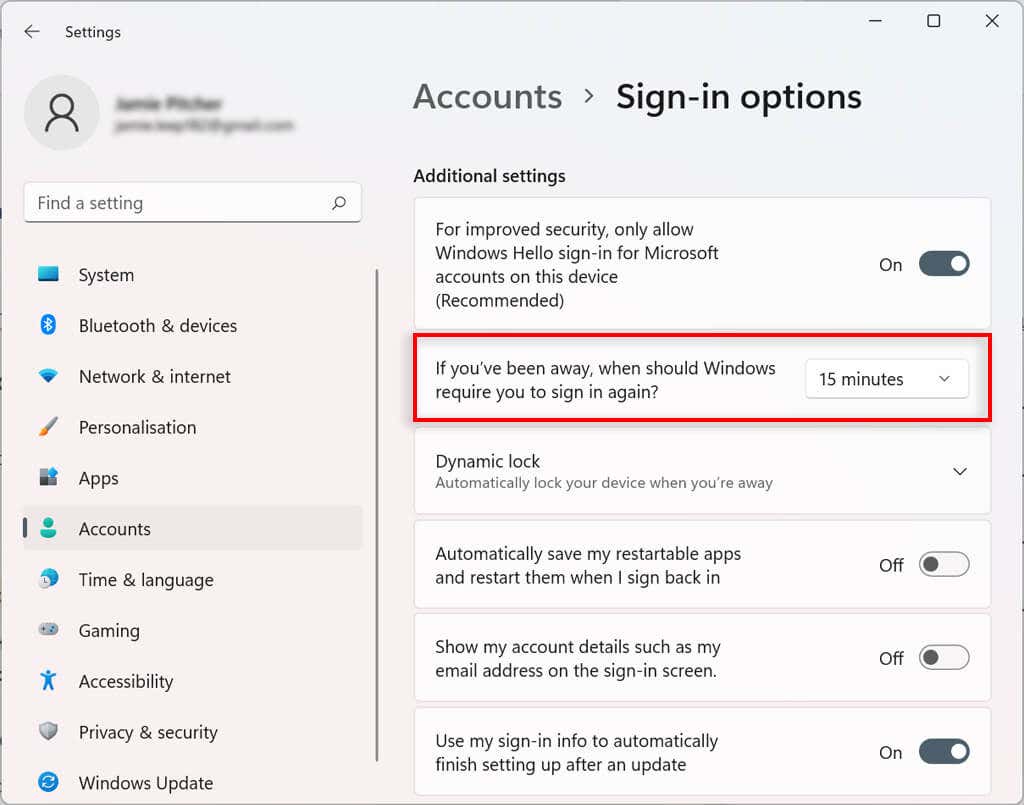
Using this setting, you can decide whether your PC will prompt you for a password upon waking up or after a set amount of time.
- Mở cửa sổ Cài đặt.
- Chọn Trợ Lý Giám Đốc.
- Chọn Đăng ký lựa chọn.
- Theo Cài đặt thêm, select the drop-down box next to If you’ve been away, when should Windows require you to sign in again?
- Select the time you would like.
Enable Dynamic Lock in Windows 11
The dynamic lock feature automatically secures your device when you step away from the room. It uses Bluetooth proximity technology, so you will need to link a Bluetooth device like a phone or smart watch before you can configure it.
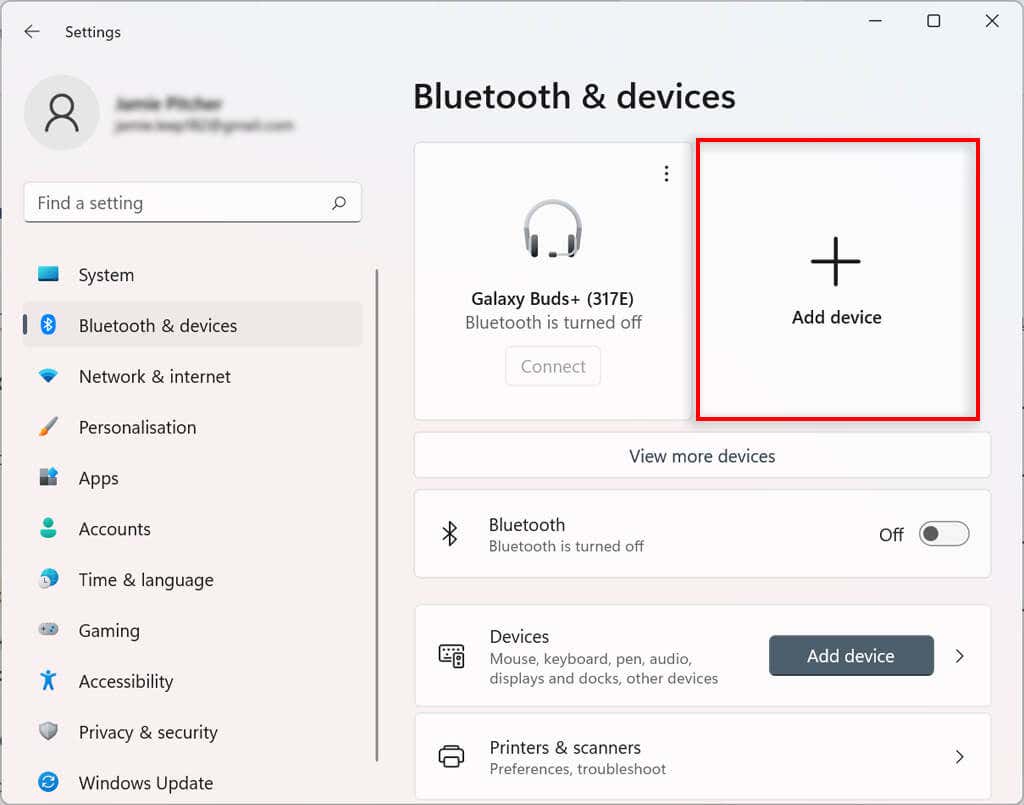
- Mở Cài đặt.
- Chọn Bluetooth & thiết bị.
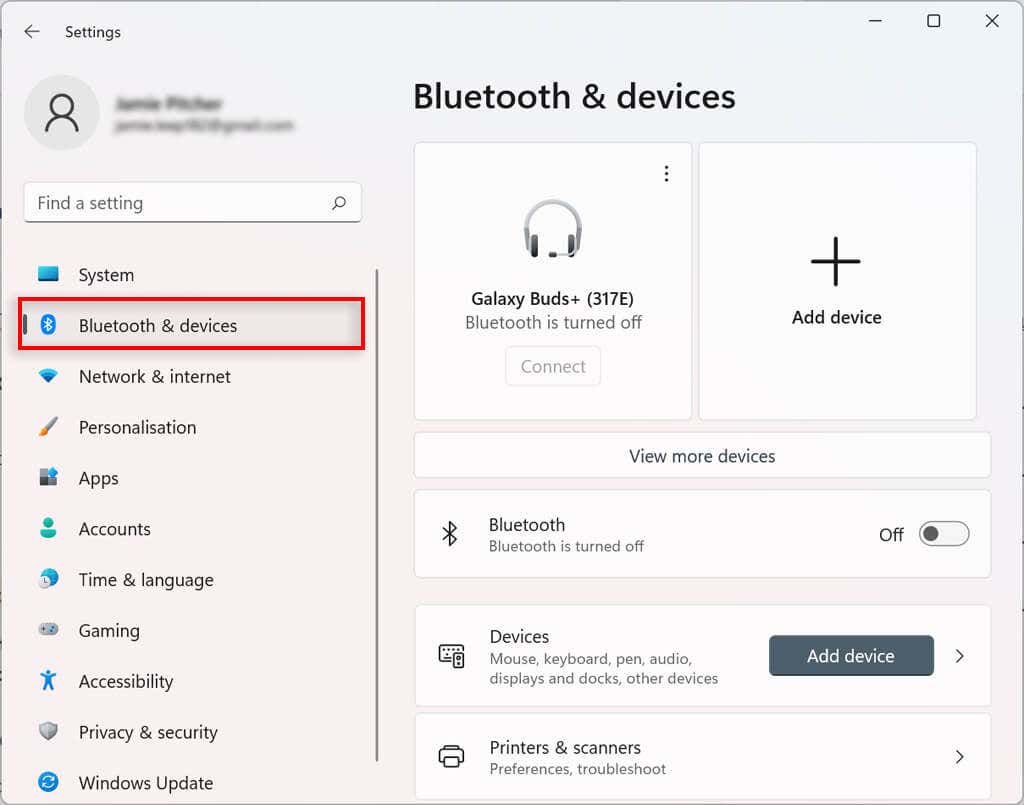
- Nhấn Thêm thiết bị .
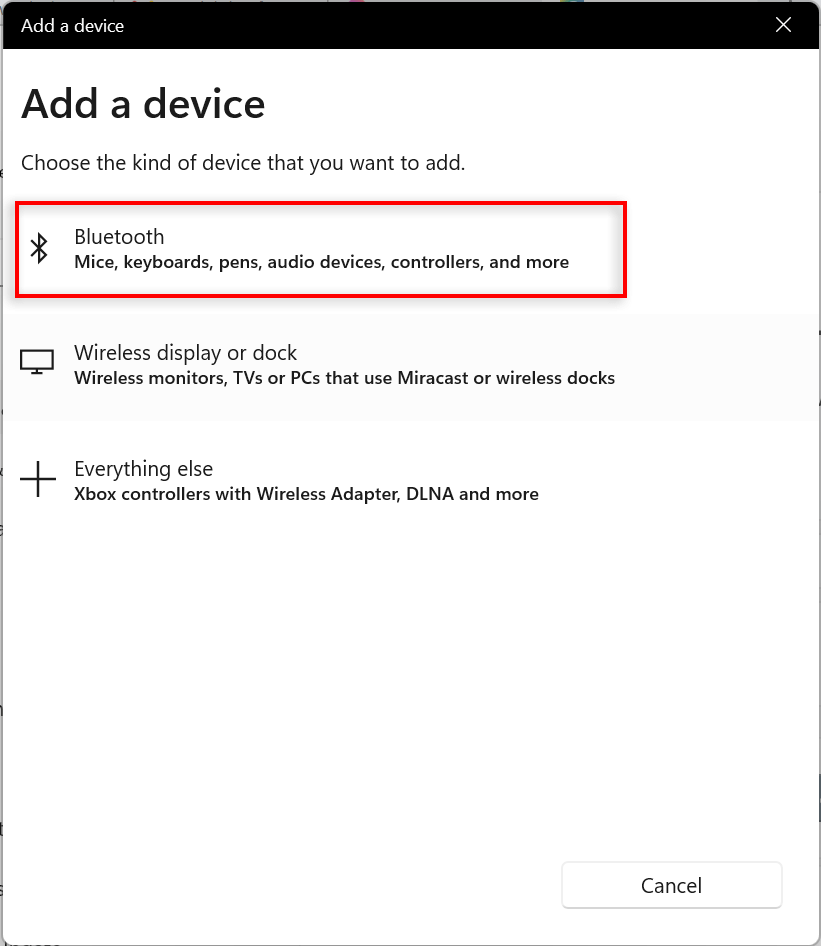
- Chọn Bluetooth. Turn on Bluetooth on the device you want to pair and select the device from the list and pair it to your computer.
- Head back to the Settings app and choose Trợ Lý Giám Đốc.

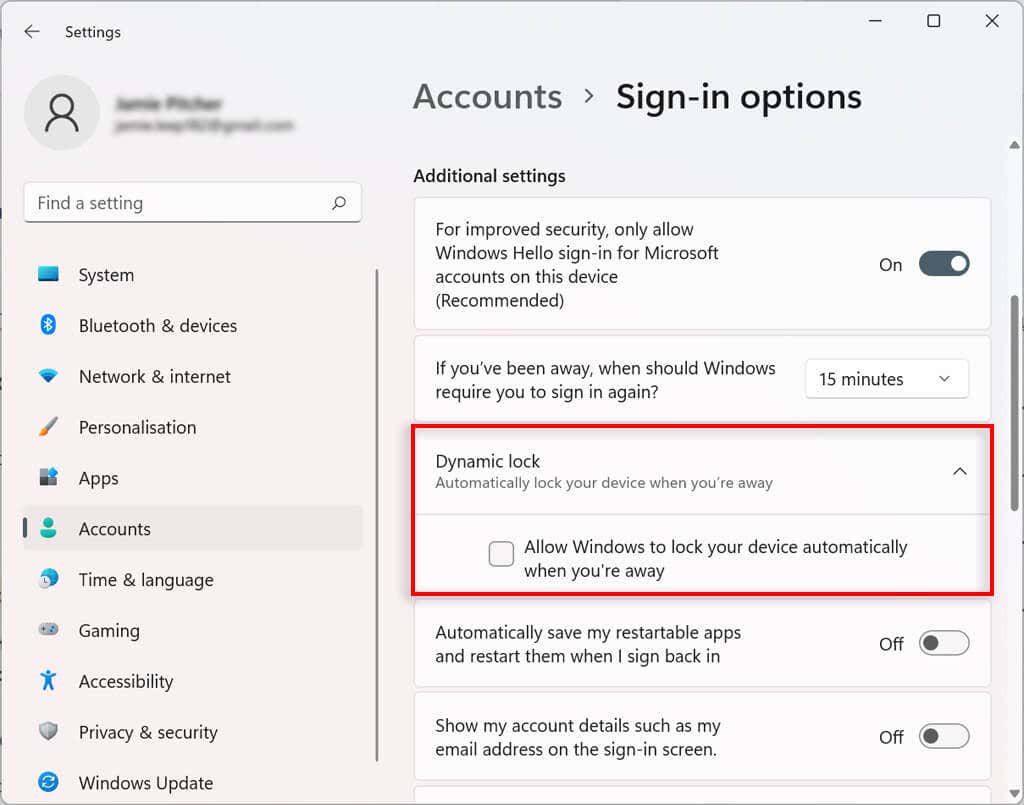
- Chọn Tuỳ chọn đăng nhập.

- Bên dưới Cài đặt thêm, lựa chọn Khóa động và kiểm tra hộp bên cạnh Allow Windows to automatically lock the device when you’re away.
Now when you step away from the computer with the linked Bluetooth device for more than 30 seconds, your computer will lock.
Stop Restarting Apps on Startup
Some apps open automatically at startup if they weren’t closed before shutdown. You can disable this feature by following these steps:
- Mở Cài đặt.
- Chọn Trợ Lý Giám Đốc.
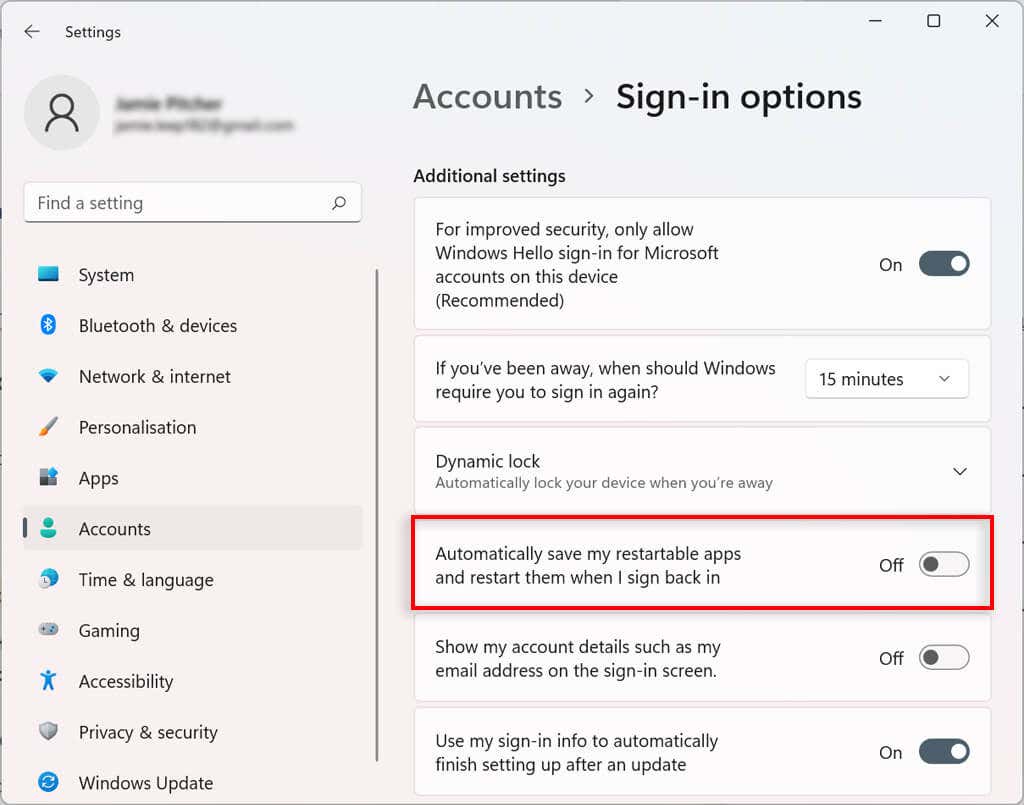
- Nhấn vào Tuỳ chọn đăng nhập trang ở phía bên phải.
- Theo Cài đặt thêm turn off the toggle next to Automatically save my restartable ứng dụng and restart when I sign back in.
Now apps will no longer restart automatically on startup.
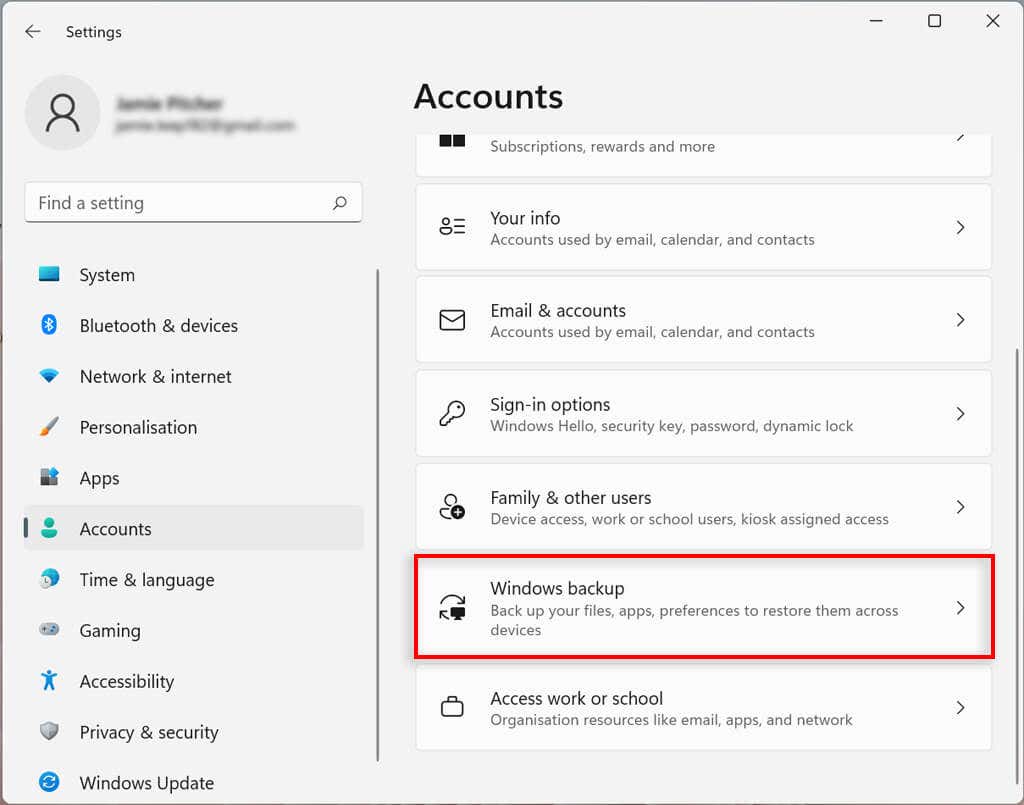
How to Control Account Sync Settings on Windows 11
You can determine how your account settings sync in Windows 11. This configures which folders are backed up in OneDrive. You can also decide whether the system will remember your apps and settings across devices with the same Microsoft account.
- Mở Cài đặt.
- Chọn Trợ Lý Giám Đốc.
- Chọn cửa sổ dự phòng.
- Ở cạnh OneDrive folder syncing, chọn Thiết lập đồng bộ hóa. This might appear as “Manage sync settings”.
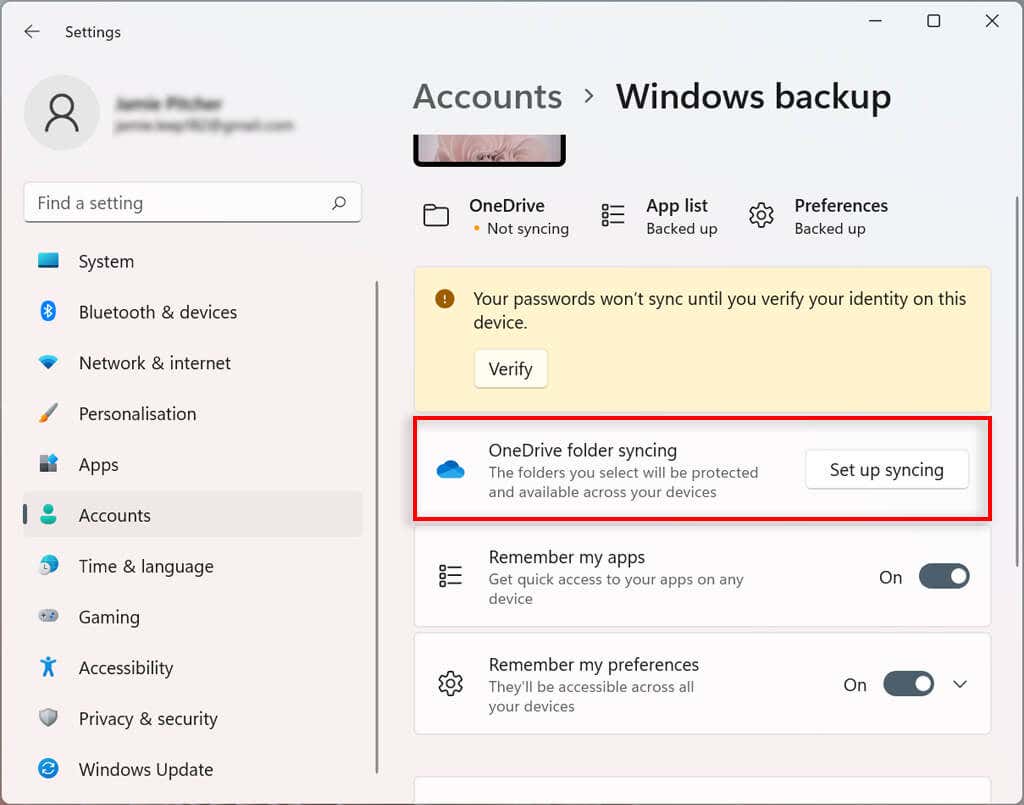
- Select the folders to upload and back up on the cloud.
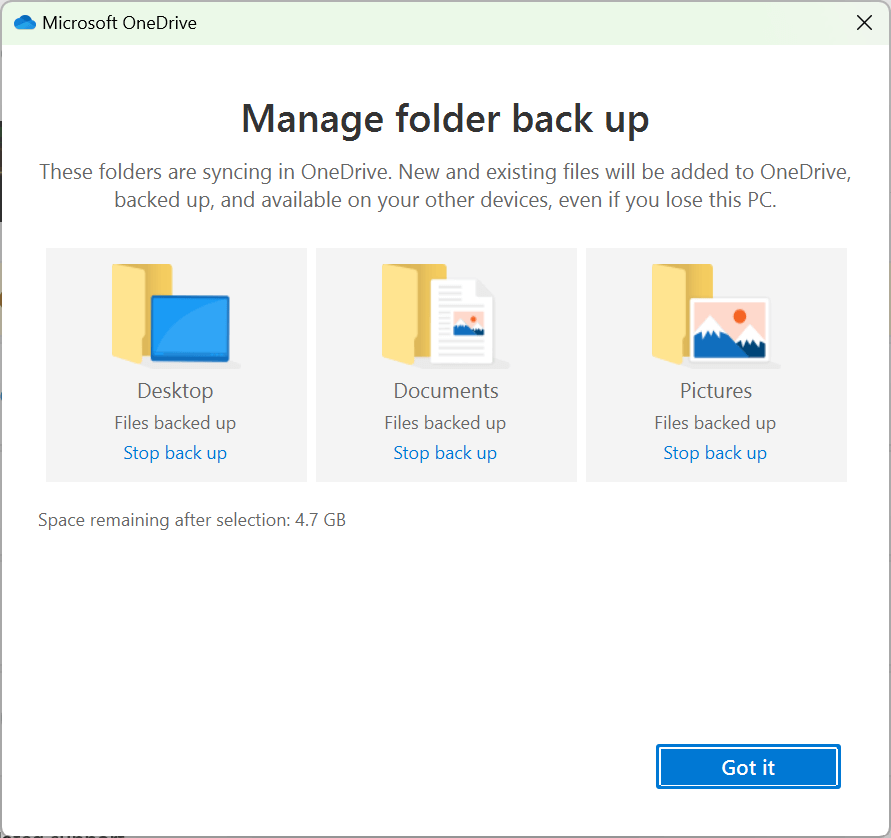
- The backup will start automatically. If not, select Bắt đầu sao lưu.
- (Optional) You can toggle on Nhớ tôi ứng dụng, Nhớ sở thích của tôivà Nhớ sở thích của tôi to sync your Microsoft apps, preferences, and settings between devices.
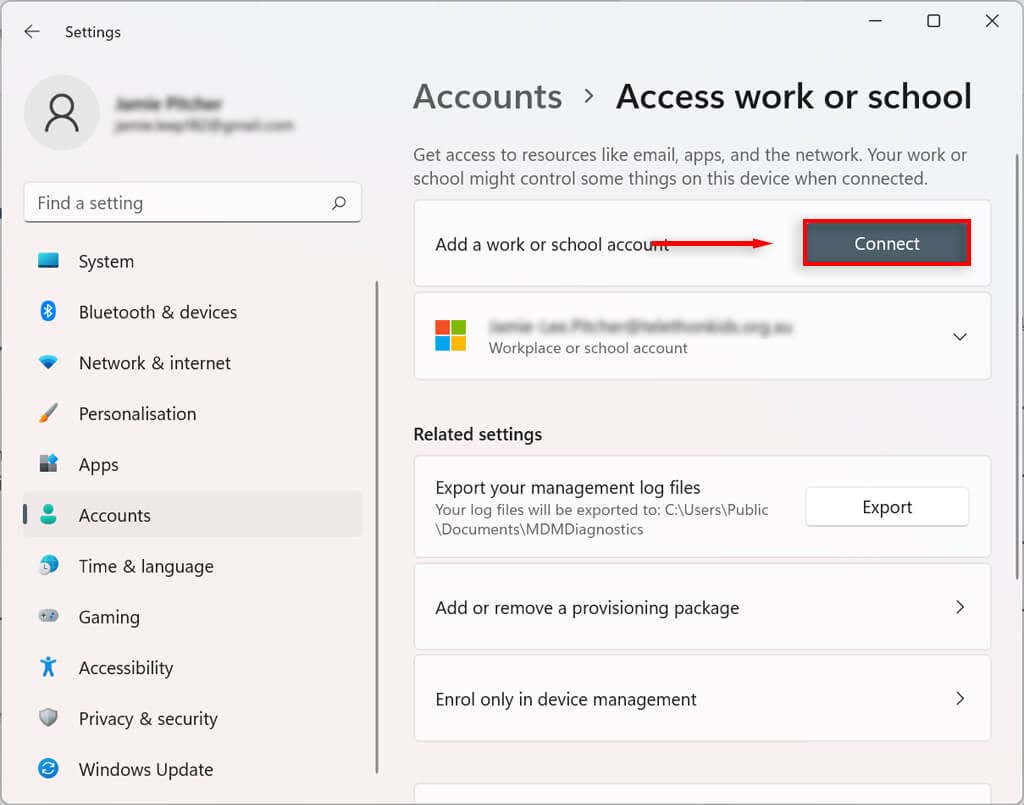
How to Connect an Organization to Your Windows 11 Account
You can connect an organization to your account to access shared resources, such as network resources, apps, and emails.
- Nhấp chuột phải vào Start Menu và chọn Cài đặt.
- Chọn Trợ Lý Giám Đốc.
- Chọn Tiếp cận công việc hoặc trường học.
- Ấn Bản Kết nối.
- Confirm your work or school account.
- Chọn Sau.
Tùy biến vô tận
Although Windows 10 had some customization features, the newest version of Windows has taken local user account control to the next level. Hopefully, with this tutorial, you’ve been able to make your Windows 11 account exactly the way you’d like it.

