With an earlier version of Windows, users could only track their Wireless (Wi-Fi) or Ethernet Adapter data usage. Still, with the Windows 10 April 2018 Update version 1803, you can now set a data limit for Ethernet, Wi-Fi, and mobile networks. Although you could set Ethernet or Wi-Fi connections as metered, you couldn’t restrict the data usage by any of these networks.
This feature works best for those who use a limited data broadband plan; in such cases keeping track of your data usage becomes difficult, and this is where the new feature of Windows 10 comes into action. Once you reach your data limit, Windows will notify you regarding the same. You can also restrict the network’s background data usage, and once you reach within the 10% of the data limit, background data usage will be restricted. Anyway, without wasting any time, let’s see How to set Data Limit for WiFi and Ethernet in Windows 10 with the help of the below-listed tutorial.
How to set Data Limit for WiFi and Ethernet in Windows 10
Đảm bảo tạo điểm khôi phục đề phòng trường hợp xảy ra sự cố.
Method 1: Set Data Limit for WiFi and Ethernet in Windows 10 Settings
1. Nhấn phím Windows + I để mở Cài đặt sau đó nhấp vào Network & Internet icon.

2. Now, from the left-hand menu, select Sử dụng dữ liệu.
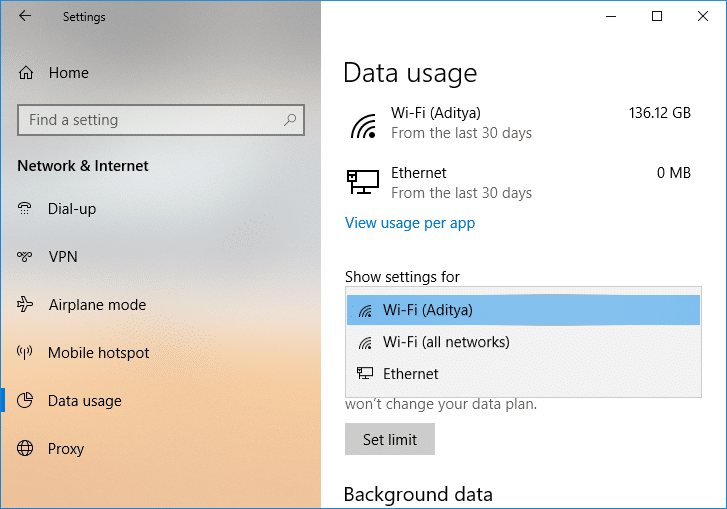
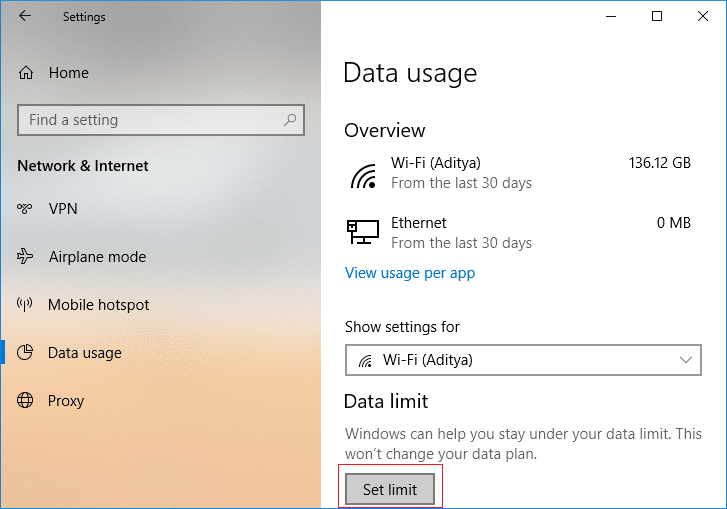
3. In the right-hand side window, from the “Show settings for” dropdown select the network connection you want to set a data limit for and then click on “Đặt giới hạn"Nút.
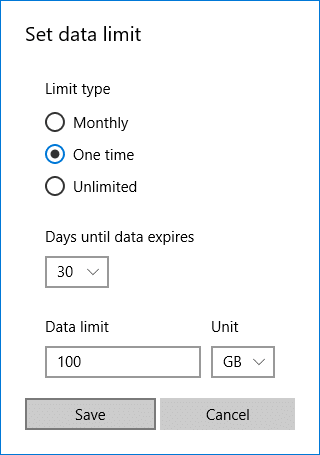
KHAI THÁC. Kế tiếp, specify the limit type, monthly reset date, data limit, etc. sau đó nhấn vào Lưu.

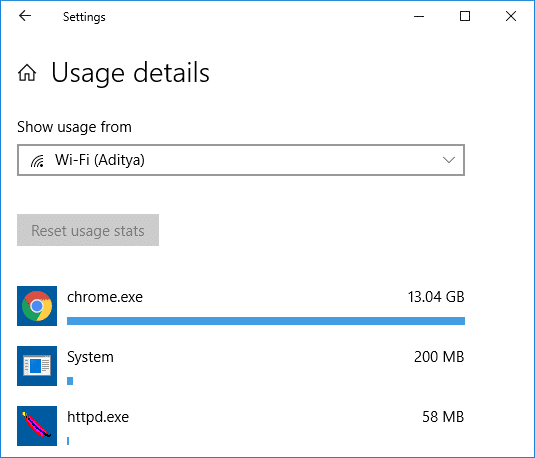
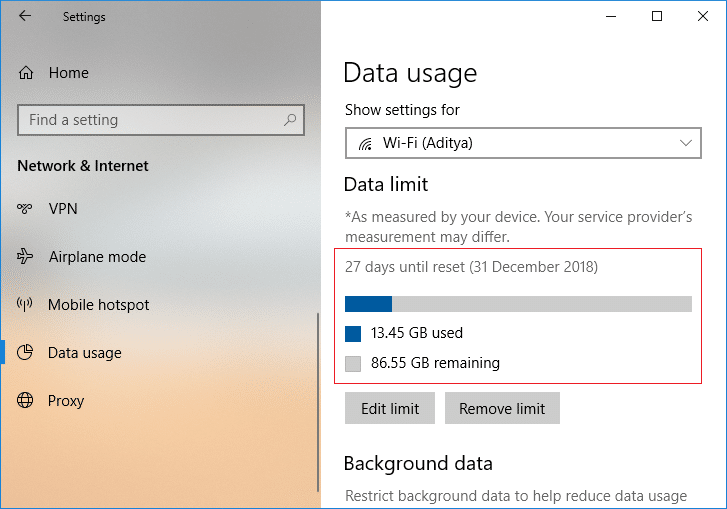
Lưu ý: Once you click Save, it will detail how much your data has been consumed till now as the data has already been tracked.
Method 2: Set Background Data Limit for WiFi and Ethernet in Windows 10 Settings
1. Nhấn phím Windows + I để mở Cài đặt sau đó nhấp vào Network & Internet icon.
2. Now, from the left-hand menu, select Sử dụng dữ liệu.
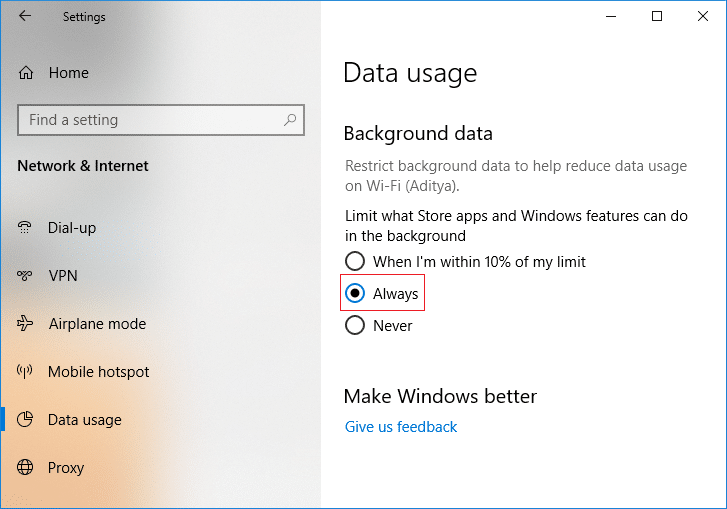
KHAI THÁC. Kế tiếp, select the network connection for which you want to set the data limit from the “Show settings for” drop-down then under Dữ liệu nền either select “Luôn luôn" hoặc "Không bao giờ".
Method 3: Edit Data Limit for WiFi and Ethernet in Windows 10 Settings
1. Nhấn phím Windows + I để mở Cài đặts then click on the Network & Internet icon.
2. Now, from the left-hand menu, select Sử dụng dữ liệu.
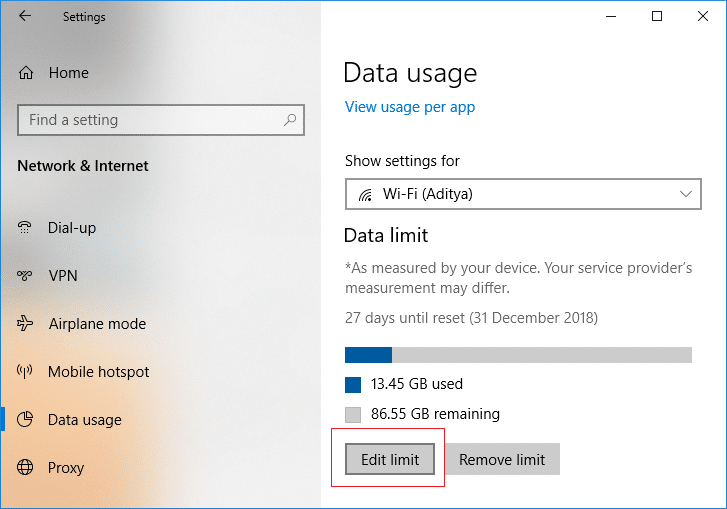
3. In the right-hand side window, from the “Show settings for” dropdown select the network connection you want to edit the data limit for and then to click on “Chỉnh sửa giới hạn"Nút.
4. Một lần nữa specify the data limit you want to set for this network connection and then nhấp vào để lưu.
Method 4: Remove Data Limit for WiFi and Ethernet in Windows 10 Settings
1. Nhấn phím Windows + I để mở Cài đặt sau đó nhấp vào Network & Internet icon.
2. Now, from the left-hand menu, select Sử dụng dữ liệu.
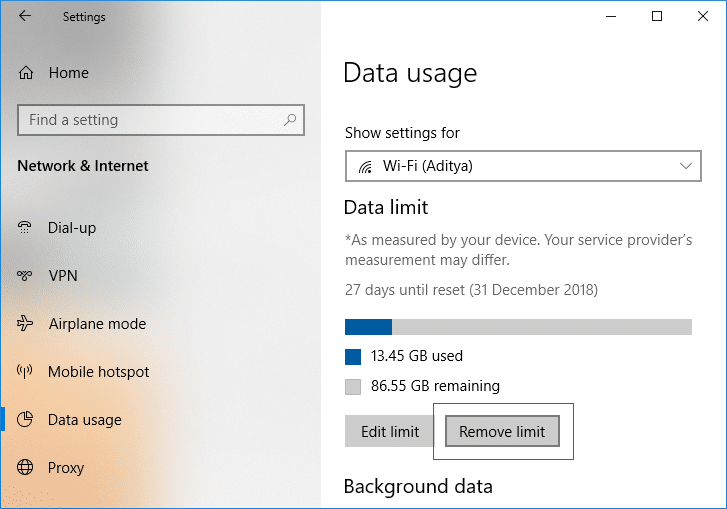
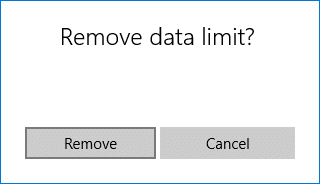
KHAI THÁC. Kế tiếp, select the network connection for which you want to remove the data limit from the “Show settings for” drop-down then click on “Xóa giới hạn"Nút.
4. Again click on Hủy bỏ để xác nhận hành động của bạn.
5. Once finished, you can close the Settings window.
Đề nghị:
Thế là bạn đã học thành công How to set Data Limit for WiFi and Ethernet in Windows 10 nhưng nếu bạn vẫn có bất kỳ thắc mắc nào liên quan đến bài đăng này thì vui lòng hỏi họ trong phần bình luận.
")
