WmiPrvSE is the acronym for Windows Management Instrumentation Provider Service. Windows Management Instrumentation (WMI) is a component of the Microsoft Windows operating system that provides management information and control in an enterprise environment. Many people believe it’s a virus as sometimes WmiPrvSE.exe causes high CPU usage, but it’s not a virus or malware instead WmiPrvSE.exe is manufactured by Microsoft itself.
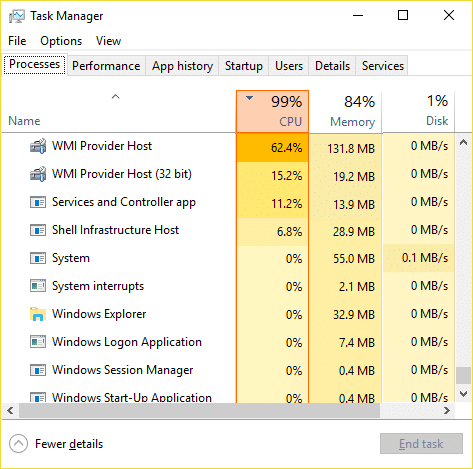
The main problem is that the Windows freezes or stuck when WmiPrvSE.exe is taking many system resources, and all the other apps or programs are left with a little or no resources at all. This will cause your PC to become sluggish, and you won’t be able to use it all, at last, you will have to reboot your PC. Even after a reboot, sometimes this issue will not be resolved, and you will again face the same problem. So without wasting any time let’s see how to actually Fix High CPU Usage by WmiPrvSE.exe with the below-listed troubleshooting guide.
Fix High CPU Usage by WmiPrvSE.exe
确保创建一个还原点,以防出现问题。
Method 1: Restart Windows Management Instrumentation Service
1. Press Windows Key + R then type SERVICES.MSC 并按Enter键。

2。 找 Windows Management Instrumentation Service in the list then right-click on it and select 重新开始。
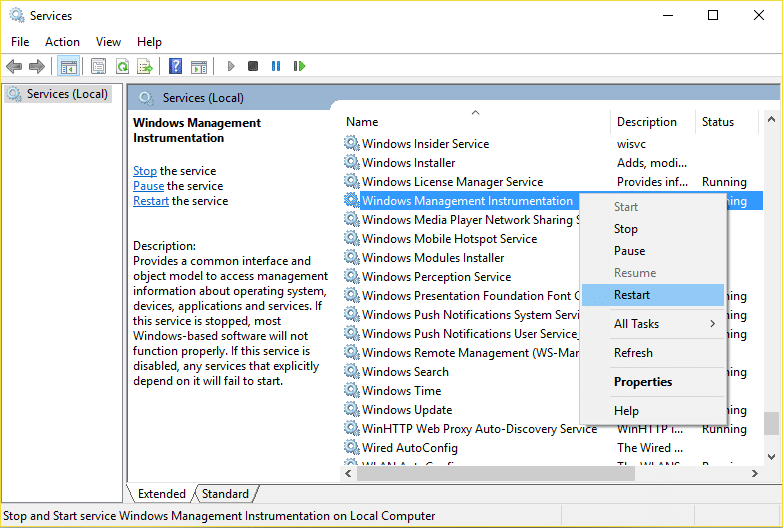
3. This will restart all the service associated with WMI services and Fix High CPU Usage by WmiPrvSE.exe.
Method 2: Restart Other Services associated with WMI
1. Press Windows Key + X then select 命令提示符(管理员)。

2. Type the following into cmd and hit Enter after each one:
净止价iphlpsvc
净停止wscsvc
净停止WINMGMT的
net start winmgmt
净启动wscsvc
网络启动 iphlpsvc
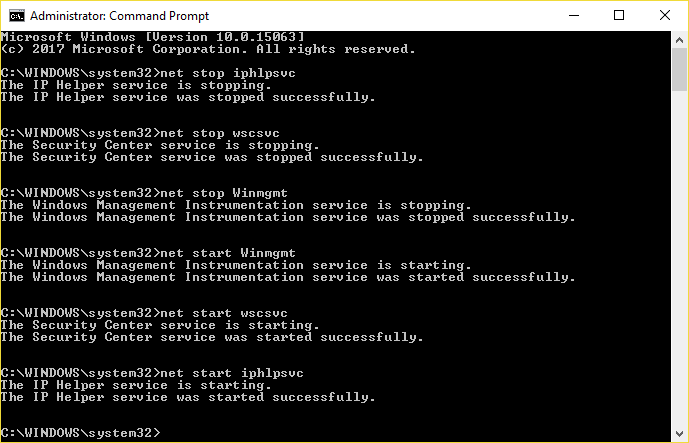
3. Reboot your PC to save changes.
方法 3:运行 CCleaner 和 Malwarebytes
1。 下载并安装 CCleaner的 & Malwarebytes.
2. 运行恶意软件字节 and let it scan your system for harmful files. If malware is found, it will automatically remove them.

3. Now run CCleaner and select 定制清洁.
4. Under Custom Clean, select the Windows tab then make sure to checkmark defaults and click 分析.

5. Once Analyze is complete, make sure you’re certain to remove the files to be deleted.

6.最后,点击 运行清洁器 button and let CCleaner run its course.
7. To further clean your system, select the Registry tab, and ensure the following are checked:

8。 点击 检查问题 button and allow CCleaner to scan, then click on the 修复选定的问题 按钮。

9. When CCleaner asks “您想要备份对注册表的更改吗?= 选择是.
10. Once your backup has completed, click on the Fix All Selected Issues 按钮。
11. Restart your PC to save changes.
Method 4: Run System Maintenance Troubleshooter
1. Press Windows Key + X and click on 控制面板。

2. Search Troubleshoot and click on 故障排除。

3. Next, click on view all in the left pane.
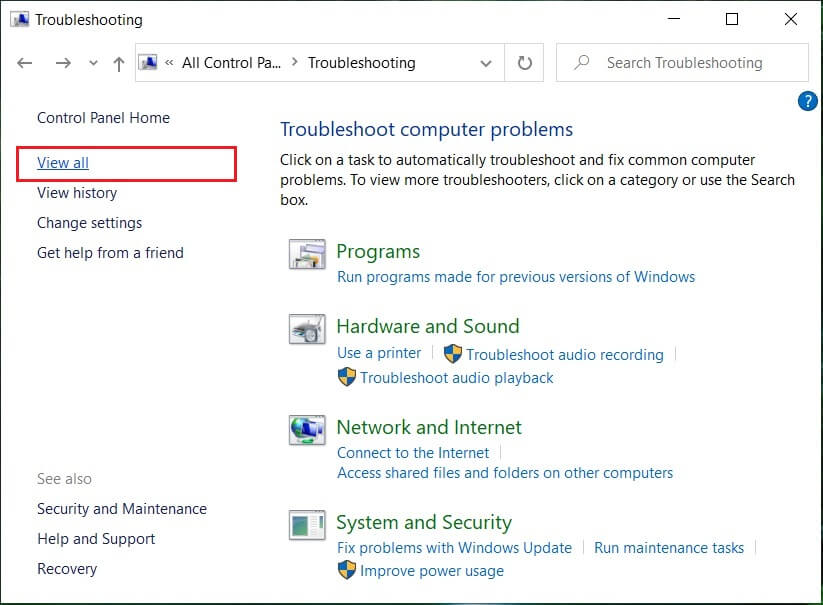
4. Click and run the Troubleshooter for System Maintenance.

5. The Troubleshooter may be able to Fix High CPU Usage by WmiPrvSE.exe.
Method 5: Locate the process manually using Event Viewer
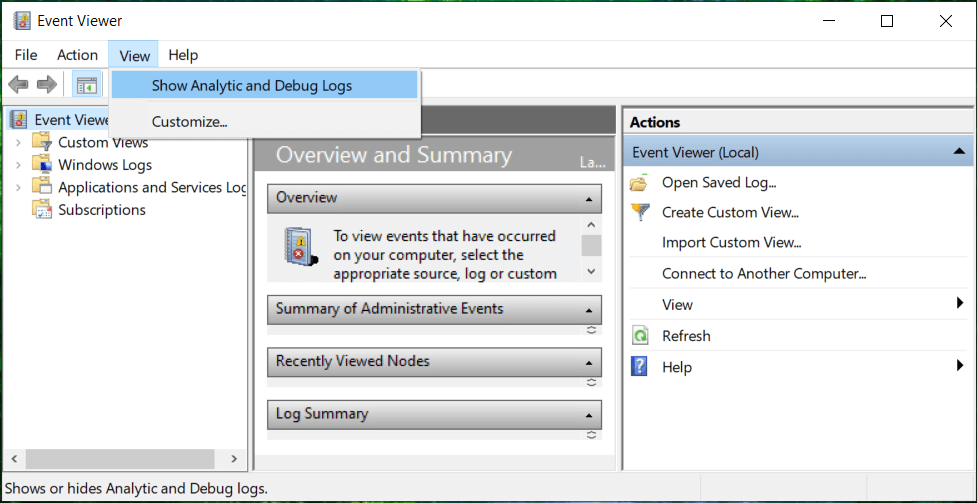
1. Press Windows Key + R then type EVENTVWR.MSC 然后按Enter打开 事件查看器。

2. From the top menu, click on 查看 然后选择 Show Analytic and Debug Logs option.
3. Now, from the left pane navigate to the following by double-clicking on each of them:
Applications and Services Logs > Microsoft > Windows > WMI-Activity
4. Once you are under WMI-活动 folder (make sure you have expanded it by double-clicking on it) select Operationally.
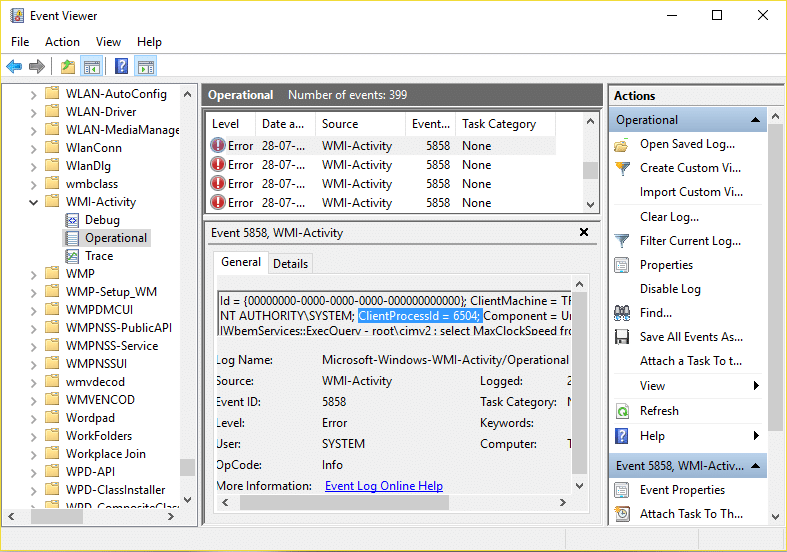
5. In the right window pane select 误差 under Operational and General tab look for the ClientProcessId for that particular service.
6. Now we have the Process Id of the particular service causing High CPU usage, we need to disable this particular service 解决此问题。
7。 按 按Ctrl + Shift + Esc键 together to open Task Manager.

8.切换到 Service tab 并寻找 Process Id which you noted above.
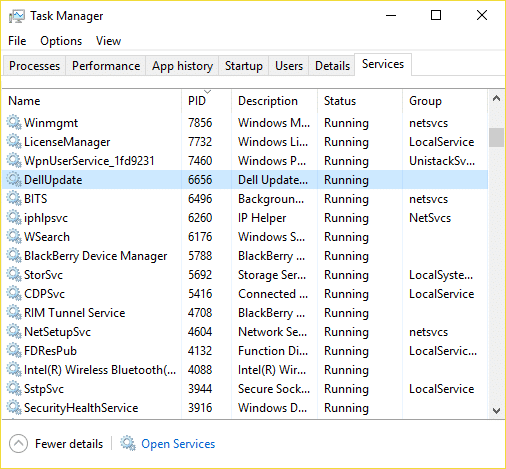
9. The service with the corresponding Process ID is the culprit, so once you find it go to Control Panel > Uninstall a Program.
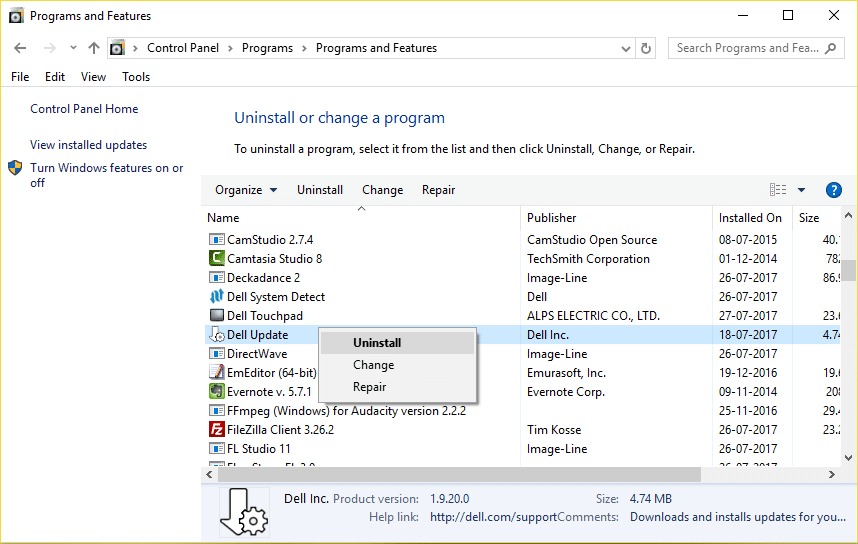
10. Uninstall the particular program or service associated with above Process ID then reboot your PC.
推荐:
这样你就成功了 Fix High CPU Usage by WmiPrvSE.exe but if you still have any questions regarding this post then feel free to ask them in the comment’s section.

